
I’ve just received Wanboard Dual development board together with an enclosure, and Wi-Fi antenna. This board is powered by Freescale i.MX6 Duallite Cortex A9 processor, and comes with 1GB RAM, HDMI output and Ethernet. There’s also a version based on Freescale i.MX6 Solo with 512 MB RAM. You can refer to my earlier post for more detailed specifications. I’ll start by showing some unboxing pictures of the board, and write a quick start guide (casing assembly, Ubuntu & Android boot, and development). I also planned to run some benchmarks and test videos, as according to a poll on Wandboard website many people want to use it as a media player, but I’ll do that a bit later since the current Android image is not up to the task yet.
Wandboard Dual Unboxing
The package I received contained 3 boxes: one for Wandboard Dual board, one for the enclosure, and one for the Antenna. The complete kit below should cost around $120, and Wandboard has distributors worldwide. Prices vary so make sure you shop around.
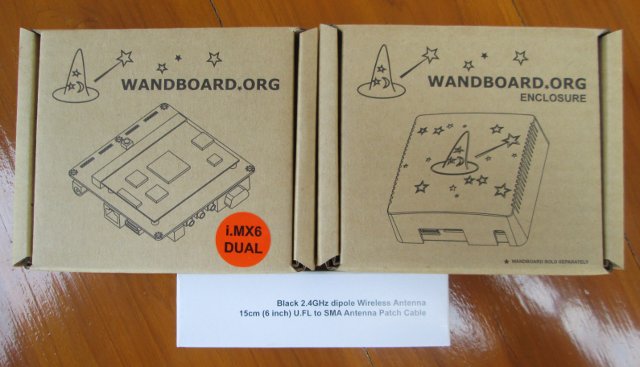
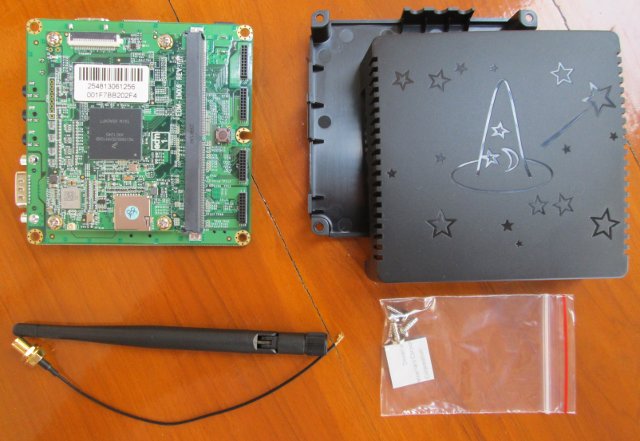
Inside those packages, you’ll find the Wandboard Dual board, the casing and screws, and the Wi-Fi antenna with a cable to connect it to the Wandboard Dual SoM.
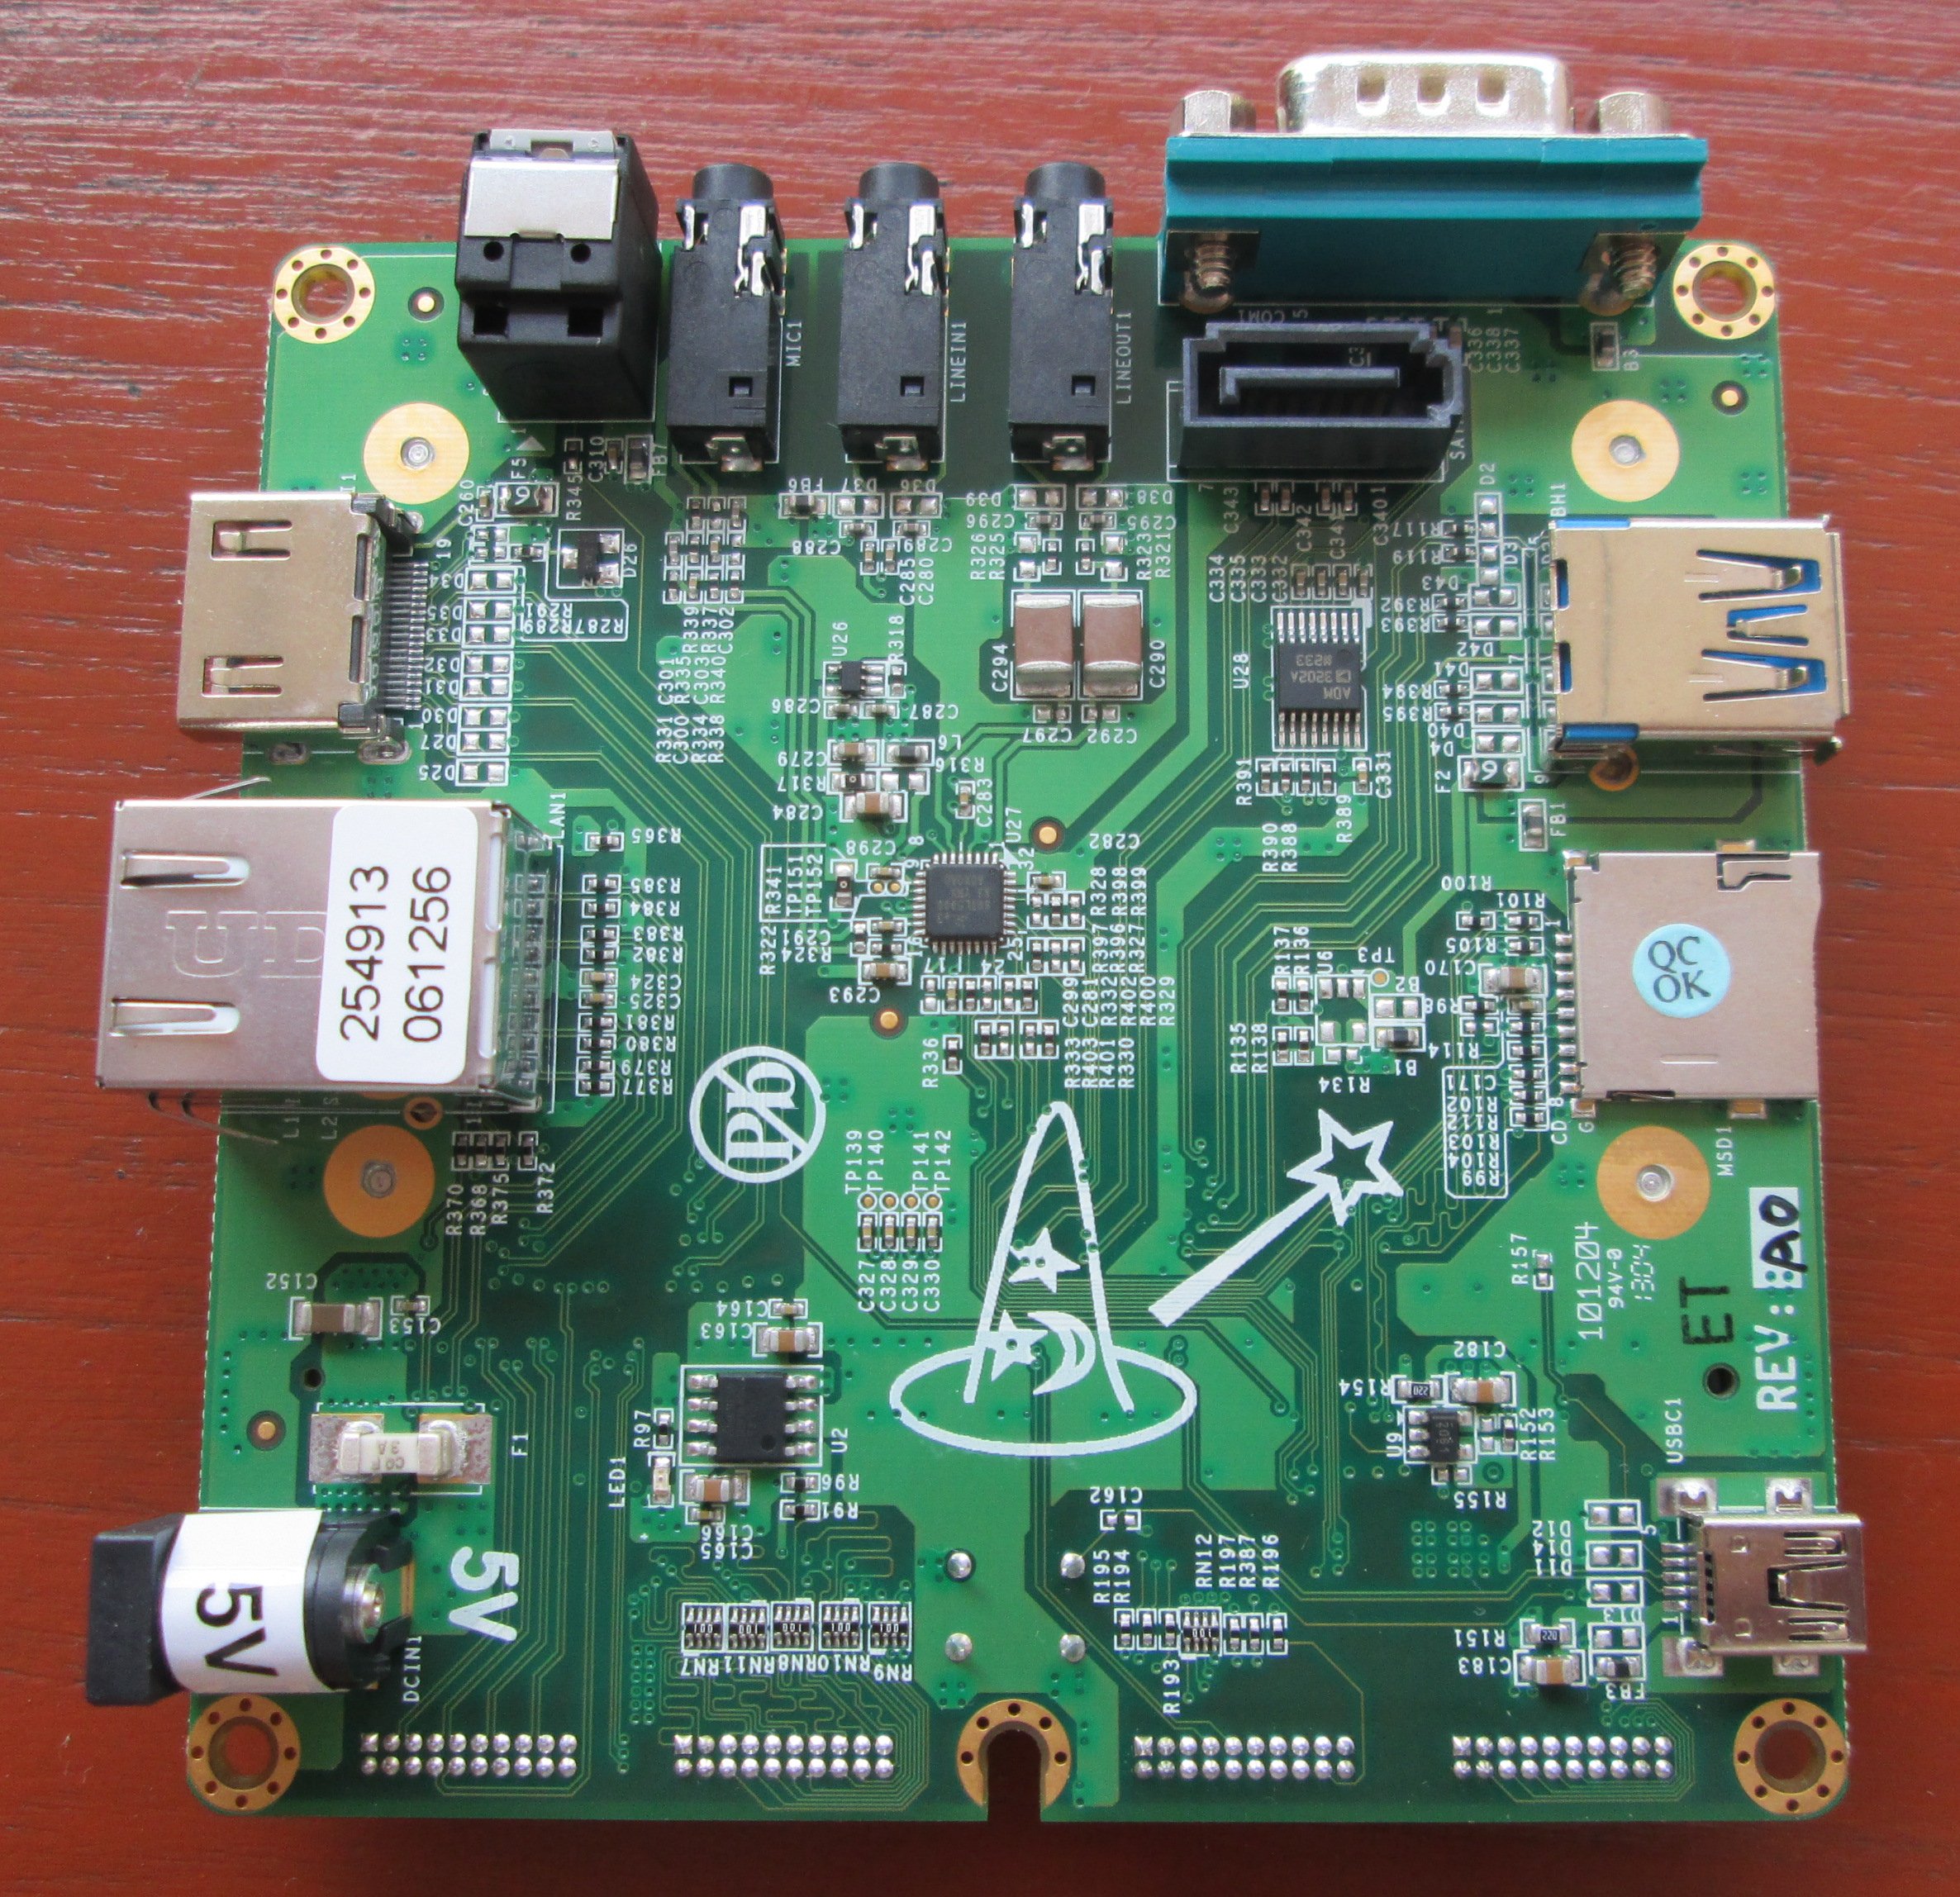
Let’s have a closer look at the board. The top of the board features all the ports (further described below). A SATA connector is included but none of the Freescale SoM (Solo and Duallite) provided with the Wandboard can support it.
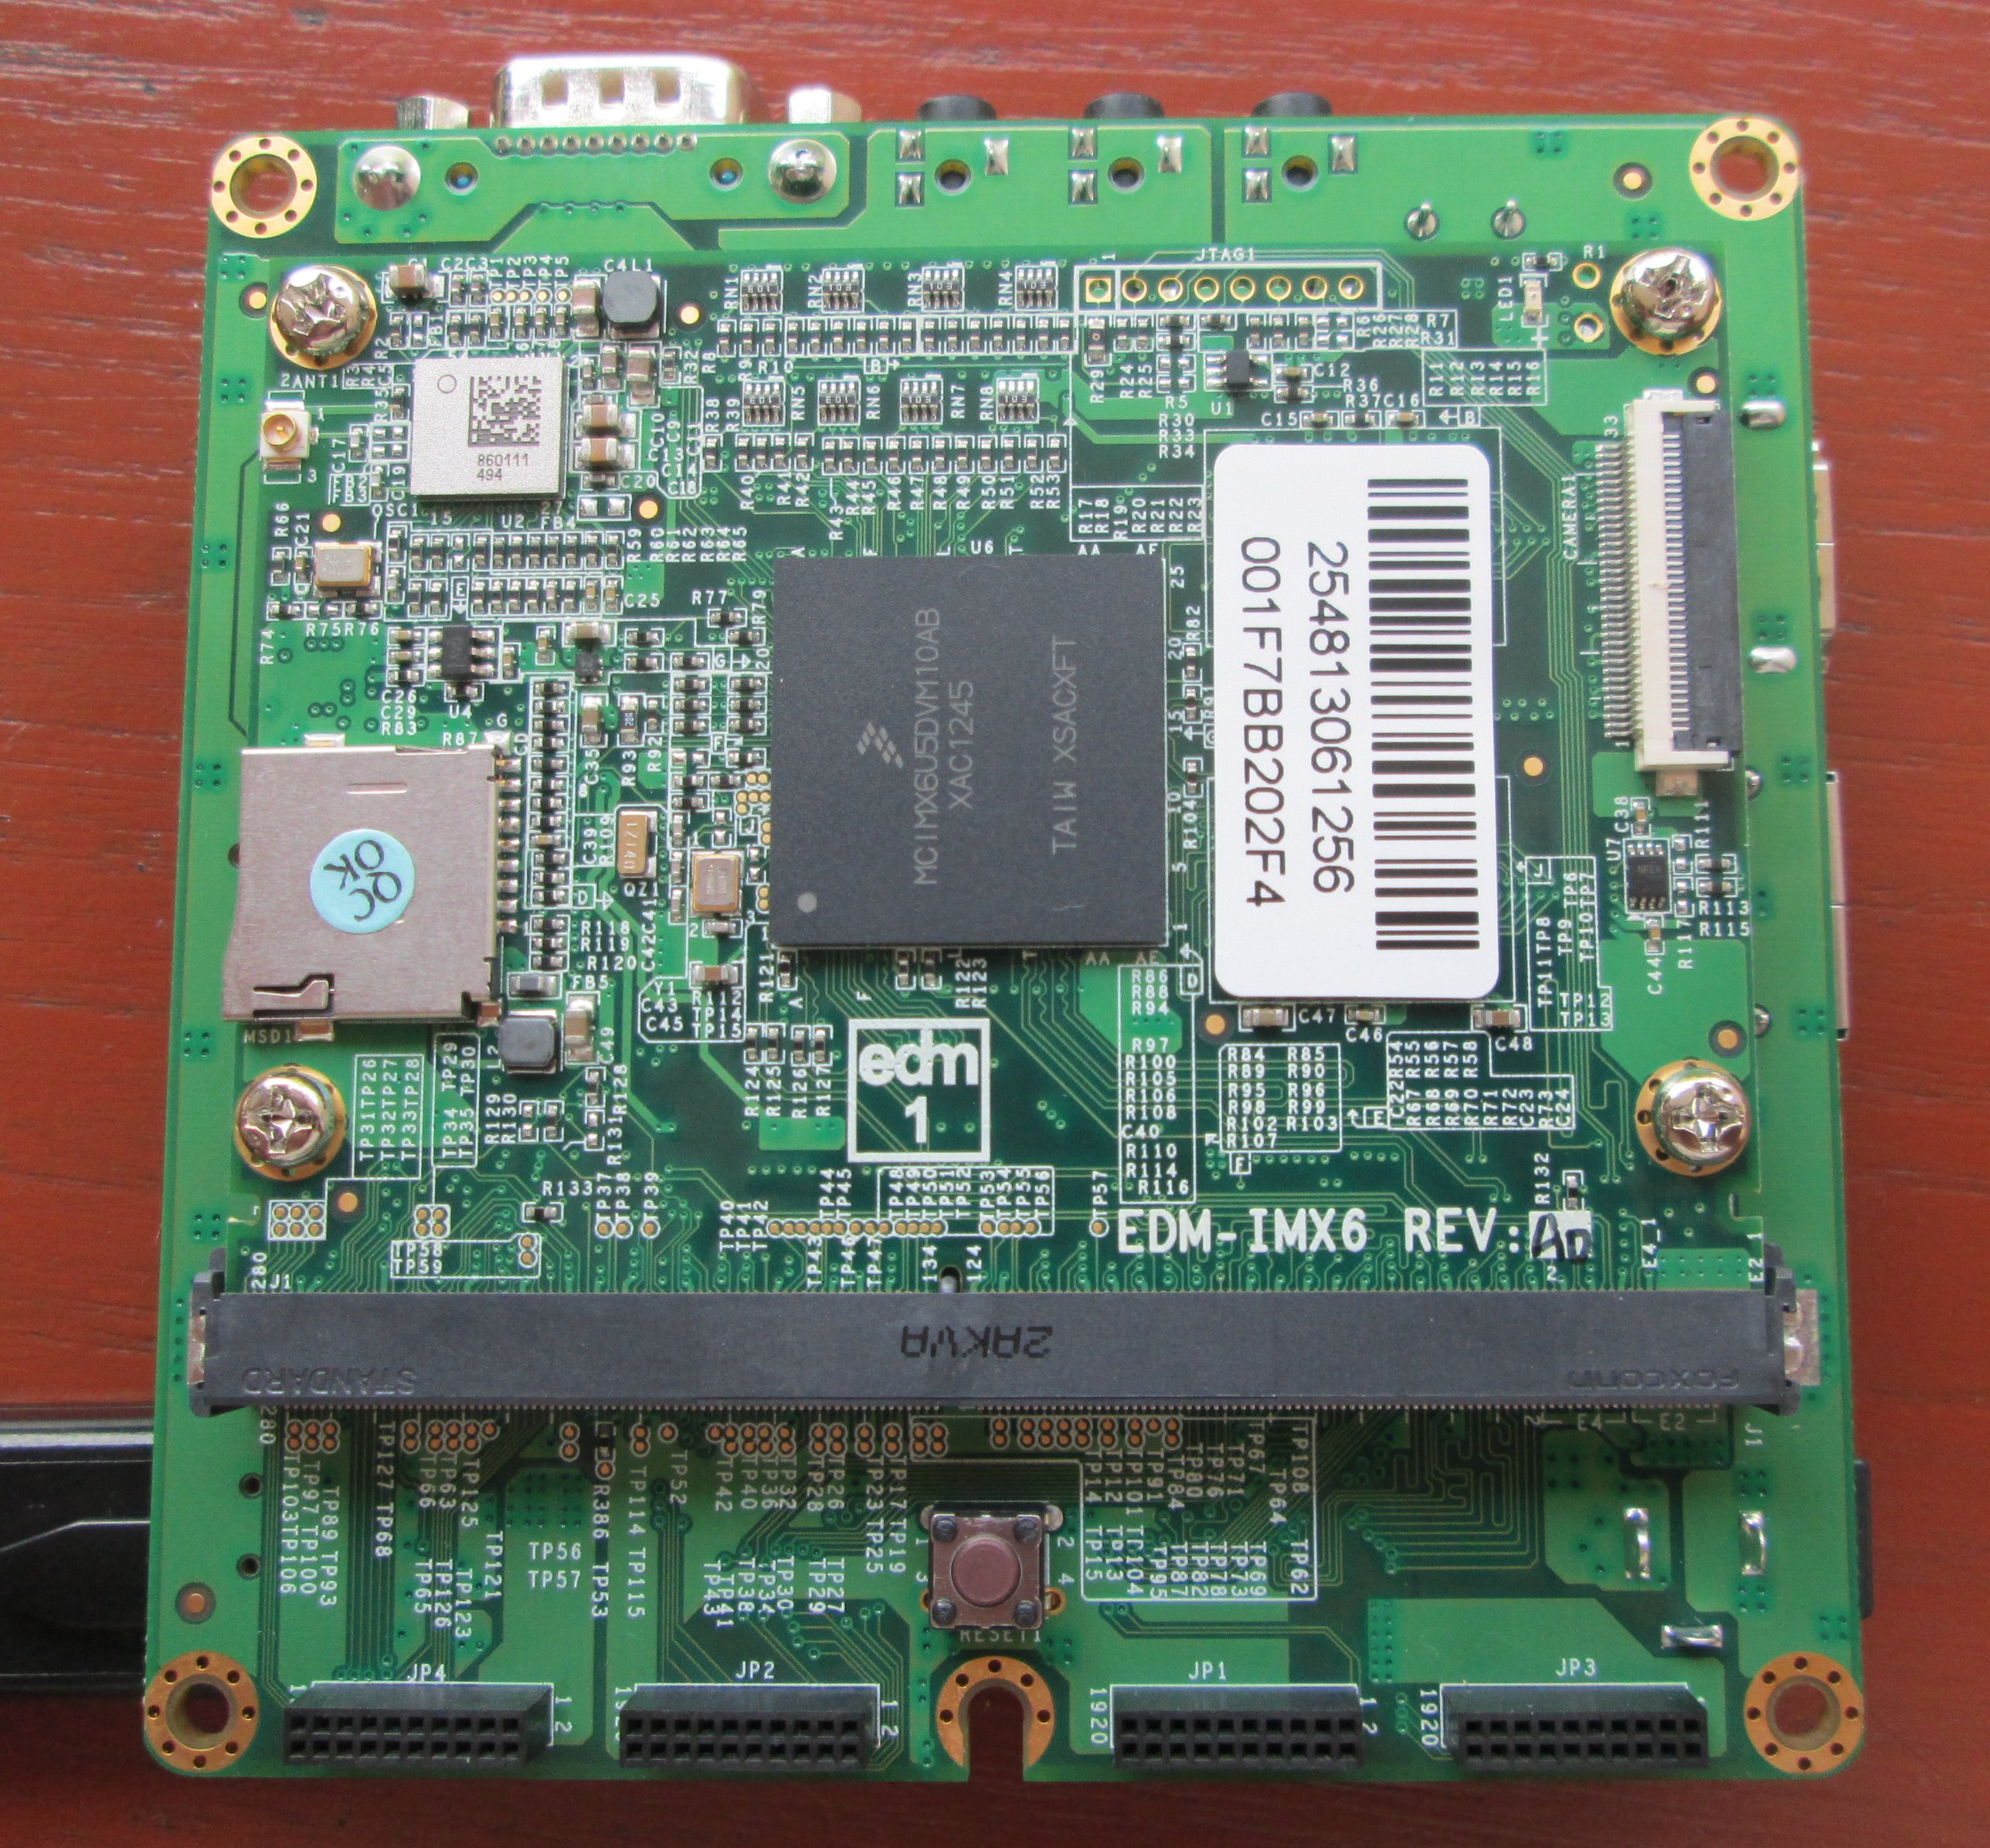
At the bottom of the board, there’s an EDM compatible SoM with the Freescale Processor, the RAM chipsets, an internal microSD slot (for the OS), a camera connector, as well as the Wi-Fi module (Dual version only). There’s also a reset button and 4 expansion pin headers at the bottom of the baseboard.
I’ve take some pictures on the side of the board to have a close look at the ports accessible on the Wandboard.
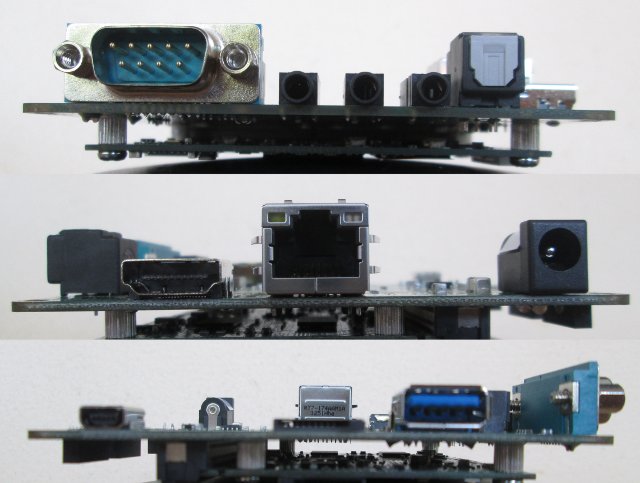
From left to right, top to bottom we’ve got:
- Serial connector (DB9), digital line OUT, digital line IN, microphone, and S/PDIF
- HDMI, Gigabit Ethernet, and 5VDC Jack
- USB OTG, microSD slot (for applications/data) and USB Host (USB 3.0 Connector, but only USB 2.0 is supported by Freescale SoM)
One of the advantage of the Wandboard is that it’s comprised of a baseboard and a system-on-module (SoM) which are based on the EDM standard. This means, at least in theory, that you could remove the SoM, and replace it by another EDM Compact SoM (85x60mm). I’ve seen some people interested in upgrading their board to “Wandboard Quad” by replacing the provided SoM with Technexion EDM1-CF-iMX6 Quad SoM.
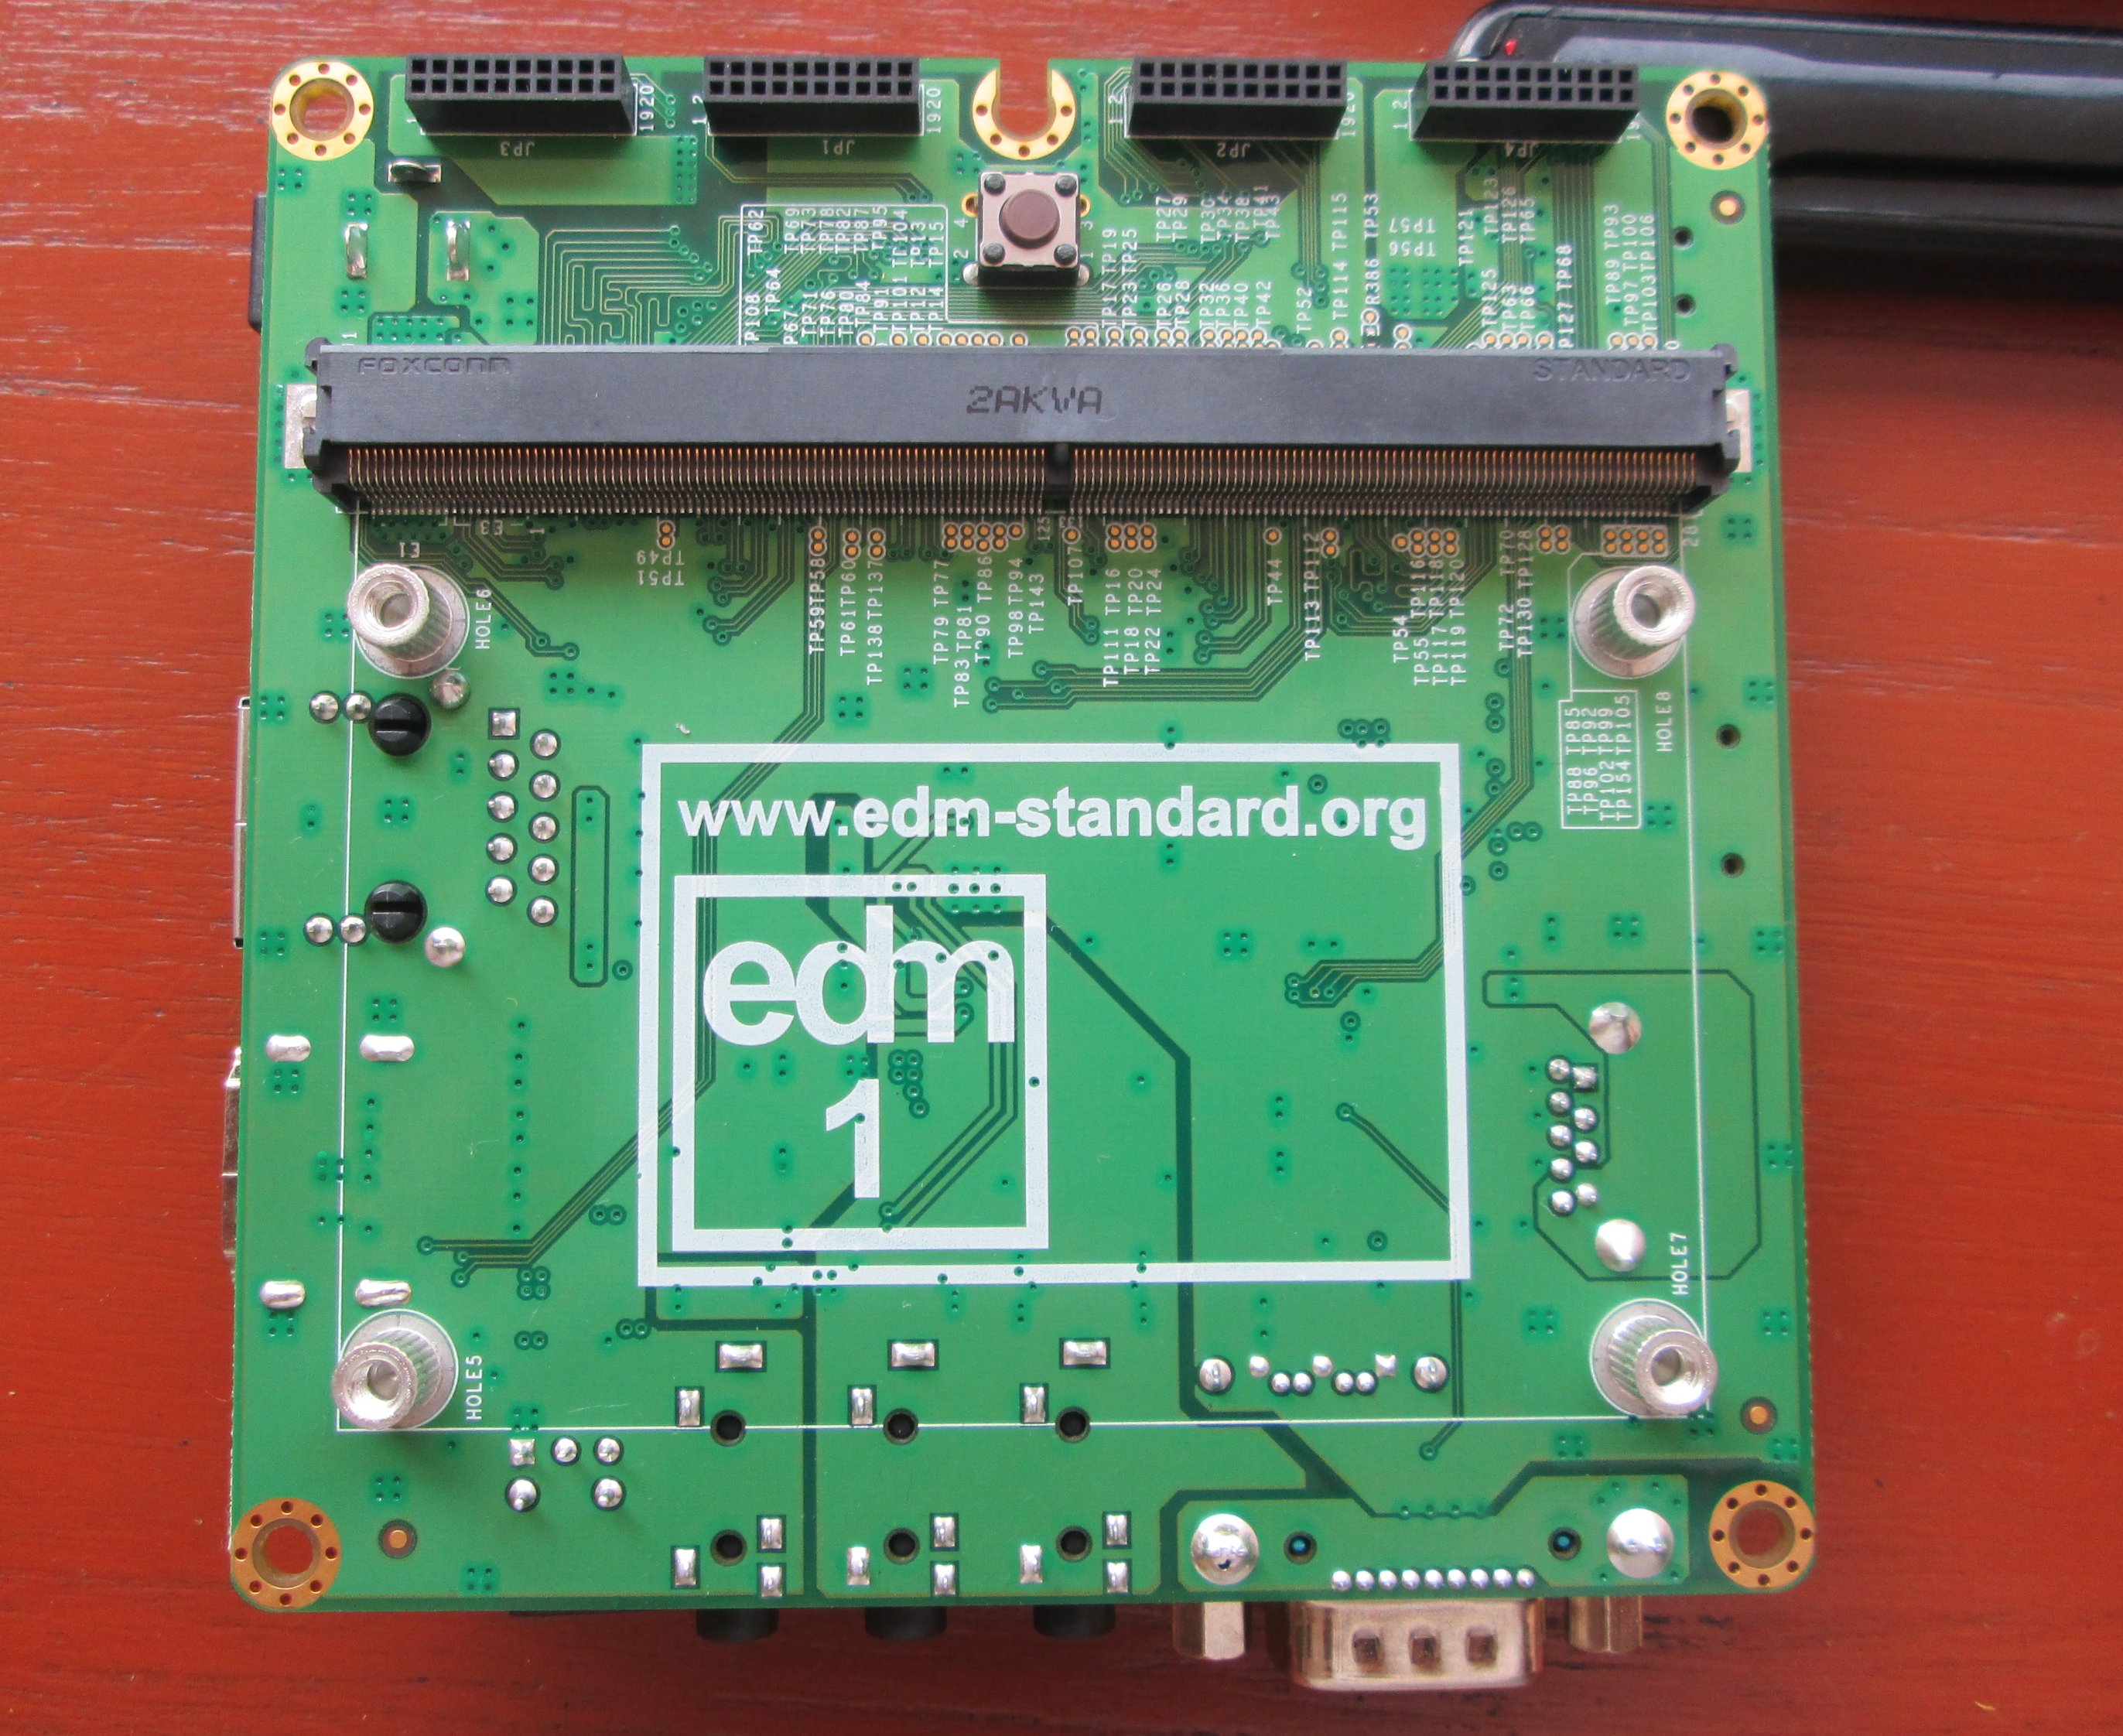
I’ve removed the 4 screws to remove the EDM-IMX6 SoM.
On the back of the module, you’ve got 2 more RAM Chips, Atheros AR8031 (Gb Ethernet), and lots of markings. If you want to connect the Wi-Fi antenna, the (golden) connector is just on top of the Wi-Fi module, and right of the microSD slot in the picture above.
Wandboard Quick Start Guides
Casing Assembly
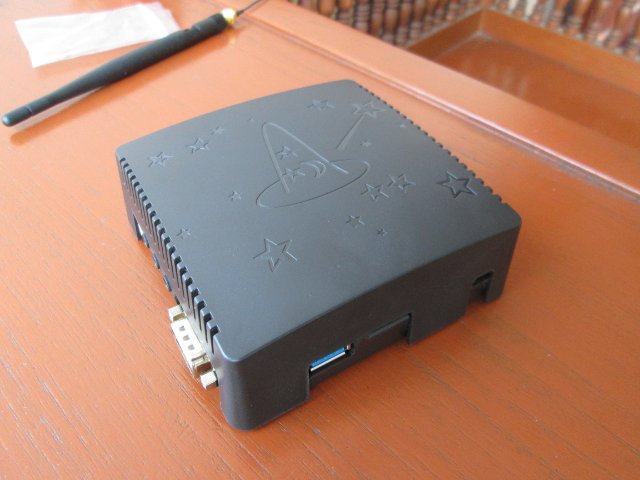
Putting the enclosure and the board together, is extremely easy. Align the board with the top of the case, cover it with the bottom, insert and tighten the 4 screws and you’re done.
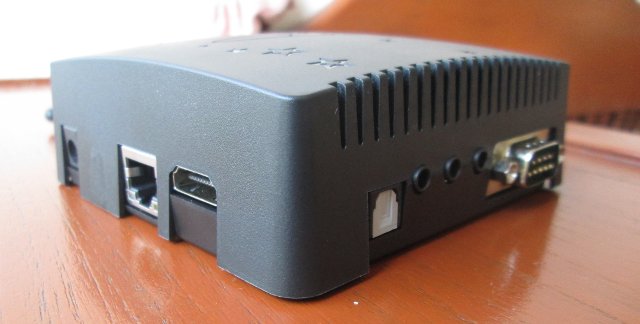
You’ve got yourself a nice looking box. There are 2 issues however. The first and most important is that the connector for the Wi-Fi antenna faced the bottom of the enclosure, so it’s impossible to connect the Wi-Fi antenna and use the enclosure at the same time (Wi-Fi should still work without antenna though), unless you drill a small hole at the bottom of the casing. [Update: Wandboard posted the instructions to assemble the enclosure with the Wi-Fi antenna. This involves using a cutter, but it still looks neat]. The second, which is less a problem, is that the OS is stored in the internal microSD, so each time you need to update the OS, you’ll have to open the casing. It would have been a bit more convenient to be able to use the external microSD as well.
Installing and Running Android in Wandboard
I’ll provide the instructions for a Linux PC, but it’s also possible to do with Windows, and Win32DiskImager (Included in the images). First Download and unzip Android Jelly Bean (Early Preview) for the Wandboard Dual in your PC:
|
1 2 |
wget http://www.wandboard.org/images/downloads/android-4.1.2-wand-dual-20130207.zip unzip android-4.1.2-wand-dual-20130207.zip |
You’ll get three files:
- android-4.1.2-wand-dual-20130207.img – Android Jelly Bean Image for Wanboard Dual
- android-4.1.2-wand-dual-20130207.txt – Release notes
- win32diskimager.zip – Disk imager utility for Windows.
Now insert a 4GB (or more) microSD card into your PC, and copy the image with dd or dd.sh:
|
1 |
sudo dd.sh if=android-4.1.2-wand-dual-20130207.img of=/dev/sdc |
You’ll have to replace “/dev/sdc” by your microSD card device. You can check by running sudo blkid.
Insert the microSD card in the internal microSD slot, connect the HDMI connector to your TV, connect Ethernet, a keyboard and mouse via a USB hub, and power the board with a 5V/2A power adapter. After about 2 minutes the boot should be complete, and you should get to the lock screen.
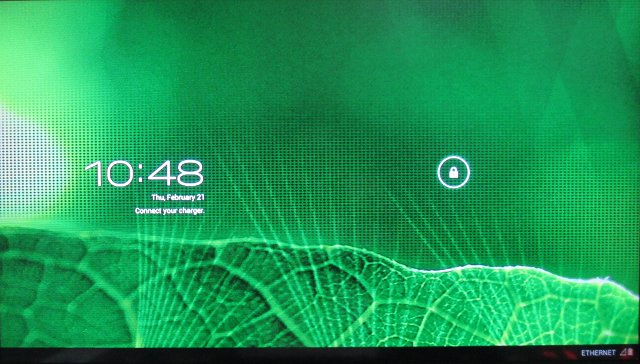
According to the release notes files, wifi, bluetooth, adb, usb gadget and uvc cam are not working in Android yet. HDMI might fail to setup audio rate, and there’s no Setup menu for Ethernet (only dhcp will work). Ethernet works, but there’s no Google Play or file manager, and copying apks into /system/app did not install them automatically. I’ll do more testing once another Android image is available.
Installing and Running Ubuntu 11.10 in Wandboard
Thep rocedure for Ubuntu is very much similar to the one for Android. Get the image, uncompress it, and copy it to a 4GB (or greater) microSD card.
|
1 2 3 |
wget http://www.wandboard.org/images/downloads/ubuntu-11.10-wand-dual-20130208.zip unzip ubuntu-11.10-wand-dual-20130208.zip sudo dd.sh if=ubuntu-11.10-wand-dual-20130208.img of=/dev/sdc |
Insert the microSD in the Wandboard, make sure everything is connected, and power on the board. The boot will take a while, and the screen will stay black for about 1m20, then you’ll see a gray background and the mouse pointer, but it will only become usable after 3 minutes (From power on to Unity desktop).
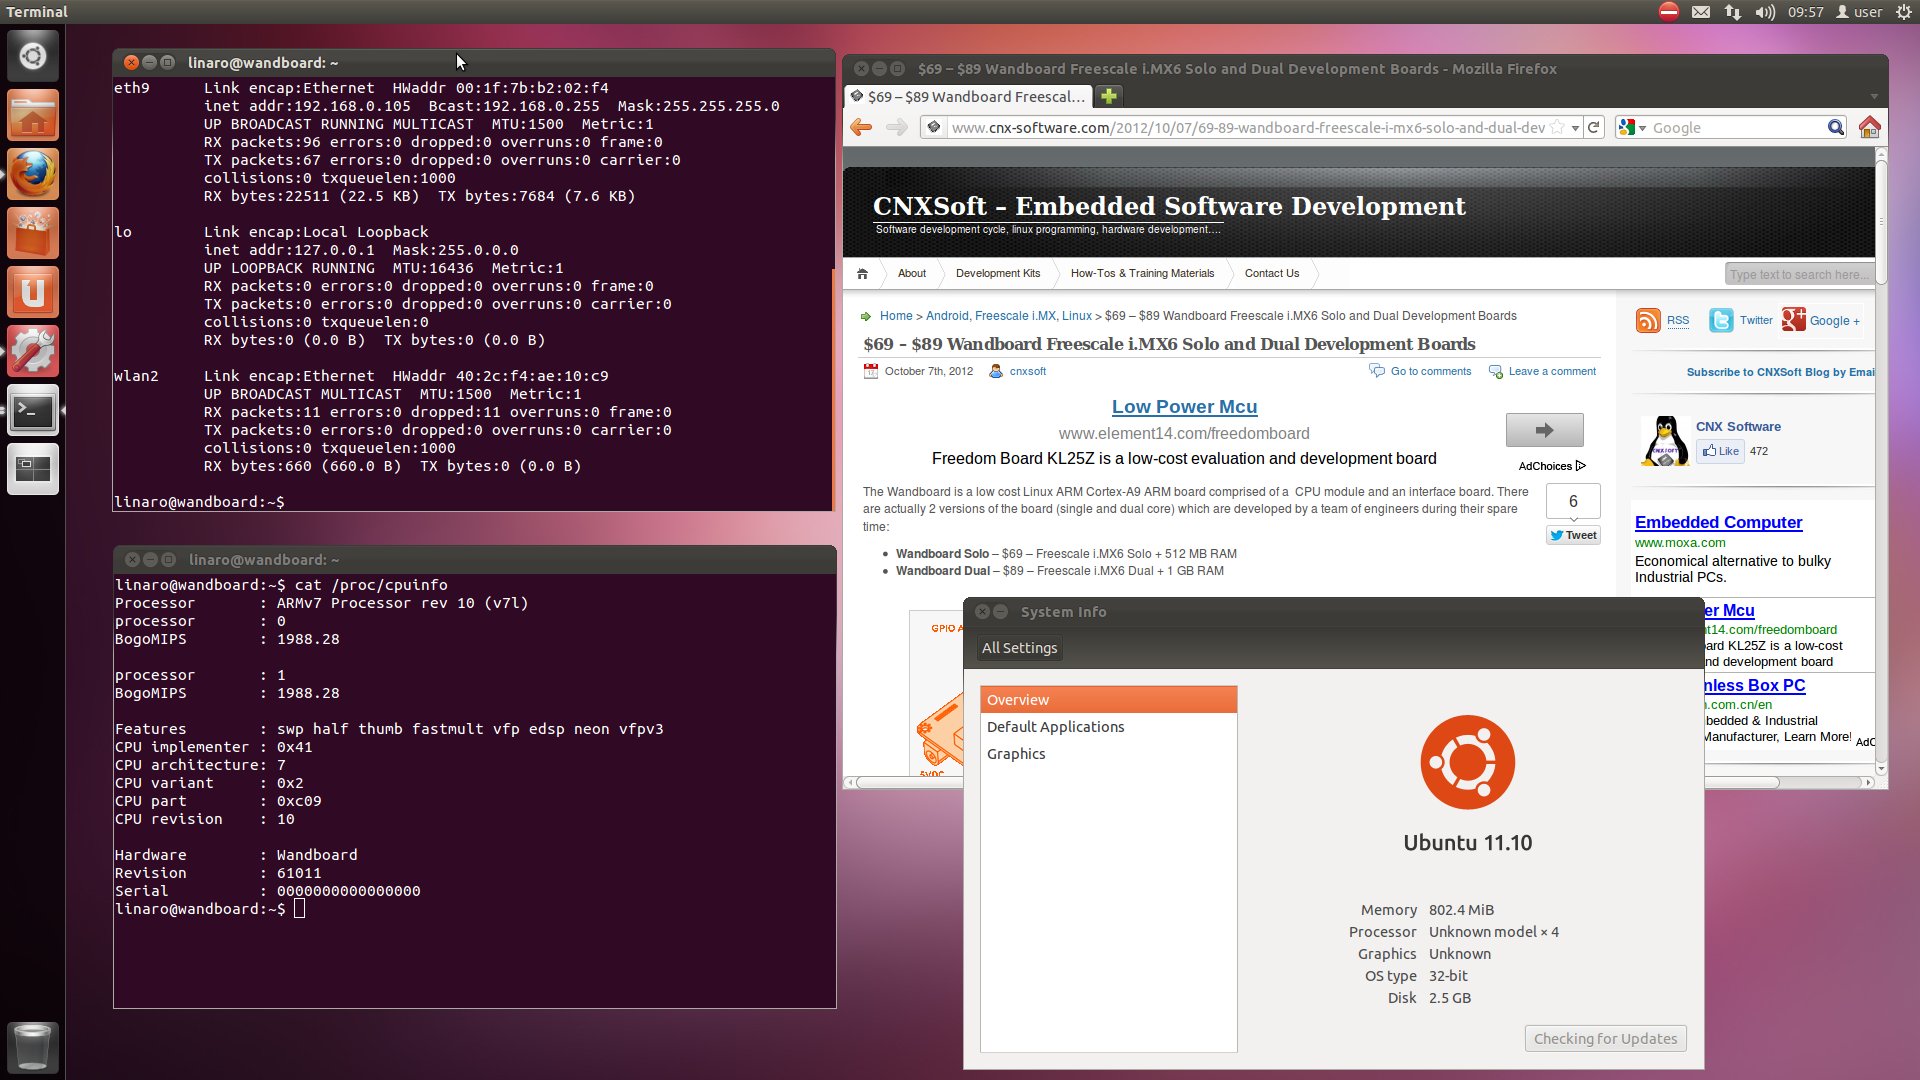
As with most other ARM systems, Ubuntu feels really slow to use, mostly because of the I/O on the microSD card, and I suppose Unity is also part of the sluggishness, so using another desktop environment (e..g LXDE) should help with performance. I’ve also tried es2gears just in case GPU acceleration would magically work, but it’s still using software rendering, which is the same issue as with other Freescale i.MX6 devices at the moment. VPU should work, but since there appears to be a lot of fancy things to do with gstreamer, I’ll write a separate post about video playback on Freescale i.MX6 platforms. If you’re planning to use the board as an embedded platform (e.g. for automation), a Yocto Project build is in the work.
Wandboard SDK and Kernel Build
Wandboard developers eventually intend to release the source code in a public repository, but in the meantime, u-boot and linux source code is available as a tar file, which also contains binaries (precompiled kernel, kernel modules, u-boots and patchram util), firmware (for VPU, Bluetooth and WiFi), tools and documentation like SD card layout.
Download and extract the SDK:
|
1 2 |
wget http://www.wandboard.org/images/downloads/wandboard-sdk-20130208.tar.xz tar xvf wandboard-sdk-20130208.tar.xz |
You can build the kernel and modules (for Linux/Ubuntu) by following the steps below, assuming the toolchain is already installed:
cd wandboard-sdk-20130208/linux-3.0.35-imx6-wand

cp wandboard_ubuntu_defconfig arch/arm/configs/

make ARCH=arm wandboard_ubuntu_defconfig

make -j8 ARCH=arm CROSS_COMPILE=arm-linux-gnueabihf- uImage

make -j8 ARCH=arm CROSS_COMPILE=arm-linux-gnueabihf- modules

make -j8 ARCH=arm CROSS_COMPILE=arm-linux-gnueabihf- modules_install INSTALL_MOD_PATH=../modules
Now that the build is complete, copy uImage and the modules to the microSD card with
|
1 2 3 |
Ubuntu, and umount it: sudo dd if=arch/arm/boot/uImage of=/dev/sdc bs=1M seek=1 cp ../modules/lib/modules/3.0.35/ /media/<rootfs_mount_point>/lib/modules -rf sudo umount /dev/sdc1 |
Insert the microSD card in the Wandboard, it should boot Ubuntu, and can verify the kernel is the one just you built by displaying the build date with uname:
|
1 2 |
linaro@wandboard:~$ uname -a Linux wandboard 3.0.35 #3 SMP PREEMPT Thu Feb 21 18:41:10 ICT 2013 armv7l armv7l armv7l GNU/Linux |
Ideally you should connect a null modem cable or DB9 serial to USB cable to access the serial console for bootloader and kernel debugging, but since I don’t have one of those, I haven’t tried.
If you have any questions or technical issues with the Wandboard, you can get support on Wandboard Google Group. Header pins description and schematics are available in Wandboard User’s Manual.

Jean-Luc started CNX Software in 2010 as a part-time endeavor, before quitting his job as a software engineering manager, and starting to write daily news, and reviews full time later in 2011.
Support CNX Software! Donate via cryptocurrencies, become a Patron on Patreon, or purchase goods on Amazon or Aliexpress


That missing SATA is what still keeps me from instantly buying this thing.
with SATA i could insert one of my 2,5″-drives and use it as mediacenter-device instead of this atom-things.
i expect the performance with a better windowmanager (i3wm in my case) and some smaller tools to be pretty usable.
Maybe someone can do something like http://www.raspbmc.com/ for Wandboard.
@Dr. Azrael Tod
I suppose everything is there for SATA on the baseboard, but none of the Freescale i.MX6 CPUs chosen by Wandboard support SATA.
@Dragonik
I’m pretty sure XBMC Linux will come to i.MX6 devices.
@Jean-Luc Aufranc (CNXSoft)
I hope so 🙂
I got my own Wandboard DL, so I waiting for any tutorial, files ect. on Yours site.
Couldn’t they ship the Wandboard in the enclosure to save shipping the enclosure (a box…) in its own box… :s
@onebir
That’s why they call it “DIY” 😀
XBMC runs very bad on a GK802, so don’t hold your breath just yet…
Hi,
We will post a document how to assemble the enclosure + antenna. The trick is to first connect the uFL connector on the Wandboard SoM and let the cable go through the hole next to the RESET button from top to bottom and after that close the enclosure.
We will do a picture by picture assembling guide and get it in the download section together with 3D files of the enclosure for people that want to “print” their own on a 3D printer.
@wandboard
Thanks for your Good Work, Wandboard is a nice piece of hardware 🙂
I agree, @Dr. Azrael Tod , it would be great to have that SATA port supported. I imagine it is on their roadmap. I can see no other explanation for including it unless they plan to ship a SoM that supports it.
Updated post with link to instructions to use the Wi-Fi antenna with the enclosure.
A little surprised that OpenGL ES is using software rendering for Ubuntu. I was under the impression that Vivante OpenGL drivers are available. Hmm on some other vivante boards, loading the “galcore” module is required. Can you check if the galcore module is loaded?
@rahul
I’ve heard OpenGL does not work on any i.mx6 boards right now. I’ll try to check the “galcore” module a bit later.
ARCH=arm CROSS_COMPILE=arm-linuxvi lovi unmae-gnueabihf- uImage
Looks funny, no?? 😉
@giovanni.v
Lol.. Something must have gone terribly wrong with the copy/paste 🙂
HI
iam getting this error when iam make uIMage
CC drivers/mxc/gpu-viv/hal/kernel/gc_hal_kernel_video_memory.o
drivers/mxc/gpu-viv/hal/kernel/gc_hal_kernel_video_memory.c: In function ‘gckVIDMEM_Lock’:
drivers/mxc/gpu-viv/hal/kernel/gc_hal_kernel_video_memory.c:1771:16: error: ‘needMapping’ may be used uninitialized in this function [-Werror=maybe-uninitialized]
cc1: all warnings being treated as errors
make[3]: *** [drivers/mxc/gpu-viv/hal/kernel/gc_hal_kernel_video_memory.o] Error 1
make[2]: *** [drivers/mxc/gpu-viv] Error 2
make[1]: *** [drivers/mxc] Error 2
deleted
HI
iam getting this error when iam make uIMage
CC drivers/mxc/gpu-viv/hal/kernel/gc_hal_kernel_video_memory.o
drivers/mxc/gpu-viv/hal/kernel/gc_hal_kernel_video_memory.c: In function ‘gckVIDMEM_Lock’:
drivers/mxc/gpu-viv/hal/kernel/gc_hal_kernel_video_memory.c:1771:16: error: ‘needMapping’ may be used uninitialized in this function [-Werror=maybe-uninitialized]
cc1: all warnings being treated as errors
make[3]: *** [drivers/mxc/gpu-viv/hal/kernel/gc_hal_kernel_video_memory.o] Error 1
make[2]: *** [drivers/mxc/gpu-viv] Error 2
make[1]: *** [drivers/mxc] Error 2
OpenCL works out of the box – tested with the quad-core version.
Found 1 platform(s).
platform[0x4021c8a0]: profile: EMBEDDED_PROFILE
platform[0x4021c8a0]: version: OpenCL 1.1
platform[0x4021c8a0]: name: Vivante OpenCL Platform
platform[0x4021c8a0]: vendor: Vivante Corporation
platform[0x4021c8a0]: extensions:
platform[0x4021c8a0]: Found 1 device(s).
device[0x4021c720]: NAME: Vivante OpenCL Device
device[0x4021c720]: VENDOR: Vivante Corporation
device[0x4021c720]: PROFILE: EMBEDDED_PROFILE
device[0x4021c720]: VERSION: OpenCL 1.1
device[0x4021c720]: EXTENSIONS: cl_khr_byte_addressable_store
device[0x4021c720]: DRIVER_VERSION: OpenCL 1.1
(…)