
Texas Instruments CC2541 SensorTag is a Bluetooth Low Energy (BLE) development kit with 6 sensors (IR temperature, humidity, pressure, accelerometer, gyroscope, magnetometer) mainly destined at mobile application developers for iOS, and soon, Android 4.3. I’m interested in BLE, as I expect most new phones with come with BT 4.0 BLE (aka Bluetooth SMART), and this technology may help bring the Internet of things to life, allowing us to interact with sensors, smart appliance (e.g. light switch)… Since it just costs $25 (including international shipping), I decided to buy it, and give it a try. Today, I’ll show some unboxing pictures, and how to communicate with the kit using the Linux command line.
TI SensorTag Unboxing
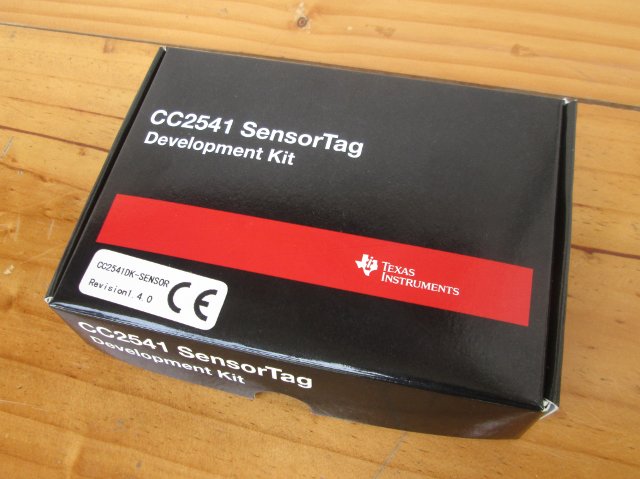
I ordered it at the end of May, and receive it by Fedex on the 18th of July, about 7 weeks later, in the package below.
Inside we’ve got a Quick Start Guide for iOS and Windows, a screw for the enclosure, CC2541 SensorTag board, 2 parts for the enclosure, and a CR2032 battery.

There are also some documents with warning, and legalese, mainly explaining this kit is only for development. On another important info is that in Japan, you can only use this kit in a shielded room or specialized test facility, or you may get into troubles with the authorities.
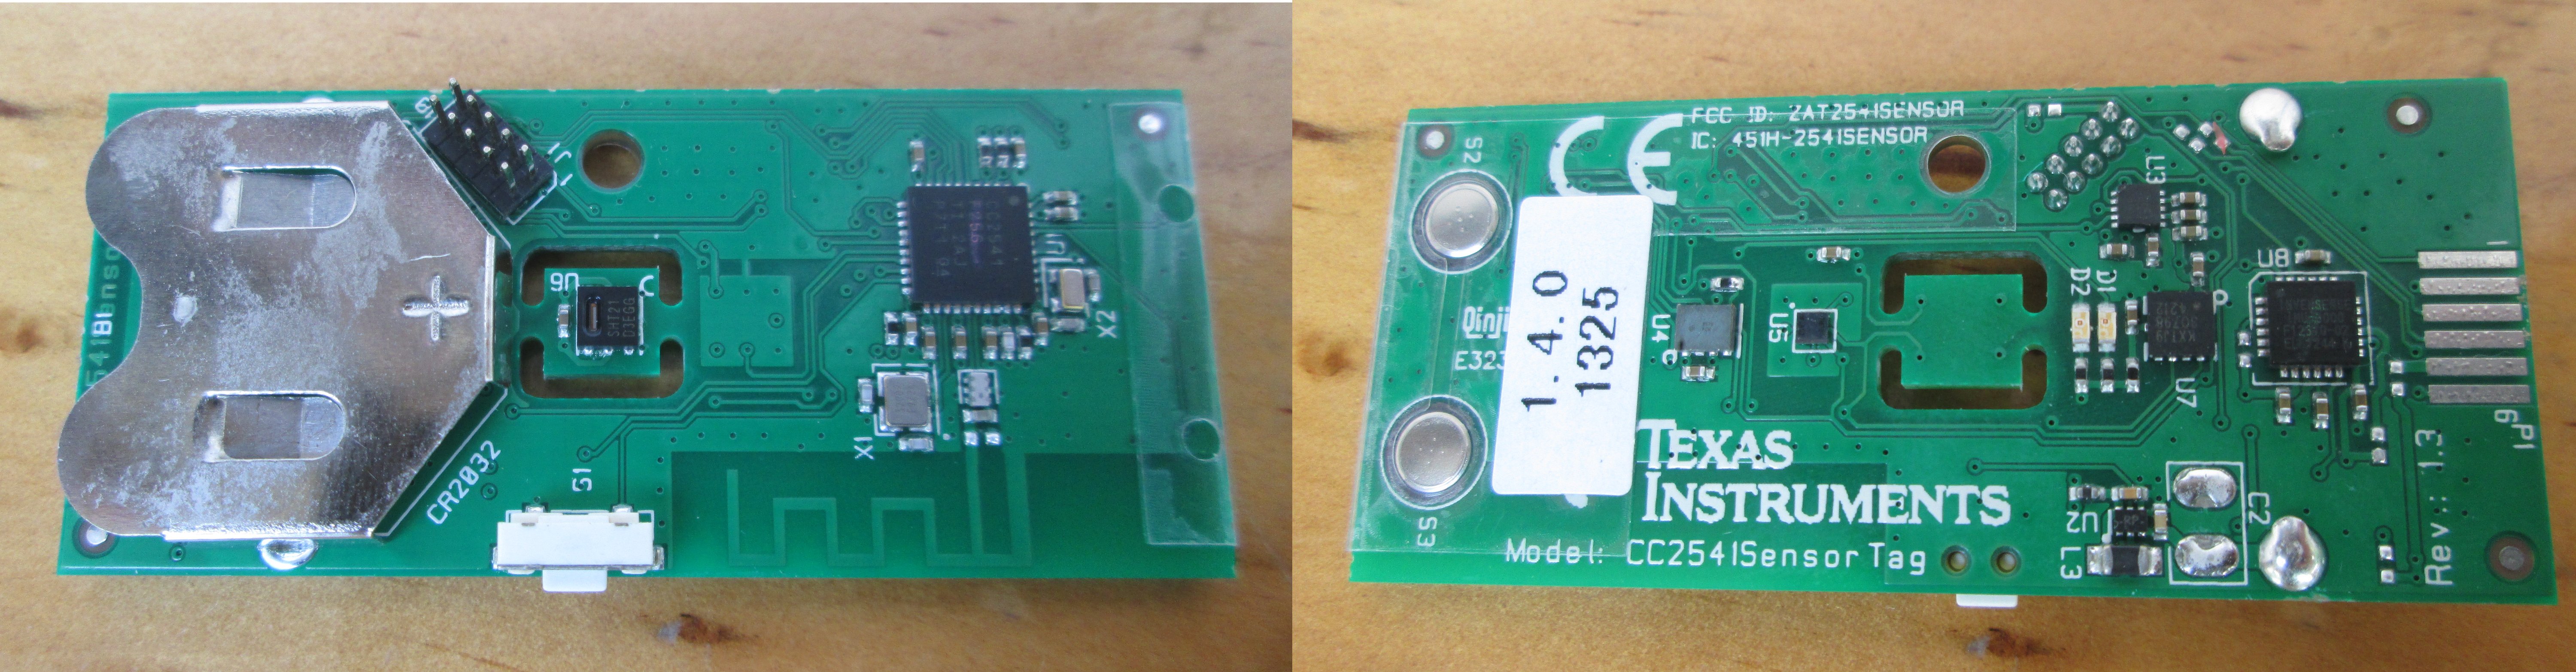
On one side of the board (left on pic), we’ve got the battery socket,S1 button to turn on/off the SensorTag, the humidity sensor (U6, Sensirion SHT21), and TI CC2541 Bluetooth low energy SoC. J1 connector is used to debug, and flash CC2541.
On the other side, we’ve got S2 & S3 push-buttons, a pressure sensor (U4 , Epcos T5400), an infrared thermopile sensor (U5, TI TMP0006), a magnetometer (U3, Freescale MAG3110), an accelerometer (U7, Kionix KXTJ9), and a gyroscope (U8, InvenSense IMU-3000).
You can also watch SensorTag Unboxing Video if you please.
Assembly of the SensorTag
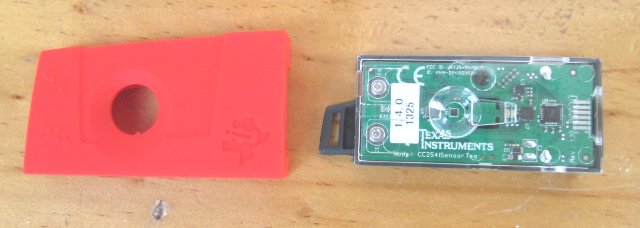
Assembling the SensorTag is pretty easy. First insert the CR2032 battery, and press S1 to check the connection is fine, as it should make D1 blink. If it does not work, you may have to remove and re-insert the battery a few times (I did not have to do this). Place the PCB in the black plastic cover, fastened the PCB with the screw, and add the transparent plastic cover.
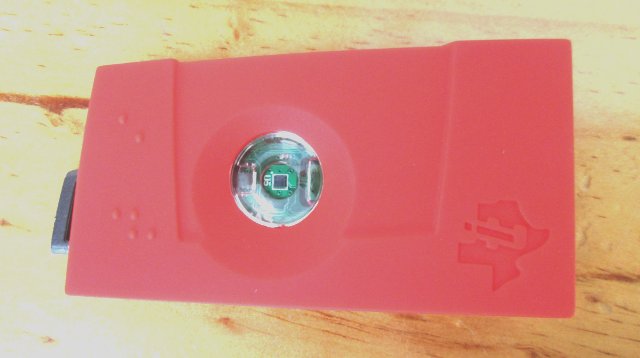
Complete the assembly by adding the red plastic cover.
Getting Started with SensorTag / Bluetooth Low Energy in Linux
Since I don’t own an iOS device, my only option is to use a computer running Windows or Linux. In that case, we need USB dongle supporting Bluetooth 4.0 Low Energy. I bought a dongle called BD-401 for $5.25 on Ebay, but the listing is now gone, and it was also on DealExtreme, but for some reasons it seems to have almost completely disappeared from the web, and I can only find it in one Aliexpress store for $7. Here are some of the USB dongle technical details for your reference:
|
1 2 3 4 5 6 7 8 9 10 11 12 13 14 15 16 17 18 19 20 21 22 23 |
lsusb Bus 003 Device 008: ID 0a12:0001 Cambridge Silicon Radio, Ltd Bluetooth Dongle (HCI mode) sudo hciconfig -a hci0 features hci0: Type: BR/EDR Bus: USB BD Address: 00:15:83:64:BA:E9 ACL MTU: 310:10 SCO MTU: 64:8 Features page 0: 0xff 0xff 0x8f 0xfe 0xdb 0xff 0x5b 0x87 3-slot packets, 5-slot packets, encryption, slot offset, timing accuracy, role switch, hold mode, sniff mode, park state, RSSI, channel quality, SCO link, HV2 packets, HV3 packets, u-law log, A-law log, CVSD, paging scheme, power control, transparent SCO, broadcast encrypt, EDR ACL 2 Mbps, EDR ACL 3 Mbps, enhanced iscan, interlaced iscan, interlaced pscan, inquiry with RSSI, extended SCO, EV4 packets, EV5 packets, AFH cap. slave AFH class. slave, LE support, 3-slot EDR ACL, 5-slot EDR ACL, sniff subrating, ,pause encryption, AFH cap. master, AFH class. master, EDR eSCO 2 Mbps, EDR eSCO 3 Mbps, 3-slot EDR eSCO, extended inquiry, LE and BR/EDR, simple pairing, encapsulated PDU, non-flush flag, LSTO, inquiry TX power, EPC extended features Features page 1: 0x01 0x00 0x00 0x00 0x00 0x00 0x00 0x00 |
Another option is to buy Plugable USB-BT4LE![]() on Amazon for about $15.
on Amazon for about $15.
If you want to use SensorTag with a Windows computer, you’ll need to download and install BLE Device Monitor. TI clearly mentions you need CC2540 USB dongle ($49) to use the software, but I just thought any BT 4.0 BLE dongle might do. When I saw BLE Device Monitor looking for a COM port, I knew this was not going to work, and you indeed need TI kit, and install a specific firmware on the dongle.
Luckily this is not the case in Linux. The requirement is just to have Linux 3.5, the first kernel version with Bluetooth Low Energy support, or better Linux 3.6 which adds some improvements. Since I had a Raspberry Pi on my table running Linux 3.6.11, and somebody clever already provided instructions to use SensorTag with the board, I decided to use this platform for playing around. Instructions for the BeagleBone Black are also avauilable, but the link not currently working.
You’ll need a recent version of Bluez, an open source Bluetooth library, in order to support BLE devices such as the SensorTag, and I’ll provide three methods to build it.
Since I’ve recently used Yocto to build Linux for the Raspberry Pi, I’ve created a new image recipe in meta-raspberrypi/recipes-core/images/rpi-ble-image.bb:
|
1 2 3 4 5 |
# Base this image on rpi-hwup-image include rpi-hwup-image.bb IMAGE_FEATURES += "ssh-server-dropbear" IMAGE_INSTALL += "bluez4 libical" |
and built the new image starting from poky directory:
|
1 2 |
. oe-init-build-env build bitbake rpi-ble-image |
A few minutes later, I’ve got an 88MB SD card image (./tmp/deploy/images/rpi-ble-image-raspberrypi.rpi-sdimg) with all tools (hcitool and gatttool) required to play with my SensorTag. That was easy.
Yocto provides Bluez 4.4 in this build, and it works fine with my system, but the latest version is 5.7, so you could also build the library and the tools natively in a Raspberry Pi:
|
1 2 3 4 5 6 7 8 |
wget https://www.kernel.org/pub/linux/bluetooth/bluez-5.7.tar.xz tar xvf bluez-5.7.tar.xz cd bluez-5.7 sudo apt-get install libusb-dev libdbus-1-dev libglib2.0-dev automake libudev-dev libical-dev libreadline-dev ./configure --disable-systemd make sudo make install sudo cp attrib/gatttool /usr/local/bin/ |
The other method is to cross-compile the library. The build is not too complex and long, and this should not really be needed, unless you use a small SD card (like I do). You’ll need an ARM cross-toolchain, and since I’ve got the ARMv6 toolchain for Raspberry Pi built with Yocto, I’ll add it to my path in ~/.bahrc:
|
1 |
export PATH=$PATH:/home/jaufranc/edev/rpi/yocto/poky/build/tmp/sysroots/x86_64-linux/usr/bin/armv6-vfp-poky-linux-gnueabi/ |
One the side note, the right way to do with yocto, would probably be edit the recipe in meta/recipes-connectivity/bluez/ to update the version. It seemed complicated, so I passed.
Let’s cross-compile Bluez for ARM, and install it in ../bluez in a Linux computer:
 mkdir sensortag

cd sensortag/

wget https://www.kernel.org/pub/linux/bluetooth/bluez-5.7.tar.xz

tar xvf bluez-5.7.tar.xz

USB_CFLAGS="-I/home/jaufranc/edev/rpi/yocto/poky/build/tmp/sysroots/raspberrypi/usr/include" USB_LIBS="-L/home/jaufranc/edev/rpi/yocto/poky/build/tmp/sysroots/raspberrypi/lib -lusb" UDEV_CFLAGS=$USB_CFLAGS UDEV_LIBS="-L/home/jaufranc/edev/rpi/yocto/poky/build/tmp/sysroots/raspberrypi/usr/lib -ludev" ICAL_CFLAGS=$USB_CFLAGS ICAL_LIBS="-L/home/jaufranc/edev/rpi/yocto/poky/build/tmp/sysroots/raspberrypi/usr/lib -lical" ./configure --target=arm-poky-linux-gnueabi- --host=arm-poky-linux-gnueabi --prefix=/home/jaufranc/edev/rpi/sensortag/bluez --disable-systemd --disable-obex --disable-datafiles --disable-udev --with-sysroot=/home/jaufranc/edev/rpi/yocto/poky/build/tmp/sysroots/raspberrypi/

make

make install

cp attrib/gatttool ../bluez/bin/
Finally, you just have to copy all files in ../bluez directory to the Raspberry Pi using an NFS share.
I’ve just use the first method (Image built with Yocto) to test the SensorTag.
First, we need to enable hci0 interface:
|
1 |
hciconfig hci0 up |
Now, let’s try to find the SensorTag, by running the command line below, and pressing S1 button on the side of the SensorTag:
|
1 2 3 4 |
hcitool lescan LE Scan ... BC:6A:29:AC:1A:5F (unknown) BC:6A:29:AC:1A:5F SensorTag |
Great we’ve found it! This command will continuously scan for devices, so press control-C to stop it.
Please note that SensorTag will turn itself off automatically if it is not connected, so you may have to press S1 again.
Gatttool allows us to connect to the kit, manually write commands, and read data:
|
1 2 3 4 5 6 7 8 9 10 11 12 13 14 15 |
gatttool -b BC:6A:29:AC:1A:5F --interactive [ ][BC:6A:29:AC:1A:5F][LE]> connect [CON][BC:6A:29:AC:1A:5F][LE]> char-write-cmd 0x29 01 [CON][BC:6A:29:AC:1A:5F][LE]> char-read-hnd 0x25 [CON][BC:6A:29:AC:1A:5F][LE]> Characteristic value/descriptor: a7 ff fc 0e [CON][BC:6A:29:AC:1A:5F][LE]> char-write-cmd 0x26 0100 [CON][BC:6A:29:AC:1A:5F][LE]> Notification handle = 0x0025 value: a3 ff 08 0f [CON][BC:6A:29:AC:1A:5F][LE]> Notification handle = 0x0025 value: aa ff 08 0f [CON][BC:6A:29:AC:1A:5F][LE]> Notification handle = 0x0025 value: a9 ff 08 0f [CON][BC:6A:29:AC:1A:5F][LE]> char-write-cmd 0x26 0000 [CON][BC:6A:29:AC:1A:5F][LE]> exit |
We are querying the temperature sensor (U5) with handles from the following table:
| Type | UUID | Handle | Read/Write | Format |
|---|---|---|---|---|
| <Data> | F000AA01 * | 0x25 | Read/Notify | ObjLSB ObjMSB AmbLSB AmbMSB (4 bytes) |
| <Data Notification> | 0x26 | R/W | 2 bytes | |
| <Configuration> | F000AA02 * | 0x29 | R/W | 1 byte |
Obj is the object temperature, and Amb, the ambient temperature.
The first command “char-write-cmd 0x29 01” enables the temperature sensor (all sensors are disabled by default to preserve energy). The second command (0x25) reads the sensor temperature. “char-write-cmd 0x26 0100” makes the device send temperature reading continuously (e.g. every seconds), and “char-write-cmd 0x26 0000” stops that.
Visit http://processors.wiki.ti.com/index.php/SensorTag_User_Guide#Gatt_Server for detailed explanations for all sensors, and algorithms to derive usable values.
If you want to write you own program, you can probably do so by starting from gatttool source code (C language) located in attrib directory of Bluez library. Mike Saunby, who provided the instructions for the Raspberry Pi, also wrote a program in python calling gatttool to retrieve the data, as well as a NodeJS / socket.IO web app to display temperature and accelerometer values in real-time in a web browser. His code is available on github.

Jean-Luc started CNX Software in 2010 as a part-time endeavor, before quitting his job as a software engineering manager, and starting to write daily news, and reviews full time later in 2011.
Support CNX Software! Donate via cryptocurrencies, become a Patron on Patreon, or purchase goods on Amazon or Aliexpress


Finally found time to play with my SensorTag… I don’t know where requirement for kernel 3.5 comes from, 3.2.0 as used in Ubunru 12.04LTS works fine. But shipped bluez package (4.98-2ubuntu7) is indeed too old, I was getting: root@x34f:~# gatttool -i hci1 -b BC:6A:29:AB:E9:C6 –interactive [ ][BC:6A:29:AB:E9:C6][LE]> connect connect: No route to host (113) So, I built latest (5.12) from source, and then it worked fine. Jean-Luc, did you play with it further? I’m interested to know if BLE battery life lives anyhow to promise ;-). And any thoughts on working distance? My initial testing shows rather mediocre range, it… Read more »
@Paul
No I did not play further. One other person left a comment about the difficulty to change the firmware however, because you need to buy a $3K tool, after the 30-day trial period.
http://www.cnx-software.com/2013/05/31/25-texas-instruments-sensortag-is-a-bluetooth-le-devkit-with-6-sensors/#comment-129343
It seems BLE was there, but not enabled by default before kernel 3.5 – http://www.spinics.net/lists/linux-bluetooth/msg24480.html
This presentation also mentions this together with improvement in 3.6. – http://elinux.org/images/1/1b/Bluetooth_Smart_devices_and_Low_Energy_support_on_Linux.pdf
@Jean-Luc Aufranc (CNXSoft)
Thanks for response. Regarding firmware hacking, I guess the biggest question is who on Earth would like to hack with 8051 in 2014 ;-). But if some will want, it’s all doable, for example, Contiki was ported to previous TI 8051 chips using SDCC: https://github.com/adamdunkels/contiki-fork/wiki/8051-Based-Platforms .
@Paul
SensorTag is only discoverable 180 seconds after pressing the button, so people have wanted to change that to be discoverable for longer intervals, or at specific times. For a weather station for example, it’s not that convenient to walk outside, and press the button to get the data….
@Jean-Luc Aufranc (CNXSoft) Btw, with wanting to do that specific change, my guess is that people miss with understanding what BLE is and how it works. “Discoverable” means it sends advertisements at rather short intervals (TI says SensorTag does 100ms for example), which in turn means in burns battery. An accessory won’t deliver “years on single coin cell”, likely just days. The way BLE should be used is that you discover devices, connect to it, and then query it infrequently. If people just want to burn battery, they don’t need to abuse BLE for that, classic BT is enough. For… Read more »
you wouldn’t happen to know if you can get one of the above usb dongles working and communicating in linux 2.6/3.x android 4.3 iso in virtualbox on Win 7 ? I tried a bluegiga bled112 (thinking any would do) and I can see the device connected to the vm but in android bluetooth won’t start. It almost immediately switches off when you switch it on. any ideas or suggestions would be great as I’m planning to return the bluegiga. thx
Hi guys,
we created our own firmware which disables the sleep mode. It works pretty well! If you are interested, have a look here – we have written a guide how it can be downloaded and installed easily:
http://www.myweathercenter.net/faq/
We use the firmware for our iPhone App MyWeatherCenter, which was featured by Apple these days.
With MyWeatherCenter you can create a beautiful Weatherstation that shows you the latest weather sensor data from the TI SensorTag. If you want to try it, just download it here:
https://itunes.apple.com/de/app/my-weather-center/id824900305?ls=1&mt=8
We would be happy to receive your feedback about it!
Best regards,
Oliver
@Oliver Heinrich “Just download” is not appropriate for paid app.
Awesome topic, ..When trying to connect to Sensor tag, I used to have error: connection host down (112). This line of code “”cp attrib/gatttool ../bluez/bin/”” got me this new message “Attempting to connect to MacAdress”.
I can tell “”cp attrib/gatttool ../bluez/bin/”” changed the situation because I had already had the newest version of Bluez and did all the steps mentioned previously of installation.
Now I would be p-leased if you explain to me why and what does that code stands for ?
Little off-topic.
I had a heck of a time using well undocumented Bluez 5.5. Since it is “advertised” as part of Linux kernel now NOBODY cares how undocumented and unsupported it is and it is basically THE library to implement bluetooth OUTSIDE Linux kernel.
Is 5.7 version of BlueZ worth the effort to update too?
You are not supposed to use BlueZ directly. You use DBUS to talk to it. There is full BLE API inside of DBUS. You are likely trying to directly use BlueZ and that is not supported.
For command line use bluetoothctl
http://www.linux-magazine.com/Issues/2017/197/Command-Line-bluetoothctl