
Beyond Semiconductor, a fabless semiconductor company based in Slovenia which develops their own 32-bit BA2x IP cores, has sent me one of their development tool, namely Beyond Debug Key supporting JTAG and UART interfaces either with BeyondStudio for the company’s BA2x processor, or the open source suite OpenOCD for other processors. Since I don’t have any Beyond Semi boards, I instead configured it, and quickly tried it with Atmel SAMA5D3 Xplained ARM Cortex A5 development board, and OpenOCD (Open On-Chip Debugger).
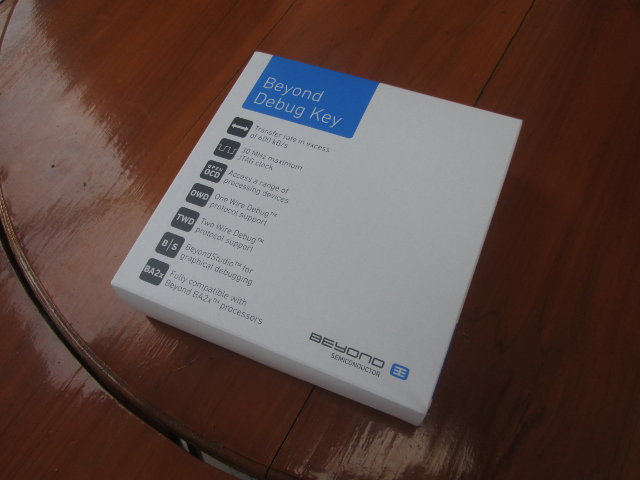 The debug tool comes in the package above describing the key features of the kit:
- Performance
- Transfer rate in excess of 600 kB/s
- 30 MHz maximum JTAG clock
- Less than 20 μW power draw from target board
- Compatibility
- Fully compatible with Beyond BA2x processor family
- Access any 8-bit, 16-bit, 32-bit or 64-bit processors via JTAG
- Works with all JTAG compliant devices
- Software Support
- OpenOCD for access to a range of CPLD, FPGA, flash and processor devices
- BeyondStudio for graphical debugging of Beyond BA2x processors
- Diagnostics – 7 autonomous status LEDs for power and flow control diagnostics
- Target Debugging Integrated in BeyondStudio
- Eclipse-based integrated development environment
- Simplified and straightforward setup of target connection in just few clicks
- Modern source-level debugger with hardware breakpoint, watchpoint and single step features
- Integrated target console
- Interfaces
- USB 2.0 Hi-speed 480Mbps connection to PC
- IEEE 1149.1 and IEEE 1149.7 JTAG interface standard pinout
- RS232/RS422/RS485 UART Transfer Data Rate up to 12Mbaud
- Simultaneous JTAG and UART operation
- IO voltage range from 1.2 V to 3.3 V and including 5V CMOS compliant signaling
- Independently controlled SRST and TRST signals
- One Wire Debug (OWD) and Two Wire Debug (TWD) protocols support
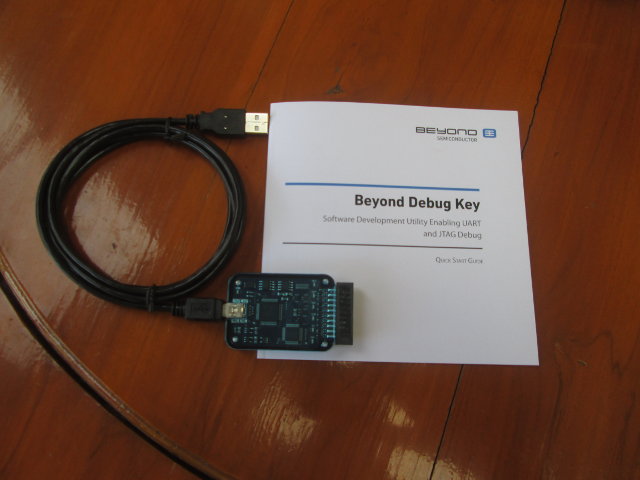
The kit include the Debug Key, a mini USB to cable, and a user’s manual describing the kit, explaining how to configured it with Windows and Linux computers, and listing the seven LED behaviours to diagonalize the connection. The tool uses a 20-pin JTAG connector, so as I did not want to wire JTAG signals manually, I went through my boards trying to find one with 20-pin JTAG receptacle, and I ended-up connecting it to Atmel SAMA5D3 Xpained development board as shown below.
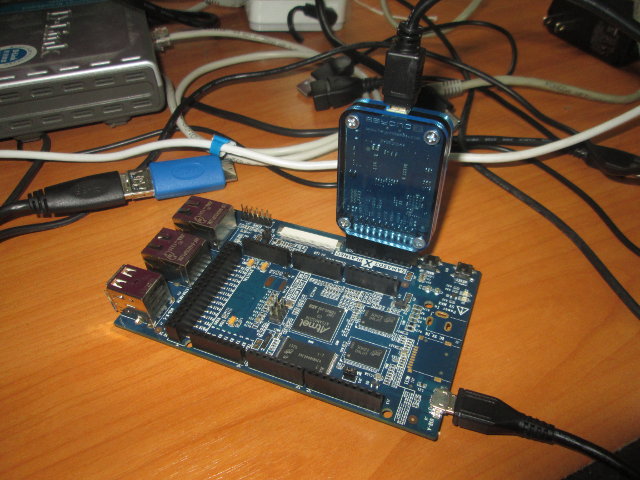
- Beyond Debug Key Connected to Atmel SAMA5D3 Xplained Board (Click to Enlarge)

JTAG can be used for board bring-up and flashing firmware, so I initially thought I would show how to configure the debug tool, and flash a firmware image to the board, but since Atmel SAMA5D3 configuration are not available, and it was my first time with OpenOCD, it took a little longer than usual, and I’ll just show the configuration part, and successful (I think) connection to the board.
The Debug key support both Windows and Linux, but I did everything from a computer running Ubuntu 14.04 LTS. The first thing is to install OpenOCD which is part of Ubuntu repo:
|
1 |
sudo apt-get install openocd |
So it’s very easy to install, but OpenOCD version in Ubuntu is 0.7.0, and depending on the board you are using, you may want to build latest release (0.8.0), or directly from the source code tree:
|
1 2 3 4 5 6 7 |
git clone http://git.code.sf.net/p/openocd/code openocd-code cd openocd-code sudo apt-get install libusb-dev libftdi-dev texinfo libtool autoconf libusb-1.0-0-dev ./bootstrap ./configure --enable-ftdi make -j8 sudo make install |
OpenOCD requires config scrips both the JTAG key, and the target board. Beyond Semi provided the configuration files for their Debug Key, so that part was easy, and all I had to do was to create beyond.cfg with:
|
1 2 3 4 5 6 7 8 9 10 11 12 13 14 |
# # Beyond Semi Debug Key # # interface ftdi ftdi_device_desc "Debug Key" ftdi_vid_pid 0x0403 0x6010 ftdi_channel 0 ftdi_layout_init 0x0f38 0xff3b ftdi_layout_signal nTRST -data 0x0100 -noe 0x0400 ftdi_layout_signal nSRST -data 0x0200 -noe 0x0800 adapter_khz 30000 |
You also need to create a udev rules to be able to access the JTAG debugger as a normal user. so I created 52-beyong-jtag.rules in /etc/udev/rules.d/ with the line:
SUBSYSTEM=="usb", ENV{DEVTYPE}=="usb_device", ATTRS{idVendor}=="0403", ATTRS{idProduct}=="6010", ATTRS{product}=="Debug Key", MODE:="0666"
At this stage, if you run OpenOCD with beyond.cfg only, you get the following output:
|
1 2 3 4 5 6 7 8 9 10 11 12 13 14 |
openocd -f beyond.cfg Open On-Chip Debugger 0.8.0 (2014-11-01-21:21) Licensed under GNU GPL v2 For bug reports, read http://openocd.sourceforge.net/doc/doxygen/bugs.html Info : only one transport option; autoselect 'jtag' adapter speed: 30000 kHz Info : clock speed 30000 kHz Warn : There are no enabled taps. AUTO PROBING MIGHT NOT WORK!! Warn : AUTO auto0.tap - use "jtag newtap auto0 tap -expected-id 0x974008ef ..." Warn : AUTO auto0.tap - use "... -irlen 2" Error: auto0.tap: IR capture error; saw 0x0003 not 0x0001 Warn : Bypassing JTAG setup events due to errors Warn : gdb services need one or more targets defined |
At this stage, I had to find or create the script for Atmel SAMA5D3 CPU, and you’ve got a list of scripts in /usr/share/openocd/scripts/ which can help. There’s also site claiming to support Atmel SAMA5D3 with OpenOCD, but checking out the code asked me for a password. So instead I read Atmel SAMA5D3 datasheet (Chip Identification section), where I found relevant information such as SRAM start address, and Cortex-A5 JTAG IDCODE (0x4BA00477). The SRAM address is exactly the same as SAM9G45 processor which has a config files in OpenOCD, namely at91sam9g45.cfg which also includes at91sam9.cfg, so I simply copied both files to create my own at91sama5d3.cfg, by simply replacing set _CPUTAPID 0x0792603f by “set _CPUTAPID 0x4ba00477”.
Here’s the output if I use both the Debug Key and SAMA5 scripts:
|
1 2 3 4 5 6 7 8 9 10 11 12 13 14 15 16 17 |
openocd -f beyond.cfg -f at91sama5d3.cfg Open On-Chip Debugger 0.8.0 (2014-11-01-21:21) Licensed under GNU GPL v2 For bug reports, read http://openocd.sourceforge.net/doc/doxygen/bugs.html Info : only one transport option; autoselect 'jtag' adapter speed: 30000 kHz trst_and_srst separate srst_gates_jtag trst_push_pull srst_open_drain connect_deassert_srst adapter_nsrst_delay: 300 jtag_ntrst_delay: 200 RCLK - adaptive 1 Info : RCLK (adaptive clock speed) Info : JTAG tap: at91sama5d36.cpu tap/device found: 0x4ba00477 (mfg: 0x23b, part: 0xba00, ver: 0x4) Info : Embedded ICE version 0 Error: unknown EmbeddedICE version (comms ctrl: 0x00000000) Info : at91sama5d36.cpu: hardware has 2 breakpoint/watchpoint units |
So despite one error, the connection appears to be successful, and both TDO and TDO LEDs blinked on the debug key, which means both JTAG Tx and Rx were active. That’s all I have achieve so far with the amount of time I had.
If you are interested in getting such JTAG Debugger, you can purchase Beyond Debug Key for 90 Euros directly from Beyond Semiconductor.

Jean-Luc started CNX Software in 2010 as a part-time endeavor, before quitting his job as a software engineering manager, and starting to write daily news, and reviews full time later in 2011.
Support CNX Software! Donate via cryptocurrencies, become a Patron on Patreon, or purchase goods on Amazon or Aliexpress


Yet another FTDI based JTAG adaptor.