
Hey Karl again with part 2 of my 3D printing experience with the CR-10, after the first part describing CR-10 3D printer setup and first prints. The intent is to share my experiences with the CR-10 with the perspective from a noob. I have to say if you are hard heading like I am, and do a lot of research but don’t fully listen to what you are reading, you are going to waste a lot of filament and time. I spent a couple hours a day for weeks with trial and error and watching the printer and how it works adjusting about a billion settings and testing. I am hoping this will help any current or future CR-10 owner speed up the learning curve.
Measuring Filament Diameter
The single biggest thing to improve my print quality I found was measuring the filament. I read about this several times but just didn’t do it. On some prints it didn’t matter they came out great. On others I had terrible zits and under and over extrusion. Depending on the model the effects are more pronounced.
I purchased a cheap plastic caliper that only goes down to tenths right now so I have to do some trial and error. I plan on getting a metal one in the very near future to cut down that time that goes to the thousandths.
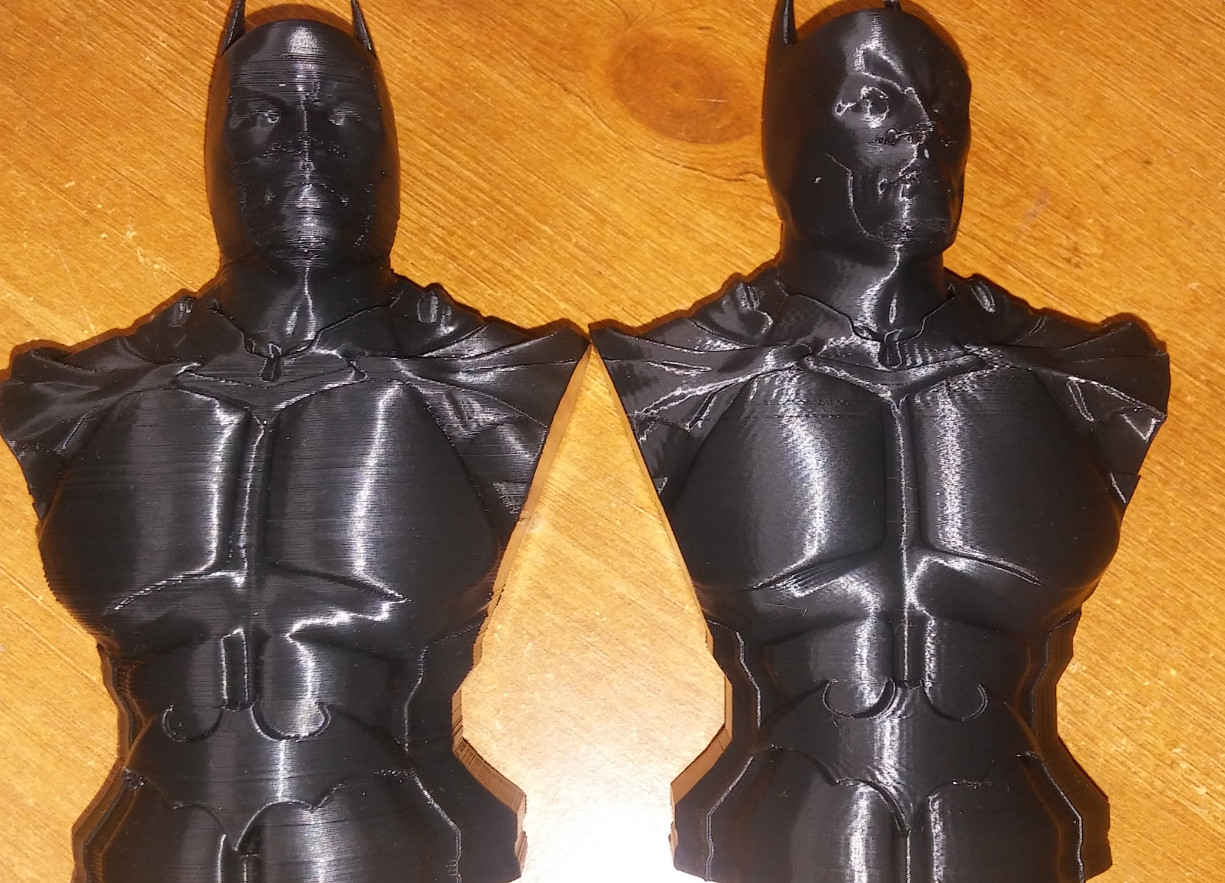
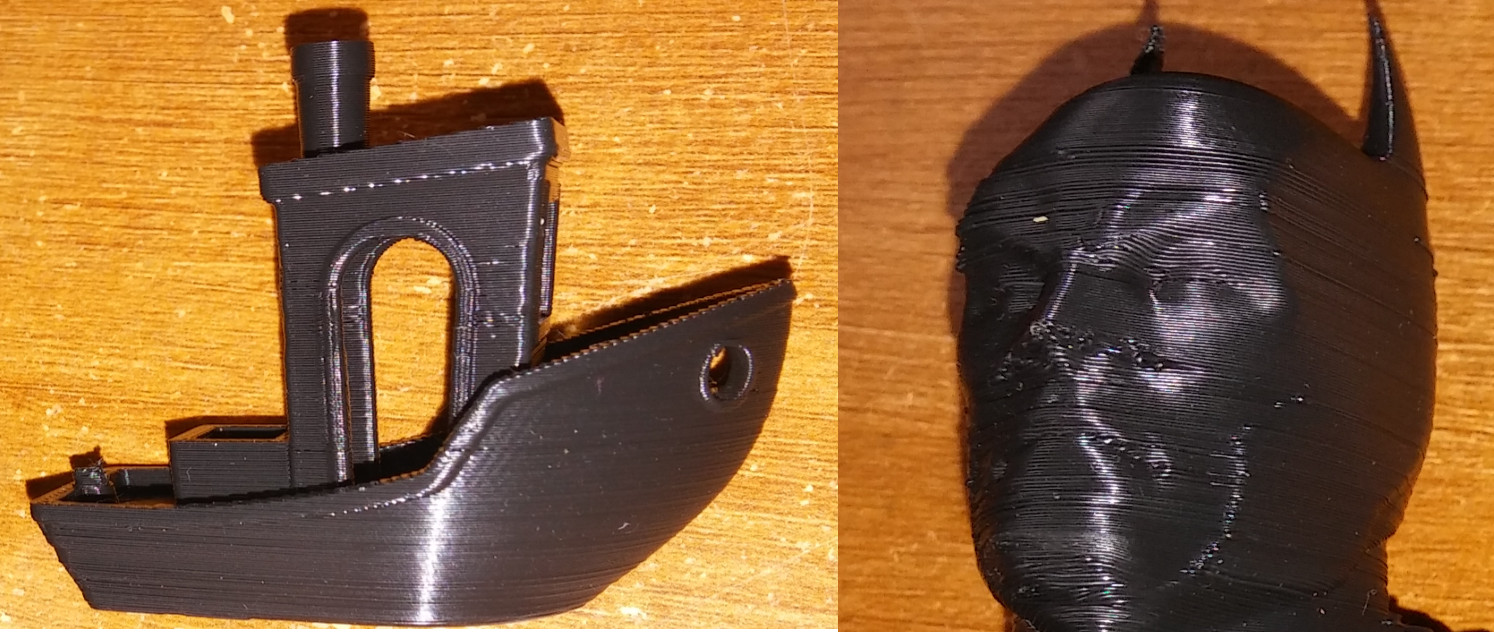
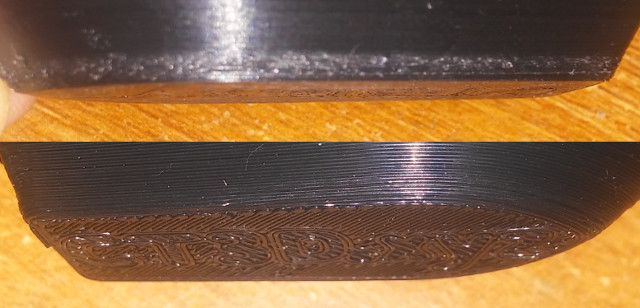
The Batman on the left is before and batman on the right is after. It really hard to show in pictures but the one on the right is 200% better. You can see it really well on his face. Overhangs on both are a little rough. Overhangs are places in the print where you’re printing in mid air with no supports. Eventually I will look at changing the parts cooler to help with this. A different parts cooler can cool the filament faster and it will sag far less. For now on these, I can do some post print cleanup.
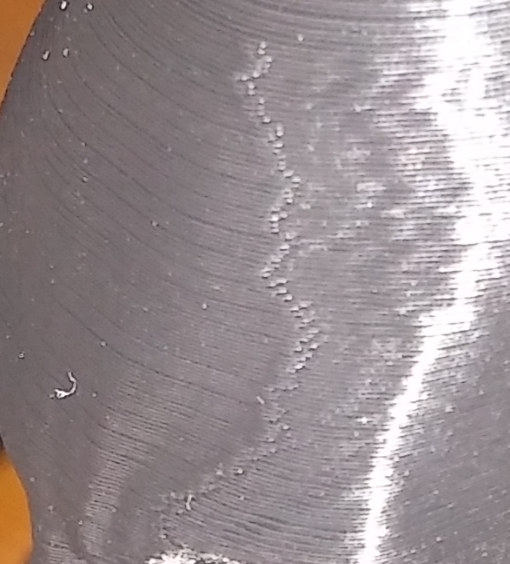
Here is a seem on the round part of the batman head that is just barely noticeable.
To measure unroll about 3m of filament and measure at 10 points. At each of those points measure then rotate caliper around 90 degrees. Average the 20 points and set it in your slicer filament diameter. I purchased 3 different brands and none seem close to 1.75. I been running between 1.65 and 1.69. My caliper bounces between 1.6 and 1.7. I will probably pick this one up for $27.
Extruding Temperature
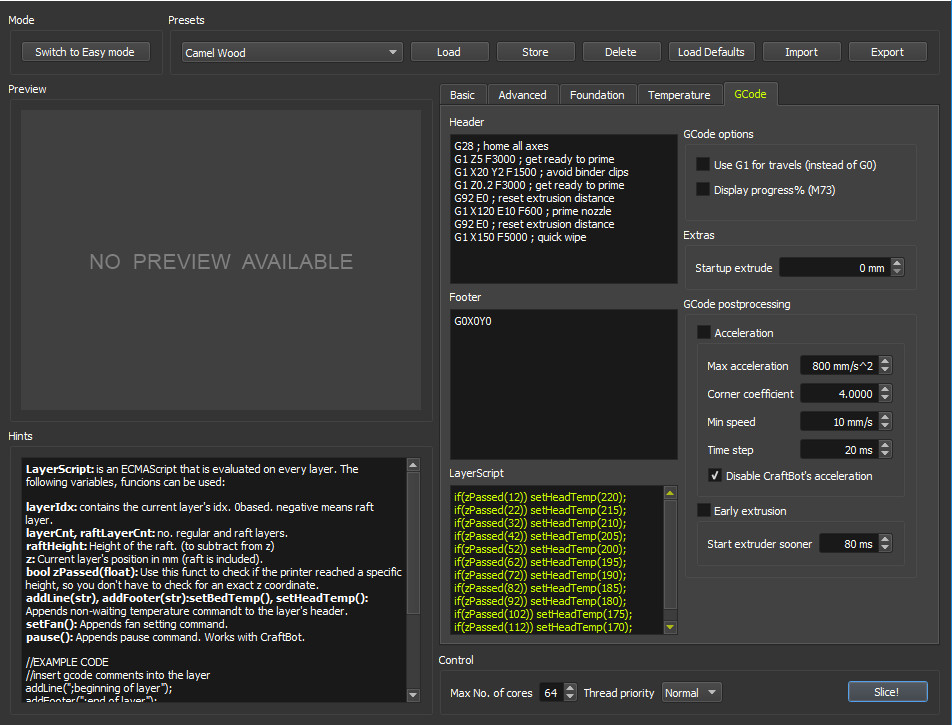
The nozzle temperature calibration is the second most important procedure I found to affect prints. This one is pretty easy to do. I downloaded a customizable temperature tower. I set mine up from 225-170 at 5 deg increments with highest temp at the bottom. Then set Craftware nozzle temperature to 225 then used set this code in the layer script box to adjust the temperature at different heights. Craftware didn’t like the the STL generated by Thingiverse for this particular object. I imported into MeshMixer and exported to an OBJ to fix.
|
1 2 3 4 5 6 7 8 9 10 11 |
if(zPassed(12)) setHeadTemp(220); if(zPassed(22)) setHeadTemp(215); if(zPassed(32)) setHeadTemp(210); if(zPassed(42)) setHeadTemp(205); if(zPassed(52)) setHeadTemp(200); if(zPassed(62)) setHeadTemp(195); if(zPassed(72)) setHeadTemp(190); if(zPassed(82)) setHeadTemp(185); if(zPassed(92)) setHeadTemp(180); if(zPassed(102)) setHeadTemp(175); if(zPassed(112)) setHeadTemp(170); |
Depending on the filament you are using you can adjust the temperatures. I highly suggest testing outside the manufactured suggested temperature. The wood filament that I purchased from GearBest works best for me 10 degrees cooler than the suggested lowest temperature.
At first I printed with trial and error. After doing a temperature tower I was way off, and noticed a difference in quality. Although this particular temperature tower doesn’t seem perfect. On the red PLA, I ended up going slightly higher than the one that looks best. On the picture, below it is really obvious with the wood filament which is better. The red and black are not as obvious. I will try some different temperature towers in the future.
CR-10 Hardware Upgrades: Mirror and Spacer
I made 2 modifications. I replaced the glass printbed that came with the printer with a mirror. I read mirrors have to be extremely level in order to not cause distortion. I purchased a 10 pack from a local hardware store for about 10 dollars. This gave me a good flat surface and as a benefit I didn’t have to use paper to level. I didn’t realize this for a long time, so I tweaked all kinds of settings trying to get the first layers looking better.
After trying to get a perfect first layers, I did a bunch of reading on bed leveling. I ended up purchasing some feeler gauges (ended up being a waste). It is really for me hard to level while sliding something between 2 slick surfaces. I had read a really long post in a forum about just eye it if you have a mirror. This worked really well for me. It is surprising how well you can level with the naked eye. I set the level as close to the bed as possible without touching. When I move the nozzle to the 4 corners above the glass if there is any pressure on the filament it will leave just the slightest line.This is something that you just have to do and experience to perfect.
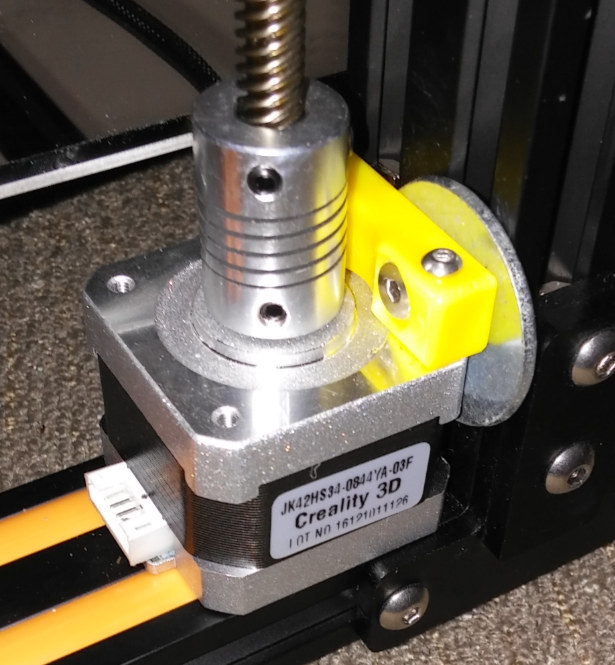
The second thing I did was insert a washer between z axis servo and frame. After reading a few posts on the Facebook forum I decided to take a look at mine. Sure enough z axis rod was in a bind. I didn’t even realize this. But one symptom is that before this I was only able to push the z axis down. Now I am mostly able to move up and down with the stepper motors disabled.
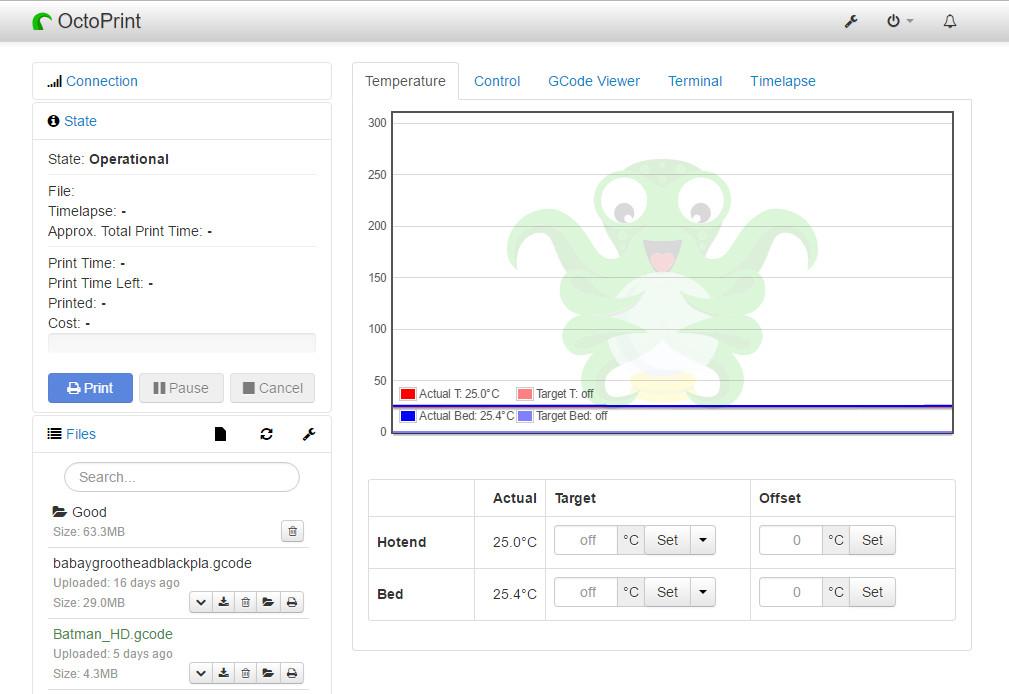
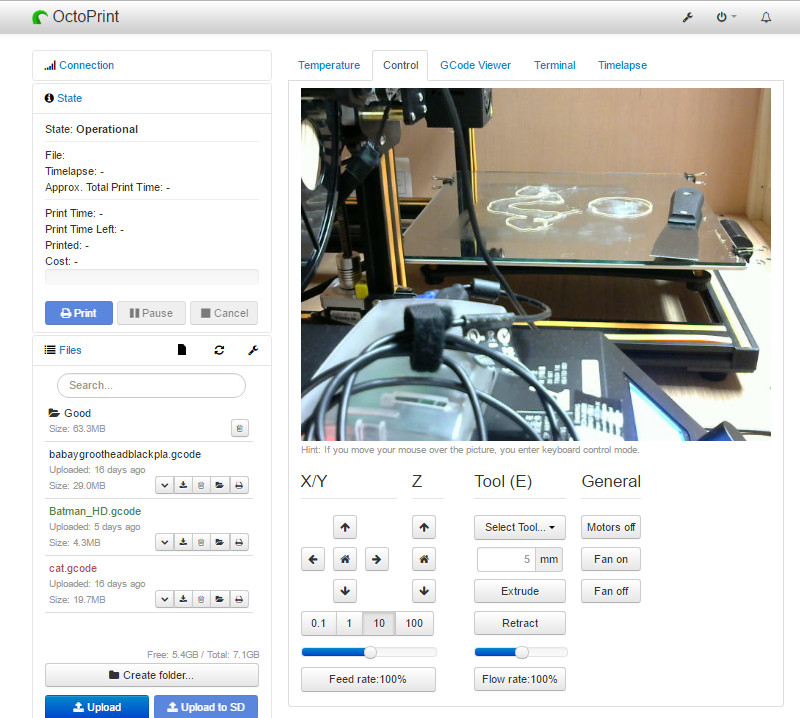
OctoPrint
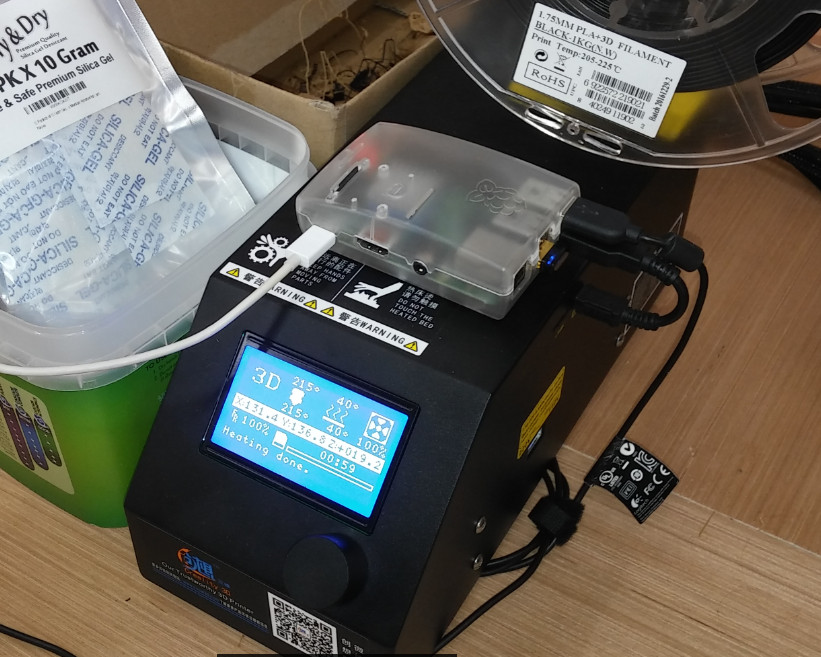
My SD card slot on the control box stopped working. I was able to get it working by bending in the outside of the reader inside the box to force the card to make contact with the pins. I knew this solution wouldn’t be a permanent solution. I can solder a new one but haven’t got to it yet. Luckily I had a Raspberry Pi my brother gave me. I never found a good use until now. There is no way I would trust a Windows box for this task. I would cry if I was in a long print and windows decided to update or some other Windows thing. I loaded Octoprint with Win32DiskImager on an SD card. Set my network settings in a text file, SSH’ed over and expanded the partition to the SD card size. I set a static IP address through my router and now back in business. I kinda wish that I started with Octoprint. It is very handy. It is much easier than constantly swapping SD cards around. One other benefit is I hooked up a webcam and I can see progress in any browser while at home… If I wanted to check from anywhere I could VPN to the house as well. It is really straight forward and easy to use. I also setup a pushbullet notification to send me a picture when a print is complete. I just started doing time lapses in Octoprint which is really a cool feature. I did have a few issues where prints would fail randomly and get a communications issue. It is a known issue on the Octoprint wiki. There were a few causes so I covered them all, and haven’t had an issue since. I did end up charging my phone with the USB cable that I was using to power the Raspberry Pi with, and I definitely attribute it to the cause of the issue. Phone charged much slower over this cable on a charger I know typically charges much faster. More on this issue in previous article here. I also replaced the long USB cable that came with the printer with a very short 4” one. While it was turned off I also installed a heat sink.
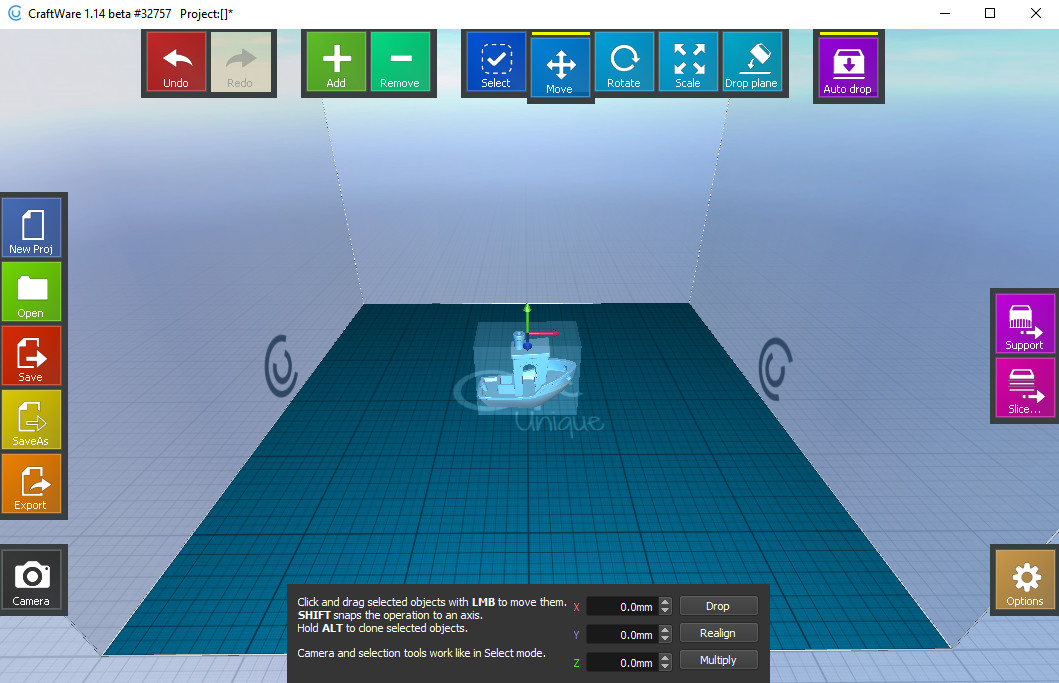
Craftware
Let’s talk about slicers. Slicers take the 3D object and makes a file that the 3D printer reads, and it tells the printer how exactly to print the object. Every single move, temperature change, etc… is controlled. After much trial and error I found that Craftware works best for me as a slicer. I have not tried Simplify 3D because it costs $150. The single biggest reason IMHO is the automatic placement of the seams. Seams practically disappear in turns. Craftware will choose the seam placement in the corner over a flat surface on its own. I have some really clean prints. Right now, I am focusing on finish with as little post print cleanup. Another feature is in the slicer settings there is window that visually shows how the settings are affecting the print. One final noteworthy feature is the ability to manually place supports. Automatic works as well but I believe automatic puts too many.
I started out with default settings and did some test prints. I only tweaked very few settings.
Below are some screenshots.
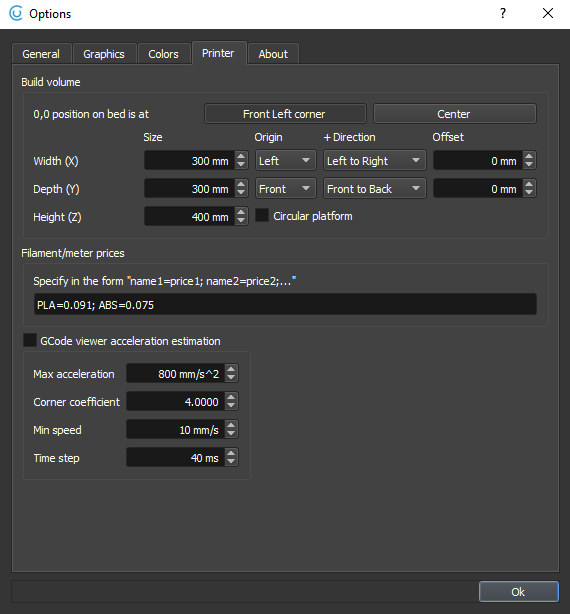
There is a bug. When installing the first time, load the second to last version, and set your build volume. Then upgrade to the latest. Otherwise the size will have to be set every time it is launched.
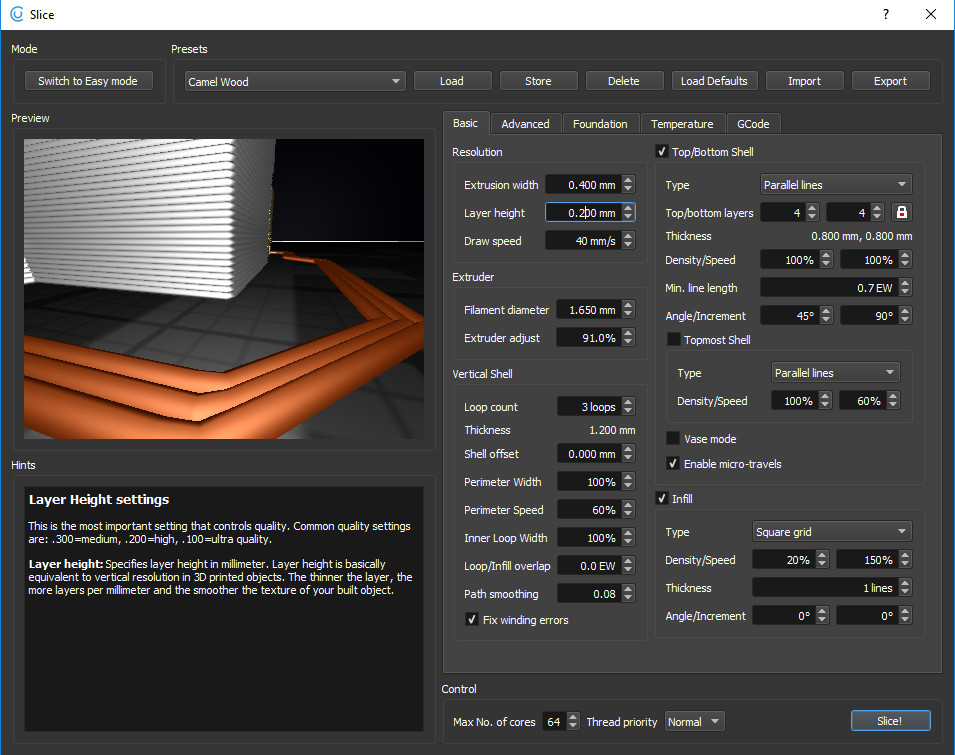
After placing and scaling your parts, press the slice button and change all your settings.
Now you can inspect the print, and see how each layer is printed. Press Save to save your gcode.
I find myself changing settings for every print after dialing it in. There is no one size fits all. I look at these every print:
- Layer height
- Draw speed
- Infill
- Top and bottom layer count
Gotta have LED’s
I have a couple feet left…will probably stick a few to the nozzle frame and power by a fan.
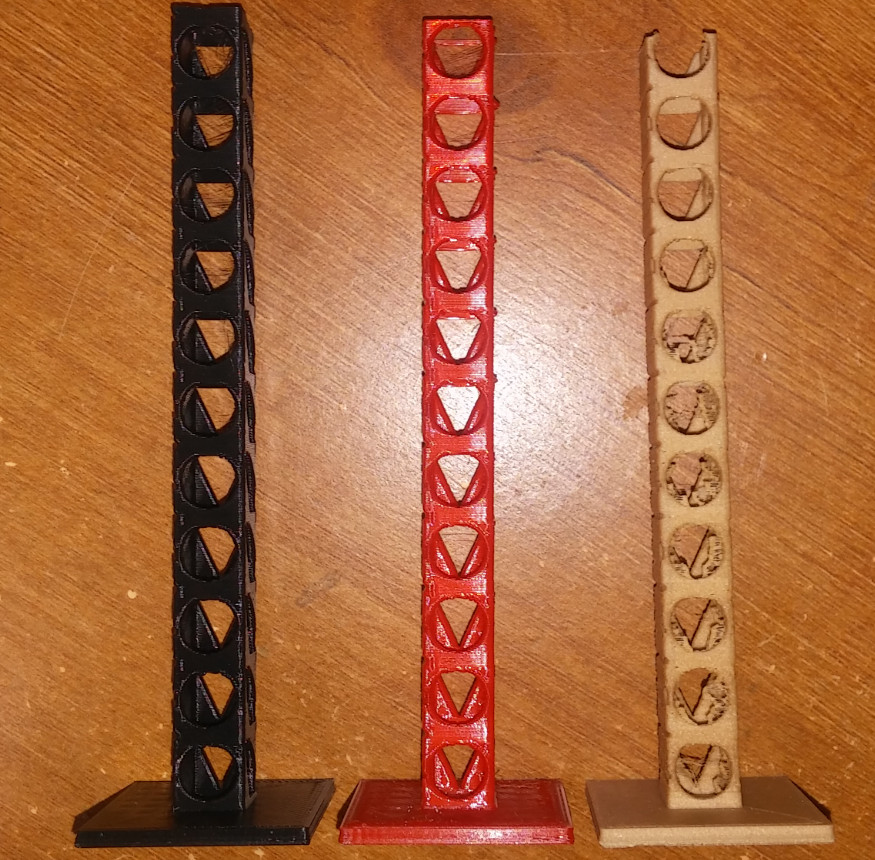
More 3D Print Samples
Here are just some of the prints that I have done.

Cortana Chip. One of first prints for buddy of mine for CosPlay. I was still tweaking settings but turned out OK.
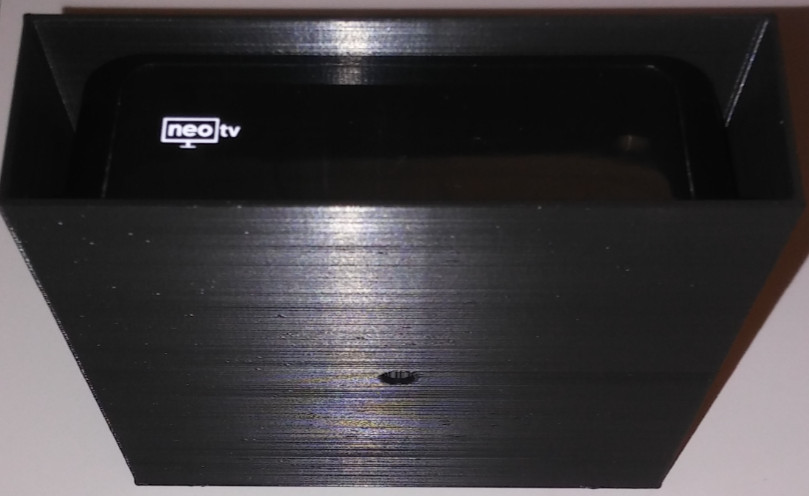
Box I designed in Tinkercad, so friend can mount his NEO TV to bottom of his wall mounted TV. This was before I measured filament and still had bad zits.
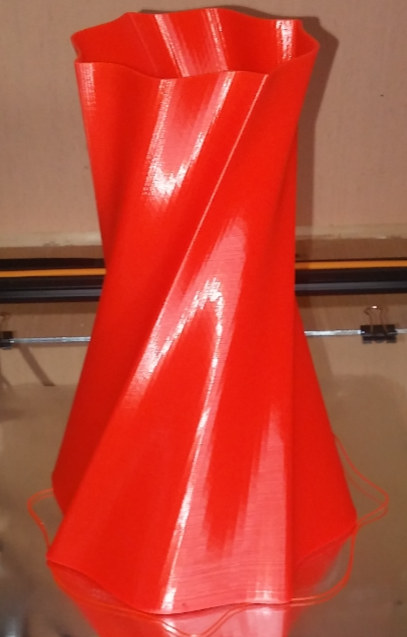
Vase. Printed after started measuring filament. Flawless and is water tight.Printed in vase mode.
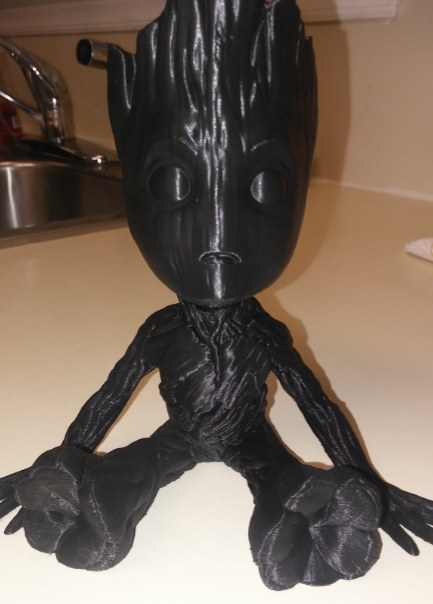
One of many Baby Groots printed. My buddies went wild over this one. I have printed it several times. About a 30 hours print at .1 layer, and slow.
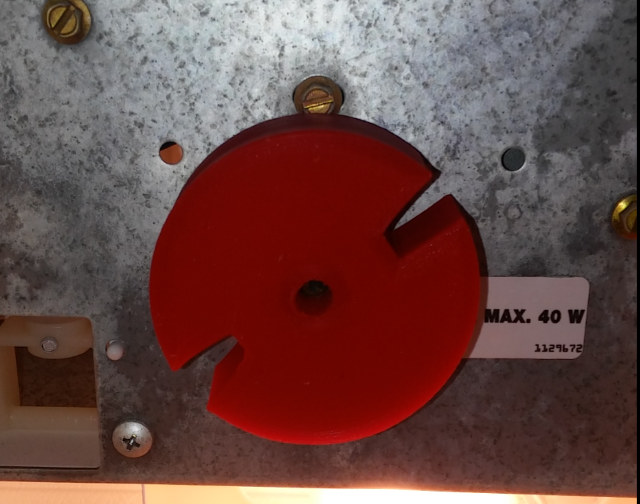
Designed this in Fusion 360 to fix my ice dispenser in my Fridge. Printed really fast because I didn’t care if it looked bad. 6 outer layers for strength with 20% infill. Really surprised this is holding up in freezer. I was a little off on center hole measurement and enlarged with a drill. Dumb cheap calipers.
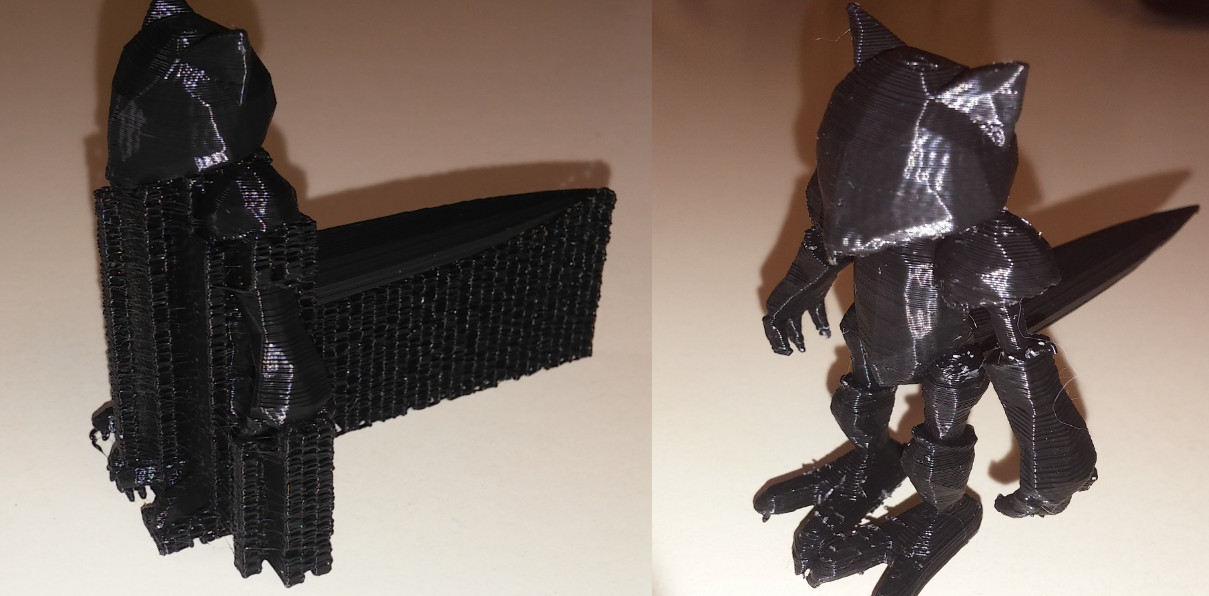
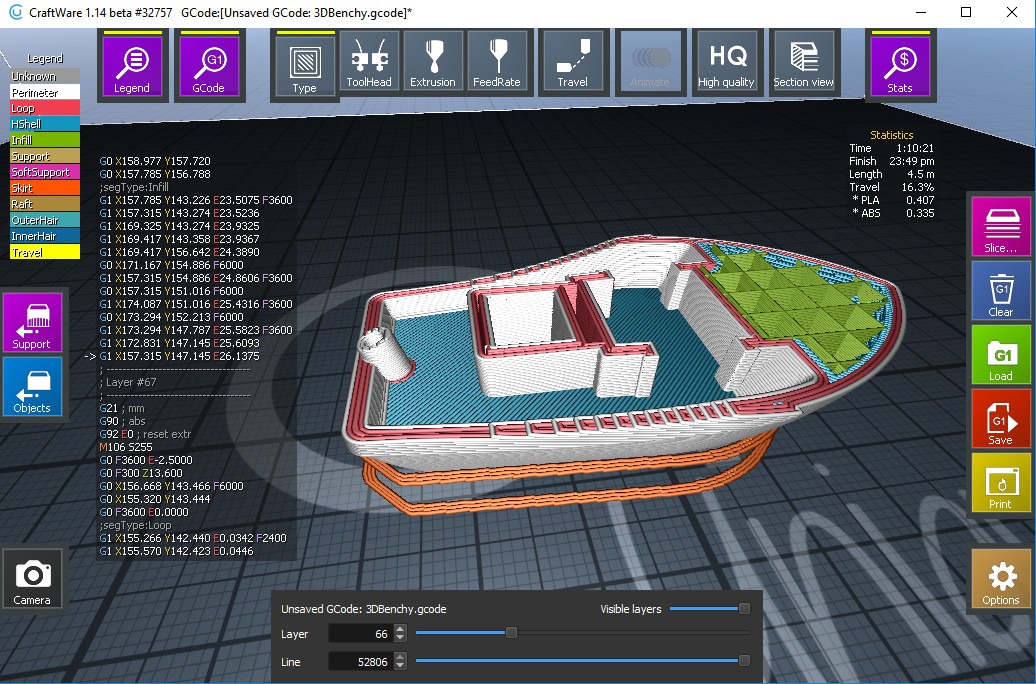
First print with supports. Auto-generated in Craftware. Second is after bulk cleanup. Need to take tweezers to get remaining bits. Keep in mind this thing is tiny. .2 layer height.
Final thoughts
The only complaint that I really have are the noisy fans but they could be replaced, and the faulty micro SD card reader. This is my first printer, but I still think they could be less noisy. Other then that, I have enjoyed my time with the CR-10. I would like to thank Gearbest for sending the CR-10 to review, and if you are interested in the printer you could purchase it from their website for $309.99 plus shipping using GBCR10 coupon. I plan on 1 more article. Some bigger prints and some mods I would like to try (but running out of filament). If you have any questions or comments feel free to post below.

Karl is a technology enthusiast that contributes reviews of TV boxes, 3D printers, and other gadgets for makers.
Support CNX Software! Donate via cryptocurrencies, become a Patron on Patreon, or purchase goods on Amazon or Aliexpress


just thought id ask for your cura or simplify3d profile ?? thanks 😀
I don’t have s3d but the Facebook group has one in the files section. I think the cr-10 has a profile built into s3d now. Cura profile is on Facebook as well. I have not used latest Cura yet on CR-10. Cura is pretty good stock and adjust to your needs. Only major change is I reduce the infill over lap down to I believe .001 or .01. I also do 3 outside layers and slow the outermost one considerably. If you have not tried it give Craftware a shot. Super simple and basically just works out of the box.… Read more »
Hello,
Thanks for the great post.
Just a quick question. How does ocotoprint actually connect to the CR10 control box? Does it emulate and SD card? Do you have direct control over the steppers?
Thanks in advance.
It is a serial connection over usb. Yes you can home x and y. Home z. Move in small or large increments in all directions. I’ll be releasing an alternative to raspberry pi soon for s905x and s912 boxes. S905x makes more sense and it will run from emmc rather than an SD card. You can directly connect from newest Cura now too.
Hello,
can you tell us how thick it is and which diameter your washer has?
Regards,
Michael
Were you able to find 30x30cm mirror tiles or did you have to cut them to size?
@Andrew
Wait, I see that the printbed is actually close to 31cm, and that you’re tile is a bit smaller than that, I’m assuming 12″. Is this at all an issue?
12″ from Lowe’s is perfect. But instead of glue, rough up the surface with sandpaper in both the x and y. Run the bed at 60°. Parts are sitting there after the bed cools. Just clean with Windex between prints. Only one fail so far and that was switching between flexible and regular pla and I didn’t clean between prints at this while testing. This worked on all printers so far.
Nice collection of Infos on the CR-10, thank you! I got here searching for details about the “vase mode”. I cannot find out how to set it (in Cura!?) Could you help me out?
Called spiralize outer shell or something like that. Be sure to enable all settings in preferences.
Awesome info. Thanks
Creality CR-10 giveaway (US only) @ http://bit.ly/2zNZgFc
My CR-10S will be delivered on in two days!!! I’m a complete noob with 3D Printing. Do you have a list of “right off the bat” stuff to do? Asking because you mention all of the trial and error that you went through so if there was a list of “I find this would work best now that I have experience,” that would be awesome!
Thanks for the right ups.
@fatboy1271 get some 12″ tile mirrors for your bed and some glue stick. CR-10 is pretty much print and go. Use your eyes to level. Go around 3 or 4 times. I mentioned in the article I like Craftware but the latest Cura is pretty good. In the last update they added better z seam position so it will put it in the corners. They also have a CR-10 profile so you should be good to go. Start off with small prints. I do 205 for the extruder let cura adjust for first and last layers. 60 for the bed.… Read more »
One more Creality CR-10 giveaway by All3DP: https://wn.nr/KdtnD8