How to Take a Remote Screenshot in Raspberry Pi over SSH

remote screenshot raspberry pi ssh

I recently reviewed a Raspberry Pi 4 laptop with a custom interface that made it impractical to take screenshots directly on the device. So instead I had to take screenshots remotely over SSH. It’s quite easy to do. Most of the steps can be reproduced in other Linux systems, and are not specific to Raspberry Pi. Enable SSH in Raspberry Pi First, enable SSH either with sudo raspi-config in a terminal window and selecting 5. Interface Options, then P2 SSH… If for some reason, you don’t have access to the terminal, take out the MicroSD card from the Raspberry Pi board, and from a computer create a new empty file named “ssh” in the boot partition. Now provided you have the username and password for your board, you can connect to SSH with the IP address from a terminal:

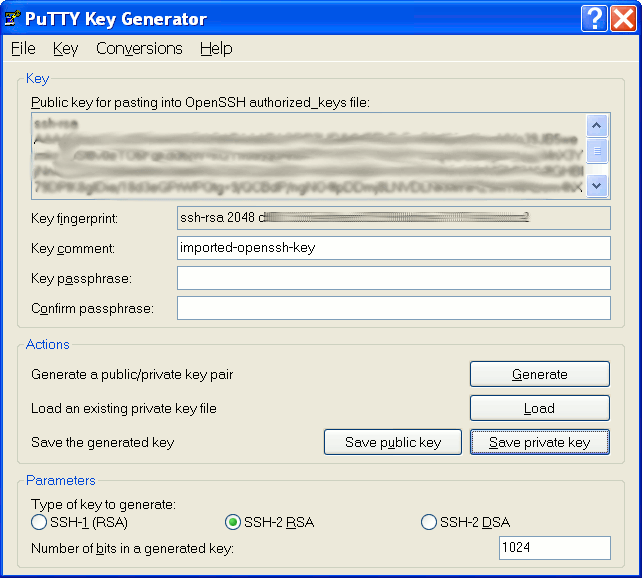
or a program like Putty. Taking a screenshot remotely You’re […]

Enabling Two-Factor Authentication for SSH Access in Armbian

Armbian Two Factor Authentication SSH

Until today, I only knew of two authentication methods for SSH: the traditional username/password and key-based login with private/public keys with the latter being more secure and not requiring any password. But I’ve just found out it’s also possible to login to SSH using two-factor authentication relying on your smartphone to get an OTP code like you would to access some banking services as it can easily be enabled in Armbian. First you’ll want to enable key-based login with private/public keys, or you won’t be able to access your board anymore after enabling 2FA except via the serial console. Now simply start armbian-config, and go to System Settings->Reconfigure SSH daemon to enable PhoneAuthentication “mobile phone one-time passcode”. We’re not done yet, so don’t close Armbian-config You’d then need an Android or iOS phone running Google Authenticator app to receive the OTP (one-time password). After enabling PhoneAuthenticator in armbian-config, you’ll see […]

NanoPi NEO NAS Kit Review – Assembly, OpenMediaVault Installation & Setup, and Benchmarks

NAS Dock v1.2 for Nano Pi NEO / NEO 2 is, as the name implies, a complete mini NAS kit for 2.5″ drive for NanoPi NEO or NEO 2 board. The NEO 2 board is strongly recommended, since it’s not much more expensive, but should deliver much better results due to its Gigabit Ethernet interface. I’ve received two of those kits together with several other boards & accessories from FriendlyELEC, and today I’ll show how to assemble the kit, configure OpenMediaVault, and run some benchmarks. NAS Kit V1.2 Assembly with NanoPi NEO 2 Board The only extra tool you’ll need is a screwdriver, and potentially a soldering iron as we’ll see further below. The metal box is stuff wih accessories so the first thing is to open one or two sides to take out the content. We have the mainboard, NanoPi NEO back plate, NanoPi NEO 2 back plater, a […]

How To Use Putty with an SSH Private Key Generated by OpenSSH

I have access to a remote server where I am only allowed to login via SSH with a key, and I can’t add an extra key by myself, as described in “No Password SSH” post. The private key (RSA) has been generated with ssh-keygen in Linux, and I can login from Linux without issue. This morning, I wanted to do the same with Putty in Windows XP, so I just copied the private key to Windows and loaded it in Putty, but it failed:

After a few minutes of research, I found my answer on UbuntuForums, and the reason it fails is because Putty does not support openssh keys, but uses its own format. Here’s what I had to do: Convert OpenSSH private key to Putty private key with Putty Key Generator (puttygen) Start puttygen, and click on Conversions->Import key, then click Browse and select the private key generated with […]

How-to Make a Process Continue to Run After Closing an SSH client

If you are connected to a remote server via SSH, you may want to start a time-consuming task or a background task in the server and right after starting it, close your SSH client, because you need to turn off your computer to “save the earth”, reduce your electricity bill, or simply because you need to bring your laptop with you. The problem is that if you close your SSH client, the terminal session will be terminated together all processes launched from this terminal. There are 2 tools to solve this issue: GNU screen and nohup. GNU screen screen may not be installed in your Linux distribution. In Debian/Ubuntu you can install it with apt-get: sudo apt-get install screen In your SSH terminal, start GNU screen: screen Press enter to discard the text, run your command and press Ctrl+a+d (and not Ctrl+Alt+d) to detach the screen. That’s it. You can […]

Dropbear: Lightweight SSH Server / Client

You may need to remotely access your embedded device, or your embedded systems is simply headless. You could use telnet, but this is insecure. A secure way to access a device remotly is to use SSH protocol. OpenSSH is one implementation but this is relatively too large and may use uncesary space on a device with limited storage. That’s where Dropbear comes into play. Dropbear is a lightweight implementation of an SSH client and server and is ideal for embedded systems. Dropbear ARM executable is only 200 KB. Here’s how it’s described on its website: Dropbear is a relatively small SSH 2 server and client. It runs on a variety of POSIX-based platforms. Dropbear is open source software, distributed under a MIT-style license. Dropbear is particularly useful for “embedded”-type Linux (or other Unix) systems, such as wireless routers. The main features of dropbear: A small memory footprint suitable for memory-constrained […]

How to Transfer files between the Host and Qemu via SSH and NFS

Last week, I wrote a blog post explaining how to copy files to a qemu image by mounting the qemu image in the host. This is only useful if emulated platform does not support networking. If networking is enabled, using SSH (Secure Shell) or NFS (Network File System) is more convenient. Using SSH with Qemu To initiate the SSH connection from qemu, there is actually nothing extra to do as long as you have sshd installed and running on the host. If it is not installed simply run  sudo apt-get install openssh-shell on the host. This will install and automatically sshd. To initiate the SSH connection from the host, you’ll have to redirect the ssh port to an unknown port and start qemu as follow (for overo):

Please refer to Beagleboard Emulator in Ubuntu with Qemu for the detailed instructions on how to setup qemu to emulate beagleboard or […]