
Wio Link is a board based on ESP8266 WiSoC that is supposed to be easy to set up thanks to Grove modules – no breadboard and mesh or wires – and, as I first understood it, to program thanks to a drag-and-drop mobile app that does not require any actual programming. More advanced users can also use a RESTful API in Python, JavaScript, Node.js, PHP, Objective-C or Java. I’ve been sent a $49 Wio Link Starter Kit including the board, a USB cable, and six Grove modules to evaluate the kit. I’ll start by having a look a the kit, before experimenting with the Wio Link Android app.
Wio Link Starter Kit Unboxing
The kit is sent in a red plastic case.
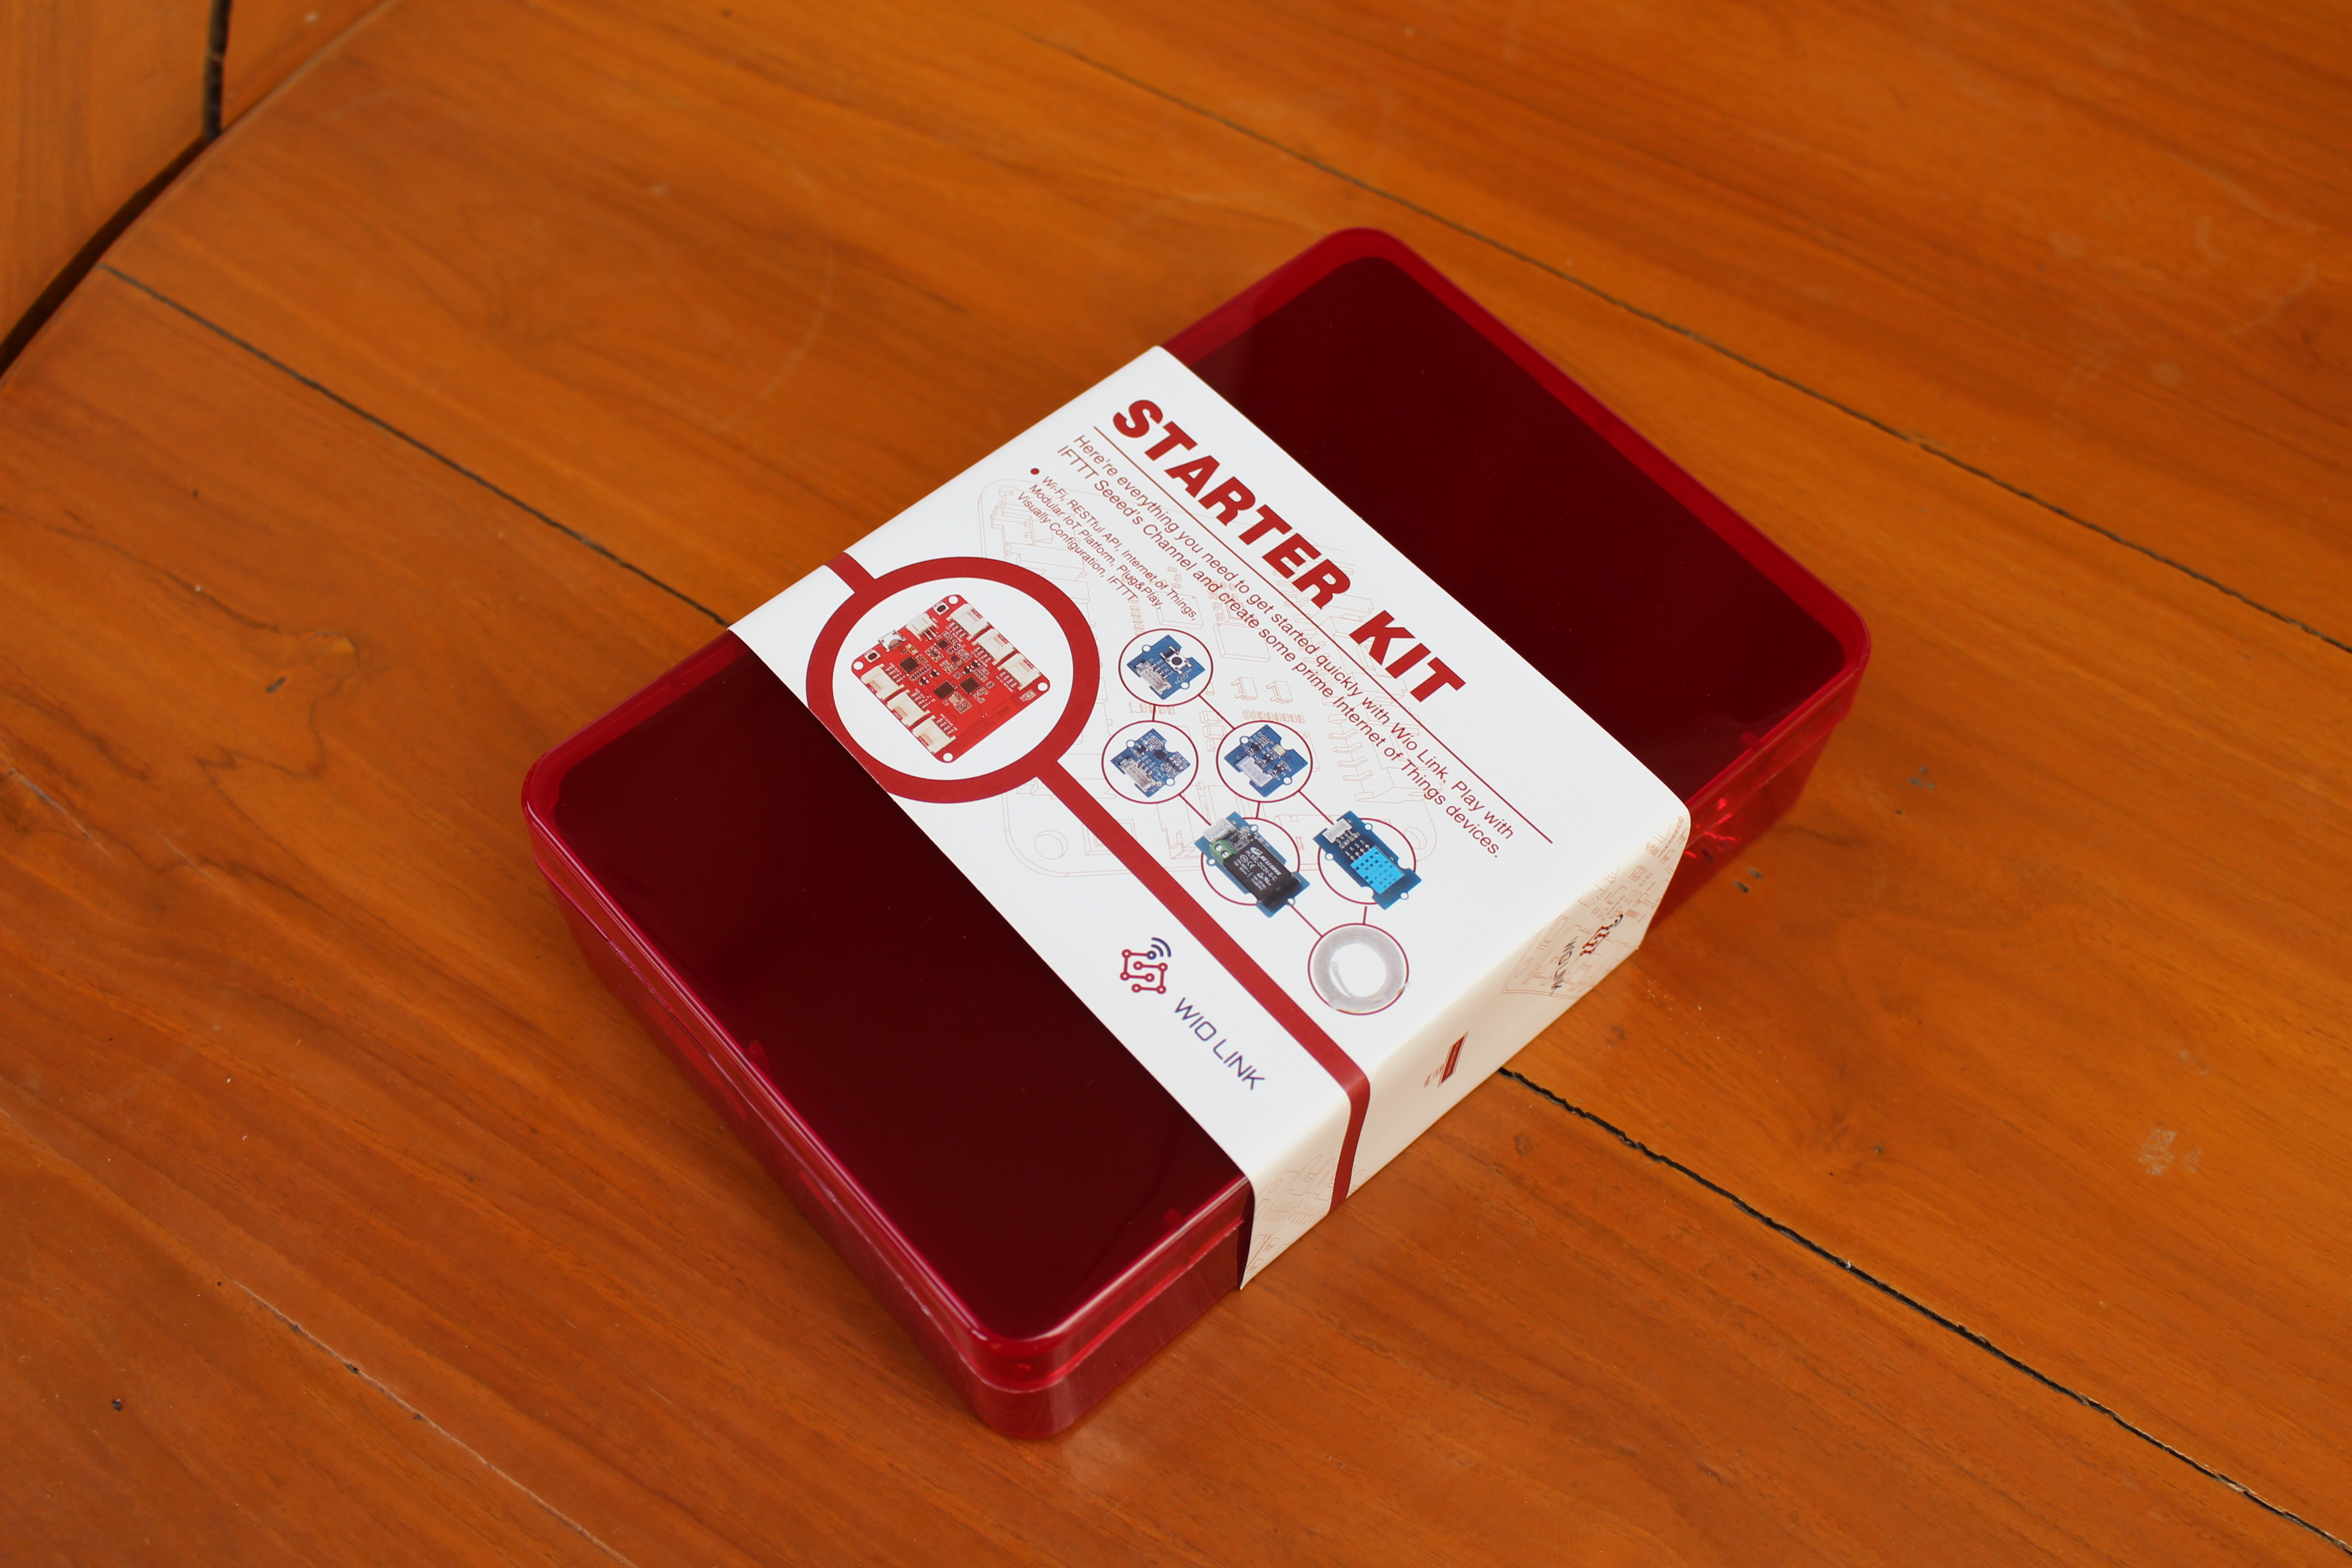
Wio Link board is lodged in the top cover, and other accessories are placed in bags in the main part of the case.

Let’s check the board first.
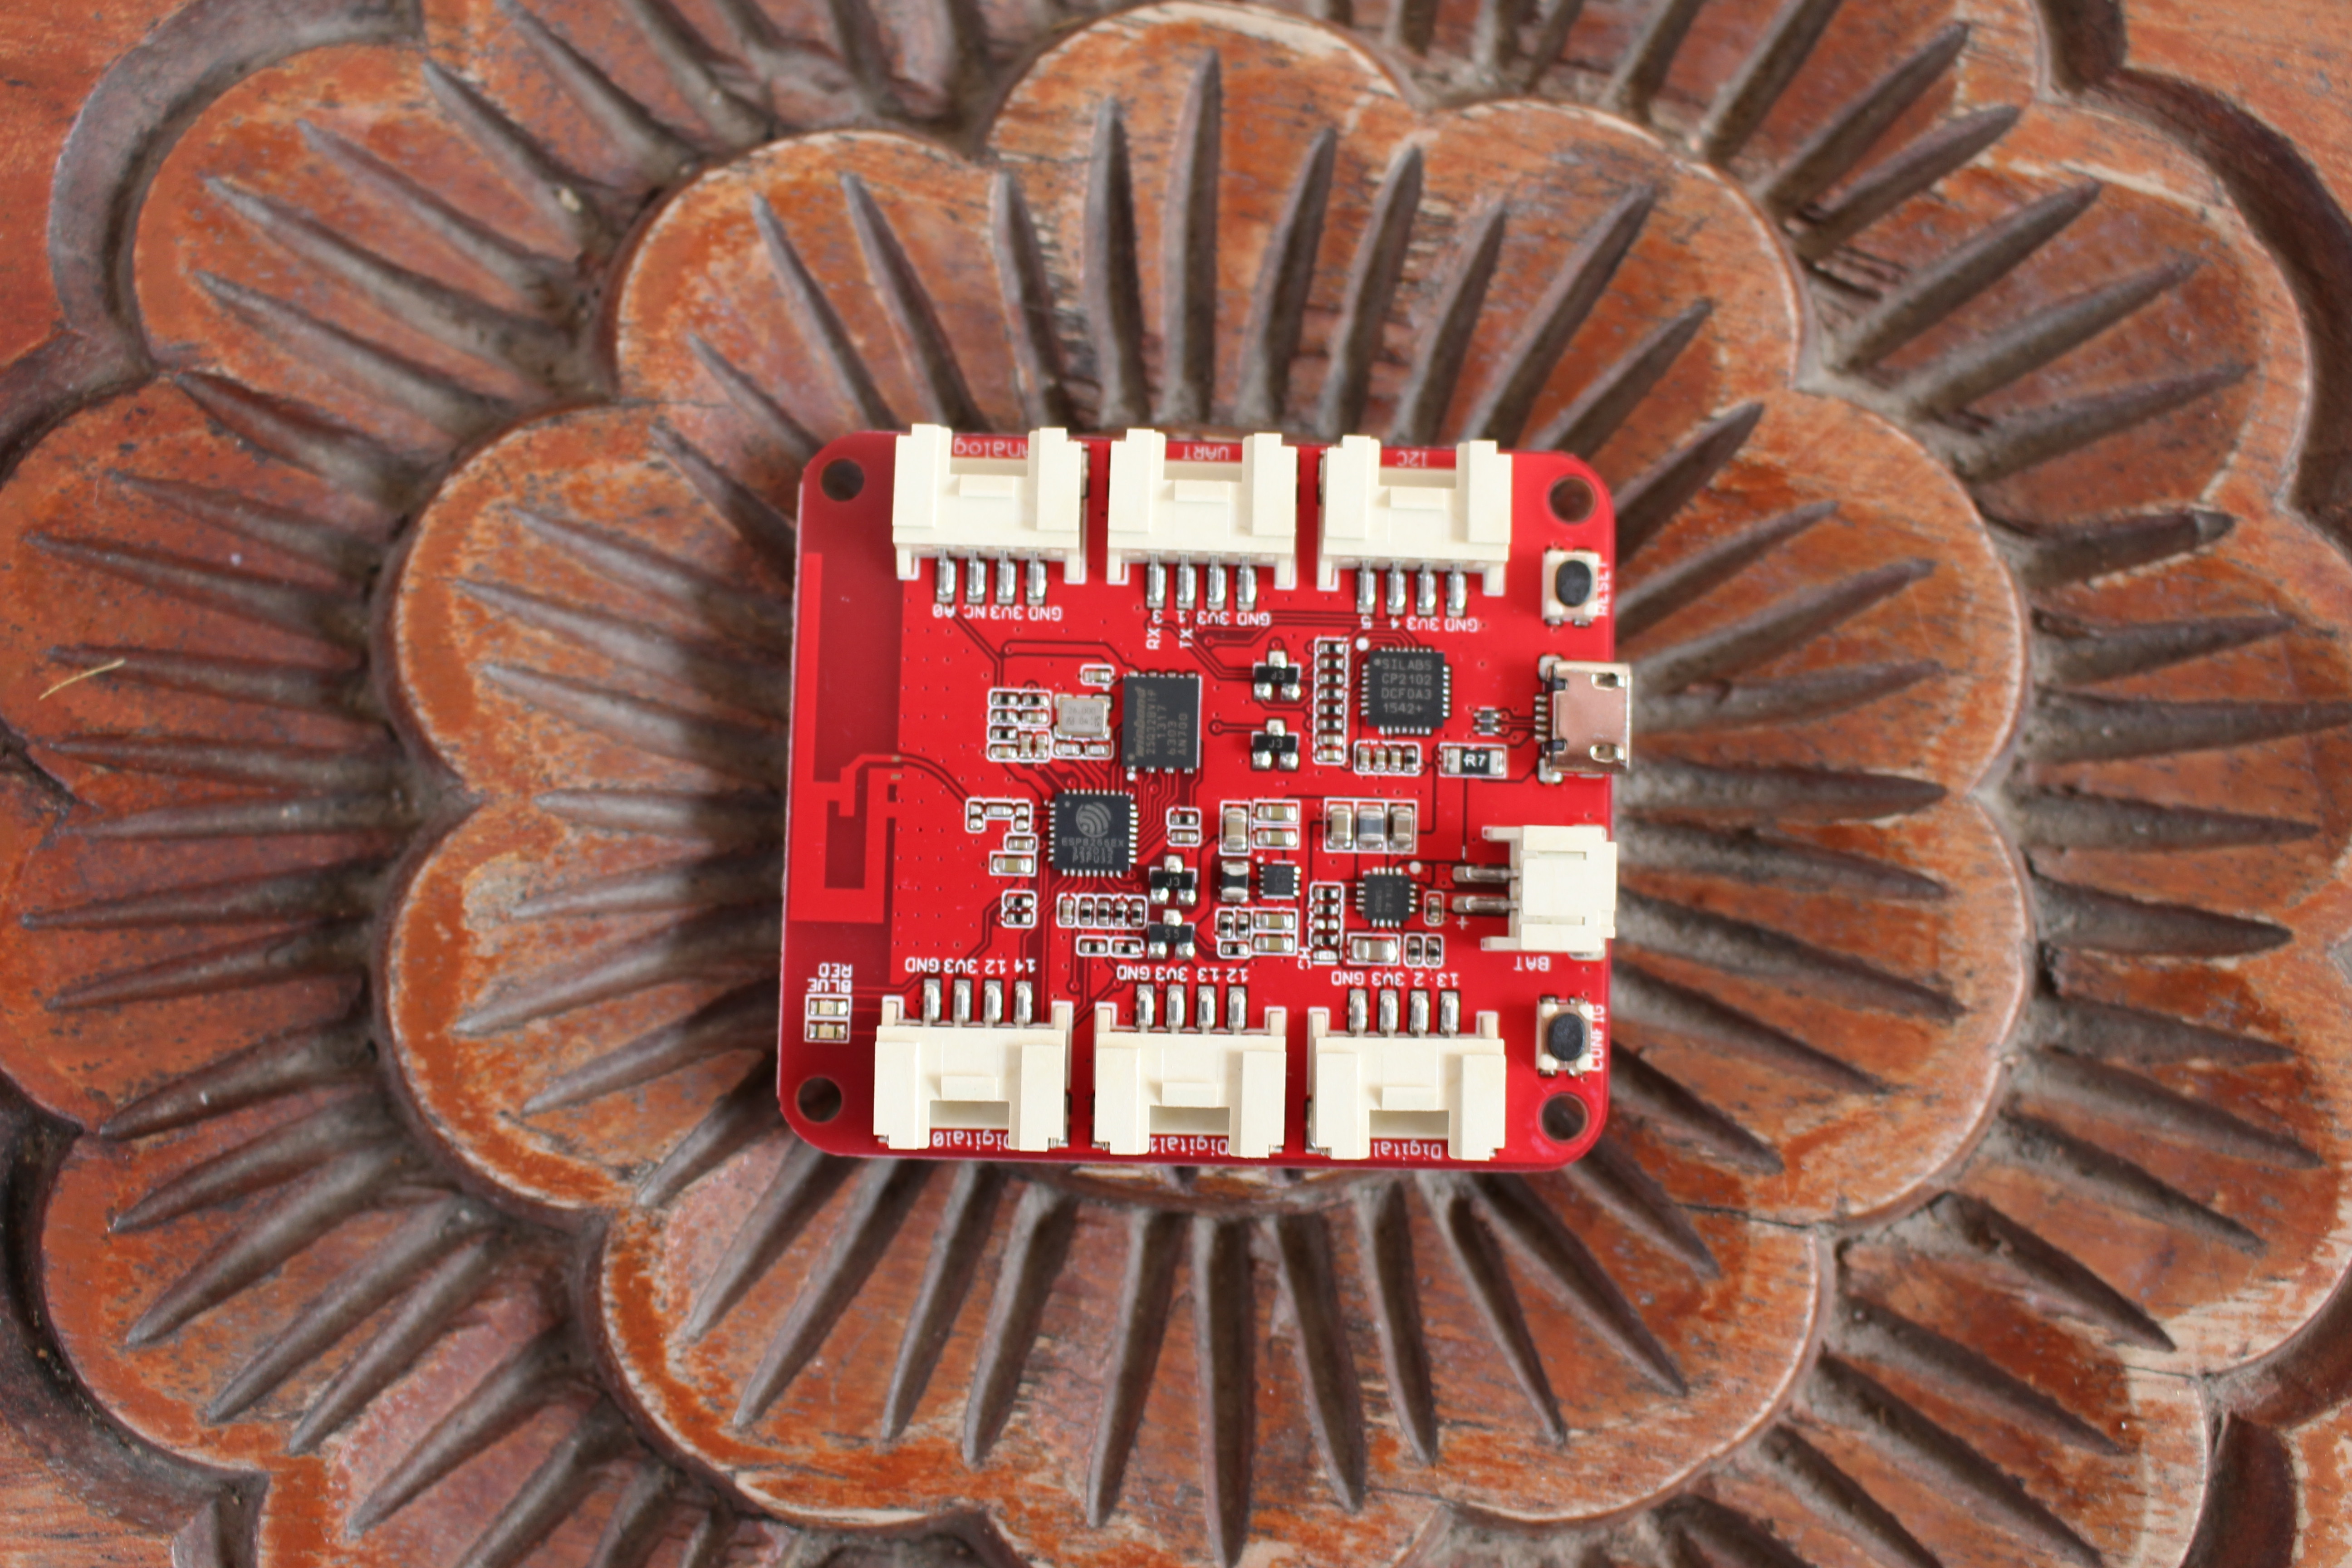
There are three main ICs: ESP8266EX WiFi SoC, Silabs CP2102 USB to TTL chip for programming the board, and Winbond 25Q23BVIG serial flash memory (4MB). On the right side, the micro USB port is used for power and debugging, a header can be used for battery power, and Config and Reset buttons are present. The six Grove connectors can either take digital (3) modules, analog (1) modules, I2C (1) modules, or UART (1) modules.
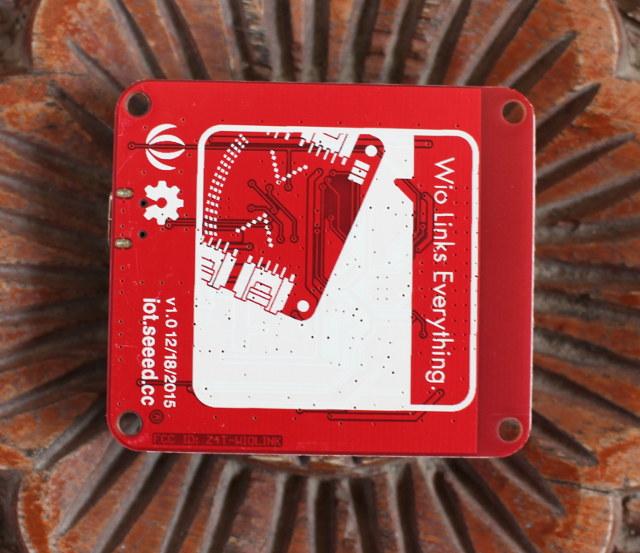
The bottom side of the board does not any components, and the only noticeable parts are Seed Studio and Open Source Hardware logo, as well as http://iot.seeed.cc which point to documentation and forums for the board.

Once I’ve taken everything out of the small bags, we can see the full kit content with Wio Link board, a micro USB port, and from top left to bottom right, six Grove modules and their cables: WS2812 LED strip (25 LEDs), temperature and humidity sensor, button, digital light sensor, 3-axis digital accelerometer, and a relay module.
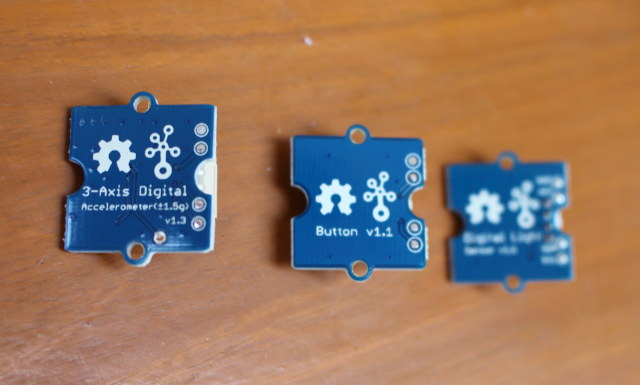
If you have many Grove modules, it may not always be easy to know which one does what, but the Grove module’s name is printed on the silkscreen on the back of the board.
Wio Link Android App
Wio / Wio Link app is available for both Android 4.1+ and iOS 7+, and I tested the board with the Android app, following some of the instructions in the Getting Started Guide.
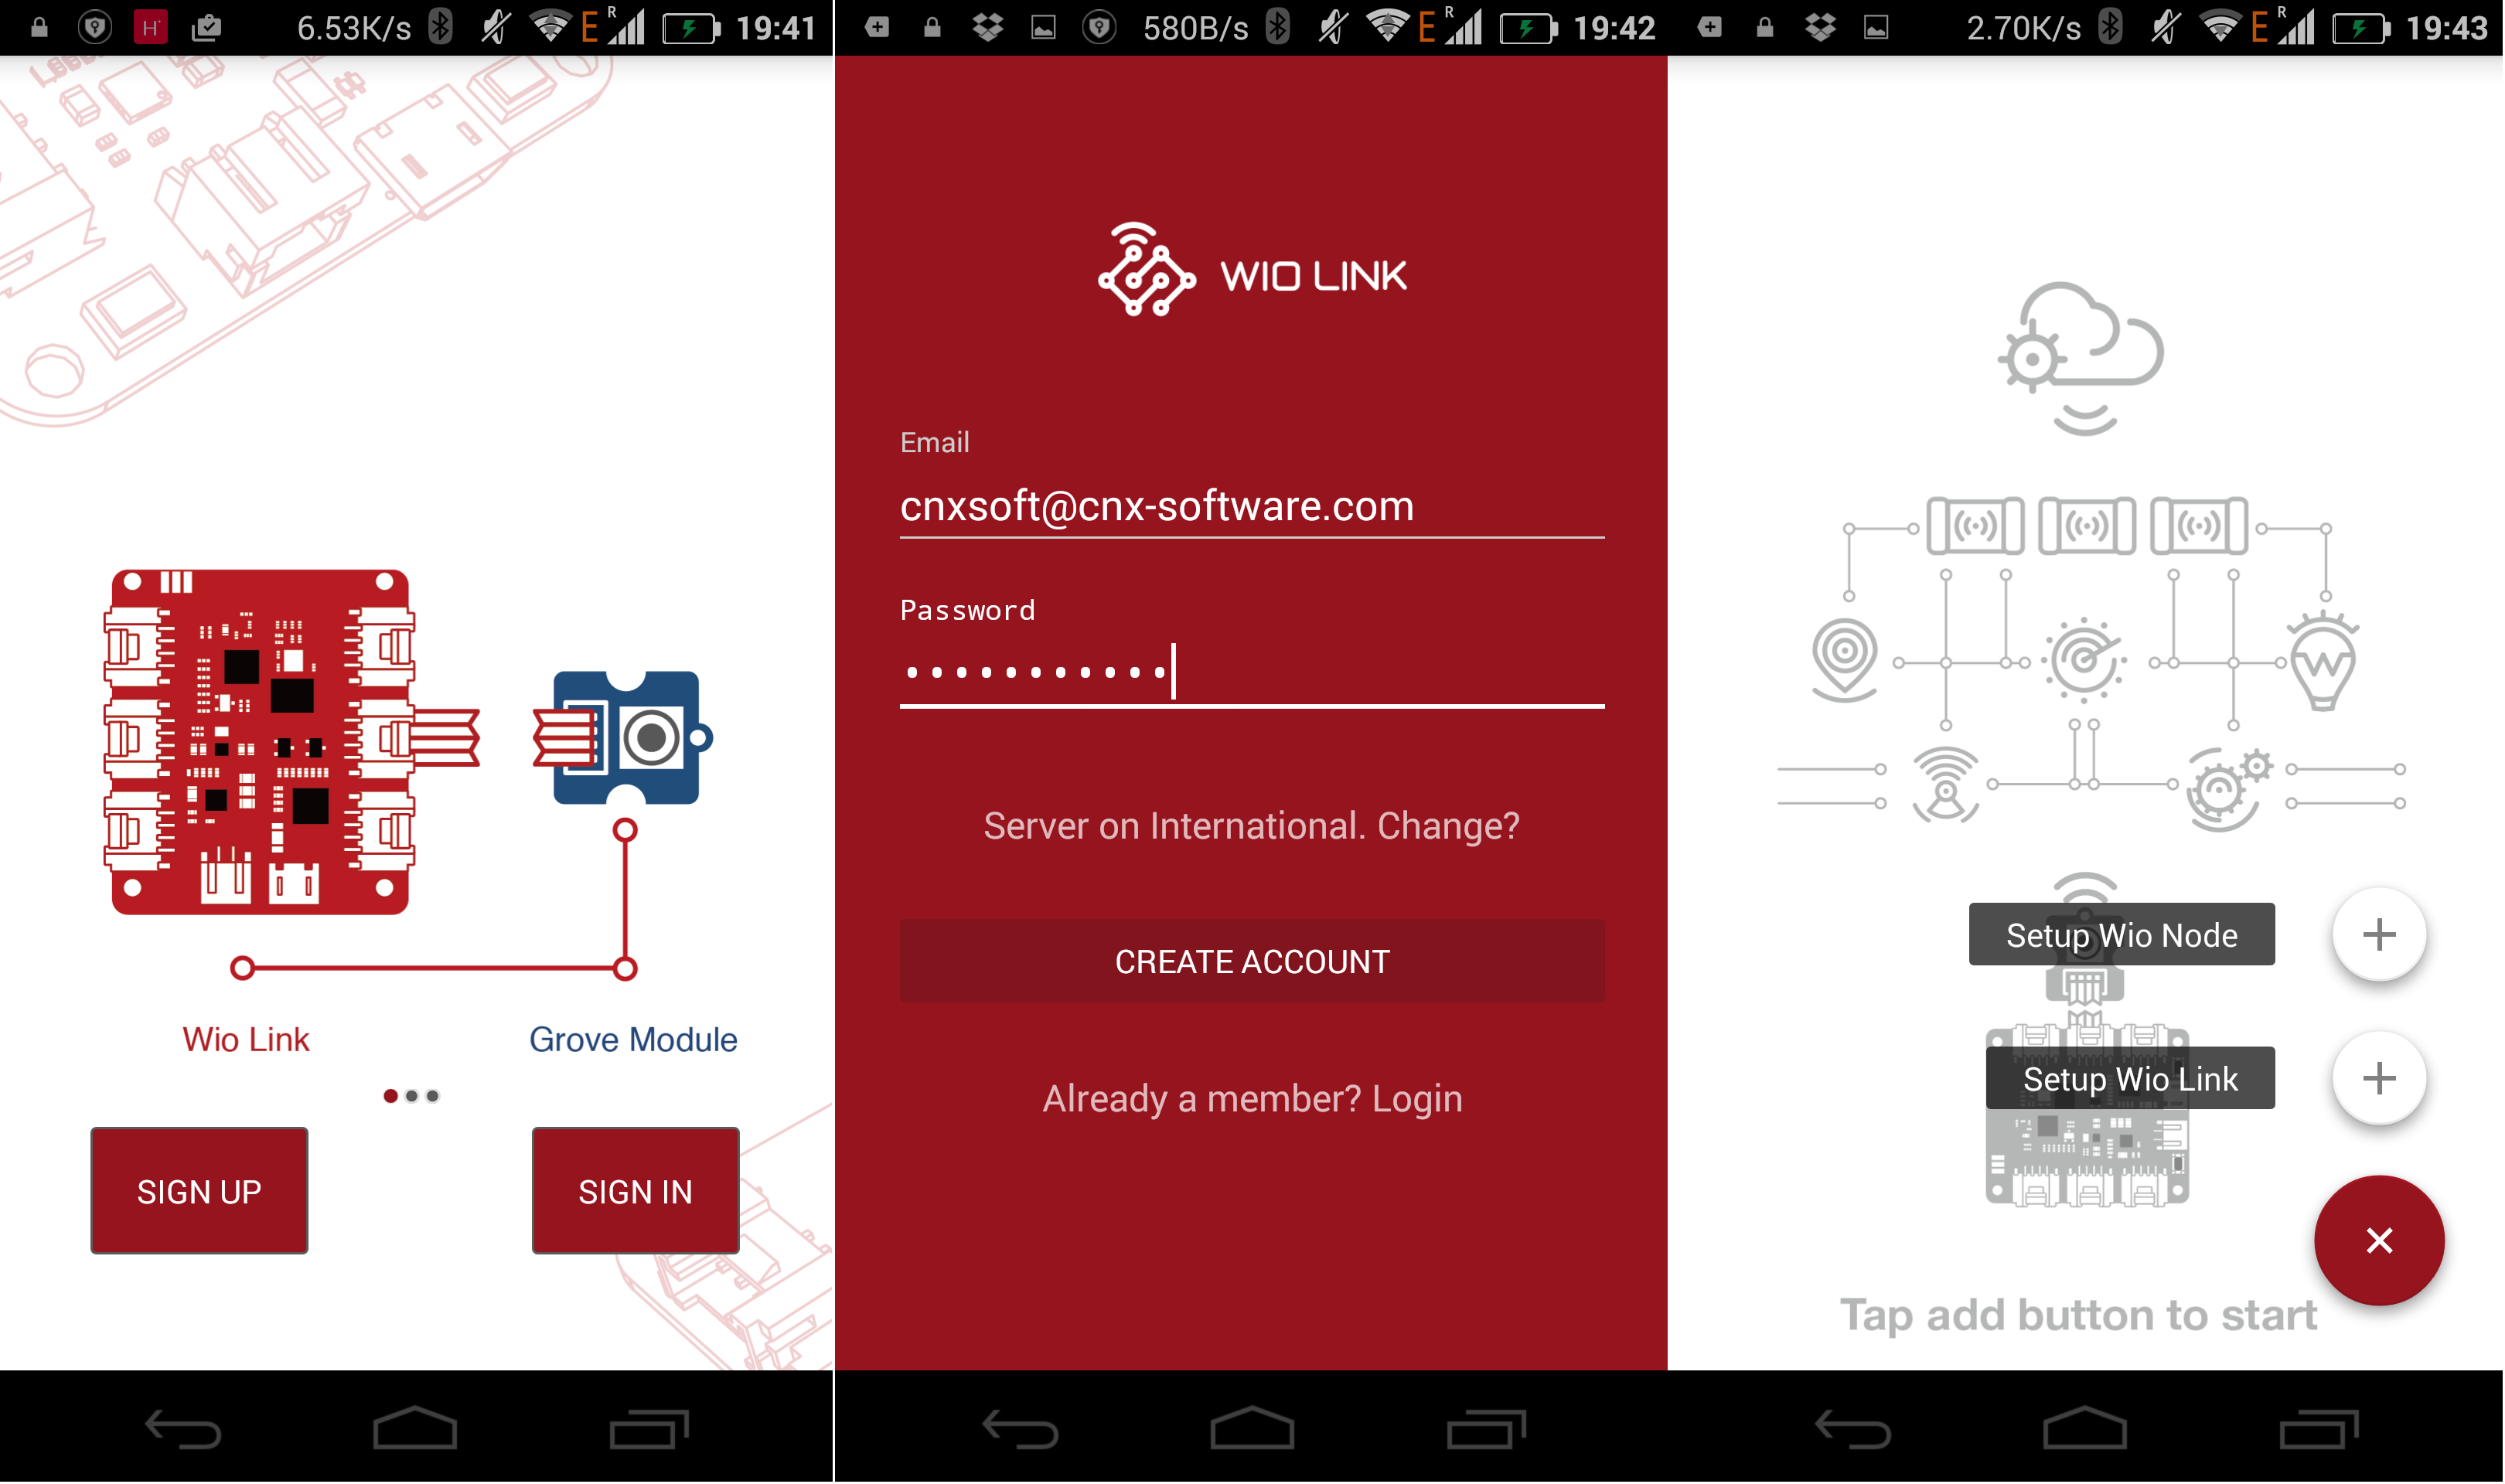
The first step is to login or create an account with your email, before setting up Wio Link, or the small and soon-to-be-released Wio Node.
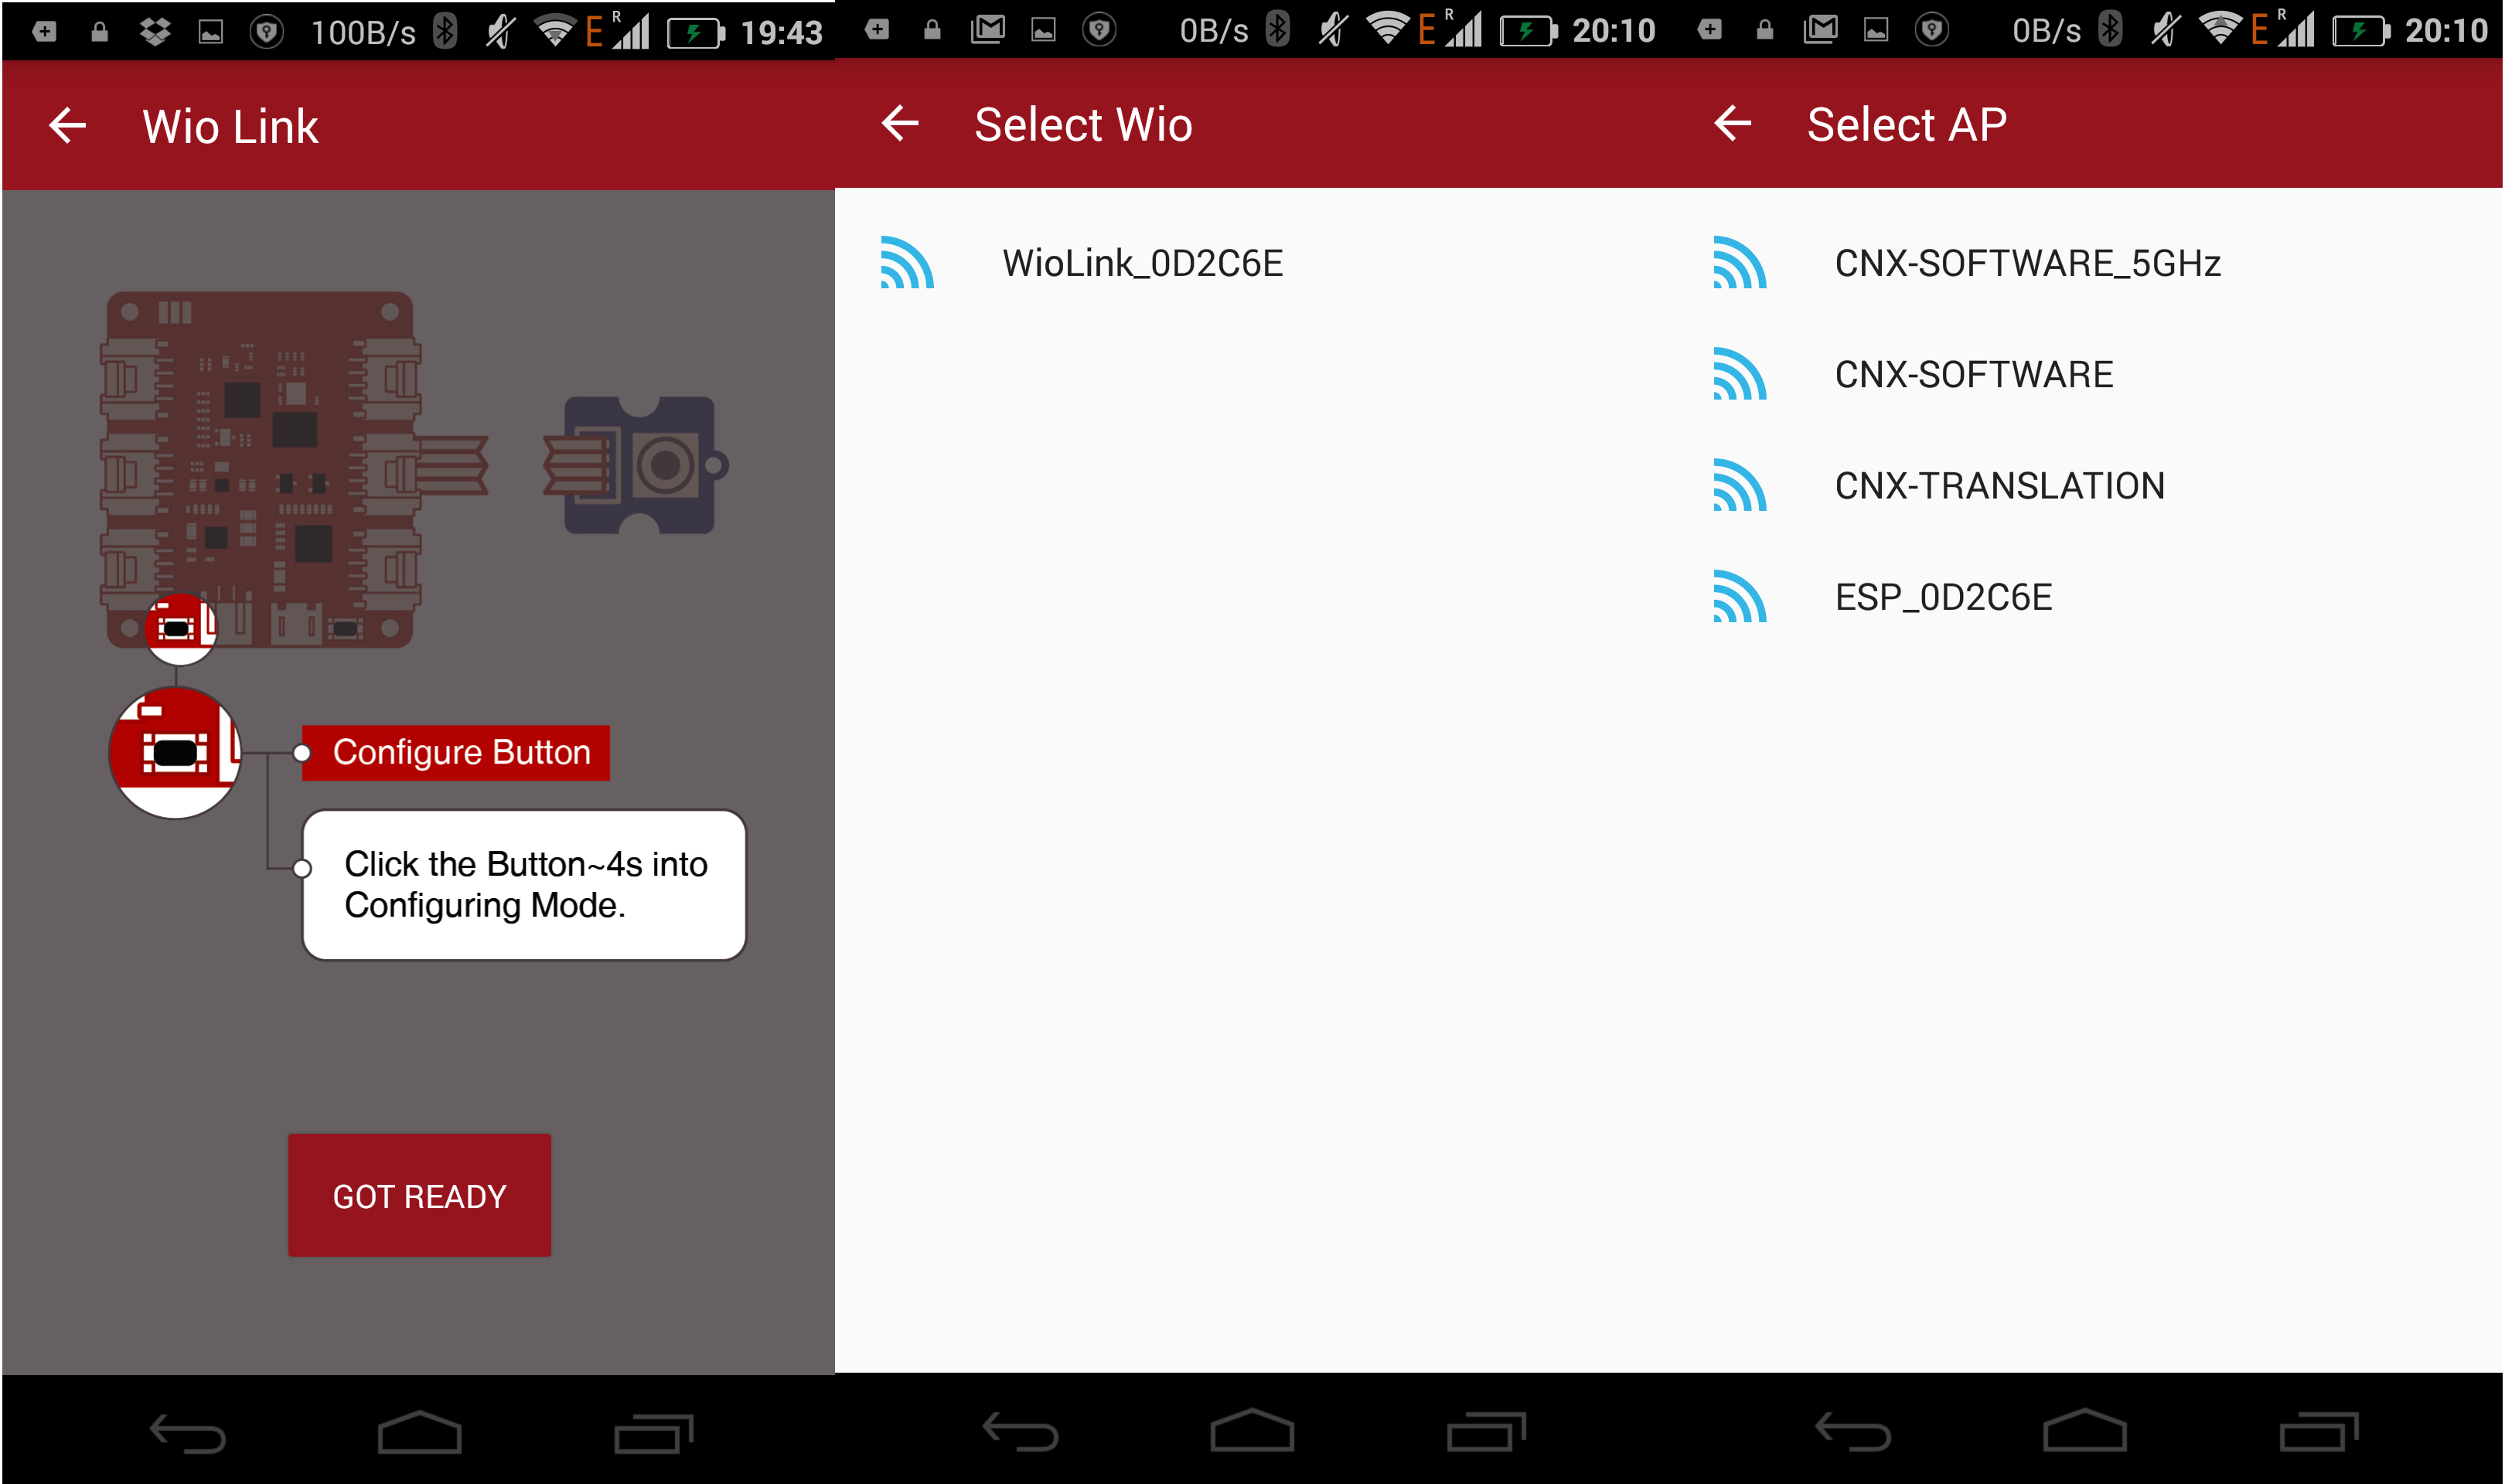
At this stage, I had to power Wio Link board. I did so by connecting Wio Link to one of the port my USB hub, and I noticed the red LED would blink very fast, but pressing on the Config button as instructed in the app would not do anything, and Wio Link was not detected at all. So I changed to a proper 5V/2A power supply, and the red LED was steady, with the green LED in the middle of the board slowly blinking, and after pressing the Config button for about 4 seconds, the blue TURN lit up. So if the board does not work, try another power supply. The USB cable should be OK, as it’s shipped with the board.
After that you can select Wio (WioLink_XXXXXX), select an access point (AP) to connect the board to the Internet, and give your board a name – I went with cnxwio – to complete the setup.

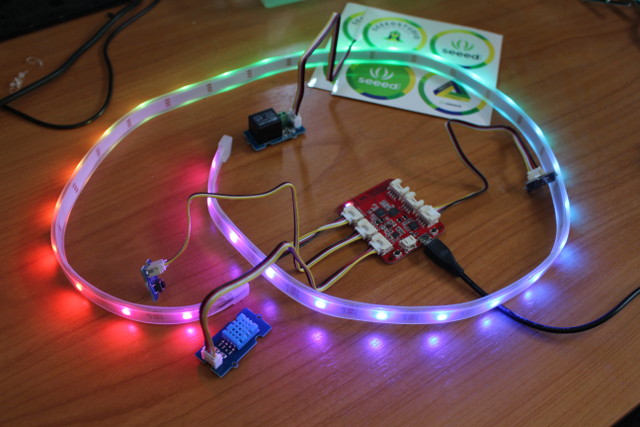
Then you can select a module on the bottom, the app will show you where you can drag and drop it (Digital. Analog, UART, or I2C), and then repeat the same process with the other modules. I had the idea of making a demo reporting the temperature and humidity while turning off the LED strip with the accelerometer, and turning it on with the button module, so I connected the four modules in the app and in “real life”.
Once you are happy with the setup, tap on Update to flash the firmware to the board. This should take a few seconds. At this stage, I was expecting to be able to do some more visual programming, but all you can do is tap on API to get the API info, and experiment with the API. So rather than a complete programming solution, the Wio app provides a helping hand for program development.
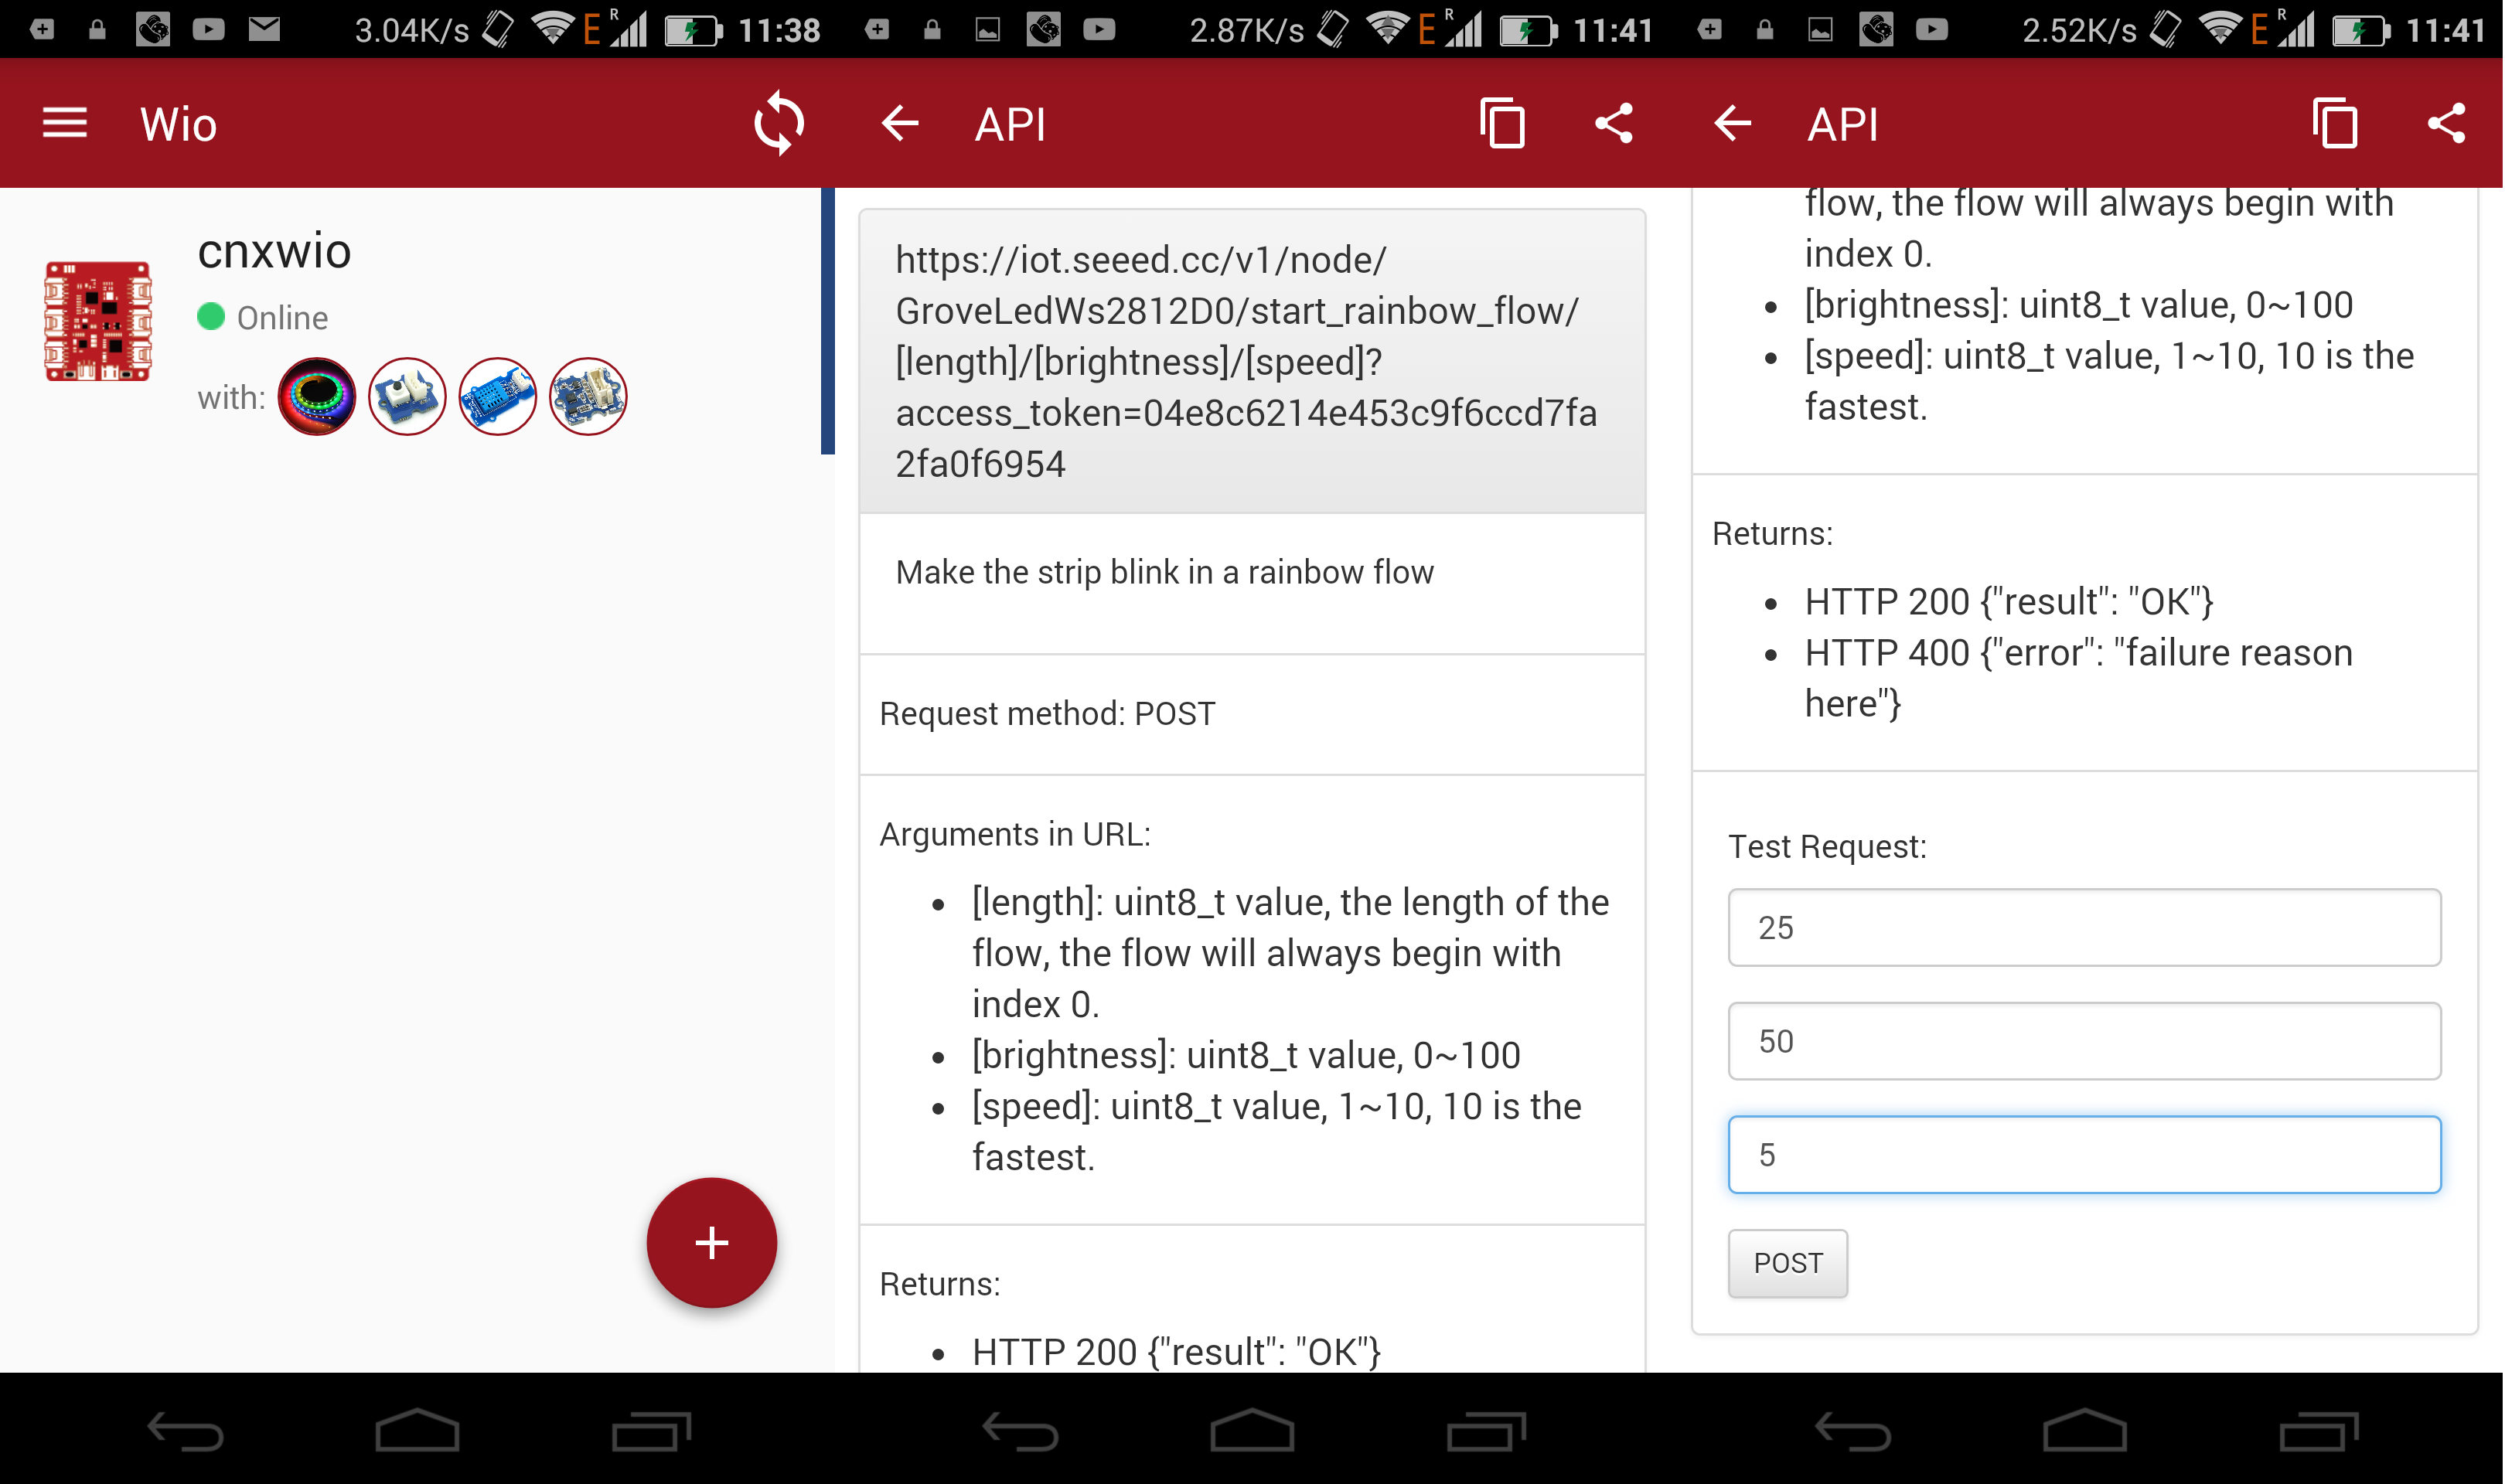
The three screenshots above show the list of Wio Link boards and their connected modules, and one API call to control the LED strip, namely to make it “blink in a rainbow flow”. You can also share the API by email or other method to get the API calls on your computer and get on with programming. This is the list of API calls I got with the four modules. You can simply use the command link in a Linux computer (or now Windows Subsystem for Linux) to monitor and control the board with curl. You can also use Python or other programming languages to use the API, as show in wio_link_execute.py that controls a traffic light.
But for the purpose of this review, I did not want to write code, only use graphical tools or app, so my next option was IF by IFTTT app.
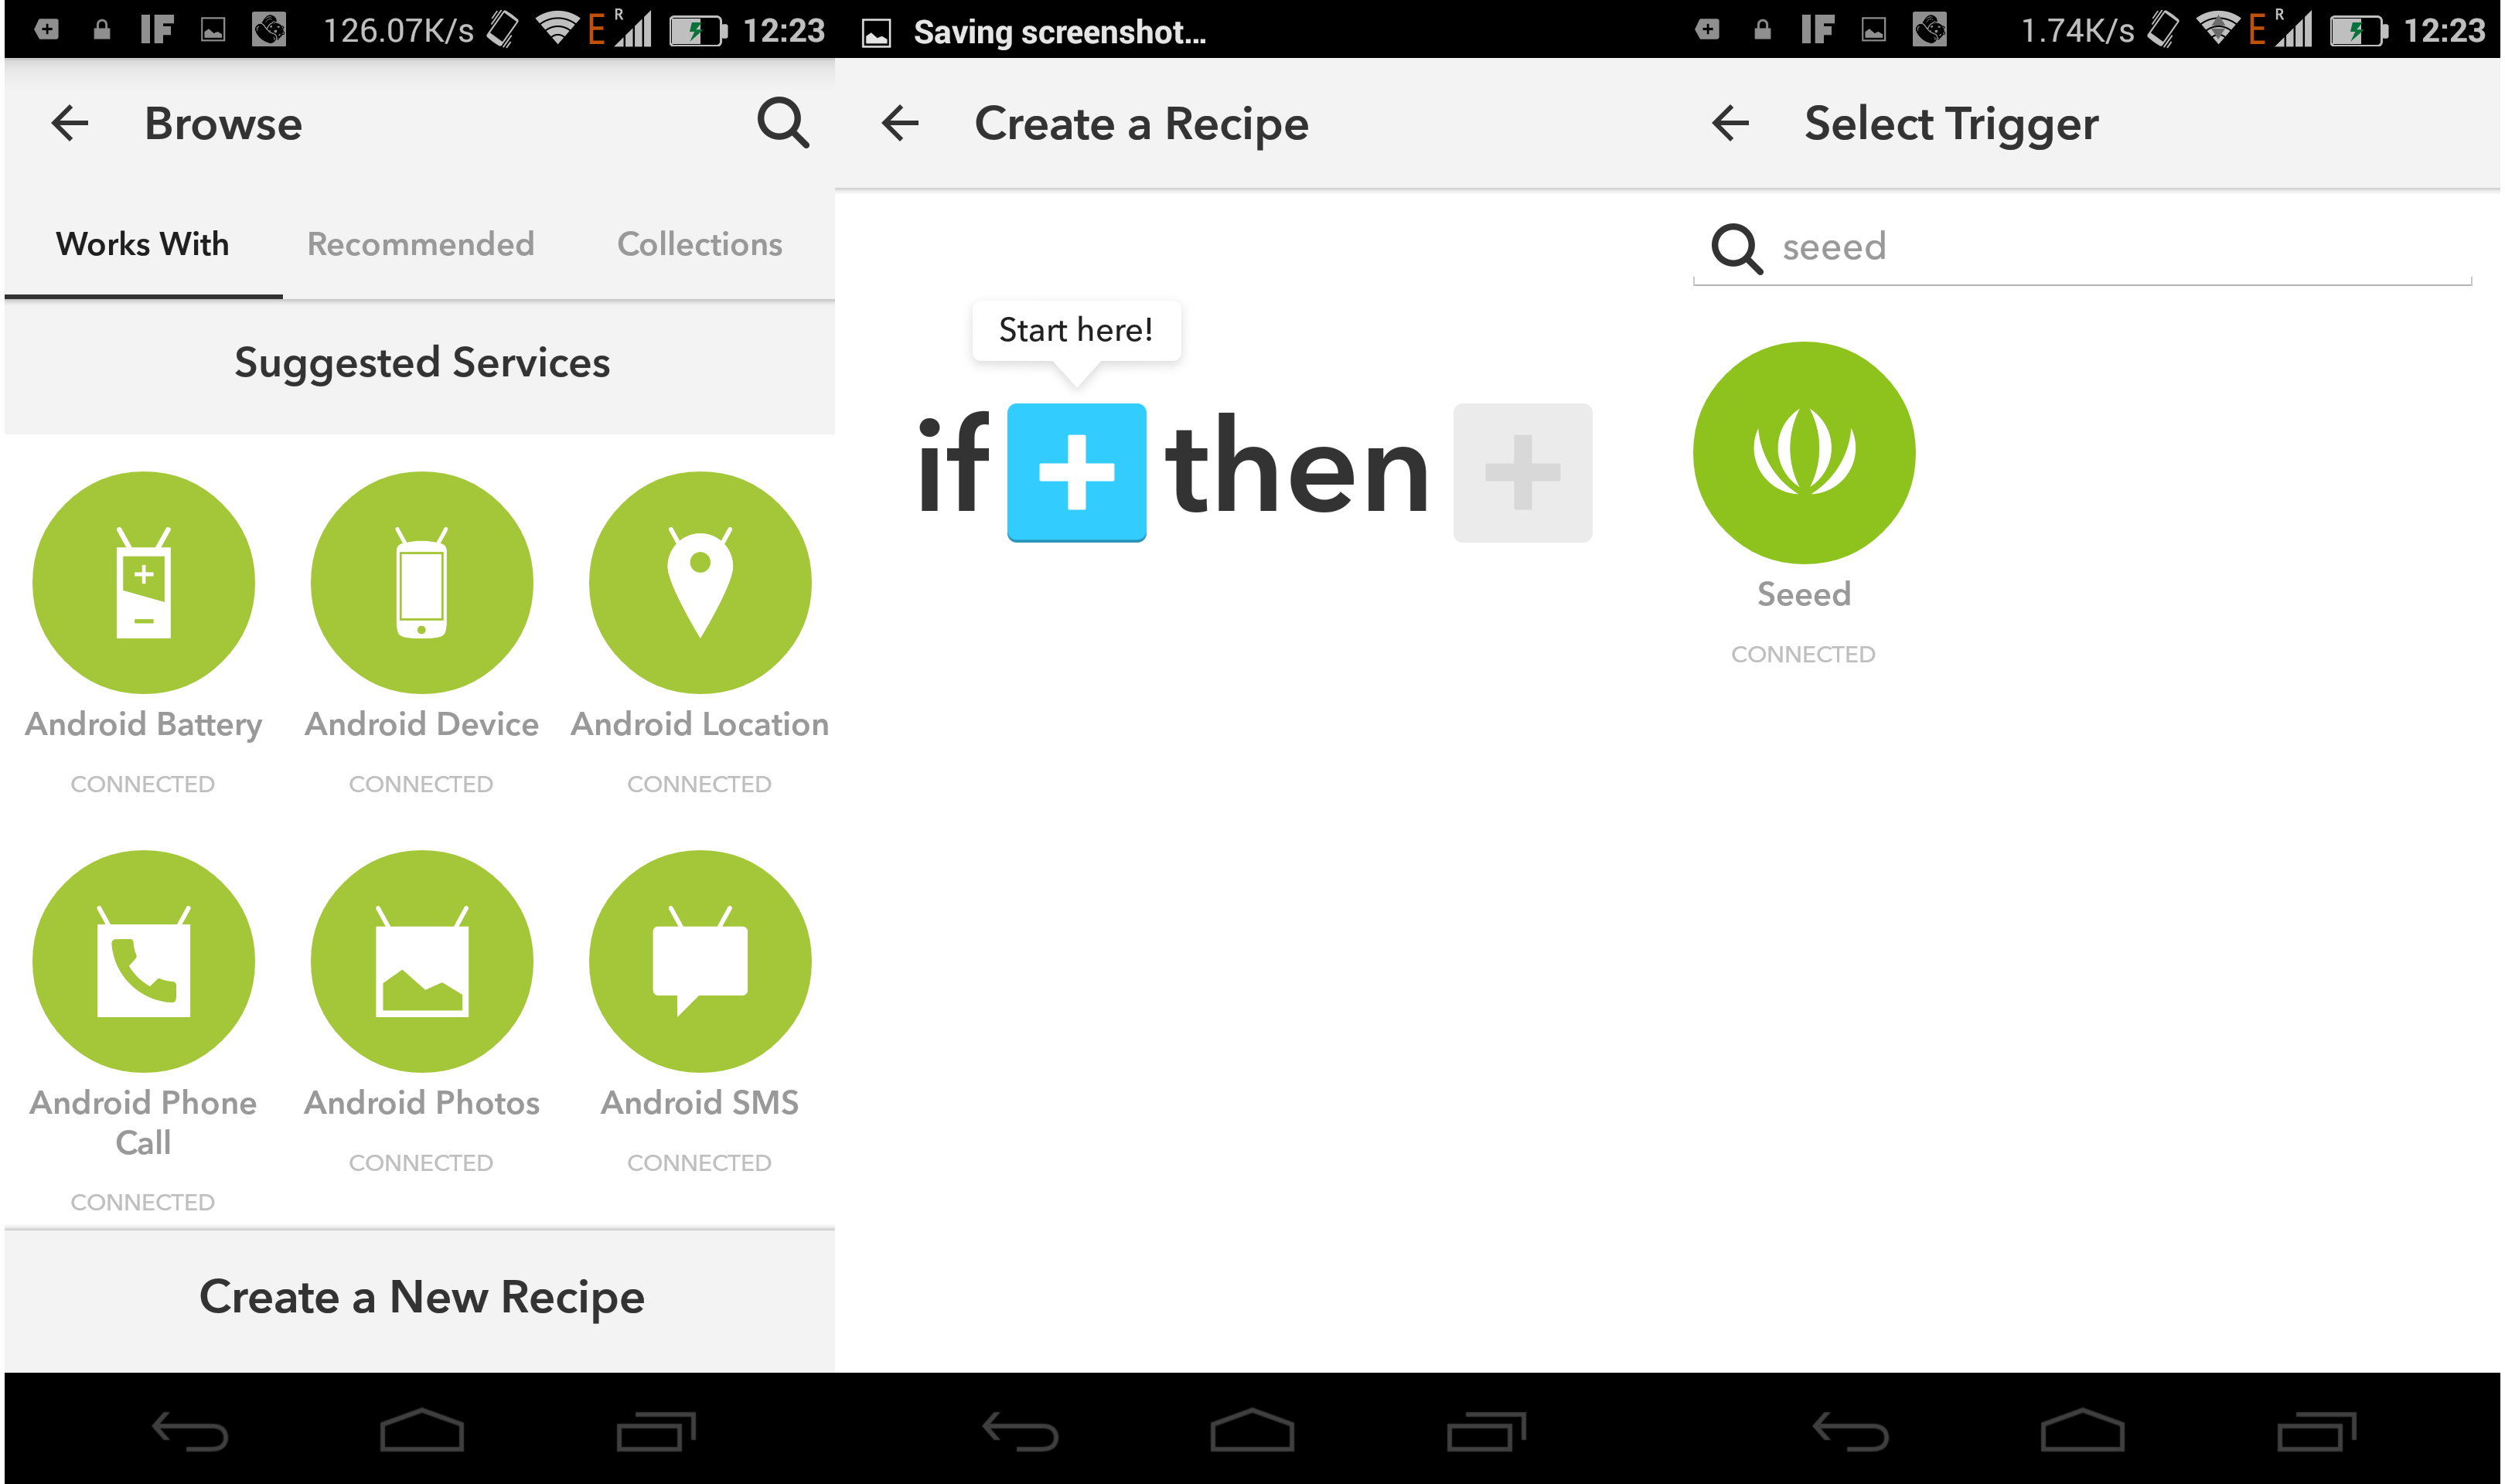
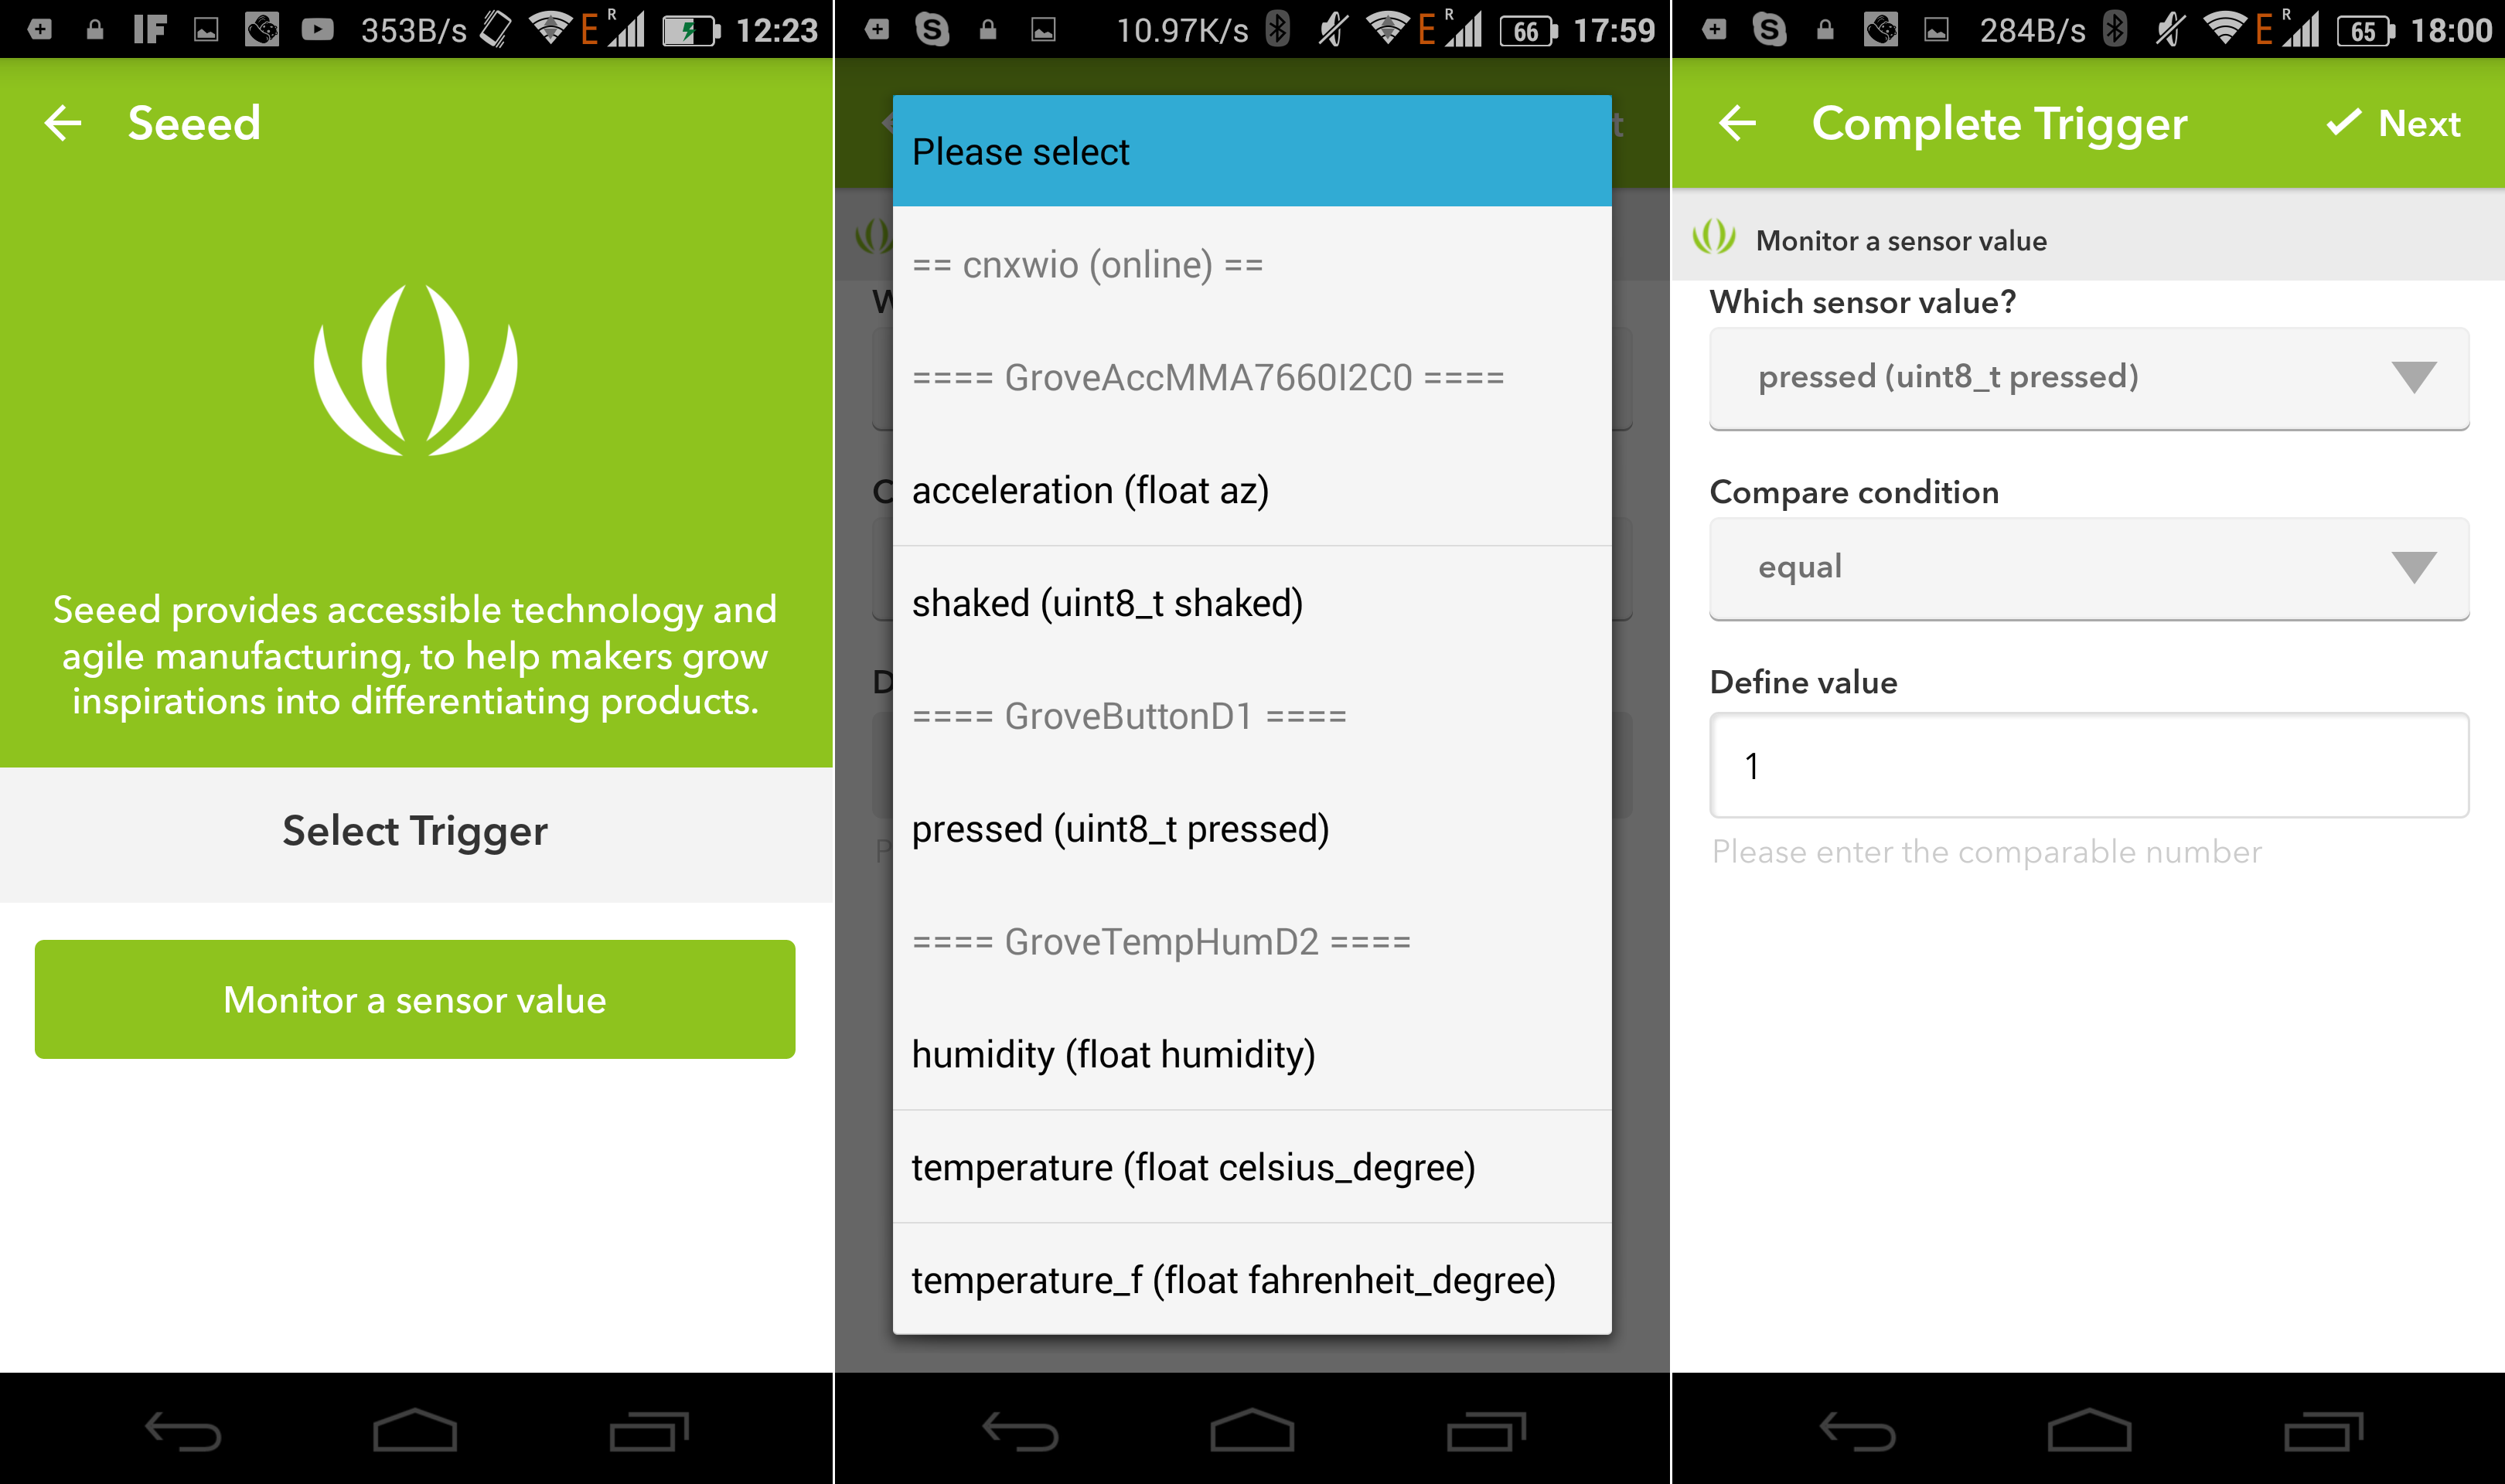
Right after you start the app, tap on the top right icon to Browse recipes, select “Create a New Recipe“, tap on “+” (Start Here!) icon, and search for Seeed trigger. The first time you’ll be redirected to login to Seeed Studio – which the password created at the beginning of this tutorial – in your browser, and once it’s done you’ll be able to “Monitor a sensor value”, select one action related to the sensors connected to Wio Link, and complete the trigger. I wanted to detect when the button is pressed (The value should be 0 when pressed) on the Grove module. There’s a big caveat doing this, but more on that later.
Now click Next to select the “That” step, and again search for Seeed to select one of the “Actions”, and configure it. I wanted to turn on the LED strip, and selected “light up Grove WS2812 LED strip” and “Random Rainbow”, before pressing on Finish to complete the action.

That’s all good, except for one detail. It did not work, as pressing the button had no effect. After configuring the accelerometer to turn off the LED strip, I started to receive notifications every 2 to 5 minutes about the “shaked” status. So I went to recipe, modified it to turn on the LED when the accelerometer is shaken, and press the Check Now button to verify it, and the LED strip indeed lit up. So unless I’ve somehow missed an important option, that meant IFTTT is not suitable for my use case, because everything is handled from the cloud, and it’s not “polling” the sensors quite often enough. However, If you want to monitor the temperature sensor, and take an action if the temperature rises above a threshold, that’s perfectly usable as long as it can be taken within a few minutes.
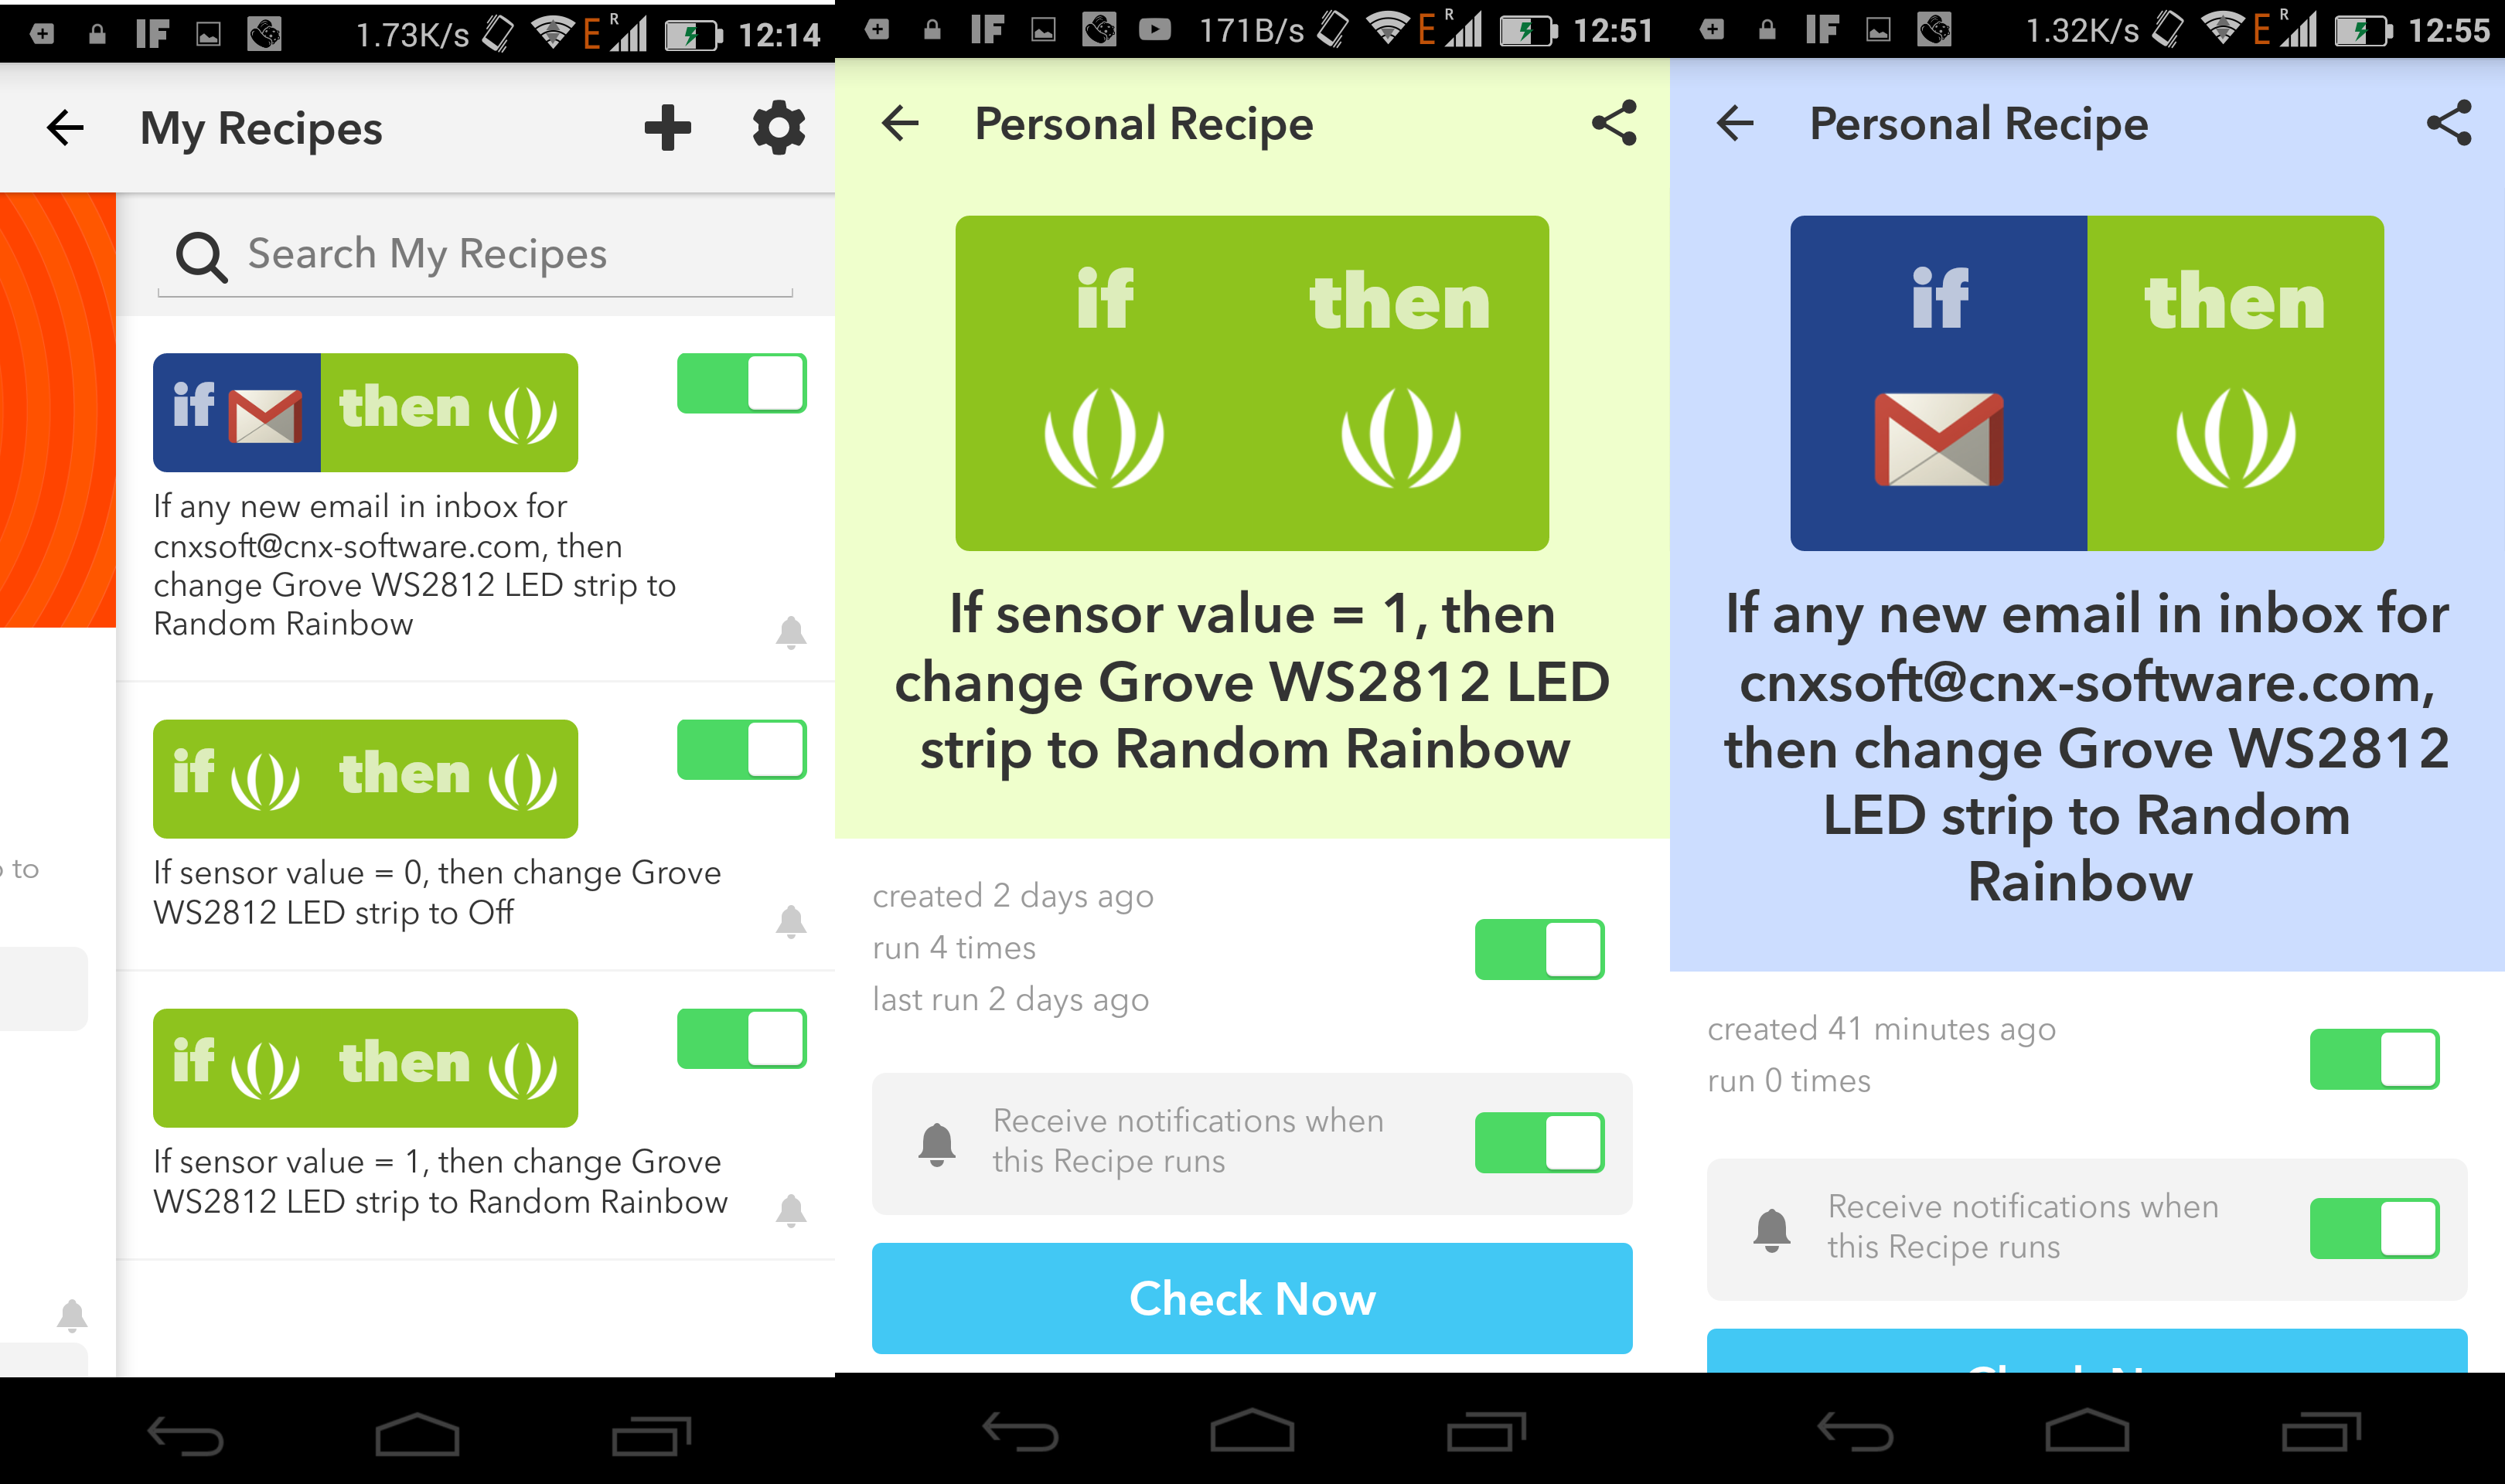
As one last experiment, I set the LED strip to turn on each time I receive a new email in my Gmail account. It did not work for the first email, even after waiting a few minutes (5+ minutes), and then pressing “Check Now”. So I sent another email, waited one or two minutes without results, and pressed “Check Now” again, and the LED strip finally turned on.
So the takeaway is that the Wio Link app does make setting up the board easier and also provides an easy-to-use reference to the API after the configuration, but it’s not a pure visual programming app per se, and you’ll need to write your own program using the RESTful API. Alternatively, the IFTTT app can be used to control the board using triggers from the Internet (Facebook, Twitter, emails, ….) or sensors from the Grove module, and the app then takes actions using the Grove modules such as relays or LED strips, but there are some limitations to what can be done, and my experience with IFTTT and Wio Link was mixed.
I’d like to thank Seeed Studio for sending Wio Link Starter Kit for evaluation. You can purchase the kit for $49 on Seeed Studio if you are interested.

Jean-Luc started CNX Software in 2010 as a part-time endeavor, before quitting his job as a software engineering manager, and starting to write daily news, and reviews full time later in 2011.
Support CNX Software! Donate via cryptocurrencies, become a Patron on Patreon, or purchase goods on Amazon or Aliexpress


I don’t believe Seeedstudio ever promised graphical programming (I backed it, and didn’t expect that).
Of course, you can always program it as an Arduino, but then it becomes a normal ESP8266 with grove connectors.