
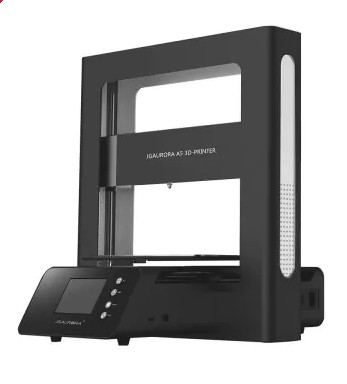
Karl here and today we are going to look at the JGAURORA A5. I specifically asked Gearbest for this printer. Features and specs looks good. Not to mention that you can go from opening the box to printing in 20 min. Nice large build volume of 305 x 305 x 320mm. Color touch screen. Filament runout sensor. Power Fail feature. Power Fail is so nice. I have lost some long prints due to power going out. I have not lost any for filament because I have always been conscious of it but it’s nice to have peace of mind. The A5 has an assisted leveling feature that is nice. When using this feature there are 5 point that it will go to. One in each corner and one in the center and you adjust the bed. It saves a little time and I believe is standard feature in Marlin now.
This is quite a popular printer and has been reviewed a lot at this point so I will touch base on my experiences and items that may not be covered in other reviews.
Mistake 1

The first mistake I made was when I first put the upright on. I didn’t pay close enough attention and I pinched one the cables that routes underneath and after I turned it off the first time it would not turn on again. I was a little upset but after some troubleshooting I realized what happened and corrected the issue. There was just enough of a shiner that was touching the frame to cause the power supply to not come on. It took me disconnecting the wires to find the culprit.
Frame
I really like the frame. It is very well engineered design. I feel like it is the most rigid Cartesian printer that I have reviewed. The vertical part rests flat on the table top/bench and the base sits inside. I have moved the printer while printing and could not tell that I moved it. I was moving it while tipping it to feel the warmth of the y stepper. There is a small access in the bottom back that I could reach the y stepper motor with my fingers. I do have one complaint about it but it doesn’t affect my setup. If you have a deep enough table all feet don’t touch at the same time. But this doesn’t affect me. I have to let the front feet hang off my work bench. If I don’t the bed hits the wall when at 0 position. I don’t think that there are any negative side effects from this.
Complaint
The only real complaint I have is access the the leveling knobs. The rear ones are a pain in the butt to get to at the first and second point for the semi auto leveling feature. They are positioned inside the frame and I have to use both hands.
One thing I wish they would have done is put an extended stepper motor rod with a manual wheel on it for the extruder. Loading and unloading the filament is OK with the menu but when I first start a print I usually manually push some filament out to prime it when the skirt starts. It is impossible to do on the A5. Typically I put just one skirt around an object and now with smaller prints I put 2.
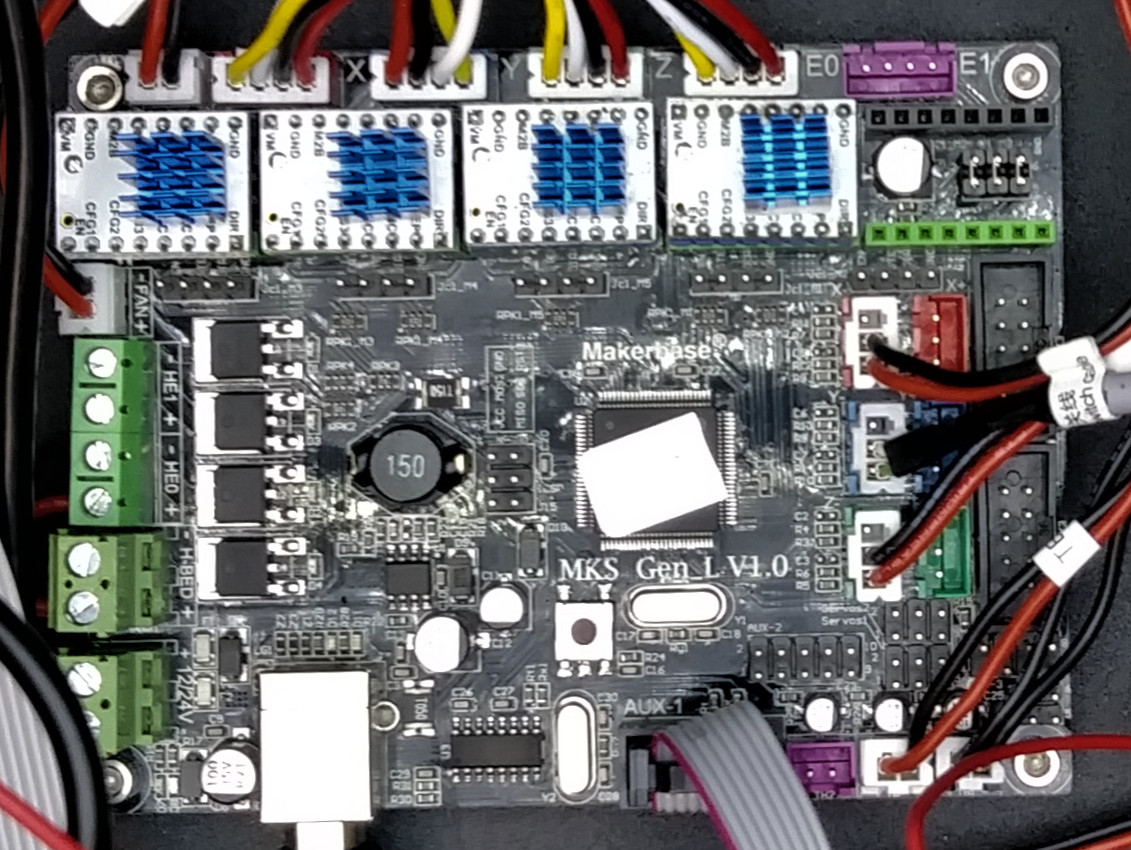
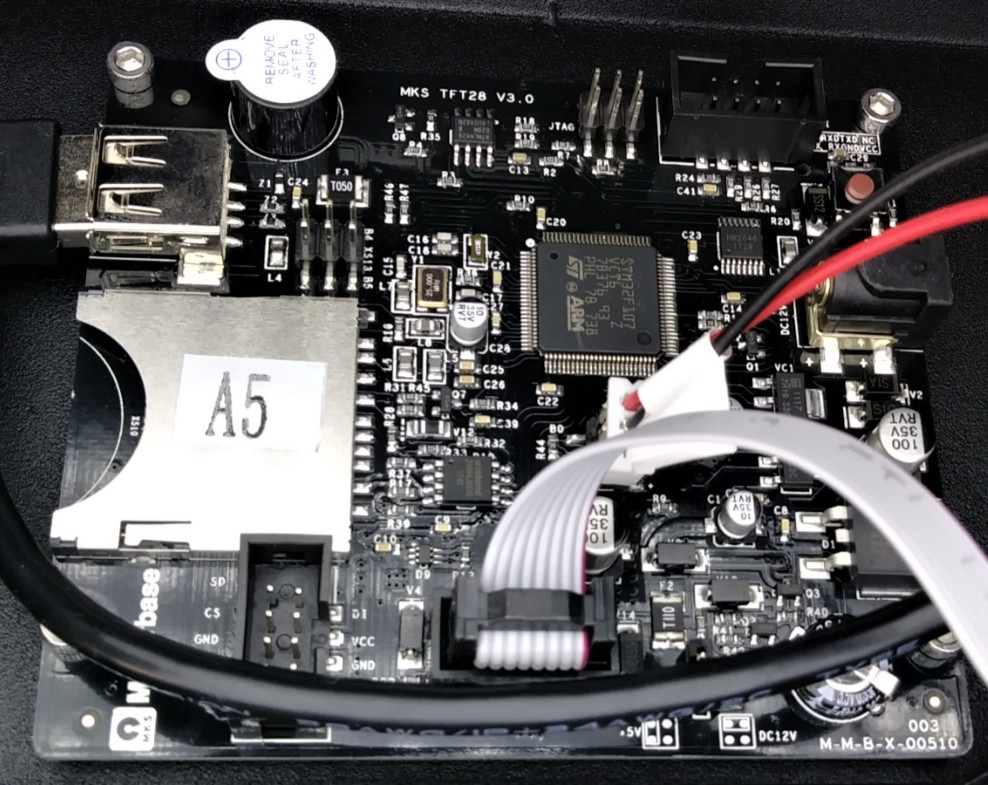
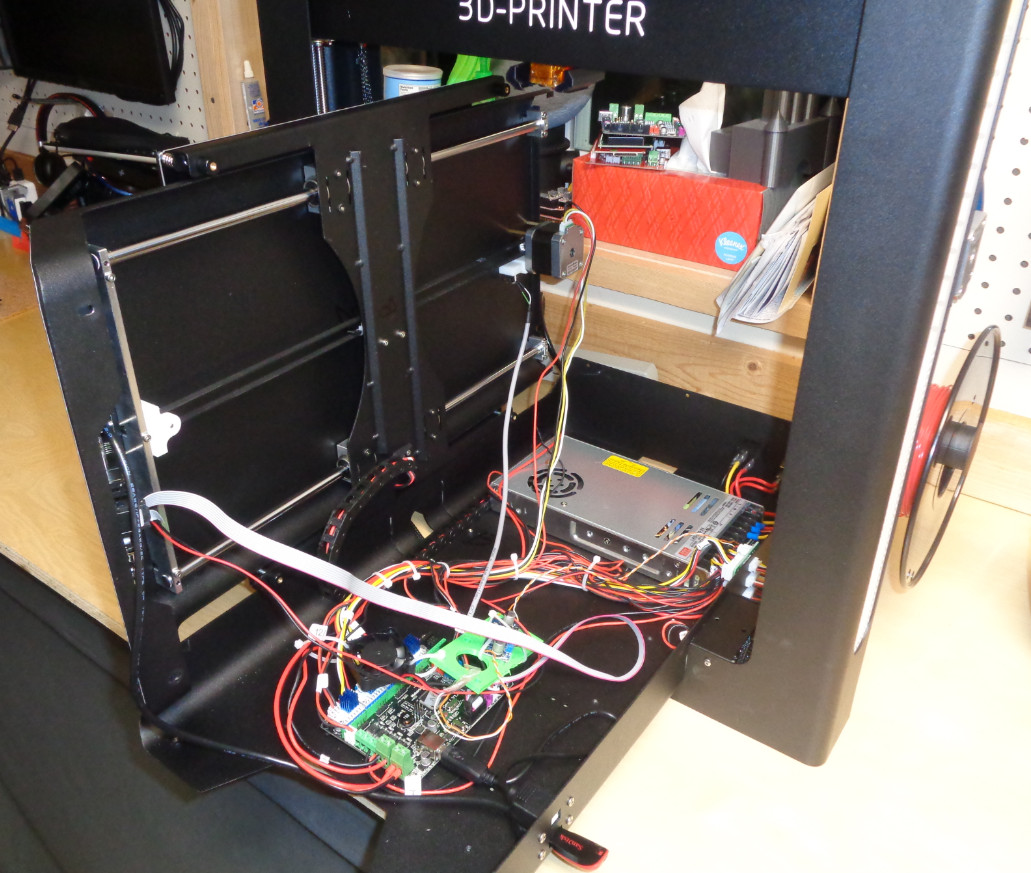
Wiring
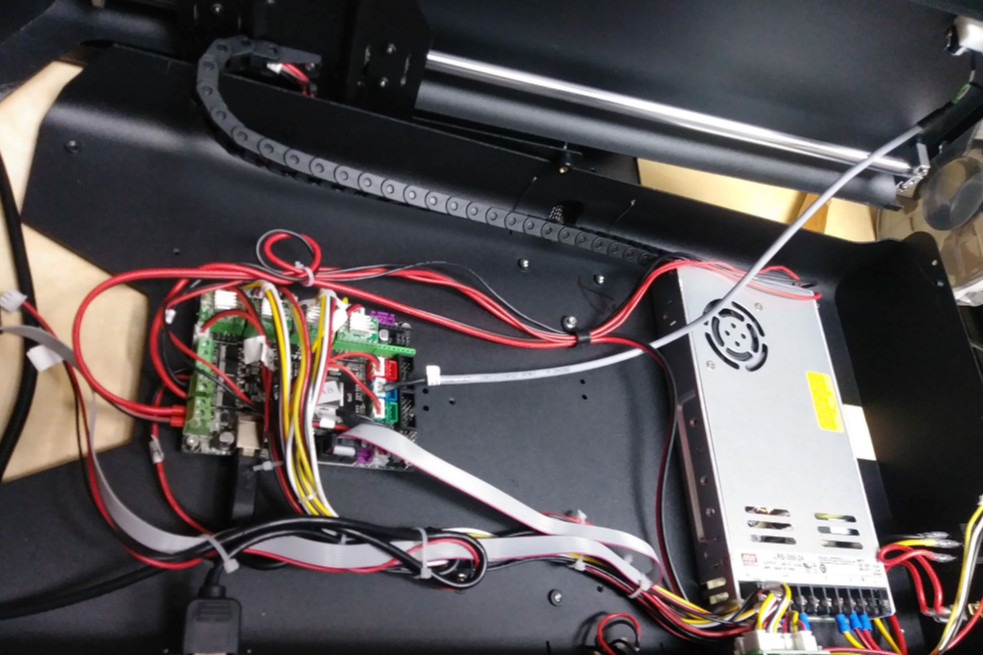
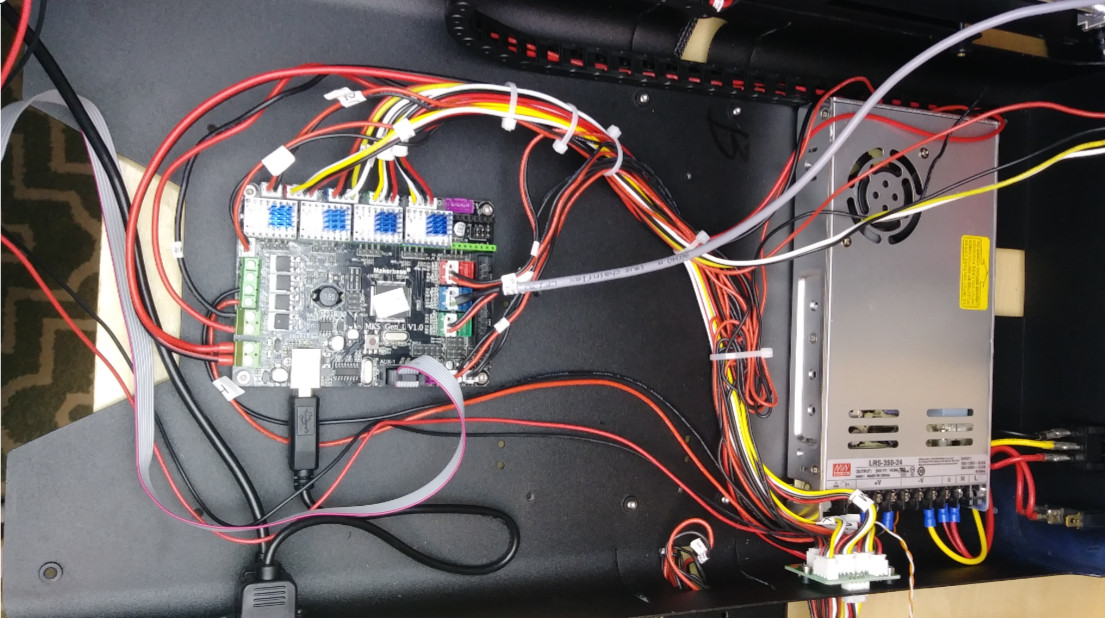
The wiring is fair inside. While installing the new stepper drivers I moved all the wiring out of the way to make way for active cooling.
The A5 has a 24V system. The bed can get up to temperature relatively quickly.
| Temp in C | Time to Temp mm:ss |
|
60 |
2:55 |
|
70 |
4:10 |
|
80 |
5:40 |
|
90 |
7:40 |
|
100 |
10:30 |
|
110 |
15:55 |
Upgrade
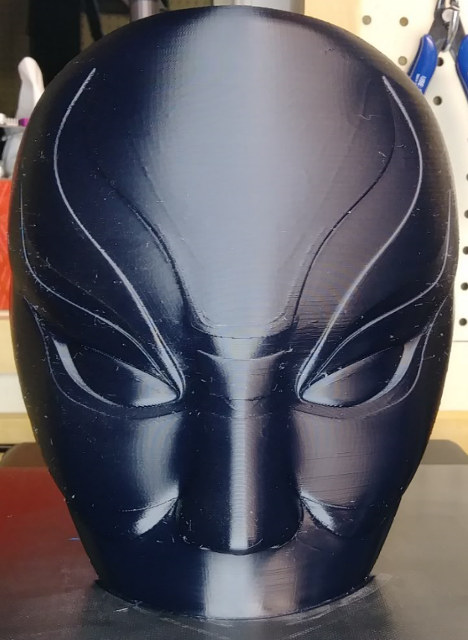
The A5 came printing well out of the box. I posted a few pictures in the Facebook group, and got schooled with this picture.
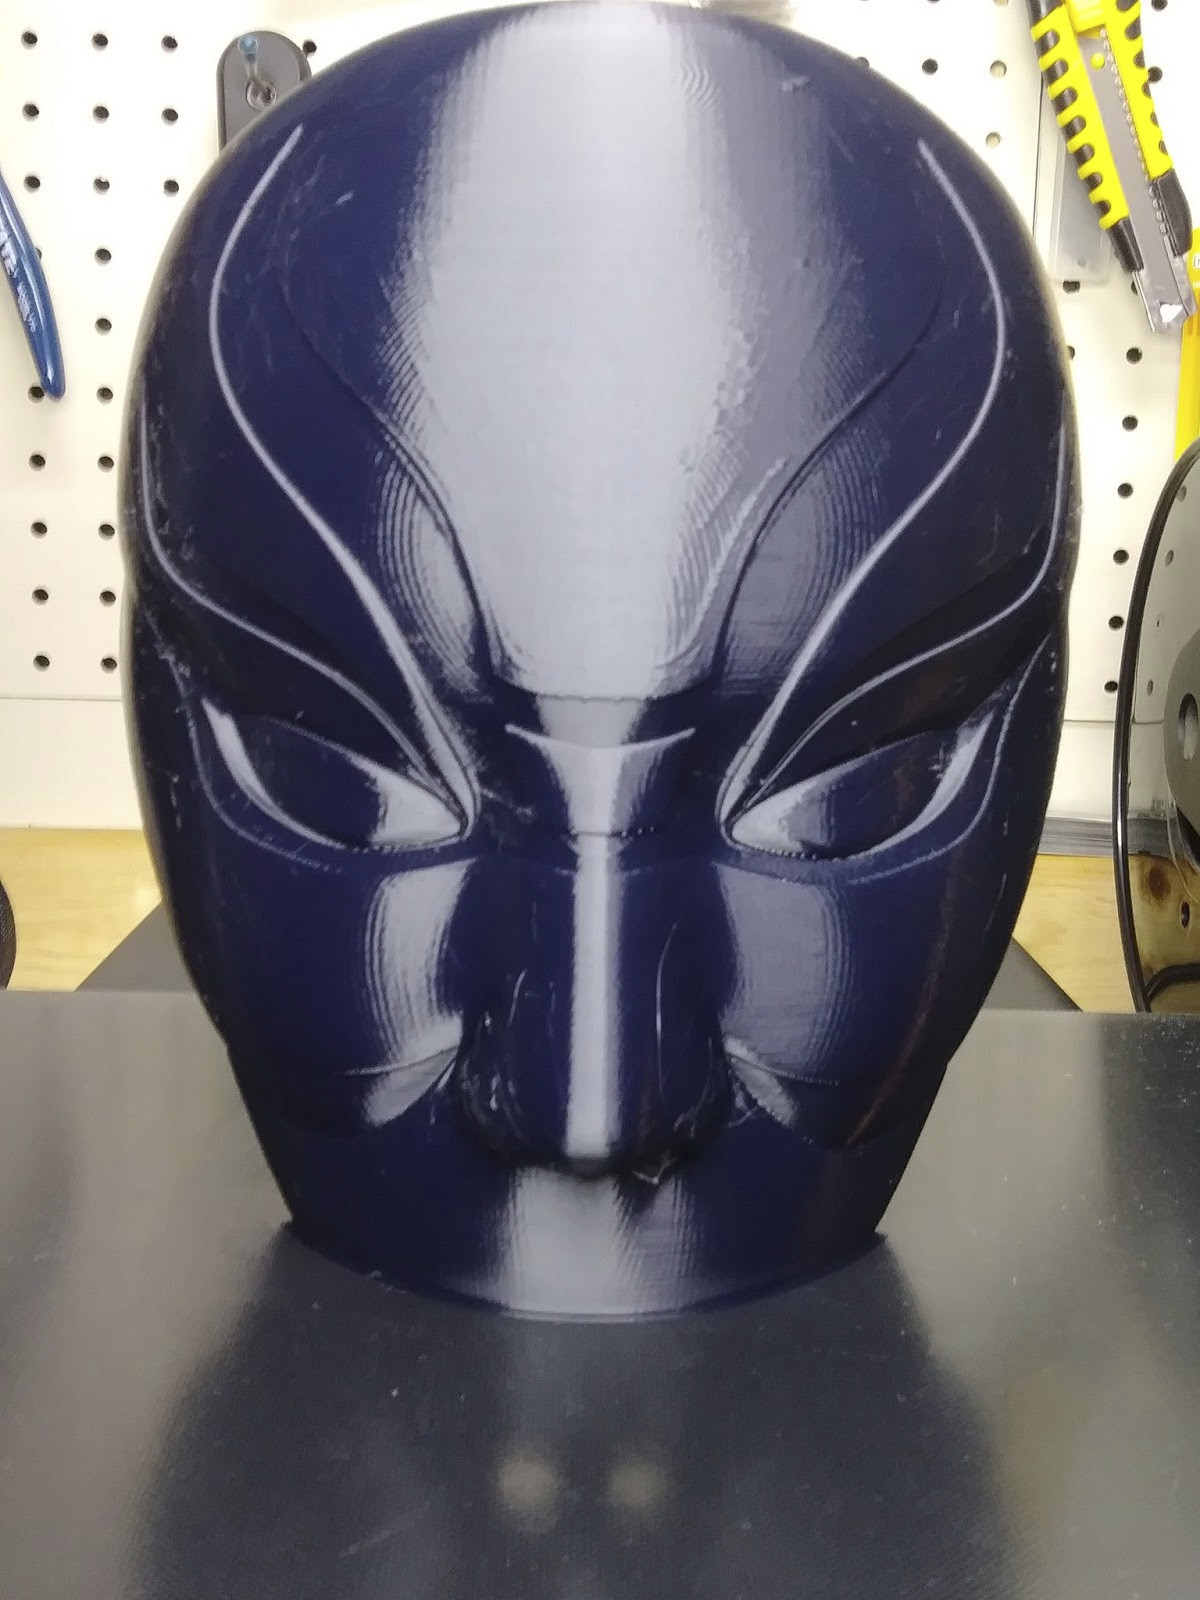
I always thought that the rings were a part of the model that you see in the picture above. It is not, it is salmon skin. So I did some research and one way to fix is to upgrade the stepper drivers. I just saw some TMC2100 newly listed on Gearbest, so I asked for them to send a set over. They did not have the newer TMC2130 at the time.
 These steppers convert the normal 16 microsteps up to 256 steps which eliminate the salmon skin. An additional benefit is stepper noises are practically gone.
Mistake 2 & 3
Here is where I made my second and third mistake.
In order to install I needed to get inside the housing. First thing to do is raise X gantry all the way to the top, then turn off and disconnect the power cord. To get inside, the 2 feet on the front are removed and 3 small screws on the back faceplate are removed. The bed, top plate, and front slide forward. Then tipped to the left you can get inside. The first time have your cutters ready. There are a lot of zip ties that need to be cut in order to get it open this much.
I would take the time and get the wiring out of the way. You will need to actively cool these drivers. They get hot if not. I used a 12V fan and buck converter to step down the 24V to 12V.
To install the steppers pull one of the steppers out, and notice the orientation and see where GND and VCC are labeled and install your new steppers with the pins in the same orientation. The heatsink don’t come installed and you can install at this point.
When changing from the existing drivers to these new ones it is going to change the direction of the stepper drivers. You can either flip the stepper cables physically or invert the direction in Marlin if you are running custom firmware.
The wiring on mine is odd, the Y is wired different than the rest. For example X, Z, and e0 go yellow, white, black, red. And the Y goes red, black, white, yellow.
To flip the X, Z, and e0 change from the yellow, black, white, red to red, white, black, yellow and change Y from red, black, white yellow, to yellow, white, black, red.
If you are using custom Marlin method edit the configuration.h
|
1 2 3 4 5 6 7 8 9 10 11 12 13 14 15 16 |
// Invert the stepper direction. Change (or reverse the motor connector) if an axis goes the wrong way. #define INVERT_X_DIR true #define INVERT_Y_DIR false #define INVERT_Z_DIR false // Enable this option for Toshiba stepper drivers //#define CONFIG_STEPPERS_TOSHIBA // @section extruder // For direct drive extruder v9 set to true, for geared extruder set to false. #define INVERT_E0_DIR true #define INVERT_E1_DIR false #define INVERT_E2_DIR false #define INVERT_E3_DIR false #define INVERT_E4_DIR false |
to
|
1 2 3 4 5 6 7 8 9 10 11 12 13 14 15 16 |
// Invert the stepper direction. Change (or reverse the motor connector) if an axis goes the wrong way. #define INVERT_X_DIR false #define INVERT_Y_DIR true #define INVERT_Z_DIR true // Enable this option for Toshiba stepper drivers //#define CONFIG_STEPPERS_TOSHIBA // @section extruder // For direct drive extruder v9 set to true, for geared extruder set to false. #define INVERT_E0_DIR false #define INVERT_E1_DIR false #define INVERT_E2_DIR false #define INVERT_E3_DIR false #define INVERT_E4_DIR false |
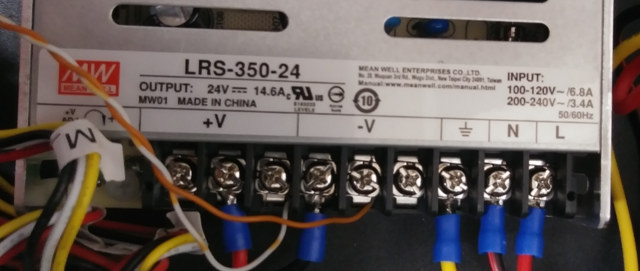
Now we need to set the Vref voltage. The safest way I found was to plug in the printer to your PC through USB. There is no need to plug in mains voltage. Then take a multimeter between the USB housing and screw that adjusts the voltage on each of the drivers.
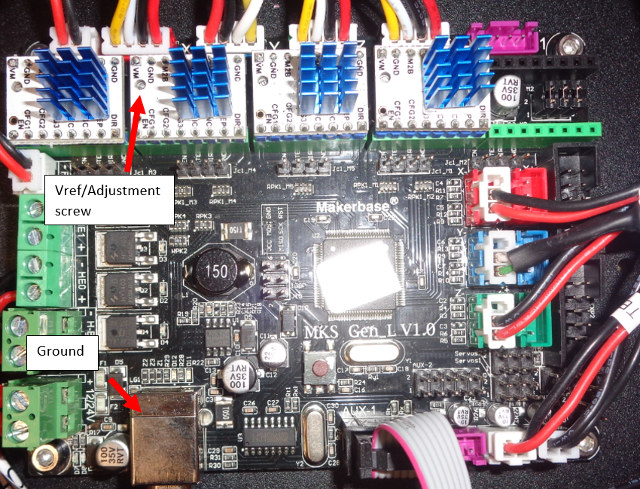
After adjusting, I settled on 0.45 volts for X, Y, & e0, and 0.8V for Z. Clockwise increases voltage and counter-clockwise decreases it. The extruder stepper gets a little warm but I didn’t want to change skipped steps. X and Z are touching the frame acting like a heatsink. Y is above the power supply so I think the fan keeps it cool. You may want to run a little less but these worked for me.
You do not need to change all these drivers. You can replace the X and Y only and get 95% of the benefits. I was intending to do that and use the 4 stepper kit on 2 printers but couldn’t do that. Keep in mind if you only change your X and Y that you only need to flip your X and Y stepper directions
I did not complete in this order when I did this. I cleaned up my wiring first and after putting everything back together I was getting terrible jittering on my X axis so I opened it back up to see what was loose. I was dumb and left it powered on. I saw after opening that one of the pins backed out of the connector so I went to push it back in. I got a little puff of smoke out of one drivers and none worked right after that. This was second mistake and turned into my third. I was frustrated and went to put the unit back together and bam gfci blew. I arced mains with the top of the case. After this, I vowed to be more careful. I am very grateful that nothing worse happened.
As mentioned earlier active cooling is necessary with these drivers. These are not visible from outside so I just zip tied the fan in place.
Bed
I am going to point out the bed on it. I have used other surfaces but this has by far given me the best results. Typically I would install a mirror but I did not have to on this one. They call it Black Diamond. It looks the same as the Anycubic ultrabase. If I print about 60°C on the bed and 220 C on my first layer with PLA, it sticks about every time. I have been cleaning it with Windex. On some really small prints, I have used some glue. As soon as the bed cools the prints pop right off.
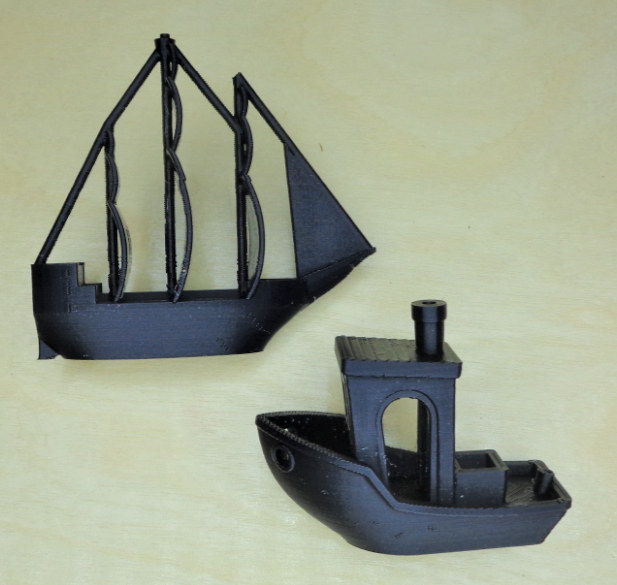
Final test prints
I do have to print about 10°C hotter on this one to stop stringing but that may be an out of spec thermistor. This threw me for a loop. All the printers before this I used the same temps. I do a 6.5mm retract at 150mm/s.
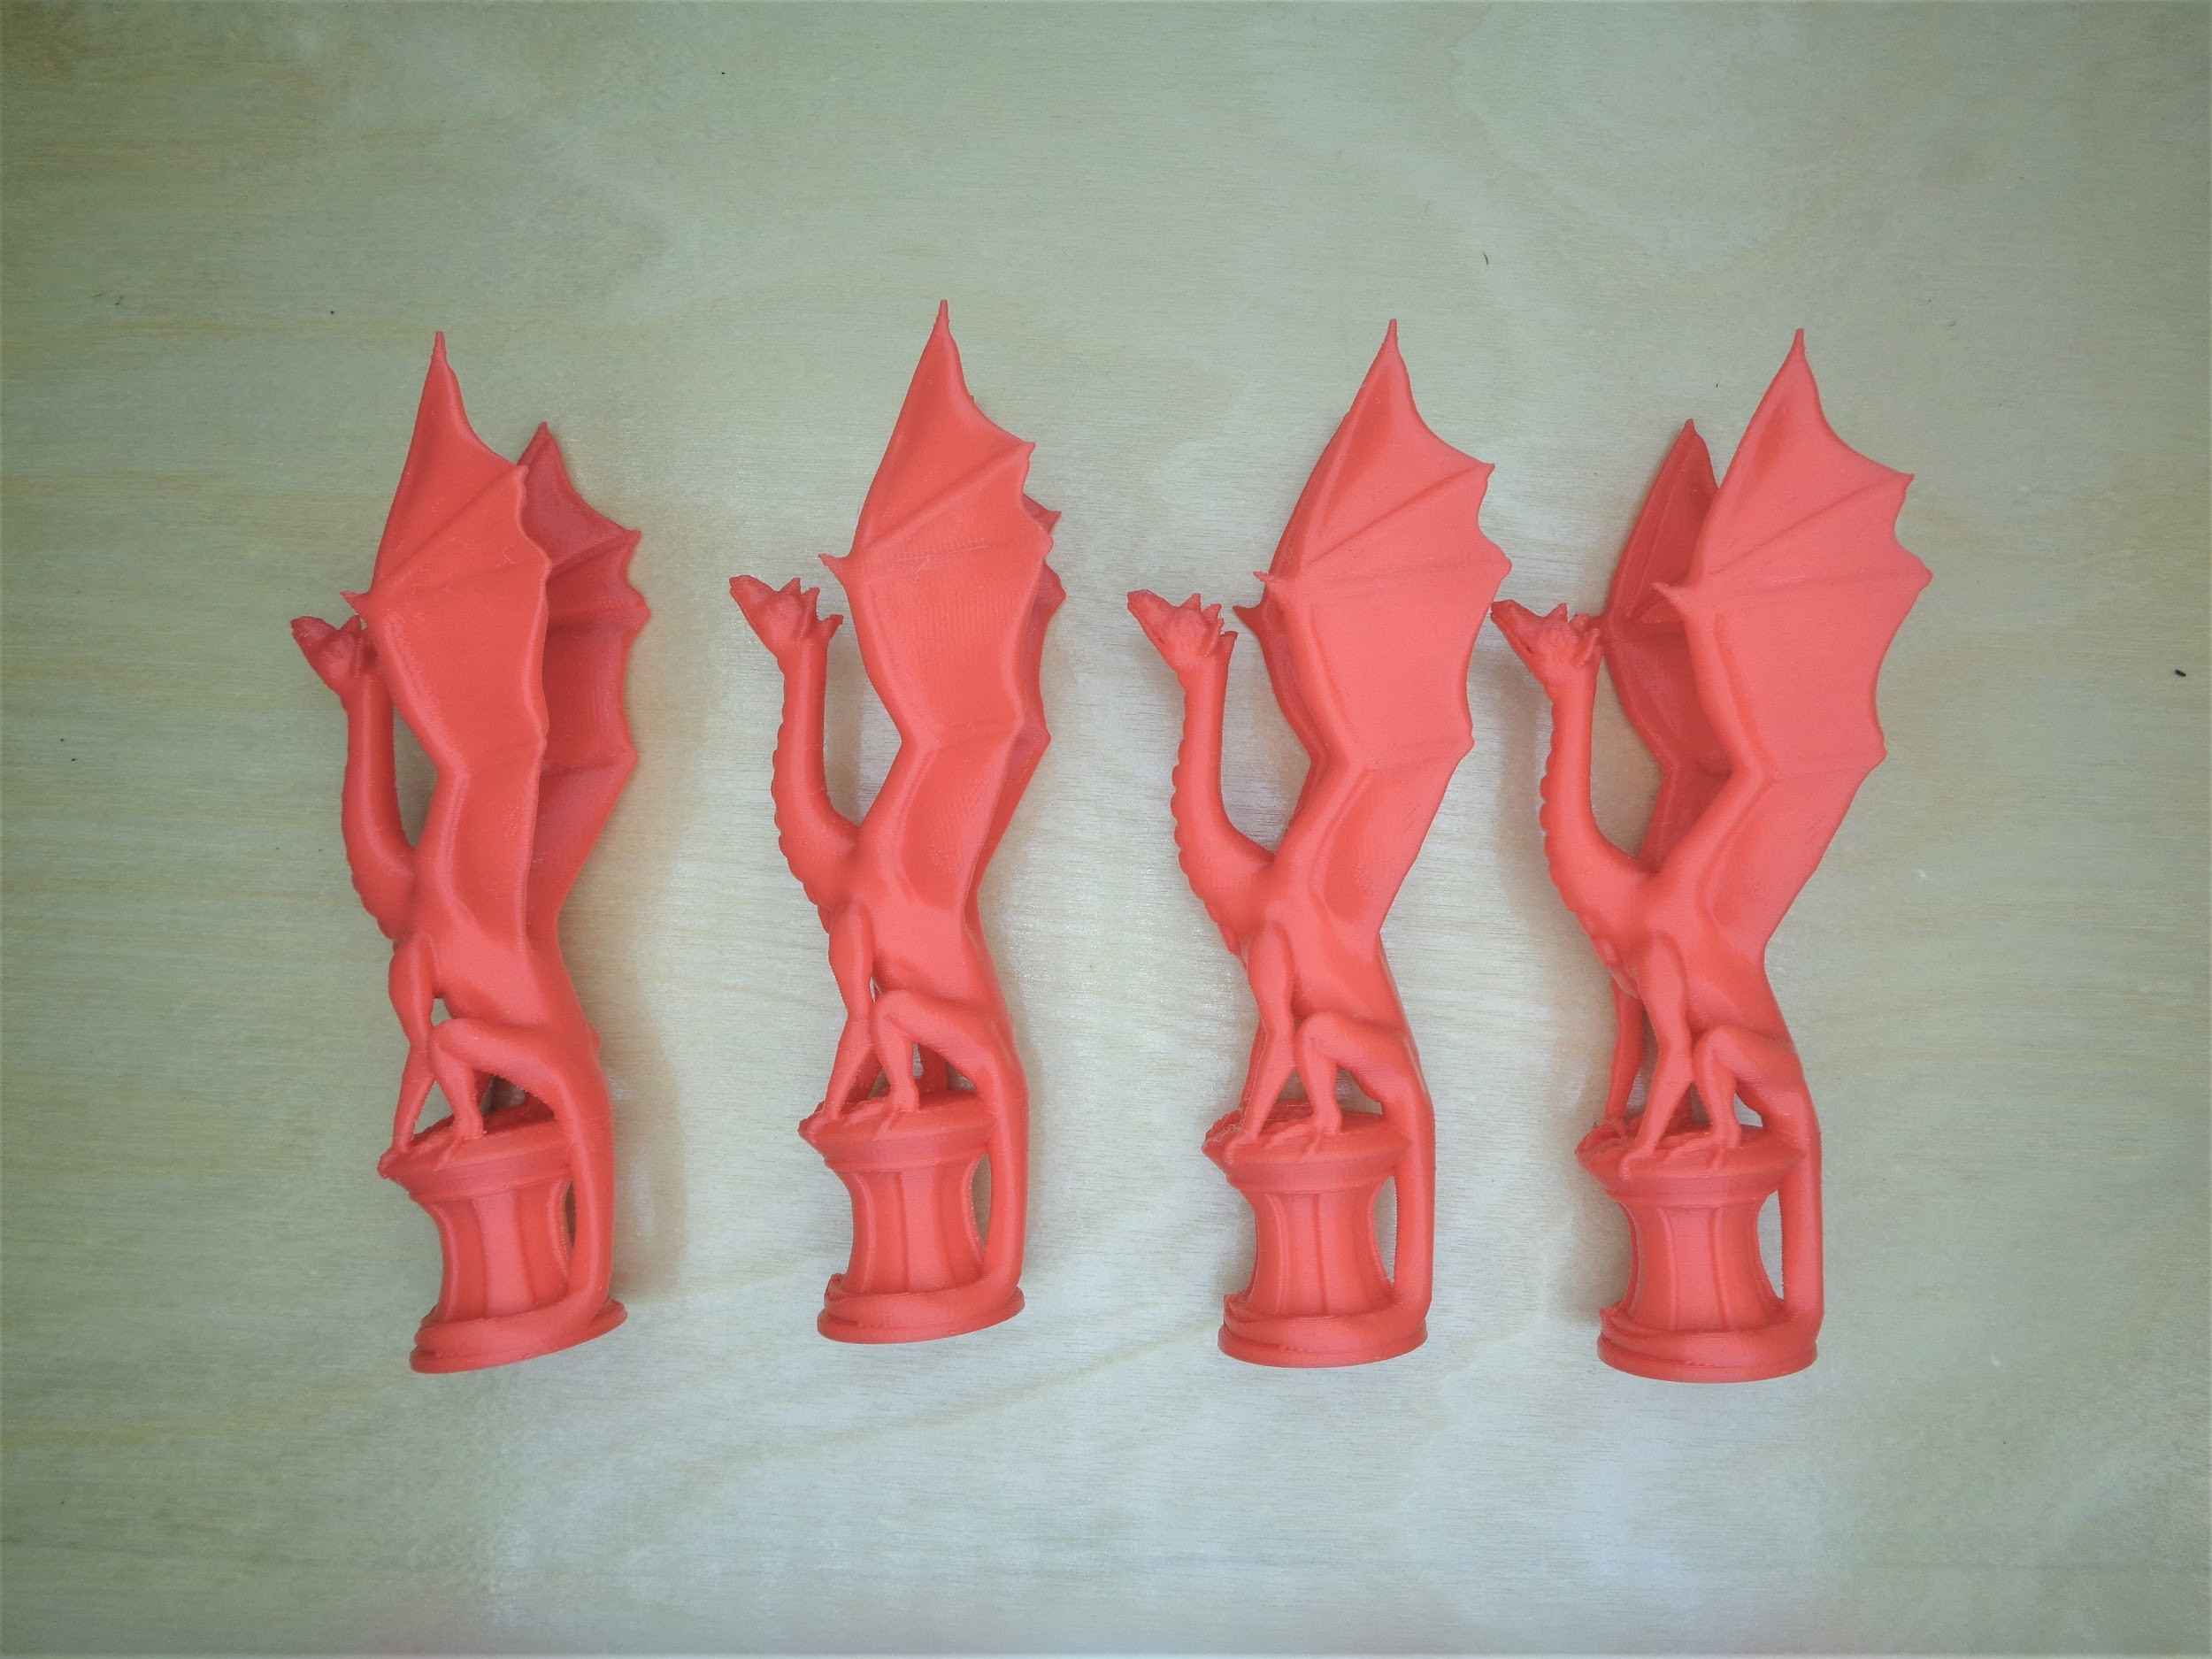
I printed this model several times trying to get rid of those irregularities in the wings. This picture didn’t capture it, but they all have the same defect.
Final Words
I like this printer. I have printed over 100 hours on it. The only real upgrade I have done are these stepper drivers to fix the salmon skin. I did upgrade the fan shroud. I also printed some spring guides but didn’t notice an appreciable difference. The A5 is one of the best printers I have reviewed. Glass was flat. Heats fast. Sturdy frame. I like the way it looks. I get very good prints. Prints are dimensionally accurate. Big build volume. POWER FAIL…is so freaking awesome and just works. But I am concerned that if power goes out and not resumed immediately that the prints might not stay stuck without glue. I print fast on it with good results. I actually like it more than the original CR-10.
It is a shame…I normally do multi part reviews on printers due to needing upgrades, but I don’t see what I need to do on this one. I really think the A5 will be the benchmark now for low cost large volume printers. The next step is to get a company to integrate all the features with TMC2130 drivers like the Prusa MK3.
I would really like to thank Gearbest for sending the A5 for review, it has been a pleasure. You can pick one up for under $400 shipped on their website, and using JGAURORAA5 coupon may lower the price further.

Karl is a technology enthusiast that contributes reviews of TV boxes, 3D printers, and other gadgets for makers.
Support CNX Software! Donate via cryptocurrencies, become a Patron on Patreon, or purchase goods on Amazon or Aliexpress


did you print with 256 Microsteps?,
I dont think that board can do 256microsteps, you need a descent arm board for that.
It takes the 16 steps that you send it and chops it into 256. http://reprap.org/wiki/TMC2100
Do you have any high pitched whine with the TMC2100? When the printer is not moving but the motors are still on, do you hear anything? Thanks.
No sir. All that I hear are the fans
Good to know, maby time then that i update my stepsticks
Very appreciative of your post. Does clear up some things, and about that electrical thing, why don’t they have the power switch at the front?
That was an interesting read, thanks!
I bought this printer and it has not arrived yet. I thought I had made a mistake but reading here I reassured myself. Thank you! I hope I can make these changes.
Does the guide also apply to the TMC2130?
sorry for my english but I translate with google.
I found this for cooling. Maybe it’s useful … https://www.thingiverse.com/thing:2774598
It should but I would do some research. 2130 are smarter and might need to remove or maybe just slide the pins up. I would also be weary of voltage if not using the bus to set. Start small then work your way up until no skipped steps. Maybe Gearbest send a set and I could do a second part setting them up. Good thing is this screen only uses 1 aux port and there are plenty extra pins to do a full integration.
I try not to be so opinionated but I believe in this one over all
@Karl Johnson
It’s my first printer and I have no experience. I will have to study and learn many things. I ordered the drivers in, but I’ll wait to get something done before mounting the TMC2130s.
I hope you will make a guide for these too! YOU ARE A BIG AND THANKS FOR ALL!!
I followed your guide and installed the TMC2100 but I could not get the VRef voltage only with the USB power supply.
By connecting only USB, the VRef voltage reached a maximum of up to 0.40
By connecting also the 220v primary power I managed to adjust the Vref as above.
the jumpers under the drivers must be removed?
@bustinex
Sorry have not been getting updates. The jumpers need to be removed on certain drivers.
the jumpers under the drivers must be removed?
it is enough to install the tmc2100 and change the cable orientation without using any software, is it correct and what could be another driver instead of tmc2100 your sharing is great thank you very much
Is there some one who can tell me whether the fan should always rotate? My printer, that has a hardware problem somewhere, i.e. motion of X,Y and Z fails completely, shows 24V on the PSU terminal, but the fan remains completely silent. If the fan perhaps controlled by temperature?