
ANAVI Thermometer was launched on CrowdSupply in January. It is an ESP8266 WiFi board with a built-in DHT22 temperature and humidity sensor, support for external DS18B20 waterproof temperature sensor, as well as other sensors thanks to three I2C sensors.
I received the ANAVI Thermometer starter kit last month, and I’ve only found time to play with it in the last few days. I’ll start with a unboxing, assembly guide, before showing it action, and I’ll try to make it interface with Home Assistant over MQTT.
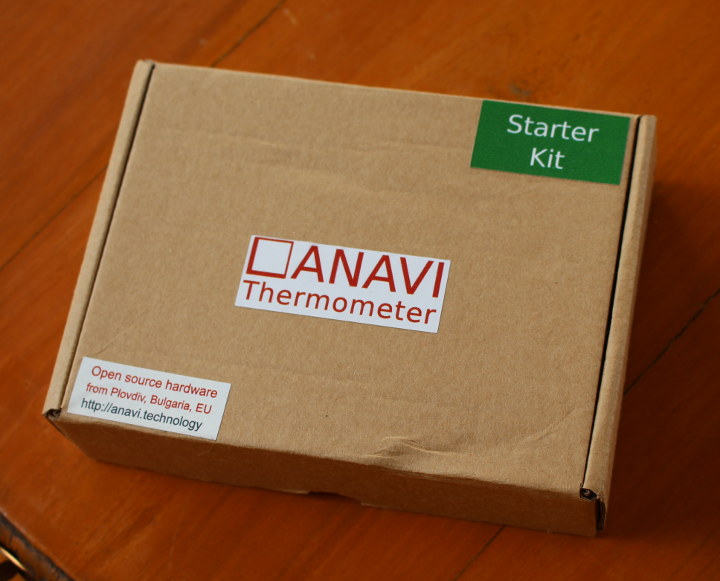
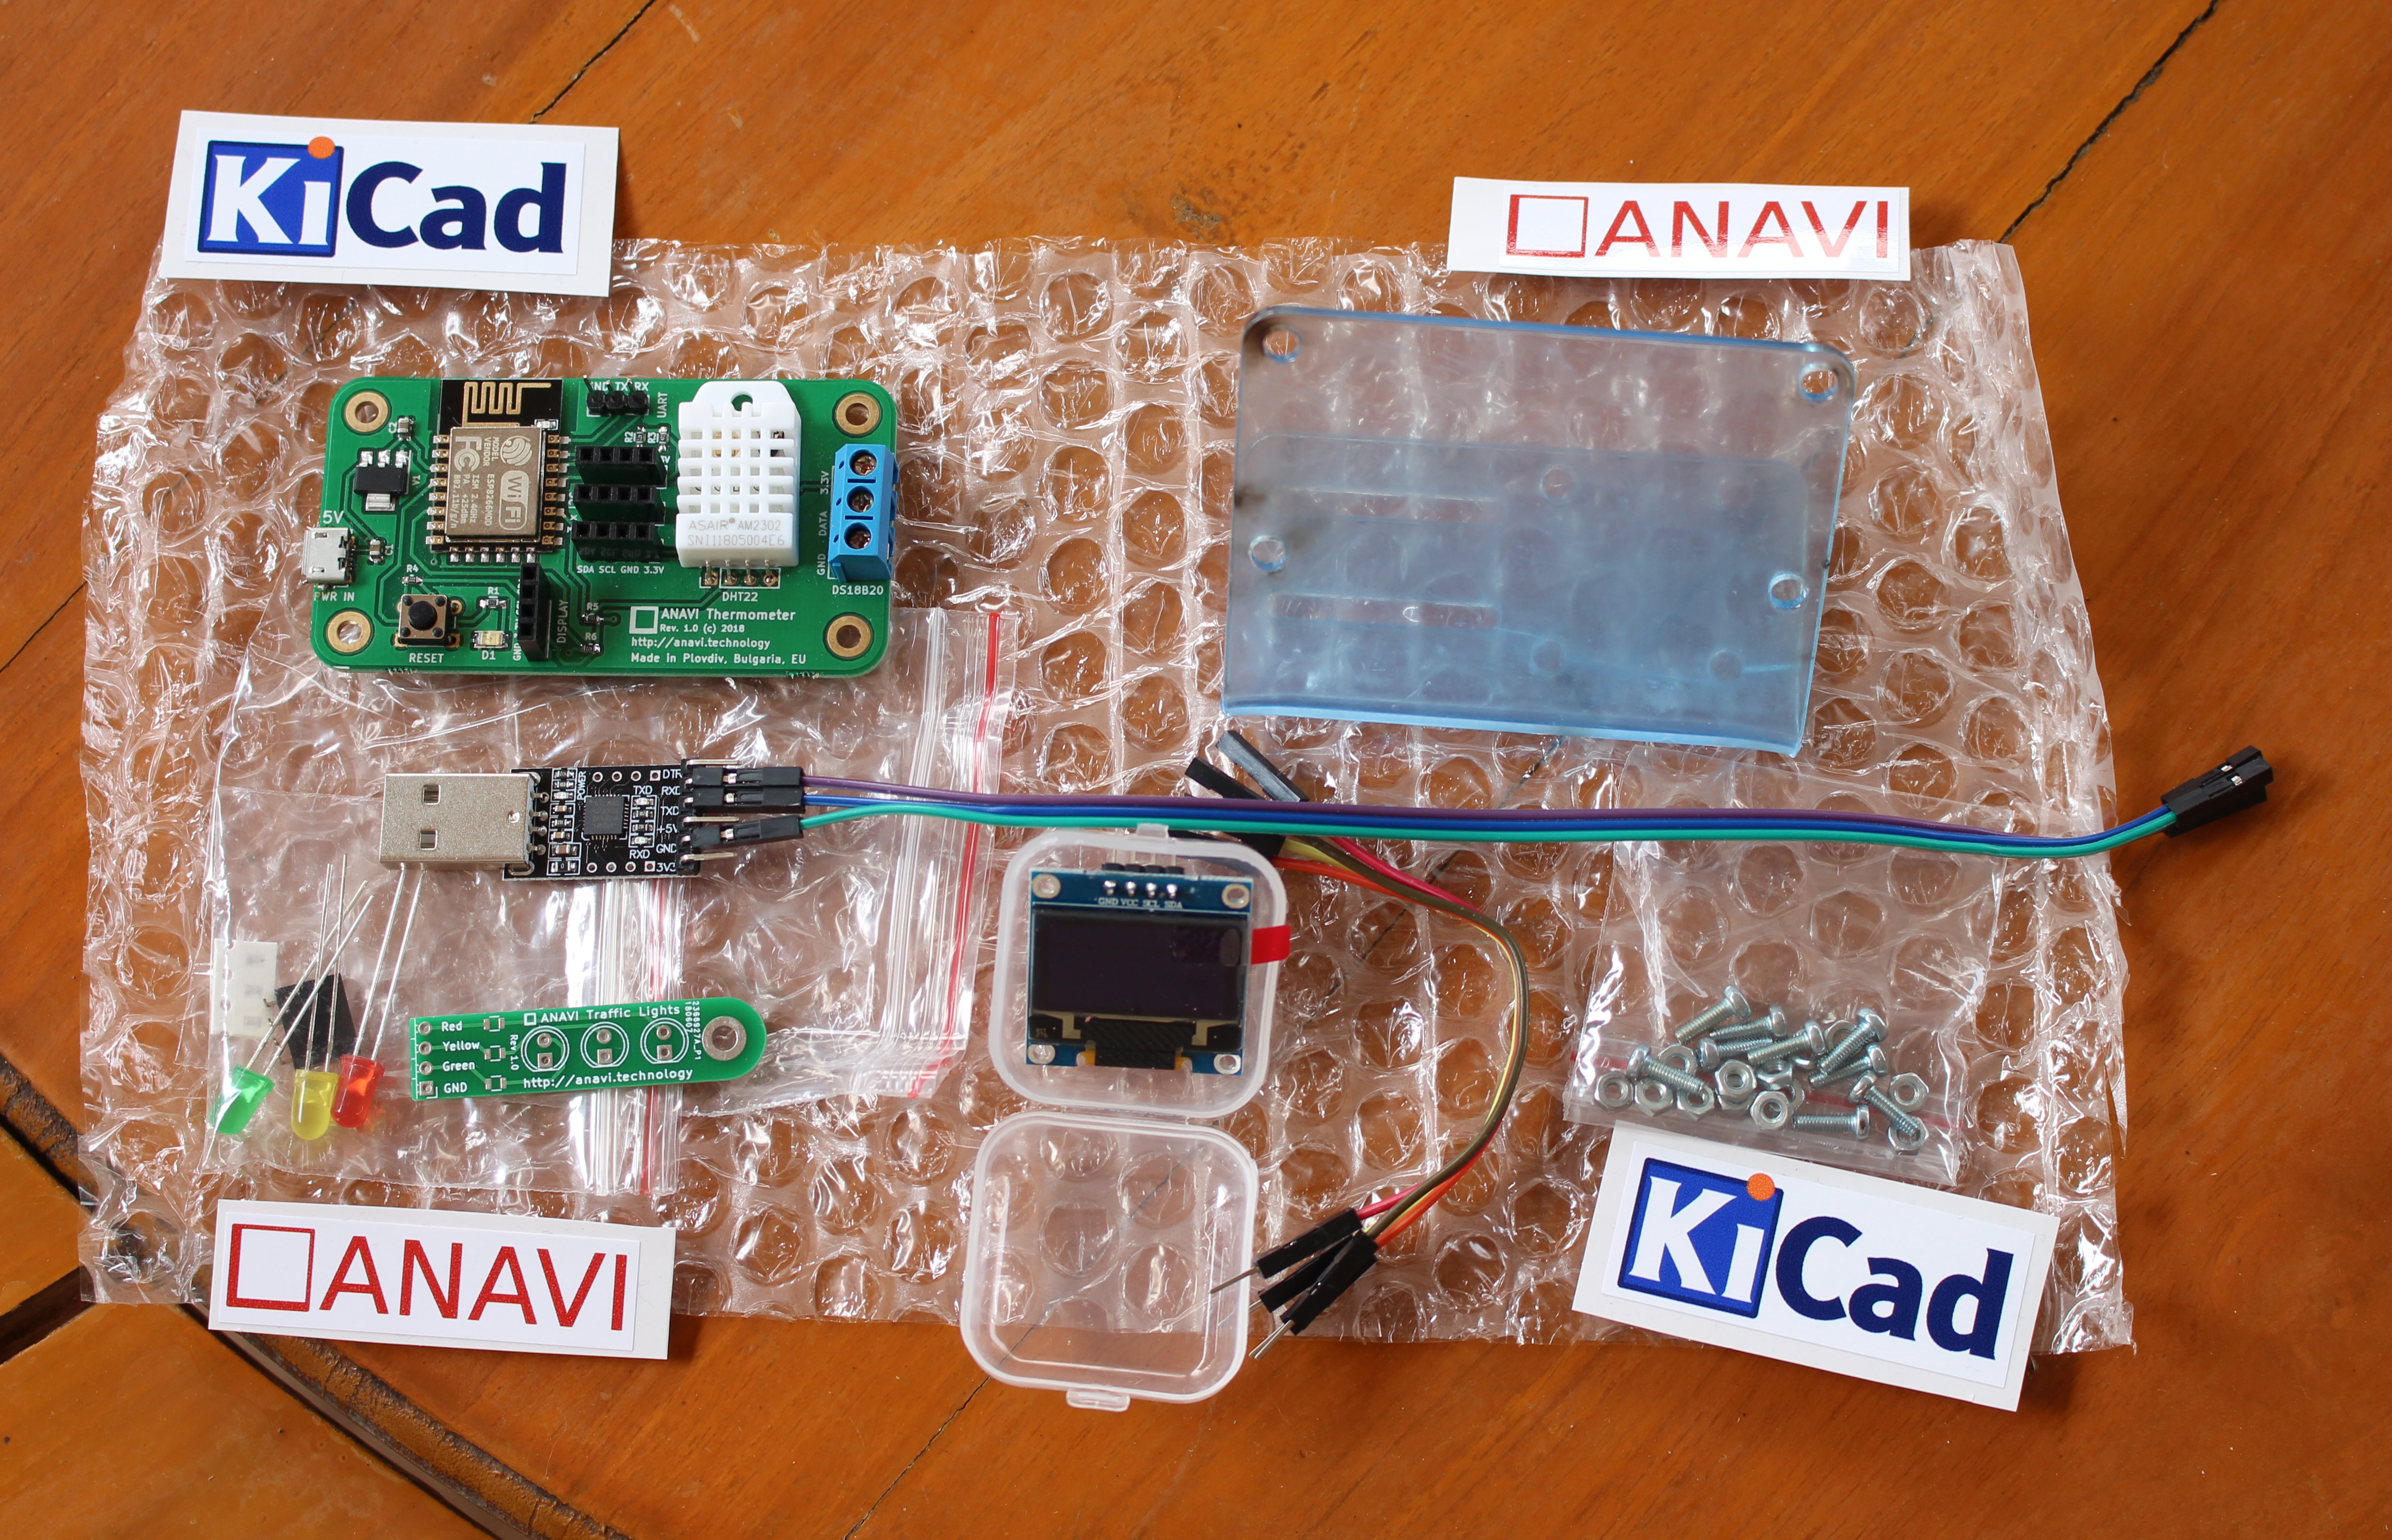
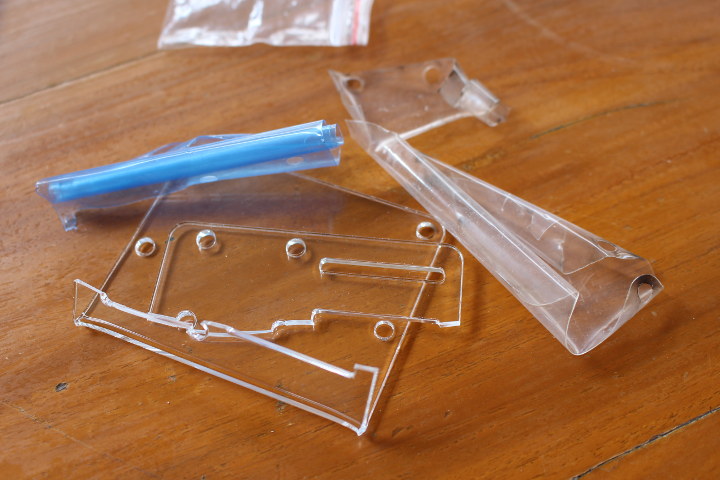
ANAVI Thermometer Starter Kit Unboxing
The kit comes with ANAVI Thermometer board, a plastic stand, a USB to TTL debug board, an I2C OLED display, a few nuts and bolts, and a couple of KiCad and ANAVI stickers. Leon ANAVI also added a traffic light board and LEDs, but it’s not normally part of the kit 🙂
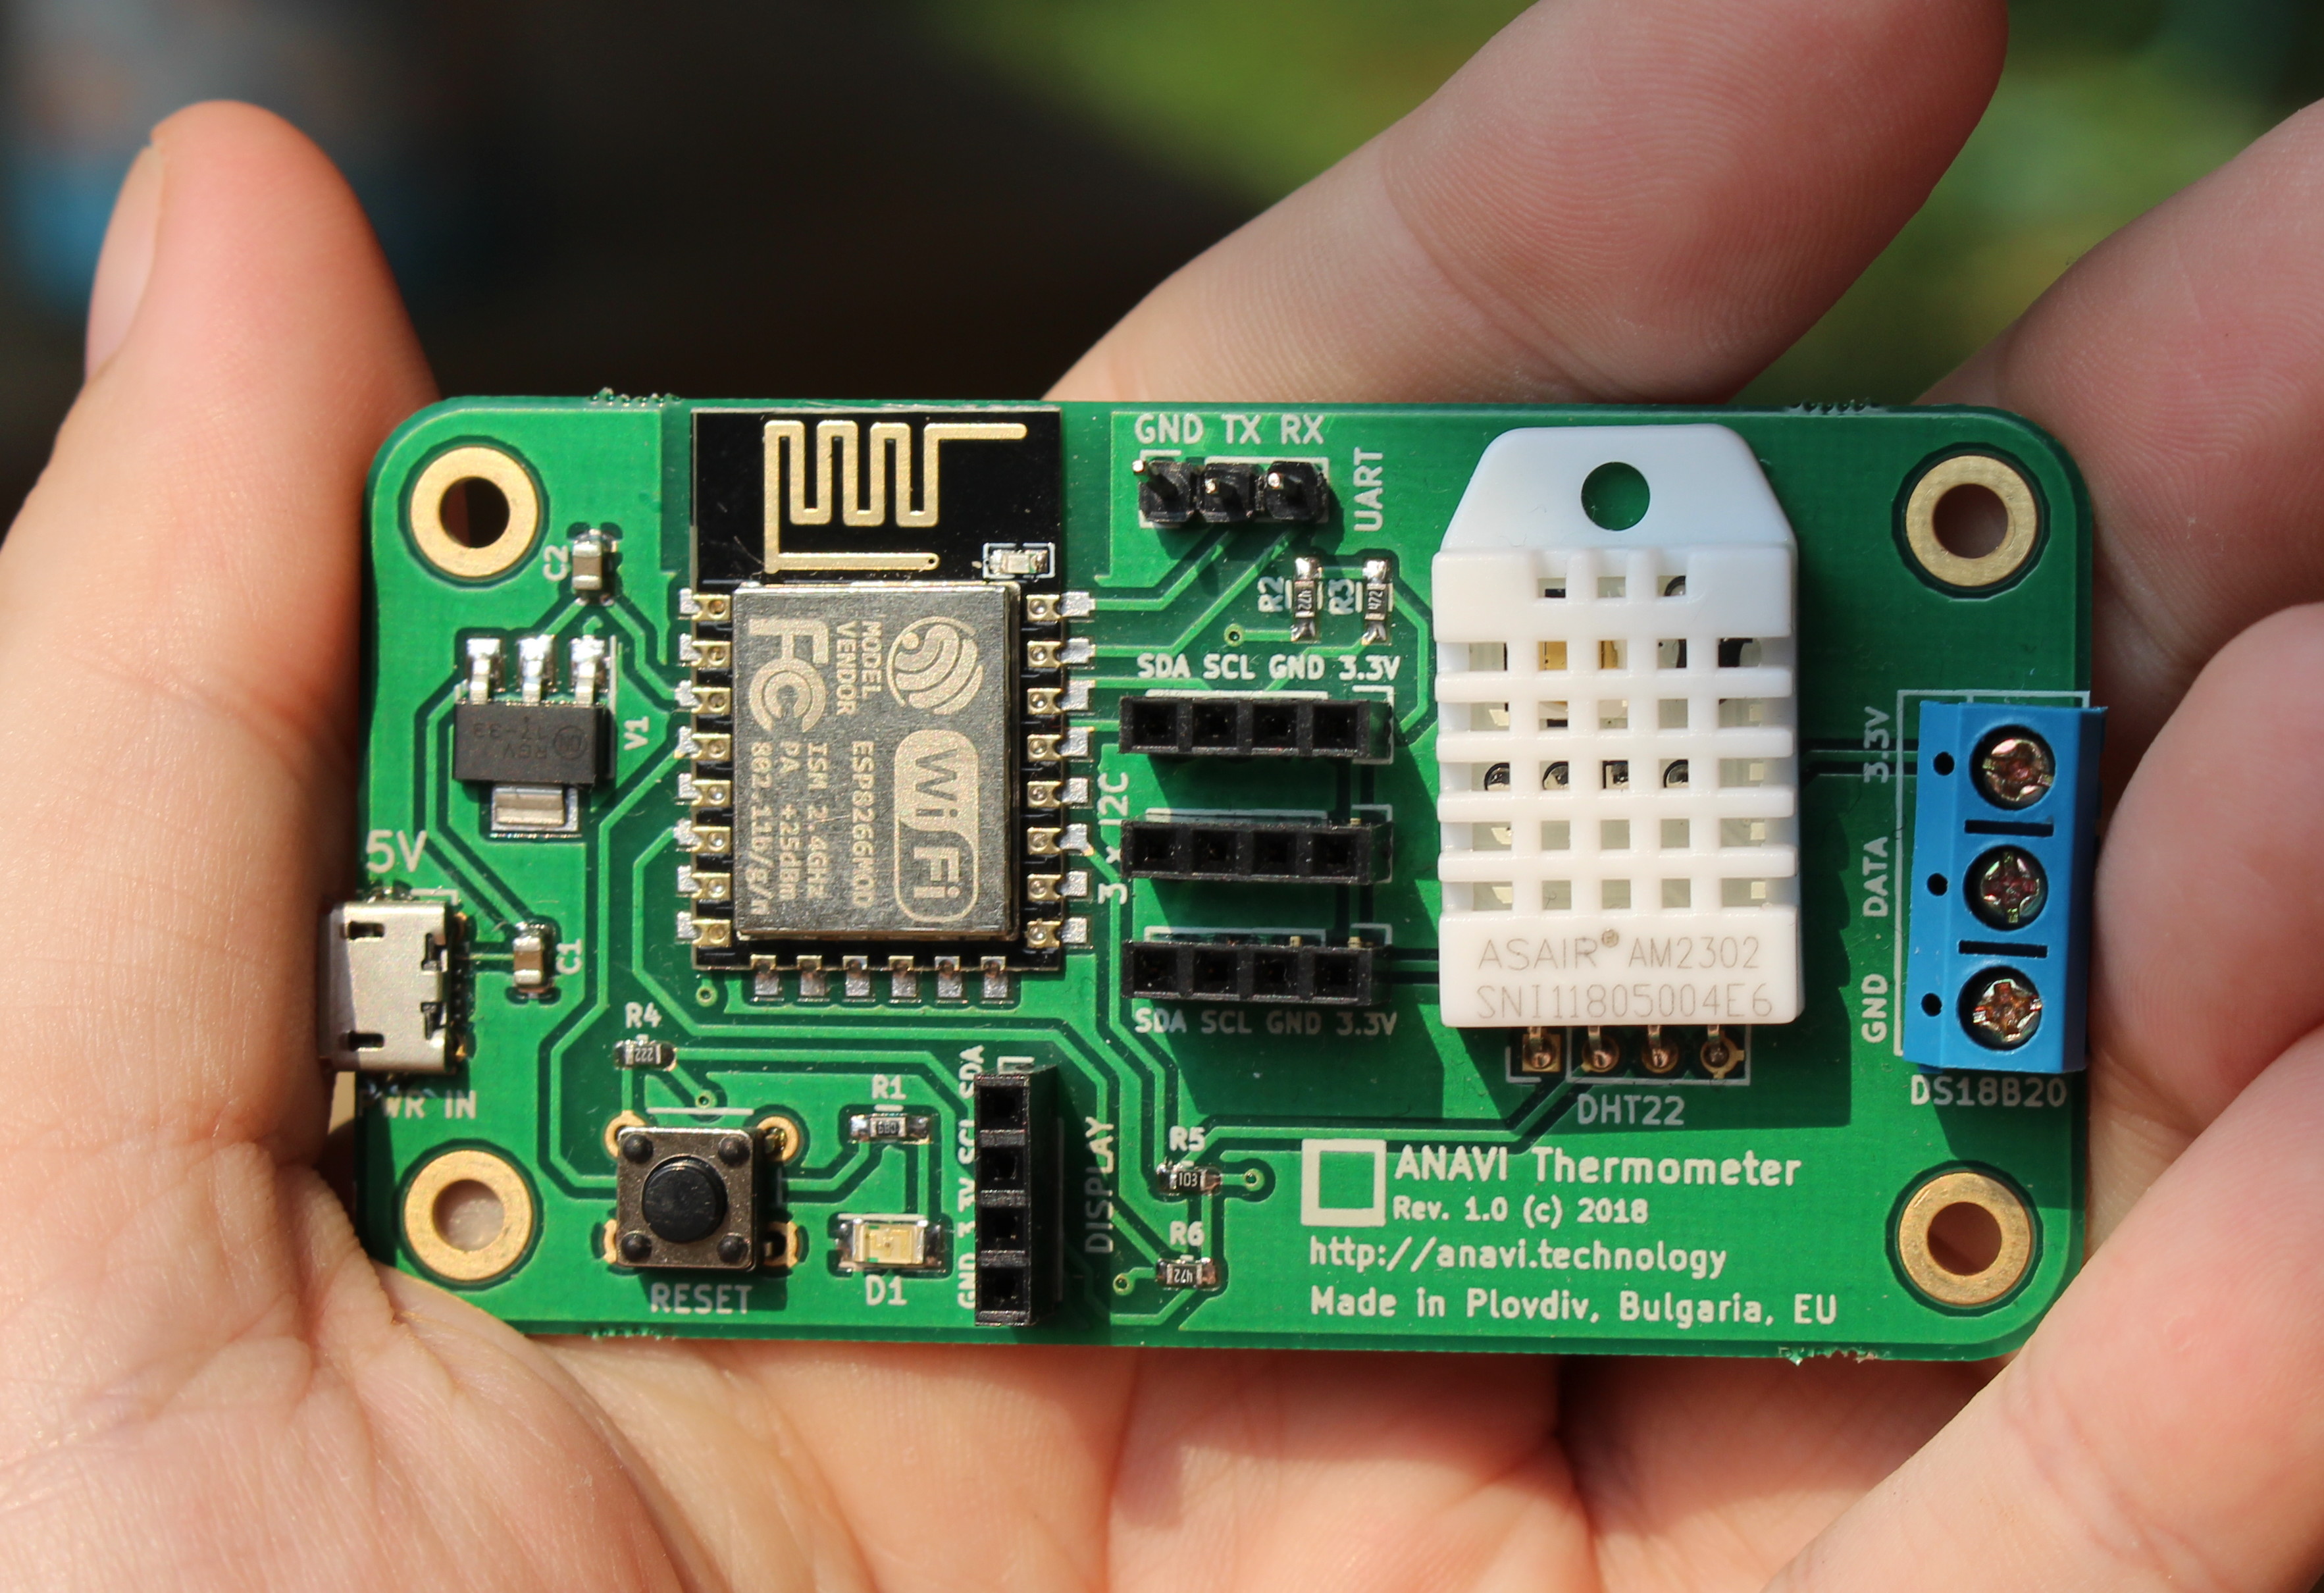
ANAVI Thermometer board include an ESP8266 module, AM2302 (wired DHT 22) temperature and humidity sensor, a terminal block for DS18B20 waterproof temperature sensor, four I2C headers including one for the display, a 3-pin UART header for programming, a micro USB port for power, and a reset button.
Nothing to see on the other side of the board.
ANAVI Thermometer Starter Kit Assembly
 The first thing you’ll want to do it to peel off the protective cover from the stand, as keeping it would make the OLED hard to read.
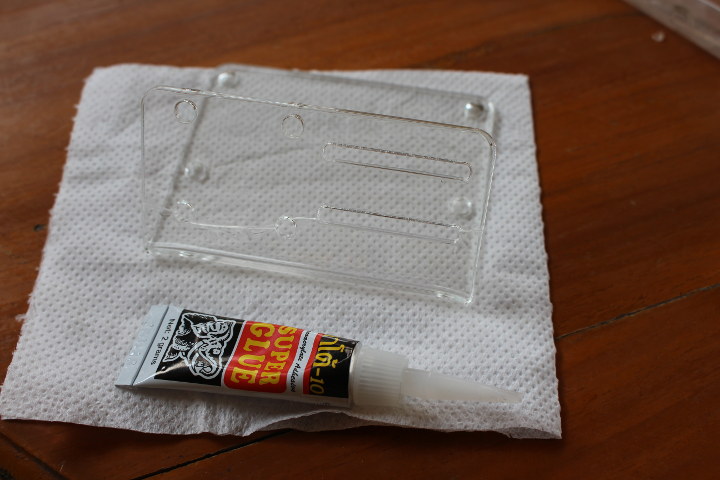 The stand did not really enjoy its intercontinental trip however, and arrived broken, but nothing that Super Glue could not fix.
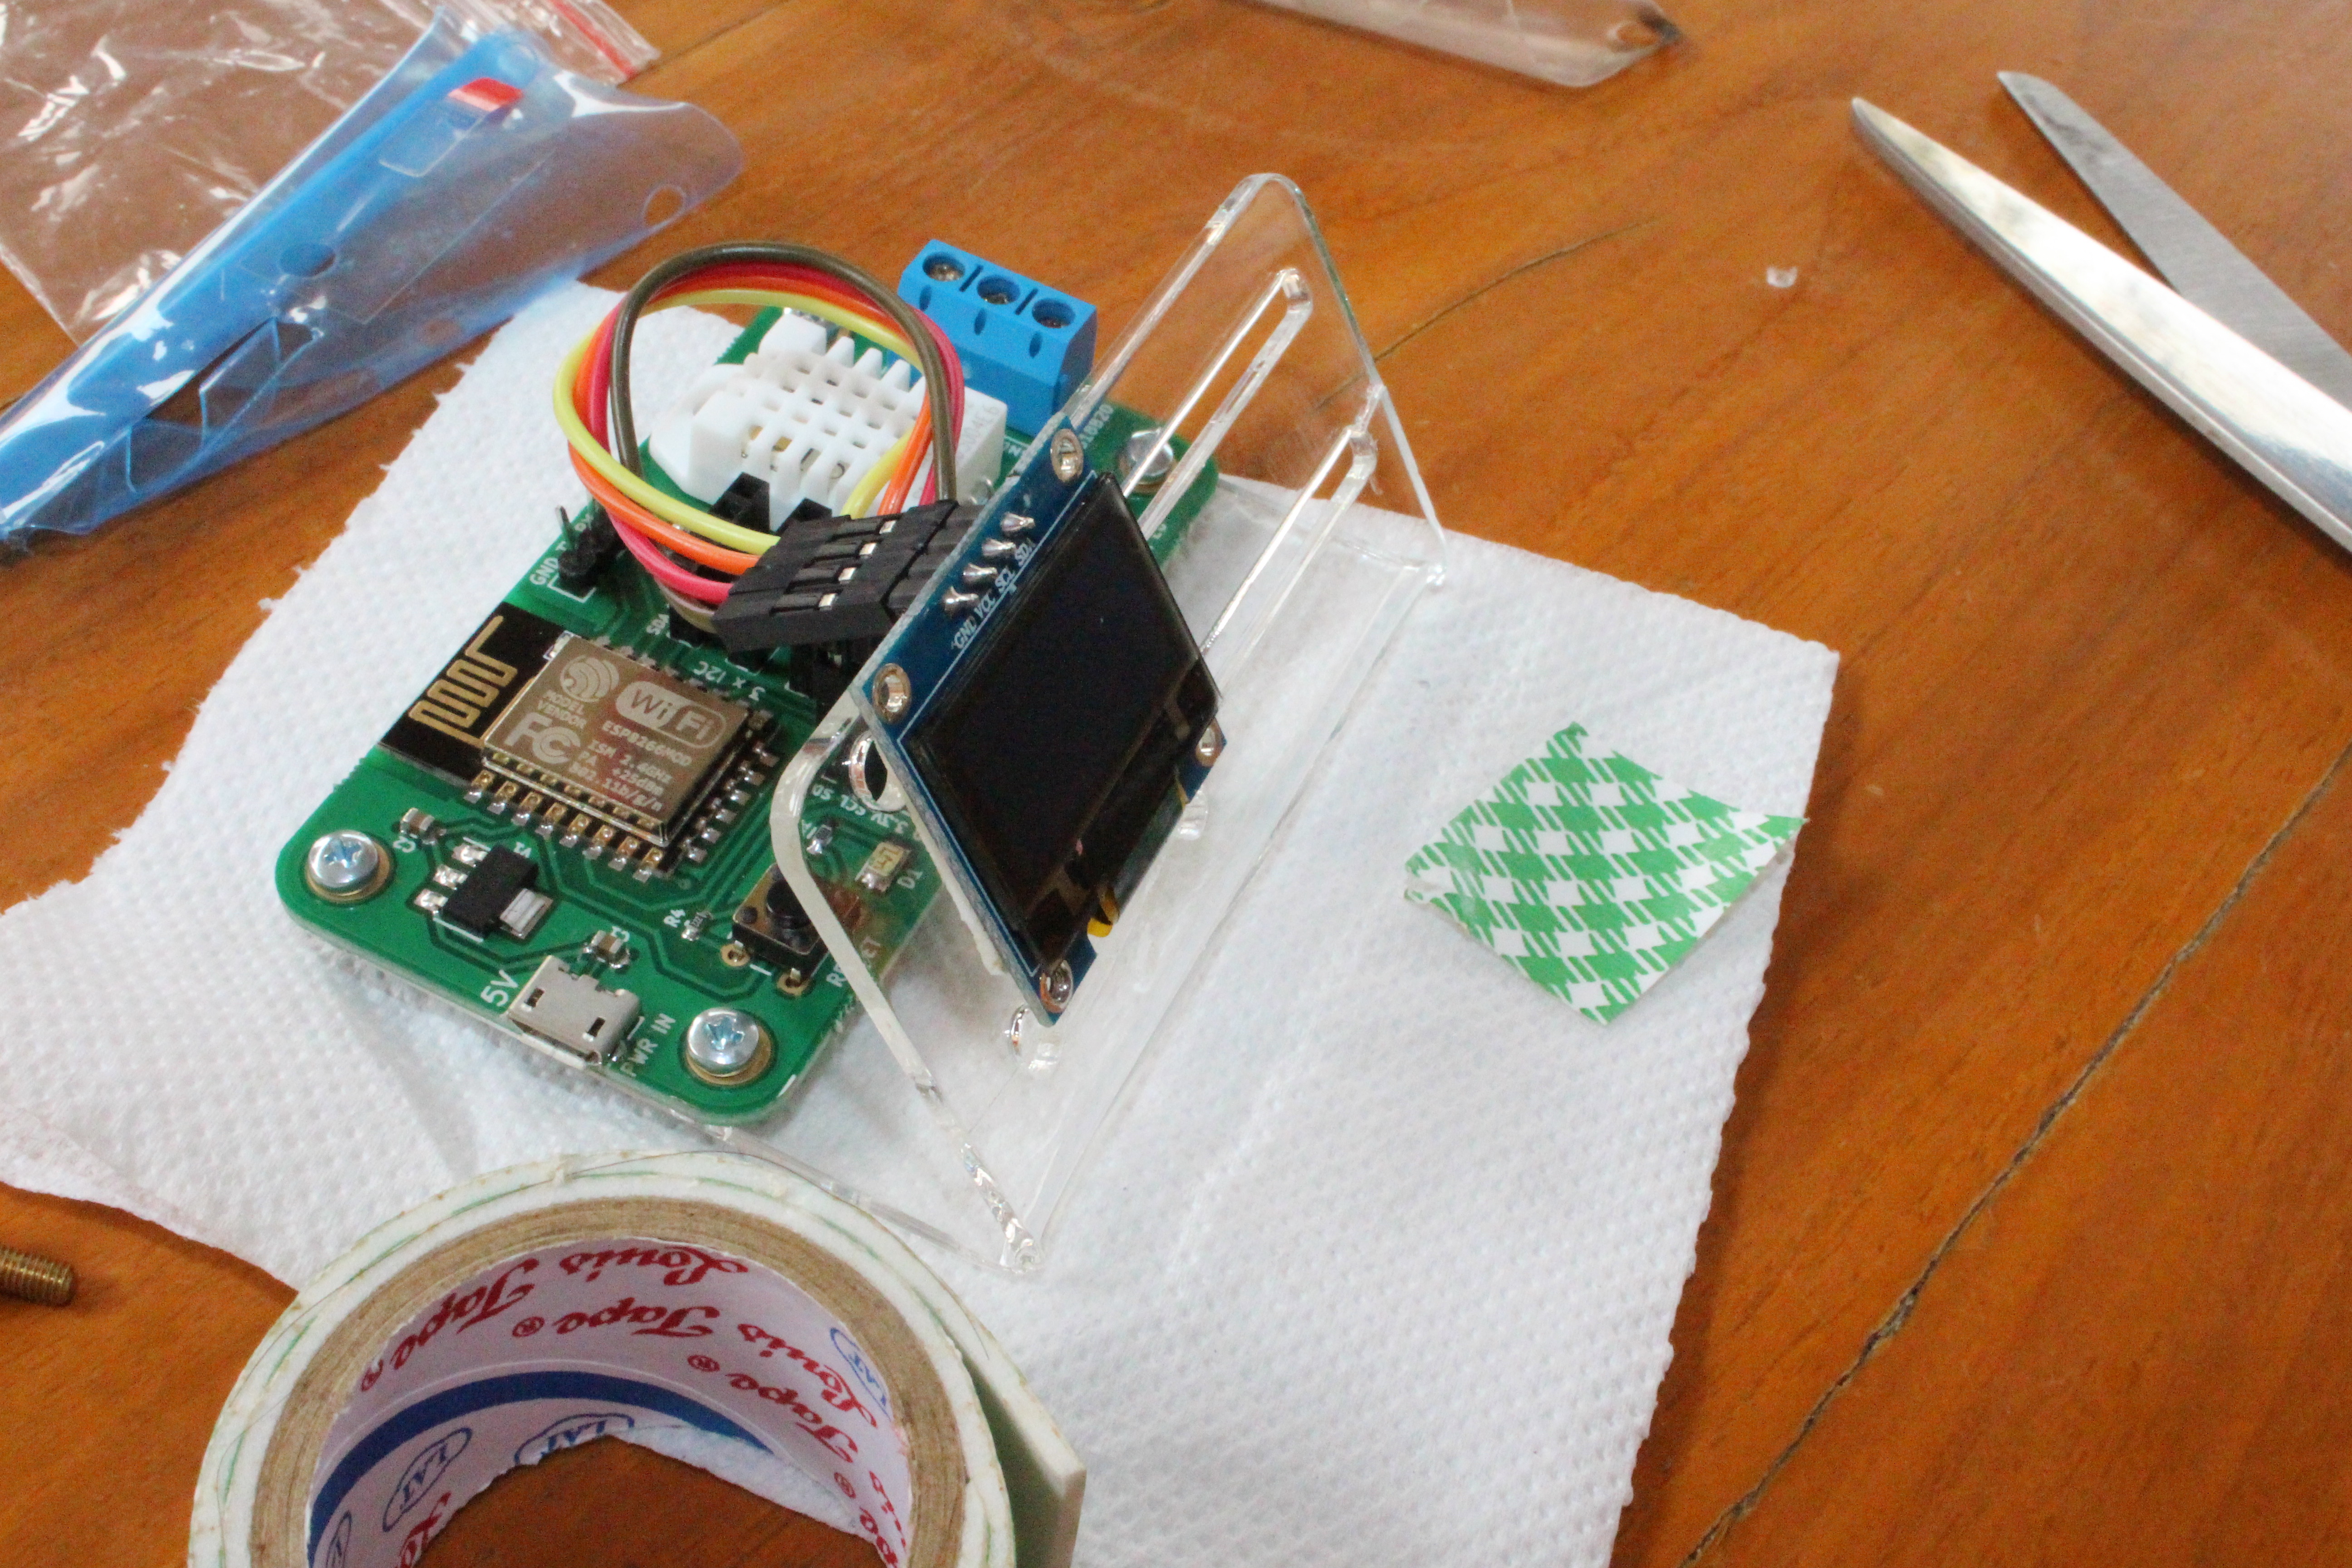
I could fasten the main board to the base of the case with the provided nuts and bolts, but the latter were just to large for the OLED display, so instead I opted for dual-sided sticky tape to stick the display to the top of the stand.
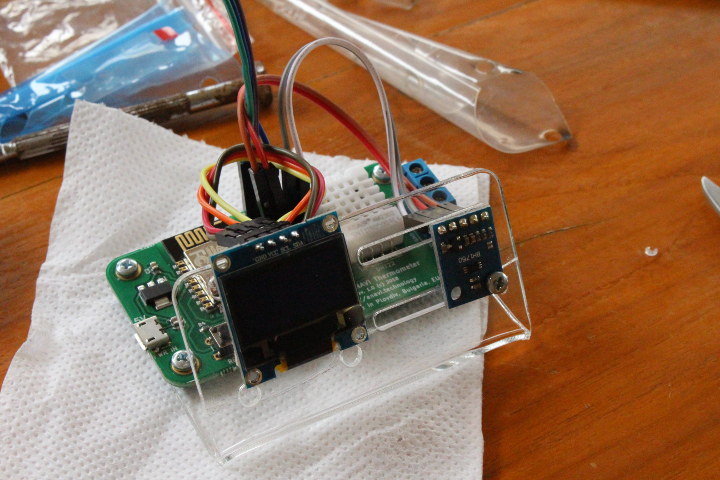 I also took a BH1750 light sensor from ANAVI Light pHat Starter Kit to demonstrate how you could add more sensors to the stand. There’s enough space for two extra I2C sensors.

Initial Setup for ANAVI Thermometer
Documentation for the board and kit can be found in Github. So we’re going to follow this, and expand where it’s not as detailed as it could be.
We need to connect the board to a 5V USB power source (1A or greater recommended), but one of the USB ports of my laptop was enough to power the board apparently.
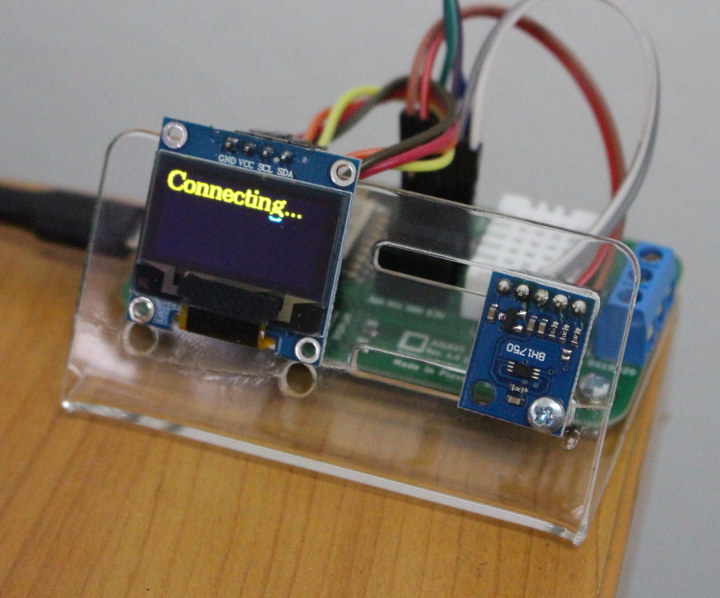
The OLED display with just show “Connecting…” meaning we have to configure the board to connect to our local WiFi network. The board will show as “ANAVI Thermometer Controller” in the list of access point in your phone or computer.
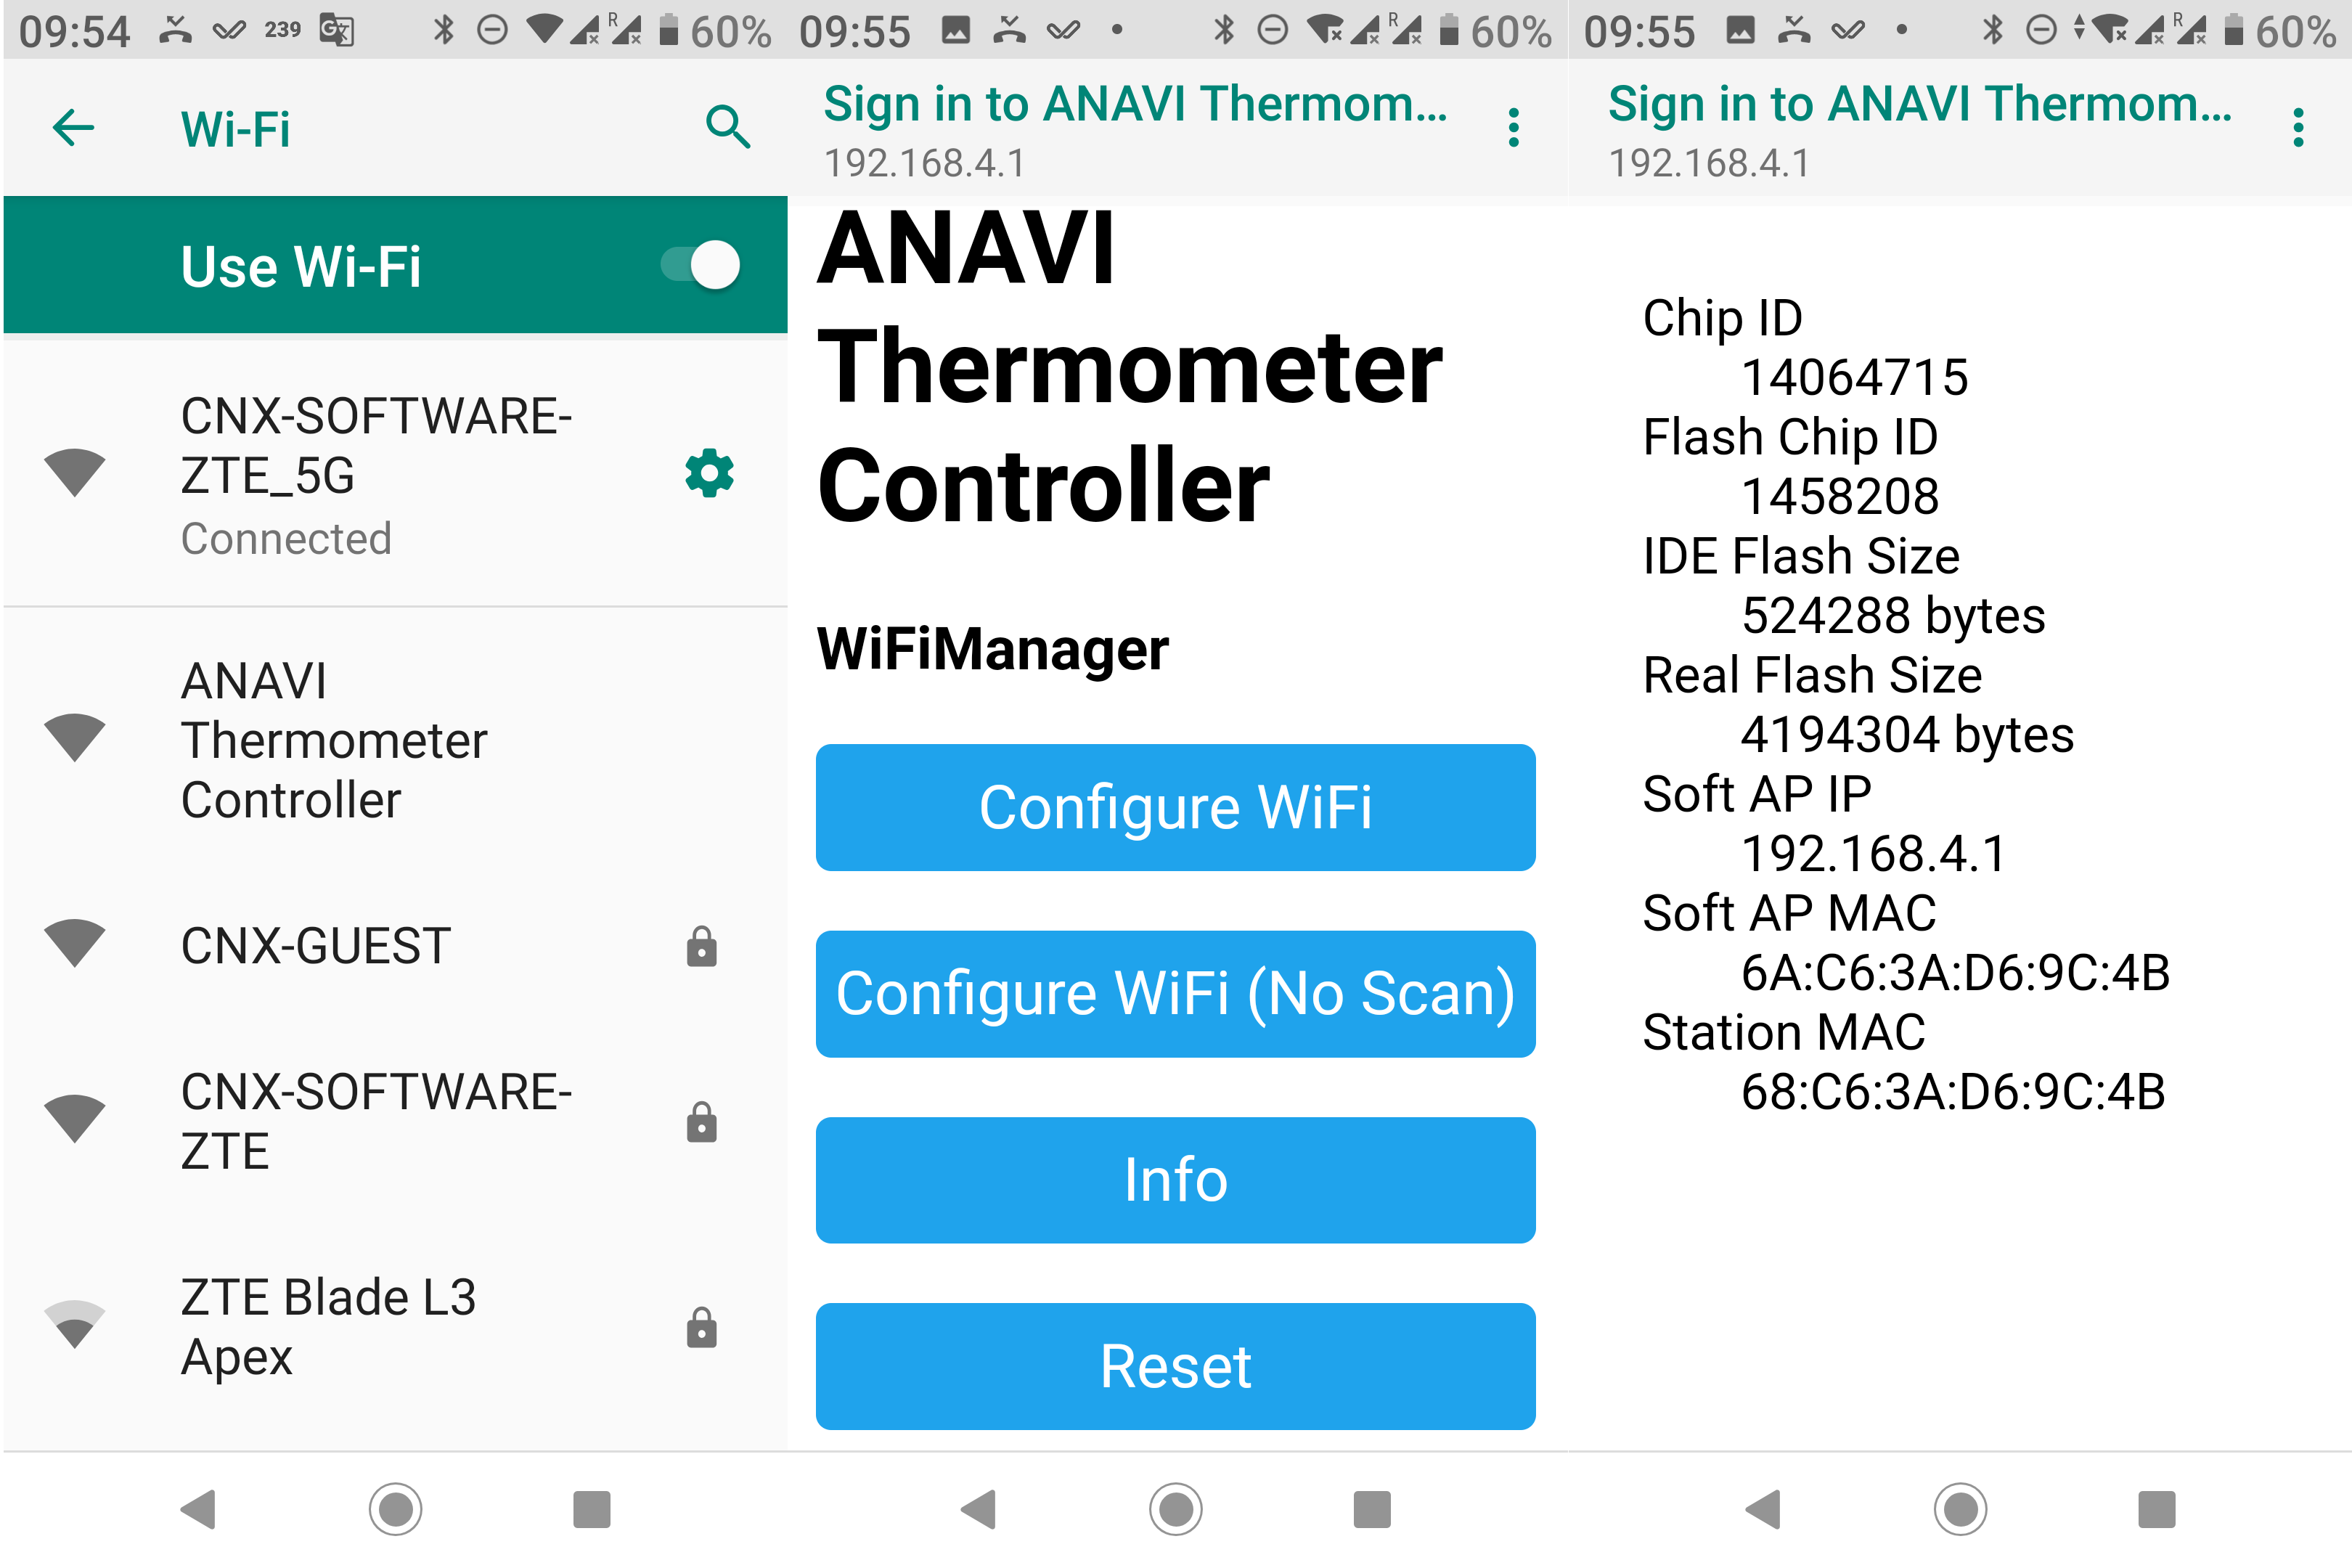
We’ll be asked to sign in to the access point, and doing so will bring us to a “Sonoff-Tasmota” like web interface to configure WiFi, and get some system information (right of screenshot above). Let’s now tap on “Configure WiFi“.
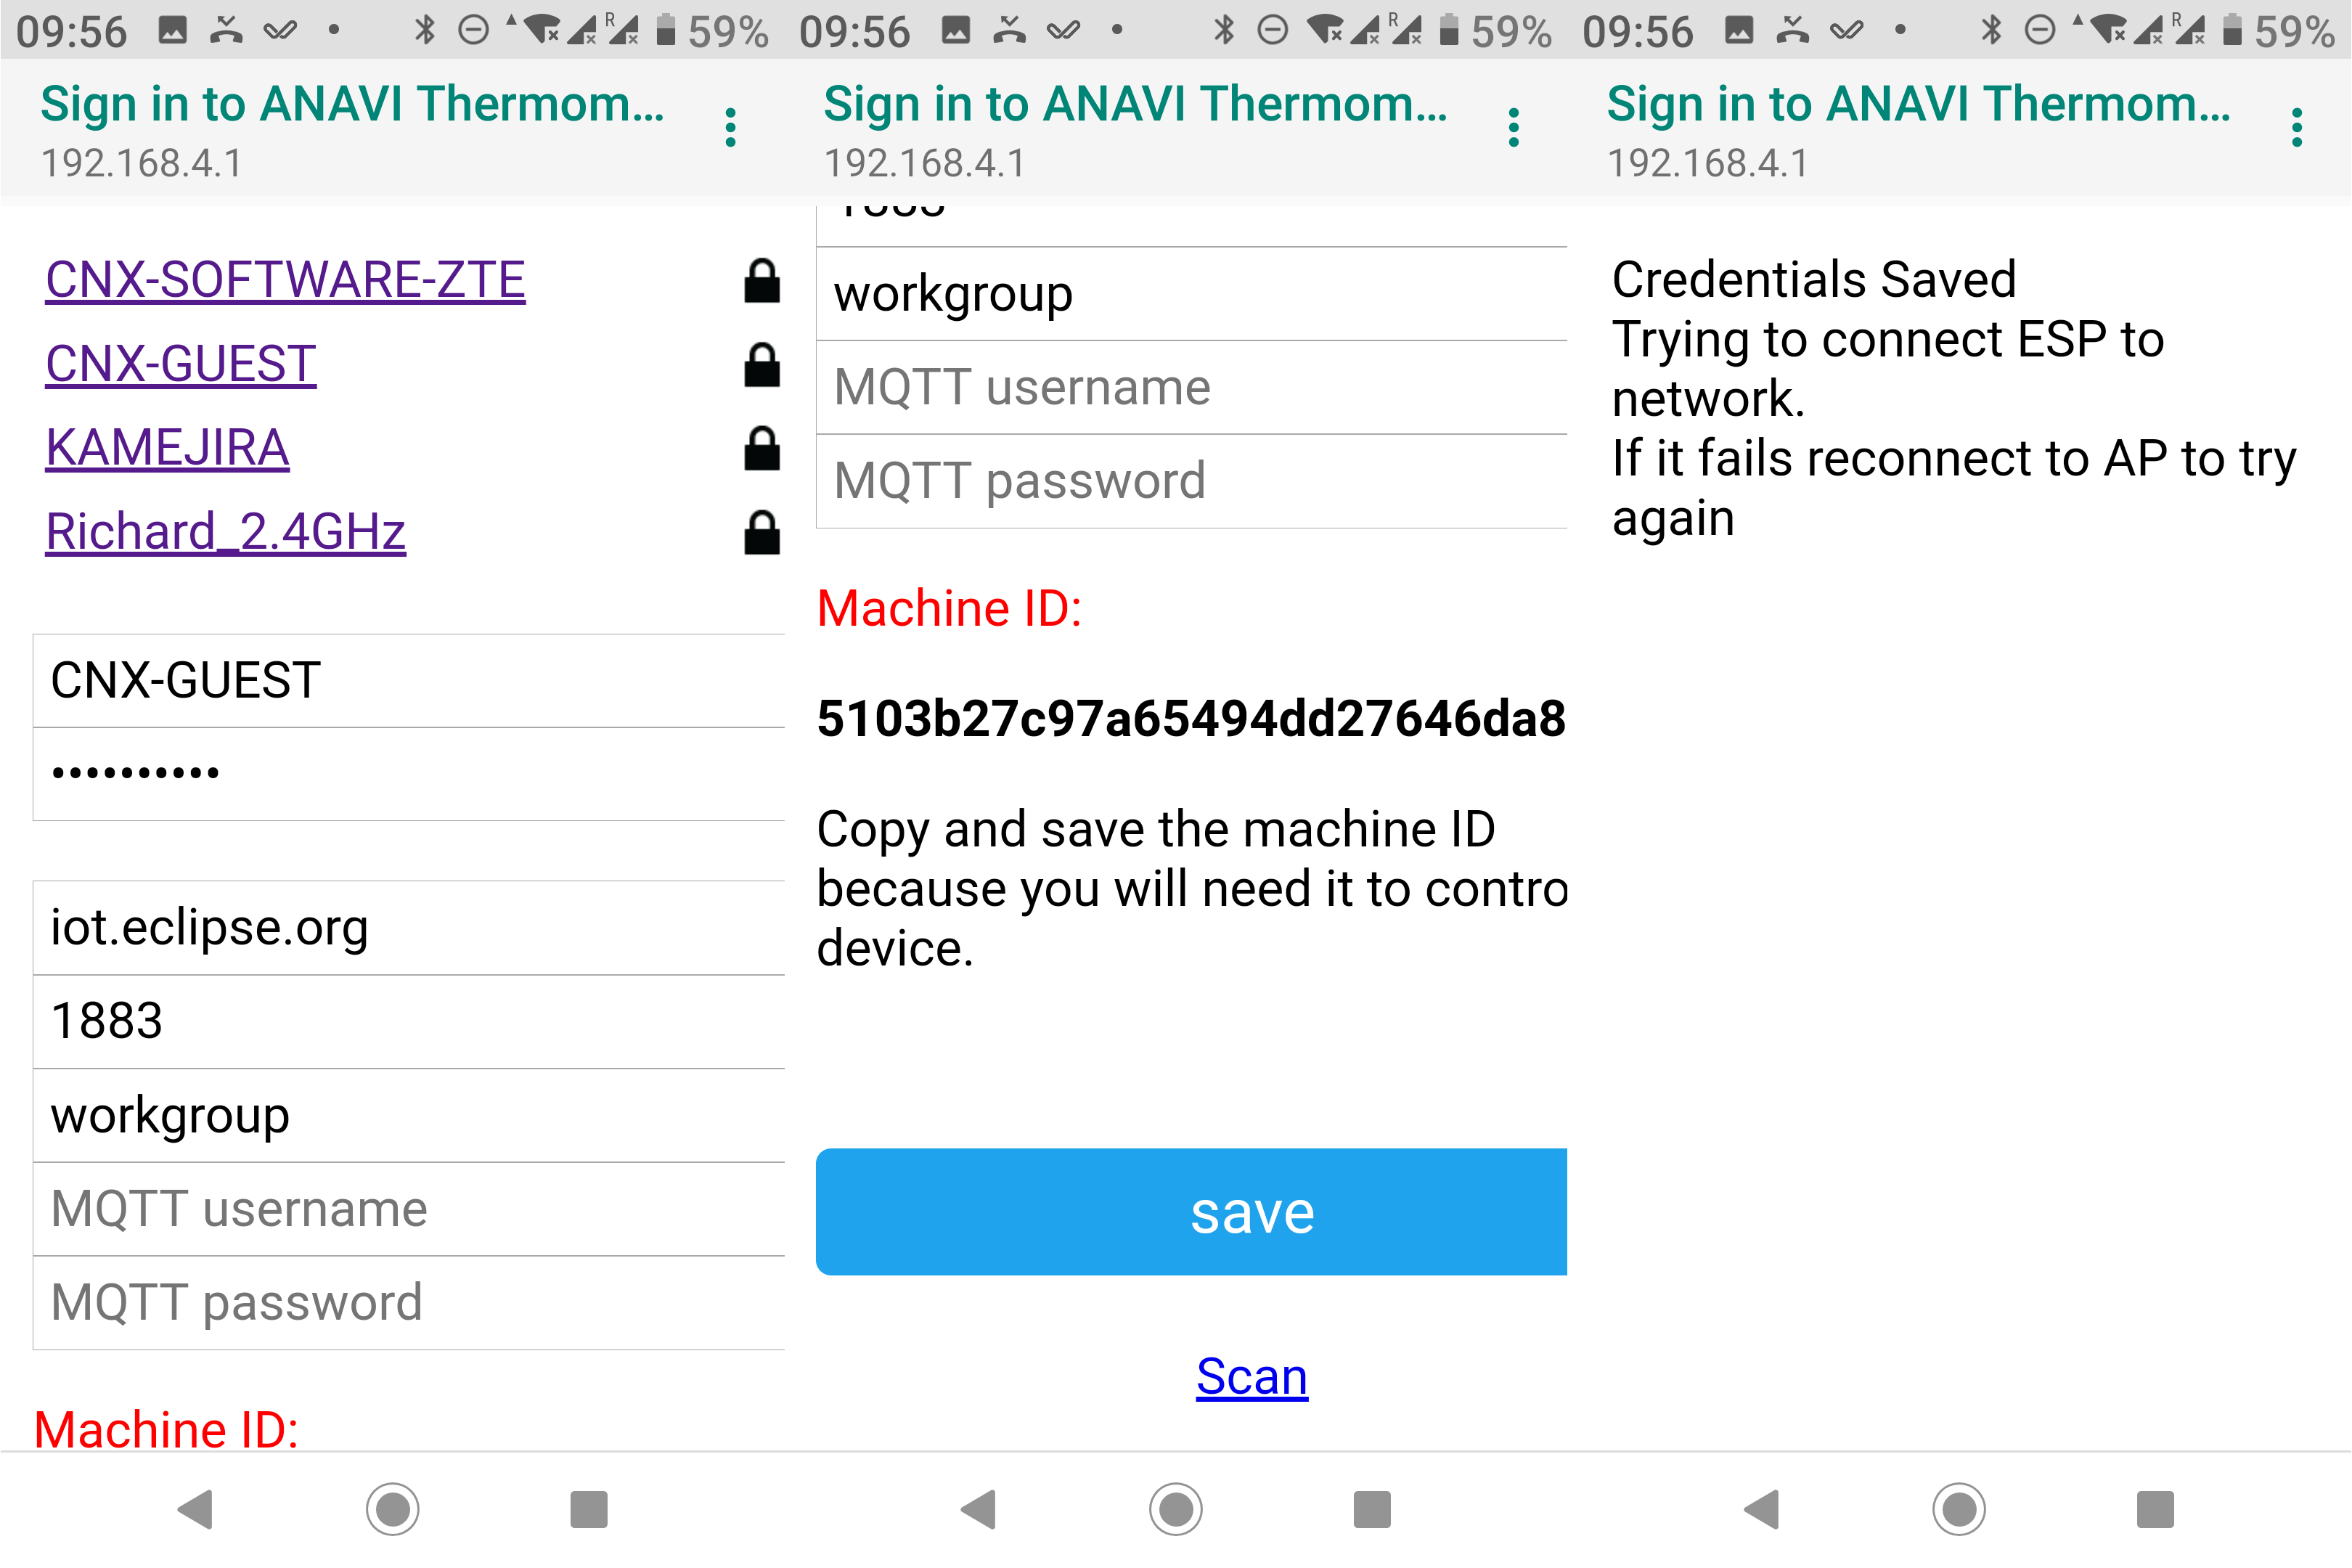
It will automatically scan for 2.4GHz access point, and you can select one and enter the password, as well as configure MQTT if needed. The machine ID is not really needed here, so you can discard it. The user interface is actually the same as for ANAVI Light Controller which could be controlled from a web interface, so that’s why it’s there I suppose. Click on the Save button, your board should then connect to the WiFi router, and after a few second you should see data shown on the OLED display.
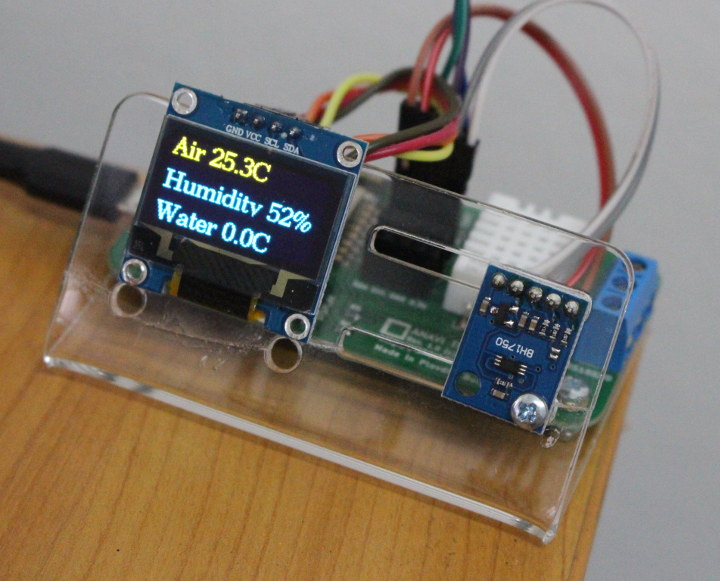 I will show both air temperature and humidity data from DHT22 sensor, but only 0.0°C for water temperature since DS18B20 temperature probe is not connected.
I also connected the serial board to my computer to check the output with minicom with 115200 8N1 /dev/ttyUSB0 configuration:
|
1 2 3 4 |
Light: 295Lux Air 28.2C Humidity 36% Water 0.0C |
The light sensor appears to be detected too, but I just covered it ith my finger to make sure it did not output garbage data:
|
1 2 3 4 |
Light: 0Lux Air 28.2C Humidity 36% Water 0.0C |
and everything looks good as the value should indeed be 0 lux in the dark.
If all you wanted to do is a system with a small display to show temperature and humidity you’d be done.
Monitoring ESP8266 Temperature & Humidity Sensor with Home Assistant
But you’ll likely want to access the sensor data remotely, and take action depending on the temperature and humidity values. So we’ll see how to install and configure Home Assistant and display temperature and humidity data in the dashboard.
[Important update: There are now easier and working instructions to configure ESP8266 ANAVI hardware with Home Assistant. Read Getting Started with ANAVI Gas Detector Starter Kit and Home Assistant for details. I’ve kept the post below unchanged]
A Raspberry Pi 3 is the recommended hardware to install Home Assistant, but I don’t have any spare board around, and instead decided to install Home Assistant via Docker in my Ubuntu 18.04 laptop. I first created a working directory called homeassistant before installing docker.io and the home-assitant container:
|
1 2 3 |
mkdir ~/homeassistant sudo apt install docker.io sudo docker run --init -d --name="home-assistant" -v ~/homeassistant:/config -v /etc/localtime:/etc/localtime:ro --net=host homeassistant/home-assistant |
The latter may take a few minutes. Once it’s done, edit the configuration file in homeassistant/configuration.yaml in order to modify the sensor section for ANAVI’s temperature and humidity sensors:
|
1 2 3 4 5 6 7 8 9 10 11 |
sensor: - platform: mqtt name: "Temperature" unit_of_measurement: 'C' state_topic: "home/room/temperature" value_template: "{{value_json.temperature}}" - platform: mqtt name: "Humidity" unit_of_measurement: '%' state_topic: "home/room/humidity" value_template: "{{value_json.humidity}}" |
and configure the MQTT broker:
|
1 2 |
mqtt: broker: 127.0.0.1 |
Install mosquitto MQTT broker:
|
1 |
sudo apt install mosquitto mosquitto-clients |
In theory, we should be able to restart home-assistant container in order to reflect our new configuration file with the command:
|
1 |
sudo docker restart home-assistant |
But I had all sorts of permissions issues related to apparmor, so instead I just restarted my computer, and connect to Home Assistant dashboard at http://localhost:8123.
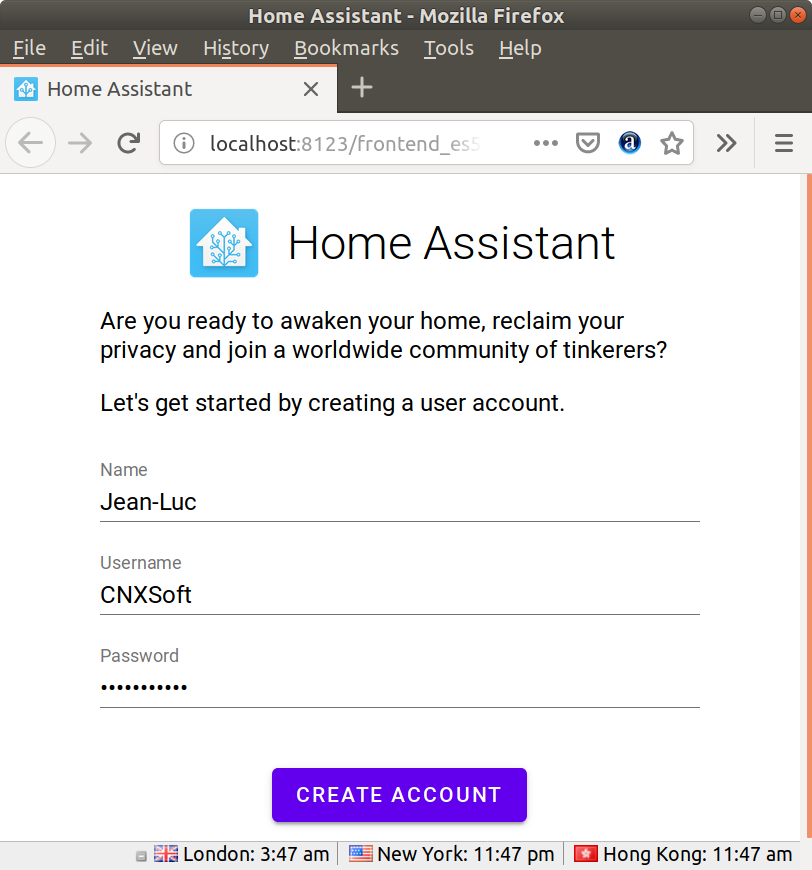 The first time we are being asked to create an account, and we’ll then be brought to the dashboard, where we can see the temperature and humidity value setup on the configuration file.
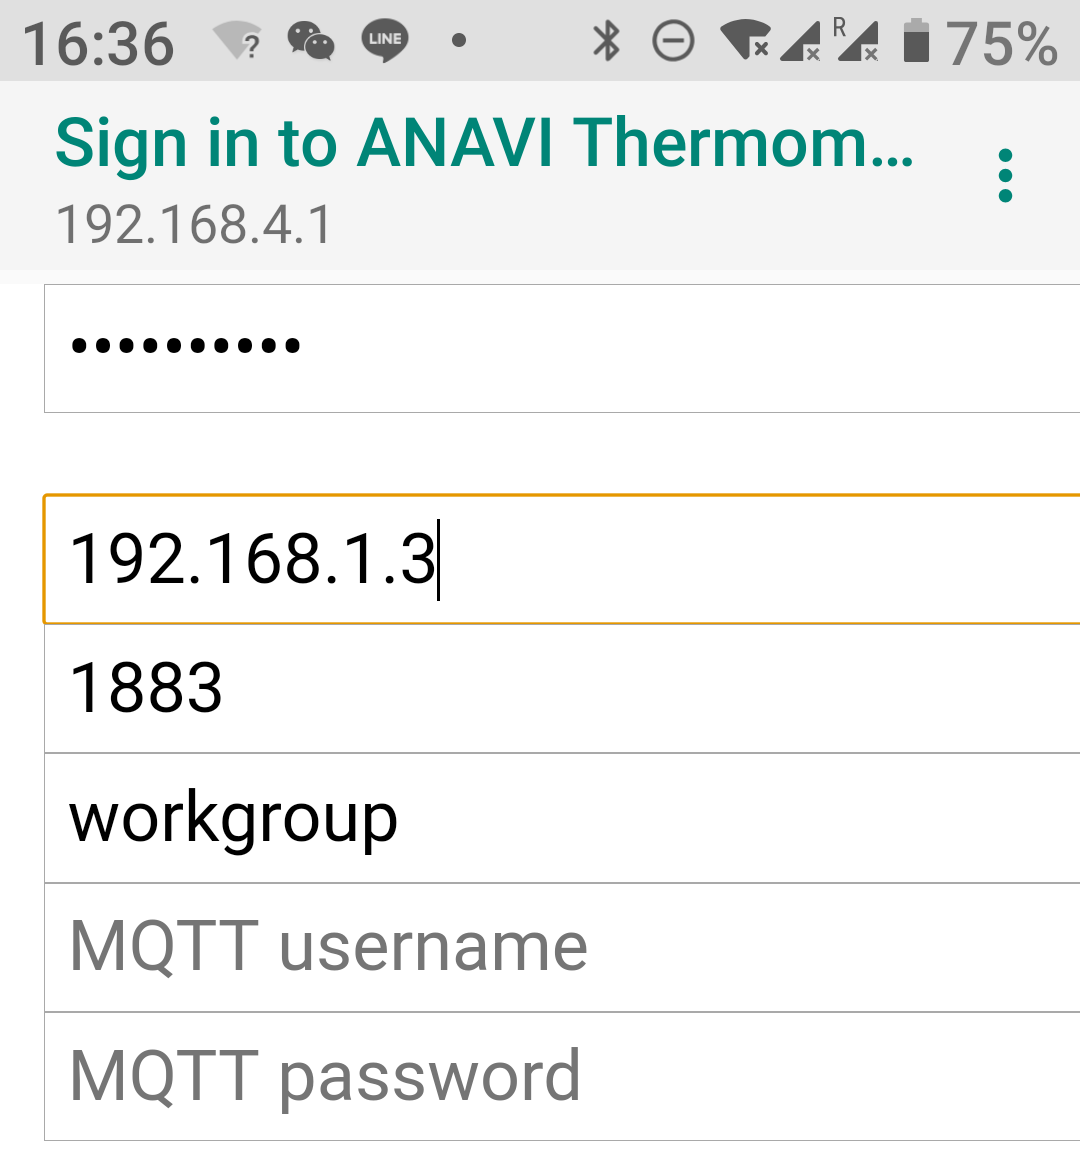
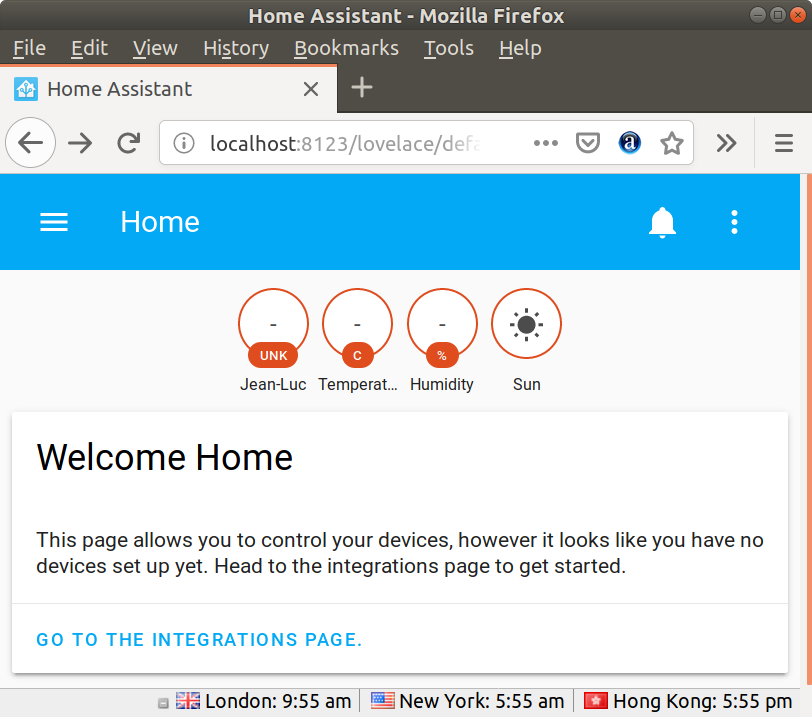 However the data is not updated because ANAVI Thermometer MQTT server is not set to your MQTT broker IP address. I tried to go to the board’s web interface, but apparently it’s only enabled in access point mode, meaning I had to factory reset the board by pressing the reset button for more than 10 seconds, and restart the configuration but this time setting the IP address to my laptop.
All good, but if we look at the serial console, there’s a small problem:
|
1 2 3 4 5 6 7 8 9 10 11 |
Should save config connected...yeey :) saving config failed to open config file for writing {"mqtt_server":"192.168.1.3","mqtt_port":"1883","workgroup":"workgroup","usernap 192.168.1.9 MQTT Server: 192.168.1.3 MQTT Port: 1883 MQTT Username: MQTT Password: Attempting MQTT connection...connected |
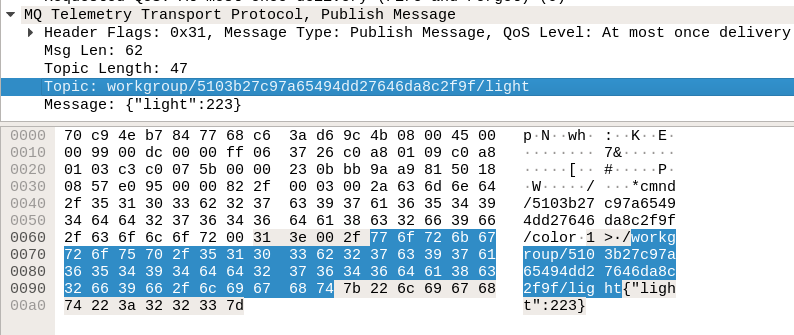
“Failed to open config file for writing”. Maybe that’s OK… We’ll see. The temperature and humidity are stuck to 0.0°C and 0% though, and while I can capture MQTT data with Wireshark that’s only for the light sensor.
The trick to have temperature and humidity working again is too simply disconnect and reconnect the power, but you’ll notice our little “config” error message is going back at us:
|
1 2 3 4 5 6 7 8 9 10 11 12 13 |
*WM: Using last saved values, should be faster *WM: Connection result: *WM: 3 *WM: IP Address: *WM: 192.168.1.9 connected...yeey :) local ip 192.168.1.9 MQTT Server: iot.eclipse.org MQTT Port: 1883 MQTT Username: MQTT Password: Attempting MQTT connection...connected |
Yep, it’s now using the default MQTT server: iot.eclipse.org. So my attempt are integrating ANAVI Thermometer with Home Assistant miserably failed, and I’ve run out of time to investigate the matter further. Documentation about that specific part is really limited on the ANAVI Thermometer’s Github page.
I also wish they would be some GPIO pins exposed on the board, so that people could locally turn on/off a switch for example. The ANAVI Thermometer Starter Kit reviewed here can be pre-ordered on Crowdsupply for $39 including international shipping with orders placed now delivered in April 2019.

Jean-Luc started CNX Software in 2010 as a part-time endeavor, before quitting his job as a software engineering manager, and starting to write daily news, and reviews full time later in 2011.
Support CNX Software! Donate via cryptocurrencies, become a Patron on Patreon, or purchase goods on Amazon or Aliexpress


I had good success integrating this myself, using a tiny ESP01 board and a DHT22 sensor. I used Adafruit’s DHT library and their Adafruit.io platform for getting the temperature and humidity feed into the cloud. I plan to control a humidifier using a TPLINK smart plug and webhooks.
It is ok as a starter, but looking on how is built, the temperature will not be precisely measured since is affected by RT heating.