
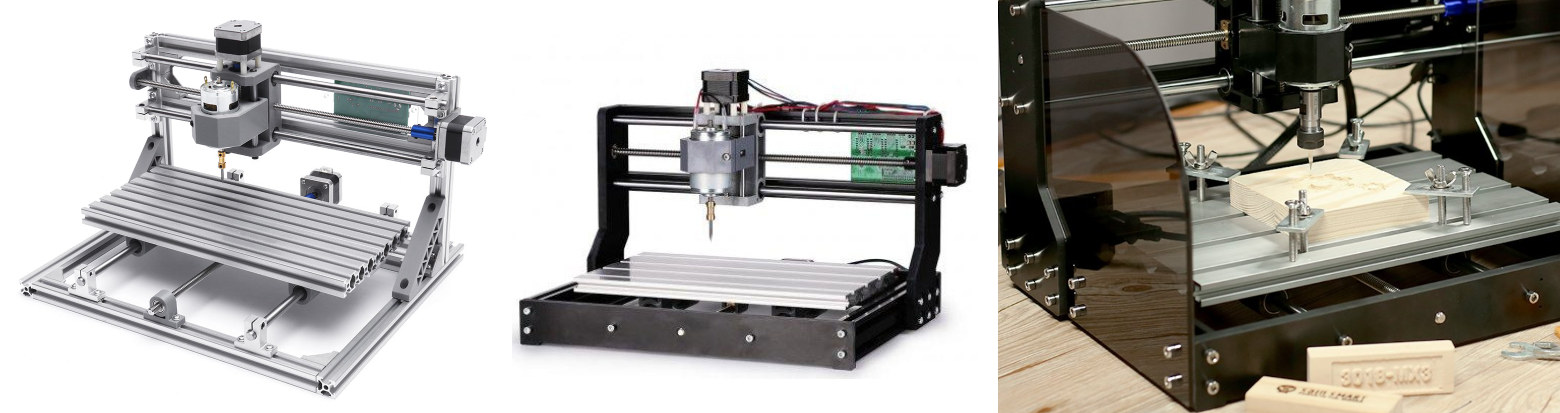
Hey Karl here. Back in September of 2018 I reviewed the Sainsmart Genmitsu 3018 Pro. Sainsmart has now further upgraded the 3018 and asked for a review of it. Let’s take a look at the changes and the evolution of the 3018 and see if the increase in price is worth it. You can find the original 3018 on sale for about $200. The pro version can be found for about $250, and the CNC Router 3018-MX3 for $350. I won’t go into too much detail like I did in the previous review. I suggest reading the pro version after reading this one. Most of the experiences and solutions apply to this version.
Build
Building the CNC Router 3018-MX3 was a breeze. The instructions are fantastic. I struggled a little bit to read the small booklet that came with the kit and afterwards I found a PDF on the Sainsmart wiki. The instructions go into a level of detail I very much appreciate. These are the best instructions that have been provided in all the 3D printers and other Chinese kits that I have put together. I really hope the other manufacturers take notice. Although the printed booklet is a little small the PDF is there to back it up. I built it on a live stream in a couple of hours with no issues except one where I wasn’t paying attention close enough.
Upgrades
Okay let’s look at what has been upgraded. The MX3 version has a new controller board, Z-axis zero out tool, limit switches, and better clamps to hold material that is being engraved/cut. There are also some acrylic pieces in the kit. Fundamentally very similar to the pro version.
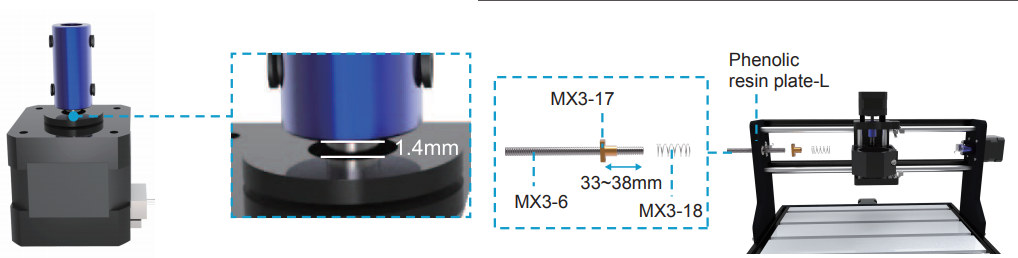
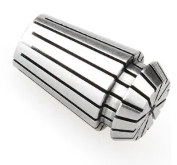 The kit also comes with the er11 collet chuck pre-installed on the motor. I never did install it on the pro version. The instructions were to heat up the chuck and press fit over the motor shaft.
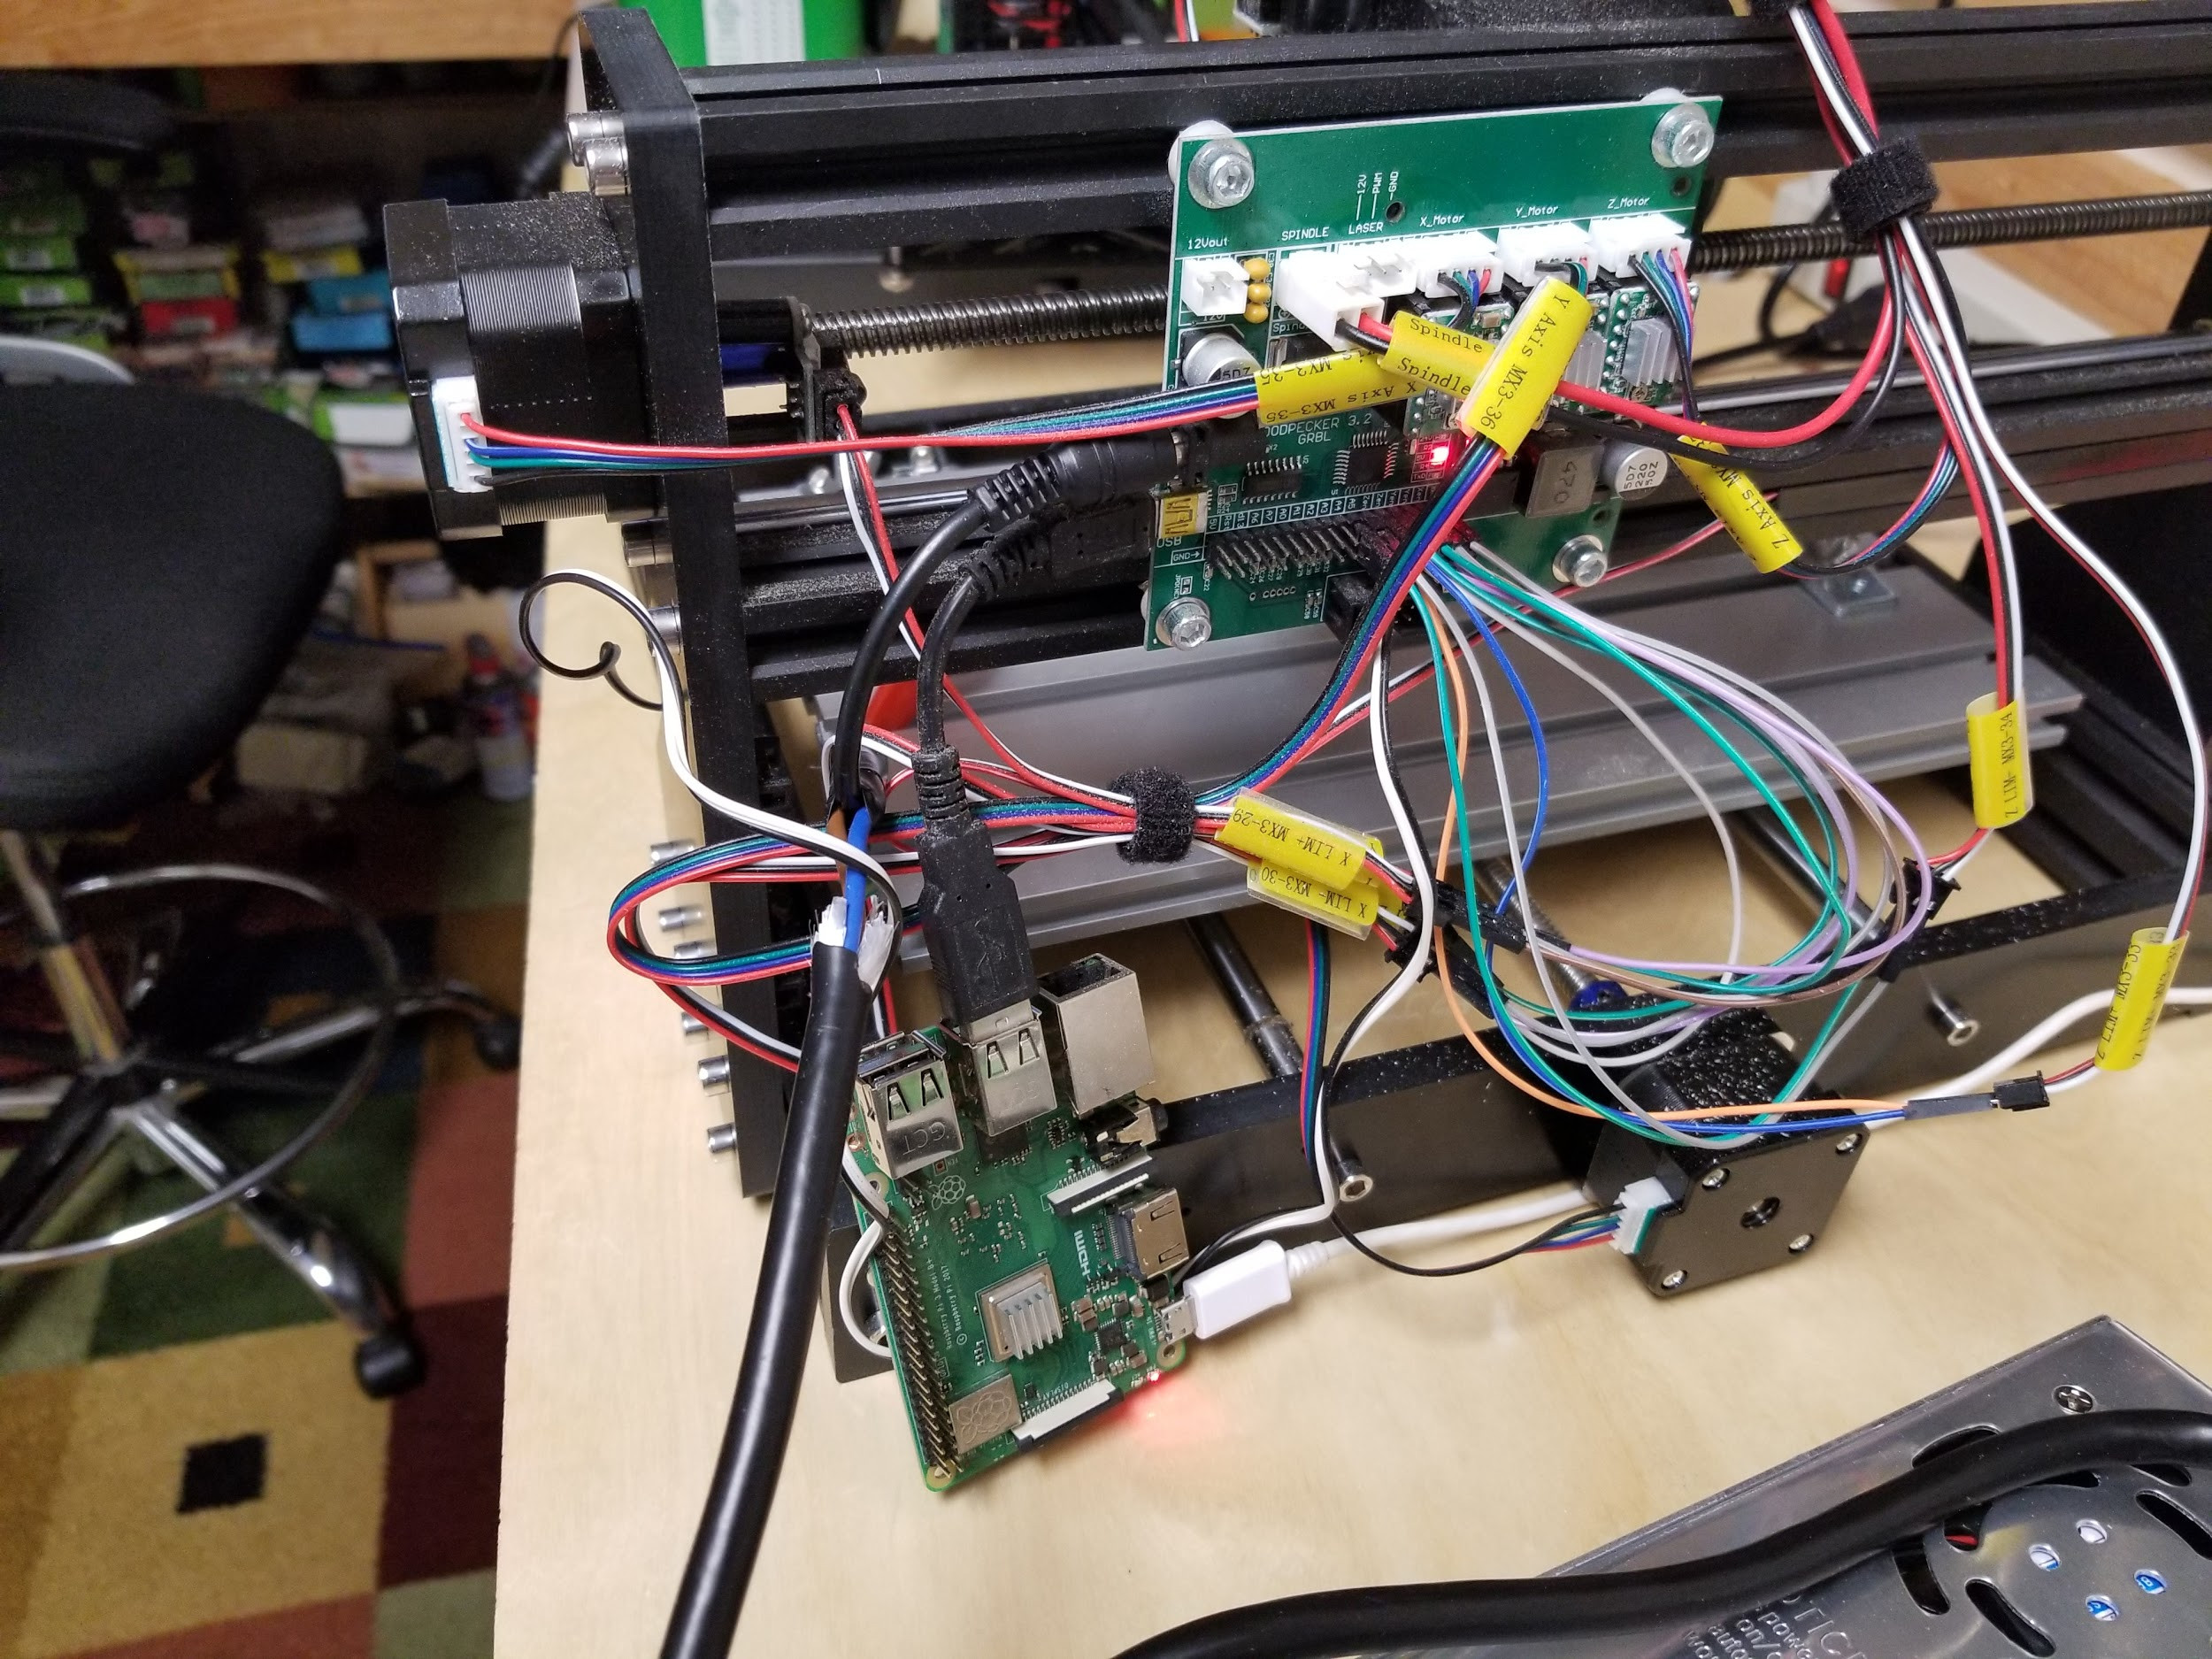
Of all the upgrades the limit switches and zero out tool are by far the best in my opinion. I really don’t like the upgraded board. The board can almost only be exclusively be controlled by Mach3 or Mach4. Mach3 is the cheaper of the two and costs $175. It runs on Windows and from my previous experience that is not a good option. I prefer to run CNCjs on a Raspberry Pi to control the 3018. Mach3 and Mach4 are pretty much the de-facto CNC software for professional CNC machines but doesn’t make sense on a hobby machine like this. For my review I installed the woodpecker board from the pro version so I can use CNCjs. It’s a $35 board substantially less than one hundred, and $175 license for mach3.

Original Grbl Config for Pro and 2 changes to enable limit switch and homing
|
1 2 3 4 5 6 7 8 9 10 11 12 13 14 15 16 17 18 19 20 21 22 23 24 25 26 27 28 29 30 31 32 33 34 |
$0=10 (Step pulse time, microseconds) $1=25 (Step idle delay, milliseconds) $2=0 (Step pulse invert, mask) $3=5 (Step direction invert, mask) $4=0 (Invert step enable pin, boolean) $5=0 (Invert limit pins, boolean) $6=0 (Invert probe pin, boolean) $10=1 (Status report options, mask) $11=0.010 (Junction deviation, millimeters) $12=0.002 (Arc tolerance, millimeters) $13=0 (Report in inches, boolean) $20=0 (Soft limits enable, boolean) $21=0 (Hard limits enable, boolean) <strong>$21=1 (Hard limits enable, boolean)</strong> $22=0 (Homing cycle enable, boolean) $22=1 (Homing cycle enable, boolean) $23=0 (Homing direction invert, mask) $24=25.000 (Homing locate feed rate, mm/min) $25=500.000 (Homing search seek rate, mm/min) $26=250 (Homing switch debounce delay, milliseconds) $27=1.000 (Homing switch pull-off distance, millimeters) $30=1000 (Maximum spindle speed, RPM) $31=0 (Minimum spindle speed, RPM) $32=0 (Laser-mode enable, boolean) $100=800.000 (X-axis travel resolution, step/mm) $101=800.000 (Y-axis travel resolution, step/mm) $102=800.000 (Z-axis travel resolution, step/mm) $110=800.000 (X-axis maximum rate, mm/min) $111=800.000 (Y-axis maximum rate, mm/min) $112=600.000 (Z-axis maximum rate, mm/min) $120=10.000 (X-axis acceleration, mm/sec^2) $121=10.000 (Y-axis acceleration, mm/sec^2) $122=10.000 (Z-axis acceleration, mm/sec^2) $130=200.000 (X-axis maximum travel, millimeters) $131=200.000 (Y-axis maximum travel, millimeters) $132=200.000 (Z-axis maximum travel, millimeters) |
Homing threw me for a loop. I assumed homing would be like a 3D printer. But it is opposite. All 3 axis go to the max which makes sense with subtractive manufacturing after I thought about it.
Testing things out
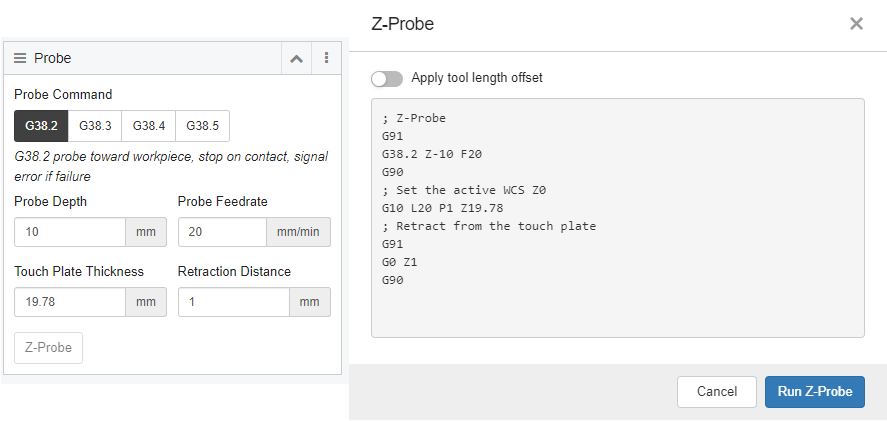
First thing I did was test out the the probing Z height. There is a widget in CNCjs that makes it super simple. I input the touch plate thickness and the other settings in the picture below. It takes the variables and runs a little bit of G-code to calibrate the Z height. I thought I was going to have to adjust the clutch plate thickness slightly to account for inaccuracies. But after testing putting the exact touch plate thickness on seem to work the best.
Repeatability
There are some big advantages to having limit switches and a Z probe. One of the issues I ran into on the pro version was the ability to restart a cut without breaking bits. I also never attempted to do multi-stage cuts. By that I mean a rough cut with a larger bit then a final pass with a smaller bit. This helps speed up the routing.
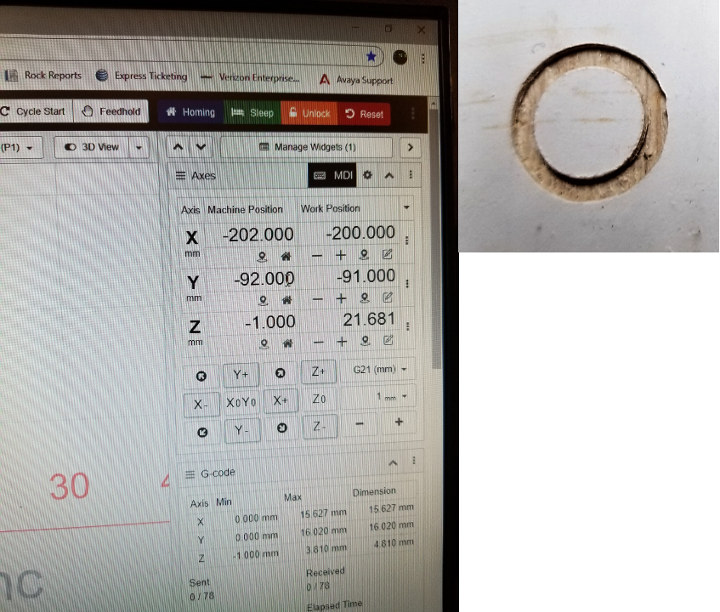
Additionally, if you lose power or have some other issue that causes you to start a cut over you can recover. I tested this by homing the spindle, probing my Z height, then setting my origin and zeroing out the work position. I then take a snapshot with my phone of the machine position before starting any cuts. If I have to start over I home and set my machine position to the picture I took and zero out the work position.
Multistage Cuts

This was my first attempt at a multi-stage cut. I took a vbuck stl I found on Thingiverse and imported into Fusion 360 and created a two-step cut. With this cheap wood, inappropriate bits, and slow spindle speed I thought it turned out okay. For perspective this square around the v buck is 50 mm.
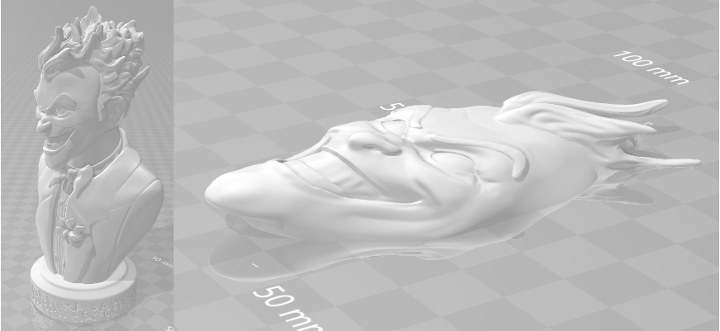
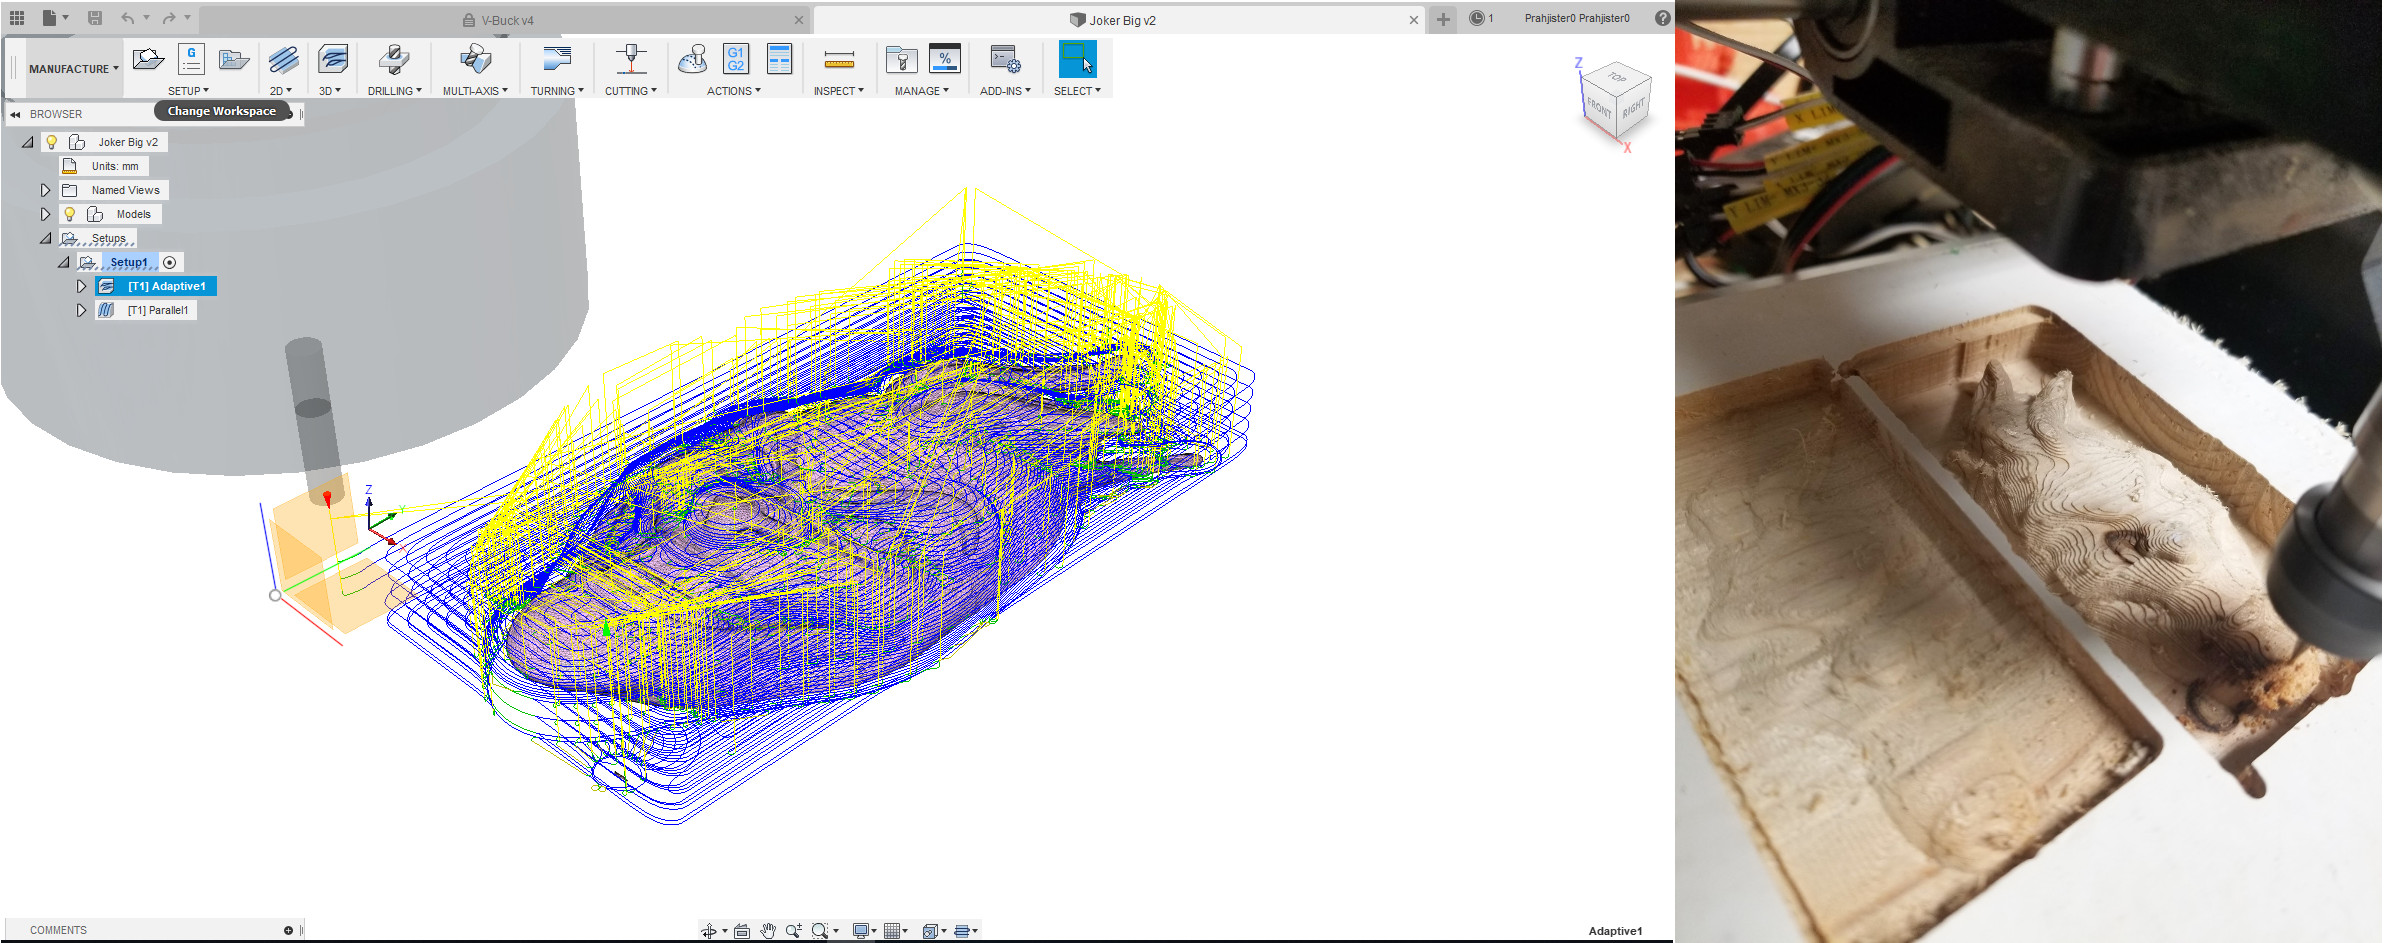
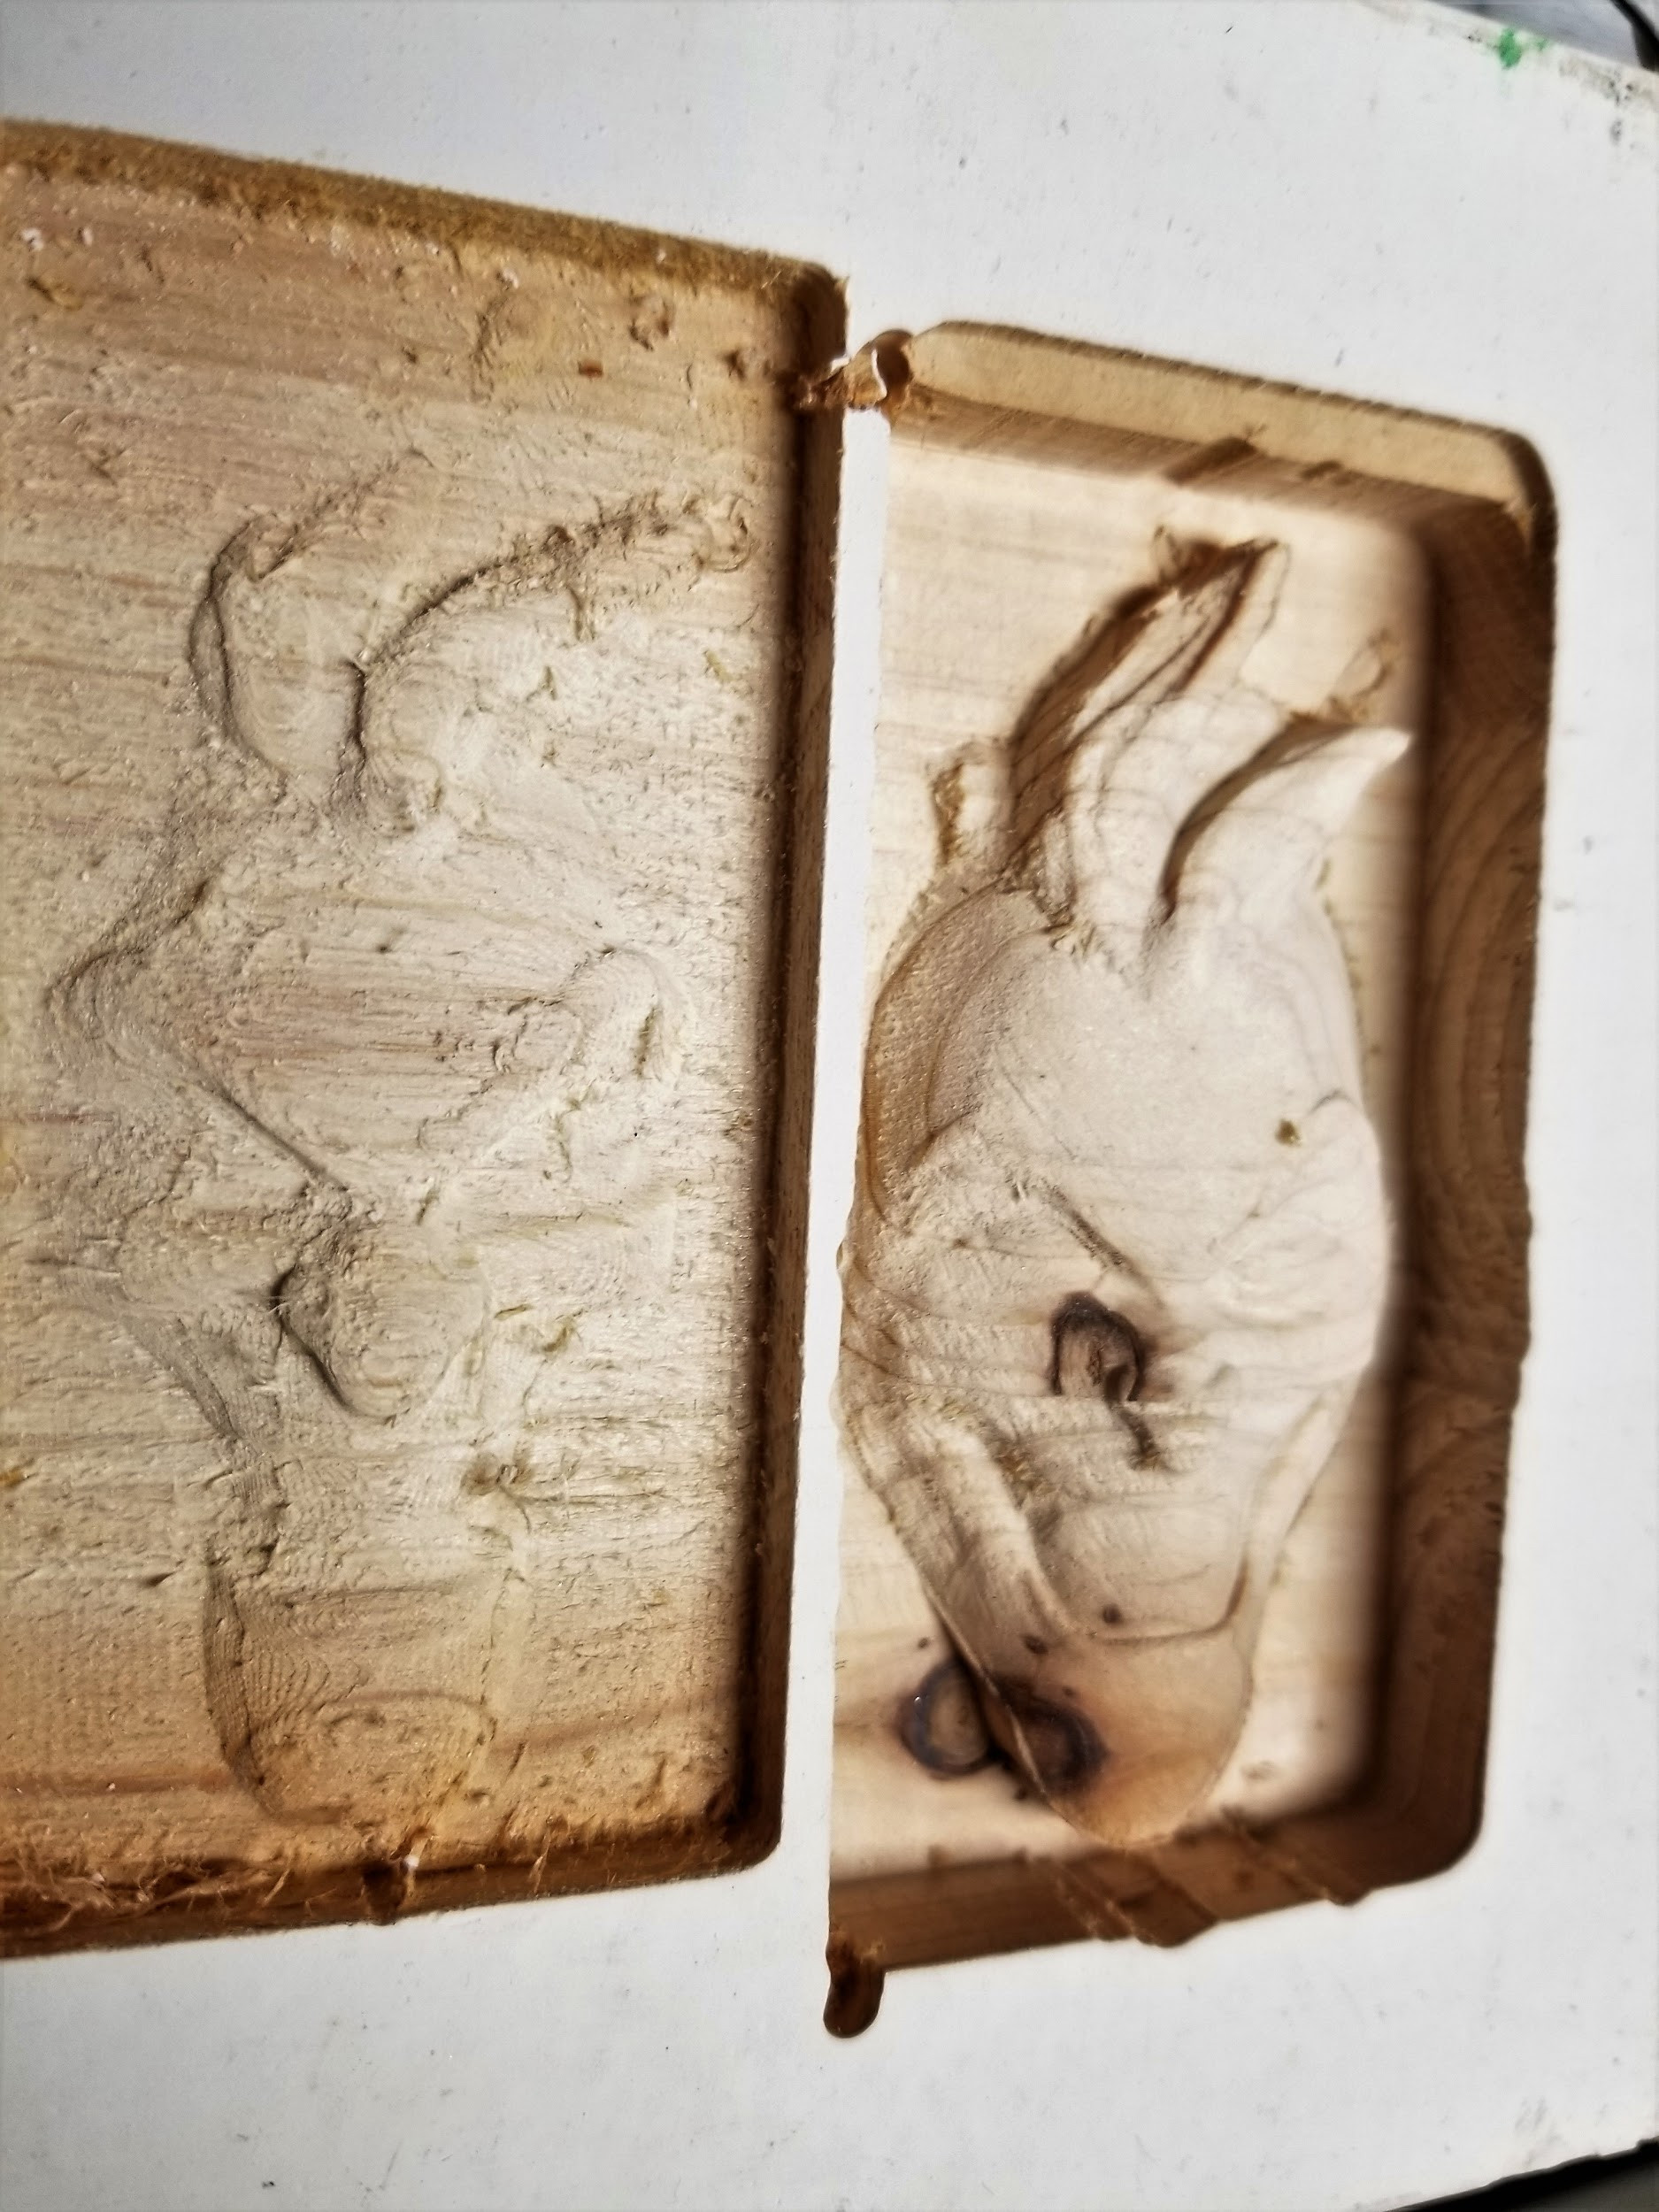
Here is attempt 2 and 3 with a 2-stage cut. I did this one slightly different. I took an STL of joker. Cut the face off. Then non uniformly scaled the z height. I did all this with Microsoft 3D builder. Then I used Fusion 360 to create 2 tool paths. I used too small of a bit on the first one and stopped it. It was taking entirely too long. I really think the picture before the second pass looks cool. Jokers face looks like a topology map. At this point I was still using slower spindle speeds and inappropriate cutting bits. More on that later. When I get some more time I would like to do this same cut on a nice piece of wood and use the whole build volume.
Lessons Learned
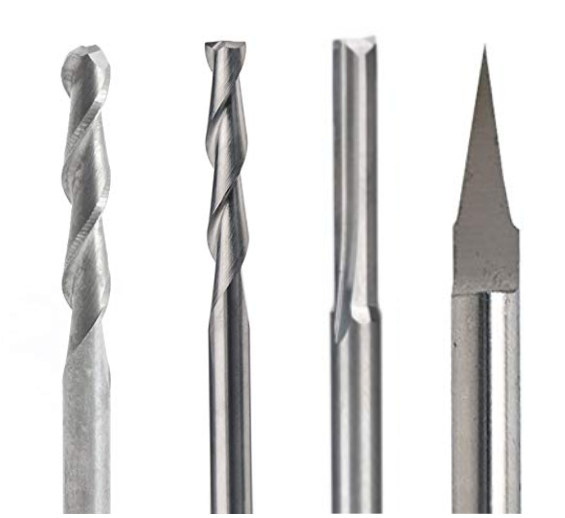
A couple things I recommend. Get some different bits and experiment with different kinds on different materials. I settled on 2 flute for all of mine but will probably get some single flute. I got a ball nose, 2 flute spiral upcut, 2 flute straight, and it comes with V bits.

I had a big face palm moment near the end. Make sure the collet is fully inserted into the chuck. I didn’t realize that it wasn’t inserted all the way until the end when trying the V bits. They were not centering very well. After investigating I realized my mistake. I went back after I realized this to confirm it wasn’t interfering with the other bits performance especially in aluminum. Noise was cut down considerably but didn’t seem to affect anything but the V bit.
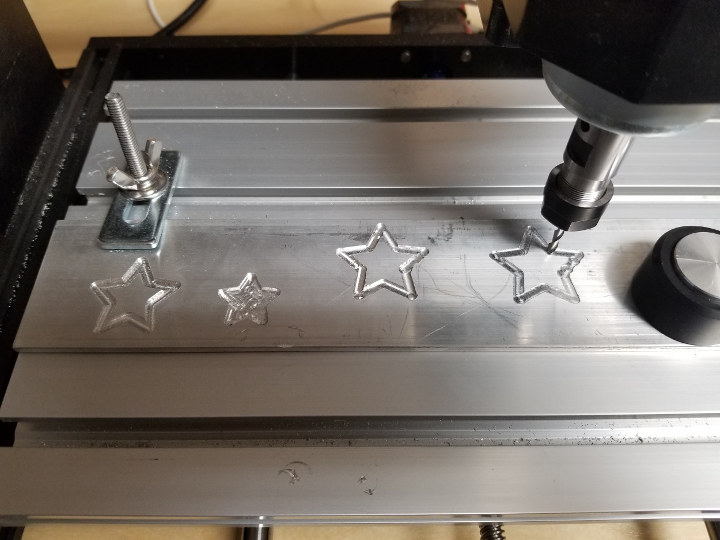
Speaking of aluminum. I didn’t have much luck cutting it. It’s not so bad when cutting, provided they are shallow cuts and the speeds are slow. When plunging, the bit was jumping all over the place. While changing directions it seemed to do it as well.
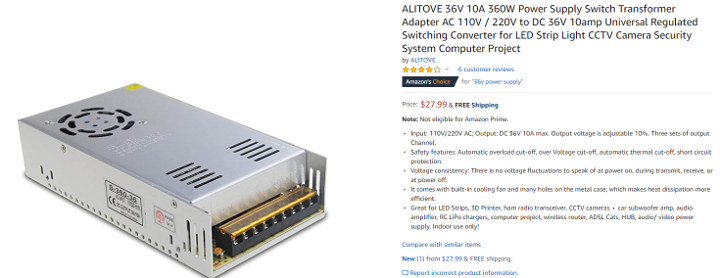
36 Volts is the way to go. I purchased a 36-Volt power supply and could tell the difference when cutting. I only used a 36-Volt power supply on the woodpecker board. I decided to go with this power supply over the brick power supply in the event it didn’t work or I wasn’t satisfied and I can reuse it on other projects. You can get 36-volt brick power supplies for less money that should just plug in.
One final note is that I had to change the spindle polarity with the woodpecker to get the spindle turning the right direction.
Final Thoughts
Opinion time. You know what they say about opinions. Okay after being able to use the pro version and the CNC Router 3018-MX3 I would probably go with the pro version and add the end stops, Z-probe, and power supply. It’s hard to justify the extra hundred dollars. Limit switches are cheap. You can make a Z probe. The only real investment is the power supply. One final note. The limit switches reduce the build volume some. I measured 262x155x37mm.
I would like to thank Sainsmart for sending the CNC Router 3018-MX3 over to review. It is currently $350 and can be found here. You may also want to read the review of the Pro model without or with the laser attachment.

Karl is a technology enthusiast that contributes reviews of TV boxes, 3D printers, and other gadgets for makers.
Support CNX Software! Donate via cryptocurrencies, become a Patron on Patreon, or purchase goods on Amazon or Aliexpress


These things seem to be getting better but still not really that usable.
3D printing and casting in metal with the “lost pla” method seems to a better route for now.
“Speaking of aluminum. I didn’t have much luck cutting it. It’s not so bad when cutting, provided they are shallow cuts and the speeds are slow. When plunging, the bit was jumping all over the place. While changing directions it seemed to do it as well.” Sounds like the bit isn’t deep enough in the chuck, so it is flexing. Cut down the bit shank so it sits deeper in the chuck. This can limit your cut depth though. If that doesn’t fix the jumping and backlash then the gantry and/or Z-mount probably isn’t stiff enough to begin with, something… Read more »
I will try that. Thanks for the tip. What bit would you use?
Great review! How would you go about adding end stops to the Pro version?
Someone did it here: https://www.thingiverse.com/thing:3625249
When using CNCJS, does the Grbl ‘widget’ display the real time spindle speed for you? I’m very new to this and not yet experienced enough to tell if the machine’s spindle speed is correct when executing some gcode. The spindle seems quieter that with some initial experiments and the widget is displaying 1000. Also, although I can control the position, I can’t activate the spindle through the CNCJS UI, is this an issue for you? Not that I need to activate the spindle really, just seems odd.
Spindle is single speed. Based on voltage. No issues for me.
Thanks. That was dumb question! I didn’t understand the basic limitation of the machine.
Hi,
To change the 24 to 36V you take a power supply with 10A. The 24V one which comes with the CNC is 5A.
How do wire the barrel connector for the board ?
Regards,
Hmmm, seems like the board for the new 3018 Pro is rated 24V max….
Hello,
I just bought a CNC 3018-MX3 and i have trouble to make it work with drufelCNC and fusion360.
mach3 500 free line are already done for me.
And with Fusion360 i can generate mach3 post process file but if it s a little elaborate the CNC is becomming crazy…
Maybe i m thinking of bying an other card that can understand GRBL, but i don’t know if it s possible ?
Can you tell me which software you have used for the test with the MX3 ? which software did you used for generating the g-code ?