
A coupled of weeks ago, I received HeimVision HM241 HD NVR kit, and in the first part of the review, I showed the content of the kit, installed an internal 3.5″ hard drive, and did a teardown of both the NVR and one camera.
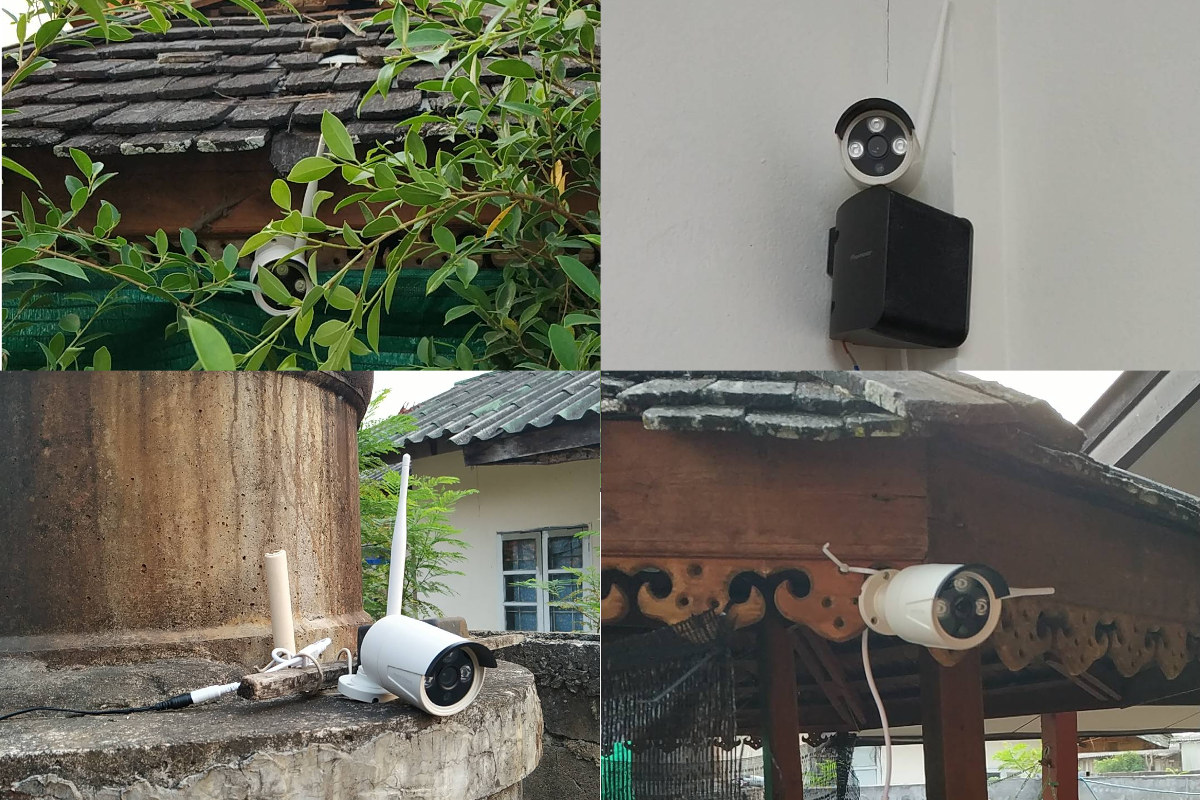
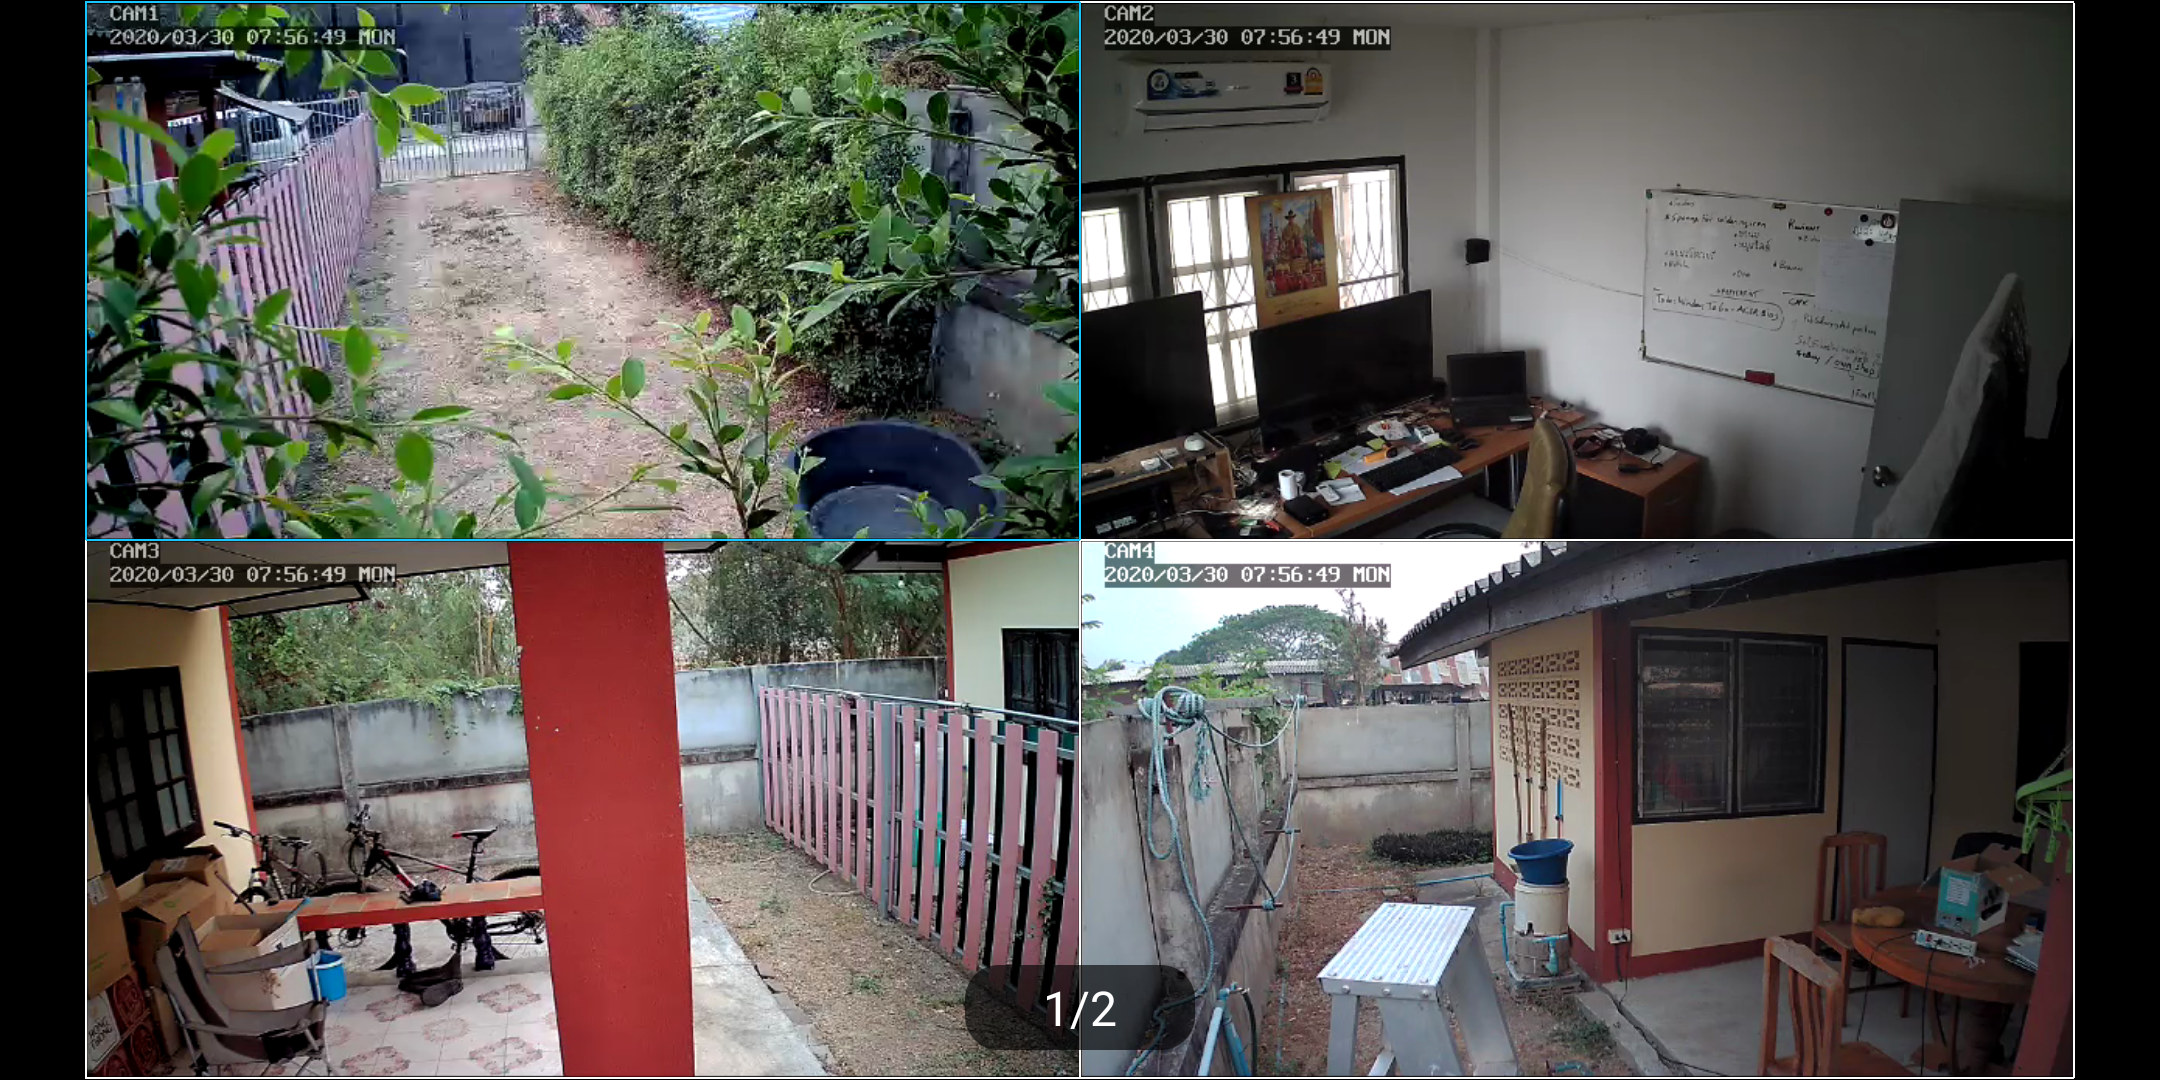
I’ve now had time to test the device for about two weeks. I have plans to install it permanently in another location, but for testing, I temporarily installed the camera for testing in several strategic locations: 3 outdoors, one indoors.
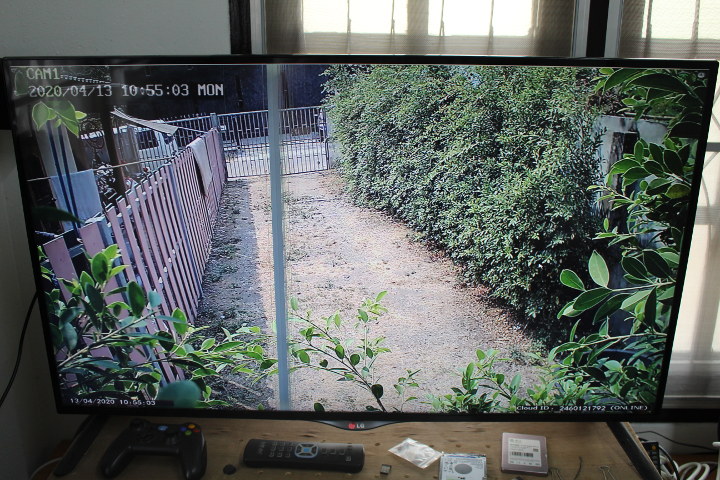
Back inside, I connected the NVR device (black box below) to an Ethernet switch for Internet connectivity, a 4K TV to access the user interface, a USB mouse, and the power supply.
First Boot and Configuration
I was quite surprised during the first boot as I did not have to set up anything and the cameras were automatically detected.
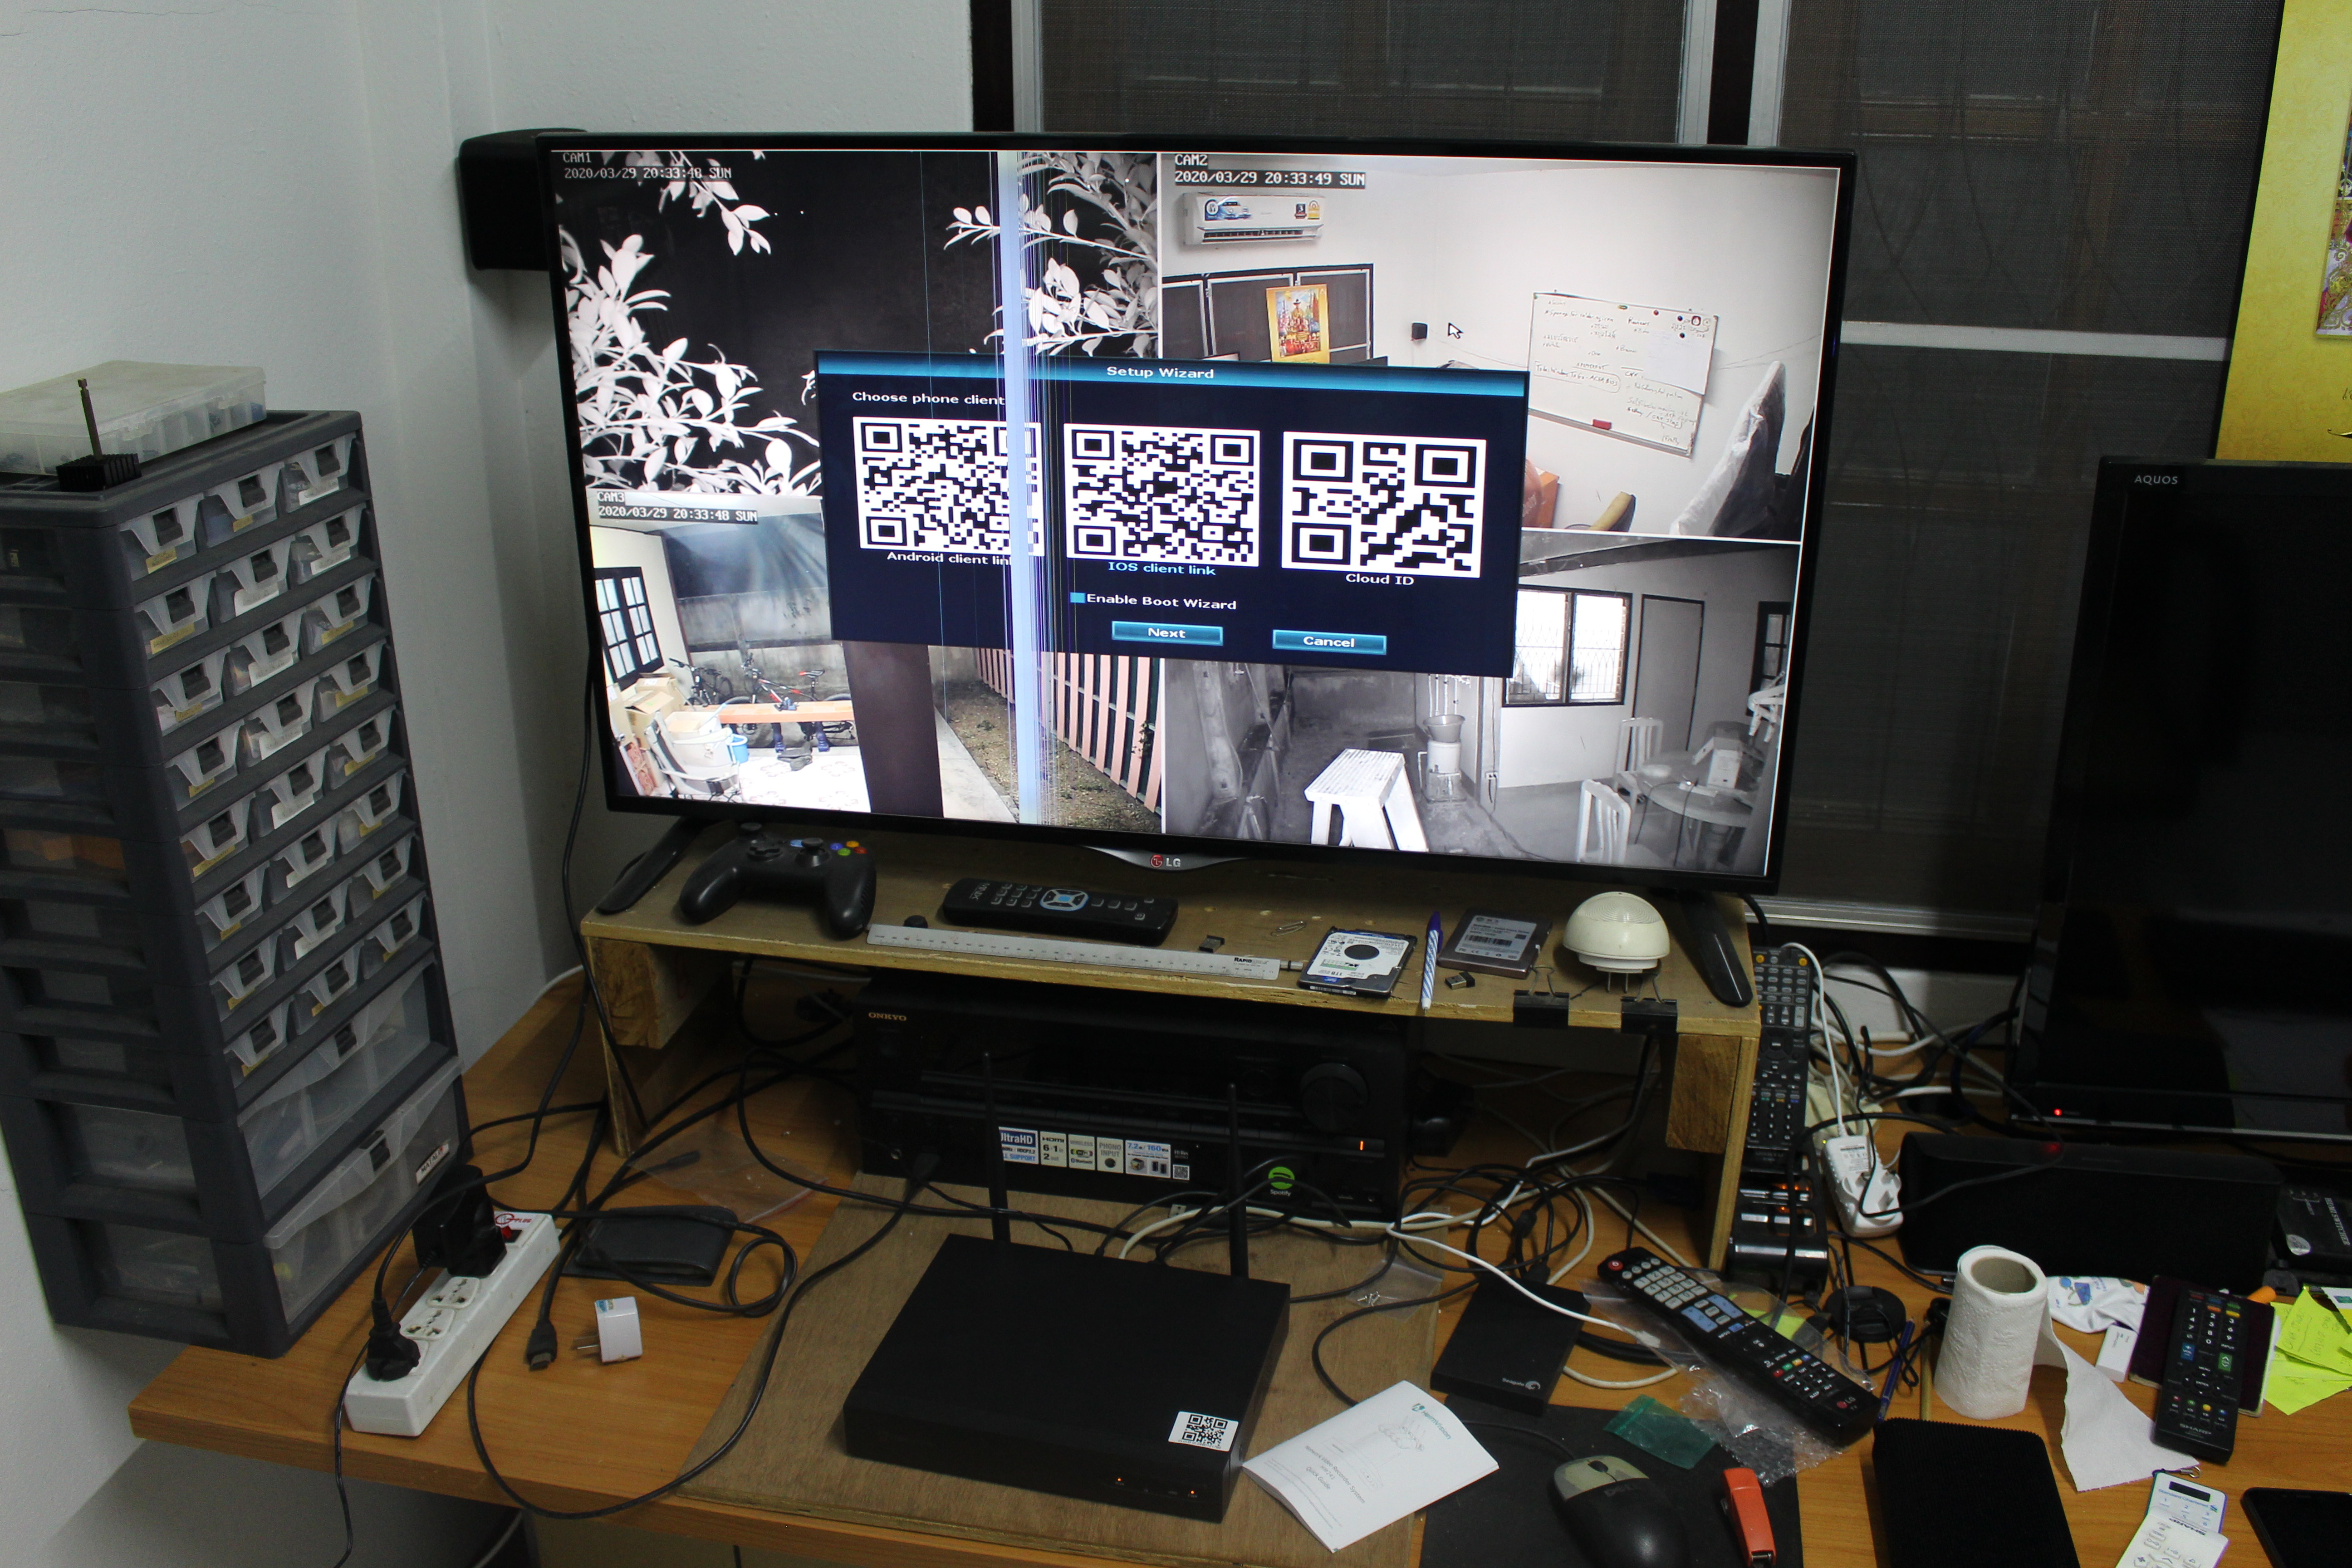
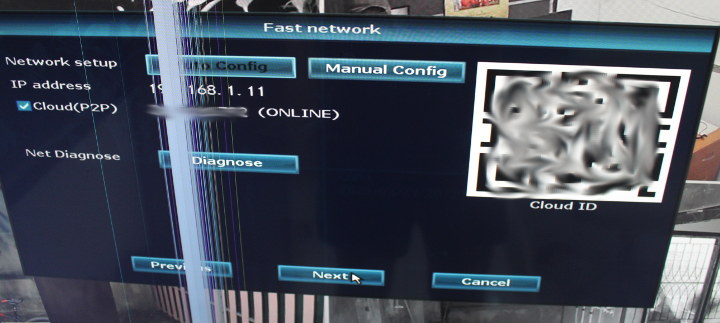
The first screen shows QR code for the Android and iOS apps, as well as the Cloud ID which you’ll need to use inside the mobile app or Windows program. Please ignore the vertical lines on the TV, it’s just my LG TV has some issues.
During the very first boot, you’ll get through a setup Wizard starting with WiFi, and some parts may be confusing.
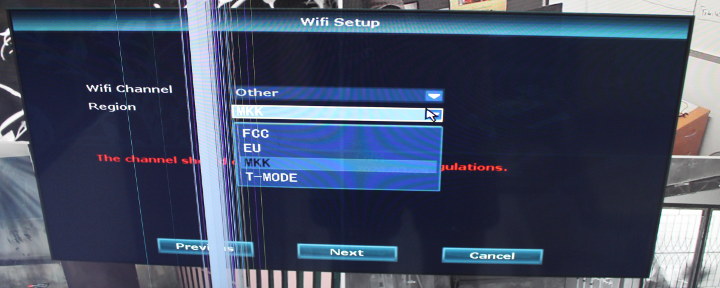
You’ll have to select the right region for WiFi. It’s easy if you live in the US (FCC) and Europe (EU), but I had never heard about “MKK”. A quick web search found an answer:
MKK is for China and will allow channels 1-14 to be used. EU is for Europe and will allow channels 1-13 to be used. FCC is for North America and will allow channels 1-11 to be used.
If you don’t know, FCC appears to be the safe option to make sure you do not use illegal frequencies in your country.
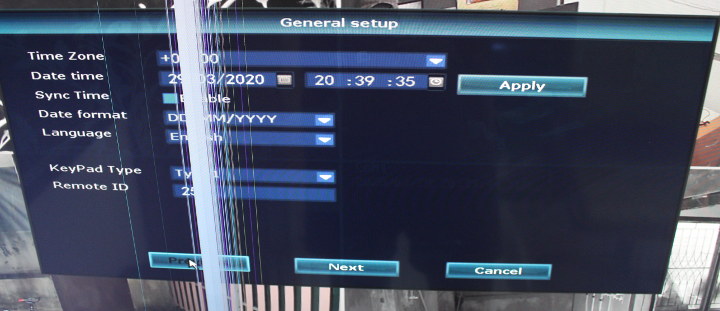
Next up is “General Setup” with date/time and regionalization settings, as well as “Fast network” for Ethernet configured, but most people won’t need to do anything since the system relies on DHCP.
Note: if you are not going to access the NVR from the Internet with the mobile app or Windows program, you do not need to connect an Ethernet cable.
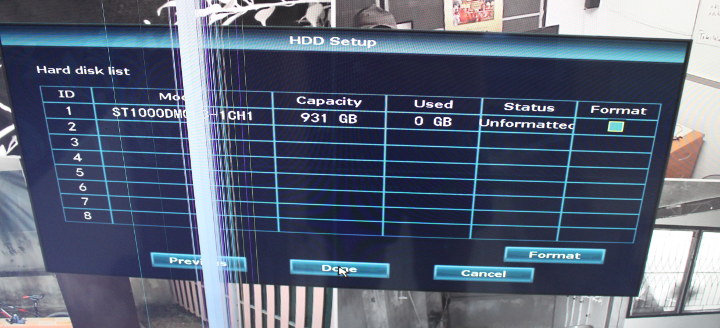
The hard drive I installed last time was automatically detected, but shown as “Unformatted”. So I just clicked on the “Format” button
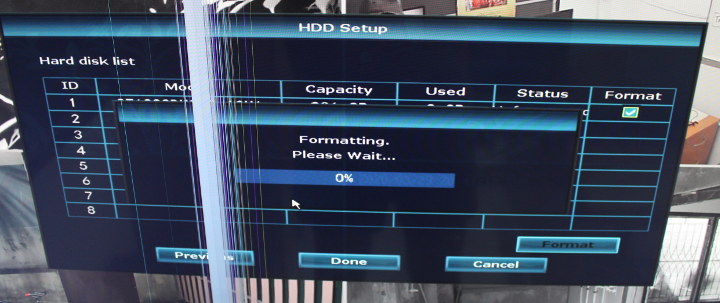
It went through the format process…
 .. and once it was done I could see the four cameras on the display. Super easy to use and setup.
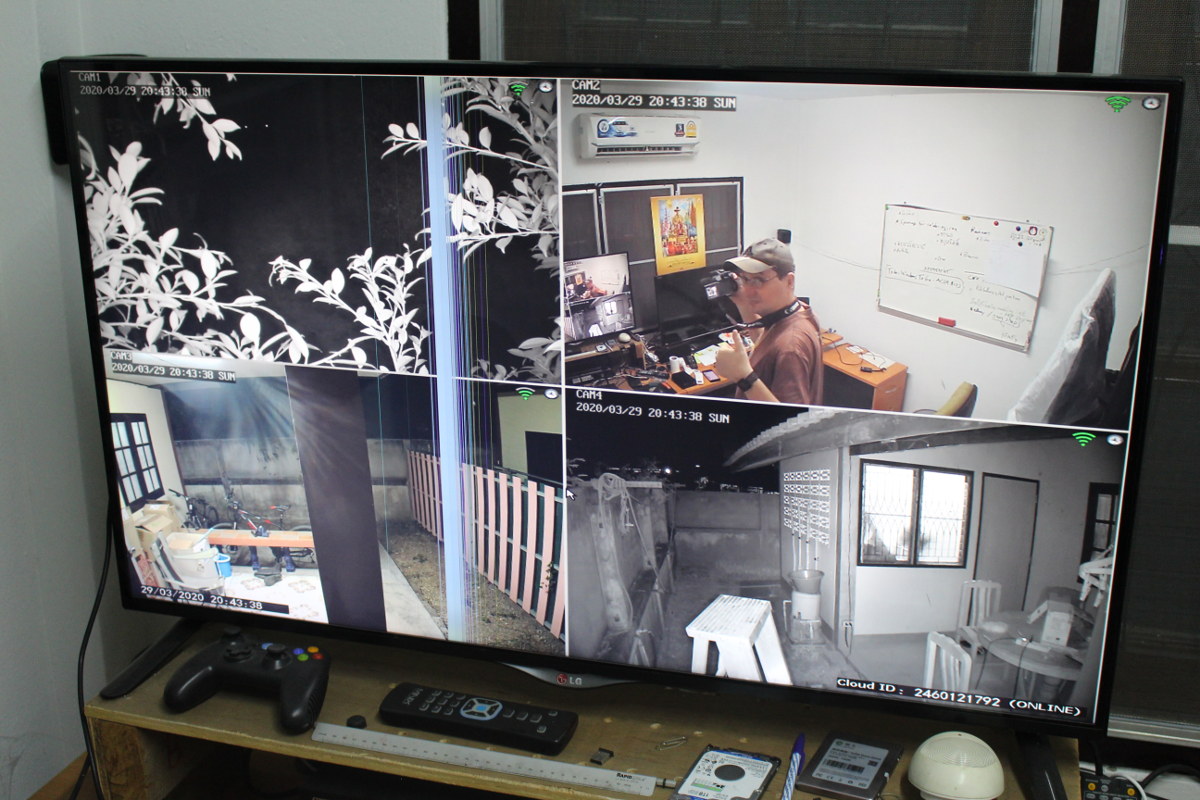
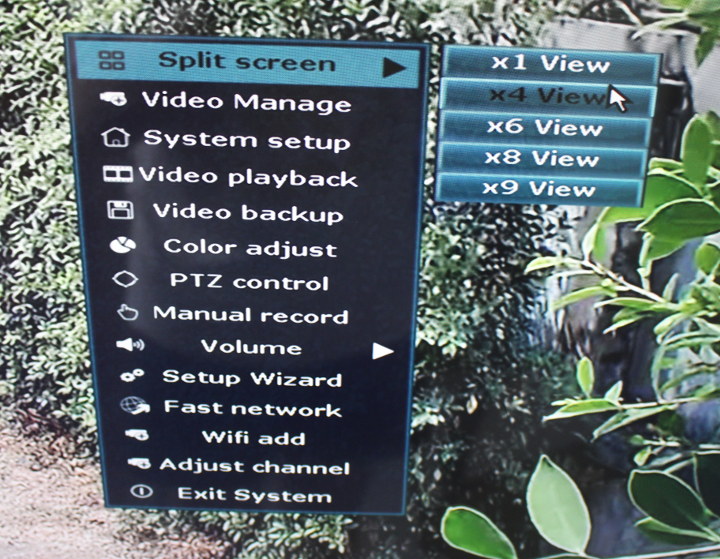
You can also double click on any camera to get a full screen few.
A right-click will bring a popup menu with many options. Not all are applicable to HM241 NVR kit since some features are not available including PTZ control.
One important thing to set after the first boot is a password. I can’t remember whether it was asked after the Wizard, but if not go to System Setup-> System Admin where you be able to set a password and create more users.
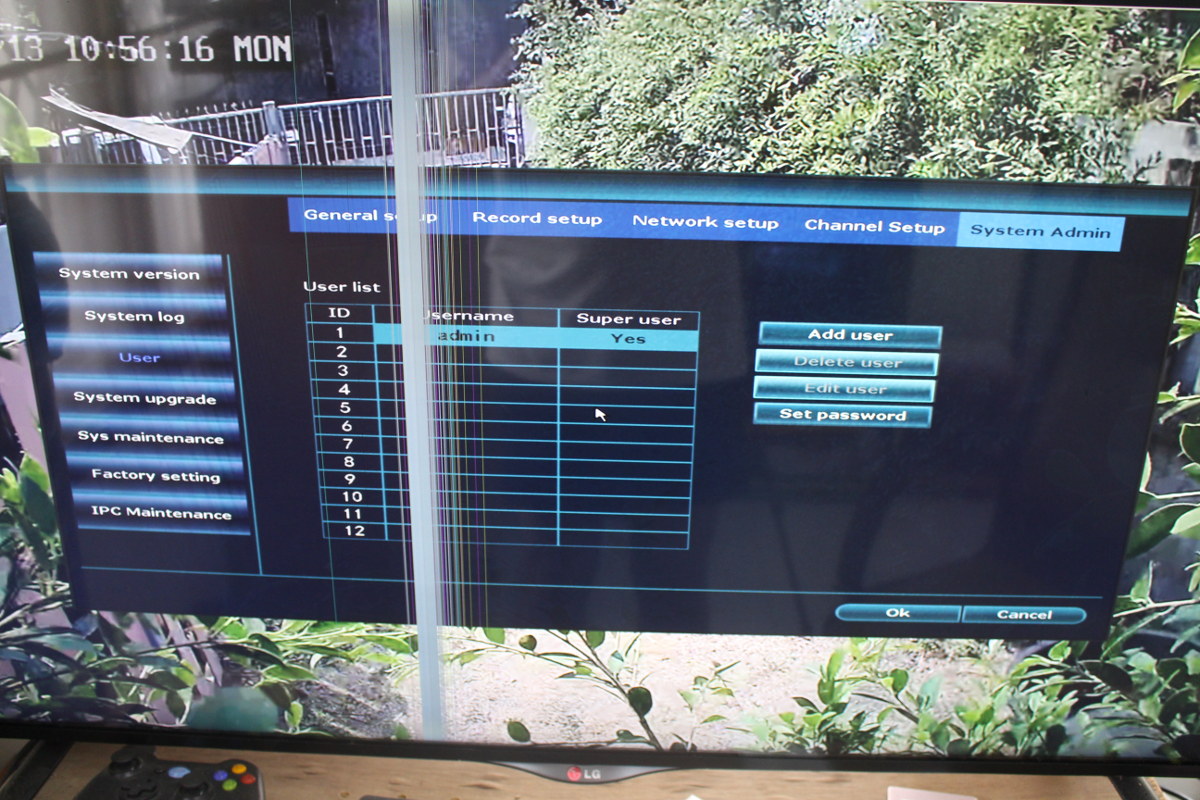
The password is used to control access to the settings for people having physical access to the NVR box, and to connect from mobile apps and/or Windows program.
By default, the system is configured to record everything around the clock without motion detection, but you can change that by going to System Setup-> Record setup.

Click on Time to select which days and hours you want to continuously record, and click on Motion to select the period for motion detection. You’ll also notice an Alarm features but this requires an RF module that’s not available with HM241 model.
Based on my experience with Reolink cameras, motion detection is often either missing events or if set too sensitive will trigger alarms all the time. I have trees and plants, as well as birds that do not help. Until security camera systems are enhanced with artificial intelligence, motion detection will always be suboptimal.
So I’ve configured both continuous recording and motion detection to run all the time. As we’ll see below setting motion detection can help to locate a particular event, and if something was missed we always have the full recording.
IP Pro Android App
Before further testing the NVR interface, I’ve installed IP Pro app on my Android phone, but it’s also available for iOS.
The setup is fairly straightforward, just tap on add device and scan the QR code on the top of the NVR box.
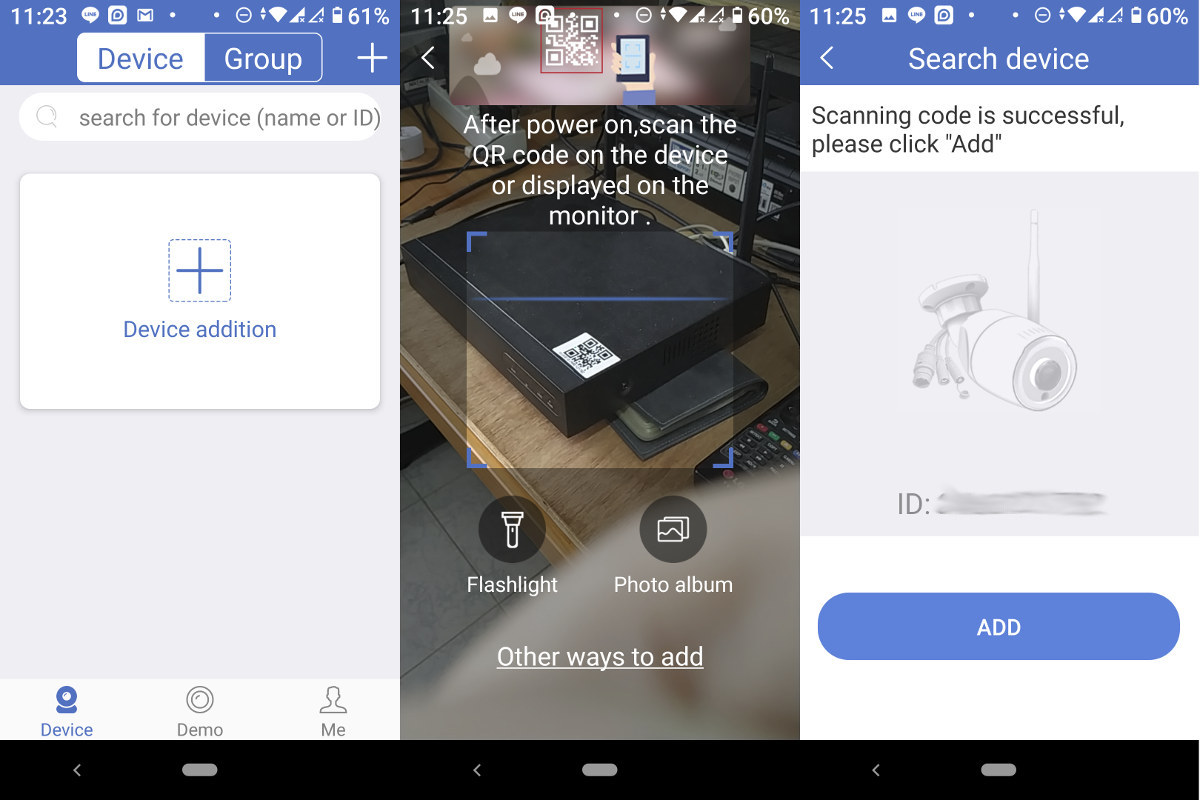
The enter the user and password you previously defined, and you’ll have access to the cameras.

You’ll see the same mosaic view as in the MH241 NVR interface, although all configuration options won’t be available. Note that if you want to share your camera with others you can just share the Cloud ID with others, as well as their username and password.
You can also tap on one camera to see it full screen, and there’s also the option to playback previously recorded video. Video playback only works with one camera at a time, not in mosaic mode in the NVR as we’ll see below.
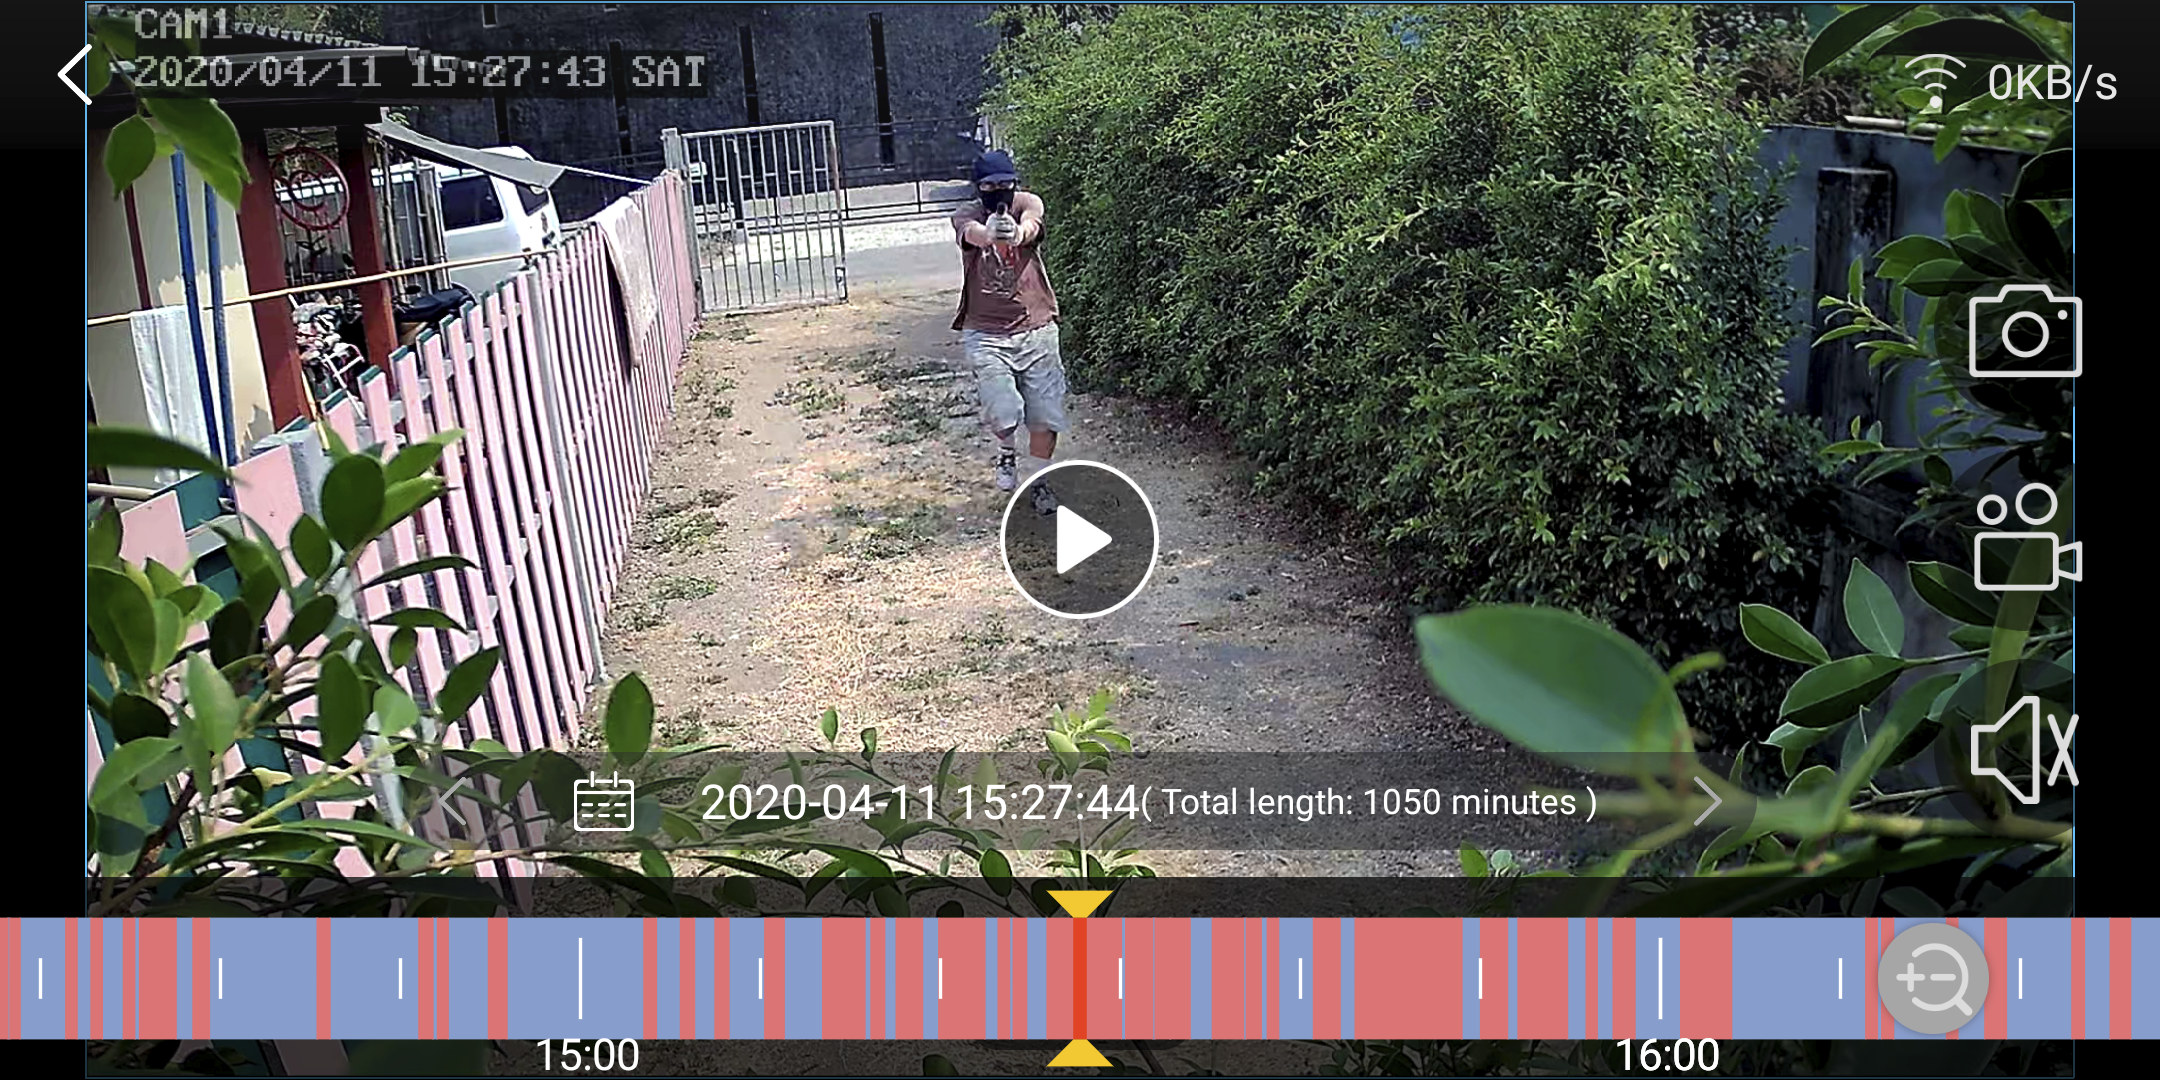
The time scale can be zoomed in and out with the blue color referring to “timed” recordings, and red ones for motion detection.
As a separate note, I wanted to access the camera from my Ubuntu 18.04 laptop, but the company confirmed there was no support for ONVIF nor Linux. There’s a Windows program (EseeCloud) which I tried to install in a Windows 7 VirtualBox session but it would just crash at start up.
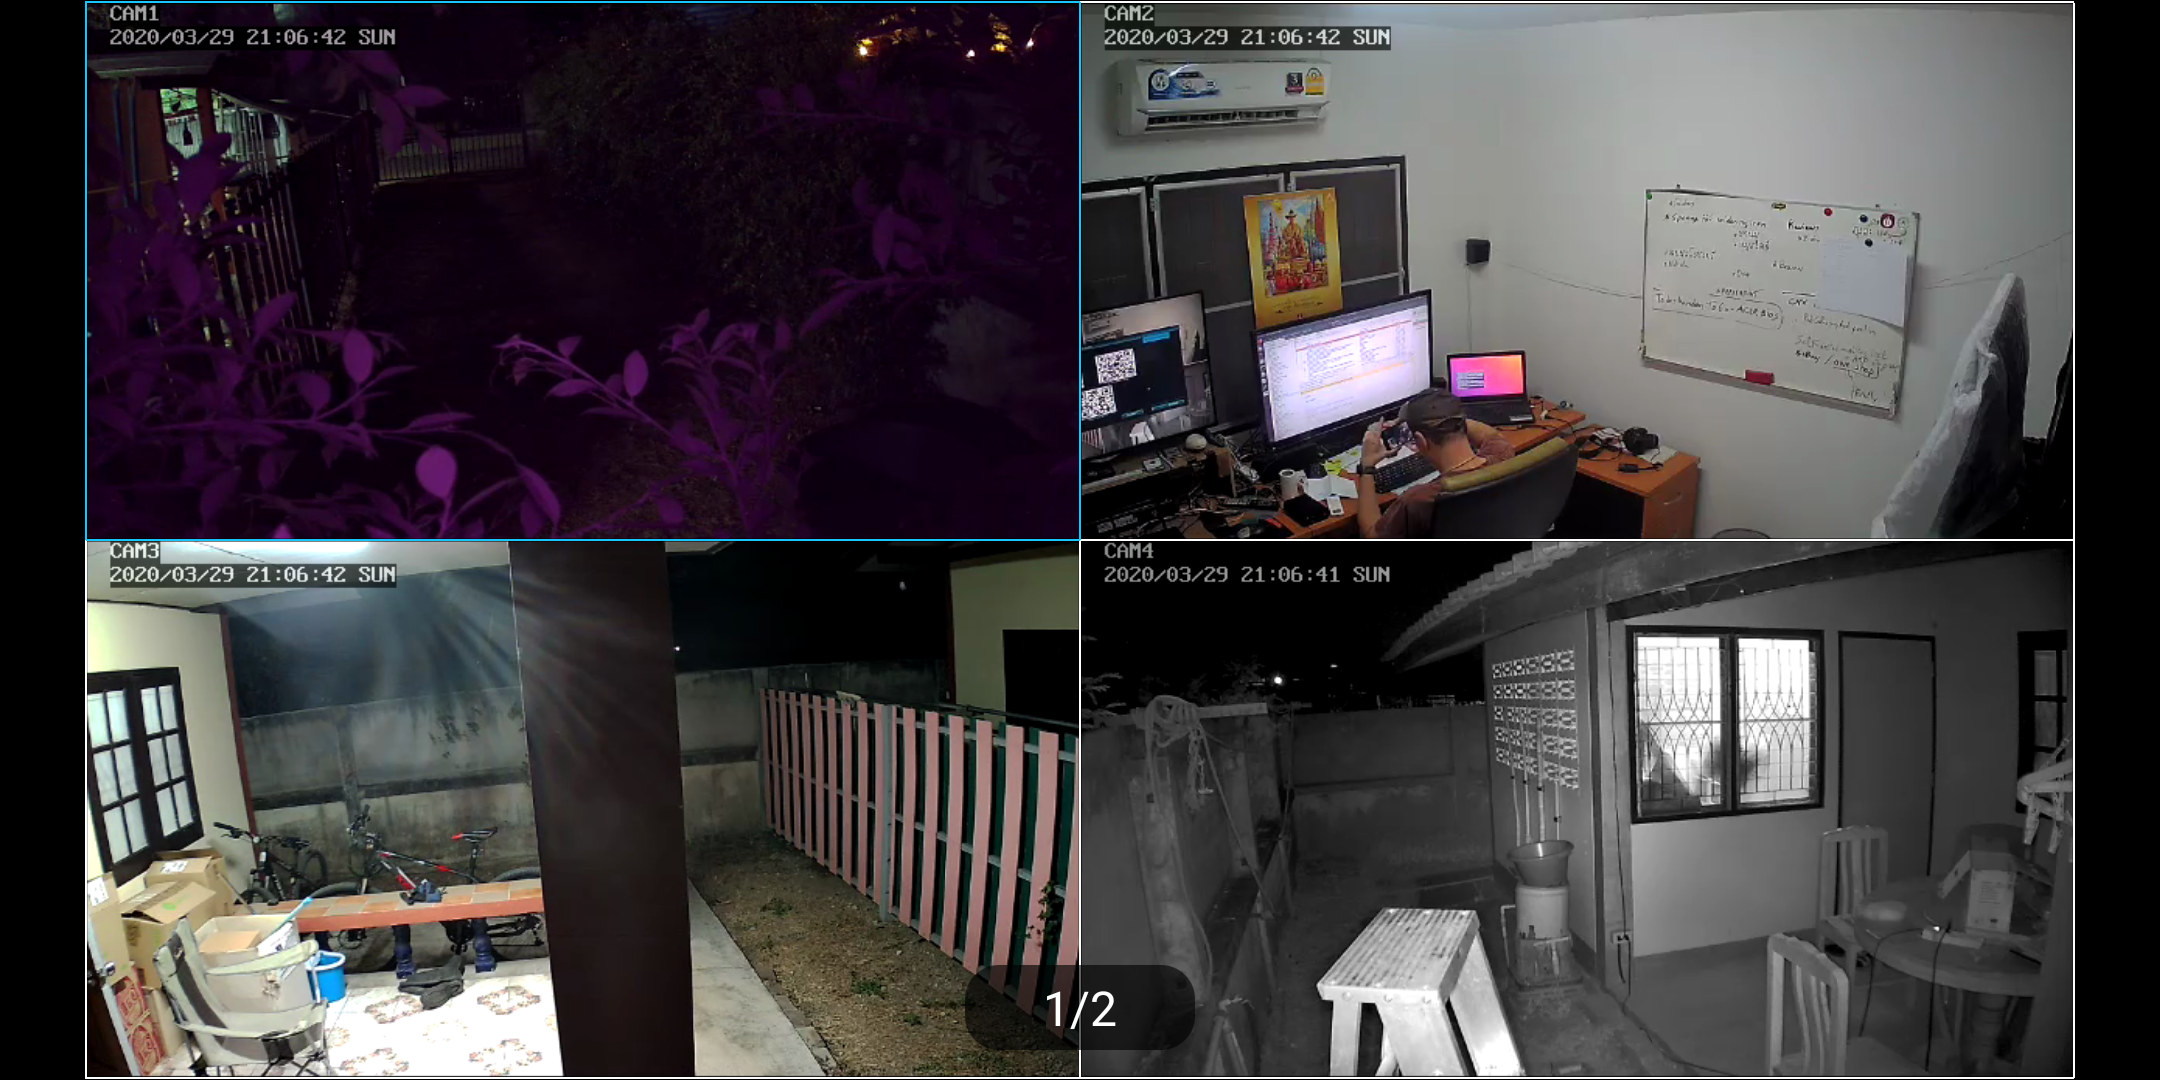
HM241 Cameras and Night Vision
Night vision works well as long as there aren’t any objects close to the camera. CAM4 looks great, but since CAM1 would only focus on the leaves I switched to day time vision and it’s a bit better although purple-ish.
The CAM1 screenshots below show objects close to the camera should be pushed on the side as much as possible.
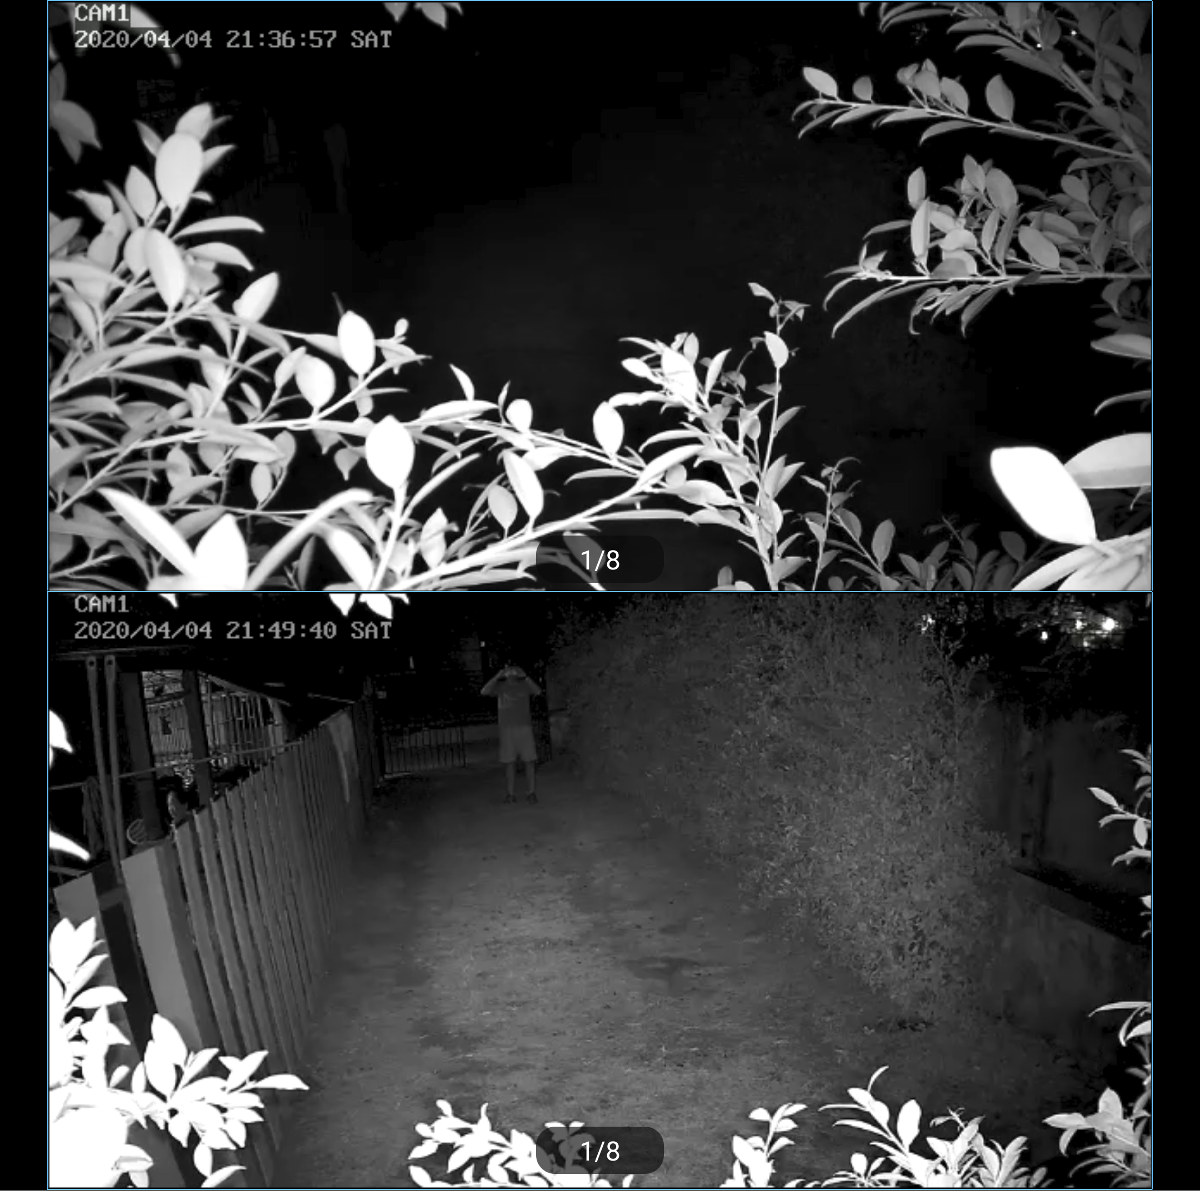
When leaves are in front of the camera we can’t see anything but the leaves at night. After pushing the leaves aside, we can see further. Since it’s not available possible/practical to remove all obstacles in front of the camera, I asked the company if there were some settings I could adjust:
If there is an object nearby the camera, it will reflect light, partial reflection, the light will be very strong. In order to prevent the reflective place from being too bright, the camera will lower the overall brightness automatically, which may cause the dark place to become darker. This is a matter of exposure settings. This parameter setting of exposure is not open in the machine.
Therefore, when installing the camera, it will be better to ensure that there is no obstruction in front of or at the edge of the camera to avoid this situation.
HM241 Video Playback
If something goes wrong you’ll want to find out what happens. We had kidnapped Santa Claus and kept in a secure location, but suddenly he went missing, so we had to find out who took out our source of income.
We could do so by going into Video playback from the popup menu in the NVR systems. The interface allows us to select the day, cameras, search for time, filter by timed or motion record, and export data.
This is what the playback looks like during day time.
Green is for motion, red for timed recording.
We managed to capture Santa Claus back, but he came back again at night:

For reference, I’ve been running the system for about 15 days, and I can access all recordings from the installation date. My hard drive has 225 GB capacity used out of around 938 GB, so that means a one terabyte drive can hold data for around two months. You can also configure the system to delete videos automatically after X days (default: 30 days). Bear in mind the amount of data stored by the system will depend on the scenes to be recorded, as more complex scenes may not compress as well.
Exporting Video Recording from HM241 NVR
In some cases, you’ll want to keep recording as proof for the police or your mafioso friends. You can do so in the Video Playback menu but only one recording at a time. It’s better to go to the popup menu and select Video backup instead.
Here you can select cameras, record modes, and search by time. You’ll need to insert a USB drive formatted with FAT32. Since there’s only one USB port, a USB hub must be connected to the NVR to have both the mouse and USB drive connected at the same time.
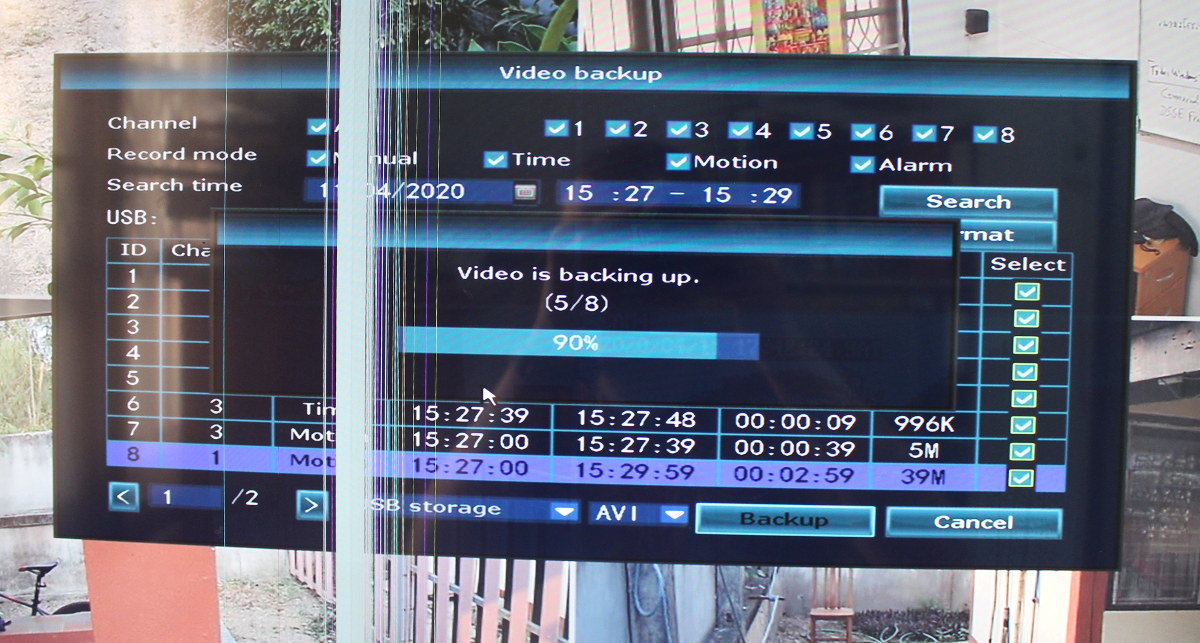
Select the videos you want to back up, and click on the Backup button until all is done.
Now let’s take the USB drive and connect it to our computer.
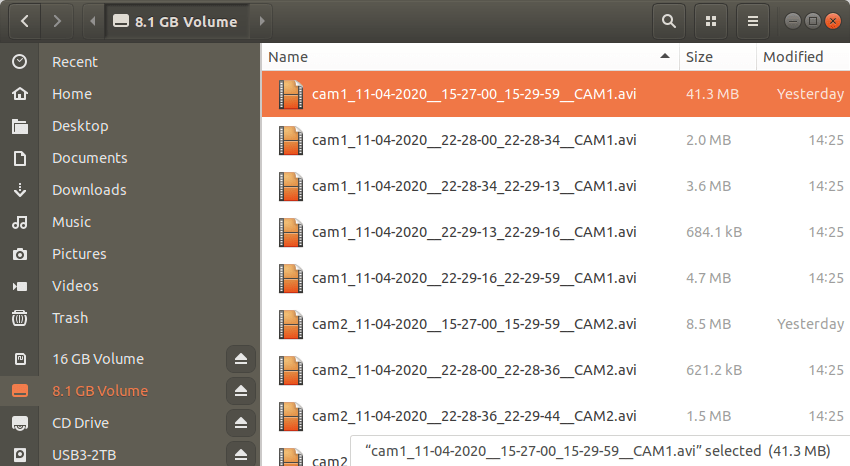
Files are conveniently named with the camera number, date, start and end times, and what I suppose is the camera name, for example, cam1_11-04-2020__15-27-00_15-29-59_CAM1.avi.
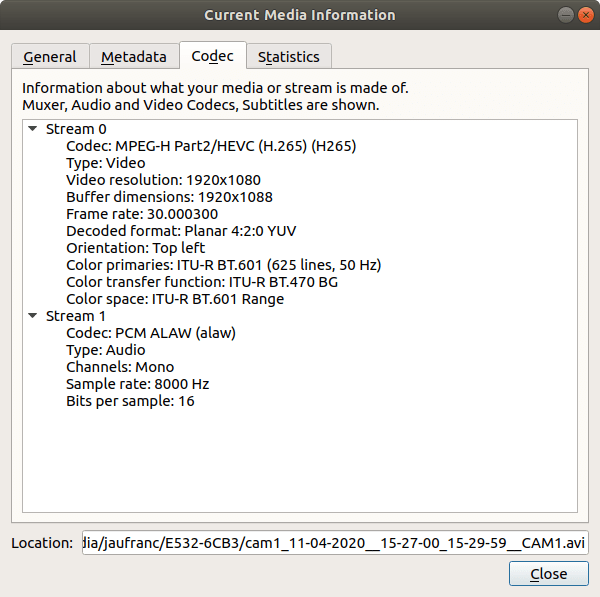 Videos are recorded with H.265 video codec and PCM ALAW audio although as far as I know there’s no audio (mo microphone inside the camera). I had no trouble playing the videos in VLC, and I did a small montage from the sample to show the video quality during the day. Make sure to play in 1080p resolution.

If you prefer getting raw video samples for night and day, you’ll find them on MEGA.
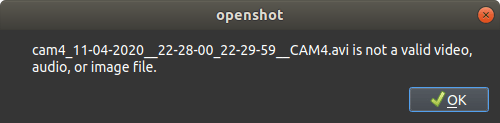
Note that I used OpenShot 2.5.1-dev2 to create a video above, and I had trouble importing the videos, as it was not detected as a valid video.
I decided to convert the file with ffmpeg but I got the following error:
|
1 2 3 |
[avi @ 0x55989269d2c0] Could not find codec parameters for stream 0 (Video: none (H265 / 0x35363248), none, 1920x1080, 1739 kb/s): unknown codec Consider increasing the value for the 'analyzeduration' and 'probesize' options Guessed Channel Layout for Input Stream #0.1 : mono |
So it’s possible the videos generated by HM241 NVR are not entirely standard. Since the file plays in VLC, so I used Media->Convert / Save menu to convert the file to H.264 MP4, and from there I could import the videos into OpenShot.
Conclusion
Now that I’ve used both solar-powered cameras and a Heimvision HM241 NVR HD kit, I really feel solar-powered cameras that must rely on PIR motion sensor to save power are more like toys since they may miss events, and if you really want to make sure to record all important events a full NRV kit that can record 24/7 is much better. The downside is that you need to have a power source for each camera which may require some extra cabling. while solar security cameras can be installed pretty much anywhere within Wi-Fi range.
I was surprised by how easy it was to set the Heimvision HM241 NVR system up, the cameras just show up as soon as everything is powered one, and the configuration of the system is not too complicated. Image quality is good, although night time recording as always less clear.
So I’m very satisfied with Heimvision HM241 NVR HD kit but bear in mind that since it’s an entry-level kit, some features may be missing including audio recording (and hence no two-way audio), camera exposure settings, PTZ, RF alarms support, etc…

Jean-Luc started CNX Software in 2010 as a part-time endeavor, before quitting his job as a software engineering manager, and starting to write daily news, and reviews full time later in 2011.
Support CNX Software! Donate via cryptocurrencies, become a Patron on Patreon, or purchase goods on Amazon or Aliexpress


First things first – what’s up with you monitor?
It’s broken. Explanation and link are already in the review 🙂
How did you get your tv to connect to the nvr? I’ve tried both hdmi and vga and nothing will pull up!
With an HDMI cable. I did not have to do anything special, it just worked out of the box.
“ My hard drive has 225 MB capacity used out of around 938 MB”
1995 called… they want their storage back 🙂
From the setup screens above it looks like it is a 1TB drive, he probably meant 225GB used out of 938GB available.
So I’m to understand that the 241A does not have the two way audio? Then why do they bother having the mic icon? What’s the purpose of the “volume” button? They have no support and I find frustrating and I rely on people like yourself and people on YouTube to help. I greatly appreciate.
That’s because they use the same software for different models.
It would be extra nice if they could be runtime detection, and clearly disable features that are not compatible with a given model.
Can you help I got heimvision hm241 I downloaded firmware from a site that was a third party and now I can’t access my past recording oonnxx.com I think I made a mistake and want to get a secure and correct website to download/ downgrade I didn’t notice upgrade with network until after the fact I have version 3.3.1 etc tried update but said it’s the newest version
Thank you – good hints. HM241 is a fine entry level kit; installed here recently. If scheduling both by time (red) and motion (green) both are saved on the hard drive? That is not clearly stated in the manual, but good with enough storage space. Converting from wifi to wired ethernet is a snap, too… very easily done.