
Beelink GS-King X is a 3-in-1 media center that works as an Android 9.0 TV box, a NAS with support for two 3.5″ hard drives, and a HiFi audio system with two ESS9018 audio DACs powering RCA and balanced audio outputs.
The company sent a review sample, and I’ll start by checking out the hardware and accessories, show how to install the hard drive(s), and attempt to tear down the device to check what it’s really made of.
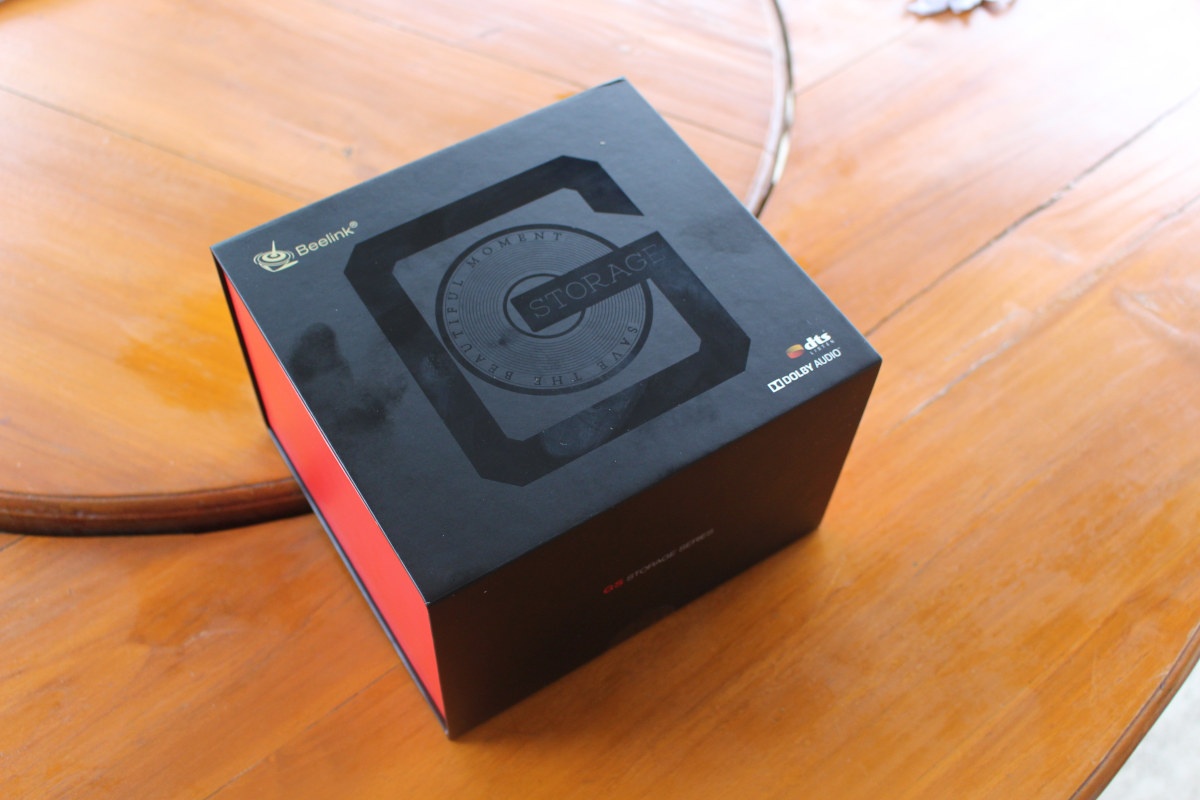
Beelink GS-King X Unboxing
There’s no mention of TV box nor Android on the package, just “STORAGE” and DTS plus Dolby Audio…
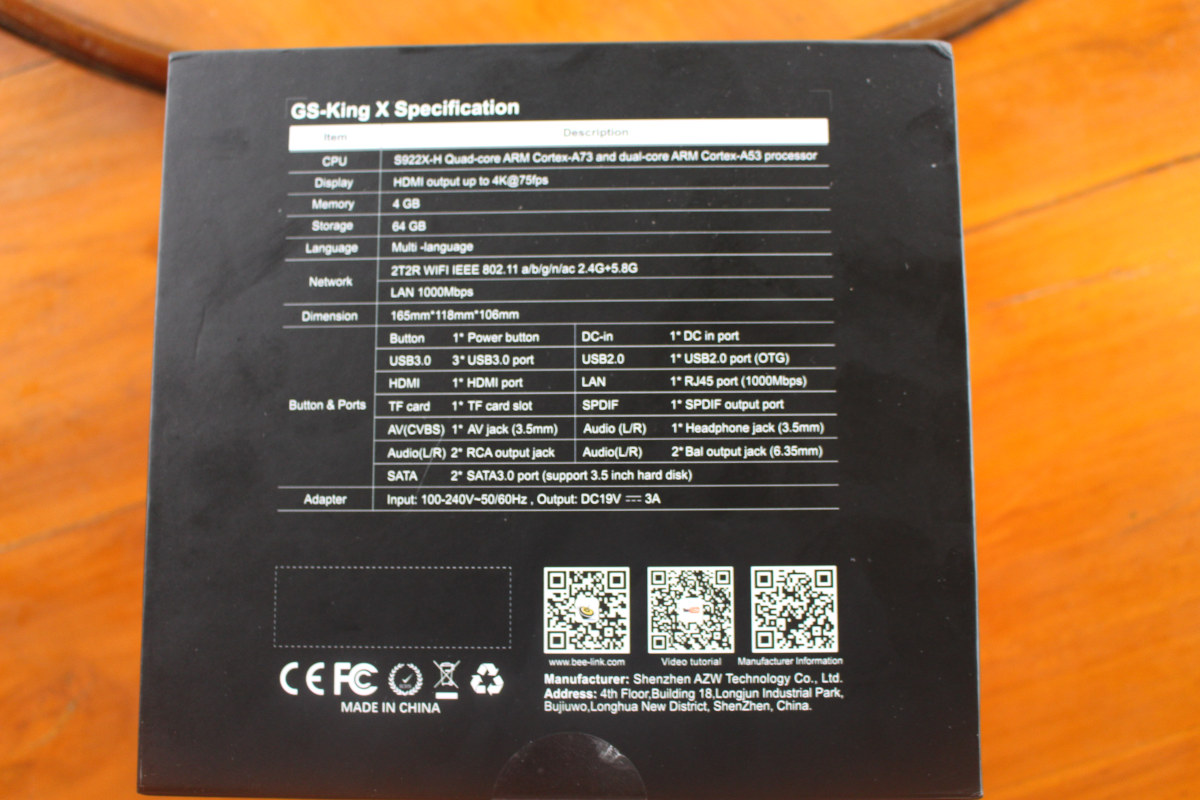
The bottom of the package lists the Beelink GS-King X specifications which we already discussed in our previous articles.
There’s a red ribbon that helps to take the device out of its package. I wish more companies would do this.

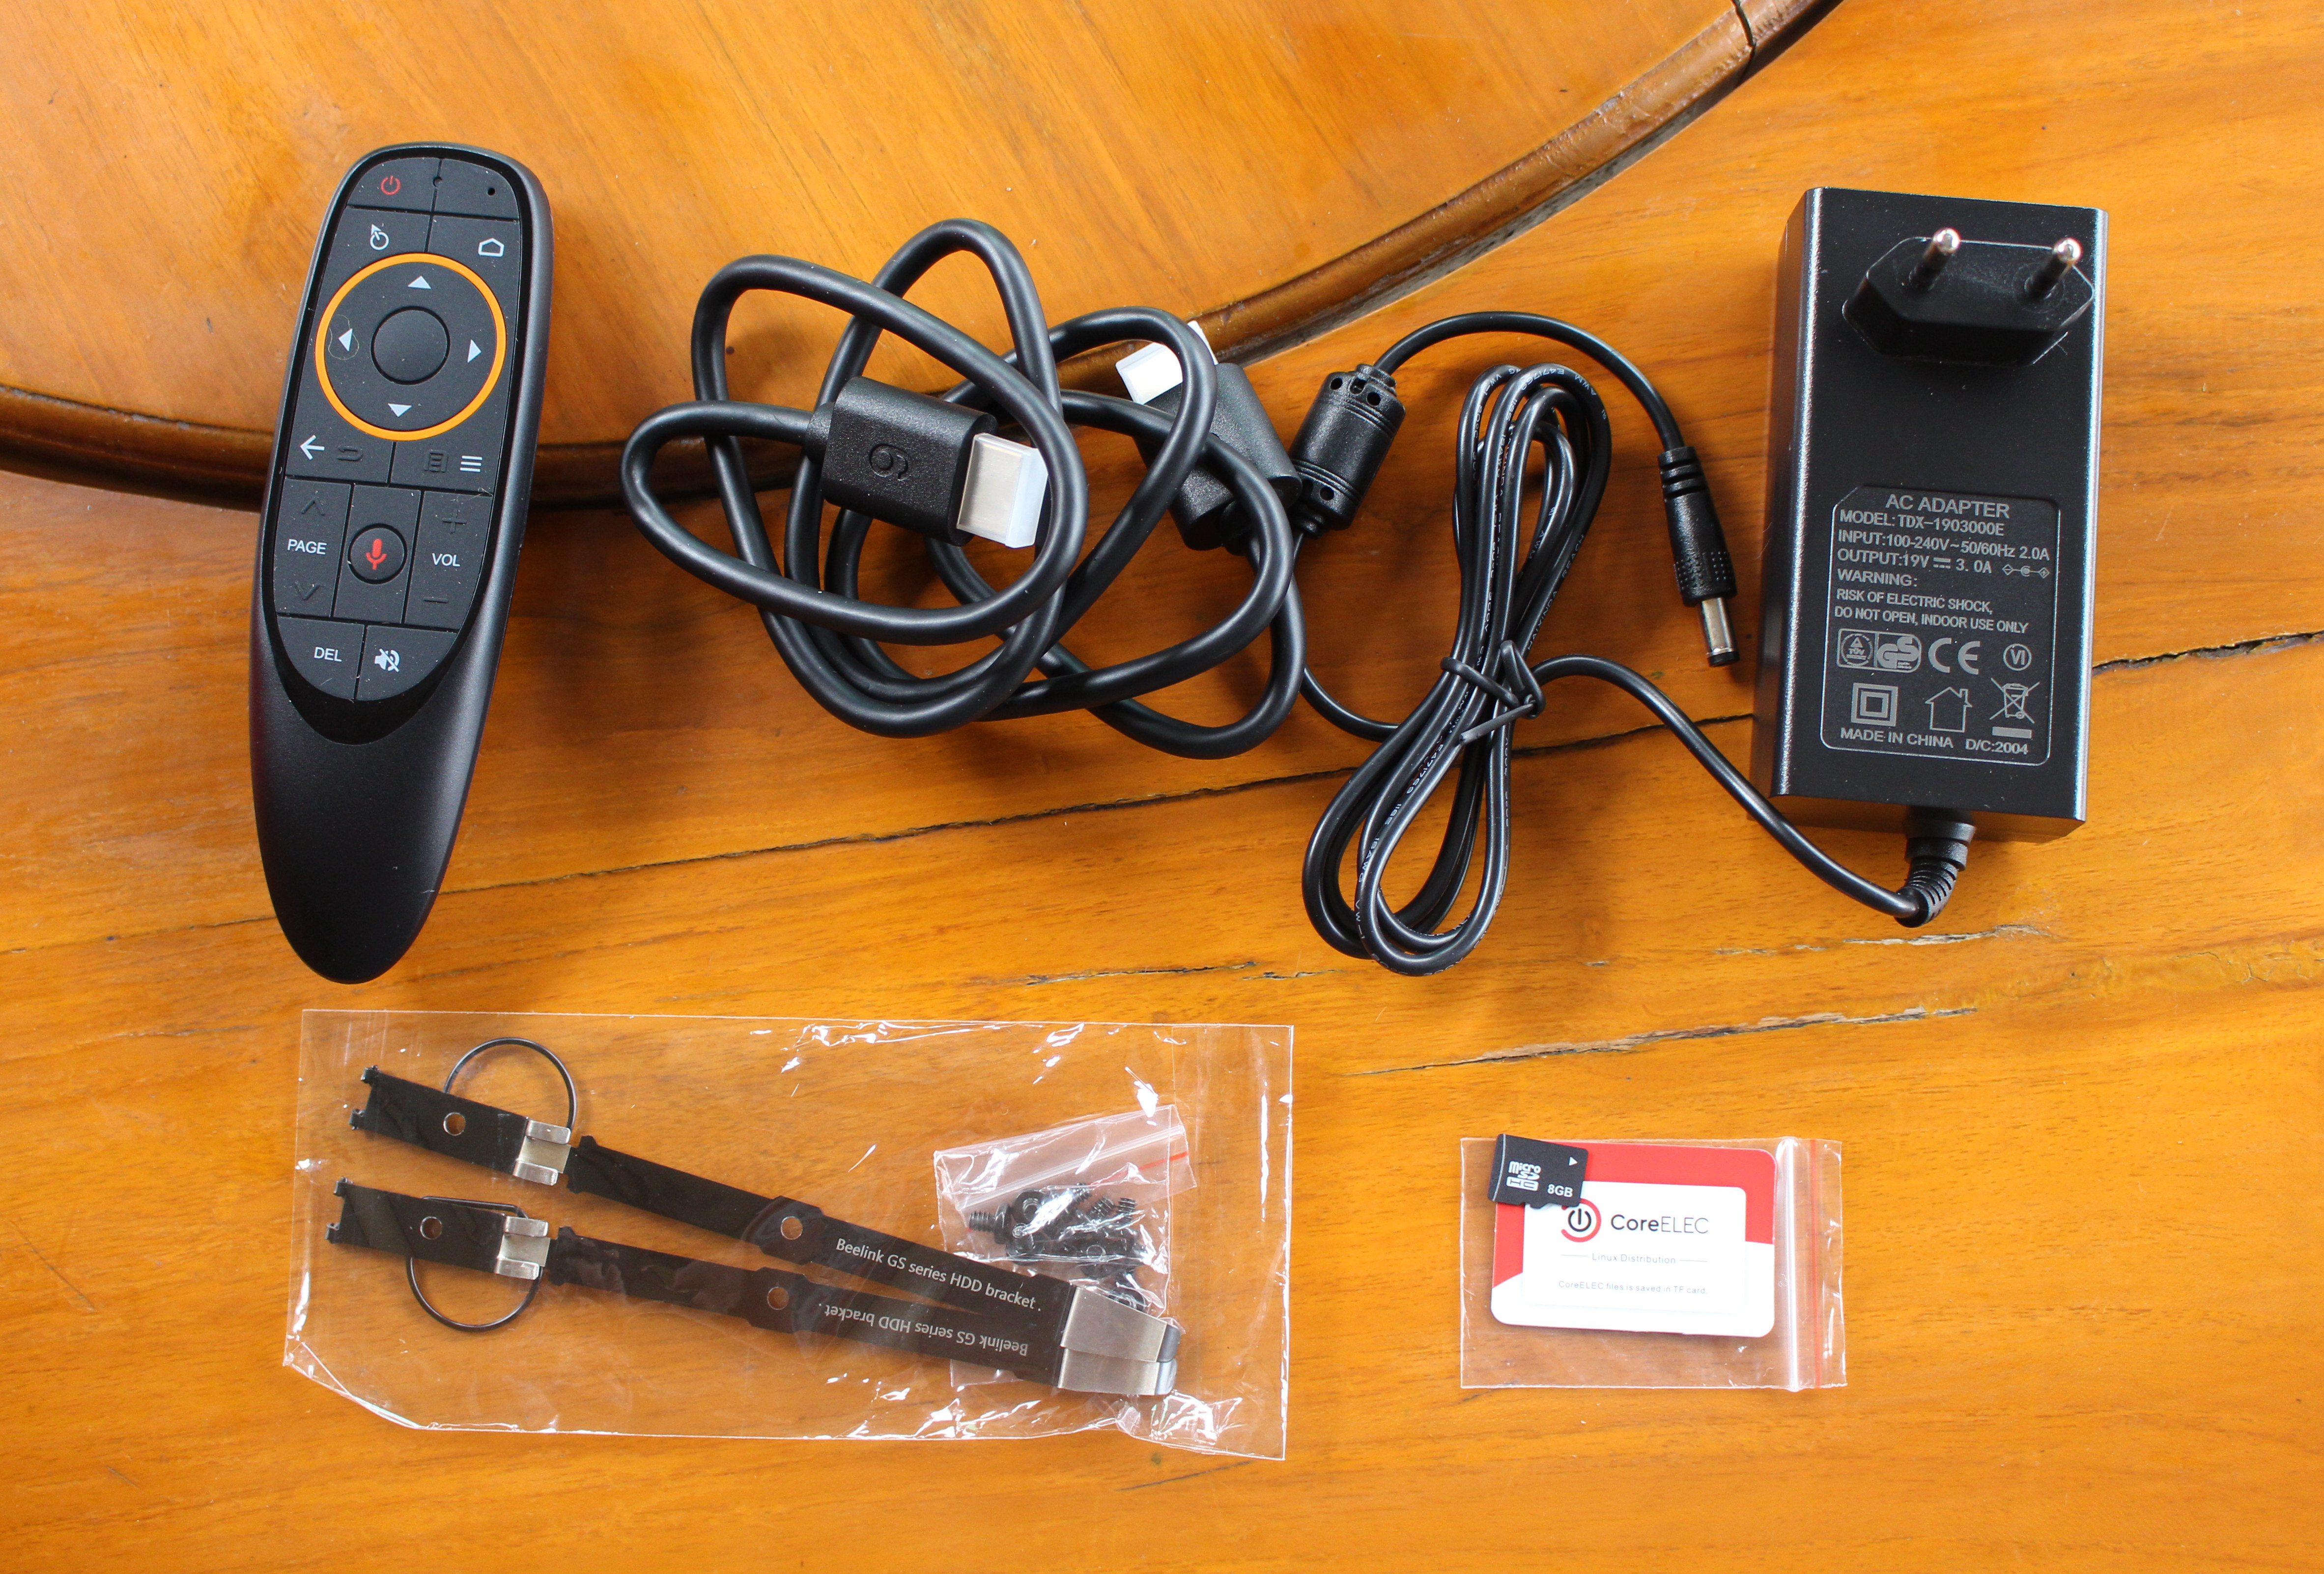
Accessories include the voice remote control, an HDMI cable, a 19V/3A power supply, HDD brackets with screws, as well as an 8GB MicroSD card pre-loaded with CoreELEC. There should also be a user manual, but Beelink removed it to avoid confusing officers at the customs department (that’s a country-specific thing…). There should also be four brackets in the package, but Beelink used two to install a drive into the review unit.
The device is actually a bit more compact than I expected from the first product photos.
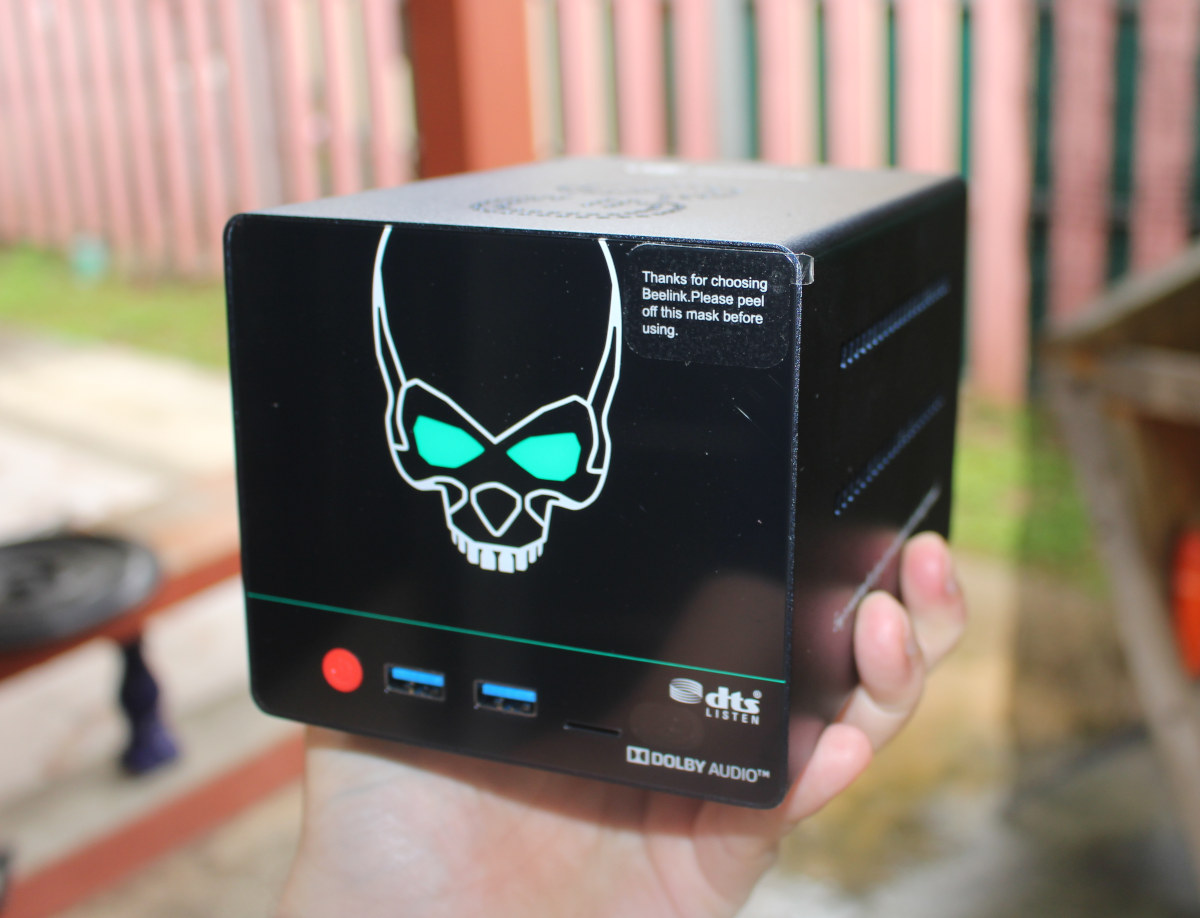
The front panel comes with a power button, two USB 2.0 ports, and a MicroSD card slot, as well as “eyes” LEDs.
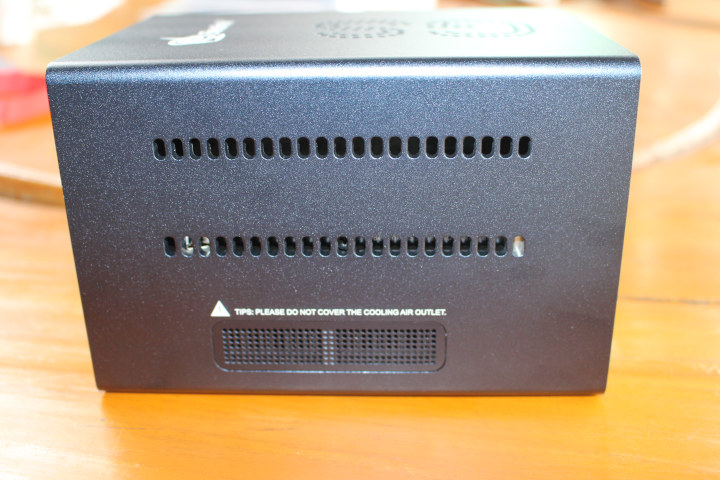
There are ventilation holes for the hard drives and a “cooling air outlet” for the fan place on top of the Amlogic S922X-H processor.
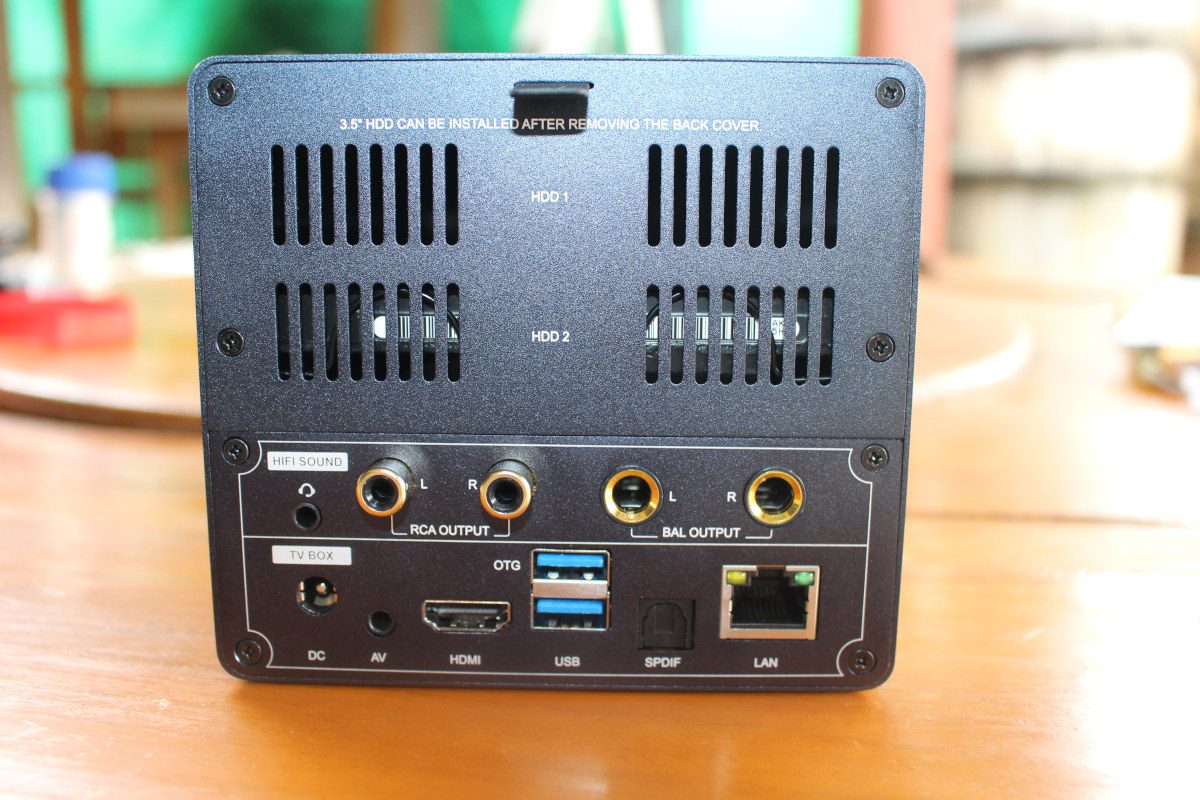
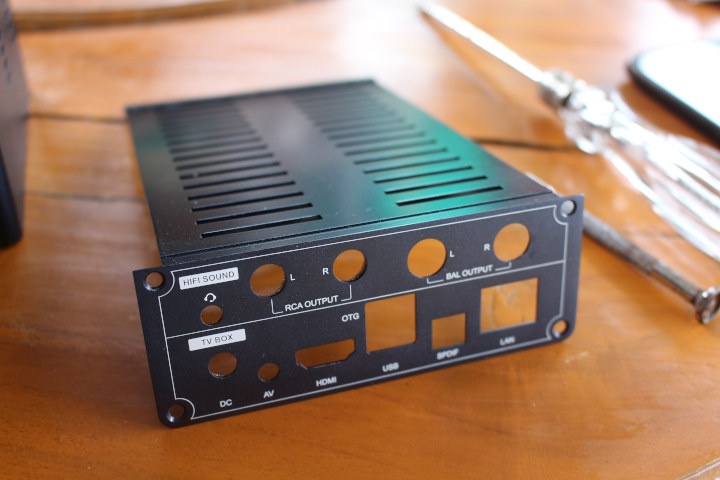
Most ports can be found on the rear panel with an “HiFI sound” section with a 3.5mm audio jack, RCA output and balanced output, as well as a “TV box” section with the power supply, HDMI and AV ports, two more USB 3.0 ports including on OTG port, S/PDIF output, and Gigabit Ethernet.
HDD “installation”
Beelink GS-King X does not normally come with any hard drives, so you’ll have to install one or two 3.5″ SATA drive(s) yourself. The company was kind enough to ship the device with one 4TB SATA drive they already installed. So the installation procedure will be shown “in reserve”.
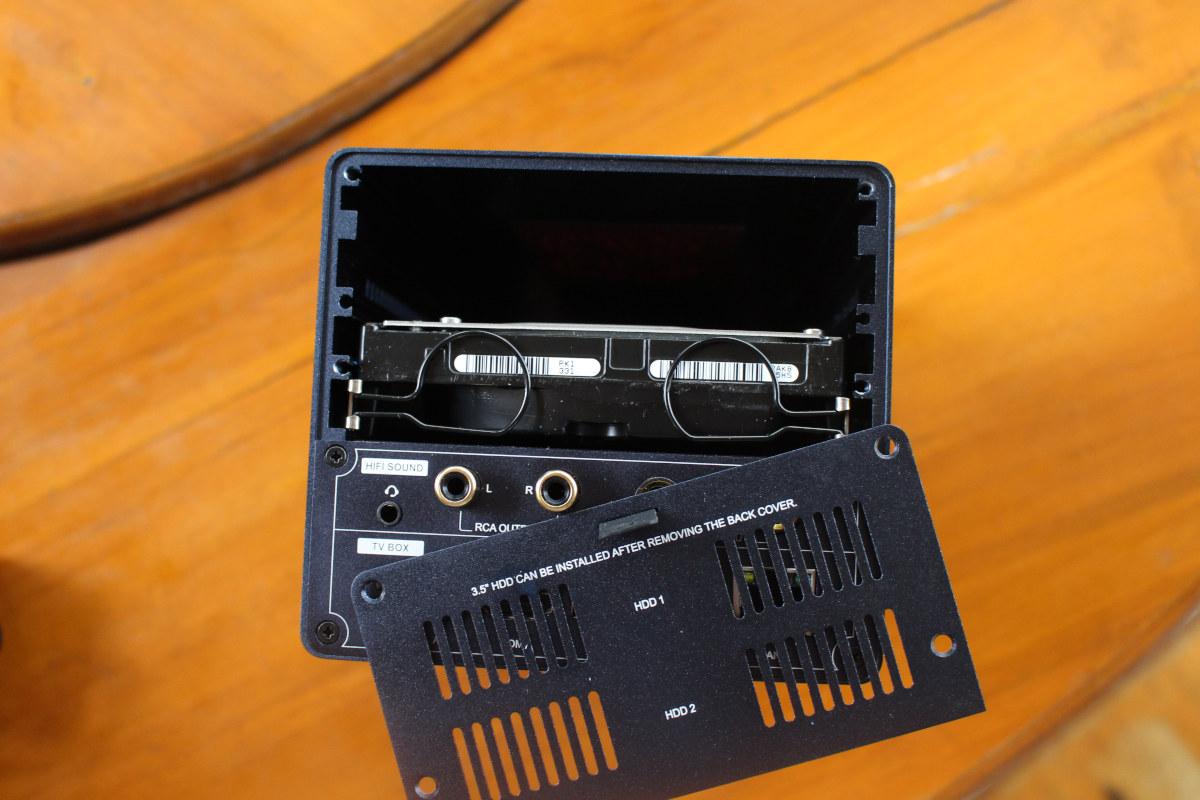
First, remove the four screws holding the hard drive cover to the main unit, and pull the “sticker” to take the cover out, and access the SATA drive bay.
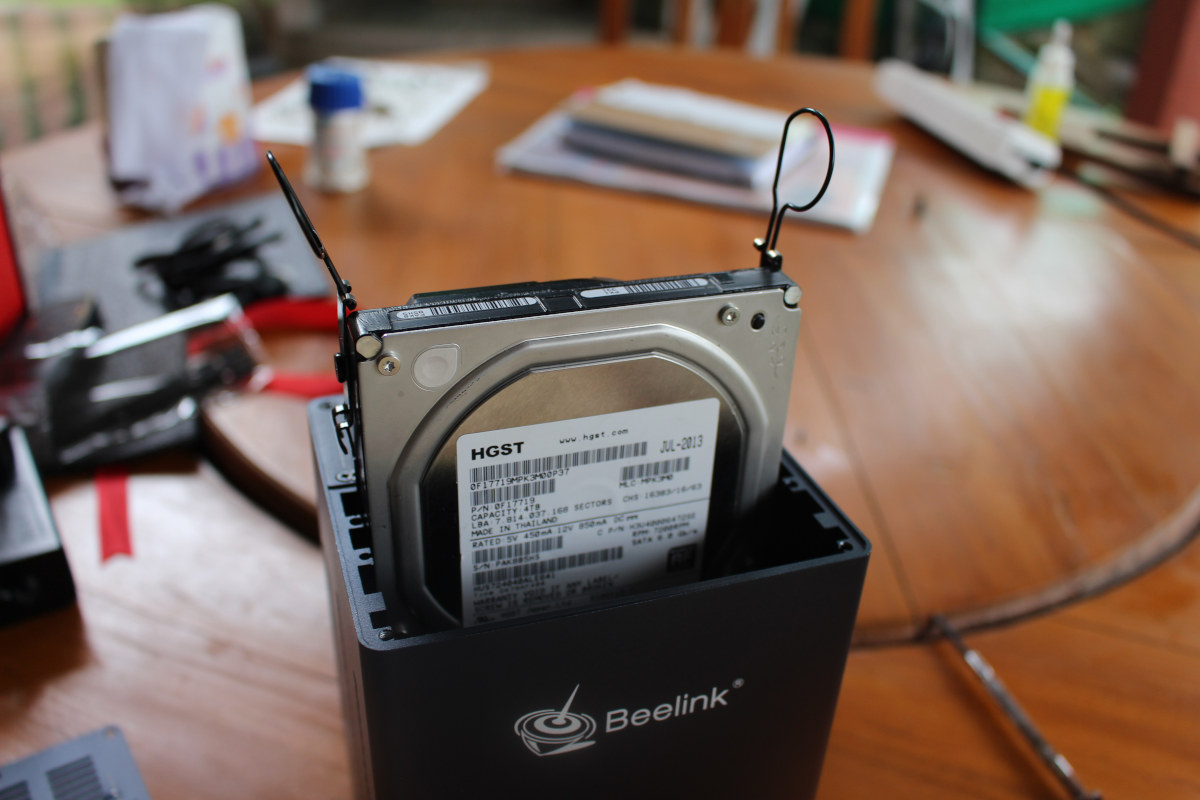
Beelink managed to find a method that looks quite cheaper than traditional hard drive slot mechanisms. You’d just need to install two brackets, one on each side of the hard drive, with each bracket fitted with two metallic hoops allowing you to take out the drive when needed.
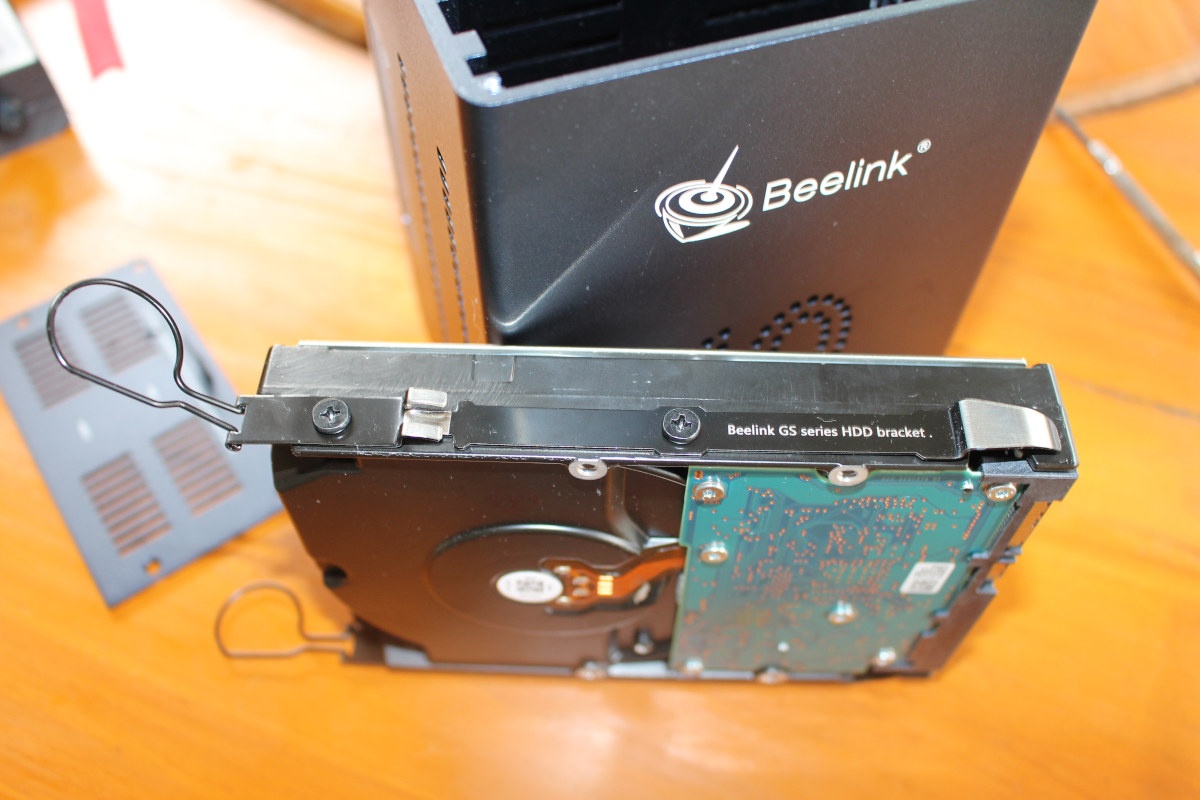
Once you’ve installed two brackets, fold the black hoops, and push it down until it’s inserted into the SATA connector at the back of the unit. Place the cover back, and you’re done.
Beelink GS-King X Teardown
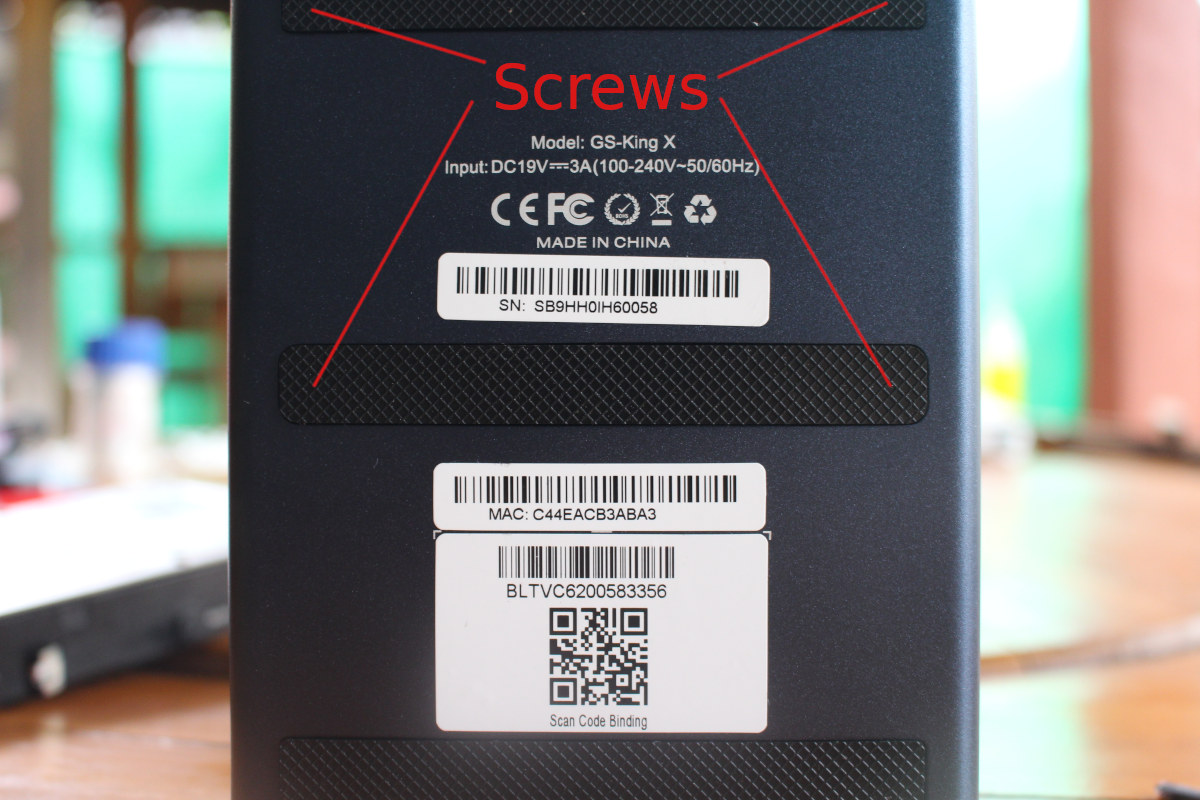
Let’s try to do a teardown. There are four screws holding the board hidden behind two of the three long rubber pads underneath the device.
You’ll also need to loosen four screws to take out the lower part of the rear panel.
There are two more screws holding the mainboard that would have required me to remove the plastic front panel cover. I did not feel I could do it without risking damaging the cover. I still managed to take some photos, albeit blurry.
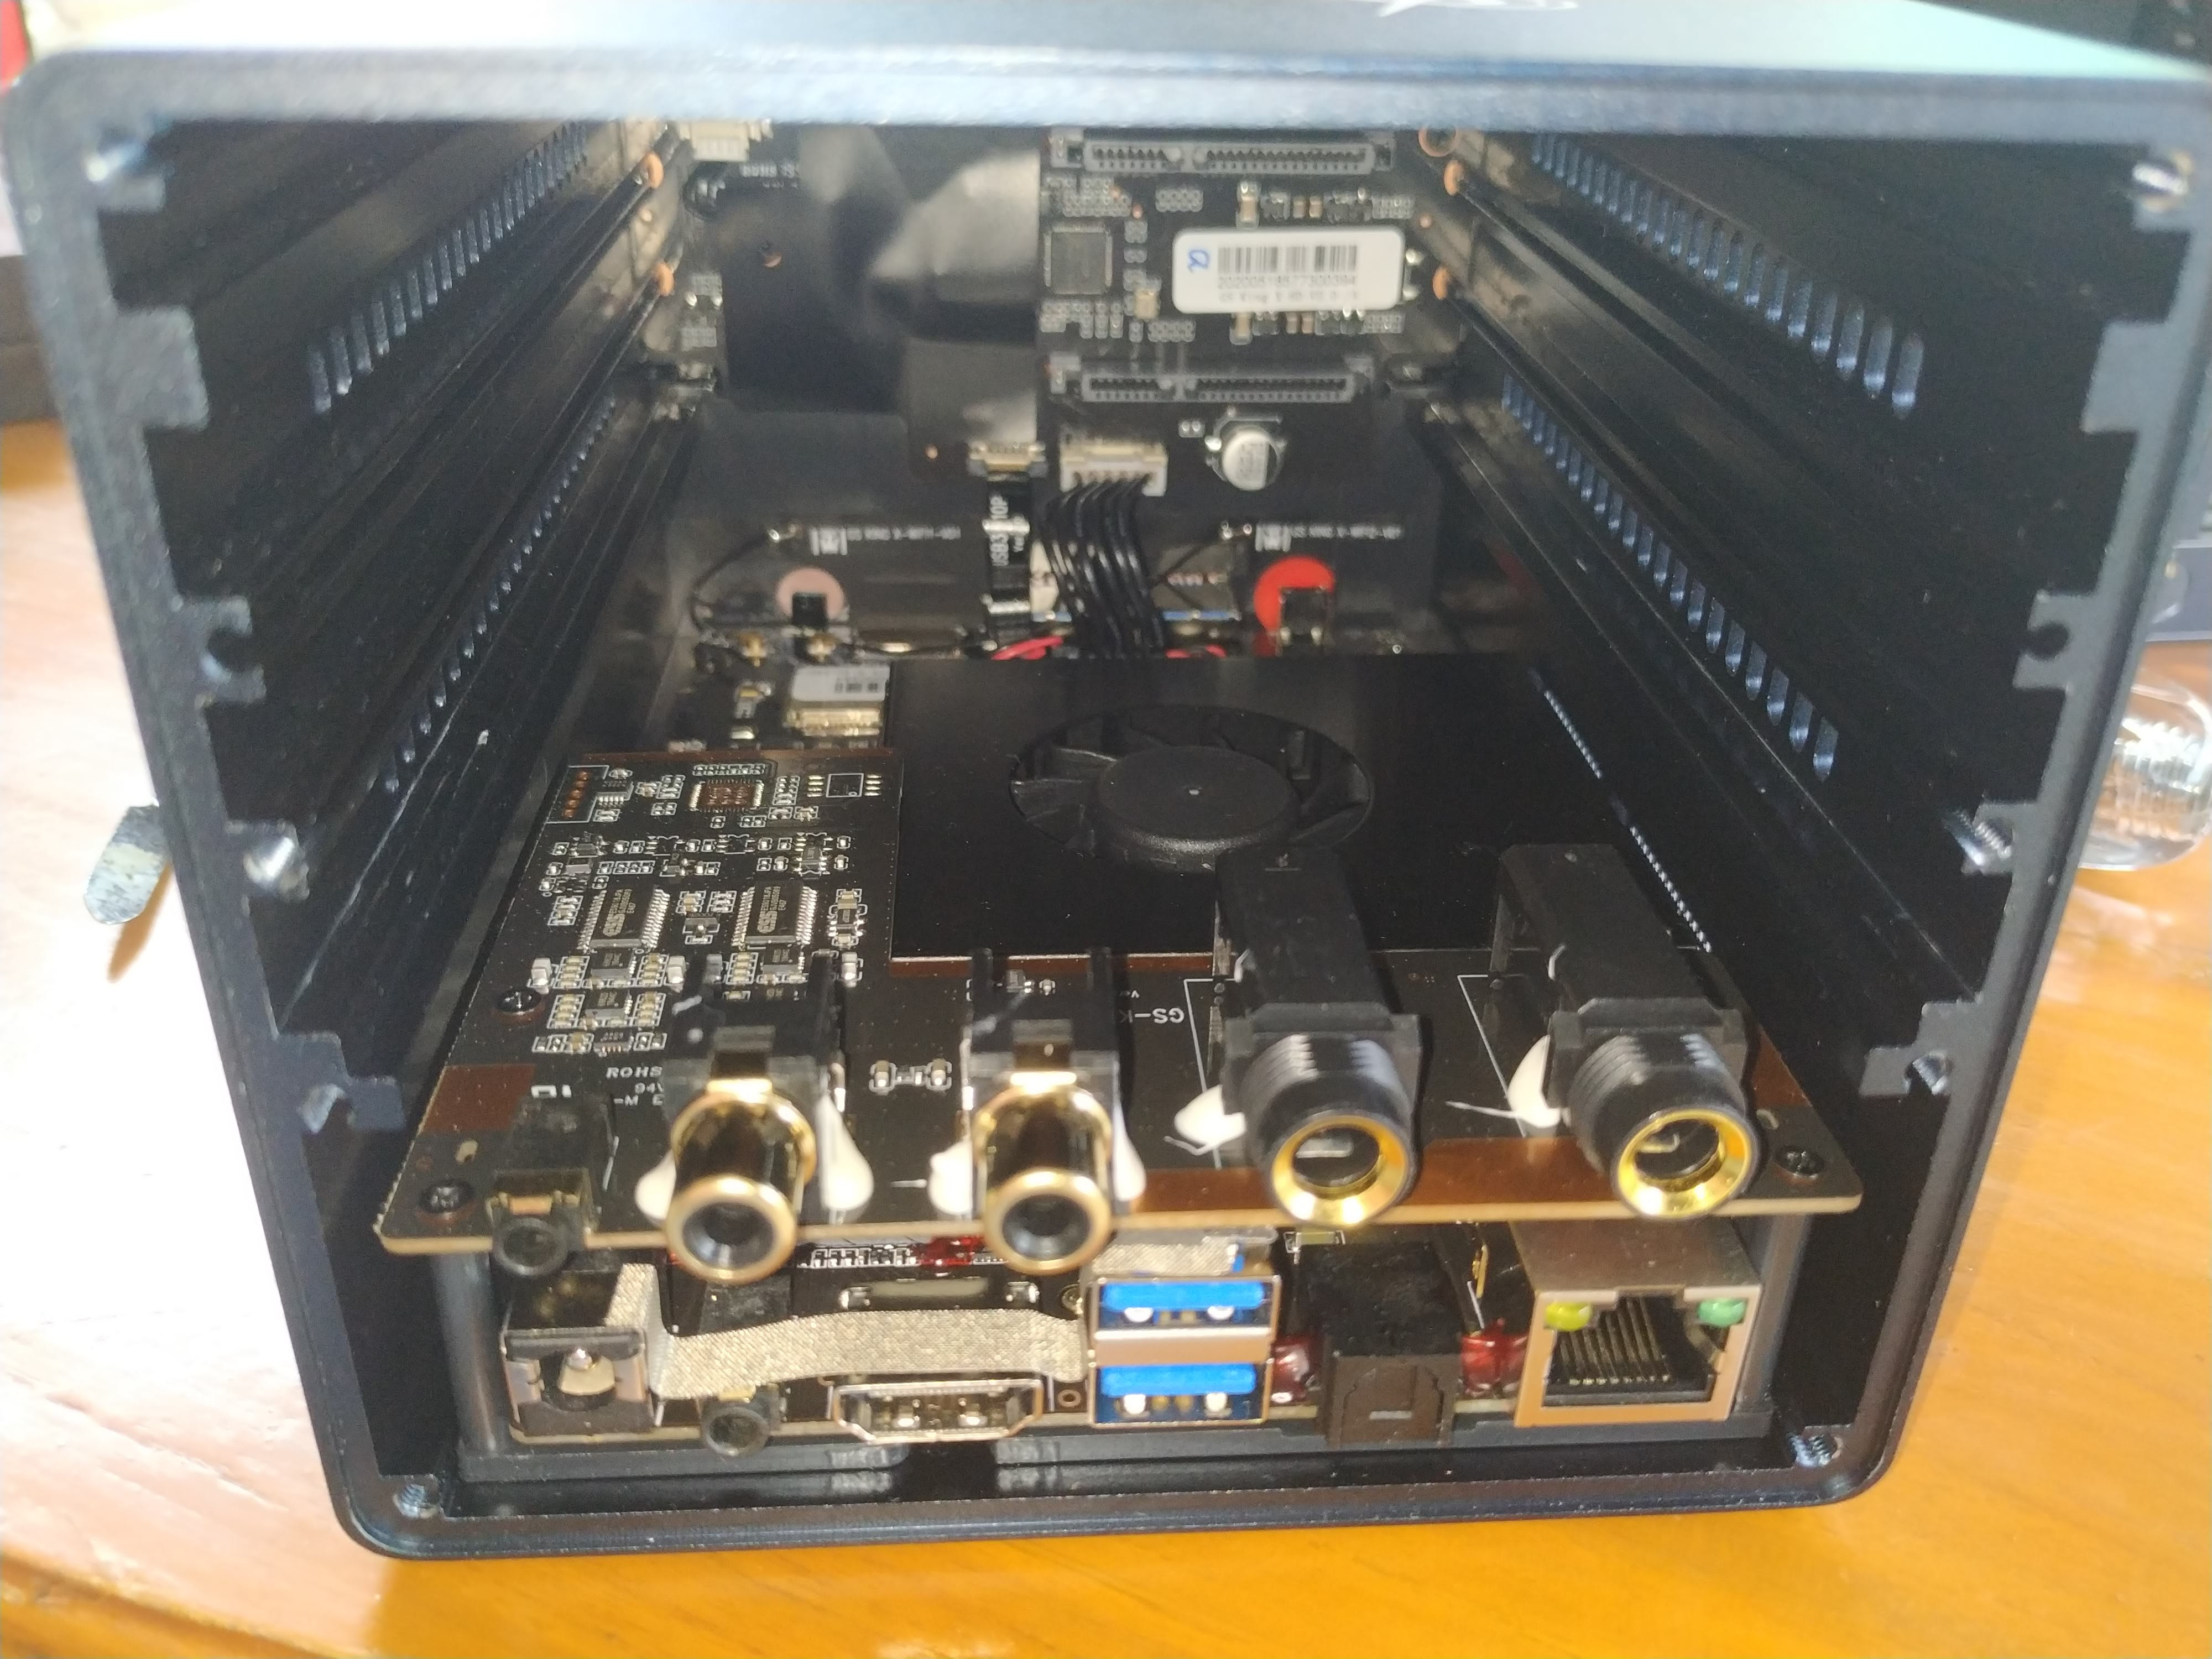
We can see the audio board with the two ESS audio codec, the fan covering the processor (and a few other components), as well as the SATA board at the back. There’s also a recovery button underneath the HDMI port.
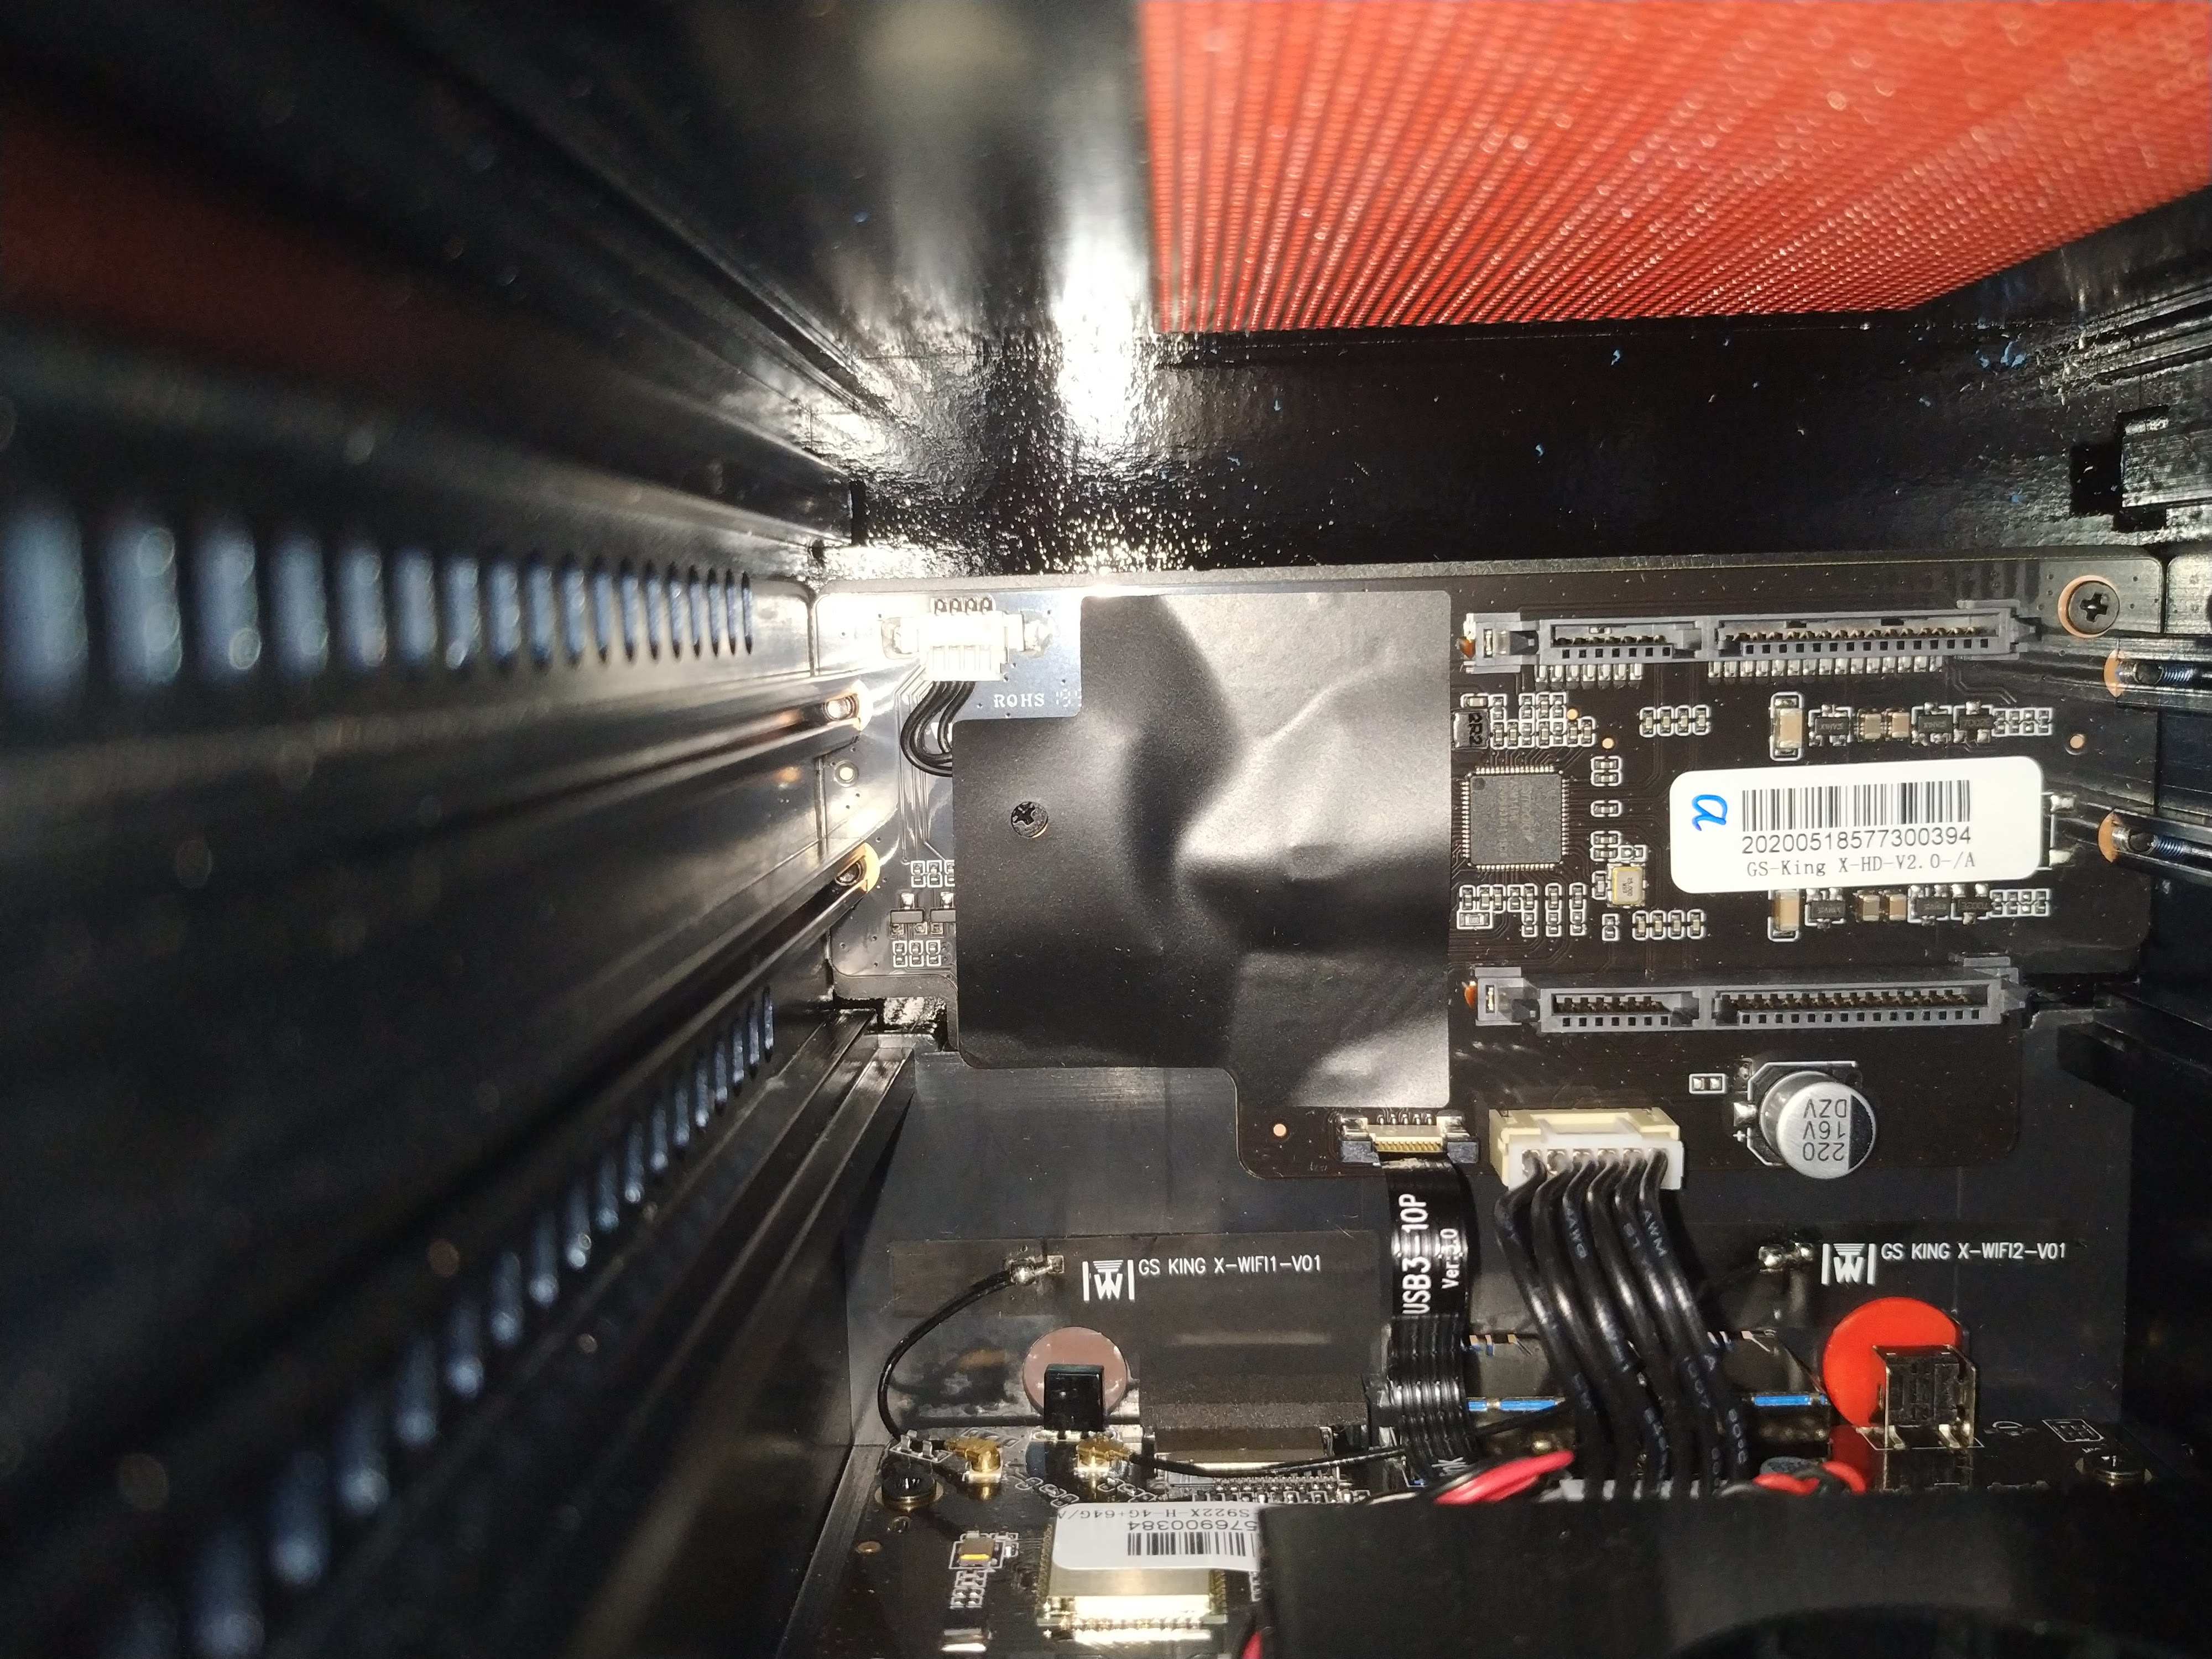
We can see the two other black screw on the left and right side of the board still holding to the chassis, The red thing on the top if an anti-dust filter, and we can also have a closer look at the SATA board with two SATA connectors and based on ASMedia ASM1156 USB 3.0 to SATA controller with support for 5Gbps speed and UASP. Despite being launched many years ago, tHere’s no product page on ASMedia, but it may be close enough to ASM1153E chip, and I just found information from another product on Amazon.
[Update: The company has provided some photos of the main board
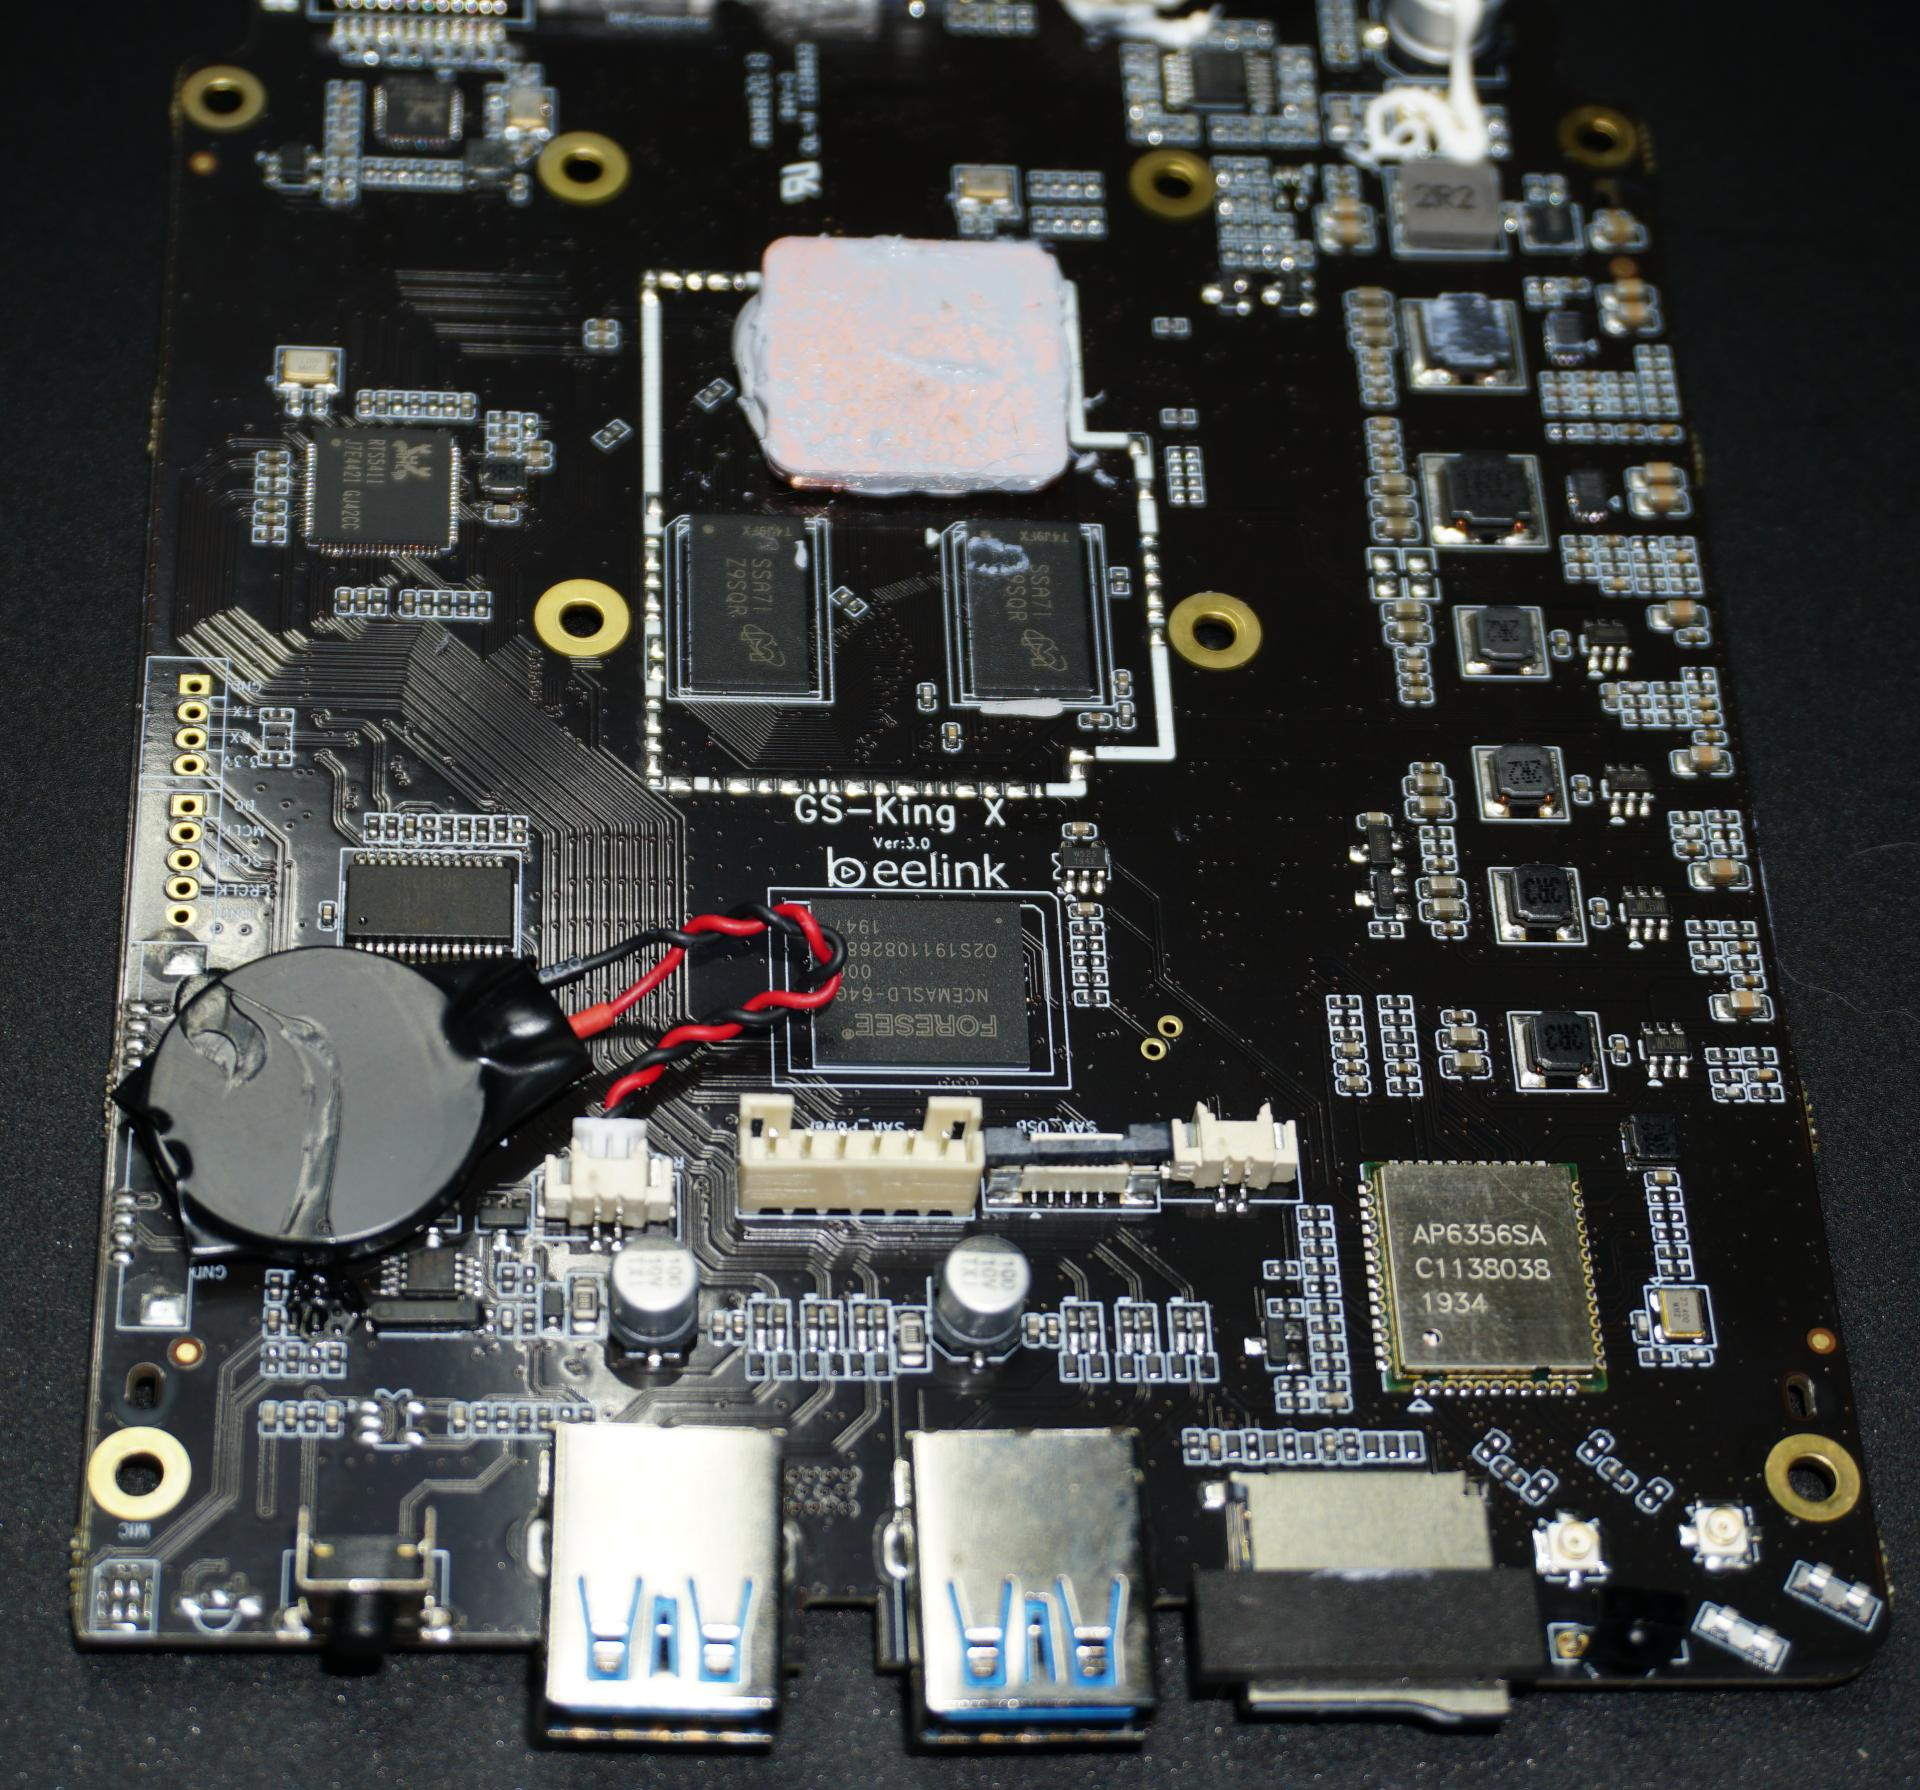
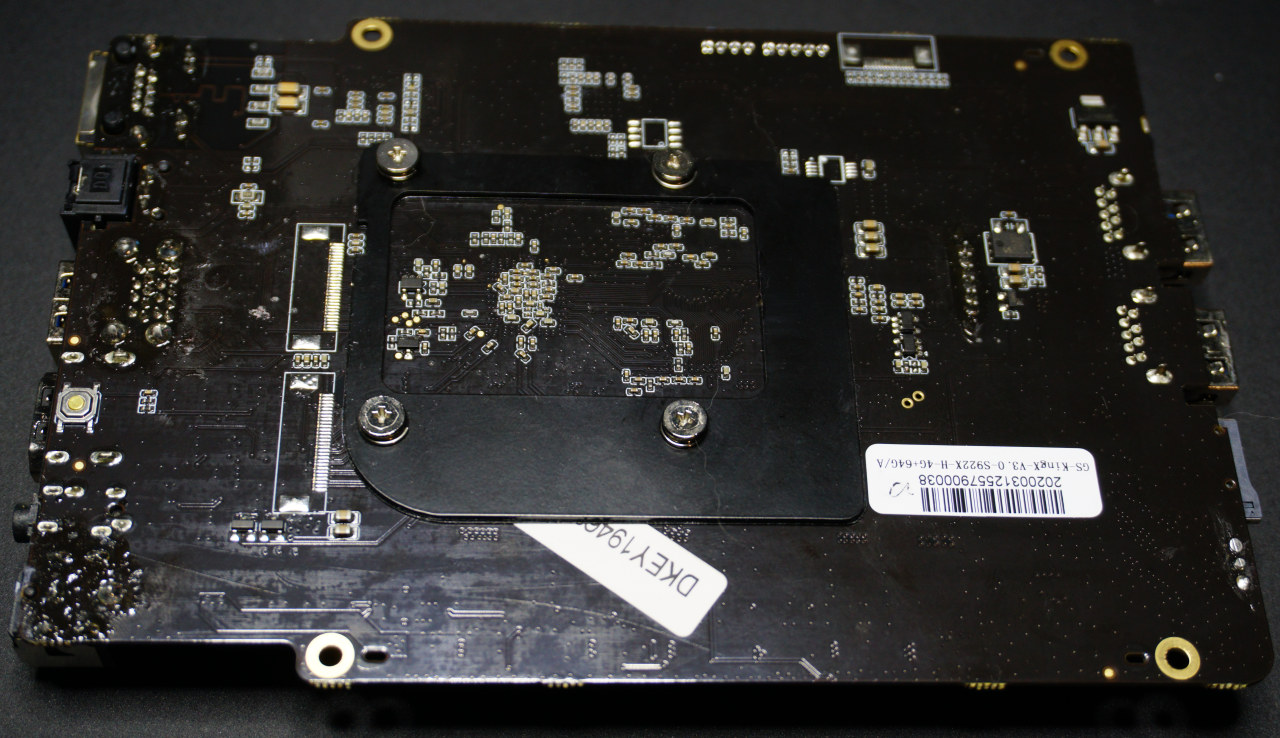
]
I’d like to thank Beelink for sending GS-King X for review. It is sold on GeekBuying for $269.99 plus shipping which brings the price to a little over $300 to the US. You’ll also find it on Aliexpress for $300 with free shipping, as well as GearBest for $289.99 plus shipping. The final price will vary from country to country due to different shipping fees, so it may be worthwhile to shop around.
Continue reading “Beelink GS-King X Review with Android 9 – Video & Audio Playback, NAS/File Server Function, and Benchmarks“.

Jean-Luc started CNX Software in 2010 as a part-time endeavor, before quitting his job as a software engineering manager, and starting to write daily news, and reviews full time later in 2011.
Support CNX Software! Donate via cryptocurrencies, become a Patron on Patreon, or purchase goods on Amazon or Aliexpress


There two to three reviews on YouTube with mixed opinions as a Android player. Also seems some struggle with google play and Netflix / Amazon streaming are in mobile resolution.
forget the specs etc.. it’s got a skull on it. Gotta be good.
My intuition was probably right when I decided not to remove the front panel:
Is there an accessible serial port without removing the front panel?
I’ve added photos of the board at the end of the post. The company sent those to me.
There’s a UART header (unpopulated) that’s should be partially coverd by the fan. It looks pretty hard to access it… Beelink also told me the serial console can only be accessed via network ADB.
I’ve been told there may be a problem with Google Play with the firmware that was sent with my samples. Not sure whether it will affect people who buy online.
There’s a fix, although not that user-friendly
General rule for chinese crap – NEVER EVER buy it first. wait. usually it’s a total crap. Chinese loves to make good specs but implement everything in such terrible way it bacomes garbage. BeeLink is not an exception.
Not to mention that chinese became very greedy, prices almost reach European prices where companies already paid taxes and so on. 300$ for this??? better buy NUC will be MUCH more versatile.
I tried to boot it up yesterday. It would not turn on. I just found out the power supply was DOA.
My experience with the device so far:
I looked for another cable, and same error. That thing is complete garbage, I’ll have to think if I carry on with the review, or just stop it…