Cross-compiling Berkelium (and Chromium) for ARM

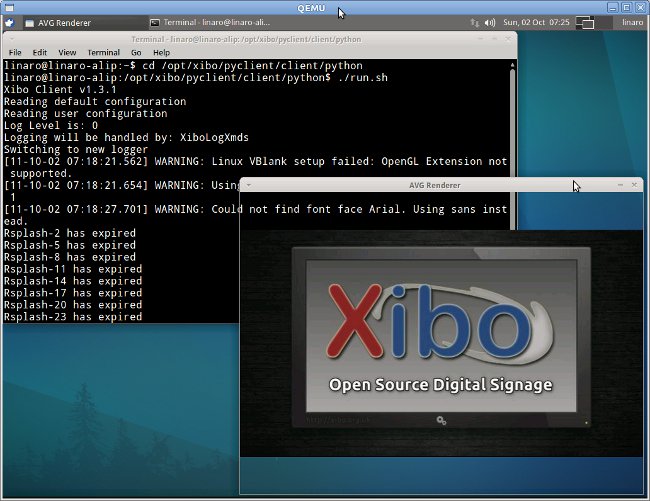
Berkelium is a BSD licensed library that provides off-screen browser rendering via Google’s open source Chromium web browser. It takes advantage of Chromium’s multiprocess rendering to isolate browsers from each other and can render to any buffer in memory. The user of the library can inject input and javascript code into web pages to control them, as well as listen for events generated by the page such as navigation events, load sequence events and paint events. Berkelium provides a small API for embedding a fully functional browser into any application. This library is used by Xibo Digital Signage Player python client. I’ll give the instructions I followed to build Berkelium and Chromium for ARM. For now the build works, but I have a problem running berkelium in the emulator. First, you’ll need to install some tools and the development version of some libraries: sudo apt-get install git-core subversion cmake doxygen […]
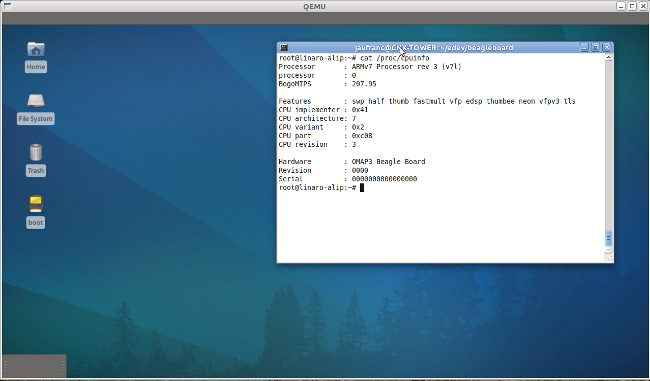
Generate a Custom ARM Rootfs Easily with Rootstock

You may need to generate your own rootfs for your ARM target board, but do not want to cross-compile all libraries manually. You can achieve this with rootstock, a utility that generates Ubuntu armel rootfs tarballs and/or qemu image, to be uncompressed onto a root device. First install roostock: sudo apt-get install rootstock Then generate a rootfs with the required libraries: sudo rootstock –fqdn beagleboard –login cnxsoft –password temppasswd \ –imagesize 3G –seed xfce4,gdm,pkg-config,python,perl,g++,bison,flex,\ gperf,libnss3-dev,libgtk2.0-dev,libnspr4-0d,libasound2-dev,libnspr4-dev,\ libgconf2-dev,libcairo2-dev,libdbus-1-dev,libstdc++6-4.5-dev,libexpat1-dev,\ libxslt1-dev,libxml2-dev,libbz2-dev  –dist natty Here are the details of the command line parameters: –fqdn: Hostname to be used for the target system –login: Login ID of the admin user created during setup –password: Password of the admin user created during setup –imagesize: Size of the target filesystem to be created (default 1GB) –seed: List of packages to install –dist: Specify Release to build (jaunty, karmic, lucid, maverick or natty) Alternatively you could also use an […]

Xibo Digital Signage on ARM (Beagleboard / Overo)

Xibo (pronounced eX-E-bO) is an open source, multi-display, multi-zone, fully scheduled digital signage solution written in Python (there is also a dotnet version). This is a client /server solution that can run on Windows or Linux. If you are not familiar with Xibo you can visit http://xibo.org.uk/ or/and read my introduction XIBO: An Open Source Digital Signage Server/Client. Since I had not seen digital signage solution running on low cost ARM development platform such as Beagleboard, Pandaboard or Origen, I decided to give the Xibo python client a try using qemu to emulate Gumstix Overo COM (OMAP 3530). Porting Xibo to ARM could provide several benefits compared to x86 platform: Lower hardware cost Lower power consumption (and electricity bill) Smaller form factor allowing easier integration in displays and in transportation (e.g. buses, subway trains). Easier to implement new digital signage features such as touch screen support, 3G connectivity, location based […]

How to Transfer files between the Host and Qemu via SSH and NFS

Last week, I wrote a blog post explaining how to copy files to a qemu image by mounting the qemu image in the host. This is only useful if emulated platform does not support networking. If networking is enabled, using SSH (Secure Shell) or NFS (Network File System) is more convenient. Using SSH with Qemu To initiate the SSH connection from qemu, there is actually nothing extra to do as long as you have sshd installed and running on the host. If it is not installed simply run  sudo apt-get install openssh-shell on the host. This will install and automatically sshd. To initiate the SSH connection from the host, you’ll have to redirect the ssh port to an unknown port and start qemu as follow (for overo):

Please refer to Beagleboard Emulator in Ubuntu with Qemu for the detailed instructions on how to setup qemu to emulate beagleboard or […]

How to Transfer files between Host and Qemu

I previously posted instructions to install and run nano and ARM Linux Internet Platform (ALIP) distribution images for Overo and Beagleboard on QEMU, If the image support networking, you could use ssh (install dropbear server in qemu) or nfs to transfer files between the host computer and qemu, or even run your program from the NFS share. This should be possible to do that on the Overo emulator since it support Ethernet. However, although I can access Internet, I cannot access the host via ssh as the host is in a private subnetwork (192.168.0.0) and qemu in another (10.0.2.0). We would probably have to enable bridge networking for that but the tun driver is apparently not compiled in ALIP kernel. I’ll look into that later on. [Update: Finally, we don’t need tun/tap to make this work, please read http://www.cnx-software.com/2011/10/02/how-to-transfer-files-between-host-and-qemu-via-ssh-and-nfs/ for details.] Today, I’ll just show how to mount a Qemu […]

Beagleboard Emulator in Ubuntu with Qemu

If you just want to try a program on Beagleboard, but do not want (or have the means) to purchase a board, you may be able to use qemu to emulate the Beagleboard or BeableBoard-xM. I’ll details the instructions to run the Nano build (minimal kernel) and the ARM Linux Internet Platform (ALIP) distribution for Beagleboard on qemu. Please read the full post before starting the installation before there are currently some issues such as no Ethernet support. First, install or update linaro-media-create: sudo add-apt-repository ppa:linaro-maintainers/tools sudo apt-get update sudo apt-get install linaro-image-tools Then download the nano image and omap3 hardware pack: wget http://releases.linaro.org/platform/linaro-n/nano/11.08/nano-n-tar-20110823-1.tar.gz wget http://releases.linaro.org/platform/linaro-n/nano/11.08/hwpack_linaro-omap3_20110823-0_armel_supported.tar.gz Generate the image for qemu: sudo linaro-media-create –image_file beagle_sd.img –dev beagle –binary nano-n-tar-20110823-1.tar.gz –hwpack hwpack_linaro-omap3_20110823-0_armel_supported.tar.gz If you don’t have it already, get the latest qemu-linaro package from Linaro Maintainers PPA: sudo apt-get install qemu-system Check the version is correct: qemu-system-arm -version QEMU emulator version […]

99 USD OMAP3 Based Overo Computer On Module by Gumstix

Gumstix has manufactured its Overo COMS based on OMAP3503 and OMAP3530 since 2008. They have now announced a new low cost version named Overa Sand that sells for 115 USD per unit or less than 99 USD per unit for orders of  1,000 units or more. Overo Sand COM is Gumstix’s most basic computer-on-module with 256MB RAM and no on-board NAND. Here are the board specifications and features: Processor: Texas Instruments OMAP 3503 Applications Processor: – ARM Cortex-A8 CPU @ 600 Mhz Memory: 256MB RAM NO On-Board NAND Included Features: microSD card slot TPS65950 Power Management Expandability: via one 140-pin expansion board of Gumstix Overo series or custom, 140-pin expansion board via 27-pin camera board Connections: – (2) 70-pin connectors with 140 signals for: – I2C, PWM lines (6), A/D (6), 1-wire – UART, SPI, Extra MMC lines – Headset, Microphone – Backup battery – High Speed USB Host and […]

Emulate Gumstix Overo COM with Qemu and Linaro Nano Image

Overa COMs are low cost computer-on-modules (COM) built around OMAP3503 and OMAP3530 depending on the model. Such device can be purchased on gumstix website. However if you just want to try a program on the board, you could use QEMU to emulate the Overo board as follows: Download pre-built image. (nano is a minimal linux ditribution without UI): wget http://releases.linaro.org/images/linaro-n/nano/11.07/overo-nano.img.gz gunzip overo-nano.img.gz Install the qemu tools: sudo add-apt-repository ppa:linaro-maintainers/tools sudo apt-get update sudo apt-get install qemu-user-static qemu-system Run the image: qemu-system-arm -M overo -clock unix -serial stdio -device usb-kbd -drive file=/tmp/overo-nano.img,if=sd,cache=writeback You can also watch the installation in the video below:   Source: https://wiki.linaro.org/Resources/HowTo/Qemu-5   Jean-Luc Aufranc (CNXSoft)Jean-Luc started CNX Software in 2010 as a part-time endeavor, before quitting his job as a software engineering manager, and starting to write daily news, and reviews full time later in 2011. www.cnx-software.com