
In the first part of the review, we checked out the hardware of the M5Stack Tab5 ESP32-P4 IoT development kit and tried the demo firmware, whose user interface allows the user to quickly experiment with the camera, microphone, speaker, WiFi, power consumption, GPIOs, RS485, and more.
Since there’s no user application for the Tab5 at this stage, I decided to look into software development resources for the ESP32-P4 devkit in the second part of the review. I’ll first follow the instructions to build the demo firmware from source using the ESP-IDF framework, then analyze key aspects of the source and make some small modifications. After that, I’ll have a look at ESP32-P4 Arduino support via M5Unified and M5GFX library.
ESP-IDF 5.4.1 installation and ESP32-P4 Hello World program
The first step is to get the ESP-IDF 5.4.1 and configure ESP32-P4 following the instructions on the Espressif website, before testing it with a Hello World program.
Let’s check out the SDK first:
|
1 2 3 4 |
sudo apt install git wget flex bison gperf python3 python3-pip python3-venv cmake ninja-build ccache libffi-dev libssl-dev dfu-util libusb-1.0-0 mkdir -p ~/esp cd ~/esp/ git clone -b v5.4.1 --recursive https://github.com/espressif/esp-idf.git |
We can now install the tools for the ESP32-P4 target:
|
1 2 |
cd esp-idf ./install.sh esp32p4 |
Now run the export.sh script to set the environment variables:
|
1 |
. ./export.sh |
The script tells me that I could clean up some old ESP tools I had installed with the commands:
|
1 2 |
python $HOME/esp/esp-idf/tools/idf_tools.py uninstall $HOME/esp/esp-idf/tools/idf_tools.py uninstall --remove-archives |
Let’s try if the ESP-IDF framework has been installed properly by building the Hello World application and running it on the Tab5. Note that this will wipe out the demo firmware.
But before that, we’ll connect the Tab5 to our host machine with a USB-C cable and longpress the reset button for about 2 seconds to enter download mode. This is what the kernel output on an Ubuntu 24.04 host machine looks like:
|
1 2 3 4 5 6 7 |
[765642.523037] usb 1-2: new full-speed USB device number 28 using xhci_hcd [765642.650815] usb 1-2: New USB device found, idVendor=303a, idProduct=1001, bcdDevice= 1.02 [765642.650829] usb 1-2: New USB device strings: Mfr=1, Product=2, SerialNumber=3 [765642.650833] usb 1-2: Product: USB JTAG/serial debug unit [765642.650837] usb 1-2: Manufacturer: Espressif [765642.650840] usb 1-2: SerialNumber: 30:ED:A0:E0:CB:9D [765642.654549] cdc_acm 1-2:1.0: ttyACM0: USB ACM device |
We can now build the Hello World demo with the following commands:
|
1 2 3 4 5 |
cd .. cp -r $IDF_PATH/examples/get-started/hello_world . cd hello_world idf.py set-target esp32p4 idf.py build |
This will end with:
|
1 2 3 4 5 6 7 8 9 10 11 12 13 14 15 16 |
esptool.py v4.8.1 Creating esp32p4 image... Merged 2 ELF sections Successfully created esp32p4 image. Generated /home/jaufranc/esp/hello_world/build/hello_world.bin [1000/1000] cd /home/jaufranc/esp/hell.../esp/hello_world/build/hello_world.bin hello_world.bin binary size 0x32f10 bytes. Smallest app partition is 0x100000 bytes. 0xcd0f0 bytes (80%) free. Project build complete. To flash, run: idf.py flash or idf.py -p PORT flash or python -m esptool --chip esp32p4 -b 460800 --before default_reset --after hard_reset write_flash --flash_mode dio --flash_size 2MB --flash_freq 80m 0x2000 build/bootloader/bootloader.bin 0x8000 build/partition_table/partition-table.bin 0x10000 build/hello_world.bin or from the "/home/jaufranc/esp/hello_world/build" directory python -m esptool --chip esp32p4 -b 460800 --before default_reset --after hard_reset write_flash "@flash_args" |
Let’s flash the Hello World firmware to the Tab5:
|
1 |
idf.py flash |
Output ends with something like:
|
1 2 3 4 5 6 7 8 9 10 11 12 13 14 15 16 17 18 |
Flash will be erased from 0x00008000 to 0x00008fff... SHA digest in image updated Compressed 22272 bytes to 13697... Writing at 0x00002000... (100 %) Wrote 22272 bytes (13697 compressed) at 0x00002000 in 0.2 seconds (effective 742.0 kbit/s)... Hash of data verified. Compressed 208656 bytes to 107531... Writing at 0x0003de0b... (100 %) Wrote 208656 bytes (107531 compressed) at 0x00010000 in 1.3 seconds (effective 1301.6 kbit/s)... Hash of data verified. Compressed 3072 bytes to 103... Writing at 0x00008000... (100 %) Wrote 3072 bytes (103 compressed) at 0x00008000 in 0.0 seconds (effective 909.5 kbit/s)... Hash of data verified. Leaving... Hard resetting via RTS pin... Done |
Now run the following command…
|
1 |
idf.py -p /dev/ttyACM0 monitor |
… press the Power button on the M5Stack Tab5, and monitor the output:
|
1 2 3 4 5 6 7 8 9 10 11 12 13 14 15 16 17 18 19 20 21 22 23 24 25 26 27 28 29 30 31 32 33 34 35 36 37 38 39 40 41 42 43 44 45 46 47 48 49 50 51 52 53 54 55 56 57 58 59 60 61 62 |
ESP-ROM:esp32p4-eco2-20240710 Build:Jul 10 2024 rst:0x7 (HP_SYS_HP_WDT_RESET),boot:0x20c (SPI_FAST_FLASH_BOOT) SPI mode:DIO, clock div:1 load:0x4ff33ce0,len:0x162c load:0x4ff2abd0,len:0xd6c load:0x4ff2cbd0,len:0x3308 entry 0x4ff2abda I (23) boot: ESP-IDF v5.4.1 2nd stage bootloader I (23) boot: compile time May 17 2025 14:28:54 I (23) boot: Multicore bootloader I (25) boot: chip revision: v1.0 I (26) boot: efuse block revision: v0.3 I (29) boot.esp32p4: SPI Speed : 80MHz I (33) boot.esp32p4: SPI Mode : DIO I (37) boot.esp32p4: SPI Flash Size : 2MB W (41) boot.esp32p4: CPU has been reset by WDT. I (45) boot: Enabling RNG early entropy source... I (50) boot: Partition Table: I (52) boot: ## Label Usage Type ST Offset Length I (58) boot: 0 nvs WiFi data 01 02 00009000 00006000 I (65) boot: 1 phy_init RF data 01 01 0000f000 00001000 I (71) boot: 2 factory factory app 00 00 00010000 00100000 I (79) boot: End of partition table I (81) esp_image: segment 0: paddr=00010020 vaddr=40020020 size=0a070h ( 41072) map I (97) esp_image: segment 1: paddr=0001a098 vaddr=30100000 size=0000ch ( 12) load I (99) esp_image: segment 2: paddr=0001a0ac vaddr=3010000c size=00038h ( 56) load I (105) esp_image: segment 3: paddr=0001a0ec vaddr=4ff00000 size=05f2ch ( 24364) load I (117) esp_image: segment 4: paddr=00020020 vaddr=40000020 size=18f28h (102184) map I (137) esp_image: segment 5: paddr=00038f50 vaddr=4ff05f2c size=08298h ( 33432) load I (145) esp_image: segment 6: paddr=000411f0 vaddr=4ff0e200 size=01cfch ( 7420) load I (151) boot: Loaded app from partition at offset 0x10000 I (151) boot: Disabling RNG early entropy source... I (163) cpu_start: Multicore app I (173) cpu_start: Pro cpu start user code I (173) cpu_start: cpu freq: 360000000 Hz I (173) app_init: Application information: I (174) app_init: Project name: hello_world I (177) app_init: App version: 1 I (181) app_init: Compile time: May 17 2025 14:28:48 I (186) app_init: ELF file SHA256: 1dd78f600... I (190) app_init: ESP-IDF: v5.4.1 I (194) efuse_init: Min chip rev: v0.1 I (198) efuse_init: Max chip rev: v1.99 I (202) efuse_init: Chip rev: v1.0 I (206) heap_init: Initializing. RAM available for dynamic allocation: I (212) heap_init: At 4FF11640 len 00029980 (166 KiB): RAM I (217) heap_init: At 4FF3AFC0 len 00004BF0 (18 KiB): RAM I (222) heap_init: At 4FF40000 len 00060000 (384 KiB): RAM I (228) heap_init: At 50108080 len 00007F80 (31 KiB): RTCRAM I (233) heap_init: At 30100044 len 00001FBC (7 KiB): TCM I (239) spi_flash: detected chip: generic I (241) spi_flash: flash io: dio W (244) spi_flash: Detected size(16384k) larger than the size in the binary image header(2048k). Using the size in the binary image header. I (257) main_task: Started on CPU0 I (267) main_task: Calling app_main() Hello world! This is esp32p4 chip with 2 CPU core(s), , silicon revision v1.0, 2MB external flash Minimum free heap size: 606120 bytes Restarting in 10 seconds... Restarting in 9 seconds... Restarting in 8 seconds... |
We can see a “Hello world!” string in there, so everything is good!
Building the Tab5’s demo firmware
We are now ready to build the M5Tab5 User Demo firmware. Let’s get the code:
|
1 2 3 |
git clone https://github.com/m5stack/M5Tab5-UserDemo.git cd M5Tab5-UserDemo python ./fetch_repos.py |
Now we can export the environment variables for the demo:
|
1 2 |
cd platforms/tab5 . ../../../esp-idf/export.sh |
This is the output:
|
1 2 3 4 5 6 7 8 9 10 11 12 13 14 |
Checking "python3" ... Python 3.12.3 "python3" has been detected Activating ESP-IDF 5.4 Setting IDF_PATH to '/home/jaufranc/esp/esp-idf'. * Checking python version ... 3.12.3 * Checking python dependencies ... OK * Deactivating the current ESP-IDF environment (if any) ... OK * Establishing a new ESP-IDF environment ... OK * Identifying shell ... bash * Detecting outdated tools in system ... OK - no outdated tools found * Shell completion ... Autocompletion code generated Done! You can now compile ESP-IDF projects. |
We’ll need to enter downloader mode again, and build and flash the firmware with a single command line:
|
1 |
idf.py flash |
It will take a few minutes and end with:
|
1 2 3 4 5 6 7 8 9 10 11 12 13 14 15 16 17 18 19 20 21 22 23 24 25 26 27 28 29 30 31 32 33 34 35 36 37 38 39 40 41 42 43 |
[1881/1883] Generating binary image from built executable esptool.py v4.8.1 Creating esp32p4 image... Merged 2 ELF sections Successfully created esp32p4 image. Generated /home/jaufranc/esp/M5Tab5-UserDemo/platforms/tab5/build/m5stack_tab5.bin [1882/1883] cd /home/jaufranc/esp/M5Ta.../platforms/tab5/build/m5stack_tab5.bin m5stack_tab5.bin binary size 0x577070 bytes. Smallest app partition is 0xa00000 bytes. 0x488f90 bytes (45%) free. [1882/1883] cd /home/jaufranc/esp/esp-...nents/esptool_py/run_serial_tool.cmake esptool.py --chip esp32p4 -p /dev/ttyACM0 -b 460800 --before=default_reset --after=hard_reset write_flash --flash_mode dio --flash_freq 80m --flash_size 16MB 0x2000 bootloader/bootloader.bin 0x10000 m5stack_tab5.bin 0x8000 partition_table/partition-table.bin esptool.py v4.8.1 Serial port /dev/ttyACM0 Connecting... Chip is ESP32-P4 (revision v1.0) Features: High-Performance MCU Crystal is 40MHz MAC: 30:ed:a0:e0:cb:9d Uploading stub... Running stub... Stub running... Changing baud rate to 460800 Changed. Configuring flash size... Flash will be erased from 0x00002000 to 0x00007fff... Flash will be erased from 0x00010000 to 0x00587fff... Flash will be erased from 0x00008000 to 0x00008fff... SHA digest in image updated Compressed 23184 bytes to 14222... Writing at 0x00002000... (100 %) Wrote 23184 bytes (14222 compressed) at 0x00002000 in 0.2 seconds (effective 771.7 kbit/s)... Hash of data verified. Compressed 5730416 bytes to 2450068... Writing at 0x00581c71... (100 %) Wrote 5730416 bytes (2450068 compressed) at 0x00010000 in 32.3 seconds (effective 1420.1 kbit/s)... Hash of data verified. Compressed 3072 bytes to 143... Writing at 0x00008000... (100 %) Wrote 3072 bytes (143 compressed) at 0x00008000 in 0.0 seconds (effective 900.9 kbit/s)... Hash of data verified. Leaving... Hard resetting via RTS pin... Done |
Let’s press the power button to check whether the user interface is back.

Awesome! It only took me about 45 minutes to get to that point, including the time I spent documenting my experience, so it was rather painless. I’m not used to that!
Modifying the Tab5 demo code
Let’s check the code for the main app:
|
1 2 3 4 5 6 7 8 9 10 11 12 13 14 15 16 17 18 19 20 21 22 23 24 25 26 27 28 29 30 31 32 33 34 35 36 37 38 39 40 41 42 43 44 45 46 47 48 49 50 51 52 53 |
/* * SPDX-FileCopyrightText: 2025 M5Stack Technology CO LTD * * SPDX-License-Identifier: MIT */ #include "app.h" #include "hal/hal.h" #include "apps/app_installer.h" #include <mooncake.h> #include <mooncake_log.h> #include <string> #include <thread> using namespace mooncake; static const std::string _tag = "app"; void app::Init(InitCallback_t callback) { mclog::tagInfo(_tag, "init"); mclog::tagInfo(_tag, "hal injection"); if (callback.onHalInjection) { callback.onHalInjection(); } GetMooncake(); on_startup_anim(); on_install_apps(); } void app::Update() { GetMooncake().update(); #if defined(__APPLE__) && defined(__MACH__) // 'nextEventMatchingMask should only be called from the Main Thread!' auto time_till_next = lv_timer_handler(); std::this_thread::sleep_for(std::chrono::milliseconds(time_till_next)); #endif } bool app::IsDone() { return false; } void app::Destroy() { DestroyMooncake(); hal::Destroy(); } |
It’s a C++ program that relies on the Mooncake multi-app management and scheduling framework designed for microcontrollers. Another dependency is the popular LVGL graphics library, and we can see assets/images are not typical PNG or JPG files, but C files generated by a tool compatible with LVGL, with tables representing the data. See logo_5.c file as an example:
|
1 2 3 4 5 6 7 8 9 10 11 12 13 14 15 16 17 18 19 20 21 22 23 24 25 26 27 28 29 30 31 32 33 34 35 36 37 38 39 |
#ifdef __has_include #if __has_include("lvgl.h") #ifndef LV_LVGL_H_INCLUDE_SIMPLE #define LV_LVGL_H_INCLUDE_SIMPLE #endif #endif #endif #if defined(LV_LVGL_H_INCLUDE_SIMPLE) #include "lvgl.h" #else #include "lvgl/lvgl.h" #endif #ifndef LV_ATTRIBUTE_MEM_ALIGN #define LV_ATTRIBUTE_MEM_ALIGN #endif #ifndef LV_ATTRIBUTE_IMAGE_LOGO_5 #define LV_ATTRIBUTE_IMAGE_LOGO_5 #endif const LV_ATTRIBUTE_MEM_ALIGN LV_ATTRIBUTE_LARGE_CONST LV_ATTRIBUTE_IMAGE_LOGO_5 uint8_t logo_5_map[] = { 0xff, 0xff, 0xff, 0xff, 0xff, 0xff, 0xff, 0xff, 0xff, 0xff, 0xff, 0xff, 0xff, 0xff, 0xff, 0xff, 0xff, 0xff, 0xff, 0xff, 0xff, 0xff, 0xff, 0xff, 0xff, 0xff, 0xff, 0xff, 0xff, 0xff, 0xff, 0xff, 0xff, 0xff, 0xff, 0xff, 0xff, 0xff, 0xff, 0xff, 0xff, 0xff, 0xff, 0xff, 0xff, 0xff, 0xff, 0xff, 0xff, 0xff, 0xff, 0xff, 0xff, 0xff, 0xff, 0xff, 0xff, 0xff, 0xff, 0xff, 0xff, 0xff, 0xff, 0xff, 0xff, 0xff, 0xff, 0xff, 0xff, 0xff, 0xff, 0xff, 0xff, 0xff, 0xff, 0xff, 0xff, 0xff, 0xff, 0xff, 0xff, 0xff, 0xff, 0xff, 0xff, 0xff, 0xff, 0xff, 0xff, 0xff, 0xff, 0xff, 0xff, 0xff, 0xff, 0xff, 0xff, 0xff, 0xff, 0xff, 0xff, 0xff, 0xff, 0xff, 0xff, 0xff, 0xff, 0xff, 0xff, 0xff, 0xff, 0xff, 0xff, 0xff, 0xff, 0xff, 0xff, 0xff, 0xff, 0xff, 0xff, 0xff, 0xff, 0xff, 0xff, 0xff, 0xff, 0xff, 0xff, 0xff, 0xff, 0xff, 0xff, 0xff, 0xff, 0xff, 0xff, 0xff, 0xff, 0xff, 0xff, 0xff, 0xff, 0xff, 0xff, 0xff, 0xff, 0xff, 0xff, 0xff, 0xff, 0xff, 0xff, 0xff, 0xff, 0xff, 0xff, 0xff, 0xff, 0xff, 0xff, 0xff, 0xff, 0xff, 0xff, 0xff, 0xff, 0xff, 0xff, 0xff, 0xff, 0xff, 0xff, 0xff, 0xff, 0xff, 0xff, 0xff, 0xff, 0xff, 0xff, 0xff, 0xff, 0xff, 0xff, 0xff, 0xff, 0xff, 0xff, 0xff, 0xff, 0xff, 0xff, 0xff, 0xff, 0xff, 0xff, 0xff, 0xff, 0xff, 0xff, 0xff, 0xff, 0xff, 0xff, 0xff, 0xff, 0xff, 0xff, 0xff, 0xff, 0xff, 0xff, 0xff, 0xff, 0xff, 0xff, 0xff, 0xff, 0xff, 0xff, 0xff, 0xff, 0xff, 0xff, 0xff, 0xff, 0xff, 0xff, 0xff, 0xff, 0xff, 0xff, 0xff, 0xff, 0xff, 0xff, 0xff, 0xff, 0xff, ... }; const lv_image_dsc_t logo_5 = { .header.cf = LV_COLOR_FORMAT_RGB565, .header.magic = LV_IMAGE_HEADER_MAGIC, .header.w = 60, .header.h = 80, .data_size = 4800 * 2, .data = logo_5_map, }; |
We can check the larger images by filtering the width:
|
1 2 3 4 5 6 7 8 9 10 11 12 13 14 15 16 17 18 19 |
aufranc@CNX-LAPTOP-5:~/esp/M5Tab5-UserDemo/app/assets/images$ grep header.w * arrow_state_on.c: .header.w = 18, chg_arrow_down.c: .header.w = 20, chg_arrow_up.c: .header.w = 20, internal_i2c_dev_chart.c: .header.w = 500, launcher_bg.c: .header.w = 1280, logo_5.c: .header.w = 60, logo_tab.c: .header.w = 180, mouse_cursor.c: .header.w = 60, porta_i2c_dev_chart.c: .header.w = 500, porta_i2c_ext5v_on.c: .header.w = 62, sw_chg_off.c: .header.w = 75, sw_chg_on.c: .header.w = 75, sw_off.c: .header.w = 75, sw_on.c: .header.w = 75, sw_qc_off.c: .header.w = 75, sw_qc_on.c: .header.w = 75, sw_rf_h.c: .header.w = 75, sw_rf_l.c: .header.w = 75, |
I could change some icons, but let’s go big by modifying the 1280×720 launcher_bg.c file. We can import a PNG file to the LVGL online converter to get a C file using the RGB565(A8) color format.
However, the file is larger (15.6MB) than the original, so it would be tough to fit in a 16MB flash althought there might be some compression. There are also some differences in the output, so instead I installed an offline converter: (Note: As I completed this review, I noticed a newer version of the converter that outputs a file that should work just fine).
|
1 2 3 4 5 6 |
sudo apt install pngquant git clone https://github.com/lvgl/lvgl.git cd lvgl/scripts/ python3 -m venv venv source venv/bin/activate pip3 install pillow pypng lz4 |
We can check the utility run without error:
|
1 2 3 4 5 6 7 8 9 10 11 12 13 14 15 16 17 18 19 20 21 22 23 24 25 26 27 28 29 30 31 32 33 34 |
(venv) jaufranc@CNX-LAPTOP-5:~/edev/lvgl/scripts$ python LVGLImage.py --help usage: LVGLImage.py [-h] [--ofmt {C,BIN,PNG}] [--cf {L8,I1,I2,I4,I8,A1,A2,A4,A8,ARGB8888,XRGB8888,RGB565,RGB565A8,ARGB8565,RGB888,AUTO,RAW,RAW_ALPHA,ARGB8888_PREMULTIPLIED}] [--rgb565dither] [--premultiply] [--compress {NONE,RLE,LZ4}] [--align [byte]] [--background [color]] [--nemagfx] [-o OUTPUT] [--name NAME] [-v] input LVGL PNG to bin image tool. positional arguments: input the filename or folder to be recursively converted options: -h, --help show this help message and exit --ofmt {C,BIN,PNG} output filename format, C or BIN --cf {L8,I1,I2,I4,I8,A1,A2,A4,A8,ARGB8888,XRGB8888,RGB565,RGB565A8,ARGB8565,RGB888,AUTO,RAW,RAW_ALPHA,ARGB8888_PREMULTIPLIED} bin image color format, use AUTO for automatically choose from I1/2/4/8 --rgb565dither use dithering to correct banding in gradients --premultiply pre-multiply color with alpha --compress {NONE,RLE,LZ4} Binary data compress method, default to NONE --align [byte] stride alignment in bytes for bin image --background [color] Background color for formats without alpha --nemagfx export color palette for I8 images in a format compatible with NEMA accelerator -o OUTPUT, --output OUTPUT Select the output folder, default to ./output --name NAME Specify name for output file. Only applies when input is a file, not a directory. (Also used for variable name inside .c file when format is 'C') -v, --verbose |
Now let’s convert our PNG image (CNX Software logo) into launcher_bg.c using RGB565 color format and RGB565 dithering:
|
1 |
(venv) jaufranc@CNX-LAPTOP-5:~/edev/lvgl/scripts$ python LVGLImage.py logo-cnxsoft.png --output launcher_bg.c --ofmt C --cf RGB565 --rgb565dither --name launcher_bg |
The filesize is even smaller than the original:
|
1 2 |
(venv) jaufranc@CNX-LAPTOP-5:~/edev/lvgl/scripts$ ls -lh launcher_bg.c/launcher_bg.c -rw-rw-r-- 1 jaufranc jaufranc 8.8M May 17 16:56 launcher_bg.c/launcher_bg.c |
We can now replace the file in the code tree, clean the code (because idf.py flash or idf.py build won’t detect the code changes), and flash it to the Tab5 again:
|
1 2 3 |
cd ~/esp/M5Tab5-UserDemo/platforms/tab5 idf.py clean idf.py flash |
Press the power button to start the Tab5.

That part worked too.
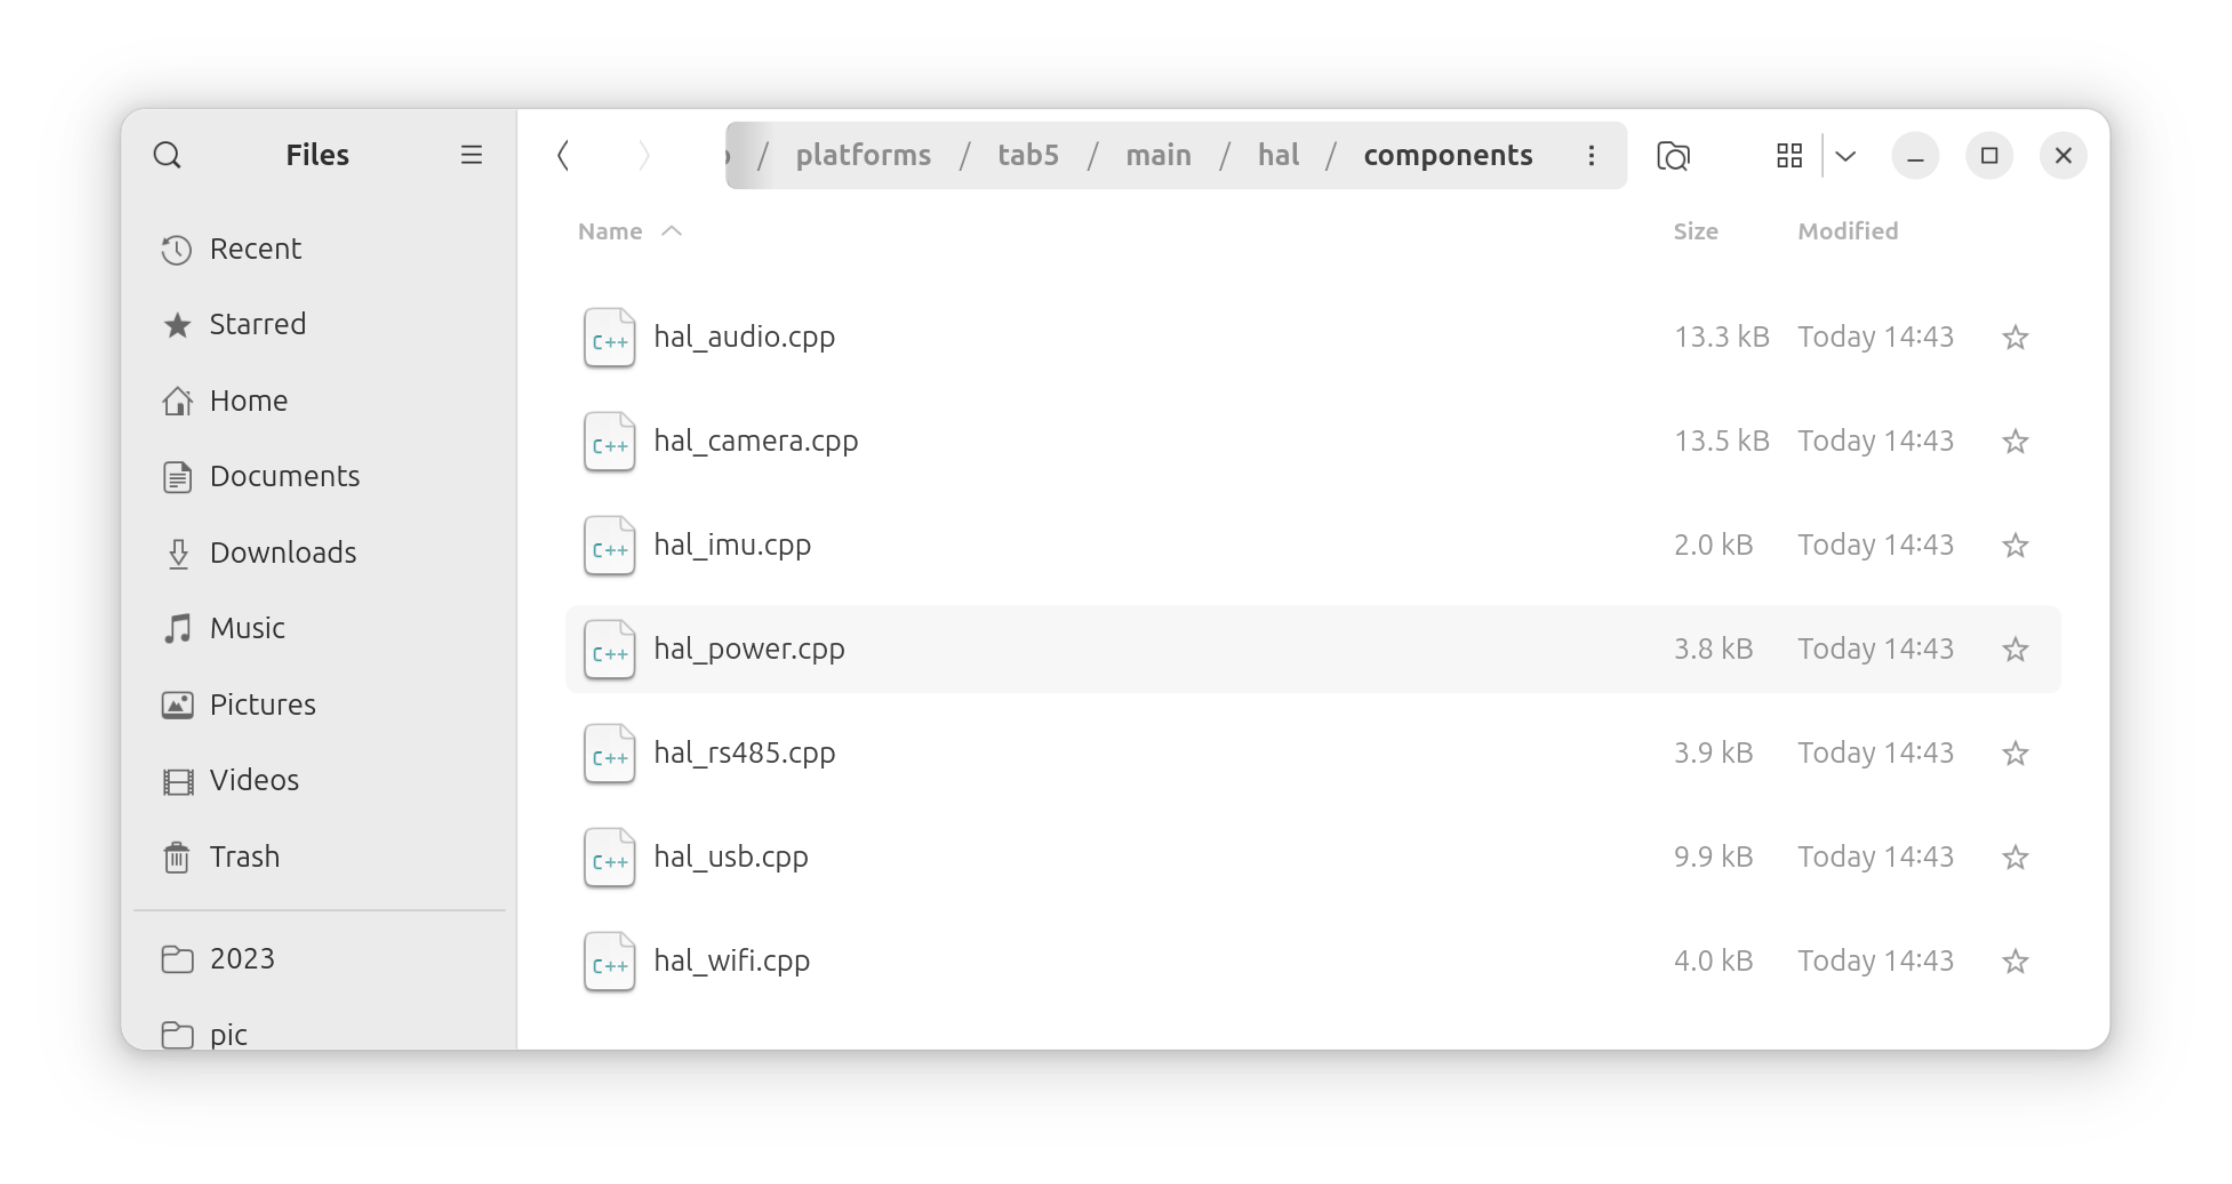
If we want to look at the low-level software, we need to go to the hal/components directory.
 When I first tested the Tab5 demo firmware, I noticed the camera’s frame rate was rather low in full-screen mode. Let’s try to decrease the camera resolution and see what happens. We can do this by opening hal_camera.cpp:
|
1 2 3 4 5 6 7 8 9 10 11 12 13 14 15 16 17 18 19 20 21 22 23 24 25 26 27 28 29 30 31 32 33 34 |
/* * SPDX-FileCopyrightText: 2025 M5Stack Technology CO LTD * * SPDX-License-Identifier: MIT */ #include "hal/hal_esp32.h" #include "../utils/task_controller/task_controller.h" #include <mooncake_log.h> #include <vector> #include <driver/gpio.h> #include <memory> #include "bsp/esp-bsp.h" #include "freertos/FreeRTOS.h" #include "freertos/task.h" #include "esp_event.h" #include "esp_err.h" #include "esp_log.h" #include "esp_timer.h" #include <string.h> #include <fcntl.h> #include <sys/ioctl.h> #include <sys/mman.h> #include <sys/param.h> #include <sys/errno.h> #include "linux/videodev2.h" #include "esp_video_init.h" #include "esp_video_device.h" #include "driver/i2c_master.h" #include "driver/ppa.h" #include "imlib.h" #include "freertos/queue.h" #define CAMERA_WIDTH 1280 #define CAMERA_HEIGHT 720 |
Two defines are used for the camera width and height. Let’s change that to 640 x 360 to keep the same aspect ratio and rebuild the code. Sadly, this does not work and only crops the camera input. I tried to change some other hardcoded values in the source code, but eventually I gave that part up.
I eventually ended up on the PPA (Pixel-Processing Accelerator) documentation on Espressif’s website, and several parameters can be changed. I decided to try rotating the image by 180° by changing PPA_SRM_ROTATION_ANGLE_0 to PPA_SRM_ROTATION_ANGLE_180:
|
1 2 3 4 5 6 7 8 9 10 11 12 13 14 15 16 17 18 19 20 21 22 23 24 |
ppa_srm_oper_config_t srm_config = {.in = {.buffer = camera->buffer[buf.index], .pic_w = 1280, .pic_h = 720, .block_w = 1280, .block_h = 720, .block_offset_x = 0, .block_offset_y = 0, .srm_cm = PPA_SRM_COLOR_MODE_RGB565}, .out = {.buffer = img_show_data, .buffer_size = img_show_size, .pic_w = 1280, .pic_h = 720, .block_offset_x = 0, .block_offset_y = 0, .srm_cm = PPA_SRM_COLOR_MODE_RGB565}, .rotation_angle = PPA_SRM_ROTATION_ANGLE_180 /*PPA_SRM_ROTATION_ANGLE_0*/, .scale_x = 1, .scale_y = 1, .mirror_x = true, .mirror_y = false, .rgb_swap = false, .byte_swap = false, .mode = PPA_TRANS_MODE_BLOCKING}; ppa_do_scale_rotate_mirror(ppa_srm_handle, &srm_config); |
It worked this time!

M5Stack Tab5 / ESP32-P4 Arduino support with M5StackGFX and M5StackUnified
While the Tab5 User Demo could serve as a starting point, developers would have to make themselves familiar with the Mooncake framework, besides learning about the ESP-IDF framework and especially new ESP32-P4-specific features. Some people may prefer using the Arduino IDE, and links to the M5StackUnified and M5StackGFX Arduino libraries were just added to the documentation, albeit without actual instructions on how to use those. Let’s see what we can do.
We still have a starting point with generic M5Stack Arduino instructions. So I installed and ran the latest version of Arduino (v2.3.6):
|
1 2 |
chmod +x arduino-ide_2.3.6_Linux_64bit.AppImage ./arduino-ide_2.3.6_Linux_64bit.AppImage --no-sandbox |
I added the URL for the M5Stack boards (https://static-cdn.m5stack.com/resource/arduino/package_m5stack_index.json) in Preferences:

I could install the latest version of M5stack boards file (2.1.4).

M5GFX v0.2.8 and M5Unified v0.2.7 were released just a few days ago, but could still be installed directly from the Arduino IDE.

All good so far. There’s just a little problem: Tab5 does not show in the list of boards… So instead, I selected ESP32P4 Dev Module from the ESP32 3.2.0 boards file released by Espressif and prayed this would work. As a side note, when I used to be an embedded software engineer/project manager, I found out that prayer, love, and sleep were some of the powerful debugging techniques. I’m speaking from experience!

My first test was the M5GFX’s AnalogMeter. The code failed to build the first time:
|
1 2 3 4 5 6 |
/home/jaufranc/.arduino15/packages/esp32/tools/esp-rv32/2411/riscv32-esp-elf/include/c++/14.2.0/bits/stl_algo.h:5695:5: note: template argument deduction/substitution failed: /tmp/.arduinoIDE-unsaved2025418-1341994-1at8pj8.n6g4/AnalogMeter/AnalogMeter.ino:168:25: note: mismatched types 'std::initializer_list<_Tp>' and 'int' 168 | liner_count = std::min(6, display.width() / 40); | ~~~~~~~~^~~~~~~~~~~~~~~~~~~~~~~~~ Using library M5GFX at version 0.2.8 in folder: /home/jaufranc/Arduino/libraries/M5GFX exit status 1Compilation error: no matching function for call to 'min(int, long int)' |
It was because of a type mismatch, so I had to cast one of the parameters to int (line 168):
|
1 |
liner_count = std::min(6, (int) (display.width()) / 40); |
But after that, the build could complete.

Flashing the firmware did not work due to memory issues:
|
1 2 3 4 5 6 7 8 9 10 11 12 13 |
entry 0x4ff2abd0 ESP-ROM:esp32p4-eco2-20240710 ESP-ROM:esp32p4-eco2-20240710 Build:Jul 10 2024 rst:0x7 (HP_SYS_HP_WDT_RESET),boot:0x20c (SPI_FAST_FLASH_BOOT) SPI mode:DIO, clock div:1 load:0x4ff33ce0,len:0x11c8 load:0x4ff2abd0,len:0xc1c load:0x4ff2cbd0,len:0x32fc entry 0x4ff2abd0 E (121) esp_core_dump_flash: Incorrect size of core dump image: 1 E (8) lcd.dsi.dpi: esp_lcd_new_panel_dpi(226): no memory for frame buffer |
That’s when I realized I had forgotten to check the parameters, so I changed the flash size to 16MB, selected a 3MB app/9.9MB FATFS partition scheme, and enabled PSRAM (probably the most important here).

After telling my Tab5 I love her so much, I tried again, and… success!

Since the demo is an animation, I also shot a short video to showcase the result.
I also tried a more complex demo “AtomDisplay_Factory.ino”, but the build failed:
|
1 2 3 4 5 6 7 8 9 10 11 12 13 14 15 16 17 18 19 20 21 22 23 24 |
/home/jaufranc/.arduino15/packages/esp32/tools/esp-rv32/2411/bin/riscv32-esp-elf-g++ -MMD -c @/home/jaufranc/.arduino15/packages/esp32/tools/esp32-arduino-libs/idf-release_v5.4-2f7dcd86-v1/esp32p4/flags/cpp_flags -Os -Werror=return-type -DF_CPU=360000000L -DARDUINO=10607 -DARDUINO_ESP32P4_DEV -DARDUINO_ARCH_ESP32 "-DARDUINO_BOARD=\"ESP32P4_DEV\"" "-DARDUINO_VARIANT=\"esp32p4\"" -DARDUINO_PARTITION_app3M_fat9M_16MB "-DARDUINO_HOST_OS=\"linux\"" "-DARDUINO_FQBN=\"esp32:esp32:esp32p4:UploadSpeed=921600,USBMode=default,CDCOnBoot=default,MSCOnBoot=default,DFUOnBoot=default,UploadMode=default,CPUFreq=360,FlashFreq=80,FlashMode=qio,FlashSize=16M,PartitionScheme=app3M_fat9M_16MB,DebugLevel=none,PSRAM=enabled,EraseFlash=none,JTAGAdapter=default\"" -DESP32=ESP32 -DCORE_DEBUG_LEVEL=0 -DBOARD_HAS_PSRAM -DARDUINO_USB_MODE=0 -DARDUINO_USB_CDC_ON_BOOT=0 -DARDUINO_USB_MSC_ON_BOOT=0 -DARDUINO_USB_DFU_ON_BOOT=0 @/home/jaufranc/.arduino15/packages/esp32/tools/esp32-arduino-libs/idf-release_v5.4-2f7dcd86-v1/esp32p4/flags/defines -I/tmp/.arduinoIDE-unsaved2025418-1341994-19m0hhr.scro/AtomDisplay_Factory -iprefix /home/jaufranc/.arduino15/packages/esp32/tools/esp32-arduino-libs/idf-release_v5.4-2f7dcd86-v1/esp32p4/include/ @/home/jaufranc/.arduino15/packages/esp32/tools/esp32-arduino-libs/idf-release_v5.4-2f7dcd86-v1/esp32p4/flags/includes -I/home/jaufranc/.arduino15/packages/esp32/tools/esp32-arduino-libs/idf-release_v5.4-2f7dcd86-v1/esp32p4/qio_qspi/include -I/home/jaufranc/.arduino15/packages/esp32/hardware/esp32/3.2.0/cores/esp32 -I/home/jaufranc/.arduino15/packages/esp32/hardware/esp32/3.2.0/variants/esp32p4 -I/home/jaufranc/.arduino15/packages/esp32/hardware/esp32/3.2.0/libraries/WiFi/src -I/home/jaufranc/.arduino15/packages/esp32/hardware/esp32/3.2.0/libraries/Network/src -I/home/jaufranc/Arduino/libraries/M5GFX/src @/home/jaufranc/.cache/arduino/sketches/49CFB58AEE229AF45889561DB040E94E/build_opt.h @/home/jaufranc/.cache/arduino/sketches/49CFB58AEE229AF45889561DB040E94E/file_opts /home/jaufranc/.cache/arduino/sketches/49CFB58AEE229AF45889561DB040E94E/sketch/AtomDisplay_Factory.ino.cpp -o /home/jaufranc/.cache/arduino/sketches/49CFB58AEE229AF45889561DB040E94E/sketch/AtomDisplay_Factory.ino.cpp.o In file included from /tmp/.arduinoIDE-unsaved2025418-1341994-19m0hhr.scro/AtomDisplay_Factory/AtomDisplay_Factory.ino:2: /home/jaufranc/.arduino15/packages/esp32/tools/esp32-arduino-libs/idf-release_v5.4-2f7dcd86-v1/esp32p4/include/driver/deprecated/driver/adc.h:19:2: warning: #warning "legacy adc driver is deprecated, please migrate to use esp_adc/adc_oneshot.h and esp_adc/adc_continuous.h for oneshot mode and continuous mode drivers respectively" [-Wcpp] 19 | #warning "legacy adc driver is deprecated, please migrate to use esp_adc/adc_oneshot.h and esp_adc/adc_continuous.h for oneshot mode and continuous mode drivers respectively" | ^~~~~~~ In file included from /home/jaufranc/.arduino15/packages/esp32/tools/esp32-arduino-libs/idf-release_v5.4-2f7dcd86-v1/esp32p4/include/esp_hw_support/include/esp_private/spi_share_hw_ctrl.h:14, from /home/jaufranc/.arduino15/packages/esp32/tools/esp32-arduino-libs/idf-release_v5.4-2f7dcd86-v1/esp32p4/include/esp_driver_spi/include/esp_private/spi_common_internal.h:19, from /home/jaufranc/Arduino/libraries/M5GFX/src/lgfx/v1/platforms/esp32/Bus_SPI.hpp:36, from /home/jaufranc/Arduino/libraries/M5GFX/src/lgfx/v1/platforms/device.hpp:56, from /home/jaufranc/Arduino/libraries/M5GFX/src/M5GFX.h:47, from /tmp/.arduinoIDE-unsaved2025418-1341994-19m0hhr.scro/AtomDisplay_Factory/AtomDisplay_Factory.ino:5: /home/jaufranc/.arduino15/packages/esp32/tools/esp32-arduino-libs/idf-release_v5.4-2f7dcd86-v1/esp32p4/include/esp_hw_support/include/esp_private/periph_ctrl.h:87:64: warning: invalid suffix on literal; C++11 requires a space between literal and string macro [-Wliteral-suffix] 87 | #define __PERIPH_CTRL_DEPRECATE_ATTR __attribute__((deprecated("This function is not functional on "CONFIG_IDF_TARGET))) | ^ /tmp/.arduinoIDE-unsaved2025418-1341994-19m0hhr.scro/AtomDisplay_Factory/AtomDisplay_Factory.ino: In function 'void setup()': /tmp/.arduinoIDE-unsaved2025418-1341994-19m0hhr.scro/AtomDisplay_Factory/AtomDisplay_Factory.ino:897:3: error: 'adc_power_acquire' was not declared in this scope 897 | adc_power_acquire(); | ^~~~~~~~~~~~~~~~~ Using library WiFi at version 3.2.0 in folder: /home/jaufranc/.arduino15/packages/esp32/hardware/esp32/3.2.0/libraries/WiFi Using library Networking at version 3.2.0 in folder: /home/jaufranc/.arduino15/packages/esp32/hardware/esp32/3.2.0/libraries/Network Using library M5GFX at version 0.2.8 in folder: /home/jaufranc/Arduino/libraries/M5GFX exit status 1 Compilation error: 'adc_power_acquire' was not declared in this scope |
The way I understand it, the ESP32-P4 requires a new ADC driver for Arduino, and the old one is deprecated. This would require changing the code quite a bit, so I’ll skip that one.
I also tried one of the M5Unified’s samples: Displays.ino. I didn’t have to modify anything, and it built out of the box.

After flashing the firmware, the demo could run normally. It will first show some text and then run an infinite loop showing squares and circles.

Conclusion
The M5Stack Tab5 is a cute, yet versatile USB or battery-powered ESP32-P4 IoT development platform with a 5-inch touchscreen display, a speaker, a microphone, a microSD card slot, GPIO headers, an RS485 connector, WiFi 6, Bluetooth, and 802.15.4 connectivity, power consumption monitoring, an IMU sensors, and more.
So, from the hardware point of view, it looks like a great development platform for the ESP32-P4. But software/firmware support is equally important, and I’ve demonstrated above that the Tab5 can be programmed with either the ESP-IDF framework or the Arduino IDE. However, everything is still fairly new, and for instance, the M5GFX and M5FUnified Arduino libraries were just released a few days ago. So there’s still some work to do, as Arduino sketches may need to be modified to work, especially since the M5Stack Tab5 board is not listed in the available boards even with the latest boards file, and I had to select a generic ESP32-P4 Dev Module for this to work.
Hardware documentation looks OK with pinout diagrams and PDF schematics. However, users are mostly on their own at this stage when it comes to software/firmware development. It may not be a major issue since the kit targets developers, and documentation from Espressif and Arduino can be used instead.
I’d like to thank M5Stack for sending the Tab5 ESP32-P4 development kit for review. They sell the Tab5 for $55 or $60 on AliExpress and their online store without or with a battery. It’s out of stock right now, but as I understand it, a new batch is scheduled for June. It may not be a bad thing, as I’d expect the Tab5 to show up in the Arduino IDE, and most/all samples to work by then.

Jean-Luc started CNX Software in 2010 as a part-time endeavor, before quitting his job as a software engineering manager, and starting to write daily news, and reviews full time later in 2011.
Support CNX Software! Donate via cryptocurrencies, become a Patron on Patreon, or purchase goods on Amazon or Aliexpress. We also use affiliate links in articles to earn commissions if you make a purchase after clicking on those links.

