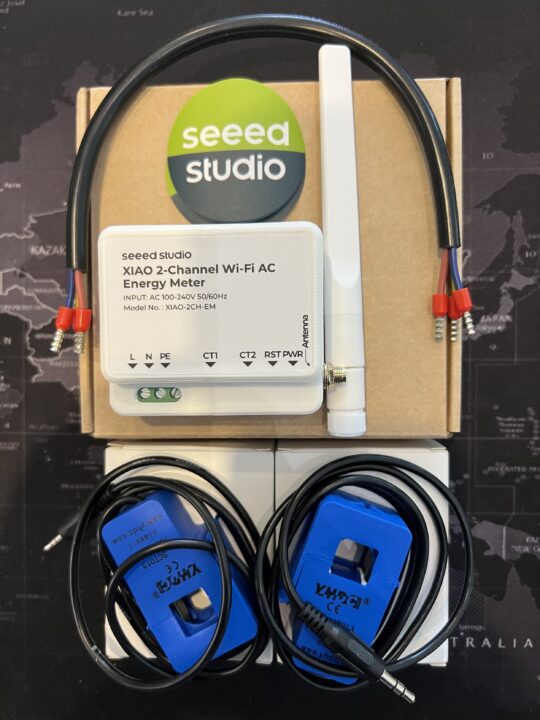
We have received a review sample of an energy metering device from SeeedStudio called the XIAO 2-Channel Wi-Fi AC Energy Meter (XIAO-2CH-EM). This device uses a clamp-on CT (Current Transformer) method on the live wire that you want to measure, without needing to modify the existing electrical wiring.
XIAO-2CH-EM comes with several key features such as dual CT sensors (CT1 and CT2), native ESPHome & Home Assistant Integration, precise measurement with factory calibration, and bi-directional power flow monitoring.
While the XIAO-2CH-EM has 2 CT input ports, it will only ship with one CT clamp by default, but users can purchase an additional CT clamp if needed. The two CT channels operate independently, and each one can measure bidirectional power and supports devices using up to 100A of current. That should be enough for an ordinary home.
The XIAO-2CH-EM comes pre-flashed with ESPHome firmware from the factory, meaning it can be integrated with Home Assistant out of the box.
Let’s take a closer look at the device and test it in various scenarios.
XIAO-2CH-EM energy meter unboxing and teardown
The equipment we received includes a box containing the XIAO-2CH-EM unit itself, which comes with an external 2.4GHz Wi-Fi antenna (2.81dBi) and power cables for self-powering (L, N, Earth). There are also two additional boxes containing two CT clamp sets. The CT jacks can be easily plugged into the XIAO-2CH-EM. The unit also features a Reset button and an LED status indicator.
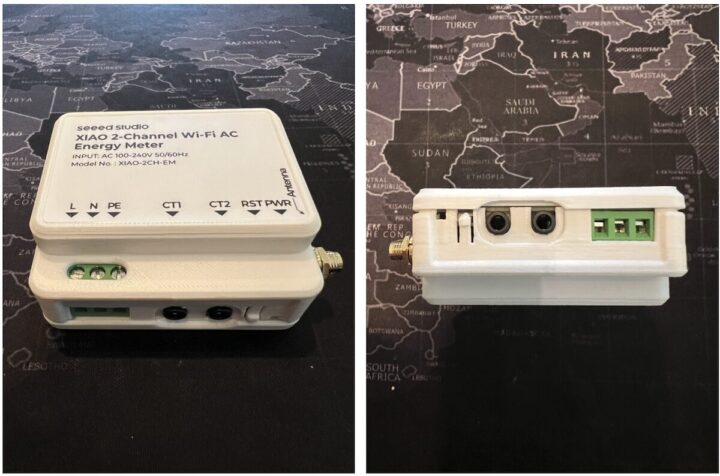
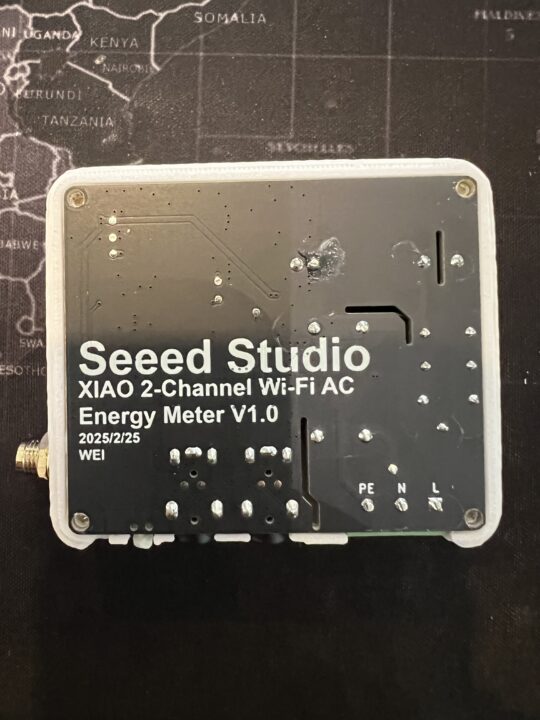
The XIAO-2CH-EM casing is 3D-printed and secured with four screws at the back, which can be easily opened. SeeedStudio has shared the 3D model files on Thingiverse and Printables.
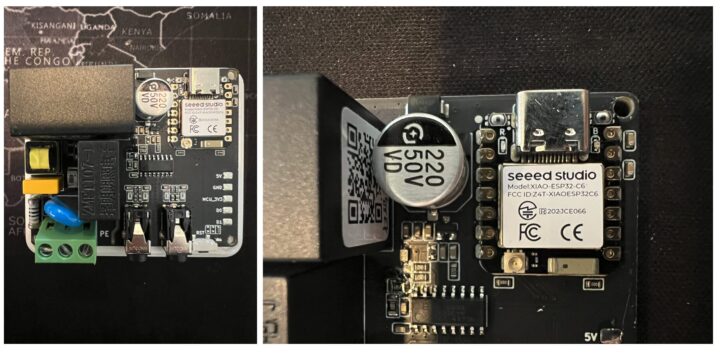
Inside, you’ll find a microcontroller using the XIAO ESP32C6 wireless module, which supports the Matter standard and operates on the 2.4GHz frequency range, compatible with Wi-Fi 6, BLE 5.0, Zigbee, and Thread. However, the XIAO-2CH-EM only relies on Wi-Fi for communication.
Nearby, you’ll see the energy metering chip, the BL0939 from SHANGHAI BELLING, which, according to its specifications, can measure energy using two methods: Direct AC and CT (Current Transformer). Seeed Studio has chosen the CT method, allowing real-world measurements of up to 100A, which is significantly higher than the Direct AC method used by other brands — for example, the SONOFF Dual R3, even though it uses the same BL0939 chip, can only measure up to 15A (100A vs. 15A).
Getting Started with the XIAO-2CH-EM WiFi AC power meter
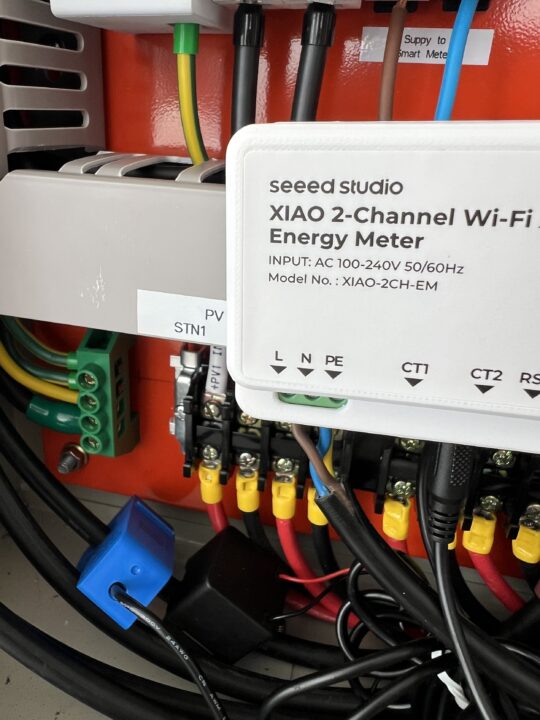
First, we begin by installing the XIAO-2CH-EM close to the device we want to monitor. We supply 220V power to the XIAO-2CH-EM unit, then clamp the CT sensor onto the Live (L) wire of the device that we want to monitor energy usage.
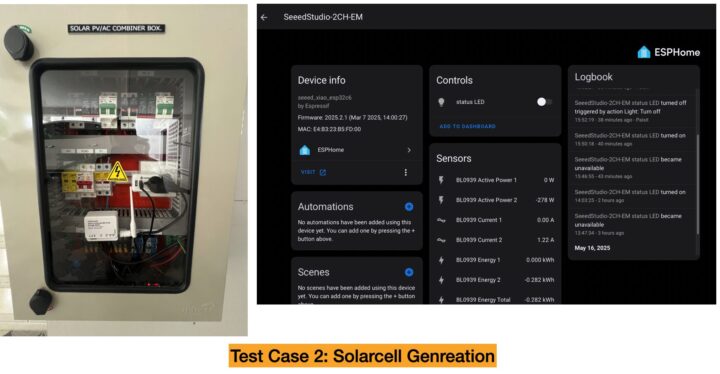
In the image below, we’ve installed it in a solar power system on our rooftop, by clamping the CT sensor (bottom-left, blue clamp) onto the live wire coming from the Deye inverter. Since the XIAO-2CH-EM supports bi-directional power measurement, the direction of the CT clamp must also align with the intended measurement direction. The resulting value for Active Power will be either positive (+) or negative (–) depending on the orientation of the clamp.
Next is the initial setup of the XIAO-2CH-EM. The device comes pre-flashed from the factory with ESPHome firmware. However, if you want to customise the code by yourself, you can download the YAML configuration file from GitHub and use the ESPHome integration to make changes. Once compiled, you can OTA (Over-The-Air) upload the modified code back to the XIAO-2CH-EM as you like — for example, you could add MQTT capability in order to connect with systems other than Home Assistant via the MQTT protocol.
Quick Setup Steps
- Power on XIAO-2CH-EM. It will create its own Wi-Fi SSID, starting with SeeedStudio-2CH-EM
- Connect to that SSID, then open a browser and go to 192.168.4.1
- A list of available Wi-Fi SSIDs will appear — choose the one you want to connect the device to, e.g. your home Wi-Fi
- Once connected, the XIAO-2CH-EM will be ready to use on the selected Wi-Fi network
- You can now access XIAO-2CH-EM via your browser at http://seeedstudio-2ch-em.local
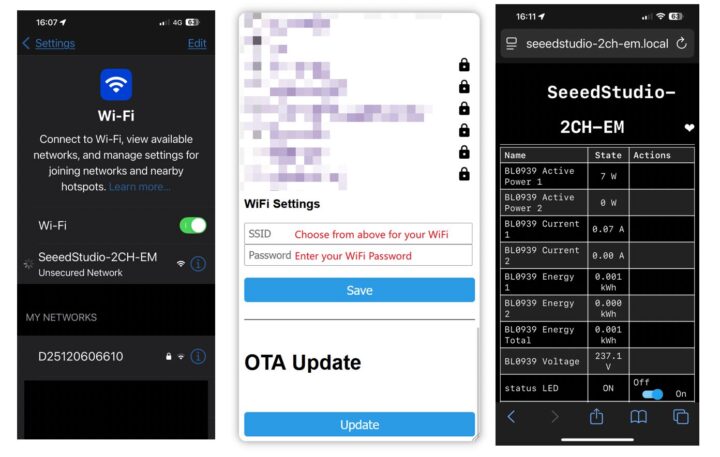
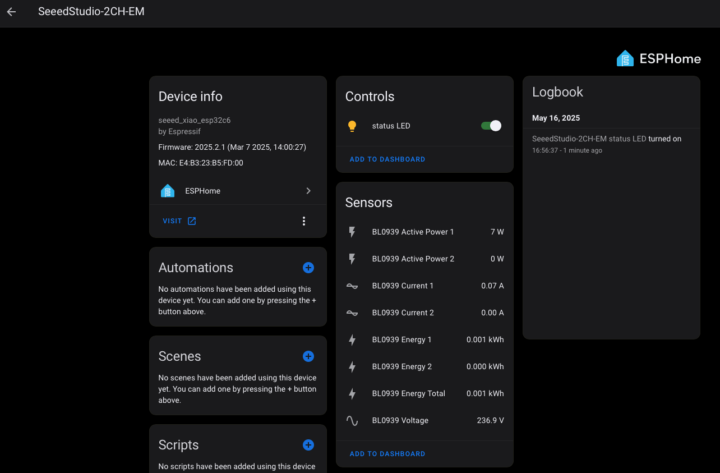
We can manage ESPHome devices directly from a web browser. In the image below, you can see real-time energy data from each CT sensor, such as power (Watts), current (Amps), voltage (Volts), energy usage (kWh), and Wi-Fi signal strength. However, it does not store historical data in the device. Seeed Studio designed it to work with Home Assistant for storing historical data or performing additional calculations, such as displaying usage by billing cycle.
For those who don’t plan to integrate with Home Assistant, the setup process ends here. It takes less than 5 minutes to install and get the device up and running.
Review of the XIAO-2CH-EM energy monitor with Home Assistant
We tested it with Home Assistant version 2025.5.3 and ESPHome 2025.5.1. Since ESPHome became part of Home Assistant in 2021, adding the XIAO-2CH-EM is very straightforward.
If Home Assistant is already installed and on the same network as the XIAO-2CH-EM, it will automatically detect the device. You simply need to go to Notifications, where the name XIAO-2CH-EM will appear, allowing you to add it to Home Assistant.
After that, the XIAO-2CH-EM entities will appear in Home Assistant as shown in the screenshot below.
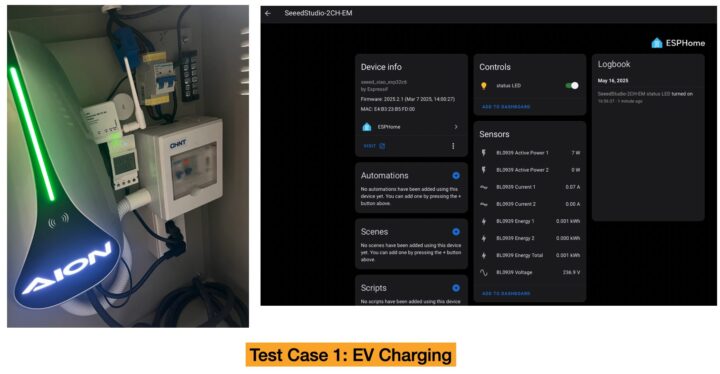
Now it’s time to put it to the test in real-world usage. We chose to test it in two scenarios: an EV charging system and a solar power generation system.
Testing the XIAO 2-Channel Wi-Fi AC Energy Monitor with an EV (Electric Vehicle) Charging System
We first tested with a home EV charger, which can deliver a constant current of up to 32A for several hours. After putting the CT clamp around the live wire cable of the charger, we left it running overnight while charging the EV car and later checked the history graph, showing both the power usage and the energy used to charge the vehicle, as seen in the image below.
Additionally, if you want to measure energy usage hourly, daily, weekly, monthly, or annually, you can leverage these entities to create new template sensors in Home Assistant with the help of the Utility Meter integration.
Testing the XIAO-2CH-EM energy monitor with a Solar Power Generation System
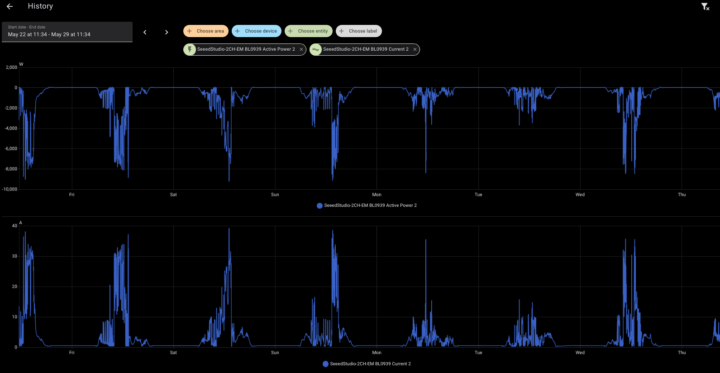
Next, we tested the XIAO-2CH-EM with a solar power generation system, where the inverter is rated at 10kW. This means the current could potentially exceed 35A (~7,700W), as specified in the BL0939 datasheet. Anyway, remember that XIAO-2CH-EM uses the CT method rather Direct AC method, so the limitation is from the CT clamp (100A in this case).
From the test results (image below), you’ll notice that the measured values are negative — this is because the system is generating power, not consuming it.
We purposely tested while the home load exceeded 35A to see whether the XIAO-2CH-EM could still measure it. It turned out that it worked just fine. In this case, the maximum load we were able to test was about 40A or 9000W, which is close to the peak output of a 10kW Deye inverter.
We tried to clamp the CT sensor as close to the main utility meter as possible to get an even higher load. However, the CT clamp ring was a bit too small — possibly because our main power cable is larger than usual (aluminum 95 sqmm), making it impossible to test higher loads although we’ve tested with other energy monitoring devices like the Eastron SDM120 CT and PZEM004 before, and those were able to clamp onto the same cable without issue.
Conclusion
After testing the XIAO-2CH-EM for over a week in a couple of scenarios, we find it’s a solid option, price/performance-wise, for anyone who wants to measure household energy consumption without modifying the existing wiring. Installation and usage are quite straightforward, and most importantly, it’s safe, thanks to the use of CT clamps.
For those who don’t want to source hardware components, wire them, and write code from scratch, this device is a great choice. We love the idea that the source code (ESPHome) is available, allowing users to quickly build and extend functionality easily.
When compared with other options such as ESP32 + PZEM004T, SONOFF Power Ring, and Eastron SDM120 CT, the SeeedStudio XIAO-2CH-EM has several advantages: It supports two channels vs. one channel compared to other solutions, allowing it to measure energy from two sources simultaneously. In terms of installation, it’s more user-friendly than a DIY setup with PZEM004T, which requires manual wiring and custom coding. It also supports bi-directional energy measurement, giving it an edge over PZEM004T, which can only measure in one direction. In terms of local operation, it outperforms the SONOFF Power Ring, which relies on the cloud to function.
Special thanks to Seeed Studio for sending the XIAO-2CH-EM for review. The device is available for for $30.30 on AliExpress or $27.80 on the Seeed Studio’s online store with two CT clamps. However, the company has yet to list it on its Amazon store.

Computer Engineering who previously worked with multinational IT company, rich experience in IT infrastructure, has a passion on Internet Of Thing i.e., Smart Home, Smart Farm as well as interested on Sustainability such as renewable energy, organic farming
Support CNX Software! Donate via cryptocurrencies, become a Patron on Patreon, or purchase goods on Amazon or Aliexpress. We also use affiliate links in articles to earn commissions if you make a purchase after clicking on those links.


