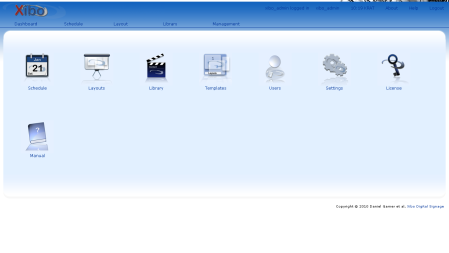
 Today’s post will deal with Xibo (pronounced eX-E-bO), an open source, multi-display, multi-zone, fully scheduled digital signage solution. I’ll firstly give an overview and explain how to install the client and server in Windows XP. In another post, I’ll demo the system.
The server can run on Windows or Linux and requires a web server (Apache / IIS), php5 and a MySQL database. The client can only runs on Windows 2000/Xp/Vista/7 and requires .NET Framework v3.5, Internet Explorer 7 or 8, Flash Player Version 9 or later, Windows Media Player 11 or later, Microsoft Powerpoint 2003 or later.
As you can see from the client description, it won’t be able to run on Linux embedded systems, but it is still interesting to study this solution to see the content management flow, what this solution has to offer and how we get development idea from this solution. An embedded client based on Xibo client (using Python) could also be potentially written so that it can communicate with the Xibo server.
Xibo uses three steps to create content:
- Layout selection
- Content selection (Media files: videos, pictures, texts, PowerPoint files…)
- Scheduling
Let’s move on to the installation part.
How to install a Xibo client/server in a Windows XP machine.
First, download the latest version of the Xibo client and server (Version 1.2.0) in Launchpad.
The full list of files can be found in https://launchpad.net/xibo/1.2/1.2.0
We’ll download xibo-client-1.2.0-win32-x86.msi and xibo-server-1.2.0.zip
Xibo Client installation
Installing the client is straightforward, just click on xibo-client-1.2.0-win32-x86.msi and follow the instructions (basically click Next) as for any applications.
After installation, Xibo Client will automatically start each time Windows XP starts. If you just want to play around for testing and do not want it to start automatically delete “Xibo Client” shortcut in All Programs->Startup.
Xibo Server installation
The server installation requires more steps. I’ll give a summary in this blog post, but you can get the full Xibo Server Installation Guide (including screen-shots) on Xibo website.
For the server, you’ll need to install Apache and MySQL with PHP5 support first.
For an easy installation of those 2 servers download XAMPP at http://www.apachefriends.org/en/xampp-windows.html
Install XAMPP 1.7.3 to C:\ (default) it will create the directory c:\xampp
Once the installation scripts complete, you should choose option 1 to load the XAMPP Control Panel. Inside the control panel, start Apache and Mysql.
Before installing Xibo server, change Mysql root password. Click on admin for Mysql in XAMPP Control Panel and change the root privileges to create a password.
Create the directory c:\xampp\htdocs\xibo and extract the content of xibo-server-1.2.0.zip to that directory and create an empty directory e.g. c:\XiboLibrary to store the media files.
In your web browser go to http://localhost/xibo to start Xibo server installation. It will first do an installation check, then you’ll be able to create a new database (Using the root password changed above) , create an admin user for Xibo, complete the installation and finally get to the Xibo Dashboard.
 That’s it. Next time, I’ll show how to use the dashboard and run the client.

Jean-Luc started CNX Software in 2010 as a part-time endeavor, before quitting his job as a software engineering manager, and starting to write daily news, and reviews full time later in 2011.
Support CNX Software! Donate via cryptocurrencies, become a Patron on Patreon, or purchase goods on Amazon or Aliexpress


