Hardkernel recently unveiled a low cost version of ODROID-XU3 board powered by Exynos 5422 SoC, and selling for $99 instead of $179 with the original version that adds a DisplayPort connector, current and voltage sensors, as well as a faster CPU frequency (2+ GHz vs 1.8 GHz). The company sent me a sample for evaluation, so today I’ll take some pictures of the ODROID-XU3 Lite kit, and I also planned to show a Linux demo, but unfortunately my board appears to have an hardware glitch with HDMI output not working, so I’ll still show some info from the first boot, but that’s just an headless system. Anyway, I’ll soon receive a replacement unit, and I’ll be able to test Lubuntu and Android in more details later.
ODROID-XU3 Lite Unboxing
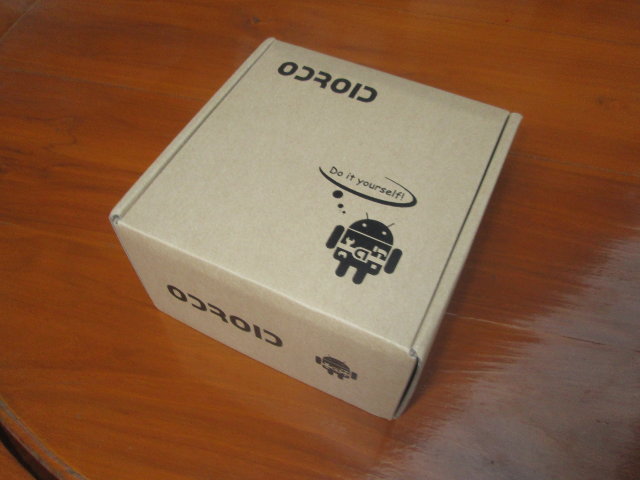
Hardkernel sent the parcel on Thursday by UPS, and I received the board on Monday in an ODROID branded cardboard box.
 The $99 kit includes the board with a heatsink and fan, a 5V/4A power supply, and a plastic case. Hardkernel also added a micro HDMI to HDMI cable, and a 16GB eMMC flash pre-loaded with Lubuntu Linux together with a USB card reader for the eMMC.
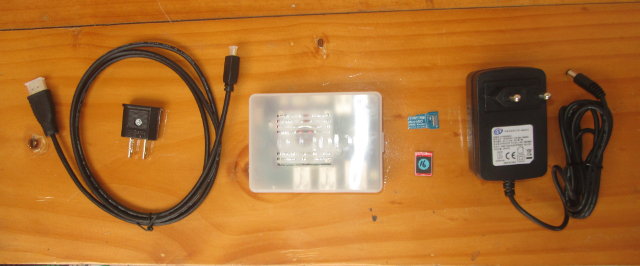
So complete kit above would be $147.70, with $99 for the kit, $39 for the eMMC and card reader, and $5.70 for the HDMI cable. You’ll also need to add DHL shipping to the total cost by DHL. Since you can boot from micro SD card, the eMMC is optional, but still recommend for better performance.
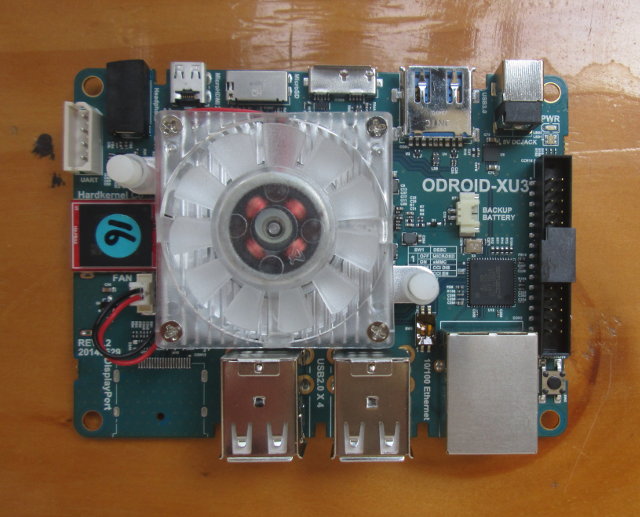
That’s the board with the 16 GB eMMC installed. The silkscreen indicates ODROID-XU3 and not ODROID-XU3 Lite because the PCB is the same for both models.
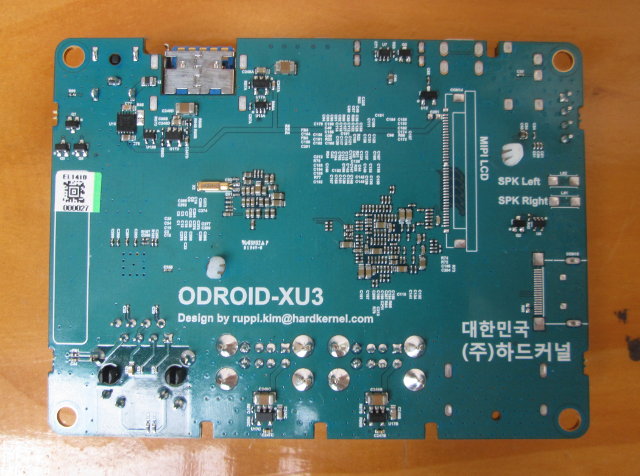
There’s a MIPI connector on the back of the board, but it’s apparently not possible to use it, so the company provide a 9″ HDMI touscheen display instead.
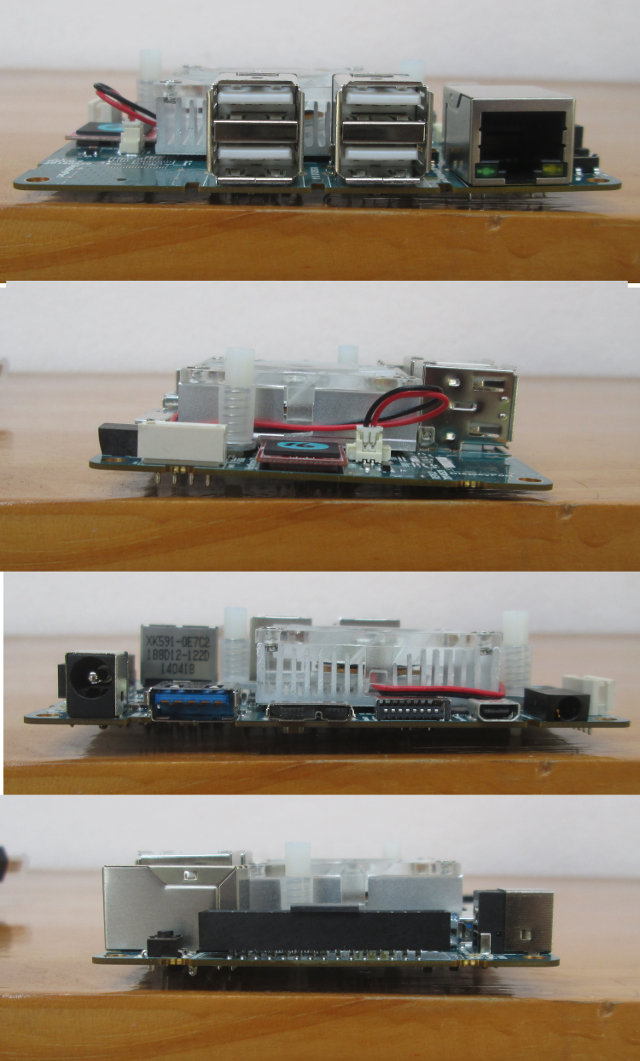
Let’s check all ports from ODROID-XU3 Lite (top to bottom of the picture above):
- Front – 4x USB 2.0 host ports, 1x 10/100M Ethernet
- Side 1 – UART pins, eMMC socket
- Back – 5V DC jack, USB 3.0 port, micro USB 3.0 OTG port, micro SD card slot, micro HDMI, and 3.5mm headphone jack.
- Side 2 – Power button, and expansion header.
There’s also a battery backup connector if you want to connect a LiPo battery.
You can also watch the unboxing video below, if you want to have a better look at the kit content, see how to open the plastic box, and connect the eMMC module.
First boot of ODROID-XU3 Lite
As mentioned in the introduction, I was planning to do more here, but the board I received did not output anything via HDMI to my Panasonic TV, nor a Philips monitor. We also tried to boot Lubuntu from a micro SD using ubuntu-14.04.1lts-lubuntu-odroid-xu3-20141023.img.xz, and some instructions on ODROID forums to switch the boot mode from eMMC to SD card using the switch nearby the Ethernet port. But no luck, but I’ve still done a headless boot.
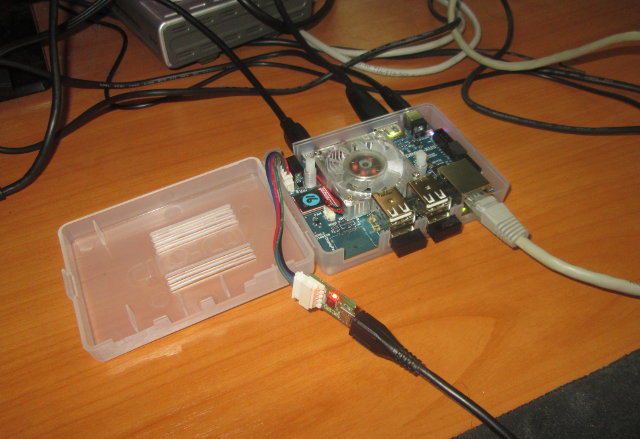 Since I did not have anything on the display I also connected a USB to TTL debug board to access the console. You can’t connect 2.54mm dupont wires to the UART connector, so instead I used the debug board that came with my ODROID-X board, and that you could consider purchasing together with the board for an extra $15.
I’ve connected a USB 3.0 hard drive, two RF dongles, the micro HDMI cable, and an Ethernet, and the power cable to start the board. Boot from the eMMC is very fast: 17 seconds from power to command line. The kernel itself boots in less than 10 seconds. You can check the boot log from a class 10 micro SD card for reference.
The image is based on Ubuntu 14.04.1 LTS with Linux kernel 3.10.58+. Here’s some extra interesting data from the command line:
|
1 2 3 4 5 6 7 8 9 10 11 12 13 14 15 16 17 18 19 20 21 22 23 24 25 26 27 28 29 30 31 32 33 34 35 36 37 38 39 40 41 42 43 44 45 46 47 48 49 50 51 52 53 54 55 56 57 58 59 60 61 62 63 64 65 66 67 68 69 70 71 72 73 74 75 76 77 78 79 80 81 82 83 84 85 86 87 88 89 90 91 92 93 94 95 96 97 98 99 100 101 102 103 104 105 106 |
root@odroid:~# uname -a Linux odroid 3.10.58+ #13 SMP PREEMPT Tue Nov 4 14:09:41 KST 2014 armv7l armv7lx root@odroid:~# df -h Filesystem Size Used Avail Use% Mounted on /dev/mmcblk0p2 4.9G 4.4G 310M 94% / none 4.0K 0 4.0K 0% /sys/fs/cgroup udev 747M 4.0K 747M 1% /dev tmpfs 998M 4.0K 998M 1% /tmp tmpfs 200M 2.8M 197M 2% /run none 5.0M 0 5.0M 0% /run/lock none 998M 72K 998M 1% /run/shm none 100M 20K 100M 1% /run/user /dev/mmcblk0p1 129M 5.1M 124M 4% /media/boot /dev/sda4 200G 17G 181G 9% /media/odroid/USB3_BTRFS /dev/sda3 245G 15G 230G 6% /media/odroid/USB3_FAT32 /dev/sda2 241G 71G 158G 31% /media/odroid/USB3_EXT4 /dev/sda1 245G 38G 207G 16% /media/odroid/USB3_NTFS root@odroid:~# free -h total used free shared buffers cached Mem: 1.9G 449M 1.5G 6.2M 61M 117M -/+ buffers/cache: 270M 1.7G Swap: 0B 0B 0B root@odroid:~# cat /proc/cpuinfo processor : 0 model name : ARMv7 Processor rev 3 (v7l) BogoMIPS : 78.00 Features : swp half thumb fastmult vfp edsp neon vfpv3 tls vfpv4 idiva i CPU implementer : 0x41 CPU architecture: 7 CPU variant : 0x0 CPU part : 0xc07 CPU revision : 3 processor : 1 model name : ARMv7 Processor rev 3 (v7l) BogoMIPS : 78.00 Features : swp half thumb fastmult vfp edsp neon vfpv3 tls vfpv4 idiva i CPU implementer : 0x41 CPU architecture: 7 CPU variant : 0x0 CPU part : 0xc07 CPU revision : 3 processor : 2 model name : ARMv7 Processor rev 3 (v7l) BogoMIPS : 78.00 Features : swp half thumb fastmult vfp edsp neon vfpv3 tls vfpv4 idiva i CPU implementer : 0x41 CPU architecture: 7 CPU variant : 0x0 CPU part : 0xc07 CPU revision : 3 processor : 3 model name : ARMv7 Processor rev 3 (v7l) BogoMIPS : 78.00 Features : swp half thumb fastmult vfp edsp neon vfpv3 tls vfpv4 idiva i CPU implementer : 0x41 CPU architecture: 7 CPU variant : 0x0 CPU part : 0xc07 CPU revision : 3 processor : 4 model name : ARMv7 Processor rev 3 (v7l) BogoMIPS : 108.00 Features : swp half thumb fastmult vfp edsp neon vfpv3 tls vfpv4 idiva i CPU implementer : 0x41 CPU architecture: 7 CPU variant : 0x2 CPU part : 0xc0f CPU revision : 3 processor : 5 model name : ARMv7 Processor rev 3 (v7l) BogoMIPS : 108.00 Features : swp half thumb fastmult vfp edsp neon vfpv3 tls vfpv4 idiva i CPU implementer : 0x41 CPU architecture: 7 CPU variant : 0x2 CPU part : 0xc0f CPU revision : 3 processor : 6 model name : ARMv7 Processor rev 3 (v7l) BogoMIPS : 108.00 Features : swp half thumb fastmult vfp edsp neon vfpv3 tls vfpv4 idiva i CPU implementer : 0x41 CPU architecture: 7 CPU variant : 0x2 CPU part : 0xc0f CPU revision : 3 processor : 7 model name : ARMv7 Processor rev 3 (v7l) BogoMIPS : 108.00 Features : swp half thumb fastmult vfp edsp neon vfpv3 tls vfpv4 idiva i CPU implementer : 0x41 CPU architecture: 7 CPU variant : 0x2 CPU part : 0xc0f CPU revision : 3 Hardware : ODROID-XU3 Revision : 0000 Serial : 0000000000000000 |
The 16 eMMC flash only have a 5GB root file systems on the pre-loaded image, so you’d have to extend the partition manually with resize2fs to make use of the full capacity. All four partitions from my USB hard drive could be automatically mounted with FAT32, NTFS, EXT-4 and BTRFS file systems, which slowdown the boot time a little…. The board get 2GB RAM, and all eight cores are available in Linux as expected with four Cortex A7 (0cx07) cores, and four Cortex A15 (0xc0f) cores.
In case you worry about the fan noise, you don’t have to. First, the fan is only active when needed, and second it’s silent when it turns, at least when it’s still new.
That’s all for today, I’ll do more testing once I receive a new sample with working HDMI output. In the meantime, you can check out some Android benchmarks published by Ian MORRISON, and find more answers or ask questions on ODROID-XU3 (Lite) forums. If you are interested in this board, you can purchase it directly from Hardkernel, or through distributors like Ameridroid (USA) or Pollin Electronics (Germany).

Jean-Luc started CNX Software in 2010 as a part-time endeavor, before quitting his job as a software engineering manager, and starting to write daily news, and reviews full time later in 2011.
Support CNX Software! Donate via cryptocurrencies, become a Patron on Patreon, or purchase goods on Amazon or Aliexpress. We also use affiliate links in articles to earn commissions if you make a purchase after clicking on those links.


Hope you receive soon and review it. Thank
Please test XBMC/Kodi on both Linux and Android for it
Harley i have tested that already on my XU3 , its working , odroid have even openelec and prebuilt images with xbmc/kodi for all their U and XU platforms
Still no available @ Pollin Electronics. I might get one depending on Jean-Luc test. but it’s really promising for the price.
The O-DROID-XU3 is already a beast, this is our Debian package server at work ! 🙂
@embedded_geek
If you already have ODROID-XU3 it will almost be the same, just maybe 10% slower CPU wise.
@cnxsoft
Yeah I’m aware of that but I want it for private usage! I think that the 10% less and the lack of eDP/MIPI is worth the 80€ less than the normal version.
Thank you for the unboxing. Waiting for a detailed review/test.
Does this company do any QC check before they send out a board considering hdmi doesn’t output anything? That makes a board almost unusable.
Hi,
i have to connect the usb host on odroid with my tv usb. There was no ground connection on minihdmi to hdmi cable.
Only way was to grab the ground from usb, after that all working.
@Puresoul
Thanks. I’ve tried that right now, but it’s not working for me.
I have two boards now with the same problem, happening on three displays (2 TVs, 1 monitor).
@cnxsoft
Grounding problems… Are you sure you used actual signal ground, and not shield ground?
@anon
I’ve connected a USB cable between my TV and the board, so both signal and shield ground should be used.
Maybe my TV is using separate grounds for USB and HDMI…
@cnxsoft
Actually USB and HDMI should use separate shield AND signal ground, as they use different voltage rails (5V vs 3.3V), but of course system designers simplify things by using singular “digital ground” and singular shiend ground, as the possible ground loop currencies are so low… My main telly does have separate signal grounds, but shared shield ground, and my computer monitor having both grounds shared, so there is some flexibility on standards.
If those mini-HDMI to HDMI cables have their shield ground broken that should not effect much (just not certifiable for FCC/CE and friends for EMI), so only reason would to have the signal ground be broken, then there is not much to do, besides getting a new cable, or by chance have a display with poor design (shared digital ground).
Hi,
If you can ssh or use UART to access the board, go to /media/boot and edit boot.ini and force a resolution..
Fell free to contact on IRC so we can address your issue 🙂
mdrjr @ #odroid on Freenode
Can you review it?
@hoangdinh86
Sorry not yet. Still trying to figure out the HDMI issue.
Finally, I flashed Android (http://dn.odroid.com/5422/ODROID-XU3/Android/4.4.4_Alpha_1.3_Nov-05-2014/) to my eMMC via the micro SD adapter. At first, I used the micro HDMI cable provided with the board, and all I got was a black screen. But after I switched to another micro HDMI cable (the one I got with ODROID-X), and it works, so I’ll post some benchmarks with Android first.
I’ve also been pointed to an interesting post about problematic HDMI cables on ODROID forums, where some cables lack a ground connection, and/or lines are mixed.
Good. Hope you review it soon
I had a similar problem – initially the board was running just fine on an LG monitor, then, after reboot it only showed a black screen. It may just be a software problem, as soon as I switched to a different monitor LG 27EA33, the board has been happily sending data over HDMI
Another update:
– got two more boards on Friday and got them up and running using HDMI connection to a Sony TV and another HDMI monitor. absolutely stunning, no pain bringup. This also includes setting up WiFi, wireless Logitech keyboard etc.
I also had no HDMI signal out of the board, but it worked fine after taking the board out of the plastic case. Trimming some plastic off the connector solved the problem.