
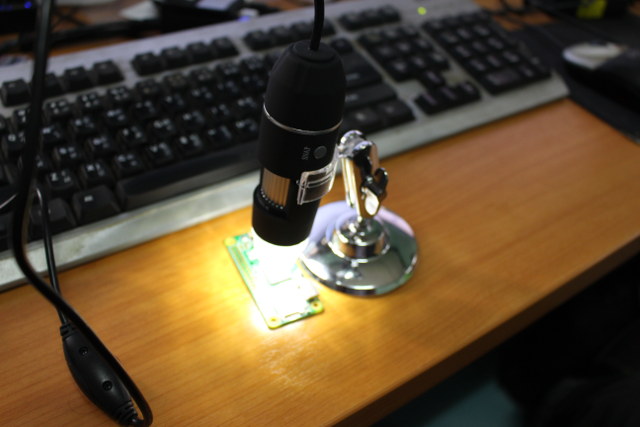
It’s not always easy to read the part number on IC you find on boards, and some time ago, I watched a video where Lady Ada used a USB microscope to demonstrate how to solder some components, and probably using that 5.0 MP model sold on Adafruit for about $80. But I found a similar looking USB microscope with a 2.0MP sensor and 1000X magnification on Ebay for $16.59 shipped, so I bought it, received it today, and I’ve given it a try.
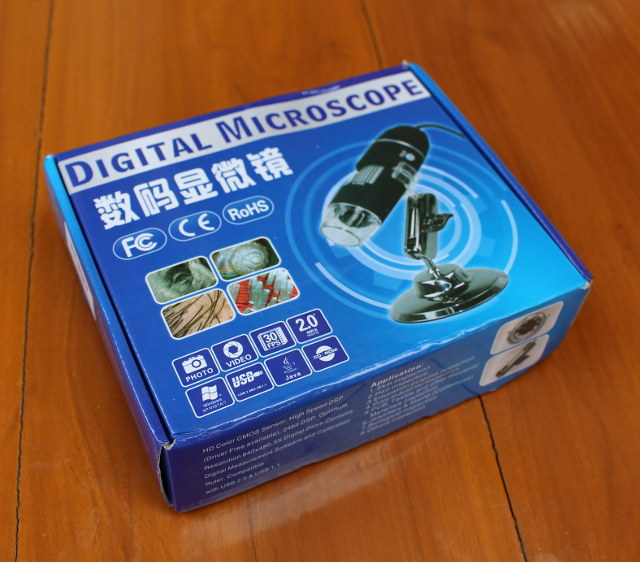
Such microscopes can be used to inspect skin and hair, PCB, textile, bank notes, jewelery, and so on.
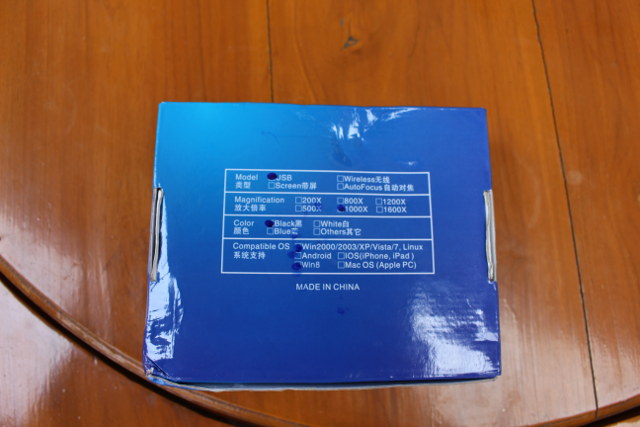
 There are apparently other models based on the one I purchased with useful features like auto-focus, wireless support, different levels of magnification, and different colors. Supported operating systems include Windows and Linux, Android, and Windows 8 according to the package.
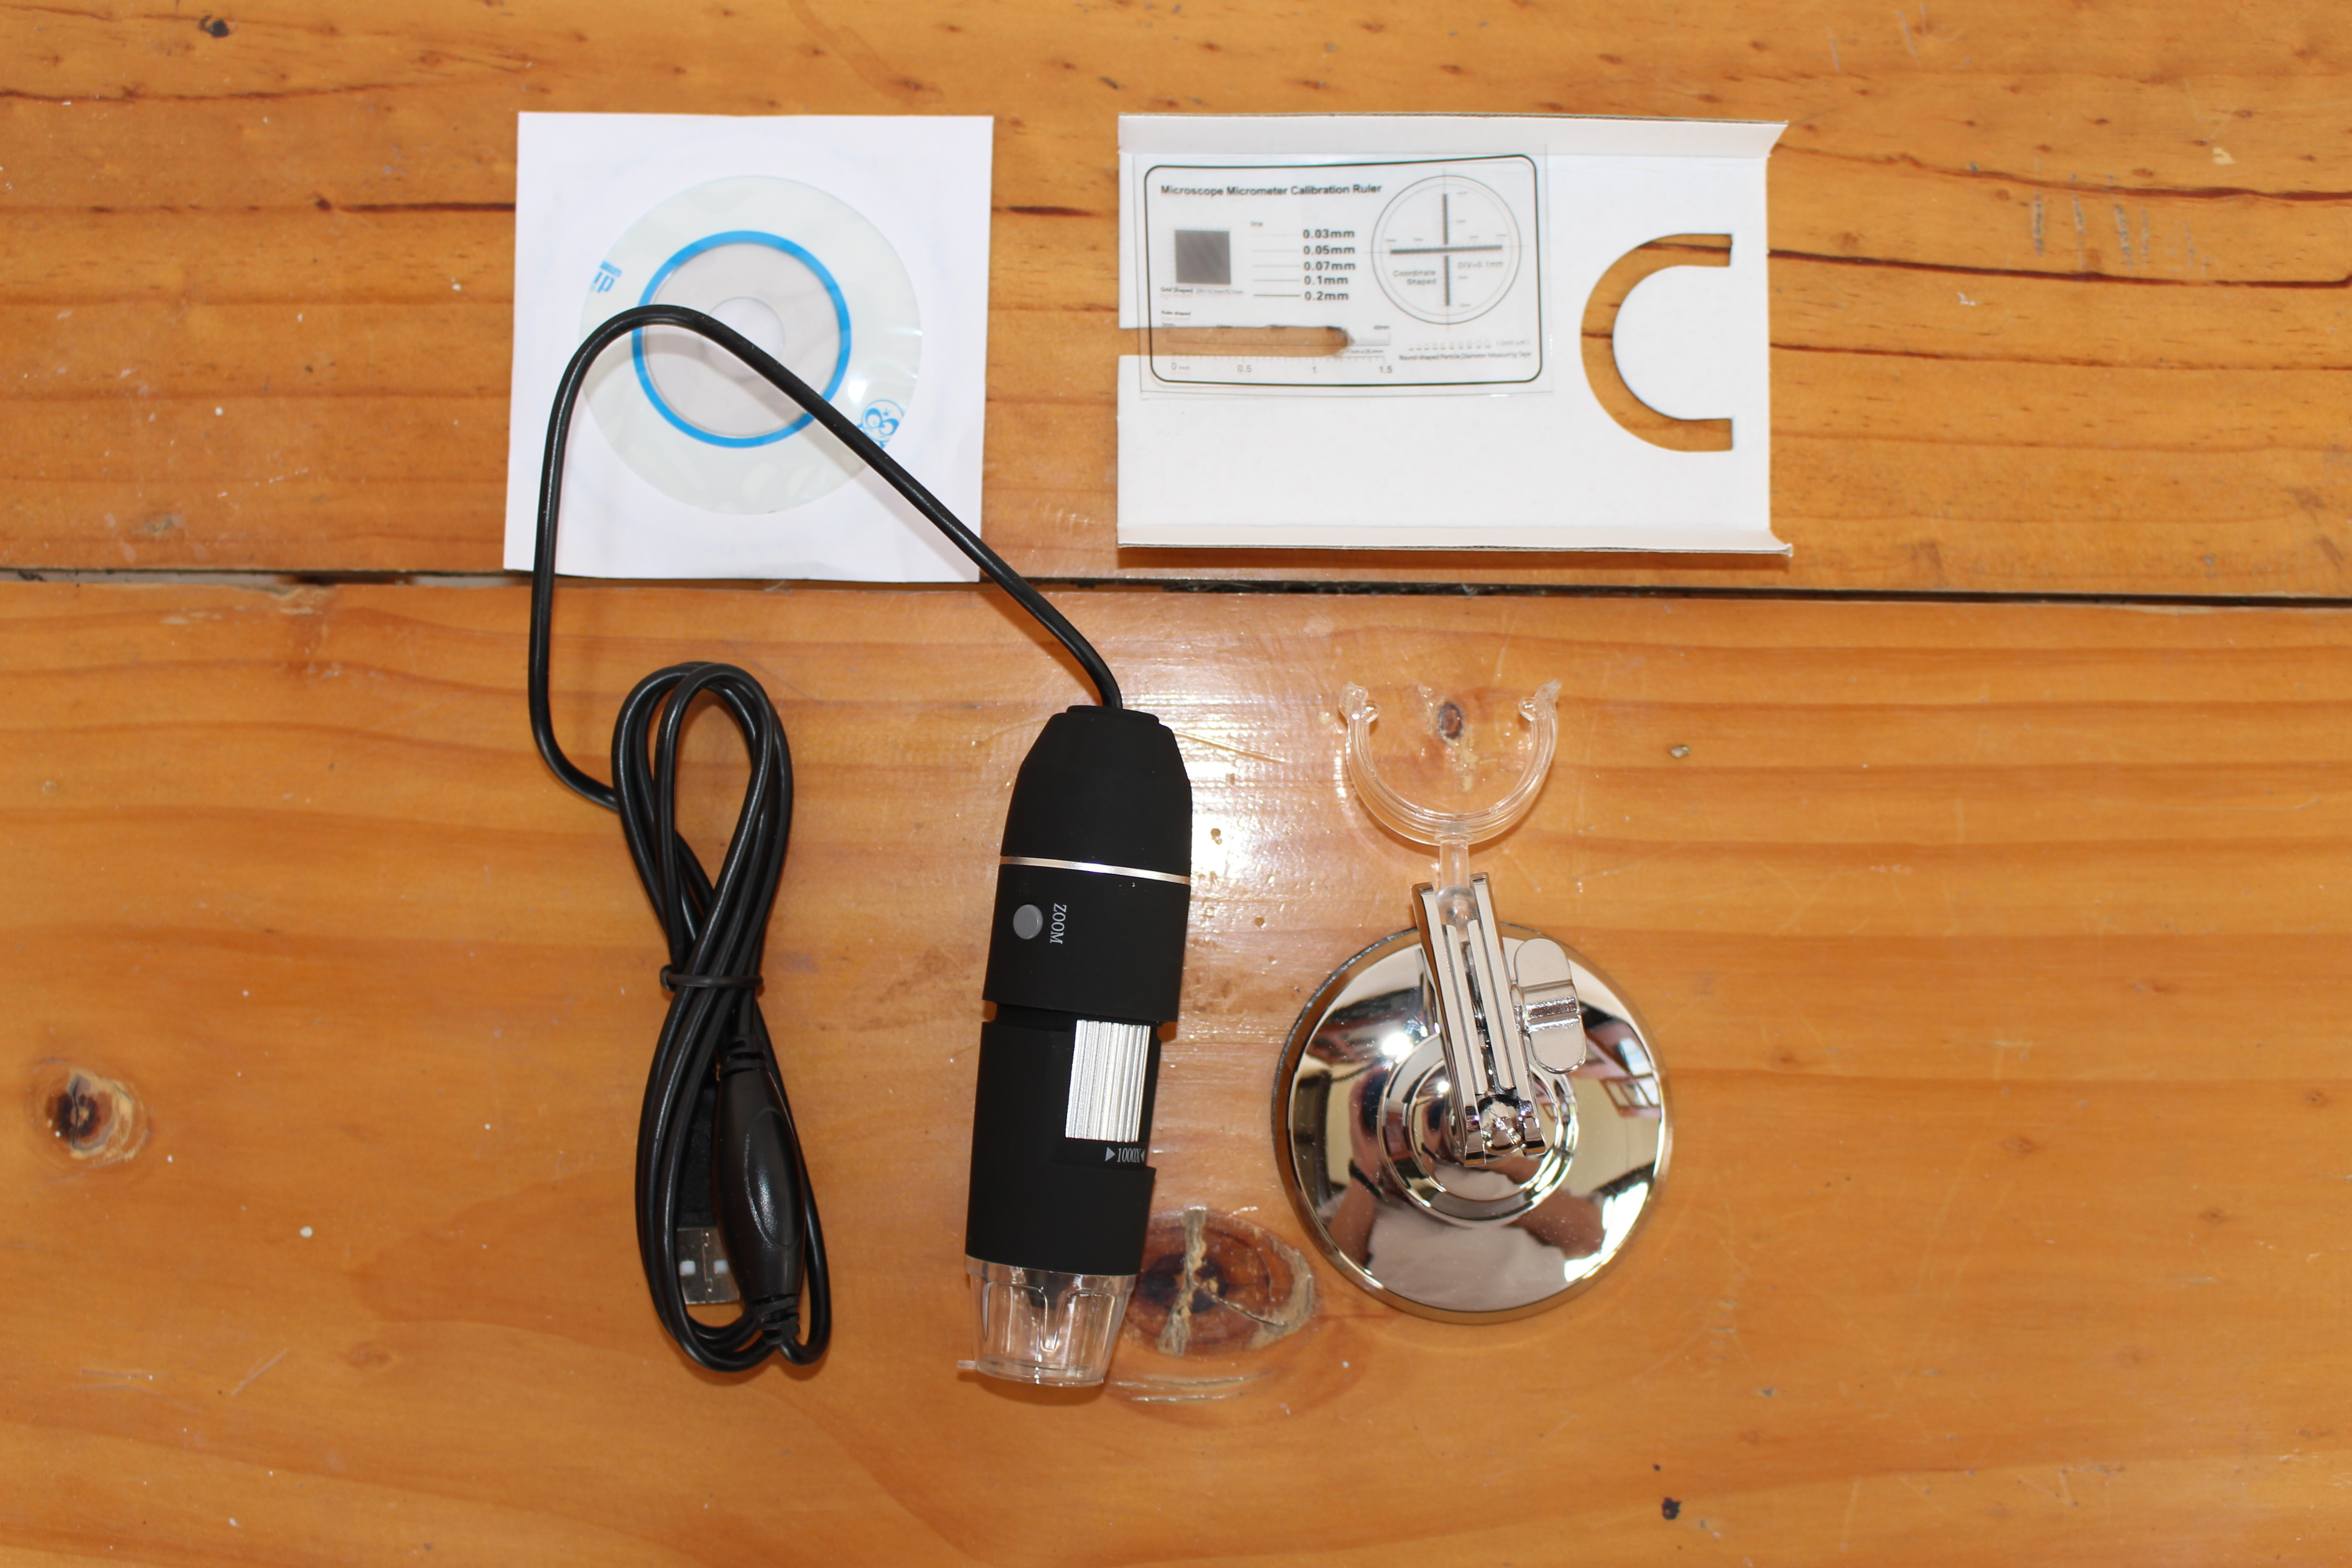
 The microscope comes with a stand, a CDROM with Windows drivers and tools, and a “Microscope micrometer calibration ruler”. The latter is used in Measurement program in Windows and allows you to make measurements.
Two buttons can be used to respectively adjust the zoom digitally (ZOOM), and take a snapshot (SNAP), and you use the grey know to adjust the focus manually. There’s no way to adjust magnification, apart from moving the microscope up and down.
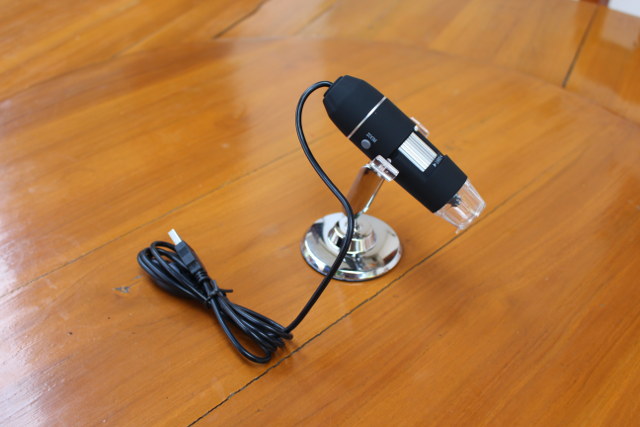
As soon as you connect the microscope to the USB port of your computer the LED will turn on, and you can adjust its brightness or turn it off with the potentiometer on the USB cable.
We can see that the microscope is a standard USB UVC camera:
|
1 2 3 4 5 6 7 8 9 10 11 |
[29274.688548] usb 1-1.4: new high-speed USB device number 4 using xhci_hcd [29274.801190] usb 1-1.4: New USB device found, idVendor=05e3, idProduct=0510 [29274.801199] usb 1-1.4: New USB device strings: Mfr=2, Product=3, SerialNumber=0 [29274.801204] usb 1-1.4: Product: USB2.0 UVC PC Camera [29274.801208] usb 1-1.4: Manufacturer: GenesysLogic Technology Co., Ltd. [29274.885323] media: Linux media interface: v0.10 [29274.890782] Linux video capture interface: v2.00 [29274.901122] uvcvideo: Found UVC 1.00 device USB2.0 UVC PC Camera (05e3:0510) [29274.945311] input: USB2.0 UVC PC Camera as /devices/pci0000:00/0000:00:04.0/0000:02:00.0/usb1/1-1/1-1.4/1-1.4:1.0/input/input18 [29274.945406] usbcore: registered new interface driver uvcvideo [29274.945408] USB Video Class driver (1.1.1) |
So that means it should work with any operating systems, and you can simply use your favorite USB webcam software if you don’t like the Windows tools provided with the device.
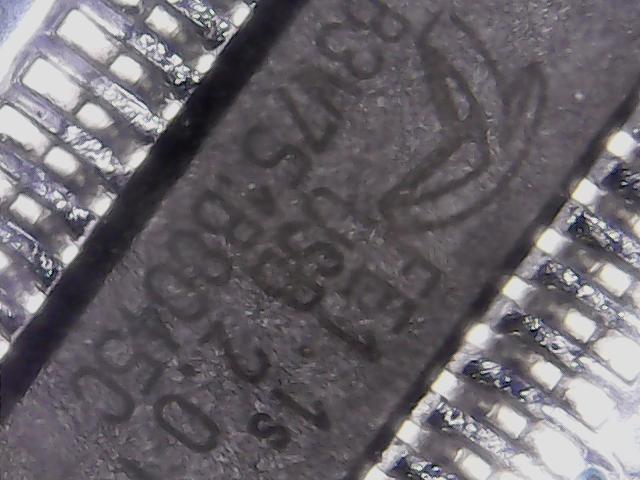
I’ve started with Raspberry Pi Zero board by adjusting the focus on the through holes, a little blurry but usable.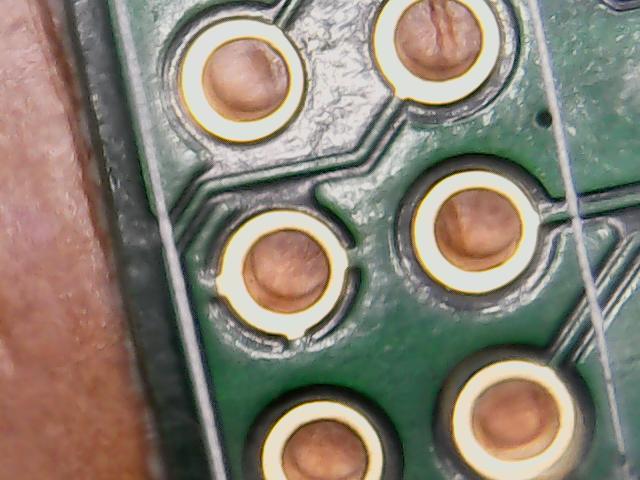 Then I’ve taken a picture of the one and only chip on the board. We can see it’s an ELPIDA chip but the part number “B4432DDPA”? is not that easy to read, and I had to move the USB microscope stand on the package in order not to be too close…

It’s now Orange Pi 2 mini turn. The USB hub chip is still blurry but perfectly readable.
It’s hard to focus perfectly in most picture. I used the program to take picture, not the button on the microscope as it would be even blurrier.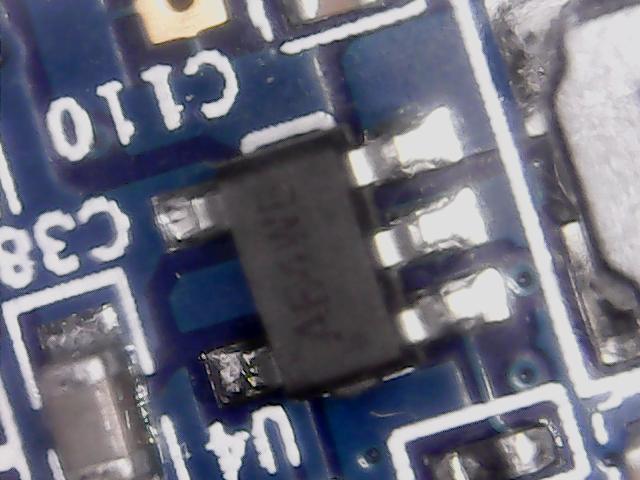
Samsung RAM chip.
Allwinner H3 processor… I wish I could have taken the complete chip, but again it was not possible.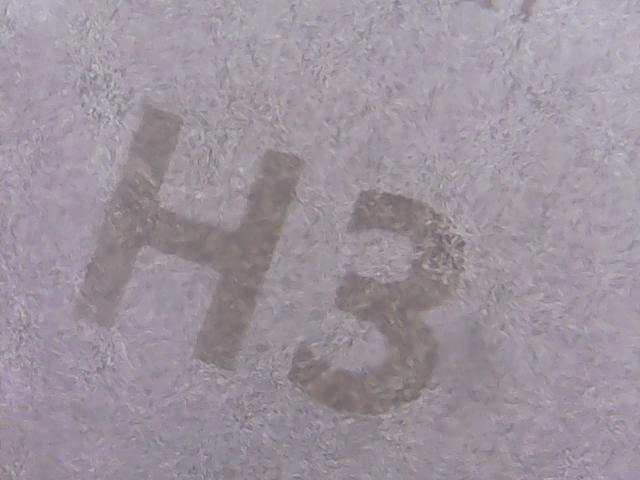
And one last try on another part.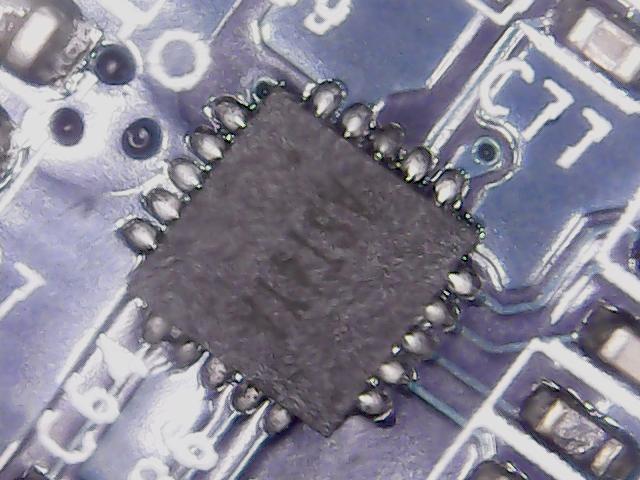 So I’m not quite sure I’ll ever use it again as it’s not really clear and user-friendly, but I was worth a try…
The model sold Adafruit appears to provide much better results, or maybe I’ll have to try day time instead…

Jean-Luc started CNX Software in 2010 as a part-time endeavor, before quitting his job as a software engineering manager, and starting to write daily news, and reviews full time later in 2011.
Support CNX Software! Donate via cryptocurrencies, become a Patron on Patreon, or purchase goods on Amazon or Aliexpress


Hmmm, we had one of those at my previous company and it came out a lot better than your shots. Maybe try to adjust the distance, as there’s an ideal focus distance on these things?
it can be also very useful for reverse engineering pcbs
When using my bare eye, I find that shining the light from a different direction can sometimes help. Is it possible to turn off the built-in lighting on this model, to try other light sources/angles?
Got one myself
but i think windows (driver) get you a better picture!!
This is a cool tool for ~$17. Please do update if you find something better at around the same price range.
Oye amigo, me gustaría que me pasaras los drivers del microscopio me ayudarías mucho, saludos
@Julio
Link of full CDROM with drivers, user’s manual and Windows apps: https://mega.nz/#F!OkAEXDxZ!TyrwHuxaMdrgwSgdz2l7Lw
@John S.
Yes, you can adjust the brightness of the LED.
EEVblog reviewed two USB microscope a while ago @ https://www.youtube.com/watch?v=H2P1_JZYnVc
He tested one similar to mine with the conclusion “Heap of shit”…, but the other looks much better, and it’s $75 on Amazon @ http://www.amazon.com/gp/product/B005P40OXY/
Also you can get pretty far with post processing. See this tiny one liner using imagemagick convert https://gist.github.com/lelandbatey/8677901
Ciao
I bought one in 2014 for about $11.
It’s more like a toy, but also a good one.
I have a similar one and it works pretty well. I have a few Tear-down pictures of it of a head lamp LED as a comparison: http://www.danand.de/index.php/electronics/teardown-silva-cross-trail-ii/
@Danand that’s a very elegant theme you got there.
got one of those as well, works but is messy and can’t be used for any productivity work.. I’m using more of a “machine camera” approach, much like what’s used on production lines for QT work. i’m using a raspberry pi with hdmi display, camera board with CS mount and the following rather large lens : http://www.aliexpress.com/item/Free-Shipping-15-X-40-X-Optical-Zoom-CS-Mount-Lens-for-Microscope/628493477.html it’ definitely not is the same price range, but you can have the optics high enough (10-20cm above) to work below it, perfect for soldering SMD. Moreover, using 60fps lower resolution on the pi camera with a preview windows gives 0 lag on… Read more »
This fantastic shop does NOT deliver to Switzerland and Germany.
Can somebody tell me what could be the reason, or is the shop just plain silly?