I’m quite late on that one, but after an extended holiday, I’m now ready to review the Raspberry Pi 5 the company sent me last month. I’ll do so with the latest Raspberry Pi OS Bookworm based on Debian 12 and CNX Software’s “tropical reviews” are usually more demanding than most others due to the higher ambient temperature (usually around 28°C in my room) in Thailand.
But since Raspberry Pi did not just send the Raspberry Pi 5, but a full kit with keyboard, mouse, enclosure, and more, I’ll start with a post mostly looking at the hardware with an unboxing, assembly, plus a quick try at Debian 12 on the new SBC.
Raspberry Pi 5 Kit Unboxing
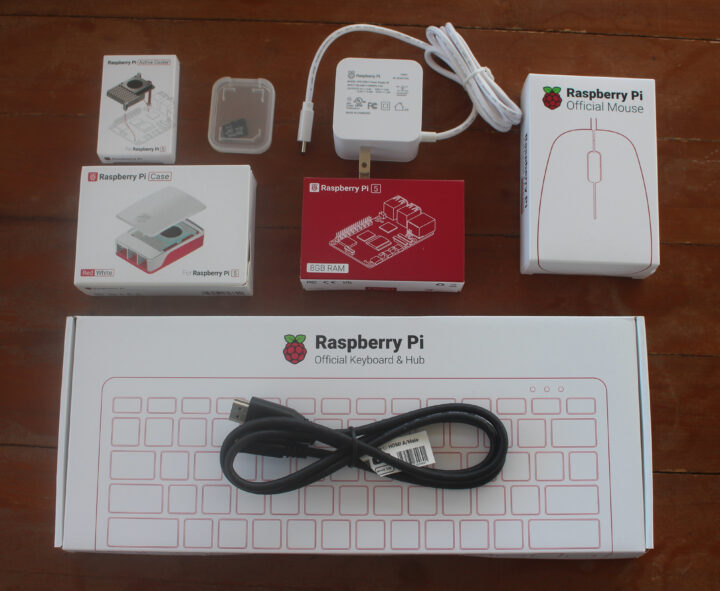
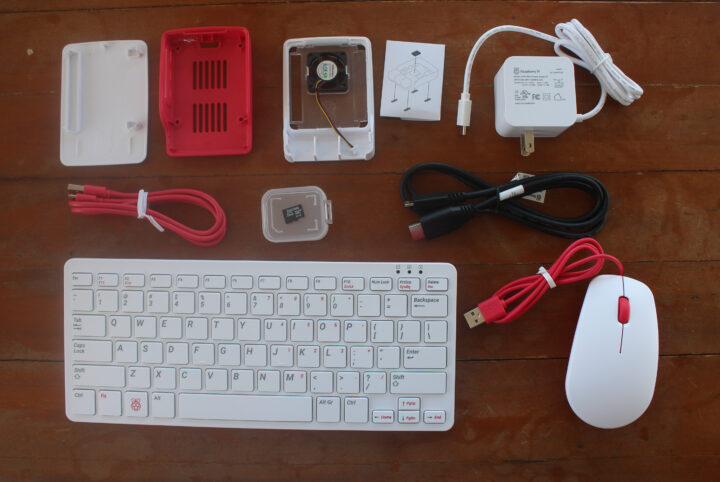
Besides the Raspberry Pi 5 itself, the package included the active cooler (heatsink + fan), a microSD card preloaded with a pre-release Raspberry Pi OS Bookworm image, a USB-PD power supply, a micro HDMI to HDMI cable, as well as the official Raspberry Pi keyboard & USB hub and mouse. The Raspberry Pi 5 case was shipped a few weeks later.
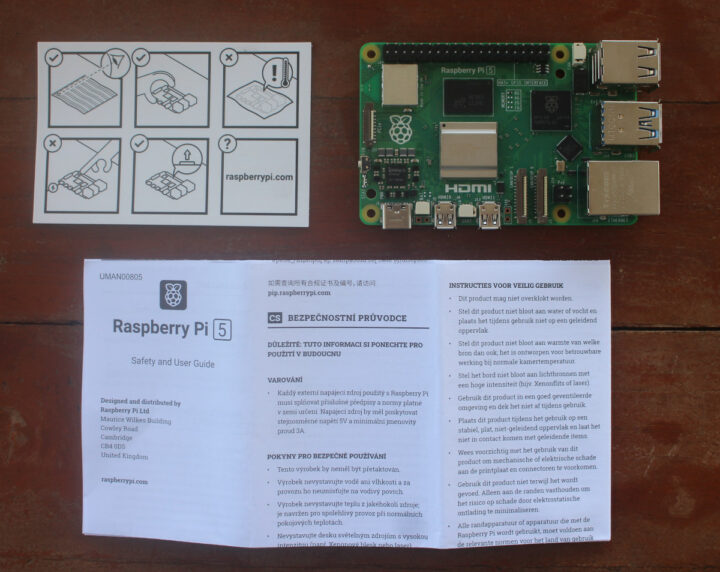
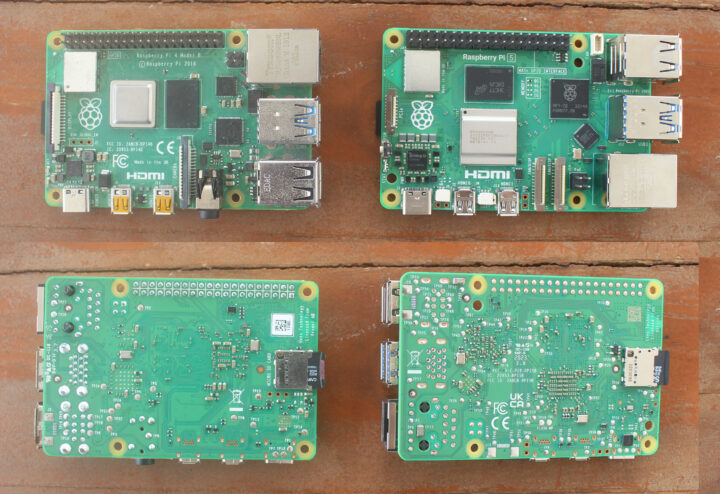
The Raspberry Pi 5 SBC ships with a multilingual safety and user guide that’s pretty much useless and is likely there for legal reasons… Let’s have a closer look at the new board side-by-side with the previous generation Raspberry Pi 4.
The first change I noticed is that the Raspberry Pi 5 reverts back to the USB and Ethernet ports arrangement of the Raspberry Pi 3 and earlier models. The MIPI DSI and CSI ports are smaller and in different positions, the 3.5mm AV jack is gone, the PoE has been moved around, and the new PCIe FPC connector shows up on the left of the board right above the microSD card. Looking at the back of the board, the Raspberry Pi 5 looks to have many more passive components as well.
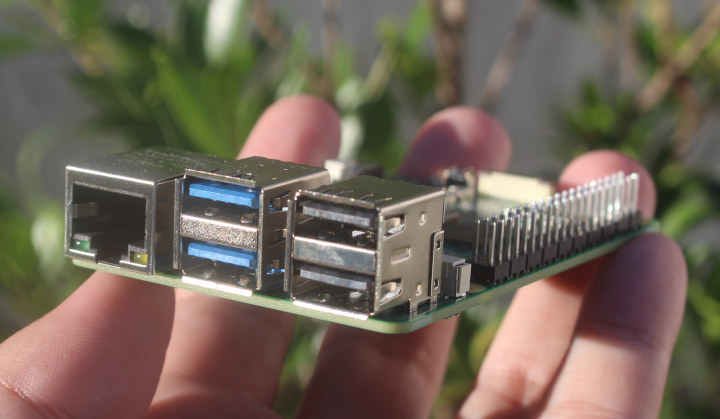
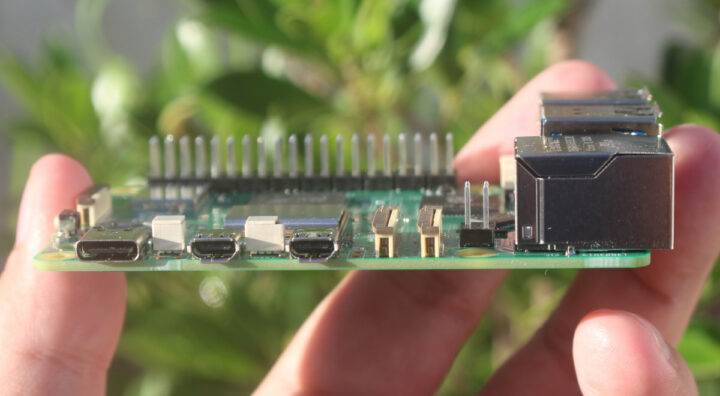
From some angles, the new board looks almost like the earlier version, but if we check out the USB-C, micro HDMI ports, and MIPI connectors’ side the changes are more apparent.
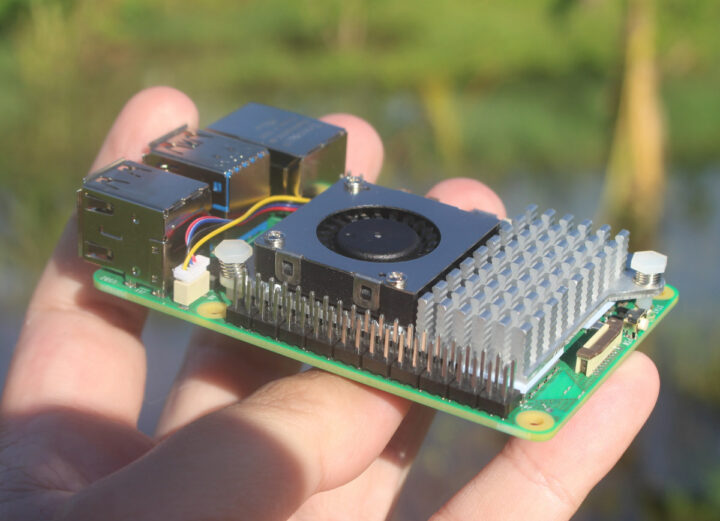
The 5th version of the popular SBC is also the first Raspberry Pi that comes with a proper cooling solution, as the Raspberry Pi 4 has its own cooling issues requiring users to find their own way to cool the board. But it’s not the case for the new board, the Raspberry Pi 5 active cooler to here to help with a PWM fan, a large heatsink fitted with thermal pads for the Broadcom BCM2712 SoC, the wireless module, and Dialog DA9091 PMIC.
Some of the other accessories part of the package are not new (keyboard, mouse, etc..), the case is familiar but had to be resigned due to the new layout of the board, and the USB-C PD adapter supports the controversial, but USB PD specs compliant 5.1V/5A output to power the Raspberry Pi 5, as well as 9V/3A, 12V/2.25A, and 15V/2A outputs none of which are supported by the new SBC likely due to cost reasons.
Raspberry Pi 5 active cooler and case assembly
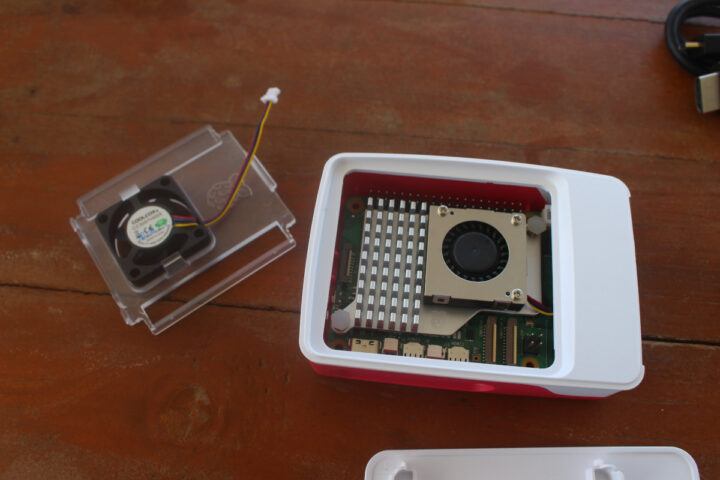
The active cooler is easy to install. Peel off the protective film covering the thermal pads, then clip it to the board using the two mounting holes. Finally, connect the 4-pin wire to the FAN connector after removing its cover. It’s pretty good-looking too.
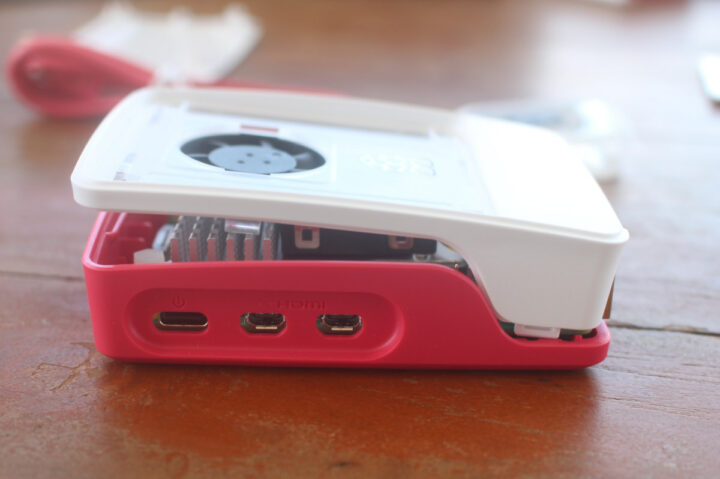
I then wanted to mount that inside the Raspberry Pi 5 case which strangely also comes with a fan, but it’s clearly not how it’s supposed to work as it won’t fit…
I decided to remove the fan from the case and install the board with the active cooler instead.
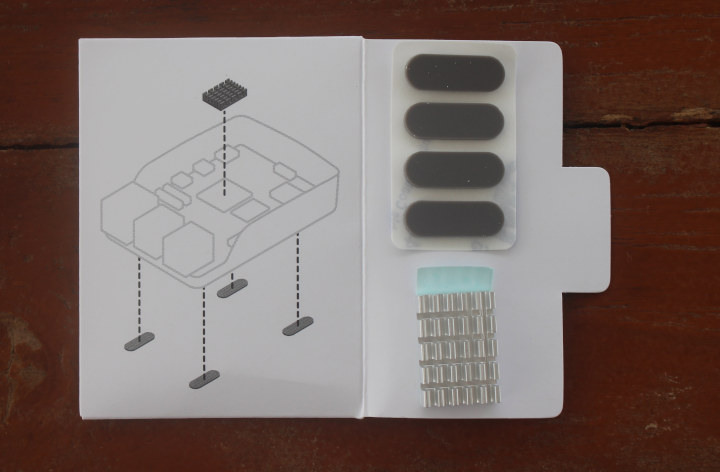
But then I realized I missed the enclosure comes with a small heatsink, four rubber pads, and assembly instructions.
Never mind… I’ll try it out my way first, then switch to the smaller heatsink for further testing. I’ll probably turn off the fan as well to find out what happens under load.
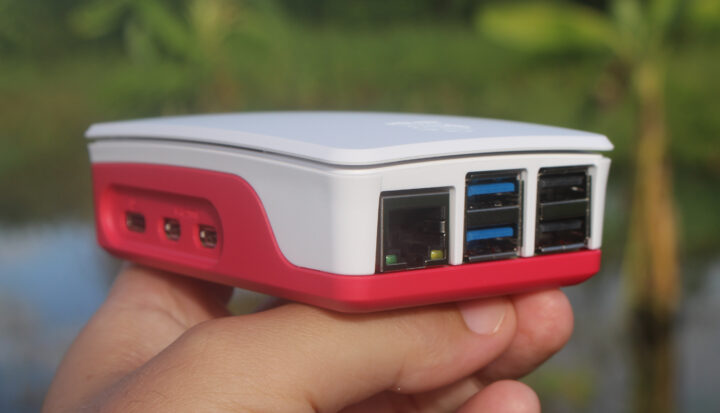
The end result looks nice, although I initially thought I had done something wrong since it’s the gap between the case and the top cover. But it looks like it’s part of the design for better airflow and cooling.
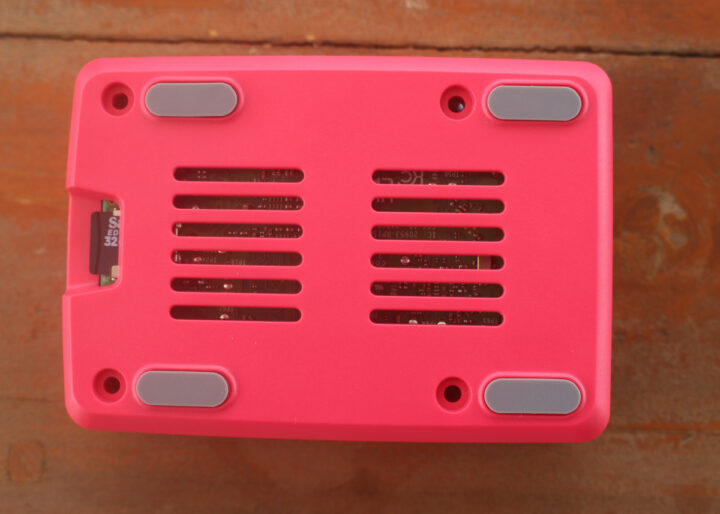
The final step is to install the four rubber pads and insert the 32GB microSD card provided with the kit.
First boot
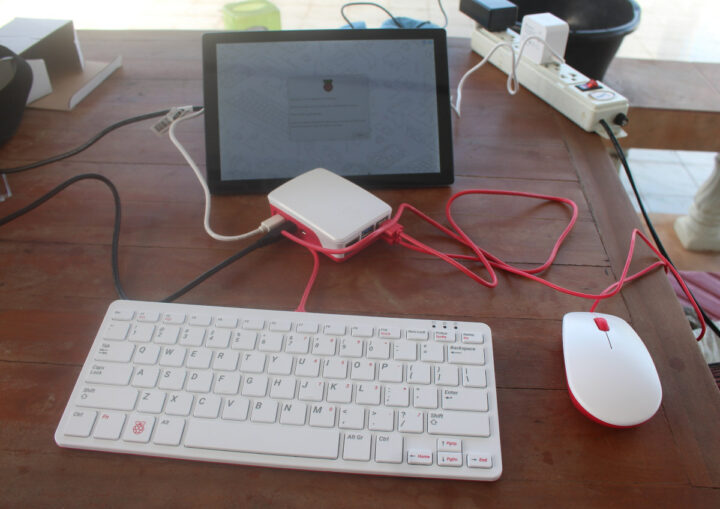
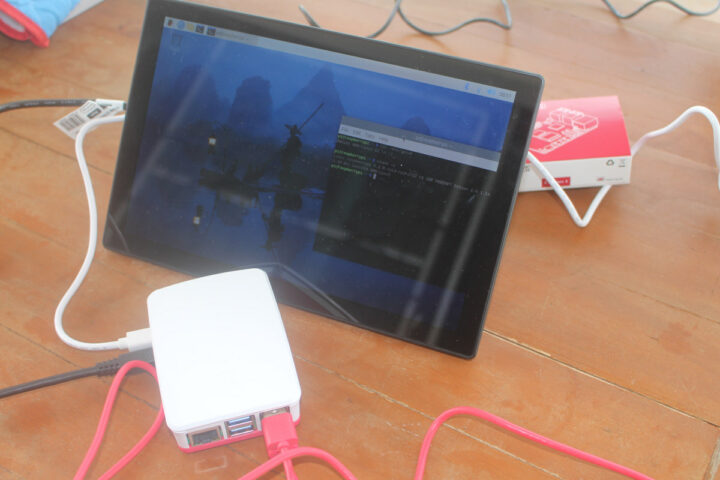
We can now try to boot the board. I connected the USB keyboard and mouse, an HDMI display, and the 30W USB-PD power supply and the system booted to Raspberry Pi OS entering the setup wizard.
It went mostly smoothly, but I had to switch the HDMI monitor because I initially wanted to use the CrowView display and while the Raspberry Pi 5 comes with micro HDMI ports, the CrowView features a mini HDMI port for input, so I would have needed a micro HDMI to mini HDMI cable or adapters which I don’t own. Smaller HDMI ports are greater to save space, but they can be a pain too. I’ve been using a wireless USB keyboard and mouse for many years now and found the USB cables from the official mouse and keyboard to be somewhat of an annoyance on the desk, but that’s just a minor point.
Raspberry Pi OS could not detect any WiFi ESSID during the setup wizard, but after rebooting and logging in, I had no problem connecting to either 2.4GHz or 5.0 GHz WiFi access points. It’s probably just a beta OS issue. I could update to the latest (and stable) version of Raspberry Pi OS Bookworm with the usual commands:
|
1 2 |
sudo apt update sudo apt dist-upgrade |
That’s all for today, I’ll run some benchmarks, measure power consumption, and test various USB devices with the Raspberry Pi 5 in the second part of the review.
The Raspberry Pi 5 8GB reviewed here sells officially for $80 it does not include taxes and shipping, and prices vary between countries. Note you’d also need either the $5 active cooler or the $10 Raspberry Pi 5 case, and a USB-C power adapter delivering 5V/5A (the official one costs $12), also a 5V/3A might work too with some limitations on the USB ports. For reference, the full Raspberry Pi 5 kit in this review should cost around $150 although most people will not need all the accessories.
Continue reading “Raspberry Pi 5 review – Raspberry Pi OS Bookworm, benchmarks, power consumption, and more“.

Jean-Luc started CNX Software in 2010 as a part-time endeavor, before quitting his job as a software engineering manager, and starting to write daily news, and reviews full time later in 2011.
Support CNX Software! Donate via cryptocurrencies, become a Patron on Patreon, or purchase goods on Amazon or Aliexpress


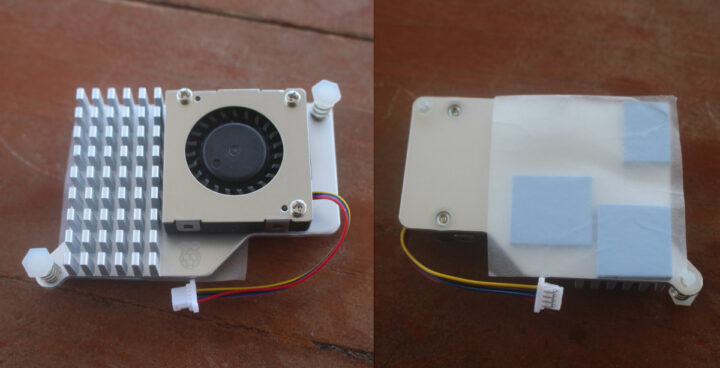


This heatsink is rather odd. The fins are placed in the wrong direction for the fan, they’re mostly obstructing the airflow and presenting the smooth edges along the path instead of the riddled ones. I suspect they initially tried with a heatsink only, relying on the case’s fan and figured that it would mostly be tested/used without the case hence without a fan and they changed it in emergency at the last minute. This would explain this odd arrangement and the stacking of two fans (which is totally inefficient).
They may have planned two separate cooling solutions either the active cooler for the barebone board or a small heatsink plus case with a fan for a complete system.
I still find it odd that the active cooler does not seem suitable for the case, as if it was there would be openings for the airflow on the side of the enclosure.
Their comment under warnings in the product brief made me lol.
“This product should be operated in a well ventilated environment, and if used inside a case, the case should not be covered.”
The Active Cooler and Case+Fan are designed for two separate scenarios, rather than to be used together.
The Case+Fan is designed to be used without the Active Cooler for those who just want to use their Pi in a case.
The Active Cooler is designed for those who want to use their Pi in other scenarios without the case, and instead need a way of keeping the bare board cool.
Are the A76 cores set up like the RK3588?
(With multiple clocks for the available cores.)
Since the RPI5 is very much optimized I’d expect one clock for all cores like the RPI4.
It’s a single cluster and all cores clock the same. They do it (unlike RK3588) in a more predictable way as 2.4 GHz really are 2.4 Ghz and 3.0 GHz are 3.0 GHz (no PVTM which downclocks automagically based on temperature and silicon quality).
But as usual once underpowering or thermal throttling kicks in the cpufreq driver running on the A76 guest processors has no clue at which frequency it is running and you need to query ThreadX: vcgencmd measure_clock arm
Huh 150$… And where just 20$ raspi for low budget projects has gone
That’s the Pi Zero2W Quad Core model. Showing as in stock in lost of places and at the price point you suggest. (The Zero2W is very similar to a Pi3A+ – just minus some of the I/O like Ethernet, DSI, full size USB and analogue audio)
The 1GB and 2GB Pi4B models are also in stock and at a lower price point than the 4/8GB Pi5 (I suspect we’ll have to wait for a 1GB and 2GB Pi5 – though the board has markings to allow them to identify 1/2/4/8 GB models)
I love the Pi 400 and am wondering if there are plans to release a similar Pi 500?