
Karl here with part 1 of Tronxy X3S build. It is another large volume printer to fully assemble on your own. Taking between 8-10 hours to put together. I have high hopes for this printer. Key things I like: metal frame, dual X, large build volume. Just from looking at it I don’t like the fact that it has no parts cooler but is easy to remedy.
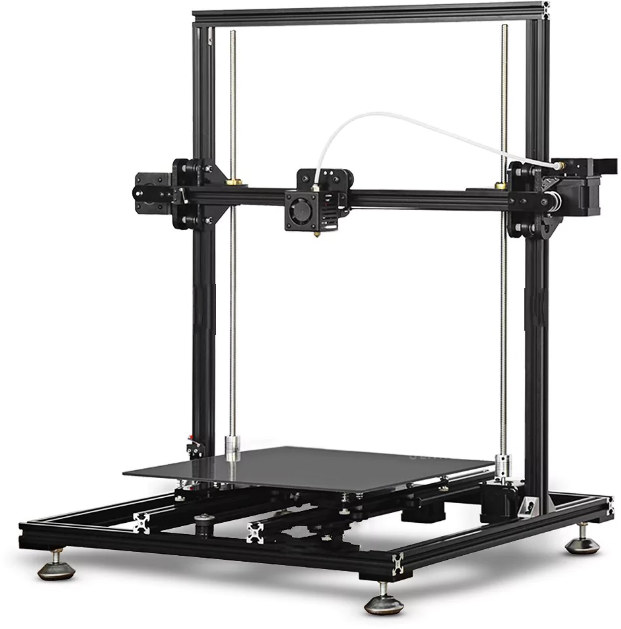 Tronxy X3S Specifications
Let’s look at some specs.
- 300 x 300 x 400 mm hot bed (Actually get 330x330x400 build volume)
- Hot bed temperature: 40 – 110 Deg.C
- Nozzle temperature: 170-275 Degree
- Marlin 1.1.5
- Frame material: Aluminum Extrusion
I have not taken the hotend apart yet so not sure about the nozzle temperature going over 245°C. I will take it apart for the next part. If you are not familiar you don’t want to get lined nozzles above 245°C, or the lining starts to melt. An all metal hotend is required to go above 245°C.
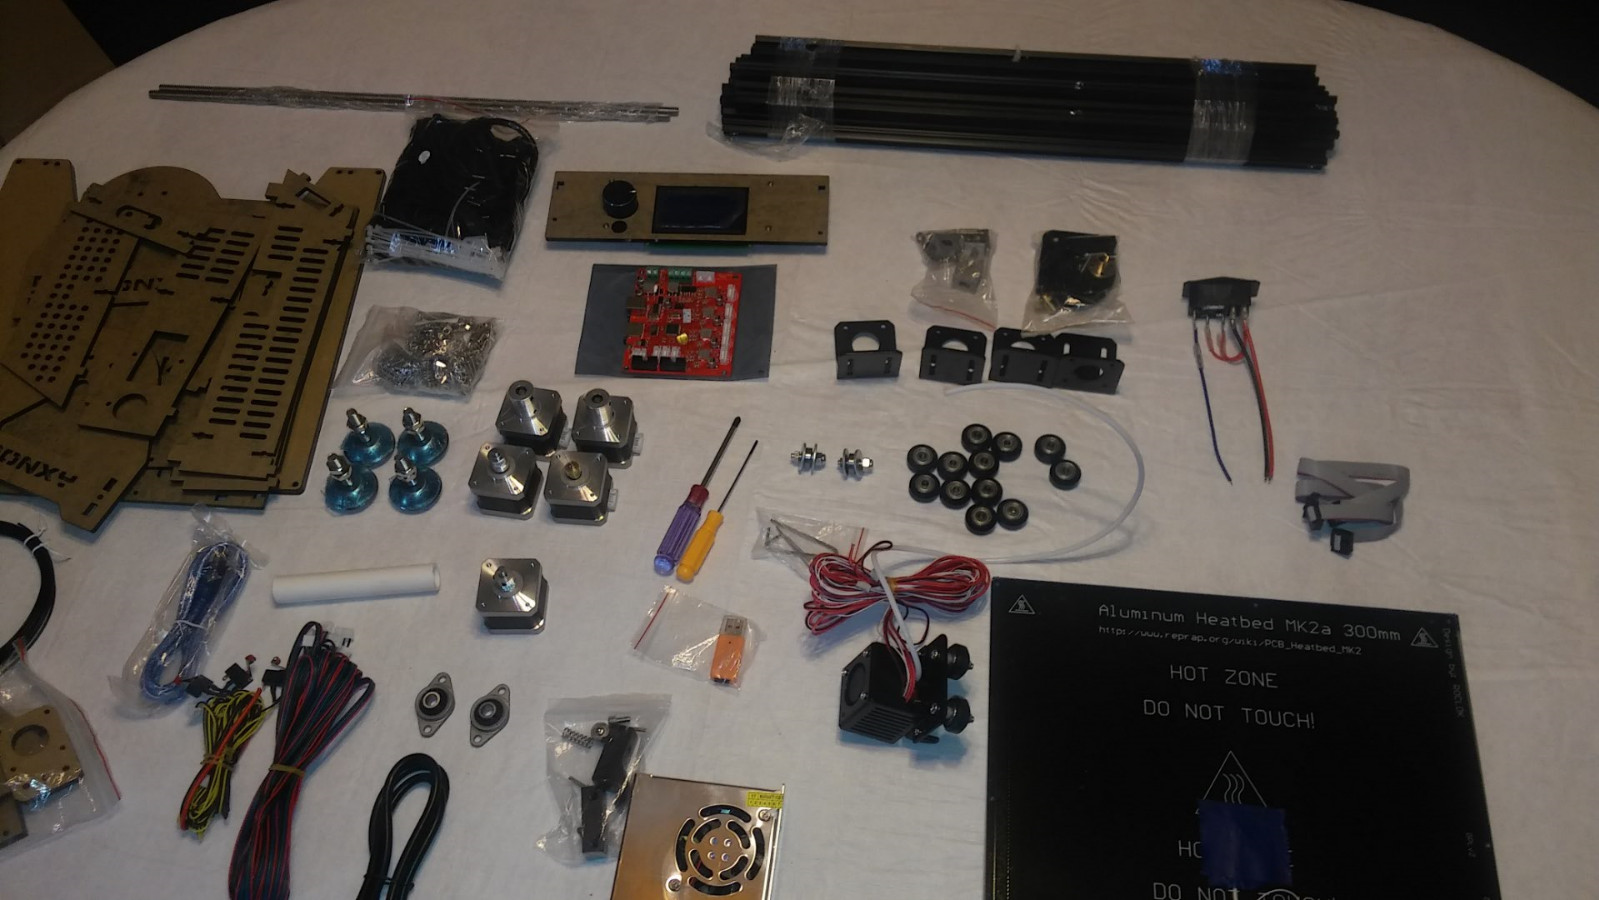
Note: I have had this printer for a while and due to some issues and changing phones I am missing some pictures of the build.
Tronxy X3S Build
My plan on this one was to let my daughter and father build this one as an experiment. I took out the parts below fired up the laptop and inserted the SD card. I was missing instructions on the SD card. So this experiment was shot down right away. With some help from my daughter tightening things, and finding pieces we put the X3S together about 95% just looking at the pictures on GearBest. I got to X carriage arm and got stuck. I couldn’t see the details enough. I remembered that the X3 was a very similar design except larger. I went online, and found the instructions and was able to finish. We put it together over 3 sessions, and had about 8 hours total putting it together. Later on I found a fellow 3D printer enthusiast on Facebook with an X3S and he sent me over the files I was missing on the SD card.
Likes
- The belts are steel reinforced.
- Only 2 pieces are printed, and 4 pieces of acrylic (nor including acrylic for power supply and board)
- Feet are included (wish they were taller to put controller case under the printer)
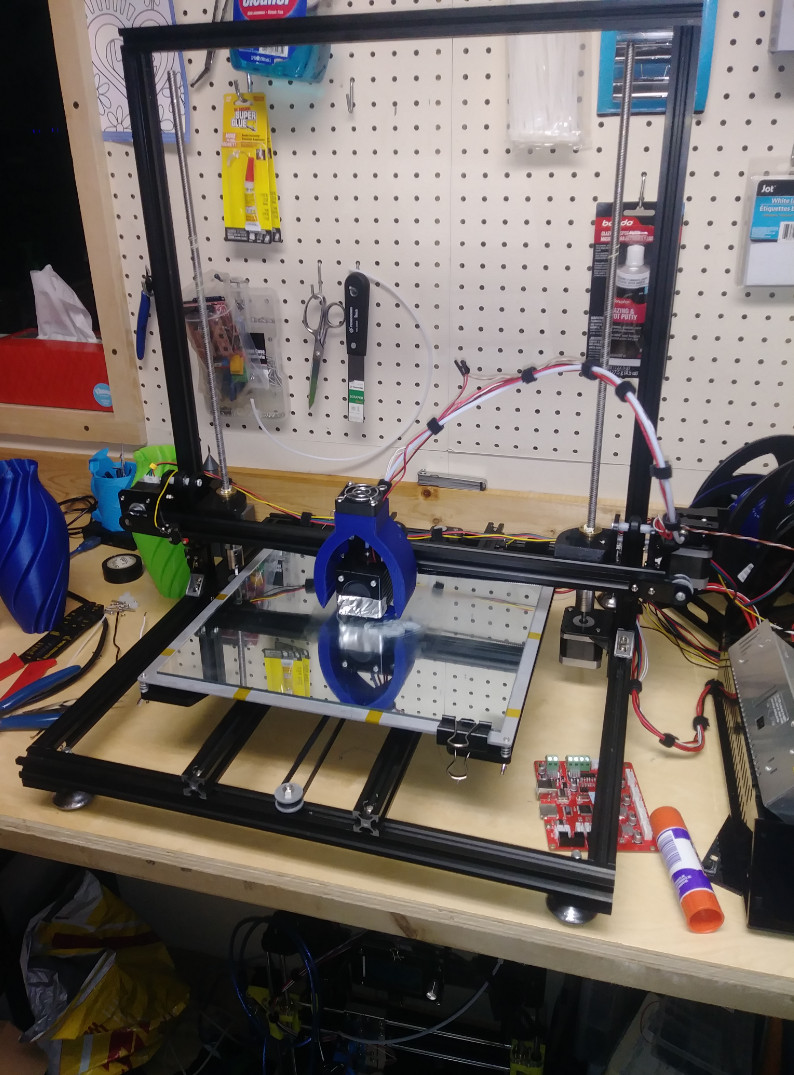
- The frame feels very rigid
Dislikes
- Bearings for belts and mounting to build plate.
- Potentially weak power supply. Still testing
- No parts cooler
Heated bed
The bed on the Tronxy is not very good. It takes forever to heat up, and there is no way to make it to 100 deg Celsius. I installed a beefier power supply, and insulated the bed with cork. After this the highest, I got to was about 70°C. It’s only about 10 minutes to get to 50°C so relegated to PLA on this one unless you upgrade the heated bed. I have one on the way with a MOSFET. About a $30 upgrade. Will test with stock, and new power supply to see the difference.
First Prints
So we put the printer together, and tested everything out. Checked movement in X, Y, and Z. Homed to make sure endstops worked, and all seemed good in the world. I had some binding on my right Z stepper. I bumped up the current on the potentiometer on the board. Still binding. I then took the Z stepper motor and rod for the Z, and positioned them in the coupler just enough to let the grub screws grip. Loaded the Z with lithium grease and finally loosened the Z screw brass nut just a little to let it move like an oldham coupler. This resolved the binding on the Z.
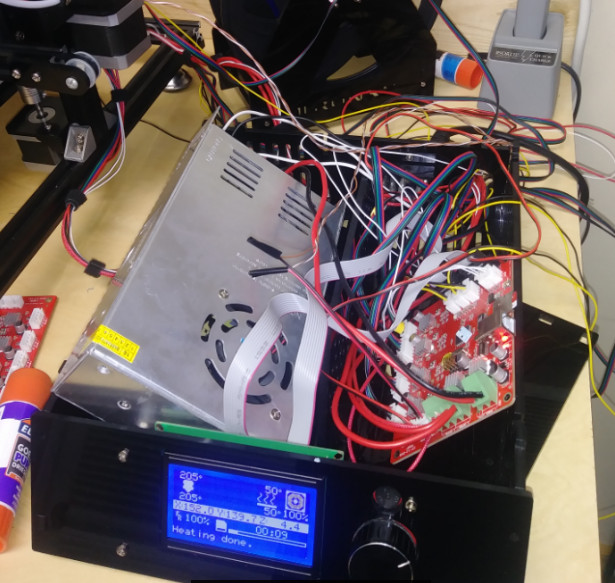
I started first print, a Benchy, and I noticed it was off center and just not looking right with over extrusion. After a while I figured out that the gears that came with the printer were 16 teeth and not 20 teeth for the X and Y axis. If this board had EEPROM enabled, it would be a matter of just modifying the steps per mm on the x and y appropriately and fix. I think I could have inserted some G-code at the beginning of each print but wanted to use with proper gears. Reducing the teeth will change the accuracy slightly. With this firmware you cannot modify the steps per mm. At this point, I was ready to start upgrading it. I connected the board to my PC and nothing. USB was bad on the board. There was a night between finding out the gears were bad, and board was bad. I had already ordered some gears, and notified GearBest of the bad board.
Fast forward a month. Gears are installed and new board installed. It was a reworked board. I can see some hand soldered spots on the board but everything is working. Finally started printing. I have not printed too much at this point but what I have printed look pretty good.

Facebook, Issues, and Reality
I have not found a good forum anywhere for 3D printing. By that I mean in a traditional forum format. Facebook is the only place that I have found that people work together and ask questions share experiences. I am a member for quite a few of them. All printers have issues that are reoccurring. CR-10 has a lot of broken couplers. Tarantula has broken acrylic (typically after installed, and not during shipping). Tronxy has all kinds of random things wrong. I have 2 outlined above.
Being that these are shipping from China directly with what looks to be slim margins there is a gamble when purchasing. If you have a missing / faulty piece that can be sourced locally just get it in my opinion. The board issue is another story in my case. I have to review with stock hardware so I waited. You can get parts replaced but you might have to wait.
In this case you are getting a 330 x 330 x 400 printer for less than $300 + potentially minor broken faulty parts. Shipping from around the world is tough. I would not even think about shipping it back.
For miscellaneous piece parts, I recommend https://www.zyltech.com/ if in the states. Really good pricing and service. For example on parts above. I ordered early on Friday and they were delivered on Monday. I have done several transactions now.
Wrap up
I did get a ramps board and adapter for the screen. I’m going to get it to work for second part with this review along with bed upgrade. I would like to thank GearBest for shipping the Tronxy X3s for reviewing. If you would like to pick one up you can get one for $289.99 including worldwide shipping, and they have a wider choice of 3D Printers on a dedicated page.
Continue reading “Tronxy X3S 3D Printer Review – Part 2: Upgraded Heatbed and RAMPS Board“.

Karl is a technology enthusiast that contributes reviews of TV boxes, 3D printers, and other gadgets for makers.
Support CNX Software! Donate via cryptocurrencies, become a Patron on Patreon, or purchase goods on Amazon or Aliexpress. We also use affiliate links in articles to earn commissions if you make a purchase after clicking on those links.


Have you seen the solvant trick to reduce the low resolution lines ? people on youtube “tell” to put the prints into a container with some solvant vapor for some time just to smoothen the surface.
@agumonkey
Yes that works with ABS and acetone vapor. The benchy above is with pla and it will not work with pla. The picture looks like it has a finish…and it might. But i cant see it in person.
Ah, I didn’t know it was limited to ABS.. sad
No limited to pla if you don’t upgrade the bed. Prints will warp bad if bed isn’t warm enough.
Hi
this is shahin from oman
i need some help for tronxy x3s firmware
do you have firmware for this printer please.
Best regards
Tronxy X3S is now available at a promotional price with promo coupon GBX3SS , check out here: https://www.gearbest.com/3d-printers-3d-printer-kits/pp_911400.html