
Karl here. So the bed I mentioned in the first part of Tronxy X3S review is not very good. It took about 10-11 minutes to heat up to 60 deg Celsius. I also mentioned I was going to upgrade the board to a RAMPS board. Today we are going to look at both these upgrades.
New Heated Bed
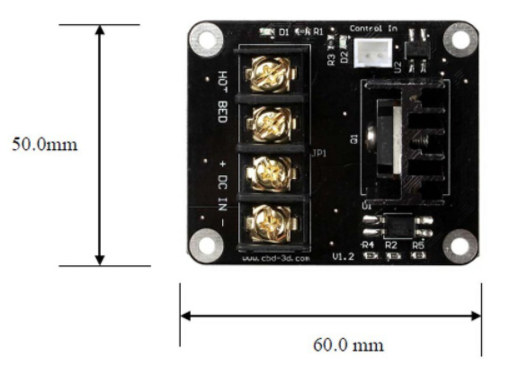
I can take no credit for this one but I wanted to pass this along. Folger tech sells a 12v 280w heated bed stick on pad. I picked this up for $20, but is now $22.

In order to do this upgrade you will need a MOSFET, 12V/30A power supply, and of course the pad above. Super easy installation. Remove the bed and stick on the self adhesive pad centered. Replace the power supply with new one. Should be self explanatory. In order to power this bed a MOSFET is needed. A MOSFET allows you to power a high current bed and not run all the current through the board. I won’t go into much detail about the MOSFET because it has been written about a lot.
 I did try the new bed with the existing power supply and without a MOSFET. The stock power supply heated up very quickly. I don’t think it would make it through a 10mm cube before failing. I also connected the new bed directly to the board without the MOSFET and the connector started to fail almost immediately.

Bed heat up times drastically improved.
- 60 deg Celsius in 2:15… took about 10 minutes previously
- 100 deg celsius in about 10 minutes… I could not get it past 70°C before
You’re looking at about an extra $60 for this upgrade. Right now, a Tronxy X3S is $289 + $60 for this upgrade. Getting close to CR-10 pricing.
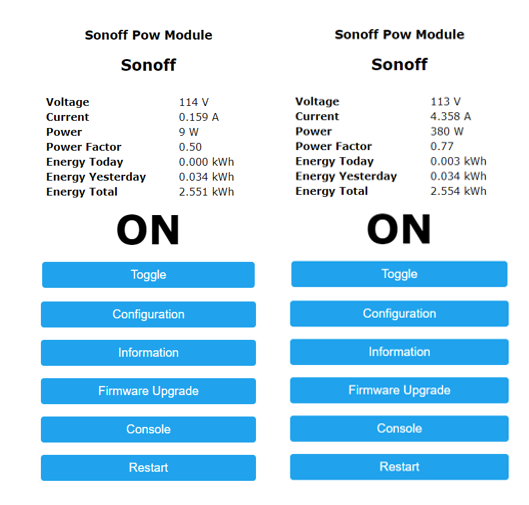
Here are some power measurements with a Sonoff POW.
RAMPS 1.4 Upgrade
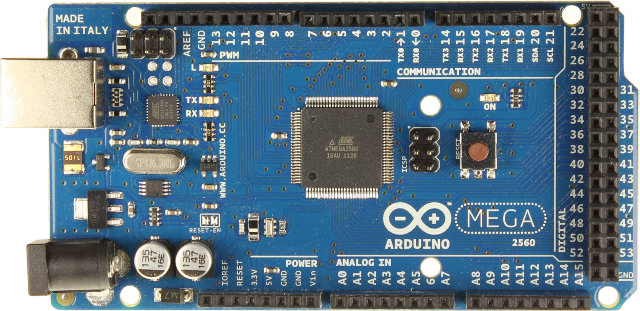
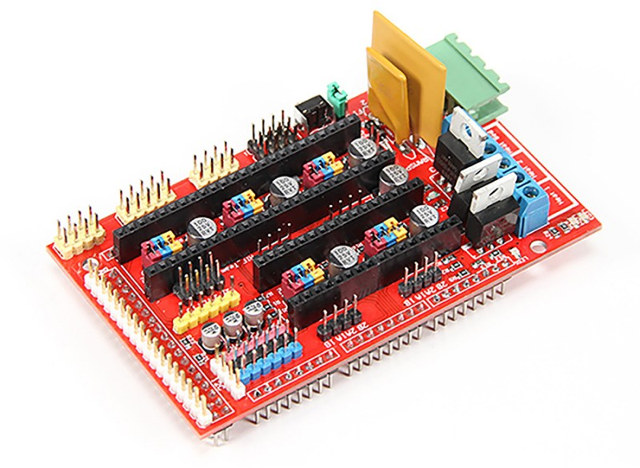
I did upgrade to a ramps board. It was my first time using a RAMPs 1.4 and Arduino MEGA board. It was very easy to do. Wiring is well documented. I don’t feel I gained anything other than fixing a few annoyances with stock firmware, and a little bit of build volume on the x and y. Now if your board goes bad here is an inexpensive solution. I picked up this kit and this adapter from Zyltech.
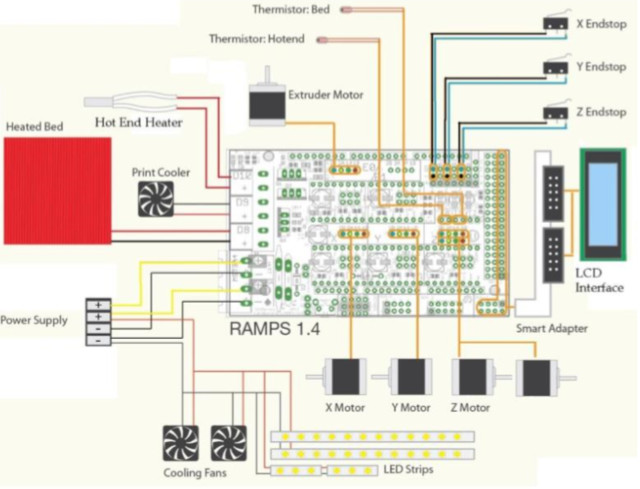
There are few considerations:
- If you decide to use the stock LCD then you will not have an SD card to print from. The stock screen with the X3S does not have an SD card and octoprint is a good solution. If you need to print via SD card you can substitute this screen for the adapter.
- The Z motor connectors are very close. I used some male to female Dupont connectors for testing, so I could go back to the stock board easily.
Here are the changes from the stock Marlin firmware that I made.
|
1 2 3 4 5 6 7 8 9 10 11 12 13 14 15 16 17 18 |
#define TEMP_SENSOR_BED 1 #define X_MIN_ENDSTOP_INVERTING true // set to true to invert the logic of the endstop. #define Y_MIN_ENDSTOP_INVERTING true // set to true to invert the logic of the endstop. #define Z_MIN_ENDSTOP_INVERTING true // set to true to invert the logic of the endstop. #define DEFAULT_AXIS_STEPS_PER_UNIT { 80, 80, 400, 90 } #define DEFAULT_MAX_ACCELERATION { 500, 500, 50, 500 } #define DEFAULT_ACCELERATION 500 // X, Y, Z and E acceleration for printing moves #define DEFAULT_RETRACT_ACCELERATION 500 // E acceleration for retracts #define DEFAULT_TRAVEL_ACCELERATION 500 // X, Y, Z acceleration for travel (non printing) moves #define DEFAULT_XJERK 4.0 #define DEFAULT_YJERK 4.0 #define DEFAULT_ZJERK 0.2 #define DEFAULT_EJERK 2.5 #define X_BED_SIZE 330 #define Y_BED_SIZE 330 #define Z_MAX_POS 400 #define EEPROM_SETTINGS // Enable for M500 and M501 commands #define REPRAP_DISCOUNT_FULL_GRAPHIC_SMART_CONTROLLER |
So once I flashed the board, and made my connections I tested the directions and end stops. If a motor is moving the wrong direction you can adjust 2 ways. Flip the connector on the board or adjust in software. I chose to just flip the connector.
|
1 2 3 |
#define INVERT_X_DIR false #define INVERT_Y_DIR true #define INVERT_Z_DIR false |
The only physical modification I did was move the X endstop to place the nozzle at the corner of the bed instead of using an offset.
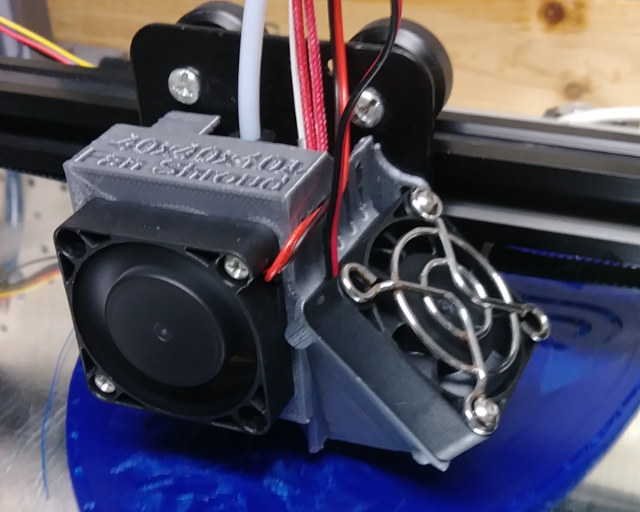
Final Modification
This one was simple. Download and print. I printed a new shroud out of PLA. It was designed by my buddy on thingiverse.
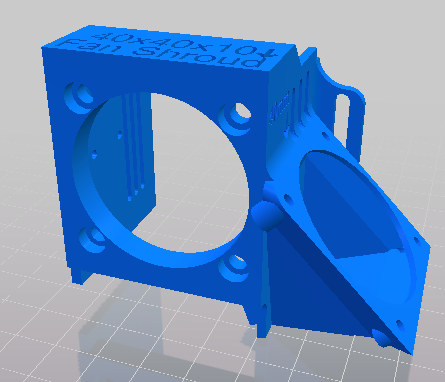 The head design on the X3S is the same as the Tronxy X3.
Closing
I will be putting the main board back now, and printing a bunch of stuff for Halloween. I will share the final thoughts on this printer at that time. I would like to thank GearBest for sending me the Tronxy X3S for review. You can buy the 3D printer from them for $289.99 including shipping (Coupon GBX3S may shove a few dollars off the price).
Continue reading Tronxy X3S 3D Printer Review – Part 3: Upgrades to Fix Bed Leveling Issues (Permanently)

Karl is a technology enthusiast that contributes reviews of TV boxes, 3D printers, and other gadgets for makers.
Support CNX Software! Donate via cryptocurrencies, become a Patron on Patreon, or purchase goods on Amazon or Aliexpress. We also use affiliate links in articles to earn commissions if you make a purchase after clicking on those links.


Where did you get the stock firmware. This is where I’ve been stuck with a dead X3S for months. 🙁
http://www.mediafire.com/file/0t4i9n4iim2hcg4/AVRUpdata_Tool_X3S.rar
I have a Marlin Config ready for stock board soon. Have some more testing to do.
I wanted to clarify. I have Marlin config for stock board nearly ready
Do you have it ready? 😀
I Would check the Facebook group. I don’t have this printer any more. If you can’t find let me know.
Hi Karl, do you have the stock board marlin finished? Thanks for your review
What vref or voltage do you have the motors set to? I had to order a replacement board for mine and cant find the info anywhere online so far