
 Ugh…I don’t like calling these reviews. I like to say that I am sharing my experiences with the products. I have a fair bit of experience under my belt using 3D printers now but still don’t consider myself an “expert”. I think that I have had about a dozen come through here. Anyway on with the show. Today we are going to look at a very economical 3D printer: the Zonestar Z6. I have to say I wasn’t expecting much. I read/ watch a lot of reviews about 3D printers and sub $100 printers aren’t typically very good. Gearbest recently had the Zonestar Z6 on sale for $99 that Jean-Luc recently posted here on CNX Software but is currently $120. Let’s see how it prints.
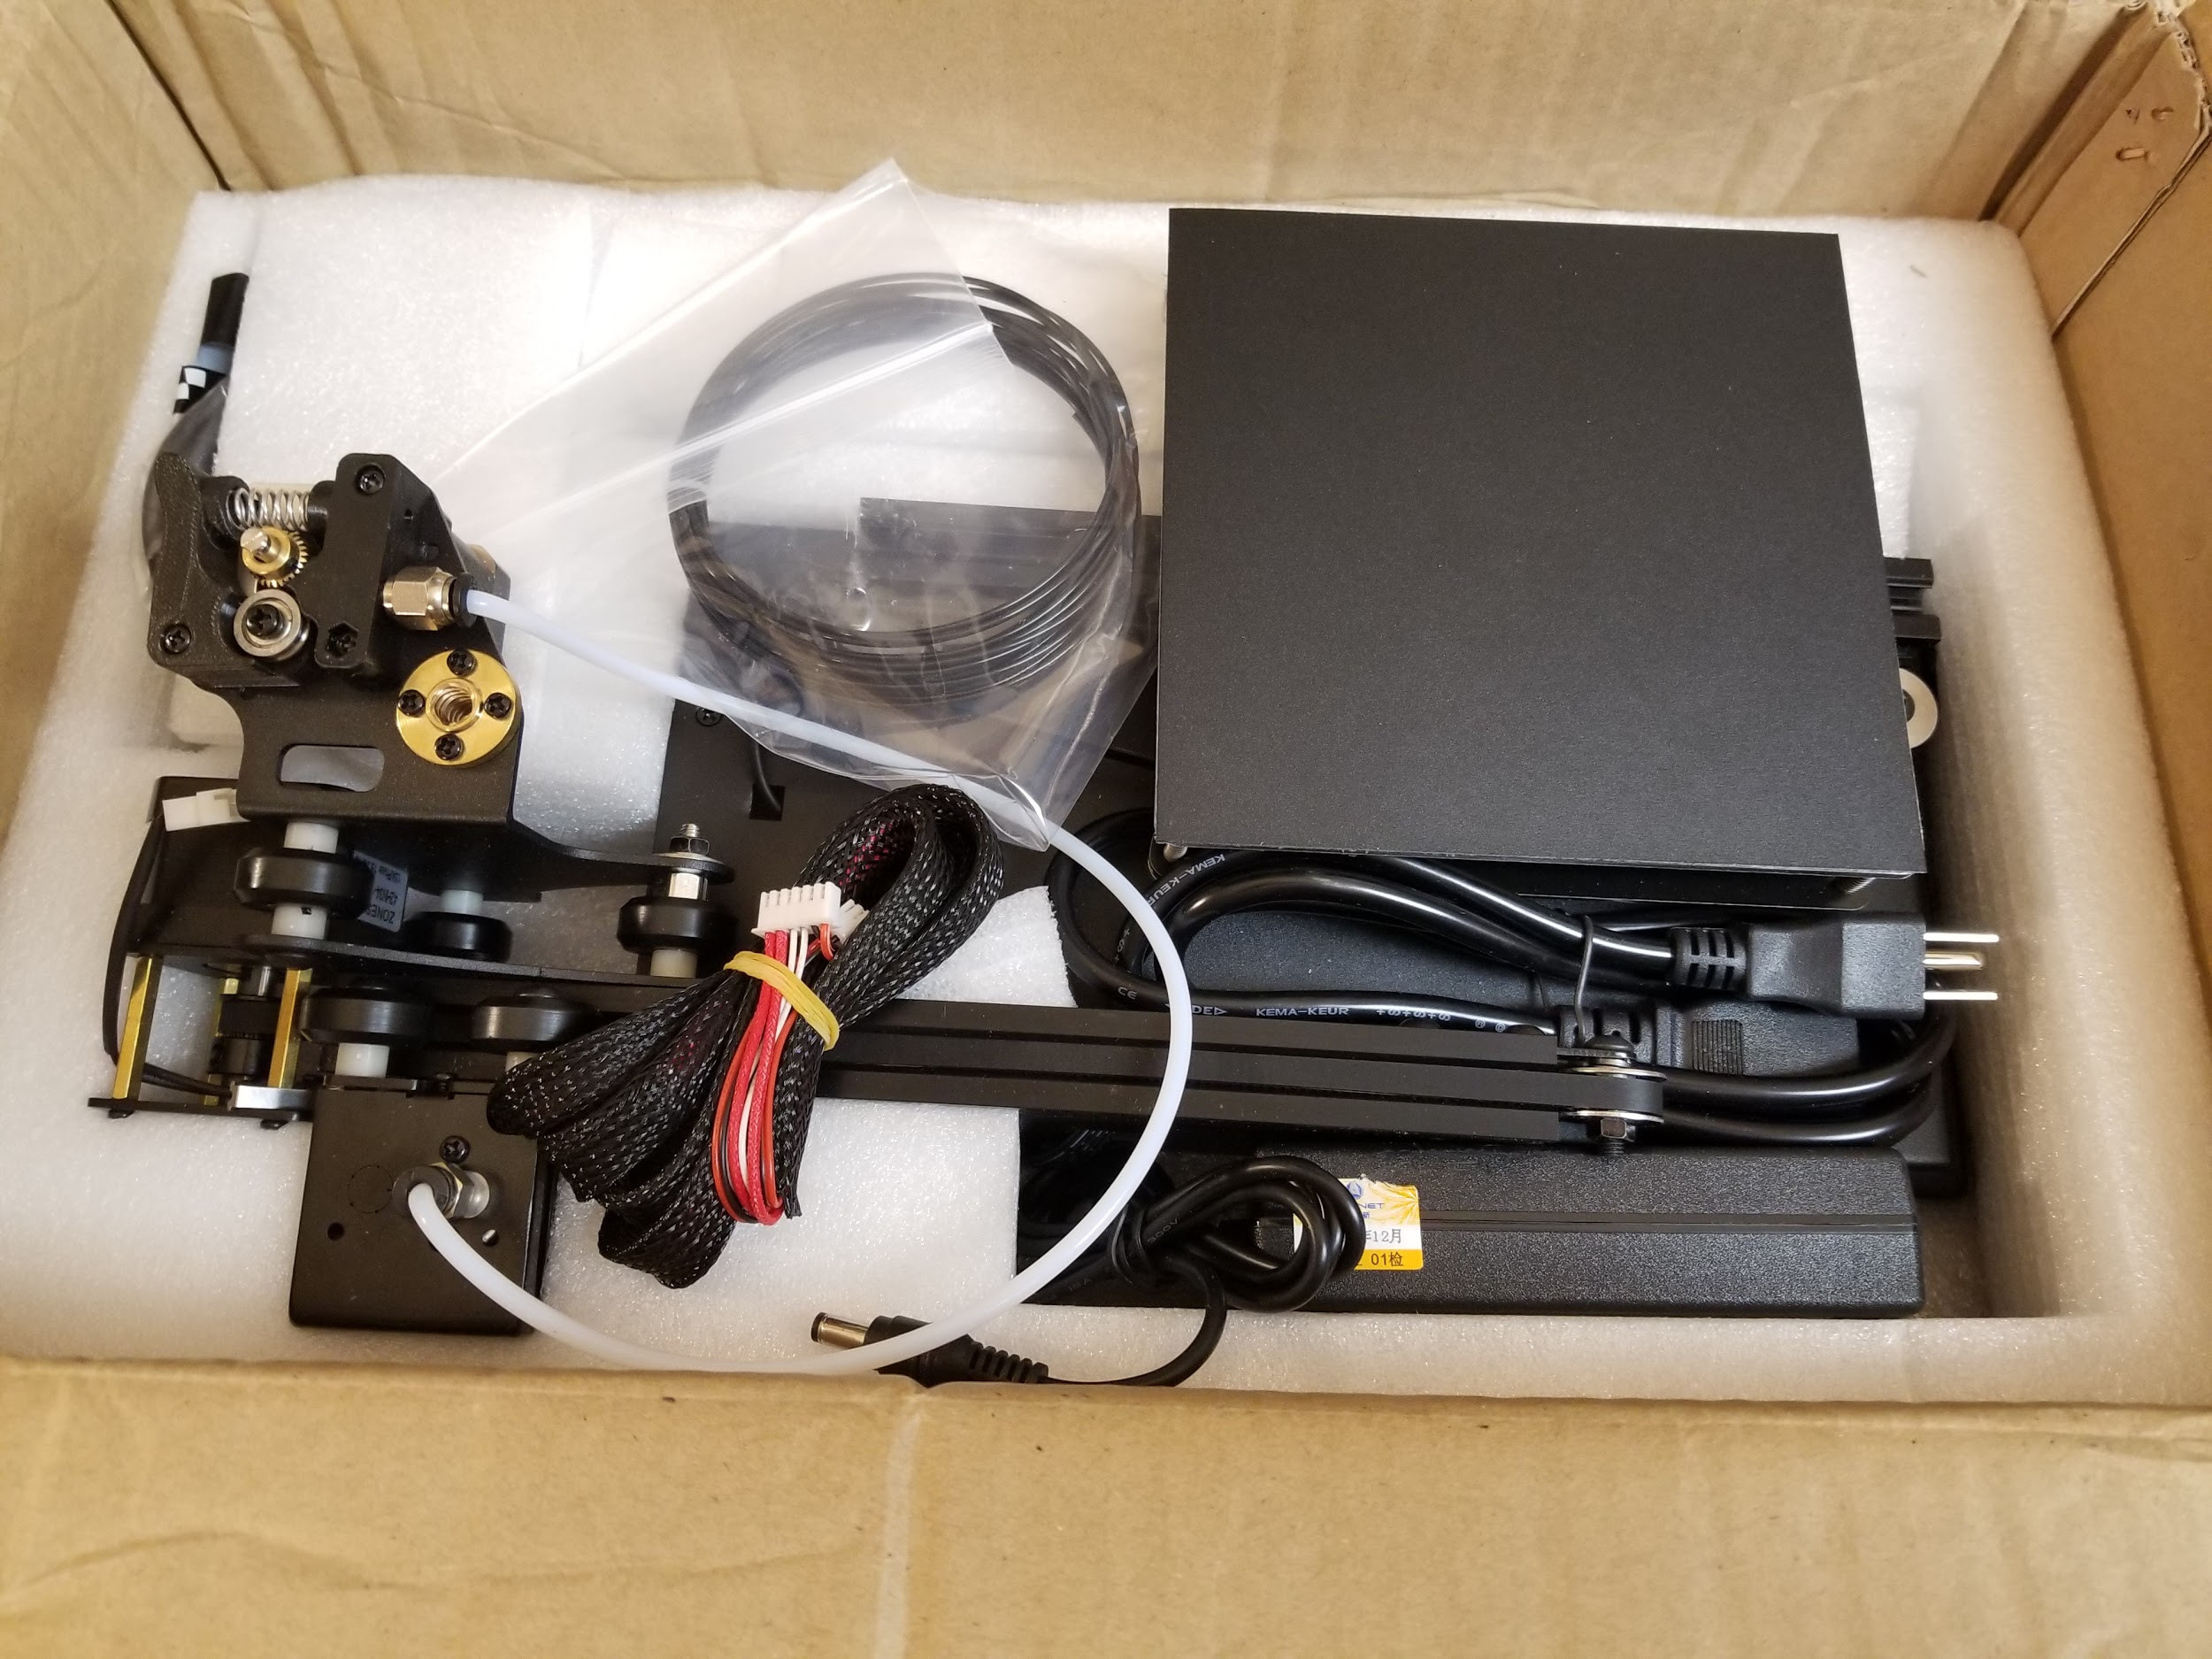
Some assembly required
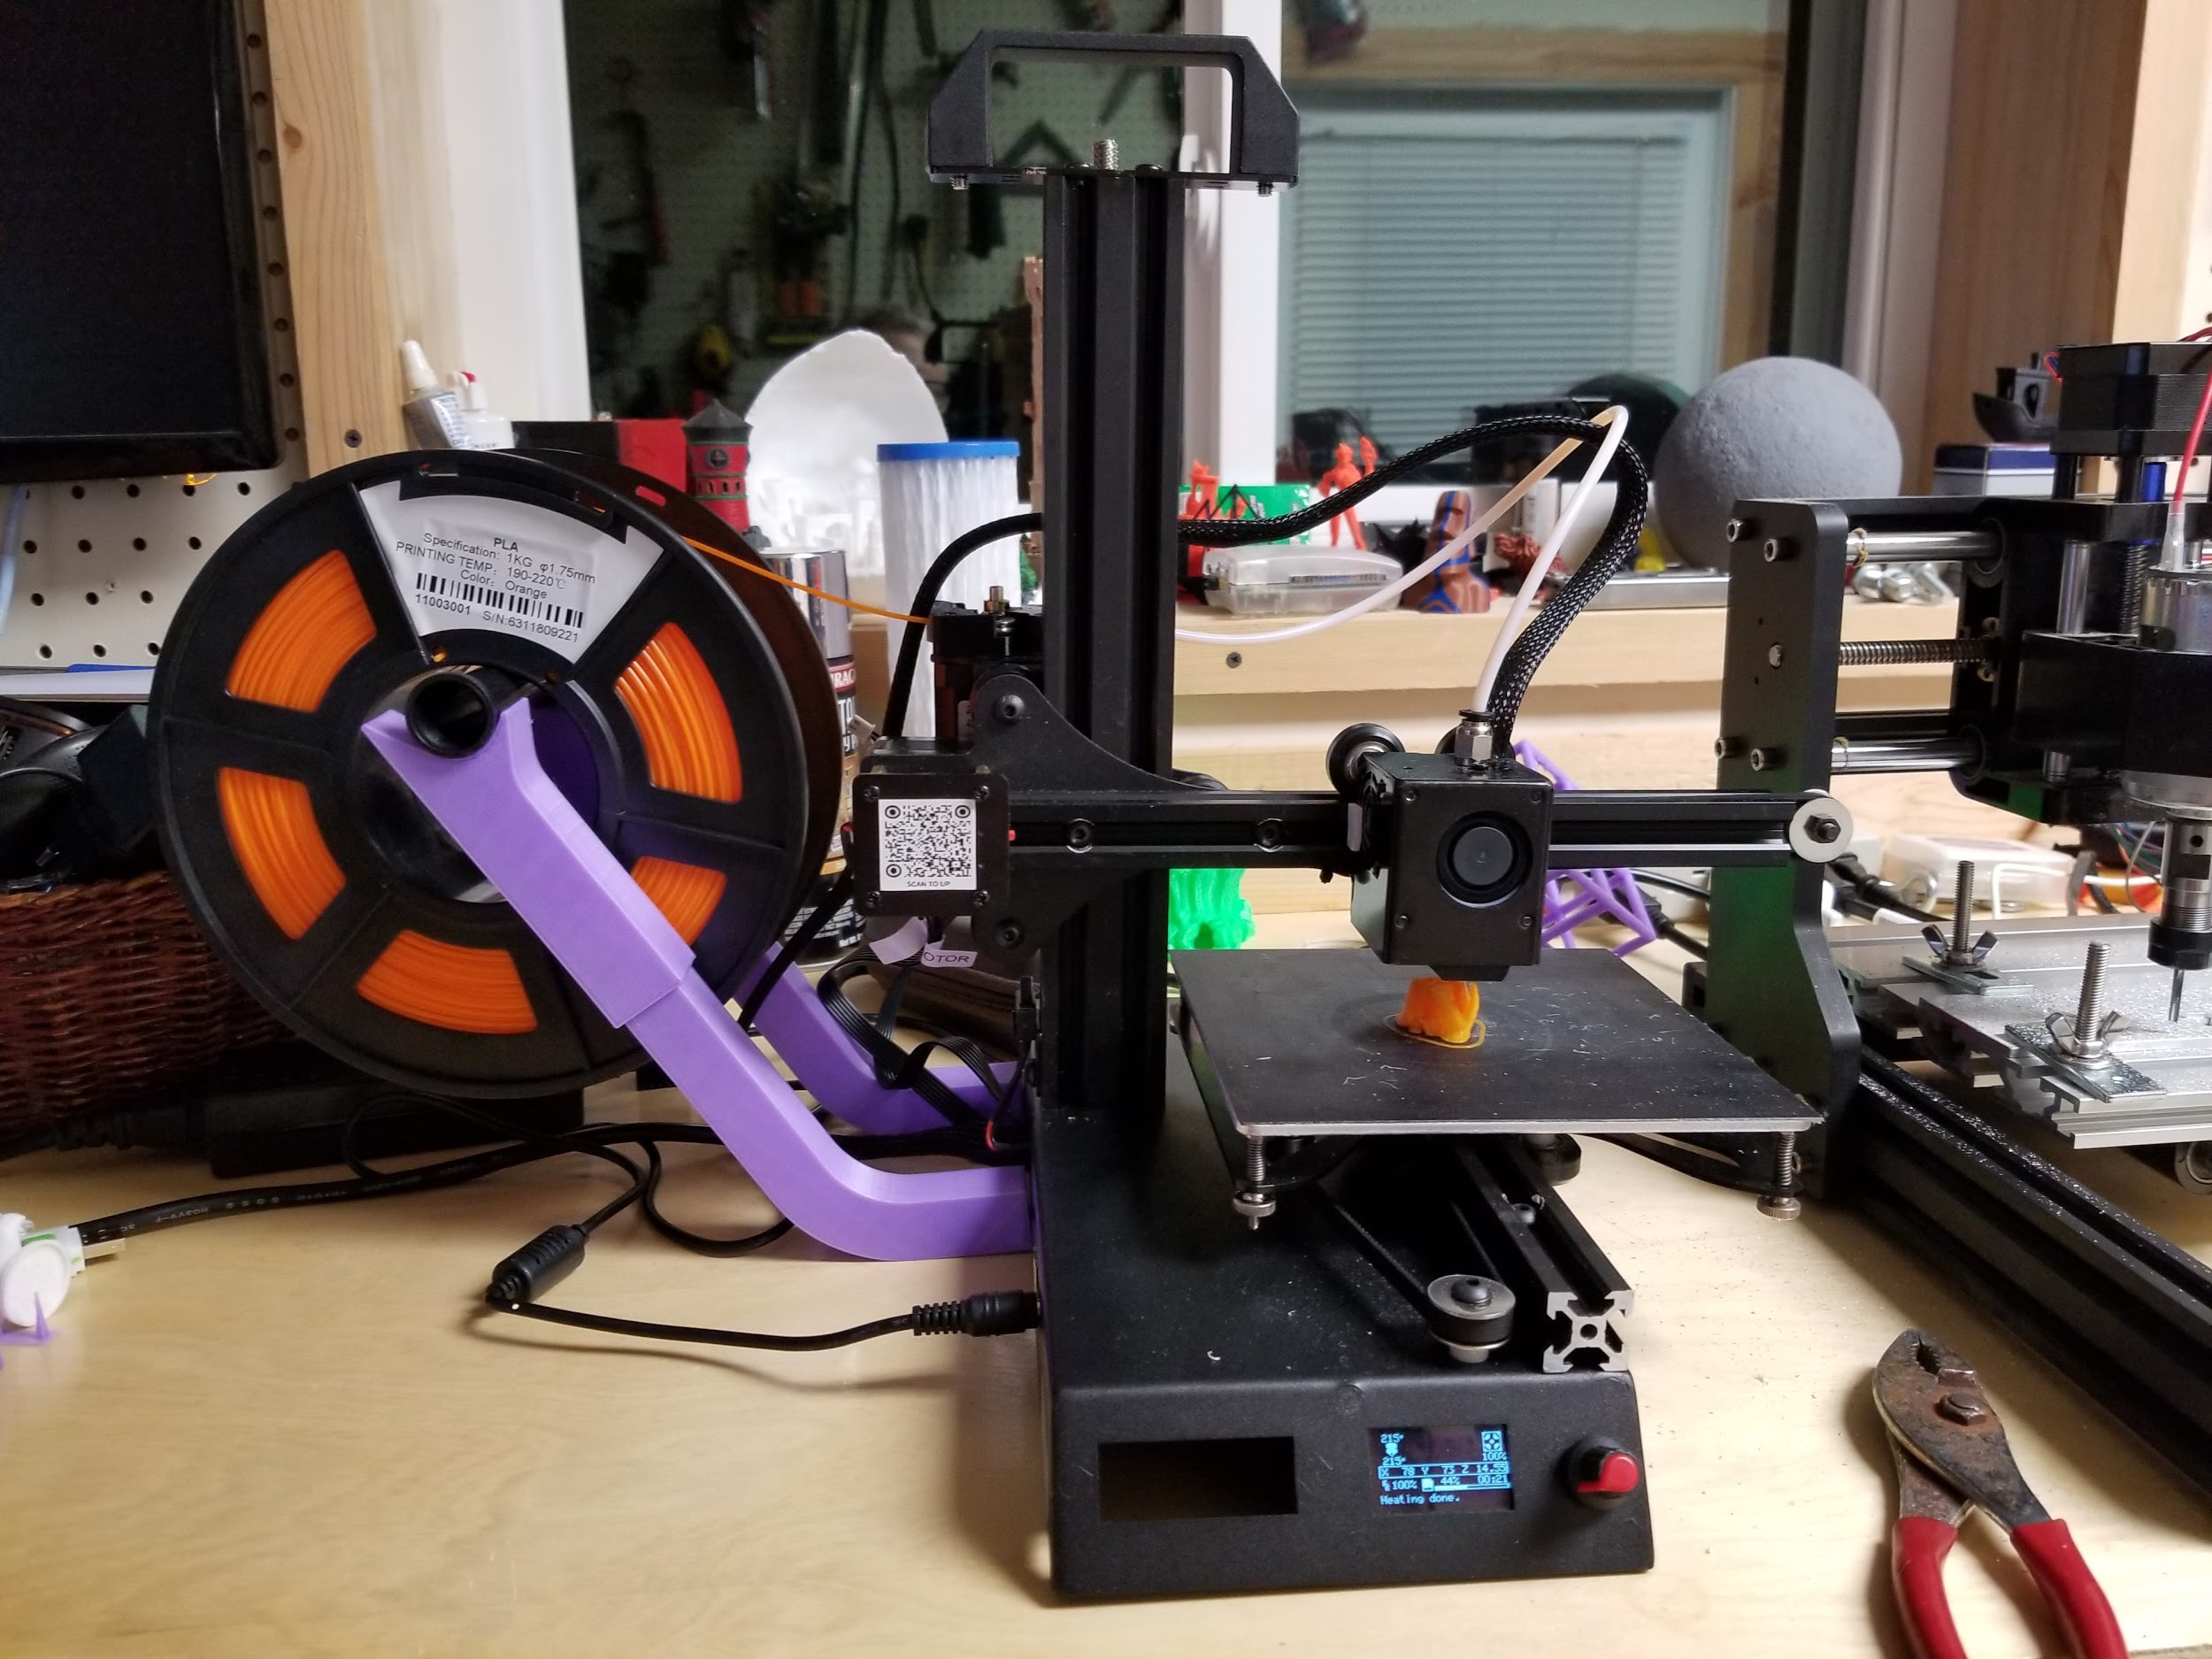
I designed a spool holder but not very good. The whole printer rocks when the full spool is on it.
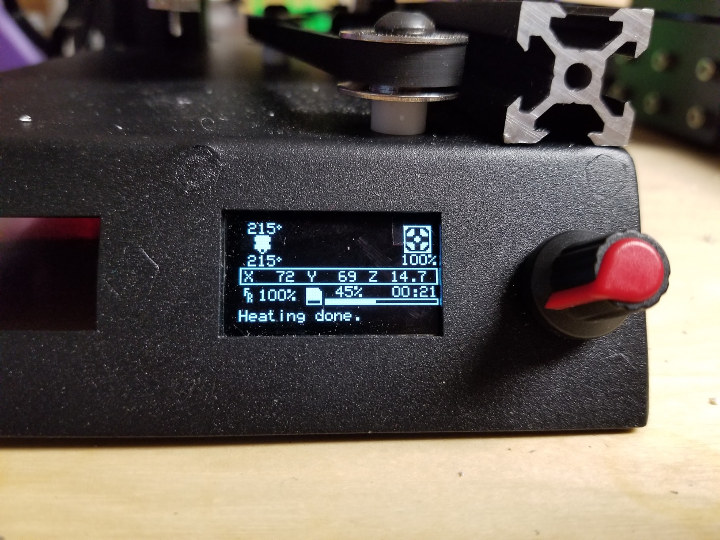
The tiny screen makes it look higher resolution and crisper.
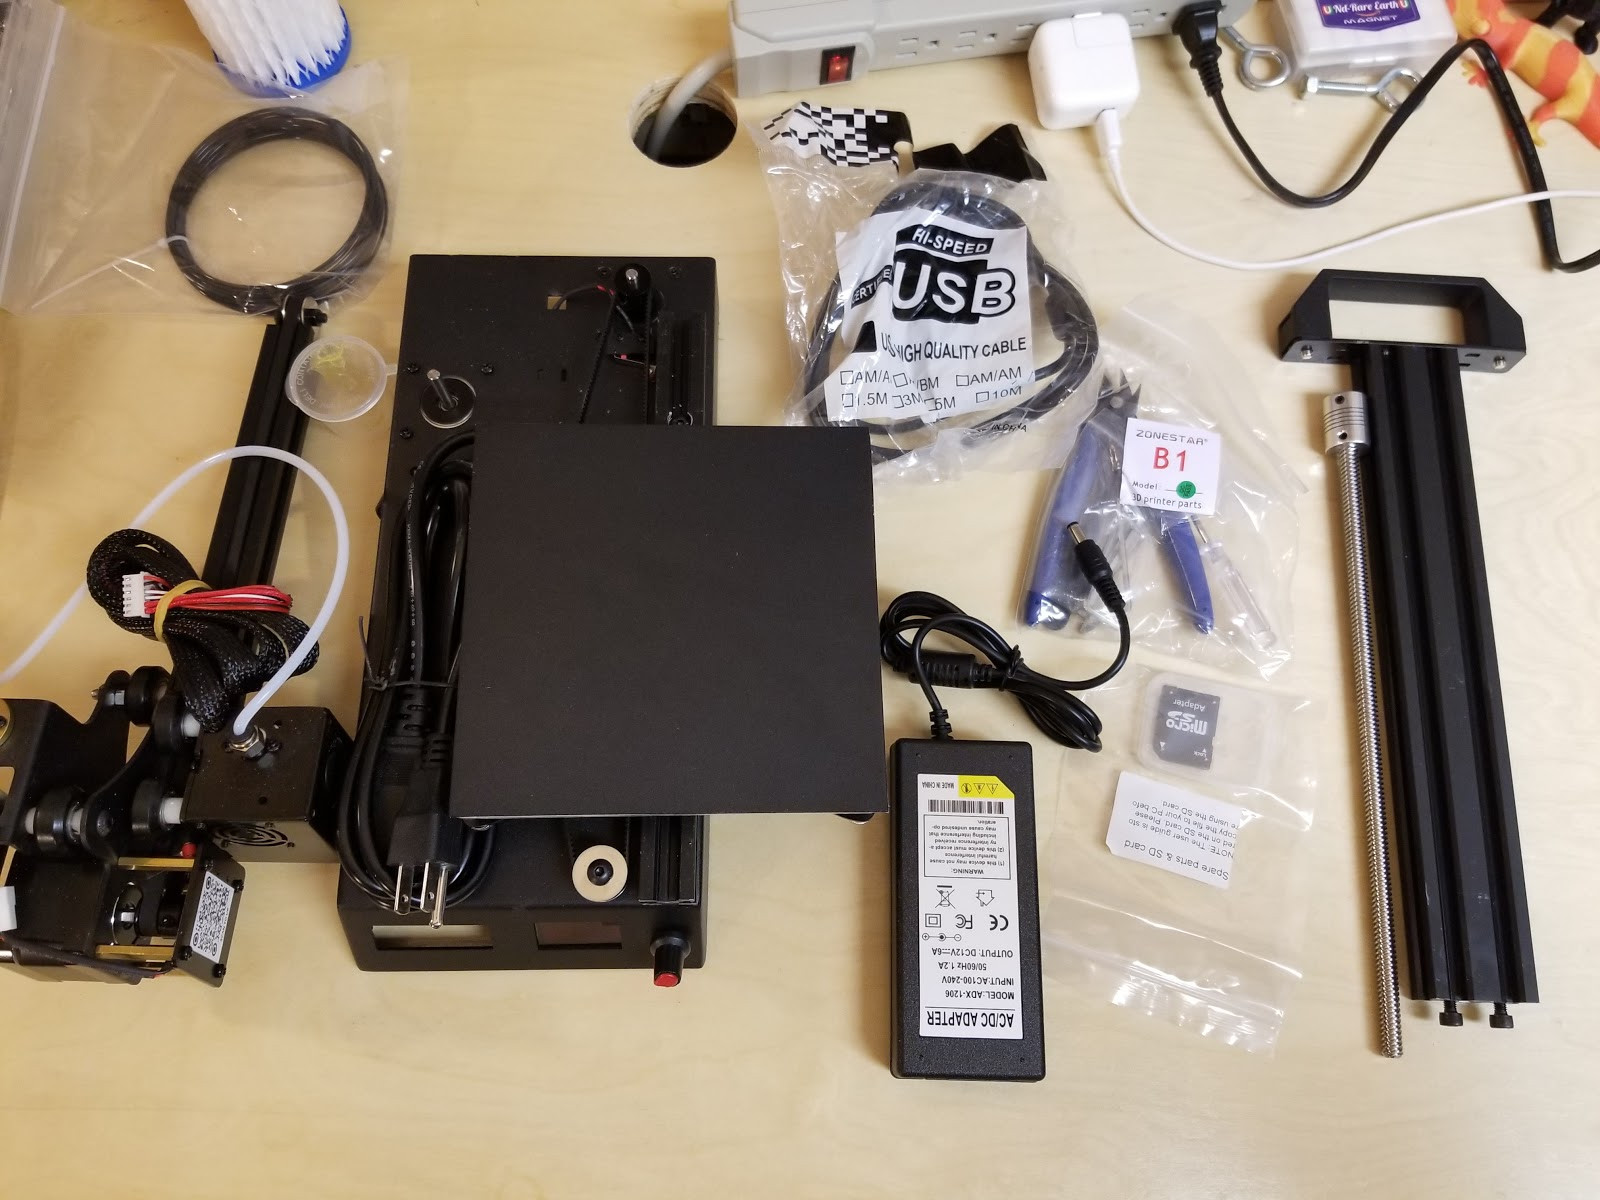
At this price point, there are not a lot of goodies. The printer. some tools to assemble, an SD card, and a little sample of filament. I didn’t do much research and I thought that it was going to be a long build but after unboxing its only a partial kit. I was up running and printing in an hour. I did a Livestream on my YouTube channel, and even with the streaming, we were up and printing quickly. I did it all without instructions but some are on the SD card.
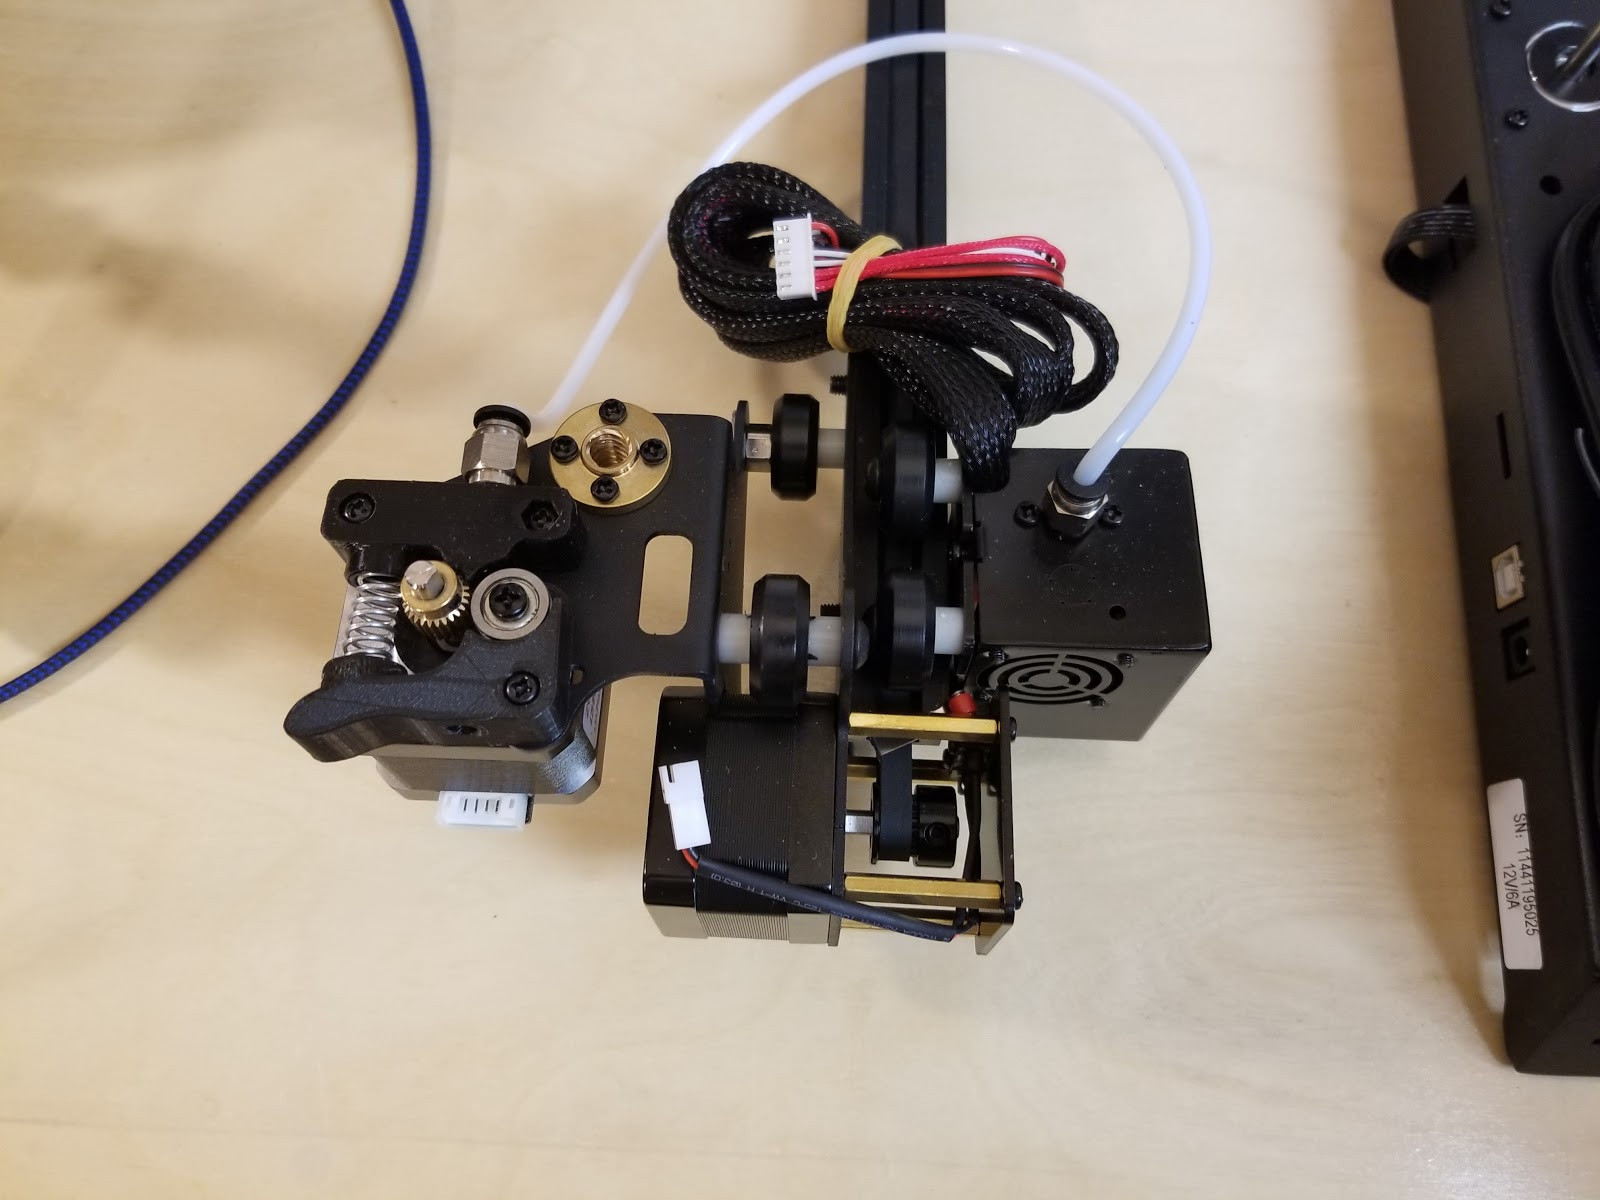
Nearly all metal construction is surprising. The base is flimsy aluminum but ultimately was adequate. One end-stop was broke. The clip broke during shipment. It was an easy fix. I put a sticky pad on the hotend assembly so it would engage the limit switch.
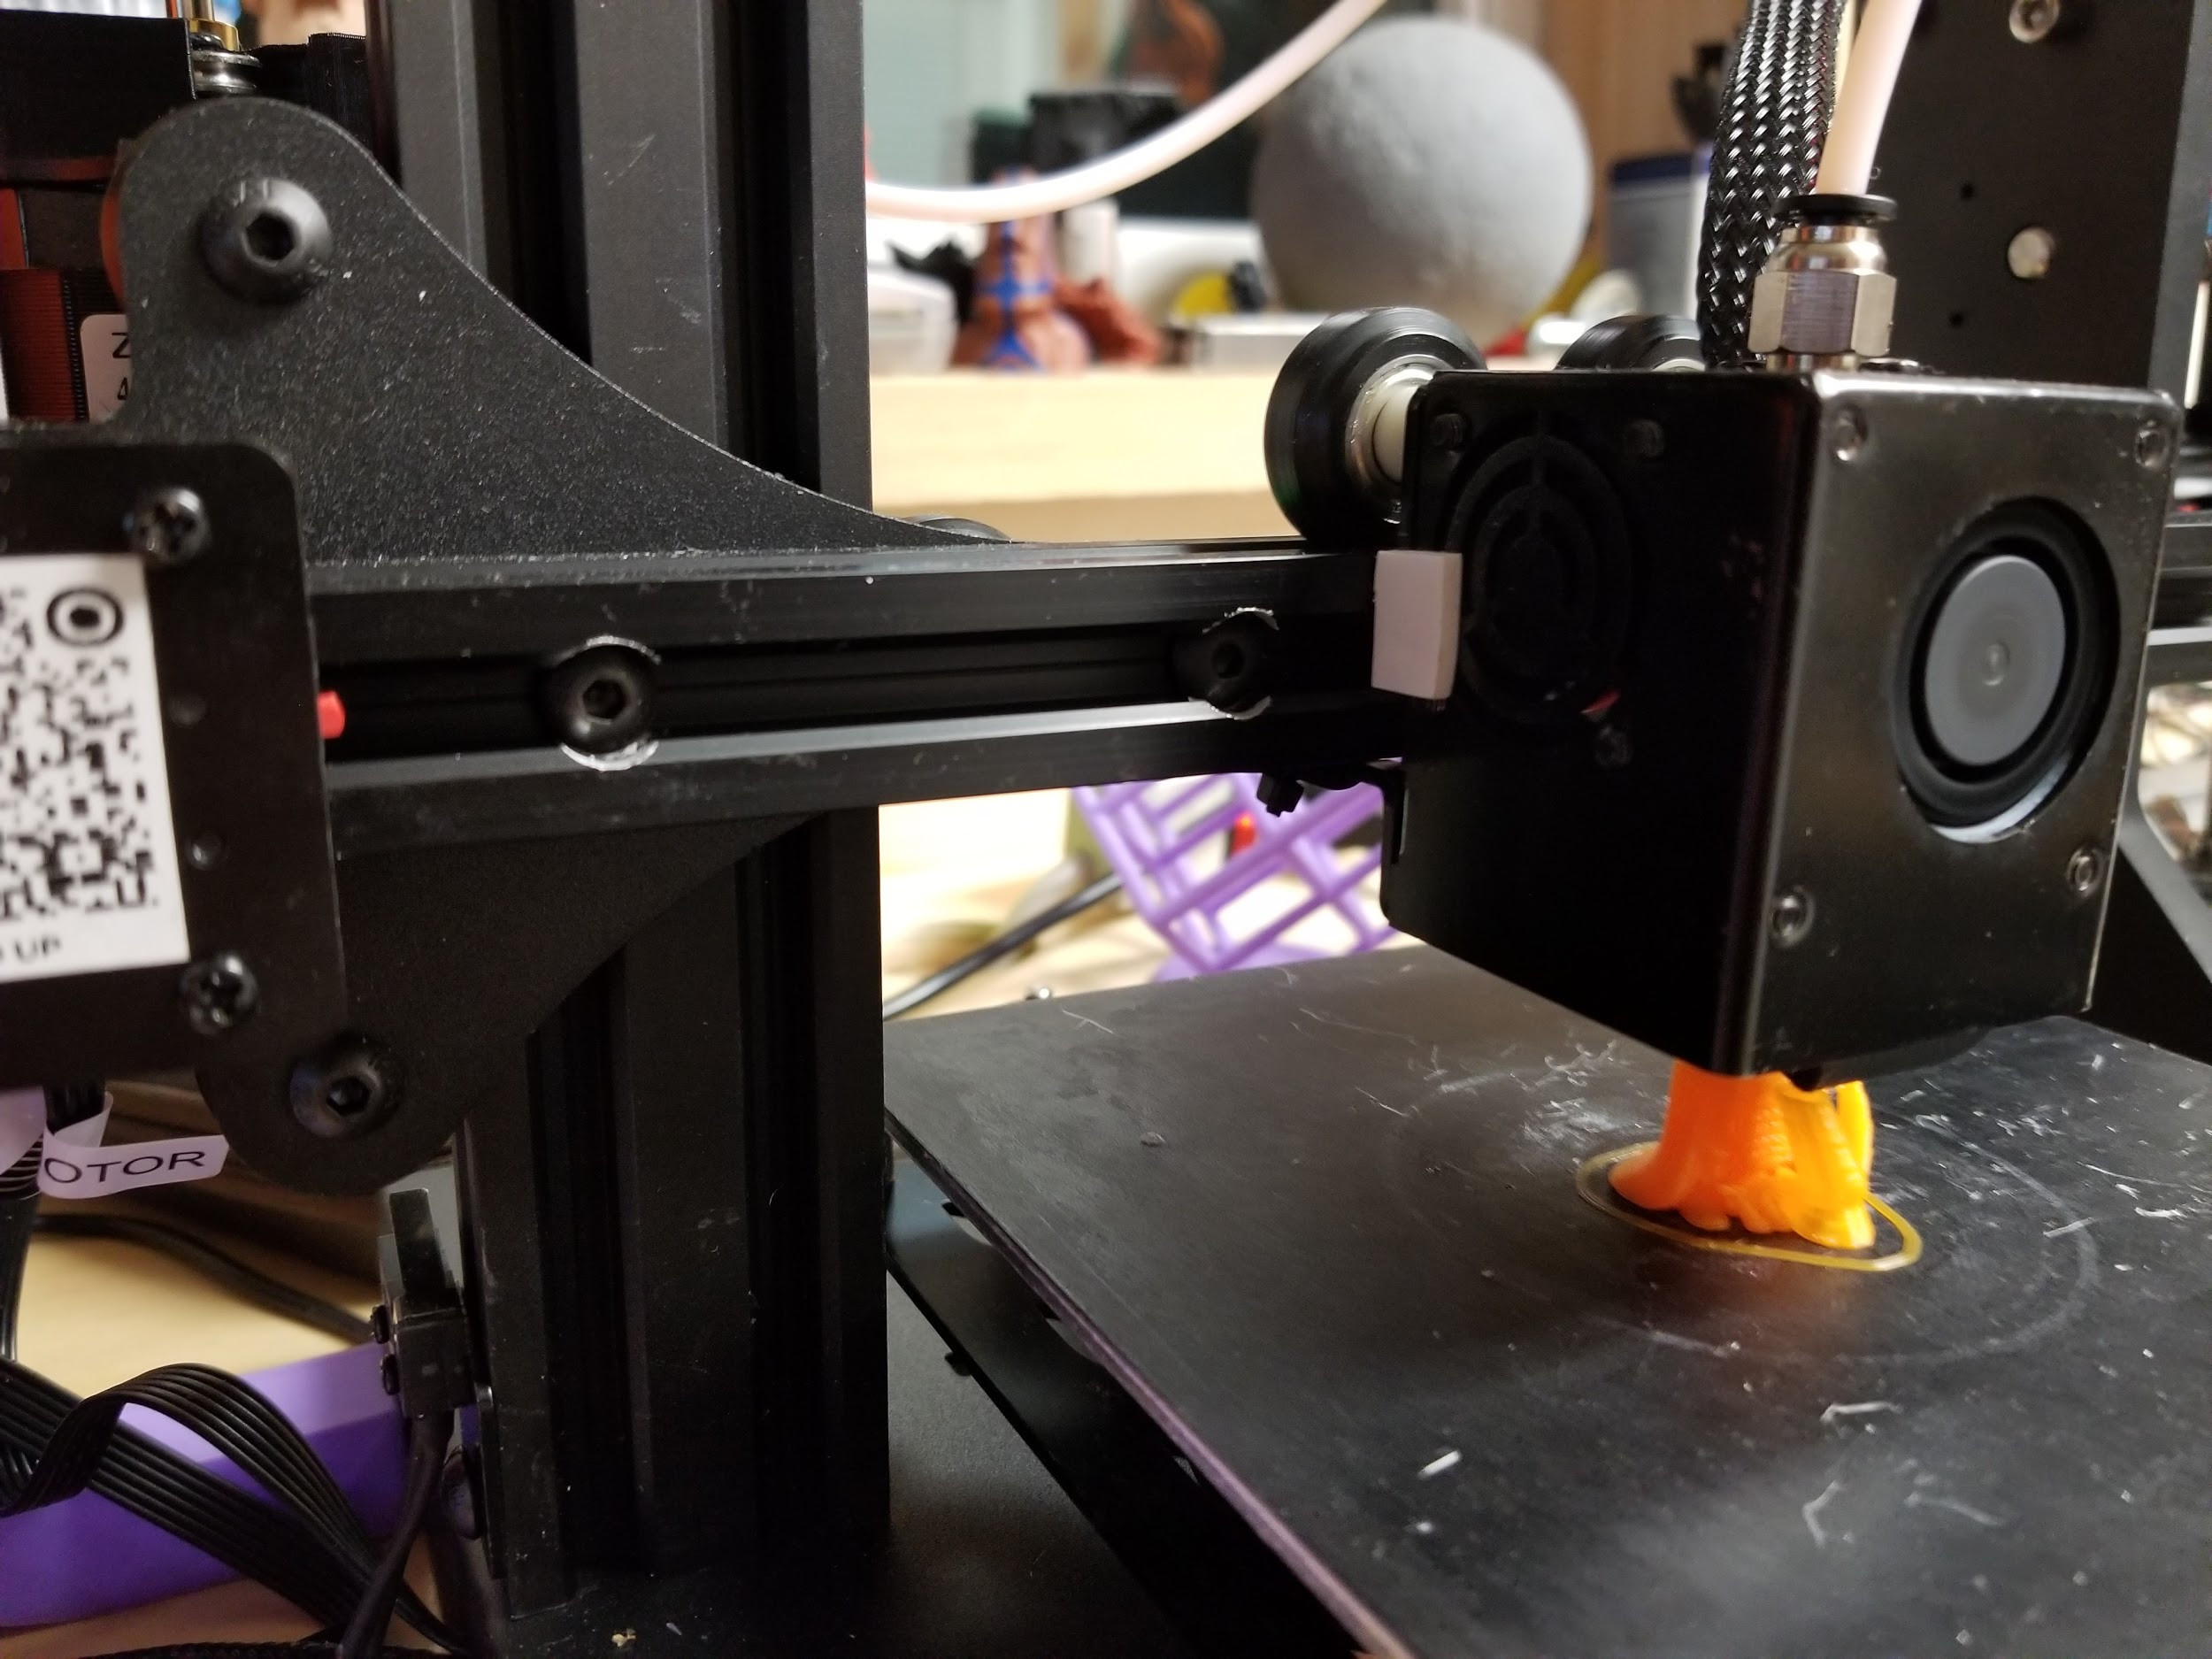
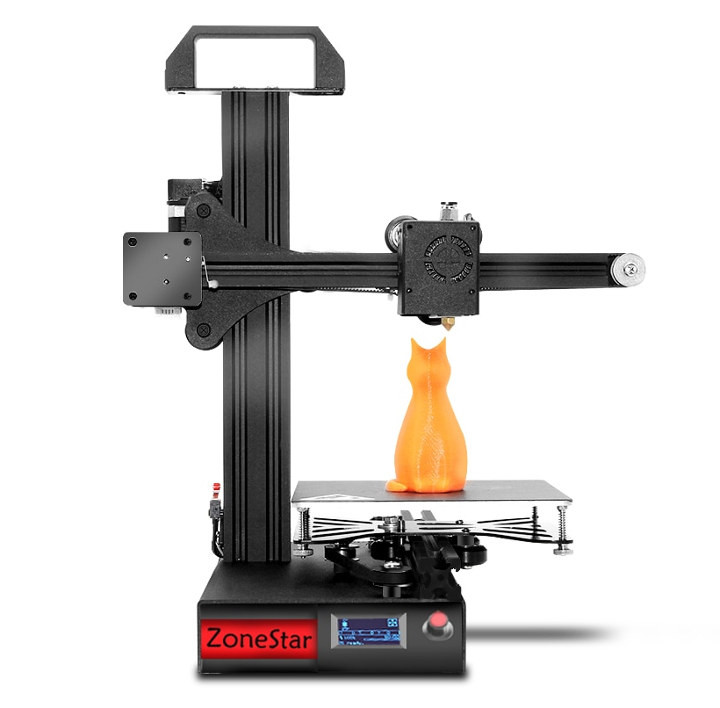
The only 3D printed part is the extruder and parts cooling duct. The cantilever design for this printer seems perfectly adequate for that s small volume: 150x150x150 mm.
During assembly, I had to tighten all the eccentric nuts to tighten the wheels. Not a big deal. One thing to note, I tightened the bed eccentric up too tight. After trying to home the first time the bed wouldn’t move. I attempted to increase the stepper current….but you can’t on this board. So my only option was to loosen the eccentric nut.
So how does it print Karl?
The unit I received prints well. Very well. I was very surprised and pleased. I literally did not have to do anything with the printer nor felt the need. Parts cooling is good. The hotend is good. It’s an E3D v6 all metal clone. Took me about an hour to dial in temps and retraction settings for PLA. After PLA, I only adjusted temps for PETG and ABS….Did you catch that… I printed ABS on this little printer… Granted it was a small print. I have always heard you have to have a heated bed and enclosure but with these small test prints (see pics below) it turned out good. If I was to print something bigger I would create an enclosure out of a box and put an incandescent light in it to increase the ambient temperature.
On a whim, I also tried what was labeled as flexible PLA. I just took the gcode that I printed PLA and let it run with the flexible PLA. Super stringy but turned out pretty good for no effort. It was printed at 50mm/s which is pretty insane for a flexible. I had a couple under extruded spots but turned out pretty fantastic.
Proof is in the prints
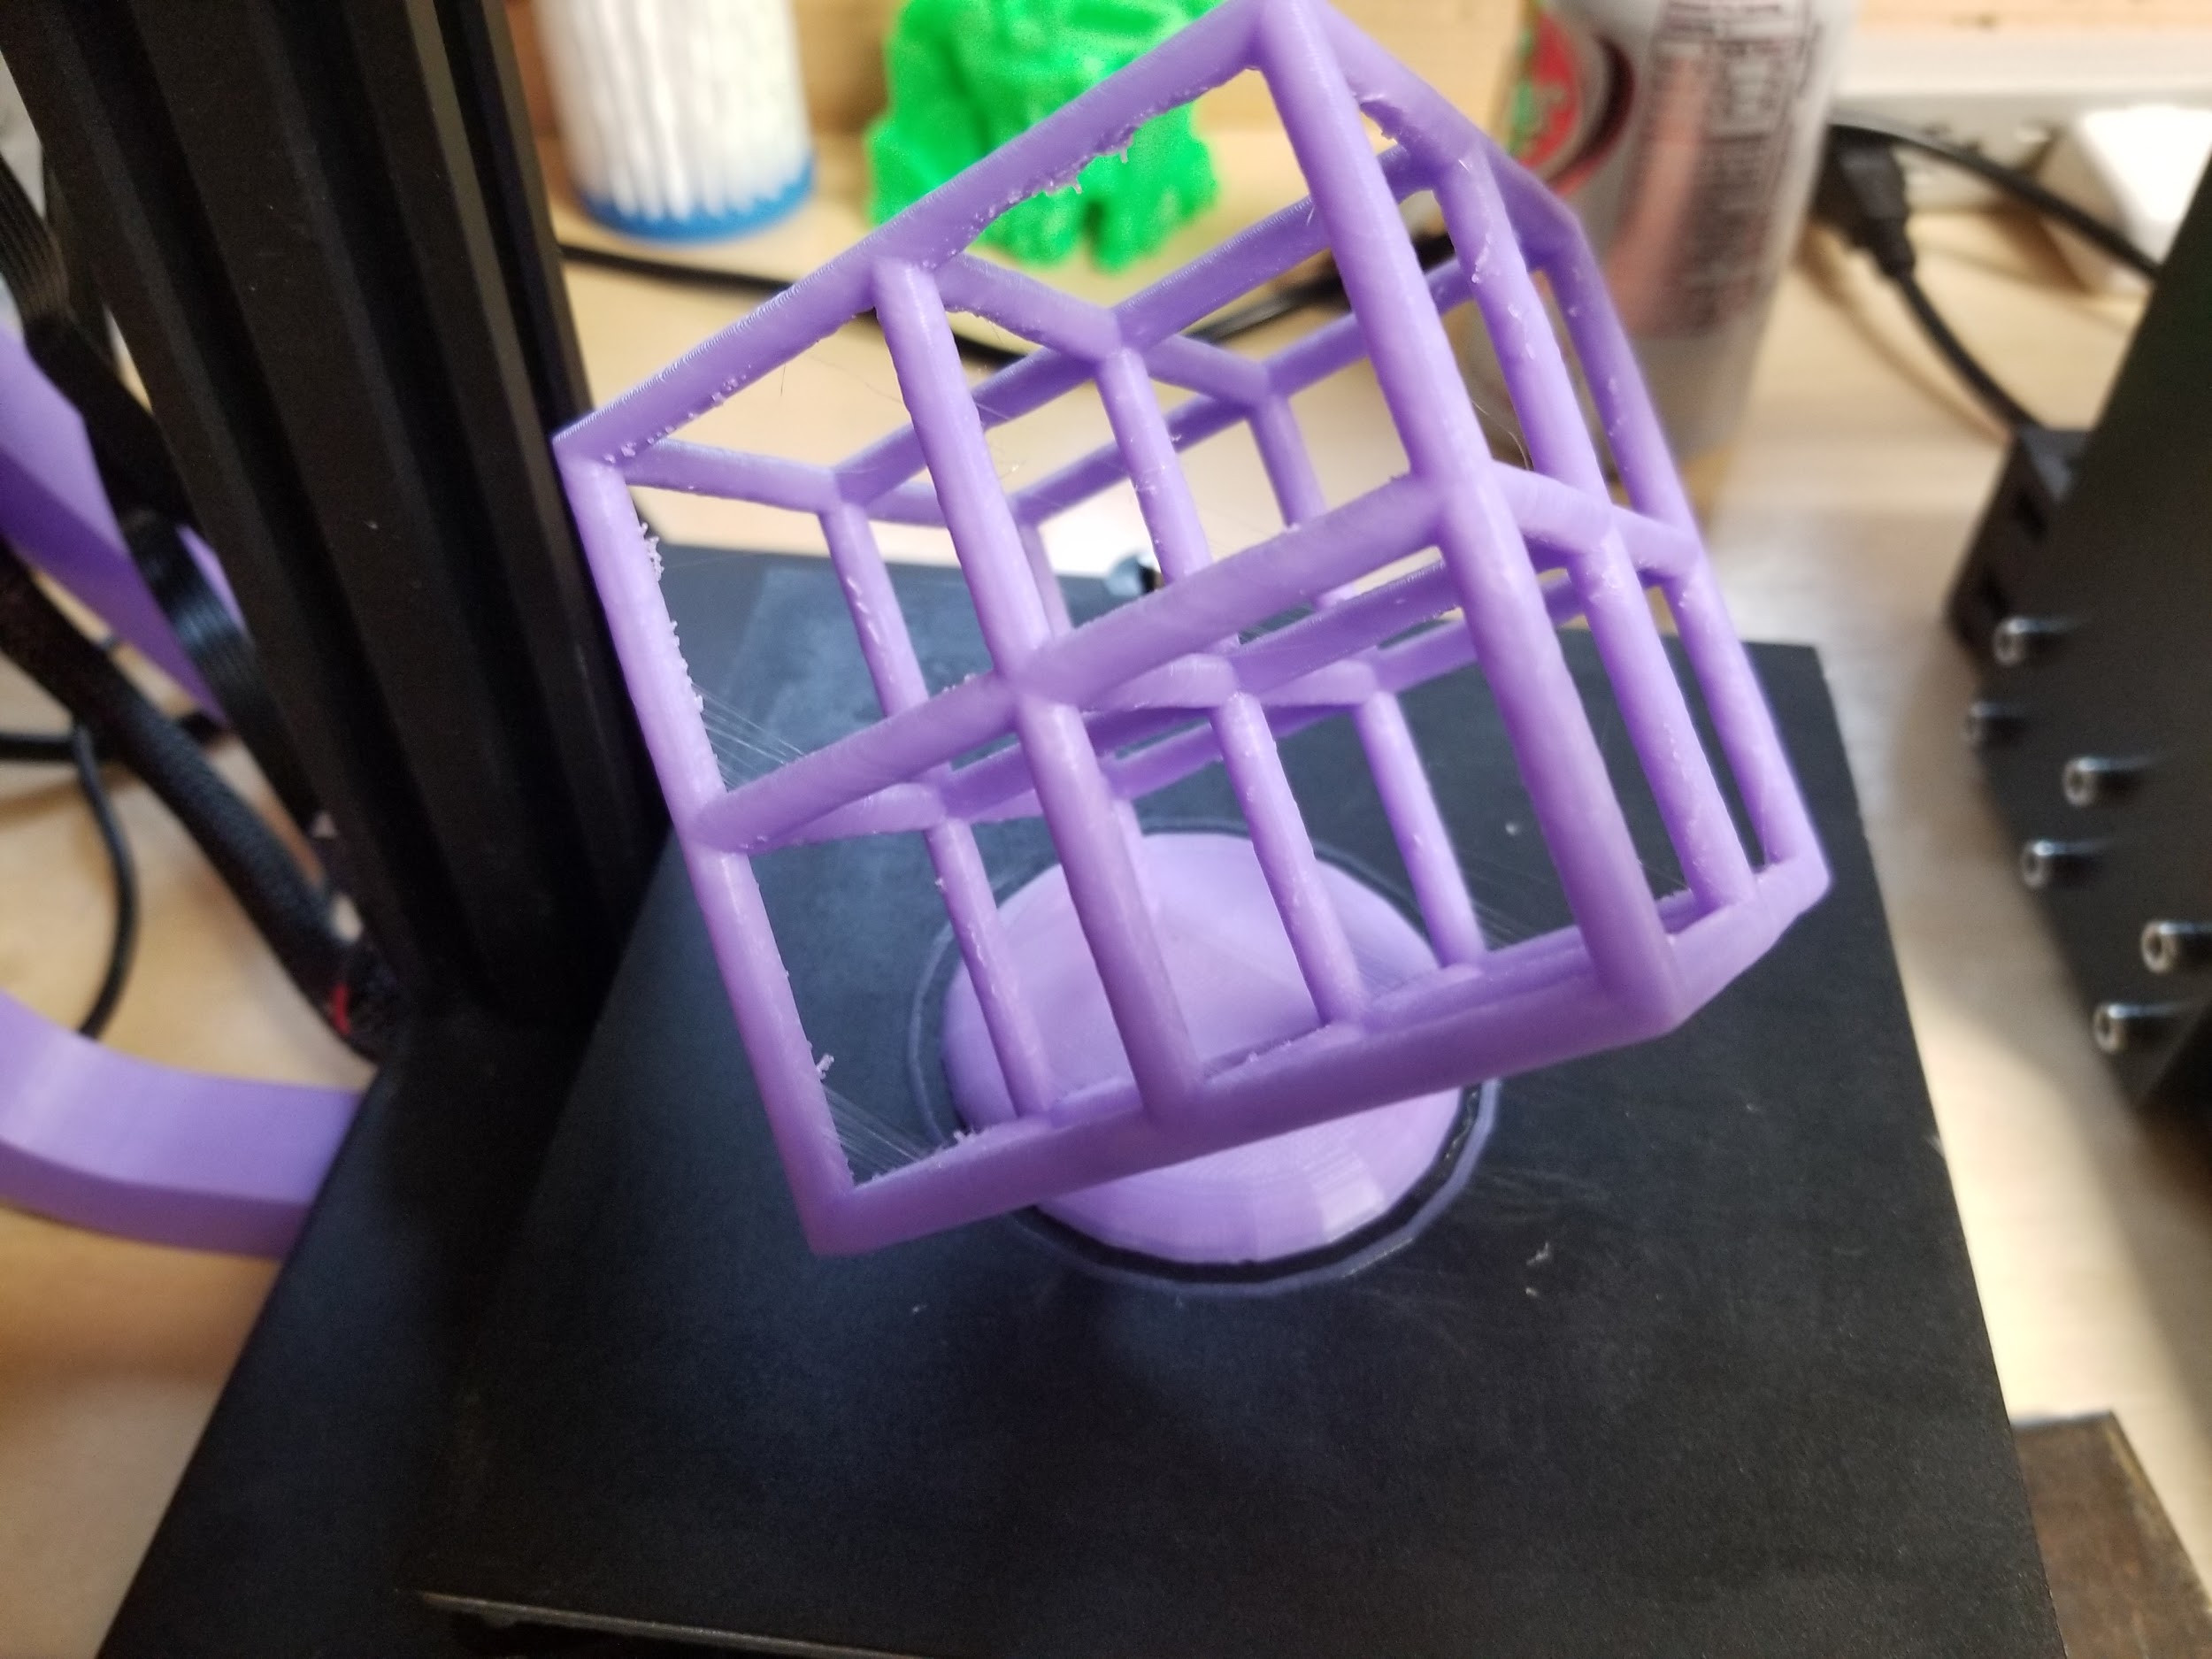
Lattice Cube Very difficult print Not perfect but I put very little effort when I sliced this. This was my second print and wasn’t expecting much at this point.
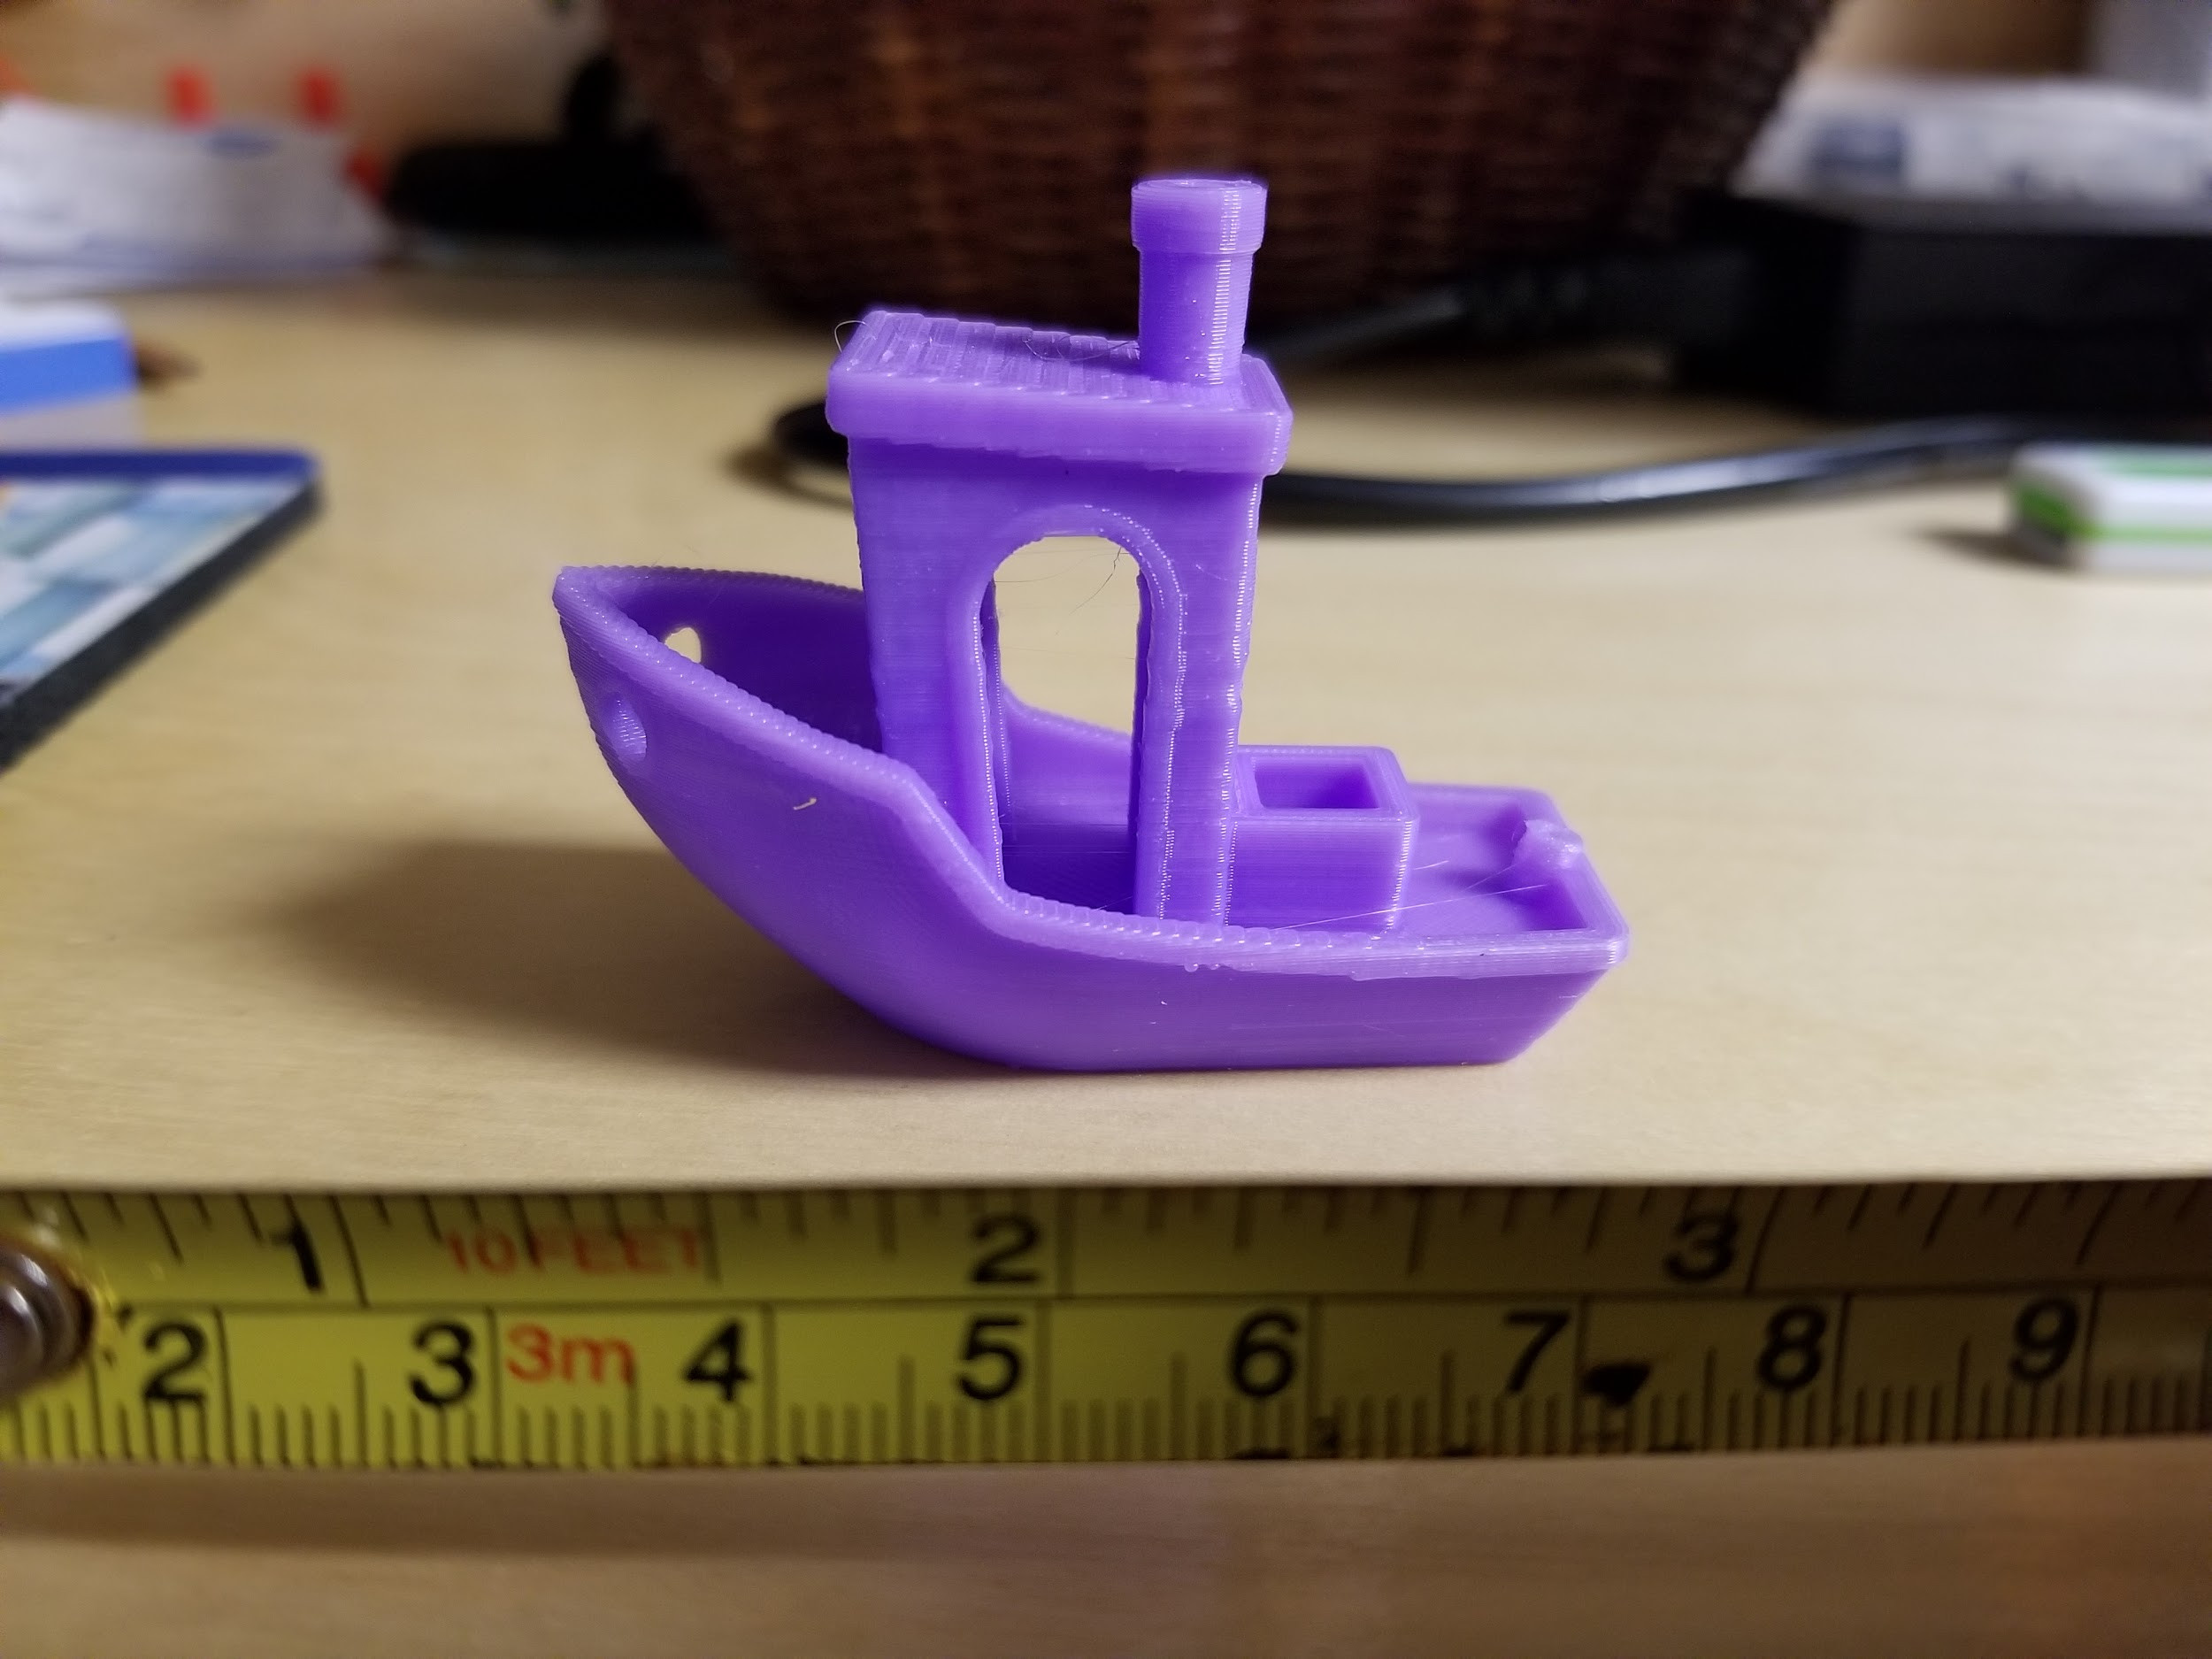
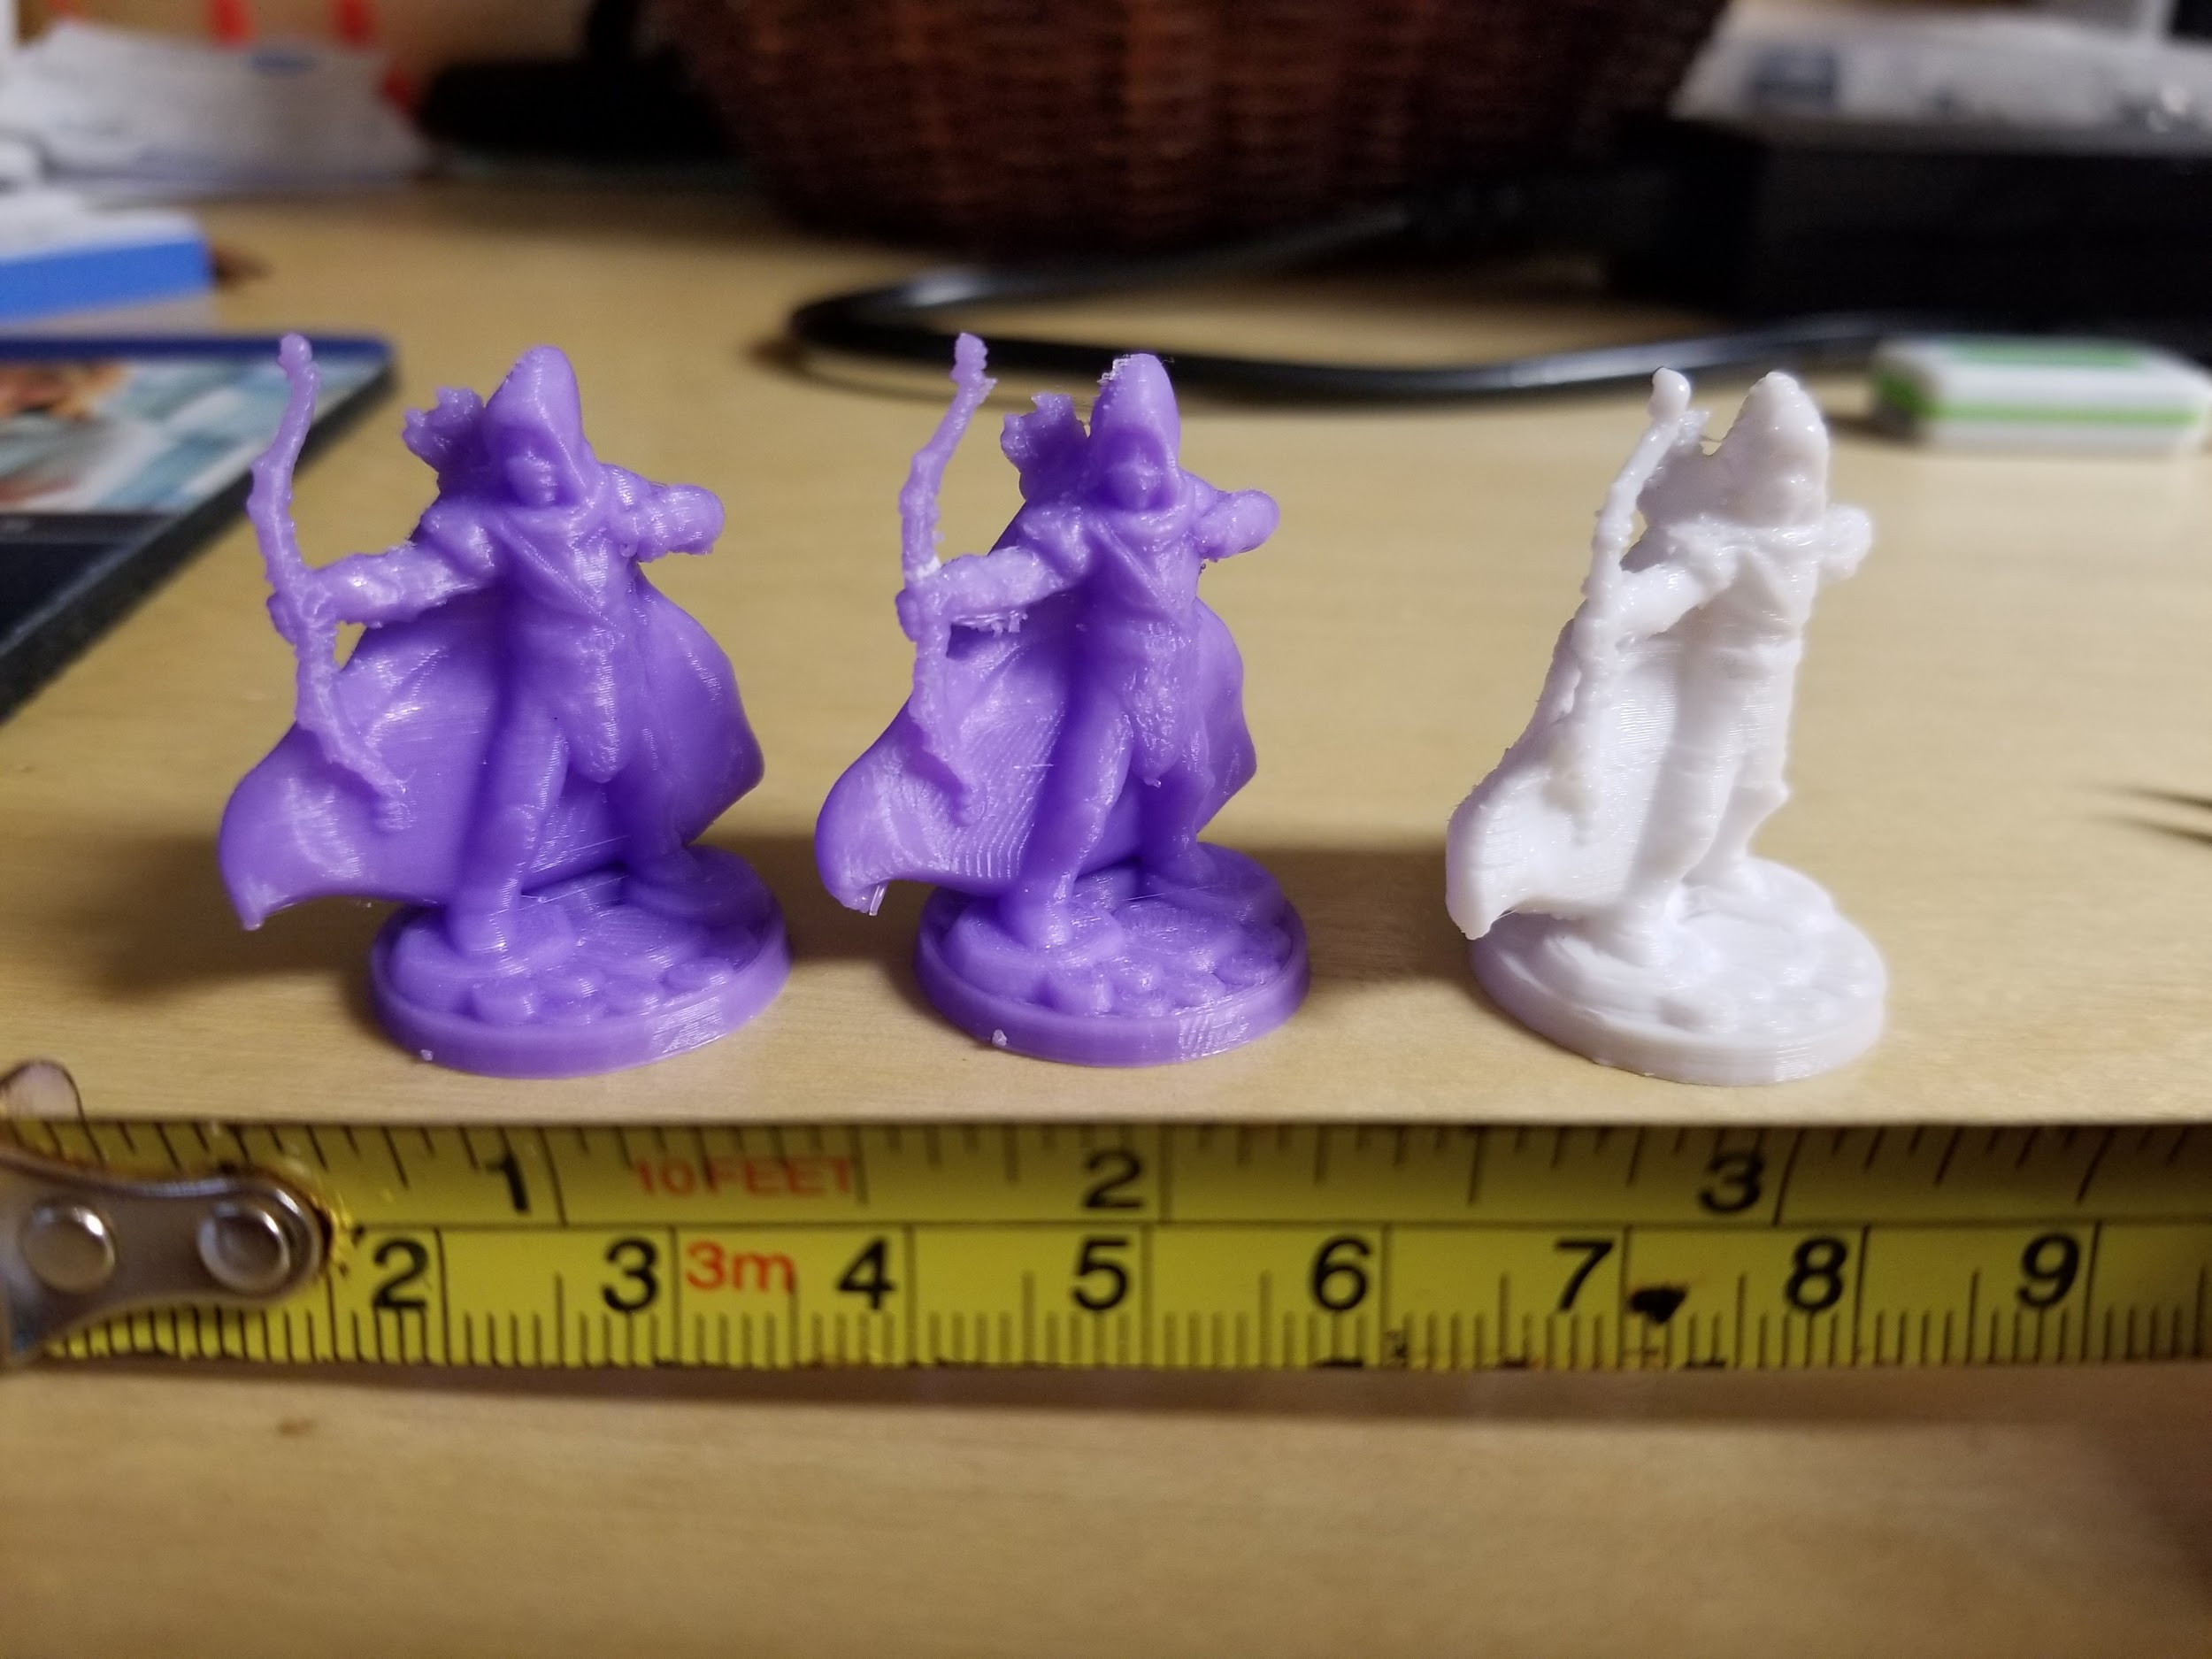
28mm miniature white is flexible PLA. Middle bow broke so I printed a second, which gave me the idea to try flexible.
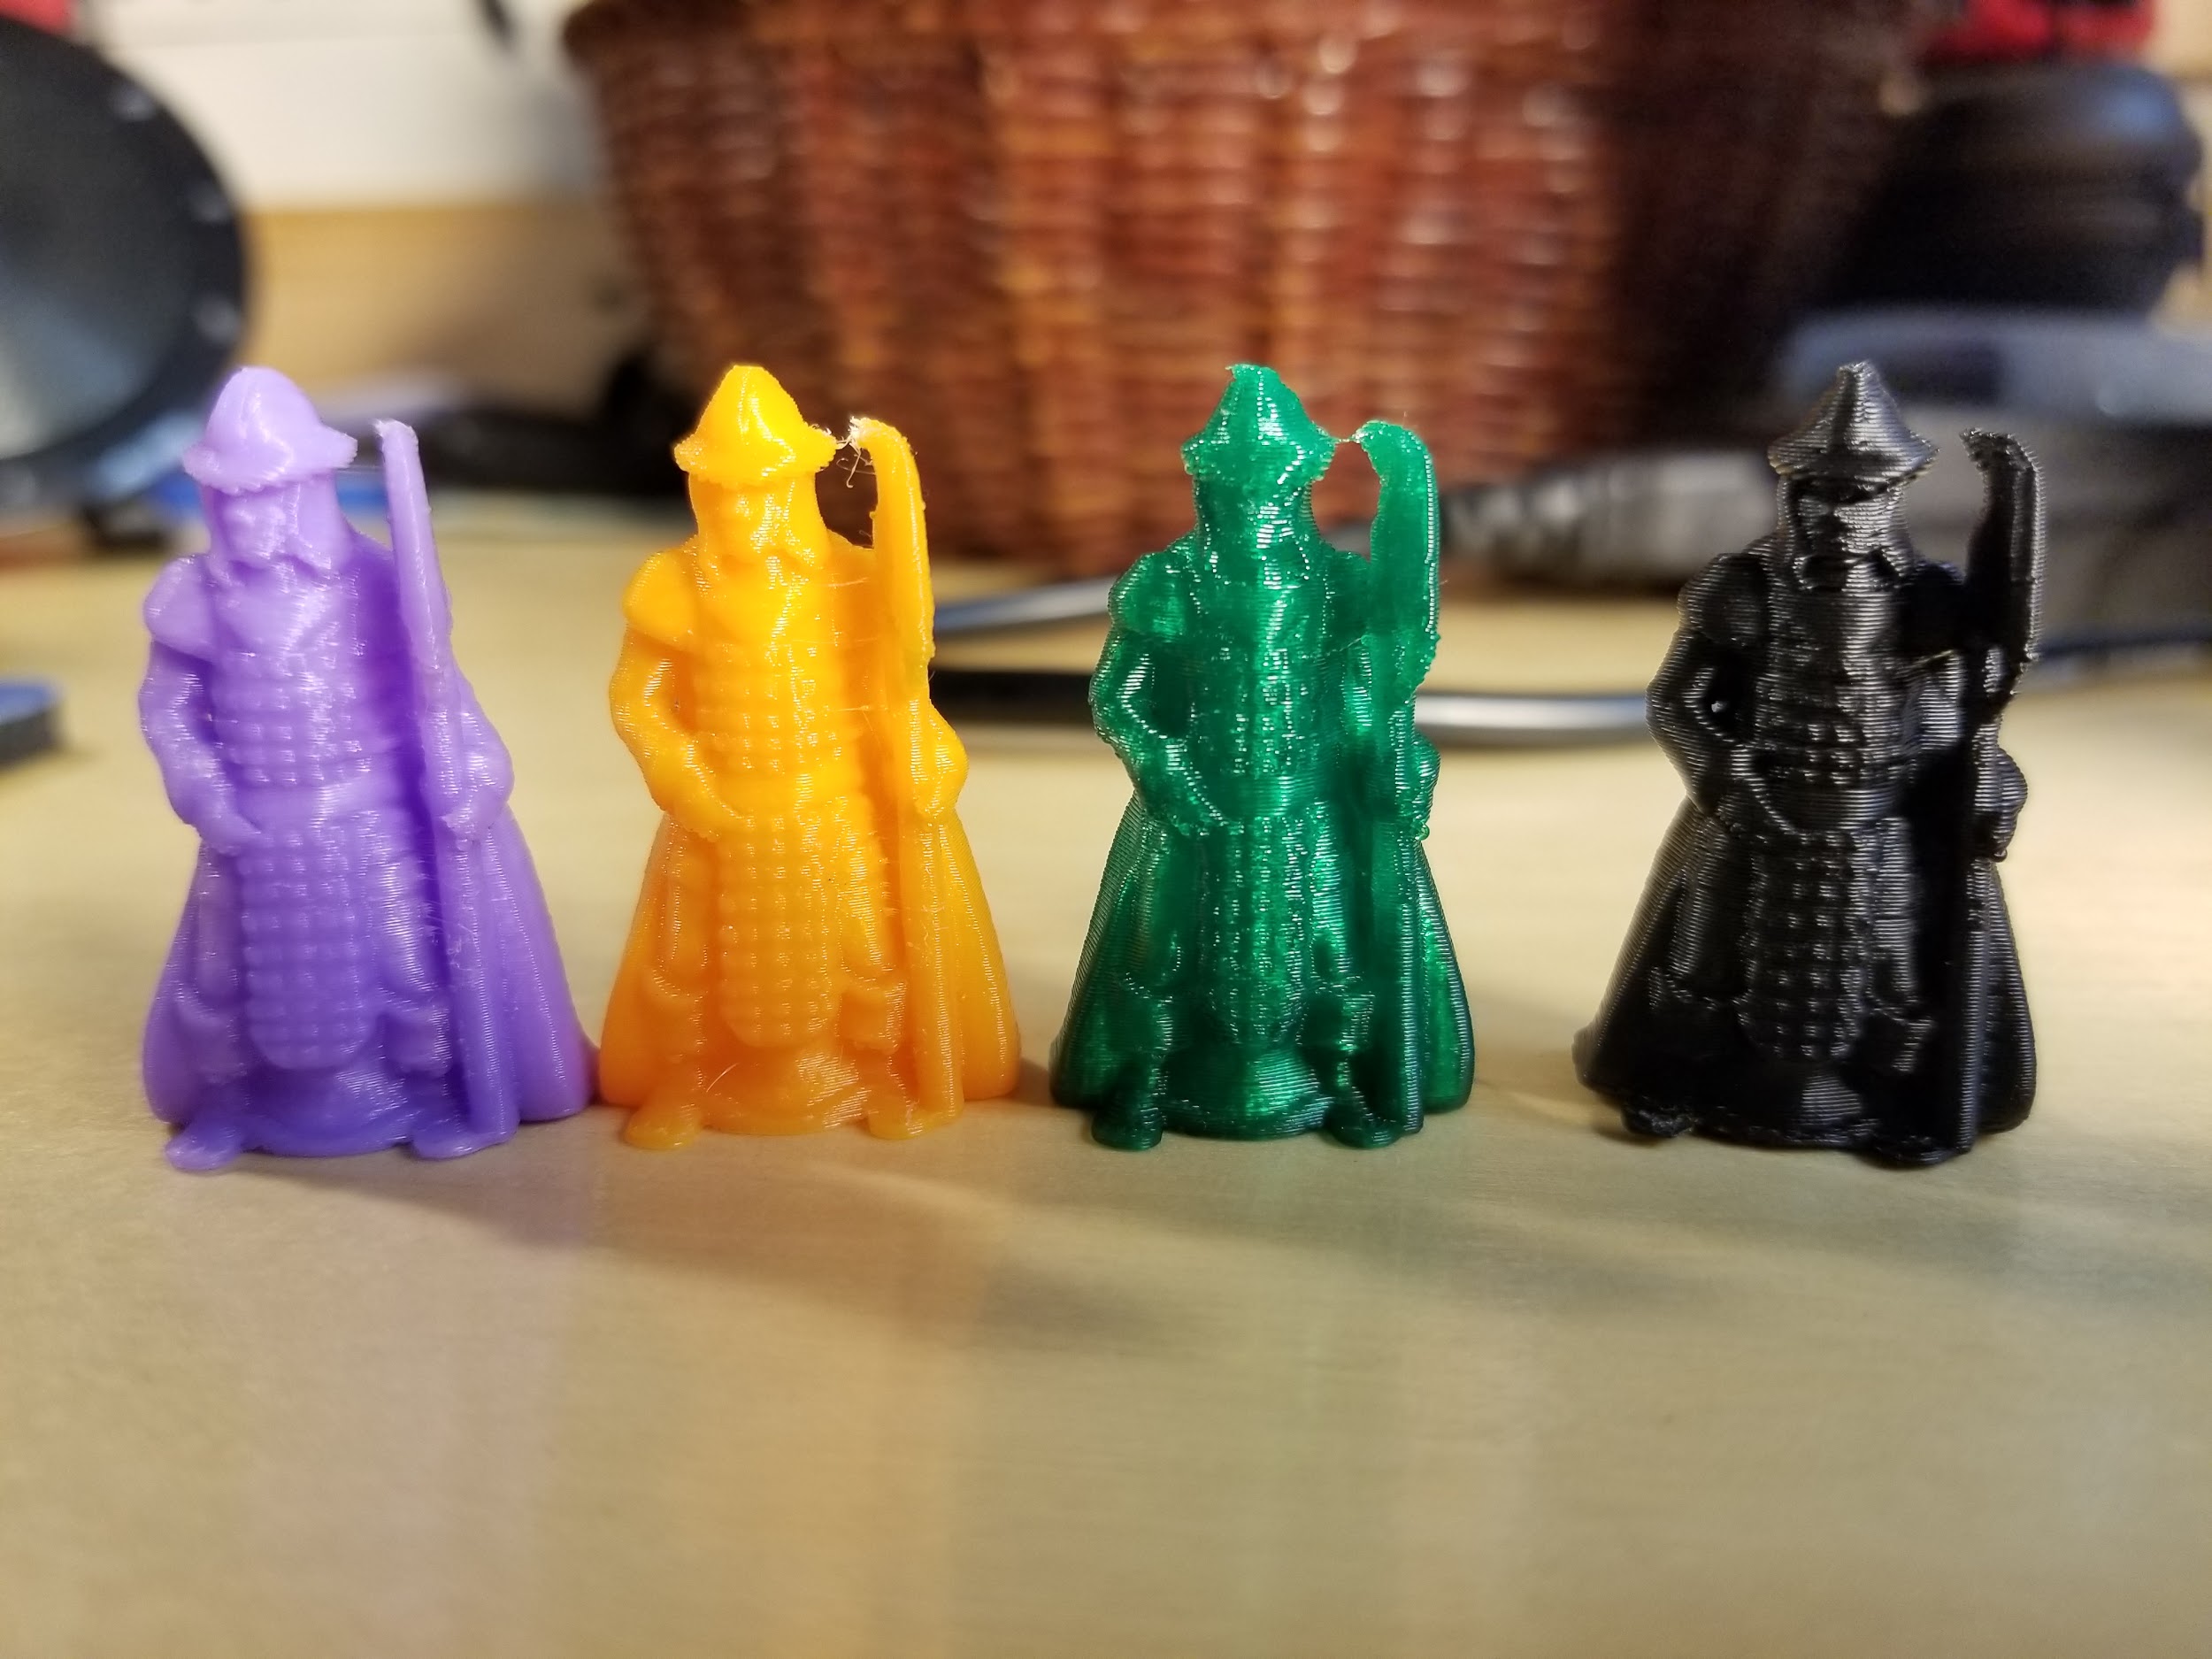
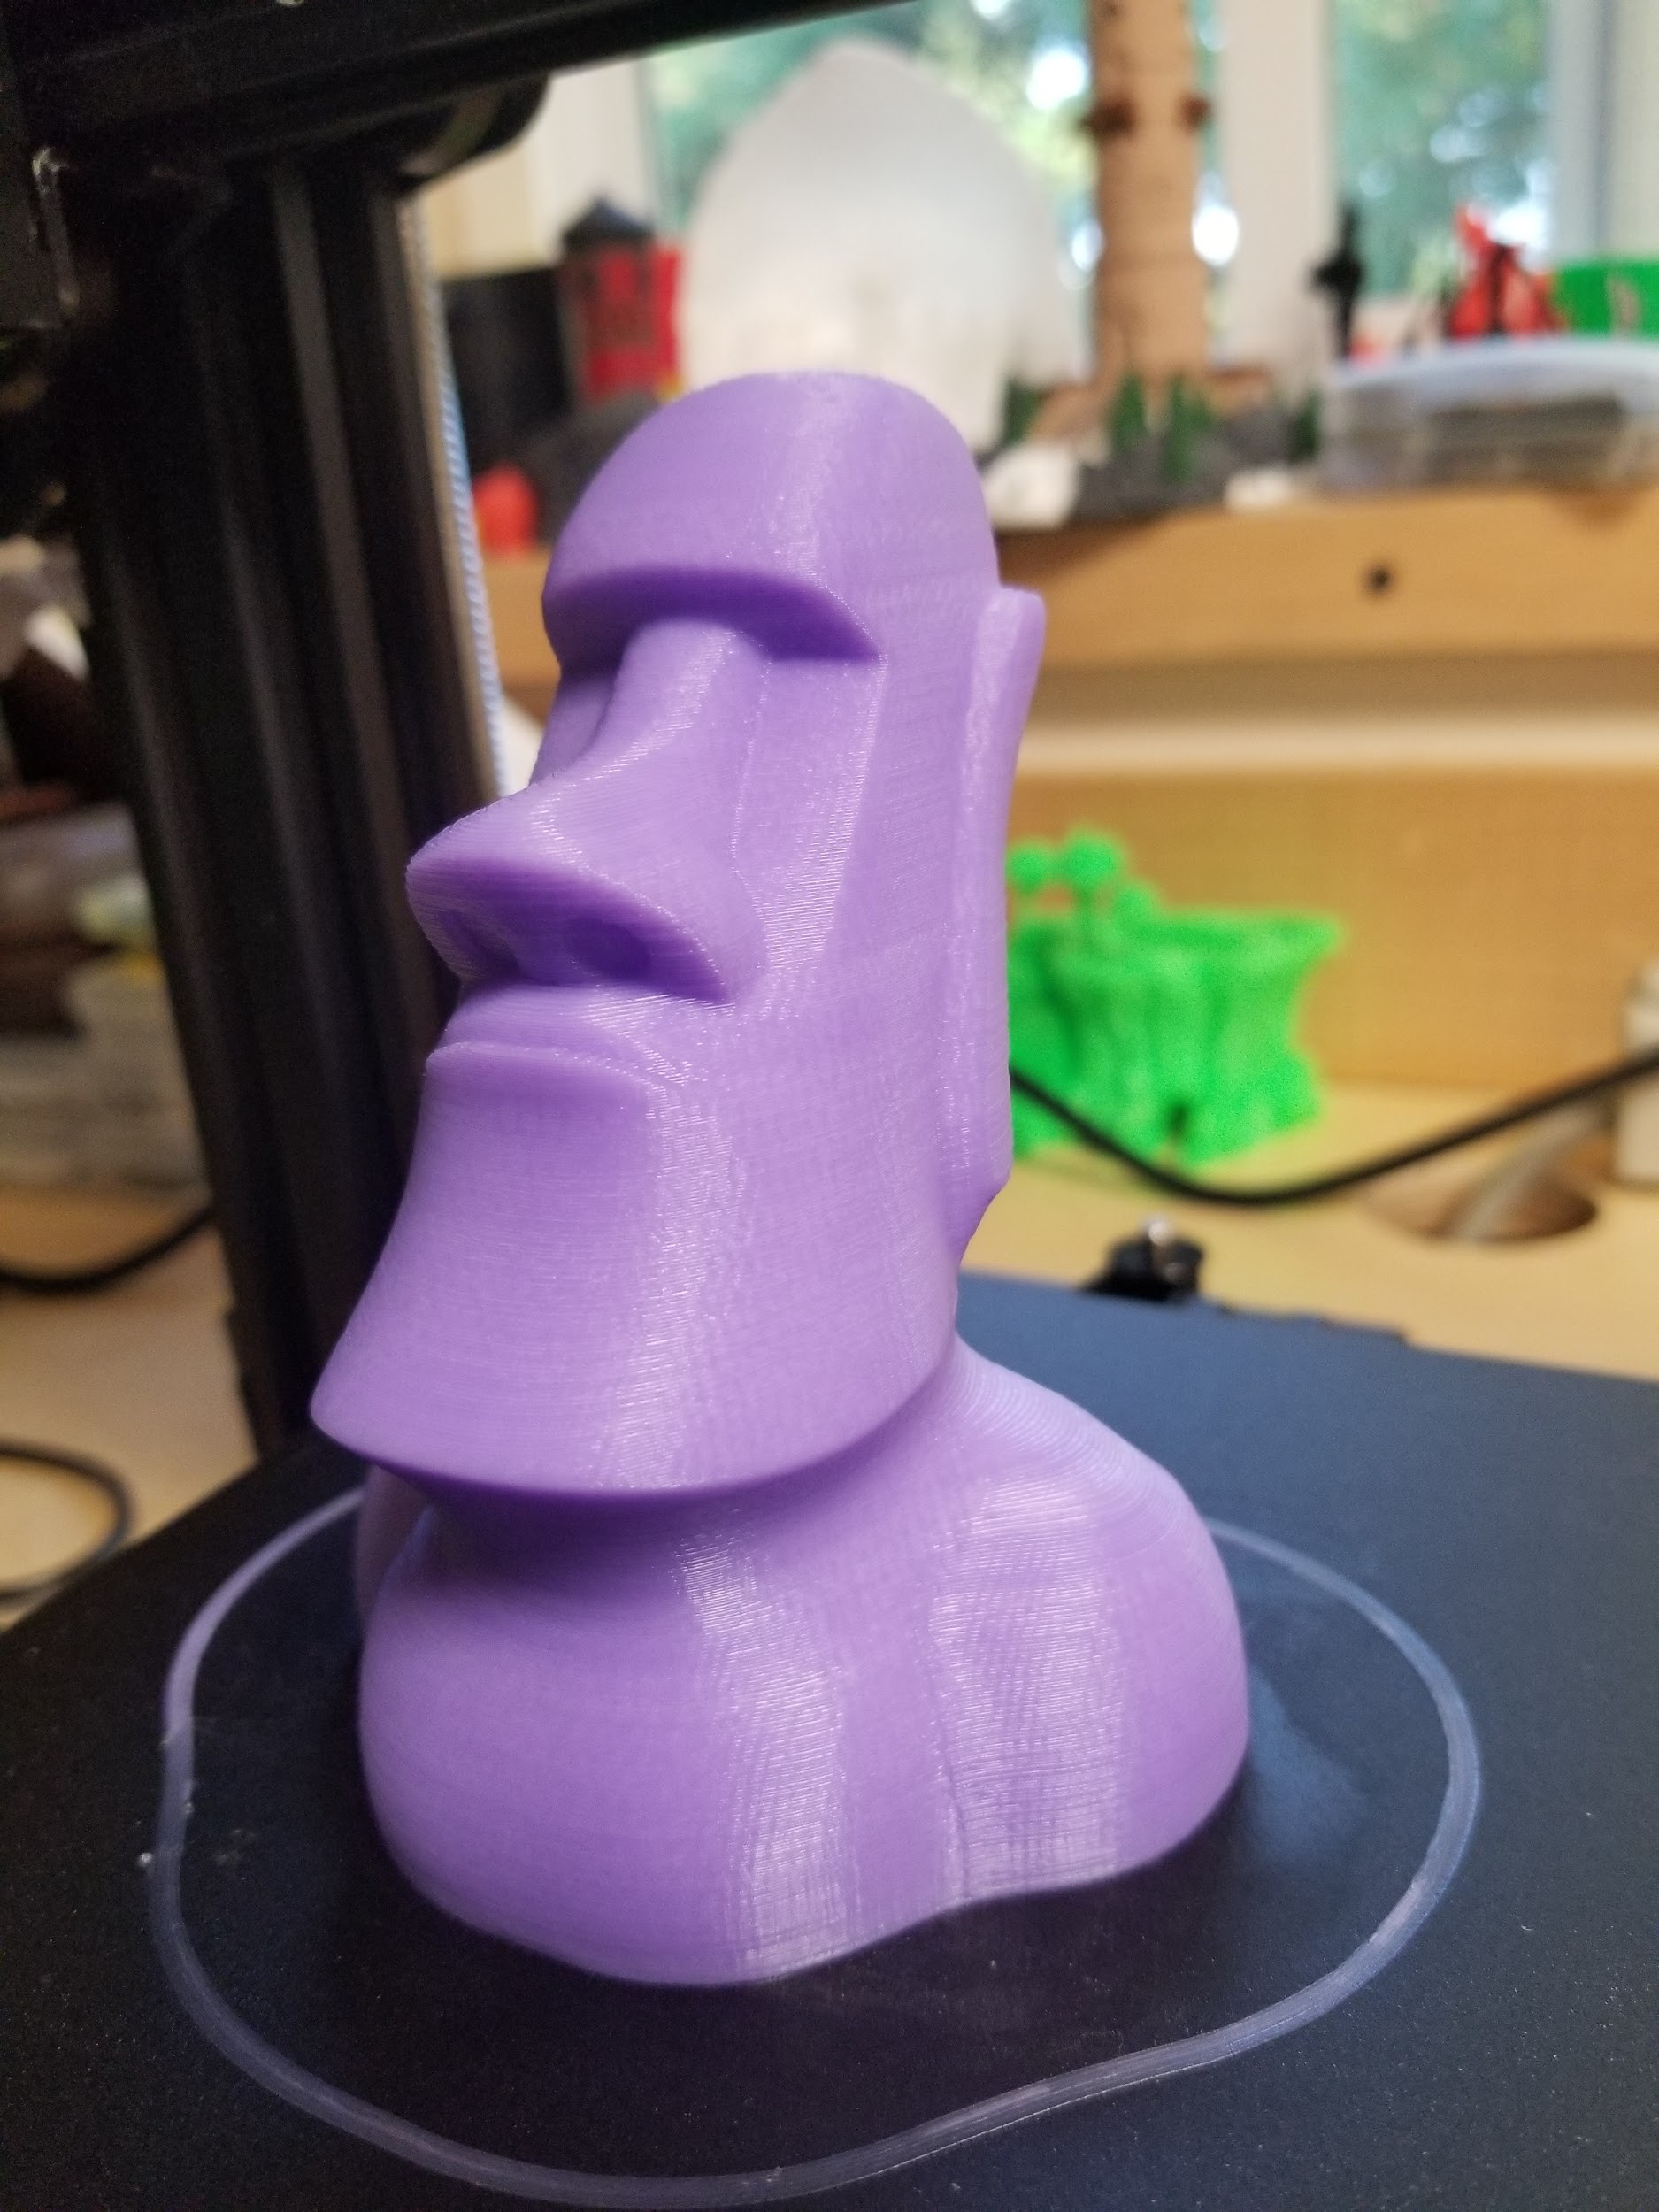
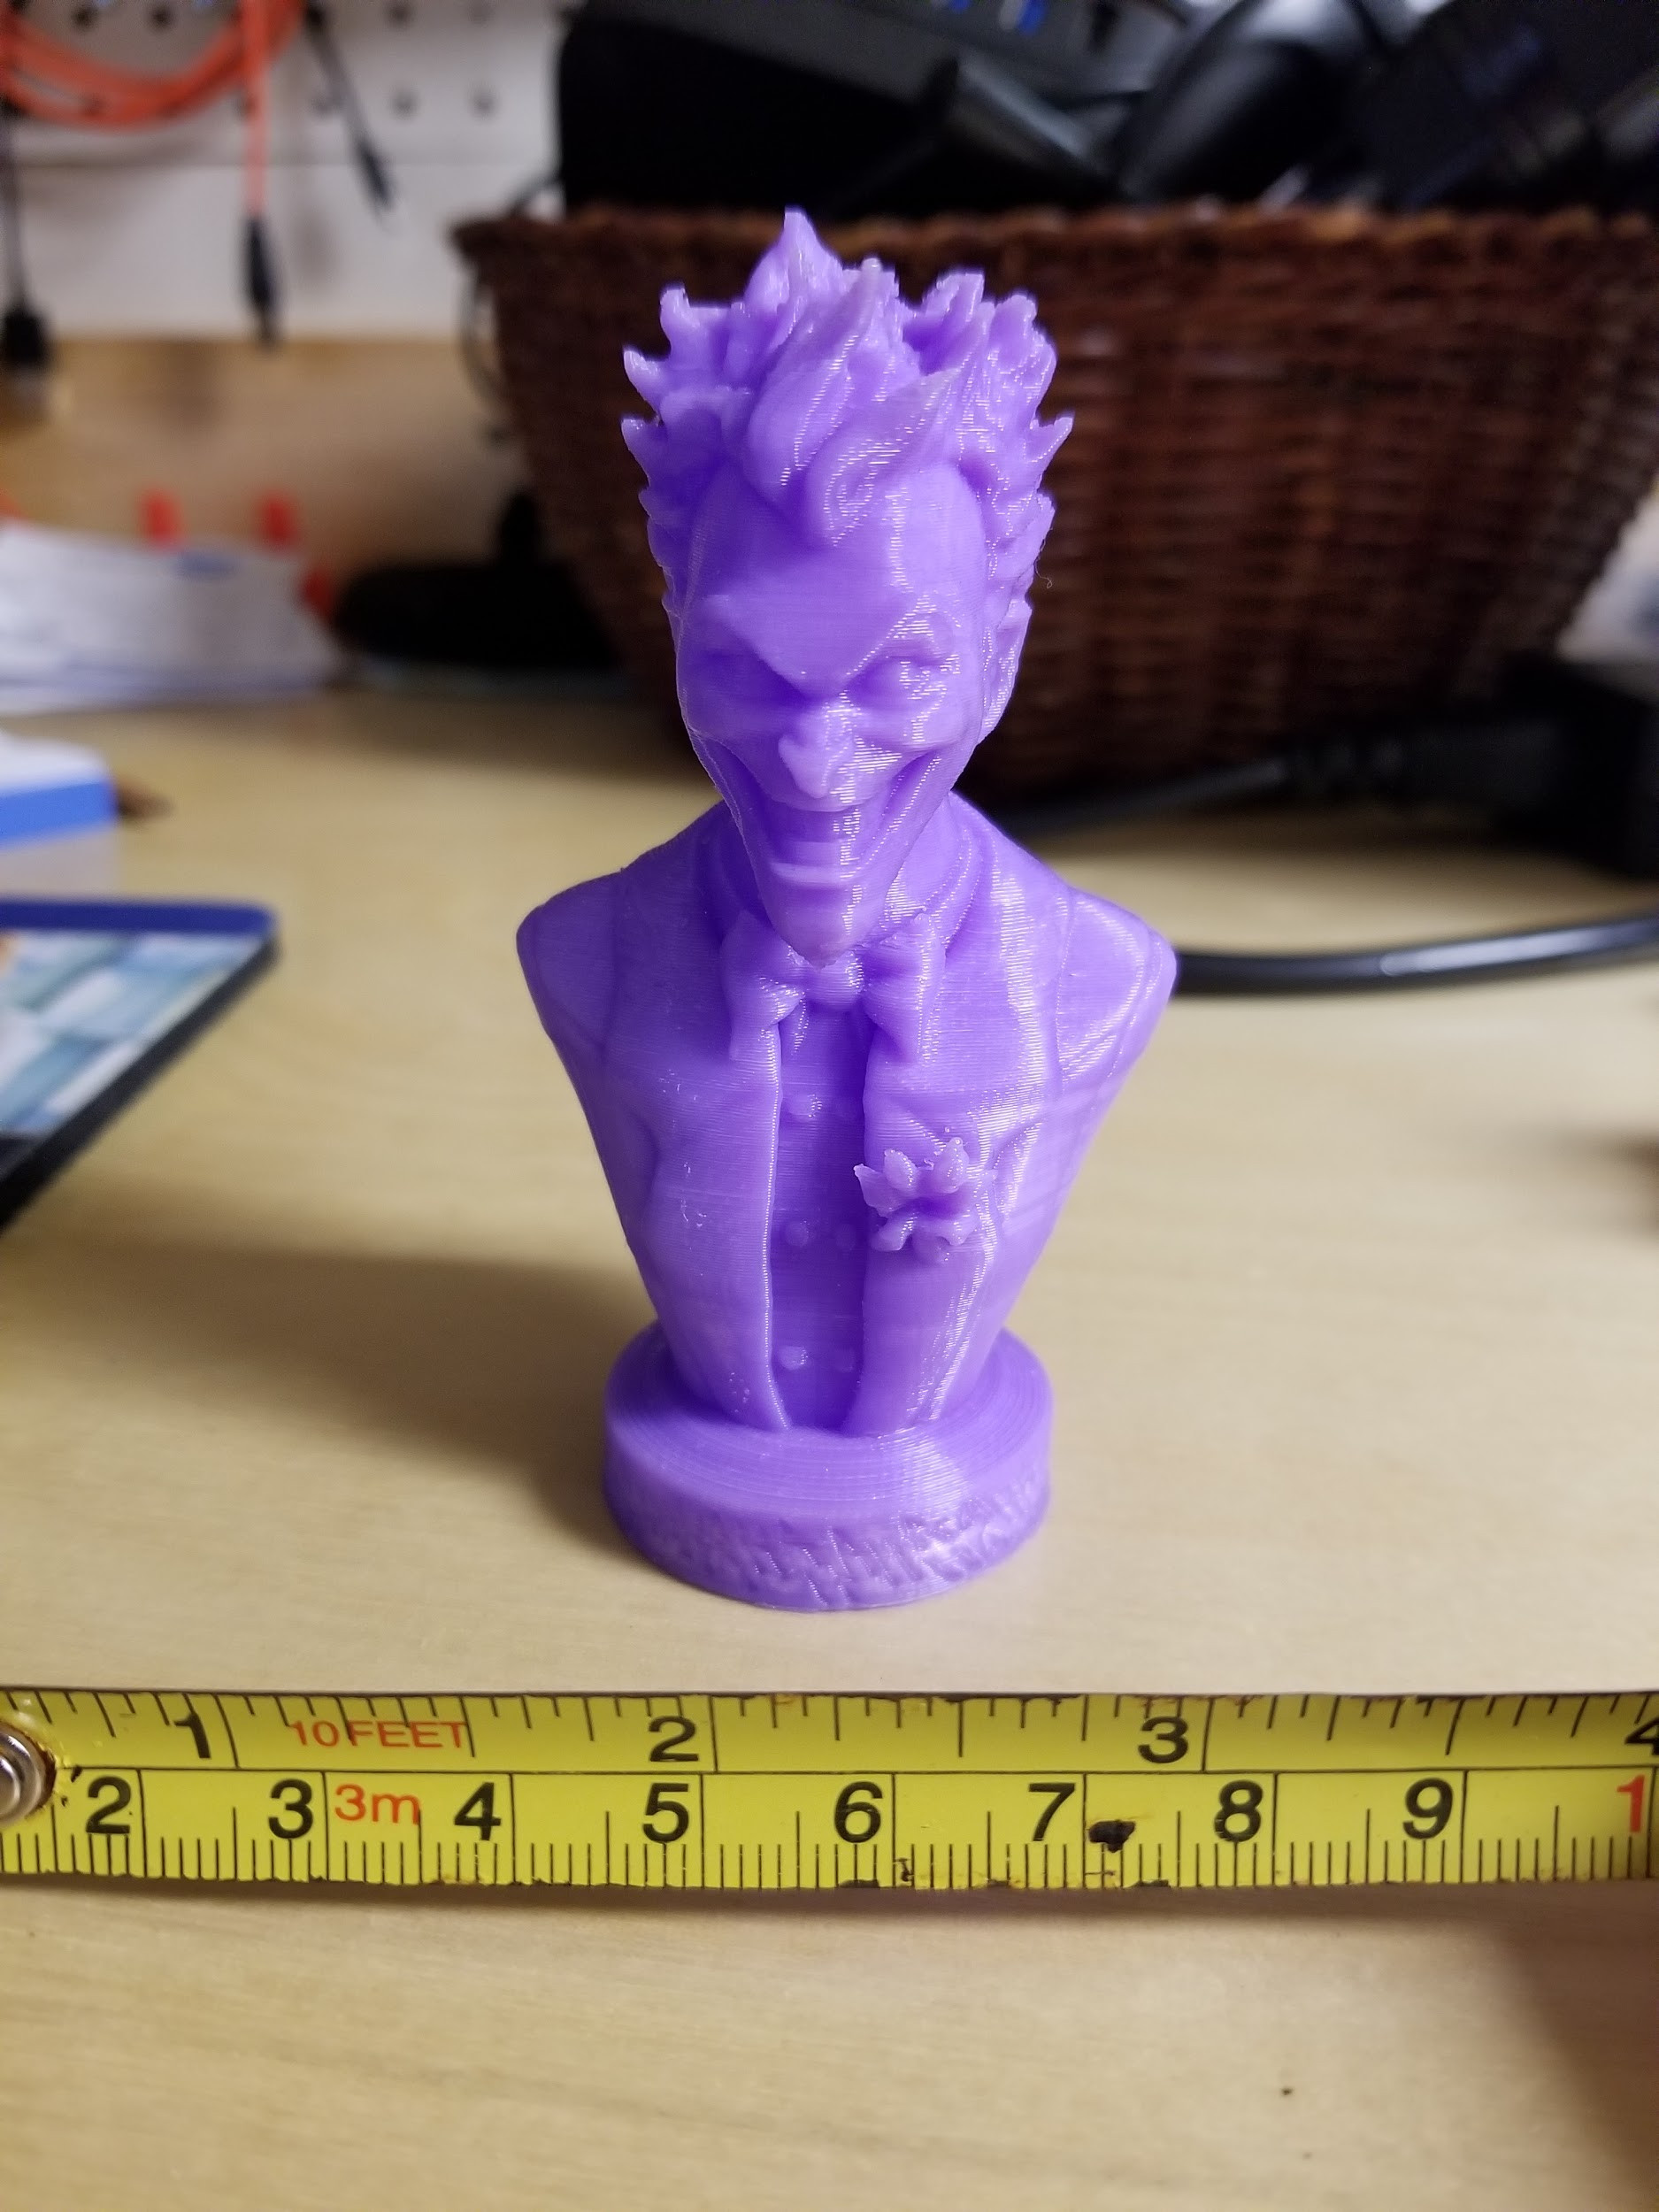
Purple and orange is PLA, green is PETG, black is ABS 28mm tall
Final Thoughts
So I went into this with very low expectations. I have only “recommended” a few printers that I have had come through my little workshop…I really hope that a few other people get this printer to share their experience and they get the same results. I think linear rods/rails are superior but wheels on 2020 extruded aluminum are popular right now. I am always afraid with wheels that 1 wheel out of tolerance can impact the movement.
The Z6 that I received prints very good. If Zonestar has good suppliers I think that they have a winner for an entry-level printer. It is literally the cheapest printer that I could find and I super pleased with the results. Now back to the recommendation part…I think so…as long as the build volume will meet your needs.
If you would like me to continue experimenting let me know. I think a good mod would be to hack a heated bed. Let me know in the comments.
I would like to thank Gearbest for sending the Z6 for review. Currently on sale for $119.99. [Update: Coupon GBJEANZ6 brings that down to $114.99]

Karl is a technology enthusiast that contributes reviews of TV boxes, 3D printers, and other gadgets for makers.
Support CNX Software! Donate via cryptocurrencies, become a Patron on Patreon, or purchase goods on Amazon or Aliexpress. We also use affiliate links in articles to earn commissions if you make a purchase after clicking on those links.


Nice ‘shared experience’, Karl. Your comment about ABS would have been better if you had said ABS the first time instead of ABD. 🙂 For a second I thought you were working on your Ph.D. 🙂
Oops, sorry. That would be a mistake by the proofreader (me) while capitalizing “abs”.
My spouse points out that I have to clarify what ABD means as many people won’t be familair with it–it may be a NA or USA thing. Basically it’s ‘mostly done’ with a Ph.D as it means All But Dissertation. I.E. you have all your research done and you just need to finish writing the darn paper.
Thanks for the explanation, I already booked it under the category unknown Americanism…
I’ve got the printer as well after Jean-Luc mentioned it here, but for me it was £78. No problems with broken end-stops, only me having zero experience with a 3D printer before. I was impressed with the print quality out-of-the-box using the GCode provided on the uSD card and some black Yousu PLA filament that I bought from Gearbest a the same time.
Since having it for about 3 weeks I’ve “upgraded” the 3D printed parts of the extruder to a metalic one and designed/3D printed a spool holder that is a mix between the Creality Ender 2’s metal holder and https://www.thingiverse.com/thing:2867348.
Still learning how to get the best out of it, but so far I’m loving it!
Well I think the board died. Won’t print anymore. It can see the sdcard but won’t start printing. Just goes back to the main screen. I am not sure I recommend this one any more. I have never had a board die on me for no reason.
Hello Karl, i got my hands on this printer recently but for some reason the prints come out squished/compressed ( lacking Z dimension). For example the XYZ cube shows all 3 letters but is only about 1/3 the height it is supposed to be. This happens with gcode i sliced myself as well as the gcodes on the SD that came with the printer, so i think it might be an issue with the printer itself.(i have almost no experience with 3D printing though). Do you have an idea what to do to solve this?
Looking forward to your reply.
Best regards. 😀
First check grub screw is tight. If it is it sounds like you need to calibrate steps for z. Maybe z was replaced with different pitch then original. Go into the menu and find steps per mm for the z. Multiple the number by 3.
Home the printer. Measure with caliper from reference point. Move z up 50mm. Measure see how much it moves. Adjust steps until perfect. Use a ratio until perfect. Then save to eeprom.
Hello Karl, thanks for your fast reply. I figured out that the issue is caused by missing Z movement(won’t go “up” while printing). However the Z axis will move if it is told to do so manually. Again this happens regardless of the gcode used, so i think there is something faulty with the printer itself(maybe firmware). Steps/mm won’t solve this since it does not move at all. Can you maybe think of a way to solve this?
Again thanks for your help, i really appreciate it.
Might be bad board. You can swap xyz on board and move axis to narrow down. The steppers are not very strong. Make sure z is not in a bind. On mine I couldn’t have x and y super tight. Steppers weren’t strong enough.
When moving cables around make sure powered off
Karl, I have a question for you about the Zonestar Z6 printer (I have it at home for some time). Please send me an email, because I rarely visit here: norbert@nyczka.pl
Hey how can I help?
Dear Karl,
Apparently is the youtube-link that you mention in the article private.
Is there any other way to see the video?
Kind regards,
Paul
zonestar z6 3D printer is cheap at a cost compared to the other 3d printer. I have purchased this printer and its printing quality is good but the main problem occurs with its speed. how do I get rid from this?
Hi Karl, how are you?
I recently bought the Z6 zonestar 3D printer. However, it has generated some failures that I cannot solve. I hope you can help me.
1. Sometimes when I am printing the extruder motor it sounds ugly and the filament jerks back and when this happens and I can see it, I can see that it does not put certain layers. When I stop printing I run tests to find out if the extruder tip is plugged but it is still working normally. Why this can happen? I have not been able to print any complete part because it happens to me all the time and I have to keep an eye on the printer all the time.
2. What conditions for printing in PLA and ABS would you recommend taking into account the operation of the 3D printer.
My English is not very good, but I hope you can understand me
Hello,
Nice review, I bought this printer after reading here.
Can you share the software used for the prints, and the configuration you used?
Thank you
hello, is there an STL file of the coil holder? please give me the same printer