
This article was written in collaboration with Jonathan Bara from Neoden USA
Using Arduino to create your own tailor-made electronics equipment is a preferred method of thousands of electronics manufacturers worldwide, big and small. Arduino projects effectively start at the software to inform the Arduino microprocessor as to what to do, and then from there, move to the prototyping stage. An Arduino prototype is typically a very rough-looking machine whose only main goal is to prove that the concept at play is functional and worthy of refinement. After this stage, thought then goes into how to create a finished product that’s efficient, properly made, and ready for mainstream use. However, it isn’t always extremely easy to know when your prototype should go to the final design stage, or if there are still some kinks to be worked out.
To make this process easier, here’s a list of ten tips when it comes to moving your Arduino project from work-in-progress to final product:
Can the circuit be simplified?
In any circuit that makes up your machine, look to see if any space can be saved on the PCBs that make it up, or if any of the circuitry is redundant, or otherwise, serving a purpose that could be filled by a smaller or different machine. Things like moving from a network of resistors instead of a series of discrete resistors are a simple example of this. Ensure that every single component used in your final PCB design is necessary and serves a distinct purpose.
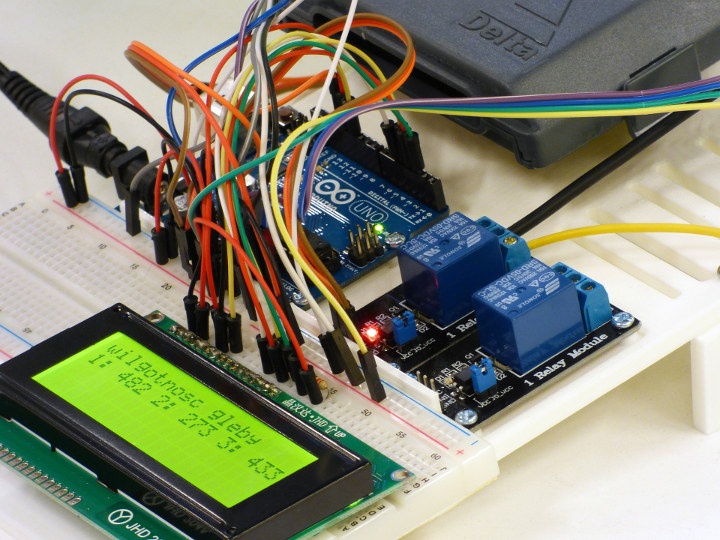
Are you ready to go from breadboard to PCB?
Most often, breadboards are used as a proof-of-concept of an Arduino setup. However, final products use PCBs. If you’ve finalized your circuit on a breadboard and everything works how you’d like it to, the next step is to design your own PCB using software like PCB Wizard, and then transferring it to a blank copper clad PCB. The requirements that shape your circuit will end up shaping your PCB design.
Can you create your final product?
It will take extra resources to create your finalized Arduino product. Before you can go to the production stage, you need to ensure you have solutions for each part of the manufacturing process. Firstly, make sure that you can both create your own PCBs, and then have your components assembled on it. Access to a pick and place machine makes assembly significantly easier, but according to Neoden USA these pick and place machines typically cost more than several thousand dollars. If you’re willing to do it by hand, that’s an option as well.
Would you be comfortable getting your project certified?
While you might not be immediately thinking about selling your final product, if it’s truly worthy of being put into the production stage, you should be confident that the FCC would certify your finished project if you were to supply it to them. Any worries you’d have about certain aspects of your project will probably surface now, and you can work on them before continuing. This way, you apply standards besides your own as to whether or not your project is completed.
Look for points of failure in your design
The next step is to carefully pour over every aspect of the creation process from the layout of your PCB to the components you’re using. Look for areas that are likely to cause issues in the future if the device is used for extended periods of time. If certain parts are being placed under sufficient stress that you worry about their longevity, that’s a good place to refine before moving on.
Do you know how much space it will occupy?
If you don’t know how much space your overall setup will need within a case, chances are you shouldn’t buy a few dozen cases, and then hope for the best. You should have at least one prototype with no case at all that you can use to figure out the dimensions you’ll need to enclose all of your equipment together in a functional manner.
Are all of your parts rated for the job?
It isn’t uncommon while prototyping to buy components that aren’t exactly ideal. It isn’t necessarily anyone’s fault. The simple fact is that early on in making any individual item, there’s a good chance those creating it didn’t exactly know what they’d need ahead of time. Look at all of the wattage and resistance ratings of your entire project, and see if there are any overpowered or underpowered parts. The goal is that all of your individual components can handle the stress placed upon them from the components surrounding them.
Find a manufacturer
If you plan on making a few dozen of your final product, you should pump the brakes on any big aspirations you have, unless you have a steady supply of all of the components necessary. Find a manufacturer for each portion of your machine that you’ll need (PCBs, components, cases, etc.) and figure out how much equipment you’re willing to buy at this point in time. After that, you’re free to make your orders, and then assemble it all once it arrives.
Final word
As exciting as it is to have gone from a schematic drawing to a functional electronic device, exiting the prototype phase early could have disastrous results on both your product’s functionality and its overall utility in the real world. By diligently ensuring that all aspects of your design are iron-clad, you reduce the risk of something going wrong exponentially. The prototyping stage is often fairly inexpensive because there isn’t as much responsibility on the product being 100% efficient and pretty to look at.
But then, the final production stage requires a significant monetary investment, since you’ll often have to buy parts in bulk that have been machined to a certain precision. Therefore, it’s vital to ensure you have total confidence in what you’ve built and how replicable it is, before deciding to produce your product at a professional standard. If your electronic device satisfies all of the criteria on this list, chances are you’re there. In just a few short weeks, you’ll have a finished product at your fingertips. Congratulations!

Jean-Luc started CNX Software in 2010 as a part-time endeavor, before quitting his job as a software engineering manager, and starting to write daily news, and reviews full time later in 2011.
Support CNX Software! Donate via cryptocurrencies, become a Patron on Patreon, or purchase goods on Amazon or Aliexpress. We also use affiliate links in articles to earn commissions if you make a purchase after clicking on those links.


Just of curiosity. Any site where its possible to order custom sbc(processor of choice or ram) or any other related circuit.
The one I can think of right now is Gumstix Geppetto web platform. I covered it a few years ago @ https://www.cnx-software.com/2013/02/15/gumstix-introduces-geppetto-web-platform-to-design-custom-embedded-boards/
It allows you to design your own baseboard, and then use off-the-shelf modules with your target SoC, memory and module. It only works for low-volume projects as the cost is fairly high.
THe problem that I’m facing is that off-the-shelf modules are too big for a project I would complete.
Or too expensive for the task they have to do!
I wonder how a smartphone is chaper of the chepaest (good quality/power) som available. Yes I know that phones have hight production count so prices get lower, but they also have a lot of stuff that I don’t need.
I also tried to contact FriendlyElec and suggest them a SBC that might be userful for a lot og guys but I got no reply from them. (I was just suggesting to create a 4 row pin version of the NanoPi Duo2 to have I2S and a maybe emmc pins to punt into the baseboard!
How much cpu power and memory do you need? There are QFNs with a cortex a7 and 64-256MB of memory out there. The main issue is getting enough people together to get the $10K to order the minimum quantity.
I would like to have a SOM for run Android. Google launched the things platform but now it deprecated.
I’ma a hobbyist and I only have to make a single device. I have a quite strong power consumption/size constraint. (And also temperature)
I also have started to design my own SBC from scratch but one not an EE and I had some trouble with the DDR3 bus. (And the A33 run too hot for my application, old Android BSP, etc)
My last hope was to find a SOM with a sd625 but I have seen the crazy prices.
I would like to have lake I said something around 25/50 euros with: 2gb ram, Android 8 or 9. And a couple of gigs of storage just to run the image.
The Neutis5 was interesting but they delayed too much and at the end no one have used/tested that SOM.
I have also searched on taobao and Alibaba. The imx6 boards are quite interesting but They don’t have wireless connectivity. And can’t run Android. (Otherwise it was perfect for my needs)
Yup, cost is high. So we are left with either baseboard + module or relatively cheap various pi’s.
The power supply is an often overlooked item. This can be a certification issue as well as reliability concern.
Cheap hobby grade components (like capacitors) often will not pass certification and when they do, they often fail within a year when subjected to 24/7 operation in a real world environment. Once the power supply starts to fail, other components can be damaged too.
Surely step 1 is to launch it on kickstarter or indiegogo and the last step is closing all of your email accounts and changing your name when you can’t actually produce it.