
CNXSoft: This is a guest post by Promwad that explains the basic steps to develop a video conferencing app with Gstreamer on TV boxes running Linux.
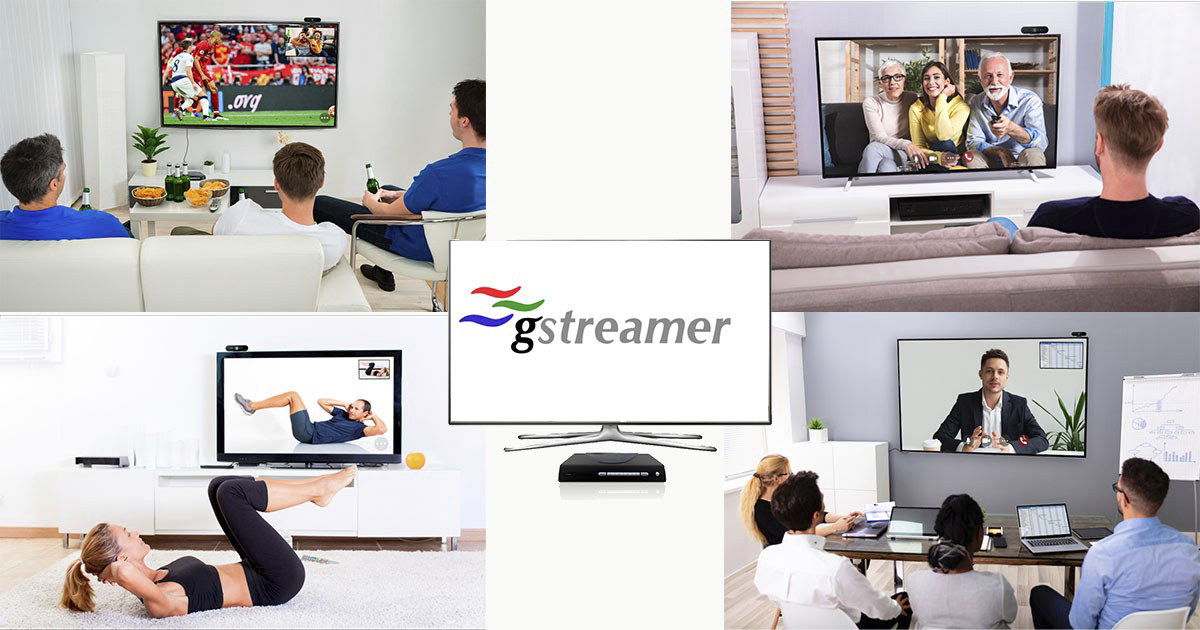
The COVID-19 pandemic has become a catalyst for new online services. For example, Zoom became so successful that it overtook IBM in terms of capitalization this month. The software engineers at Promwad were inspired by this success and decided to go even further: what about implementing video conferencing on Smart TV and STBs? Then the users of such an application will have an opportunity to communicate not only at work but also to enjoy remote meetings with friends, cheer for a soccer team, watch a movie together, or do sports with a coach.
For some reason, most digital TV operators do not have such a service, although, from an engineering point of view, all these features can be implemented on set-top boxes based on Linux/Android and RDK.
Let’s analyze the architecture of a Zoom-like video conferencing app for Smart TV and implement video stream encoding with GStreamer open-source multimedia framework. We collected information to work with this framework in pieces, but it was worth it.
Challenges and software architecture
When developing the application architecture for set-top boxes, it is essential to consider all potential software and hardware limitations. Engineers who build desktop programs, as a rule, do not face these challenges, while it is a common thing for embedded engineers.
So, what we are going to encounter on set-top boxes:
- Limited resources of CPU and devices themselves. In most cases, STB devices use a variety of ARM processors, which implies several limitations and additional tasks, such as the need to use hardware encoding/decoding for a video stream. So, performance is a bottleneck.
- Different architectures in STBs by various manufacturers. Some are based on Android; others use RDK or Linux-based distributions with their limitations and nuances. Therefore, it is better to choose the most common and cross-platform solutions in different software modules at the start of the development process. Not to mention the support of a desktop-version. And then move on to some particular cases.
- Network limits. Many set-top boxes work both over Ethernet and Wi-Fi. Compression and transmission of video/audio streams is another bottleneck in applications of this kind.
- Safety of stream transmission and other data security issues.
- Support for cameras and microphones on embedded platforms.
Now we can cluster the architecture itself. Our video conferencing app for set-top boxes will consist of several large components and modules:
- Video stream capture
- Audio stream capture
- Network module
- Video/Audio Stream Encoding Module
- Video/Audio Stream Decoding Module
- Displaying a video conference on a screen
- Sound output
- Color transformations
- Several other secondary components
In a simplified form, the architecture can be depicted as follows:

In this article, we will focus on video stream decoding/encoding and possible implementation with the GStreamer framework, as it is one of the critical points in video conferencing app development.
Audio/video stream encoding and decoding
Benefits of GStreamer for video conferencing
As we have already noted, video streaming is one of our bottlenecks. Suppose you have a camera that outputs footage at 30 frames per second at a small resolution of 640×480. In total, it turns out in RGB24: 640 * 480 * 3 * 30 = 27,648,000 bytes per second, i.e., more than 26 megabytes per second, which won’t work for obvious reasons, notably network transmission bandwidth.
One of the solutions is to implement video encoding using some library. As you can guess from the title of this article, our choice fell on the GStreamer framework. Why this particular library? Here are some of its advantages against other solutions:
- Good cross-platform solution with excellent support for Linux and Android.
- On RDK, Gstreamer is an encoding/decoding standard included in the default distribution.
- It supports a wide range of modules, filters, and codecs. For example, FFmpeg that can be used for the same purposes is one of GStreamer’s modules.
- Easy to build a pipeline. It’s easy to create a chain of encoding/decoding, and the pipeline approach enables smooth replacement of codecs, filters, etc. without the need to rewrite the code.
- C/C++ API is included.
- Support of hardware encoders/decoders, in particular the OpenMAX API – a significant thing to work with set-top boxes.
Exploring GStreamer and pipelines
Before proceeding to code review, let’s look at what we can do without it. GStreamer includes useful utilities to work with, in particular:
- gst-inspect-1.0 will allow you to see a list of available codecs and modules, so you can immediately see what will do with it and select a set of filters and codecs.
- gst-launch-1.0 allows you to start any pipeline.
GStreamer uses a decoding scheme where a stream passes through different components in series, from source to sink output. You can choose anything as a source: a file, a device, the output (sink) also may be a file, a screen, network outputs, and protocols (like RTP).
A classic example of playing an mp4 file:
|
1 |
gst-launch-1.0 filesrc location=file.mp4 ! qtdemux ! h264parse ! avdec_h264 ! videoconvert ! autovideosink |
The input accepts the mp4 file, which goes through the mp4 demuxer — qtdemux, then through the h264 parser, then through the decoder, the converter, and finally, the output.
You can replace autovideosink with filesink with a file parameter and output the decoded stream directly to the file.
Programming an application with GStreamer C/C++ API. Let’s try to decode
Now when we know how to use gst-launch-1.0, we are doing the same thing within our application. The principle remains the same: we are building in a decoding pipeline, but now we are using the GStreamer library and glib-events.
We will consider a live example of H264 decoding.
Initialization of the GStreamer application takes place once with the help of
|
1 |
gst_init (NULL, NULL); |
If you want to see what’s happening in detail, you can set up a logging level before the initialization.
|
1 2 |
gst_debug_set_active(TRUE); gst_debug_set_default_threshold(GST_LEVEL_LOG); |
Note: no matter how many pipelines you have in your application, it is enough to initialize gst_init once.
Let’s create a new event-loop where events will be processed:
|
1 2 |
GMainLoop *loop; loop = g_main_loop_new (NULL, FALSE); |
And now we can start building our pipeline. Let’s name the necessary elements, in particular, the pipeline itself as the GstElement type :
|
1 2 3 4 5 6 7 8 9 |
GstElement *pipeline, *source, *demuxer, *parser, *decoder, *conv, *sink; pipeline = gst_pipeline_new ("video-decoder"); source = gst_element_factory_make ("filesrc", "file-source"); demuxer = gst_element_factory_make ("qtdemux", "h264-demuxer"); parser = gst_element_factory_make ("h264parse", "h264-parser"); decoder = gst_element_factory_make ("avdec_h264", "h264-decoder"); conv = gst_element_factory_make ("videoconvert", "converter"); sink = gst_element_factory_make ("appsink", "video-output"); |
Each element of the pipeline is created via gst_element_factory_make, where the first parameter is the type and the second is its conditional name for GStreamer, on which it will later rely (for example, when issuing errors).
It would also be nice to check that all components are found otherwise gst_element_factory_make returns NULL.
|
1 2 3 4 |
if (!pipeline || !source || !demuxer || !parser || !decoder || !conv || !sink) { // one element is not initialized - stop return; } |
We are setting the same location parameter via g_object_set:
|
1 |
g_object_set (G_OBJECT (source), "location", argv[1], NULL); |
Other parameters in other elements can be set in the same way.
Now we need the GStreamer message handler, let’s create the corresponding bus_call:
|
1 2 3 4 5 6 |
GstBus *bus; guint bus_watch_id; bus = gst_pipeline_get_bus (GST_PIPELINE (pipeline)); bus_watch_id = gst_bus_add_watch (bus, bus_call, loop); gst_object_unref (bus); |
gst_object_unref and other similar calls are needed to clear selected objects.
Then we will name the message handler itself:
|
1 2 3 4 5 6 7 8 9 10 11 12 13 14 15 16 17 18 19 20 21 22 23 24 25 26 27 28 29 |
static gboolean bus_call (GstBus *bus, GstMessage *msg, gpointer data) { GMainLoop *loop = (GMainLoop *) data; switch (GST_MESSAGE_TYPE (msg)) { case GST_MESSAGE_EOS: LOGI ("End of stream\n"); g_main_loop_quit (loop); break; case GST_MESSAGE_ERROR: { gchar *debug; GError *error; gst_message_parse_error (msg, &error, &debug); g_free (debug); LOGE ("Error: %s\n", error->message); g_error_free (error); g_main_loop_quit (loop); break; } default: break; } return TRUE; } |
And now the most important thing: we collect and add all the created elements in a single pipeline, which was built through gst-launch. The order of addition is, of course, important:
|
1 2 |
gst_bin_add_many (GST_BIN (pipeline), source, demuxer, parser, decoder, conv, sink, NULL); gst_element_link_many (source, demuxer, parser, decoder, conv, sink, NULL); |
We should also note that this linking of elements works perfectly for stream outputs, but in the case of playback (autovideosink) requires additional synchronization and dynamic linking of the demuxer and parser:
|
1 2 3 4 5 6 7 8 9 10 11 12 13 14 15 16 17 18 19 |
gst_element_link (source, demuxer); gst_element_link_many (parser, decoder, conv, sink, NULL); g_signal_connect (demuxer, "pad-added", G_CALLBACK (on_pad_added), parser); static void on_pad_added (GstElement *element, GstPad *pad, gpointer data) { GstPad *sinkpad; GstElement *decoder = (GstElement *) data; /* We can now link this pad with the sink pad */ g_print ("Dynamic pad created, linking demuxer/decoder\n"); sinkpad = gst_element_get_static_pad (decoder, "sink"); gst_pad_link (pad, sinkpad); gst_object_unref (sinkpad); } |
A dynamic connection makes it possible to determine the type and number of threads in contrast to a static one and will work in some cases when it is required.
And finally, let’s turn the conveyor status into a playback:
|
1 |
gst_element_set_state (pipeline, GST_STATE_PLAYING); |
And let’s run event-loop:
|
1 |
g_main_loop_run (loop); |
After this procedure, everything needs to be cleaned:
|
1 2 3 4 |
gst_element_set_state (pipeline, GST_STATE_NULL); gst_object_unref (GST_OBJECT (pipeline)); g_source_remove (bus_watch_id); g_main_loop_unref (loop); |
Choosing encoders and decoders. Fallbacks.
There’s more to tell about useful but barely mentioned things in the documentation: how you can easily organize a fallback decoder or encoder.
The gst_element_factory_find function will help us do this by checking if we have a codec in the elements factory:
|
1 2 3 4 |
if(gst_element_factory_find("omxh264dec")) decoder = gst_element_factory_make ("omxh264dec", "h264-decoder"); else decoder = gst_element_factory_make ("avdec_h264", "h264-decoder"); |
In this example, we have prioritized the selection of an OMX hardware decoder on the RDK platform, and in case of its absence, we will choose a software implementation.
Another extremely useful but even more rarely used feature is to check what we actually initialized in GstElement (which of many codecs):
|
1 |
gst_plugin_feature_get_name(gst_element_get_factory(encoder)) |
You can do it in such a simple way and return the name of the initialized codec.
Video color models
We can’t help but mention color models as well since we are talking about encoding video from cameras. And that’s when YUV goes on stage (much more often than RGB).
Cameras simply love the YUYV color model. But GStreamer likes to work with the usual I420 model much better. If it is not about outputting in the gl-frame, we will also have I420 frames. Get ready to set up the filters you need and perform the transformations.
Some encoders can work with other color models as well, but more often, these are exceptions to the rule.
We should also note that GStreamer has its own module for receiving video streams from your camera, and it can be used to build a pipeline, but we will talk about it some other time.
Let’s deal with buffers and take data on the fly
Input buffer
It’s time to deal with the data flows. Until now, we have simply encoded through filesrc what is in the file and displayed everything in the same filesink or on the screen.
Now we will work with the buffers and the appsrc / appsink inputs and outputs. For some reason, this issue was hardly taken into account in the official documentation.
So how to organize a constant data flow in the created pipelines, or if to be more precise to the output buffer and get an encoded or decoded output buffer? Let’s say we got the image from the camera and we need to encode it. We have already decided that we need a frame in the I420 format. Let’s say we have it, what’s next? How do I pass a picture through the whole pipeline flow?
First, let’s set up the need-data event handler, which will be started when it is necessary to feed data into the pipeline and start feeding the input buffer:
|
1 |
g_signal_connect (source, "need-data", G_CALLBACK (encoder_cb_need_data), NULL); |
The handler itself has the following form:
|
1 2 3 4 5 6 7 8 9 10 11 12 13 14 15 16 17 18 19 |
encoder_cb_need_data (GstElement *appsrc, guint unused_size, gpointer user_data) { GstBuffer *buffer; GstFlowReturn ret; GstMapInfo map; int size; uint8_t* image; // get image buffer = gst_buffer_new_allocate (NULL, size, NULL); gst_buffer_map (buffer, &map, GST_MAP_WRITE); memcpy((guchar *)map.data, image, gst_buffer_get_size( buffer ) ); gst_buffer_unmap(buffer, &map); g_signal_emit_by_name (appsrc, "push-buffer", buffer, &ret); gst_buffer_unref(buffer); } |
You might say that “image” is the pseudo-code of our image buffer in I420.
Next, we create a buffer of the necessary size through gst_buffer_new_allocate, which will correspond to the size of the image buffer.
With gst_buffer_map we set the buffer to write mode and use memcpy to copy our image to the created buffer.
And finally, we signal GStream that the buffer is ready.
Note: it is essential to use gst_buffer_unmap after writing and to clear the buffer after using gst_buffer_unref. Otherwise, there will be a memory leak. In the low number of available examples, no one was particularly concerned about memory usage, although this is very important.
Now, when we are done with the handler, one more thing to do is to configure caps on the receipt of our expected format.
This is done before installing the need-data signal handler:
|
1 2 3 4 5 6 7 8 9 10 11 12 |
g_object_set (G_OBJECT (source), "stream-type", 0, "format", GST_FORMAT_TIME, NULL); g_object_set (G_OBJECT (source), "caps", gst_caps_new_simple ("video/x-raw", "format", G_TYPE_STRING, "I420", "width", G_TYPE_INT, 640, "height", G_TYPE_INT, 480, "framerate", GST_TYPE_FRACTION, 30, 1, NULL), NULL); |
Like all GstElement parameters, the parameters are set via g_object_set.
In this case, we have defined the stream type and its caps — the data format. We are specifying that the appsrc output will receive the I420 data with 640×480 resolution and 30 frames per second.
Frequency in our case, and in general, does not play any role. While working, we haven’t noticed that GStreamer somehow limits need-data calls by frequency.
Finished, now our frames are fed into the encoder.
Output buffer
Now let’s find out how to get an encoded output stream.
We connect the handler to the sink pad:
|
1 2 3 |
GstPad *pad = gst_element_get_static_pad (sink, "sink"); gst_pad_add_probe (pad, GST_PAD_PROBE_TYPE_BUFFER, encoder_cb_have_data, NULL, NULL); gst_object_unref (pad); |
Similarly, we connected to another sink pad event, GST_PAD_PROBE_TYPE_BUFFER, which would be triggered as the data buffer enters the sink pad.
|
1 2 3 4 5 6 7 8 9 10 11 12 13 14 |
static GstPadProbeReturn encoder_cb_have_data (GstPad * pad, GstPadProbeInfo * info, gpointer user_data) { GstBuffer *buf = gst_pad_probe_info_get_buffer (info); GstMemory *bufMem = gst_buffer_get_memory(buf, 0); GstMapInfo bufInfo; gst_memory_map(bufMem, &bufInfo, GST_MAP_READ); // bufInfo.data, bufInfo.size gst_memory_unmap(bufMem, &bufInfo); return GST_PAD_PROBE_OK; } |
The callback has a similar structure. Now, we need to reach the buffer memory. First, we get GstBuffer, then a pointer of its memory using gst_buffer_get_memory by index 0 (as a rule, it is the only one involved). Finally, using gst_memory_map, we get the data buffer address bufInfo.data and its size bufInfo.size.
In fact, we have achieved the goal of getting a buffer with encoded data and its size. So, we reviewed the key and most exciting components of our Zoom-like video conferencing application for Smart TV and set-top boxes: architecture, encoding/decoding modules with GStreamer, input/output buffers, and color transformations used.
For digital TV operators, such a software platform can become a new subscriber service. And for us, engineers, this is an interesting new embedded project for implementing different STBs based on RDK, Linux, and Android. As for everybody else, this is an opportunity to spend time together watching movies and sports matches, playing sports, and meeting with loved ones during the COVID-19 quarantine or remote work.
This idea with video conferencing service on Smart TV can be further developed, both in terms of engineering solutions and business scenarios. So feel free to share your thoughts in the comments below.

Jean-Luc started CNX Software in 2010 as a part-time endeavor, before quitting his job as a software engineering manager, and starting to write daily news, and reviews full time later in 2011.
Support CNX Software! Donate via cryptocurrencies, become a Patron on Patreon, or purchase goods on Amazon or Aliexpress


I went through all these steps myself and would have been hapy to have such a summary.
Thank you for sharing this insight.
Very nice article! It’s good to see people talking about video products and how they can take advantage of open/libre ecosystems.
Thank you for this article !