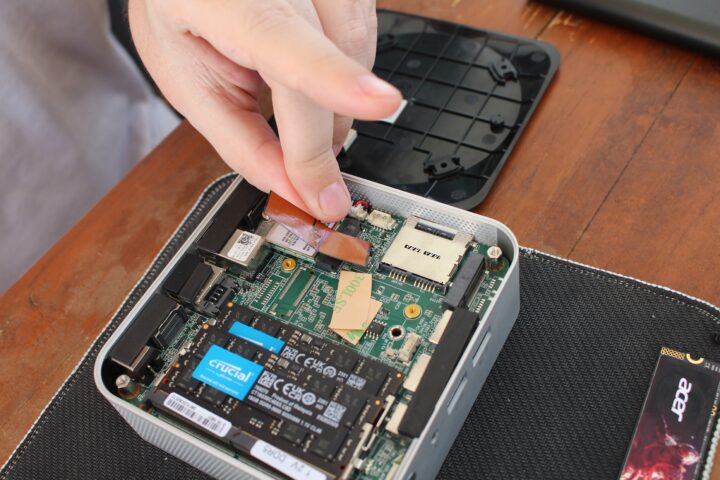
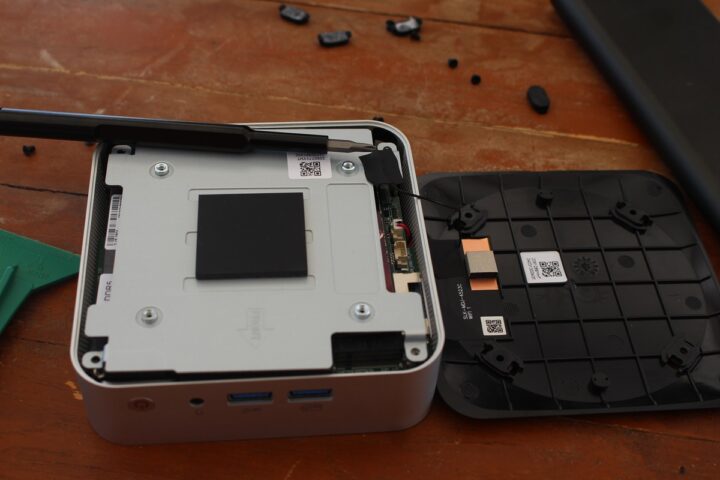
In this short tutorial, we’ll show how to repair/replace a WiFi antenna in a mini PC. We’ll use GEEKOM A8 Mini PC as a test device because one of its WiFi antennas is attached to the top plastic cover, and it may potentially get damaged when the user opens the case to change or upgrade the SSD or memory sticks.
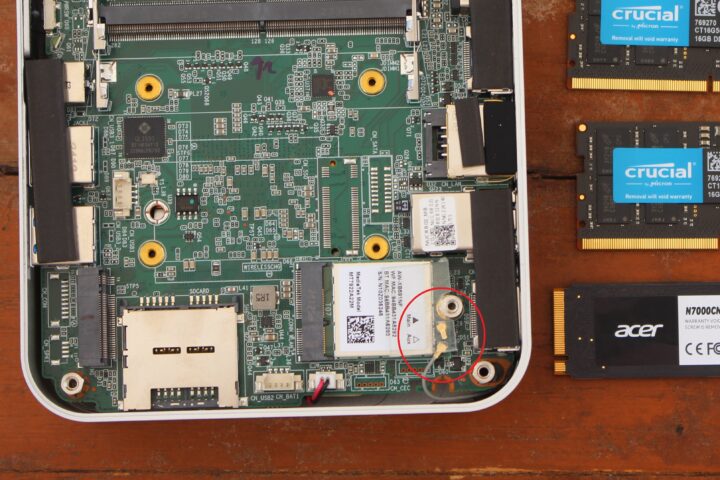
This happened to us during the teardown of the GEEKOM A8 mini PC as shown in the image below. While WiFi still works with one antenna, the performance is quite better when two antennas are connected so we decided to repair the mini PC.
We asked a few local shops, but they would only sell WiFi modules with antennas and none would just sell the antennas themselves. But luckily, such WiFi antennas can easily be purchased online in pairs.
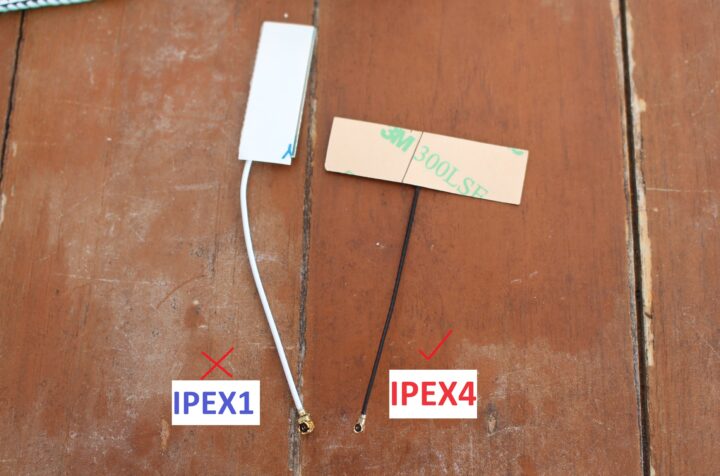
The first time, we purchased a WiFi antenna pair from Shopee (an Aliexpress equivalent in Thailand) seeing it would work with WiFi modules installed in mini PCs and laptops. But the antenna we purchased comes with an IPEX1 connector which is not compatible with the MediaTek module found in the GEEKOM A8, and require an antenna with a smaller IPX4/MHF4 connector as shown below.
So readers should first find out which model of antenna they need for their specific model.
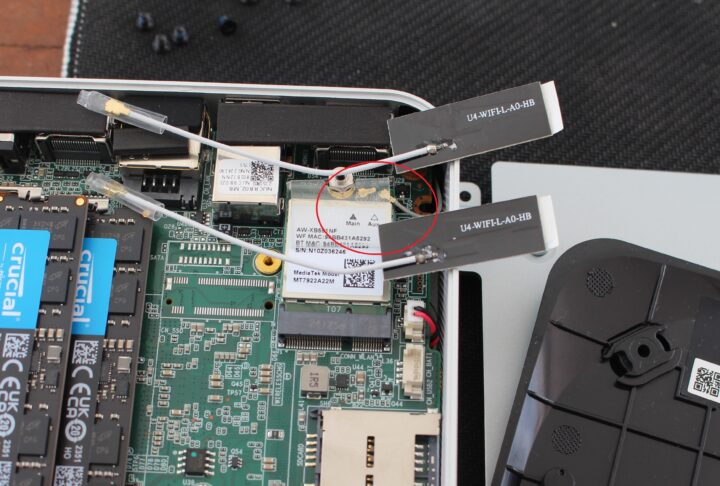
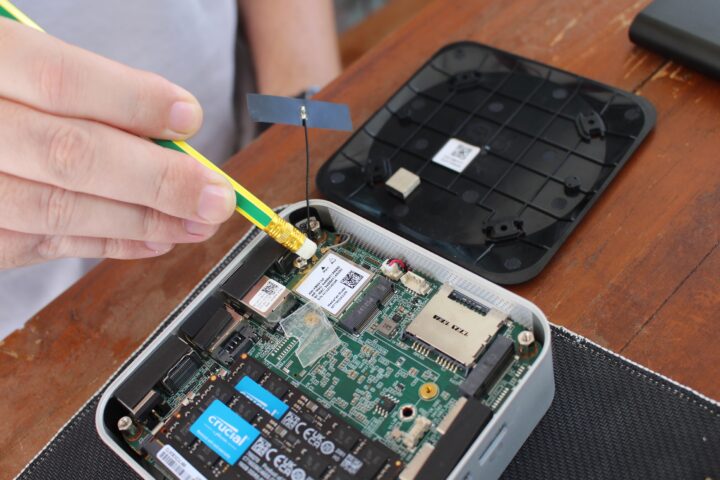
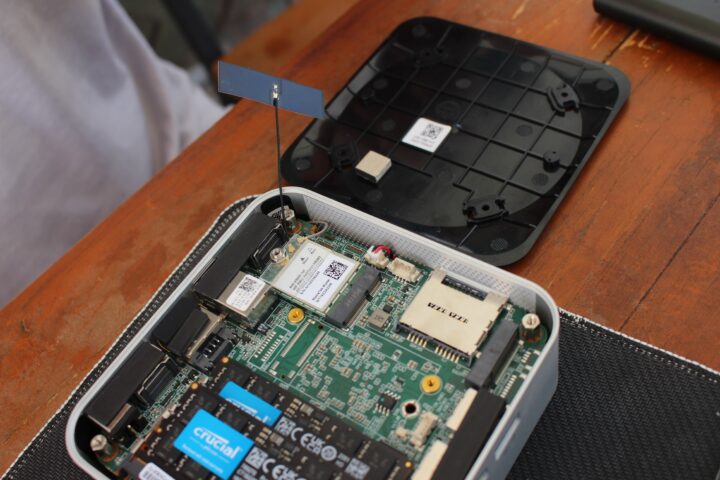
Now that we have an IPEX4 antenna, let’s install it. We’ll first need to remove the protective transparent plastic bit that covers the antenna connectors before inserting the IPEX4/MHF4 antenna using a pencil with an eraser to help push it in. We are using a pencil with an eraser because it allows us to gently insert the connector as I previously damaged a few antenna connectors using other methods (using a screwdriver to push it in).
Now that the new antenna is installed, we can put the plastic cover back in place.
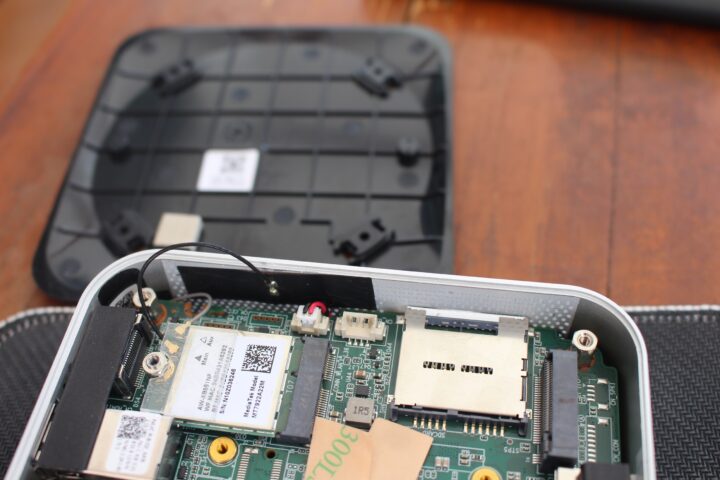
We now need to attach the antenna to the case. We won’t attach it back to the bottom cover due to the risk of breaking it again. We’ll first peel off the 3M protective film from the antenna and place it on one of the sides of the mini PC’s enclosure. Note that it works because the case is made of plastic, and if we had a metal case it could potentially block the signal.
The photo below shows the new antenna attached to the side of the mini PC.
That’s all. We fixed the GEEKOM A8 mini PC and we now have 2 antennas connected to the WiFi module for optimal wireless performance.
CNXSoft: This tutorial is a translation – with a few additional insights – of the original article on CNX Software Thailand by Suthinee Kerdkaew.

Jean-Luc started CNX Software in 2010 as a part-time endeavor, before quitting his job as a software engineering manager, and starting to write daily news, and reviews full time later in 2011.
Support CNX Software! Donate via cryptocurrencies, become a Patron on Patreon, or purchase goods on Amazon or Aliexpress. We also use affiliate links in articles to earn commissions if you make a purchase after clicking on those links.




I don’t know if this is part of the standard, but it has been my experience that mPCI-E wireless cards have IPEX1 conectors while M.2 wireless cards use IPEX4.