Google I/O started yesterday, and Google released an early access preview version of Android Studio, a new IDE based on IntelliJ IDEA with drag-and-drop GUI layout editor, Gradle-based build system, Lint tools, the ability to preview how apps look on different screen sizes, and more. This may eventually replace the Eclipse + ADT Plugin combination currently used, so I’ve decided to give it a try in Ubuntu 13.04 64-bit, but it’s also available for Windows and Mac OS X.
First, head over to Android Studio Installation instructions, and download Android Studio for you operating system via your Browser (You’ll have to accept an EULA), then open a terminal to extract it:
|
1 |
tar xvf ~/Downloads/android-studio-bundle-*.tgz |
Now let’s start Android Studio:
|
1 2 3 4 5 6 7 8 9 10 11 12 |
cd android-studio/bin/ ./studio.sh OpenJDK Runtime Environment (IcedTea 2.3.9) (7u21-2.3.9-1ubuntu1) OpenJDK 64-Bit Server VM (build 23.7-b01, mixed mode) OpenJDK 64-Bit Server VM (build 23.7-b01, mixed mode) WARNING: You are launching the IDE using OpenJDK Java runtime. ITS KNOWN TO HAVE PERFORMANCE AND GRAPHICS ISSUES! SWITCH TO THE ORACLE(SUN) JDK BEFORE REPORTING PROBLEMS! NOTE: If you have both Oracle (Sun) JDK and OpenJDK installed please validate either STUDIO_JDK, JDK_HOME, or JAVA_HOME environment variable points to valid Oracle (Sun) JDK installation. See http://ow.ly/6TuKQ for more info on switching default JDK. Press Enter to continue. |
And I did press enter to continue, but Android Studio complained about JAVA_HOME no being defined. Let’s just install Sun Oracle JAVA JDK since this is the recommended method. I’ve used the instructions provided on Mark Loiseau blog to do so.
Download the latest Sun Oracle Java JDK (now 7.21u) from http://www.oracle.com/technetwork/java/javase/downloads/index.html. For Ubuntu 64-bit, select jdk-7u21-linux-x64.tar.gz.
Let’s install, and configure the system to use the JAVA JDK
|
1 2 3 4 5 6 7 |
tar xzvf ~/Downloads/jdk-7u21-linux-x64.tar.gz sudo mv jdk1.7.0_21/ /usr/lib/jvm/ sudo update-alternatives --install /usr/bin/java java /usr/lib/jvm/jdk1.7.0_21/bin/java 1 sudo update-alternatives --install /usr/bin/javac javac /usr/lib/jvm/jdk1.7.0_21/bin/javac 1 sudo update-alternatives --install /usr/bin/javaws javaws /usr/lib/jvm/jdk1.7.0_21/bin/javaws 1 sudo update-alternatives --config java sudo update-alternatives --config javaws |
This should be it, let’s confirm we’re using the right version:
|
1 2 3 4 |
java -version java version "1.7.0_21" Java(TM) SE Runtime Environment (build 1.7.0_21-b11) Java HotSpot(TM) 64-Bit Server VM (build 23.21-b01, mixed mode) |
I also had to install some extra dependencies to workaround issues with adb when running the application:
|
1 |
apt-get install lib32ncurses5 ia32-libs |
Let’s start Android Studio again with ./studio.sh
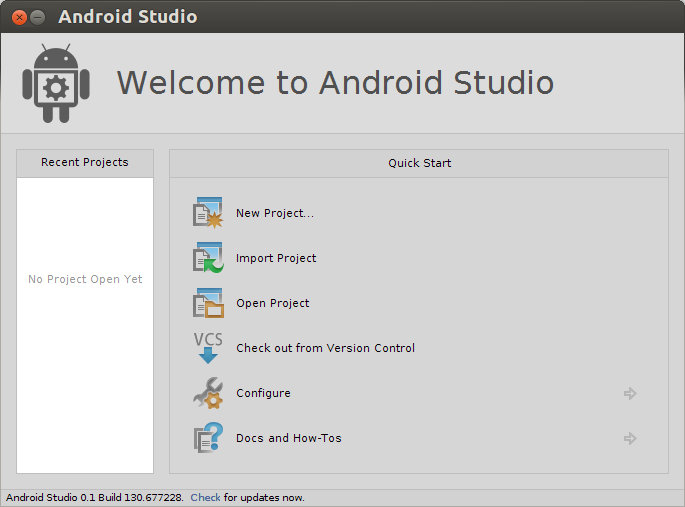
Success! If you already have project based on Eclipse, Google Provides instructions to migrate your Eclipse apps to Android Studio, but today, let’s just start a New Project.
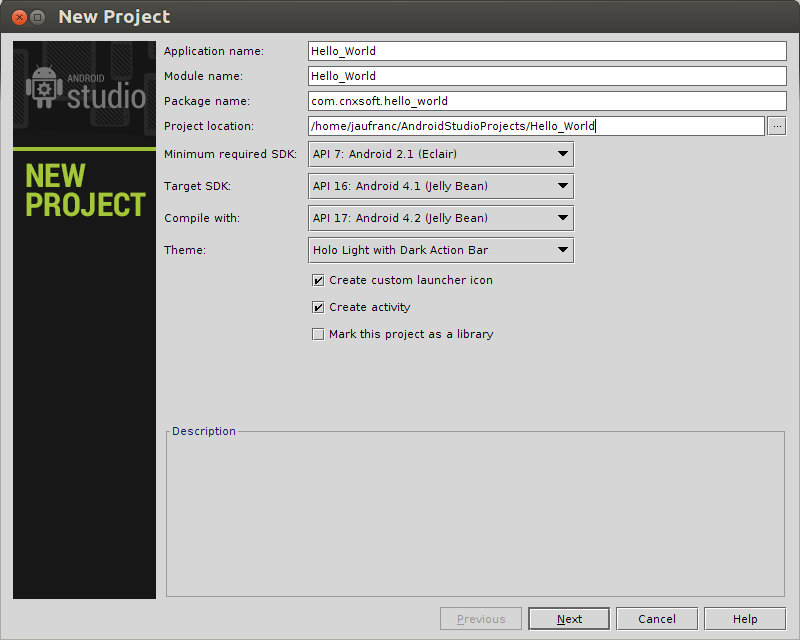
You’ll just need to provide an application name (e.g. Hello_World), and change the Package Name (replace com.example by your own) to remove a warning, and click on Next. There are several options in the wizard, but I’ve just clicked on Next several times to complete the creation of the new project. The first time will take some time since Android Studio will download, install and configure Gradle build system.
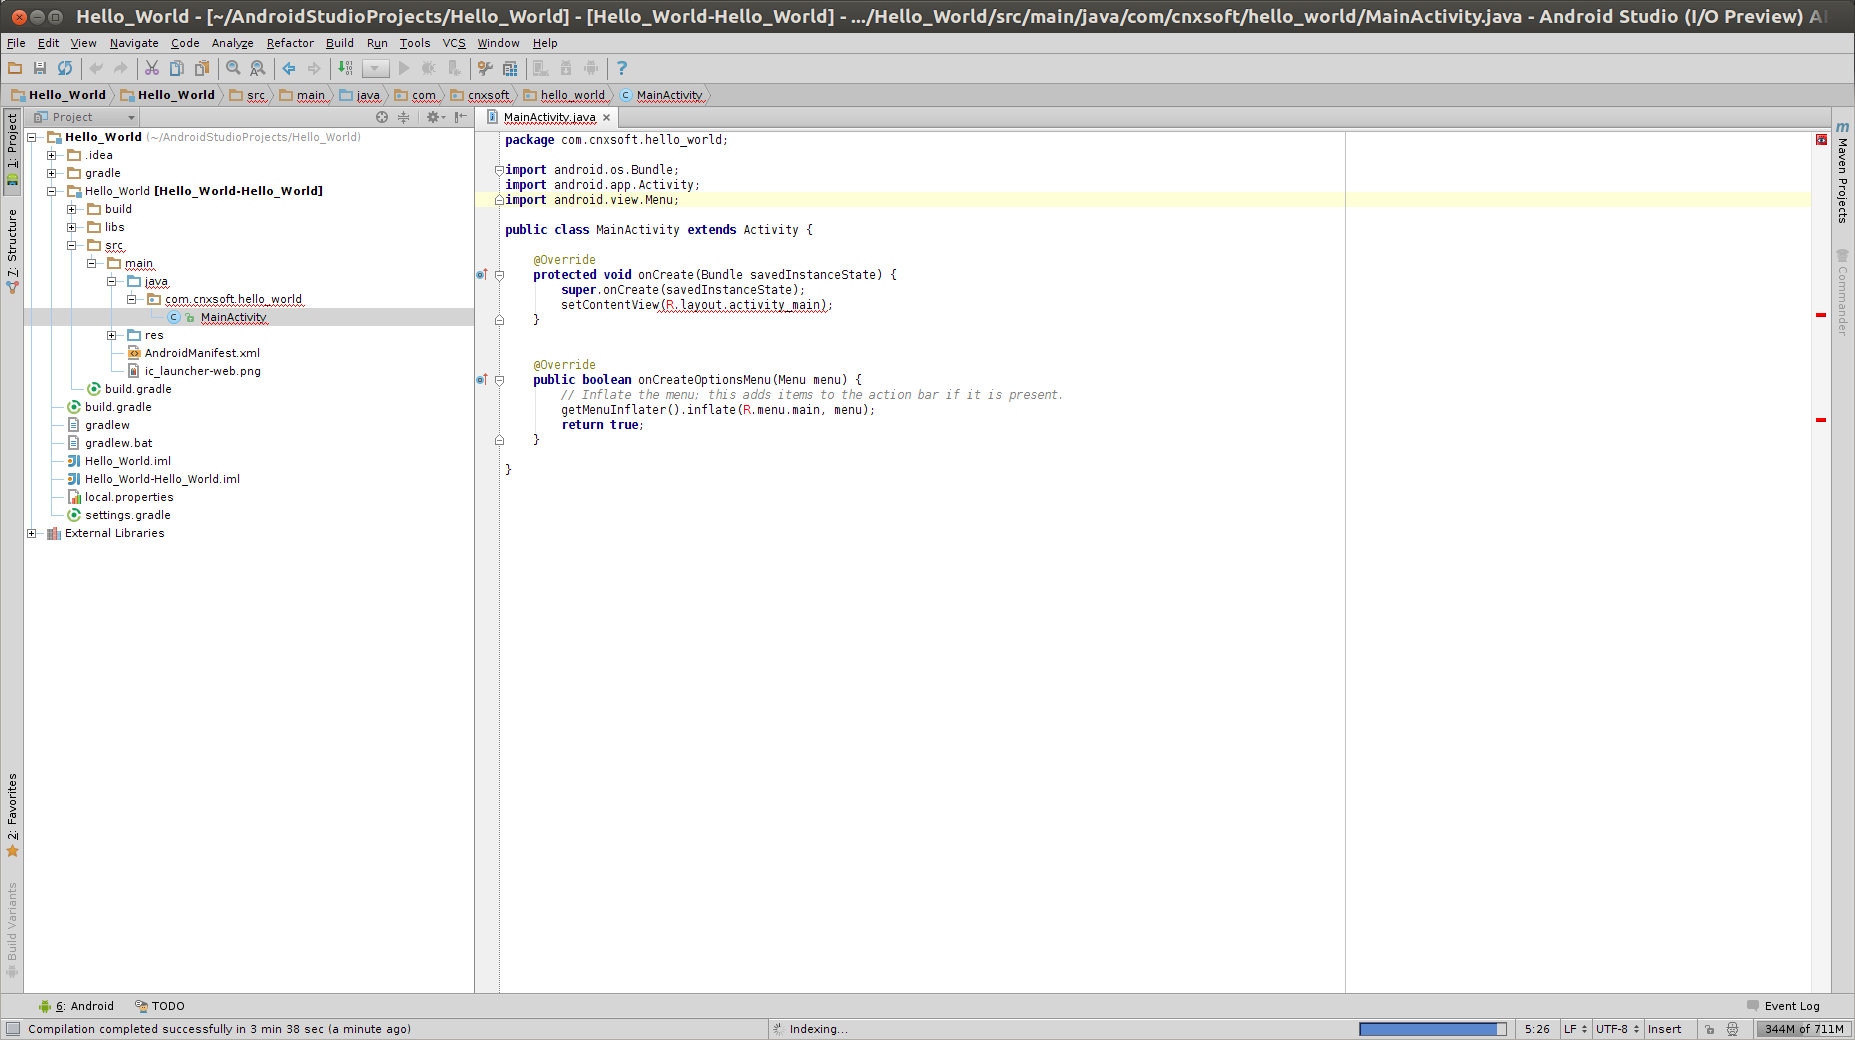
Now just open the “MainActivity” as shown below to see the source code.
Edit the code as follows (Changes highlighted in green):
|
1 2 3 4 5 6 7 8 9 10 11 12 13 14 15 16 17 18 19 20 21 22 23 24 25 |
package com.cnxsoft.hello_world; import android.os.Bundle; import android.app.Activity; import android.view.Menu; <span style="color: #008000;">import android.widget.TextView;</span> public class MainActivity extends Activity { @Override protected void onCreate(Bundle savedInstanceState) { super.onCreate(savedInstanceState); setContentView(R.layout.activity_main); <span style="color: #008000;">TextView tv = new TextView(this); tv.setText("Hello, Android"); setContentView(tv);</span> } @Override public boolean onCreateOptionsMenu(Menu menu) { // Inflate the menu; this adds items to the action bar if it is present. getMenuInflater().inflate(R.menu.main, menu); return true; } } |
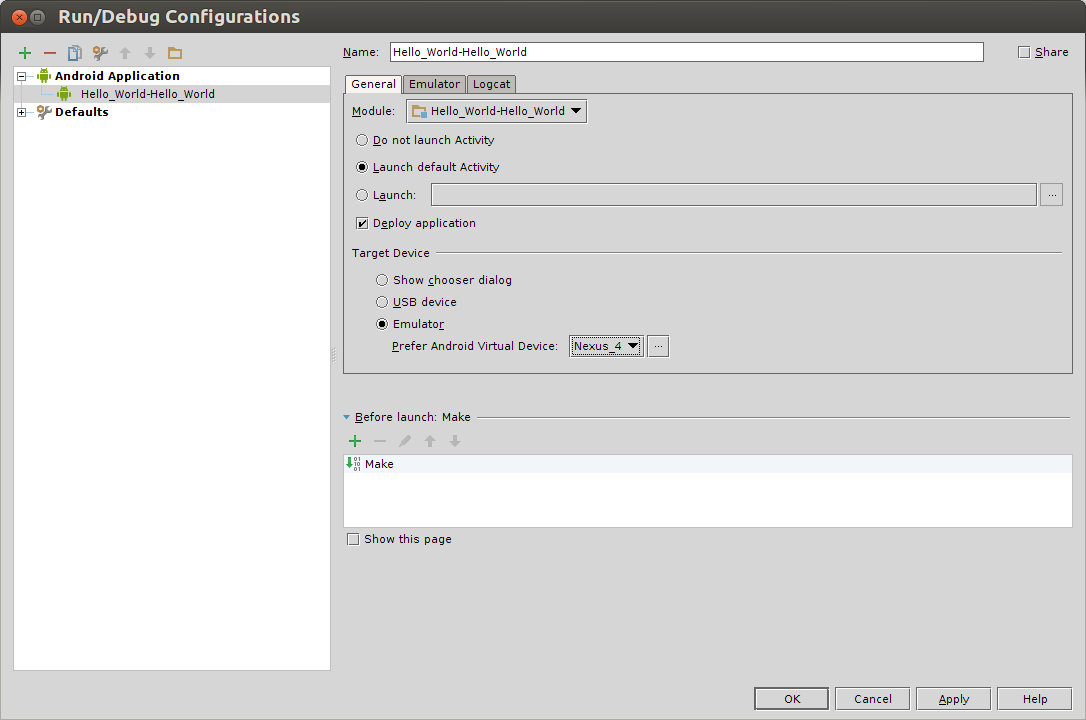
I’ll use the emulator for this hello world example, so we need to configure Android Studio to use it. Click on Run->Edit Configuration, select emulator, and create a Android Virtual Device by clicking on … (e.g. Nexus 4), and click OK.
Time to run the application by pressing the Run icon (green triangle) or pressing Shift+F10. Now be a little patient, and after a while, you should see “Hello, Android” displayed in the Emulator.

Further information is available in Android Studio Tips and Tricks page.

Jean-Luc started CNX Software in 2010 as a part-time endeavor, before quitting his job as a software engineering manager, and starting to write daily news, and reviews full time later in 2011.
Support CNX Software! Donate via cryptocurrencies, become a Patron on Patreon, or purchase goods on Amazon or Aliexpress. We also use affiliate links in articles to earn commissions if you make a purchase after clicking on those links.


You are so fast 🙂 Tired after staying up night watching google i/o live.
@Tom Cubie
I did not stay up all night, so this morning I had the energy to try it, and it went relatively smoothly. 🙂
hey nice article
i have try to install android studio on my machine ubuntu 10.10 but its giving me an error “no project to open” what to do???
Hi! very useful thanks but i have a ugly issue:
i got this erro:
ERROR: Cannot start Android Studio\nNo JDK found. Please validate either STUDIO_JDK, JDK_HOME or JAVA_HOME environment variable points to valid JDK installation.
when run studio.sh.
$ java -version
java version “1.7.0_19”
OpenJDK Runtime Environment (fedora-2.3.9.3.fc18-i386)
OpenJDK Server VM (build 23.7-b01, mixed mode)
?!!
again thanks
@curious_mind
Do you get that when you create a new project?
@hertkof
Maybe you just need to set STUDIO_JDK, JDK_HOME and JAVA_HOME environment variables.
You have to use oracle java.
@emmanuel frecon
Yes, you’re right. Sun got bought by Oracle a while ago. I’ll change the name.
When it comes to this step:”and create a Android Virtual Device by clicking on … (e.g. Nexus 4), and click OK.”
I clicked the … button, but nothing happens.
Can you tell me why? Thanks so much.
@SmilingSun
Problem solved.
It turned out to be that /opt/android-studio/sdk/tools/android does not have enough permission.
This message showed up at the status bar of the Android Studio.
@hertkof I had to remove openjdk. Be warned though this is remove LibreOffice if you use that software.
I am also not able to install iit in my android ubantu. I am not getting any error message. It just stops itself after some time of processing.
is there a way to turn on layout preview? I looked everywhere but couldn’t seem to find it
@yuechuan
Just open a layout file, and the previewer will open automatically.
Hope that the fonts rendering is better then IntelliJ IDEA cause this last one has an ugly render…
This was such a great help and I can honestly say I wouldn’t have managed it without this.
However, I am quite a n00b here, my drop-down for the emulated device contains no devices. How do I import device spec files or whatever it is that I need?
Thanks
@Olliexz
Figured it out, just the little ellipsis next to the drop-down, creating and importing the phone and saving it. *Face-palm*
Now it keeps “Waiting for ADP” and it won’t load, I keep on clicking “Wait More” but to no avail.
@Olliexz
I had the same problem, but installing the necessary packages
apt-get install lib32ncurses5 ia32-libs
fixed the issue. If it does not work, you need to check the messages in the terminal where you’re running ./studio.sh to look for clues.
@cnxsoft
Dude, you are a legend.
You have my Facebook “like” and my G+ “follow”.
@Tom Cubie
thanks for the tutorial, up and running – the missing dep’s had me scratching my head for a little bit
hello friend good day!
managed to install android studio thanks to your tutorial. But I was with a doubt over the shortcut icon.
How do I create a shortcut icon to put the slash in the ubuntu?
thank you.
@Androidzz
Just like any shortcut you would create in Ubuntu. Create a shortcut to studio.sh.
@akbar
Gradle:
FAILURE: Build failed with an exception.
* What went wrong:
Execution failed for task ‘:eds:processDebugResources’.
> Cannot run program “/usr/bin/android-studio/sdk/build-tools/android-4.2.2/aapt”: error=2, No such file or directory
* Try:
Run with –stacktrace option to get the stack trace. Run with –info or –debug option to get more log output.
Pavan @(pavanh)
Hi very nice tutorial , very detailed and explanatory and helpful for beginners
tks!!
My build failed due to the following reason :
Gradle: Execution failed for task ‘:Hello_world:mergeDebugResources’.
> java.io.IOException: Cannot run program “/usr/share/applications/android-studio/sdk/build-tools/android-4.2.2/aapt”: error=13, Permission denied
can you help to resolve it
@hertkof
Hi I got similar error the first time I execute ./studio.sh after decompression.
How do you solve this problem? install sun/oracle java?
thanks bro 🙂
Hi! Nice tutorial :] Was so helpful :]
I got error…Cannot launch SDK manager
I had 32-bit Oracle JDK6 installed in my 64-bit Ubuntu. While starting Android Studio, I got java.lang.NoClassDefFoundError: Could not initialize class sun.awt.DebugHelper
I solved this by installing the package libxtst6:i386
sudo apt-get install libxtst6:i386
chmod +x /usr/bin/java