Texas Instruments Tiva C Series TM4C1294 Connected LaunchPad is an evaluation kit for the Internet of things with a Cortex-M4 MCU (Tiva TM4C1294), an Ethernet port, and USB interfaces for power and debugging. At $19.99 including shipping via Fedex, it’s one of the cheapest ways to get devices online. I’ve purchased one via TI e-Store, and already received it. I’ll post some pictures of the kit, go through the Quick Start Guide, and provides links to resources to go further.
EK-TM4C1294XL Connected LaunchPad Unboxing
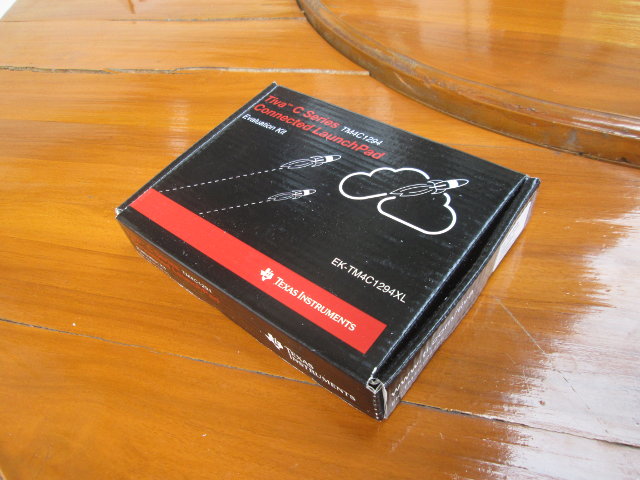
I’ve received the kit in the package below with feature a QR Code linking to http://www.ti.com/launchpad, as well basic specifications (refer to my previous post for specs), list of tools (Code composer studio, Tivaware, Keil, IAR…) and package content.
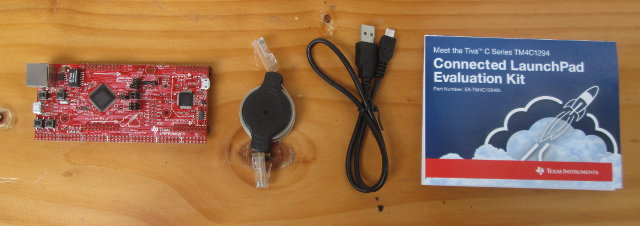
In the box we’ve got the board itself, a retractable Ethernet cable, a USB to micro USB cable for power and debugging, and Connect LaunchPad Quick Start Guide.
The Quick Start Guide describes the boards, the different pin on header, and how to get started. You can find both sides of the document here and here.
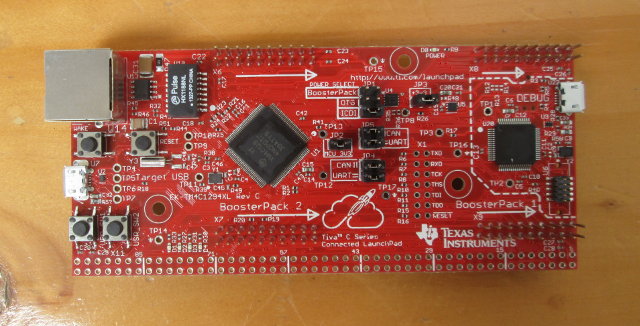
A closer look at the board shows the Ethernet port, a micro USB port, two user’s buttons as well as wake & reset button on the left, the MCU is in the middle, and the debug part on the right of the board with another micro USB port. Close to the MCU, you also have several jumpers to select the power source (ICDI (In-Circuit Debug Interface), OTG, and Boosterpack), as well as some selections for CAN and UART. At the bottom you’ve got a breadboard area, and there are also 4 Boosterpack headers (male) on the board.
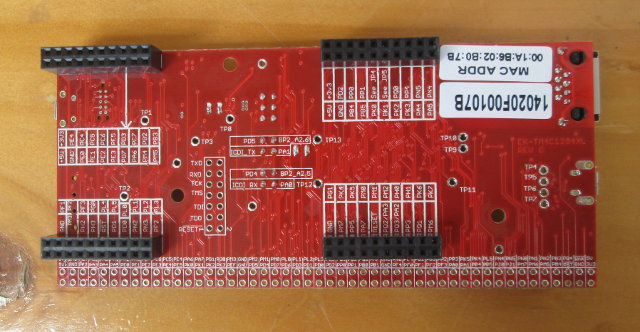
On the back of the board we’ve got the female headers for the BoosterPacks and description, as well as the MAC Address.
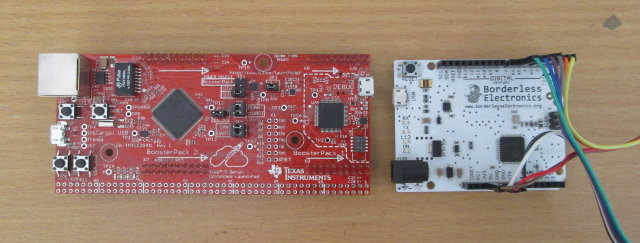 The first time I open the box, I felt the board to be larger than I expected. The above photo shows the Connected LaunchPad next to an Arduino Leonardo clone.
You could also watch the unboxing video.
Getting Started with Tiva C Series (EK-TM4C1294XL) Connected LaunchPad
The board is preloaded with an application that connected to a Cloud based platform called Exosite. The very first thing you need to do is to register your board via ti.exosite.com. This requires registration, and you can also use you Google+ or Yahoo account for this process. After login, go to Click here to add a new device to your portal, click “Select a supported device below”, and “EK-TM4C1429XL Connected LaunchPad”.
Click continue to enter the MAC Address (found at the back of the board), a device name, and the device location as shown on the screenshot below.
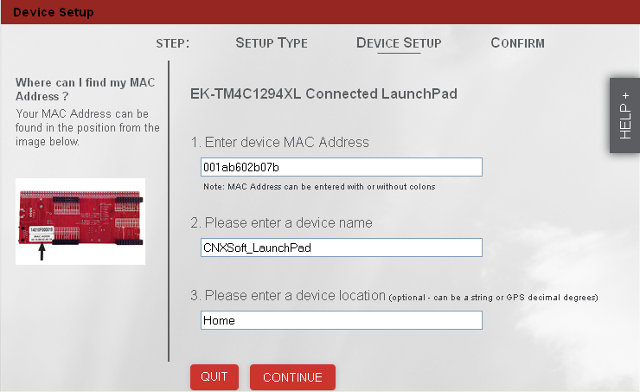 Click Continue and confirm at the next step. The device setup is completed at this stage.
This following step is optional to get started, but if you want to access the serial console, you’ll need to install drivers. It appears many of the tools are available for Windows and Linux (CCS and TivaWare), but the Quick Start Guide mentions a Windows PC is required, so that’s what I used. You’ll need to download Stellaris ICDI Drivers and extract spmc06.zip yo your computer.
Then connect the Ethernet cable between your board and your hub/router, and the micro USB to USB cable between the board and your Windows PC, which should then detect a new hardware. Select to install your own drivers, and select the path “spmc016\stellaris_icdi_drivers”. This will install “Stellaris Virtual Serial Port“. After this is complete, Windows will still detect a new hardware again, twice, repeat the steps above to install “Stellaris ICDI DFU Device” and “Stellaris ICDI JTAG/SWD Device“. If case you have issues, you can check the full instructions (PDF).
Now you can go to the Device Manager, to check installation is complete, and the serial port number, COM7 in my case.
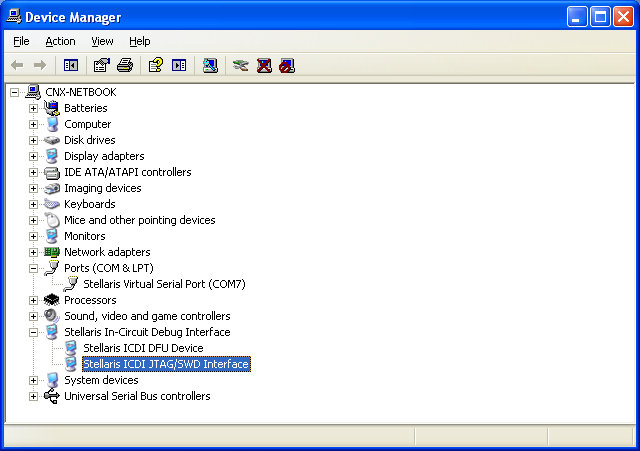
You can now start Putty or Hyperterminal, and setup a 115,200 baud 8N1 connection on your COM port to access the serial port.
Let’s go back to ti.exosite.com. Under “Device List”, click on your device to connect to it, and interact with the dashboard.
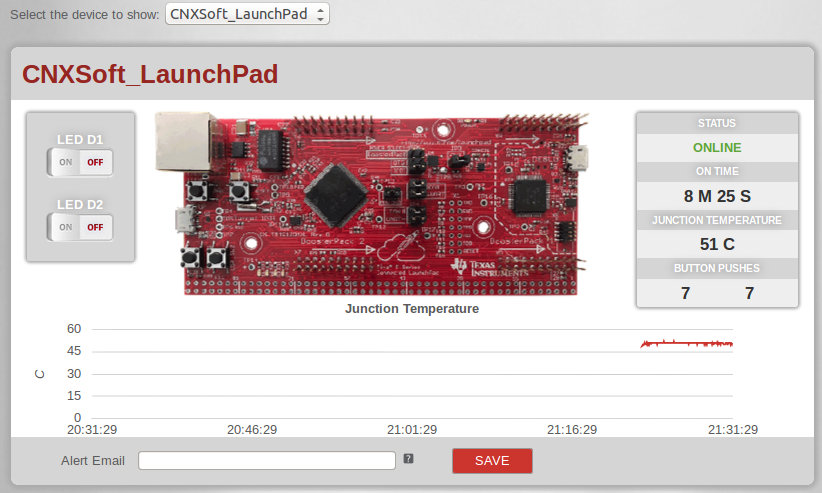 It will show the Junction temperature, update counters when you press the user’s buttons, and turn on and off two LEDs on your board. The response time was very slow when I tested it maybe 5 to 10 seconds. My Internet connection might be in cause, or the refresh rate of the dashboard.
The portal will also show a map with other Connected LaunchPad around the world (over 300 at the time of my connection), and a game of Tic-Tac-Toe using you board (which I haven’t tried). You can check the full website screenshot.
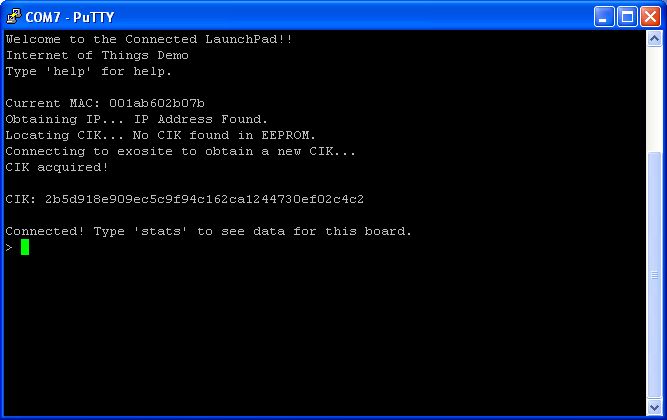
When you start the board for the first time, and connect to Exosite you can see the following log.
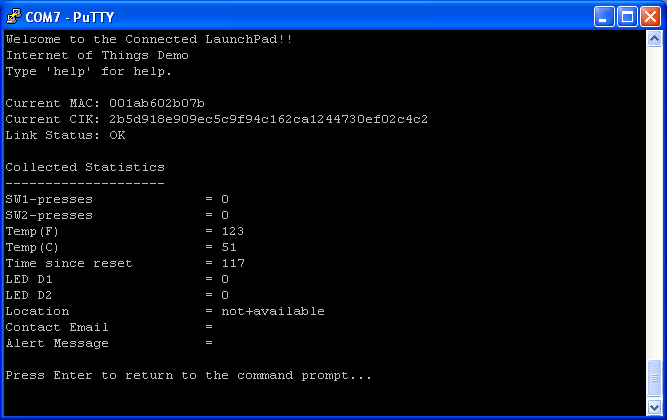
 And if you type “stats”, you’ll basically get what you can see from the Exosite dashboard.
 That’s all for the first steps with Tiva Connected LaunchPad. Texas Instruments also has uploaded a 5-minute video showing the Quick Start Guide steps.
Going further
Texas Instruments redirect developers to www.ti.com/tool/ek-tm4c1294xl to access the software, drivers, and documentation, to start with “Project 0” at www.ti.com/tiva-c-launchpad which for this board is Hello Blinky. The project requires the use of Code Composer Studio (SW-EK-TM4C1294XL-CCS), TivaWare (SW-EK-TM4C1294XL), and the ICDI drivers installed previously which you can get via http://www.ti.com/tool/sw-ek-tm4c1294xl. Please note that the download will require you to go through a ridiculous “U.S. Government export approval” form, but I got accepted immediately after application. During installation of CCS you may want to select a custom install, selecting “Tiva C Series ARM MCUs” only to avoid a large download and installation. I haven’t gone further for now due to lack of time. Beside CCS, Keil, Mentor Embedded and IAR Systems IDEs can support the board, and TI Tiva C Series MCUs.
It may also be worthwhile going through “Creating IoT Solutions with the TM4C1294XL Connected LaunchPad Workshop” with provides an introduction of CCS, TivaWare, and should go through all the MCU peripherals via sample code.
There are at least two other third party software tools:
- Exosite
Shortly after you’ve registered your device on ti.exosite,com, you will receive an email from Exosite, directing you to development resources to use something than just the default pre-loaded app:- Developer Information / Forum / Support :: http://support.exosite.com
- One Platform APIs :: https://github.com/exosite/api
- Developer Libraries :: https://github.com/exosite-labs
- Example Projects :: https://github.com/exosite-garage
- Energia – Open source code editor based on the Wiring and Arduino framework

Jean-Luc started CNX Software in 2010 as a part-time endeavor, before quitting his job as a software engineering manager, and starting to write daily news, and reviews full time later in 2011.
Support CNX Software! Donate via cryptocurrencies, become a Patron on Patreon, or purchase goods on Amazon or Aliexpress. We also use affiliate links in articles to earn commissions if you make a purchase after clicking on those links.


Hello CNXSoft,
And THANK YOU VERY MUCH for the information on this website about the Tiva C Series (EK-TM4C1294XL) Connected LaunchPad. I have just today purchased one of these boards and it should arrive on Tuesday. Your site here will be a valuable resource to me as I integrate the Tiva C Series (EK-TM4C1294XL) Connected LaunchPad into my present product developmental setup. I hope I may be able to feed something back to you which might be helpful to your enterprise. I first encountered your site a few months ago and it then alerted me to the EXCELLENT Tiva C Series (EK-TM4C1294XL) Connected LaunchPad for the first time and decided me to purchase it – TI owe you guys some commission …………………. !!
Regards,
John O’Connor