
Karl here. Today we are going to look at 2 new and one older Sonoff devices.
- Sonoff RF Bridge – $9.90 433MHz RF to WiFi Bridge
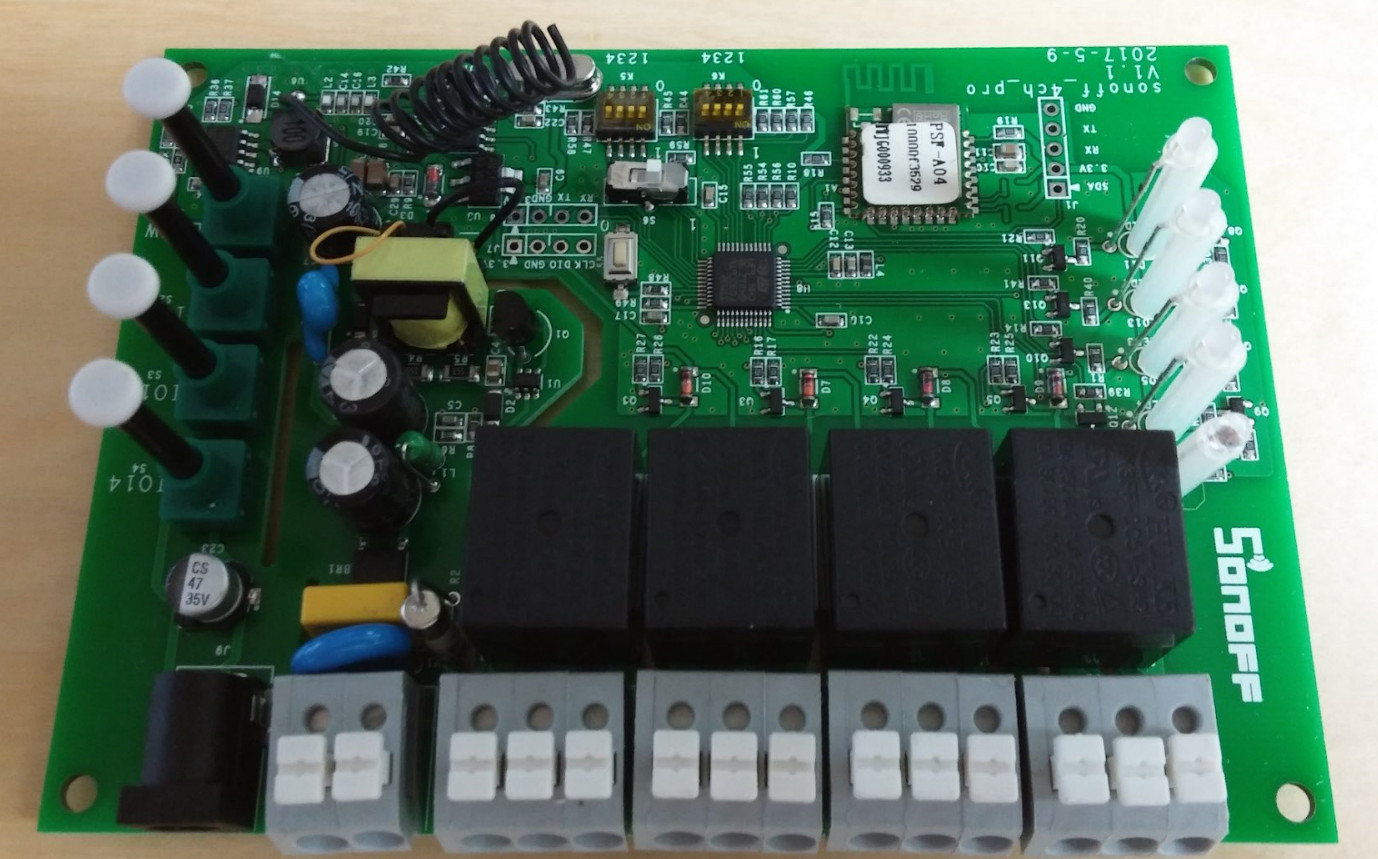
- Sonoff 4ch Pro – 4 Gang WiFi RF Smart Switch
- Sonoff POW – Wireless switch with power metering capabilities
I spent very little time with the stock firmware on the device. I don’t like the fact that an Internet connection is needed, and I am not in control. As of the time of this writing I found the Ewelink was not configurable enough to meet my needs. There is one feature that is really nice that I could easily see keeping stock firmware. It is the Alexa Skill. It worked. I am also currently reviewing Vobot Smart Alarm Clock with Alexa integration and had no trouble controlling the Sonoff devices with Alexa. But unfortunately I am lazy and want everything automatic so I can’t keep it. With the RF bridge I was unable to trigger a light from a motion sensor. In comes Arendst ‘s Sonoff-Tasmota firmware to the rescue. It gets better all the time. It is dead simple, and so configurable now. He continues to add features and devices.
RF Bridge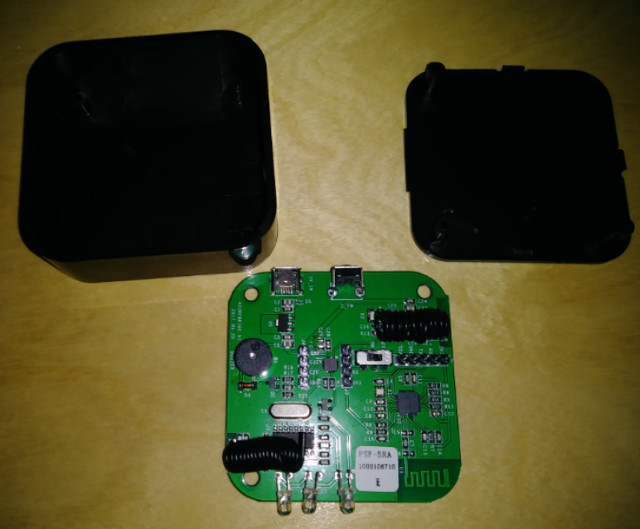
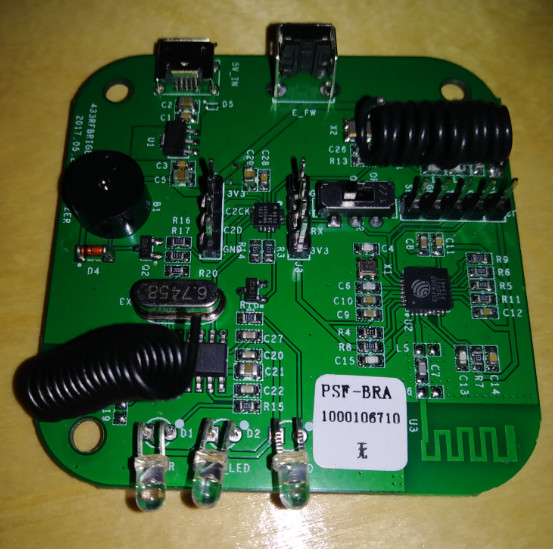
You may have seen my previous article building a 433toMQTTto433 bridge to use cheap 433mhz devices. I never did build a case for it, and it’s a little bit of an eyesore. When I found out about a nicely packaged one, I was excited to check it out. Like I stated previously, it didn’t work as I anticipated and was glad when I found out Arendst got one as well. He has a good wiki with on the github page and all the needed information to flash and configure so I won’t go into it. It flashed uneventfully. I was a little scared by the design that it was only going to be able to receive 16 individual codes and pass onto MQTT but that is not the case. It passes everything it receives. You can only send 16 different codes right now which need to be saved ahead of time. So after monitoring the MQTT server I ran into first hurdle. I was getting this example json value.
|
1 |
tele/sonoffrfbridge/RESULT {"RfReceived":{"Sync":11580, "Low":320, "High":1130, "Data":"982817", "RfKey":"None"}} |
And actually I found after much frustration that “Data” is a nested json value. This took a while for me to figure out. After that it was relatively easy to parse in Home Assistant and move my automations over from the previous bridge.
|
1 2 3 4 5 6 7 8 9 10 11 |
- alias: Living Room Tamper hide_entity: true trigger: platform: mqtt topic: tele/sonoffrfbridge/RESULT condition: condition: template value_template: '{{ trigger.payload_json.RfReceived.Data == "982817" }}' action: service: homeassistant.toggle entity_id: light.living_room |
and
|
1 2 3 4 5 6 7 |
- platform: mqtt name: "Living Room Motion" payload_on: "98281B" payload_off: "9971736" sensor_class: motion state_topic: "tele/sonoffrfbridge/RESULT" value_template: '{{ value_json.RfReceived.Data }}' |
From the previous article payload off is a made up value and is only used internally to turn the sensor off after a minute.
Just a couple gripes about the rf bridge which are superficial. There is a noticeable increased delay over the homemade bridge from the time it senses a trigger until the light comes on. It is only about half a second but a noticeable difference. And my wife pointed quickly that the led indicating it is on is very bright. I might remove it or install a varistor to tone it down. The receiver does not appear to be as good or might just be that it is in a case or my positioning. I am still able to cover my house but the trigger on my mailbox across the street doesn’t trigger. It was hit or miss on the old one but never triggers now.
FYI I am still running off the same batteries I initially installed in the 433mhz motion sensors over 6 months ago.
Sonoff 4ch Pro
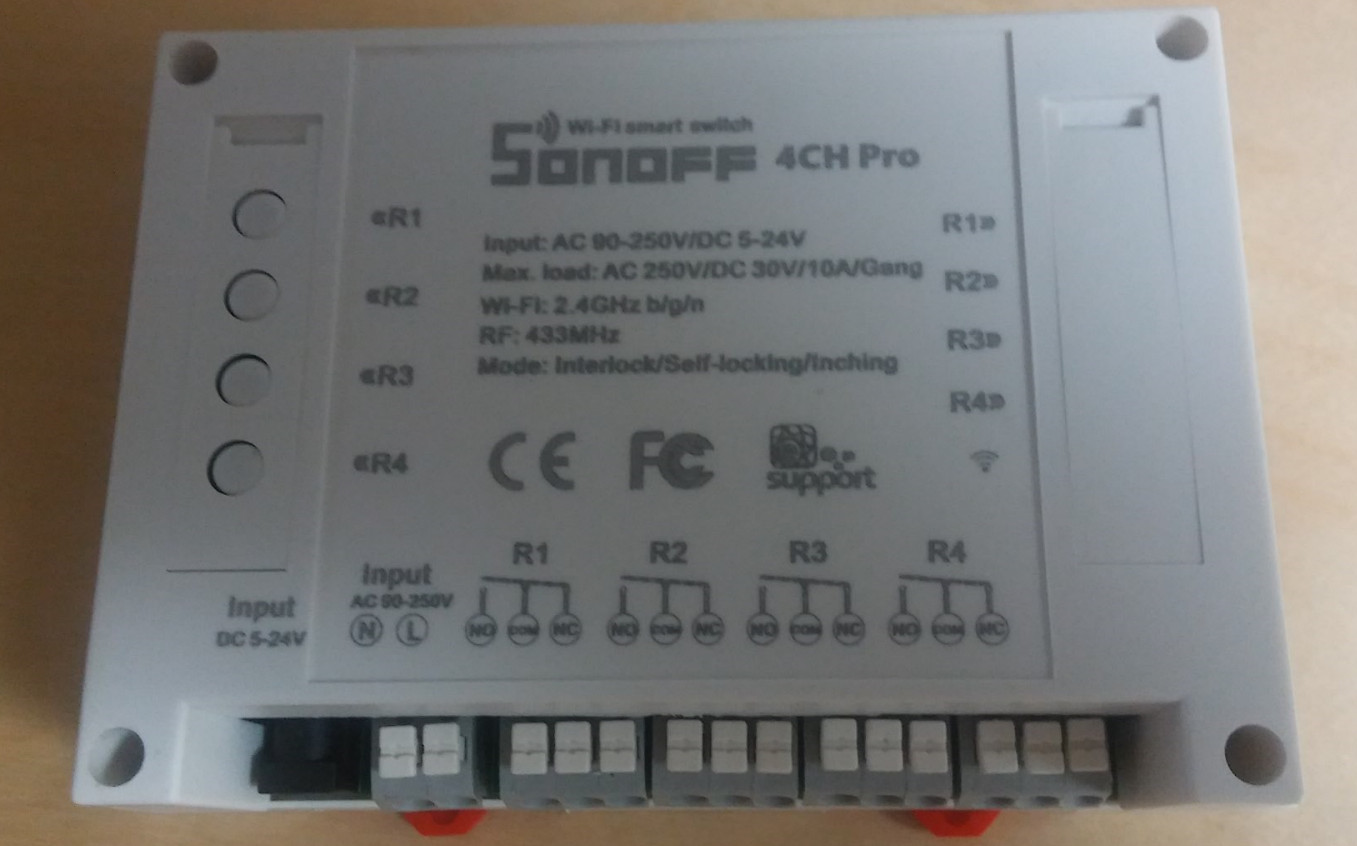
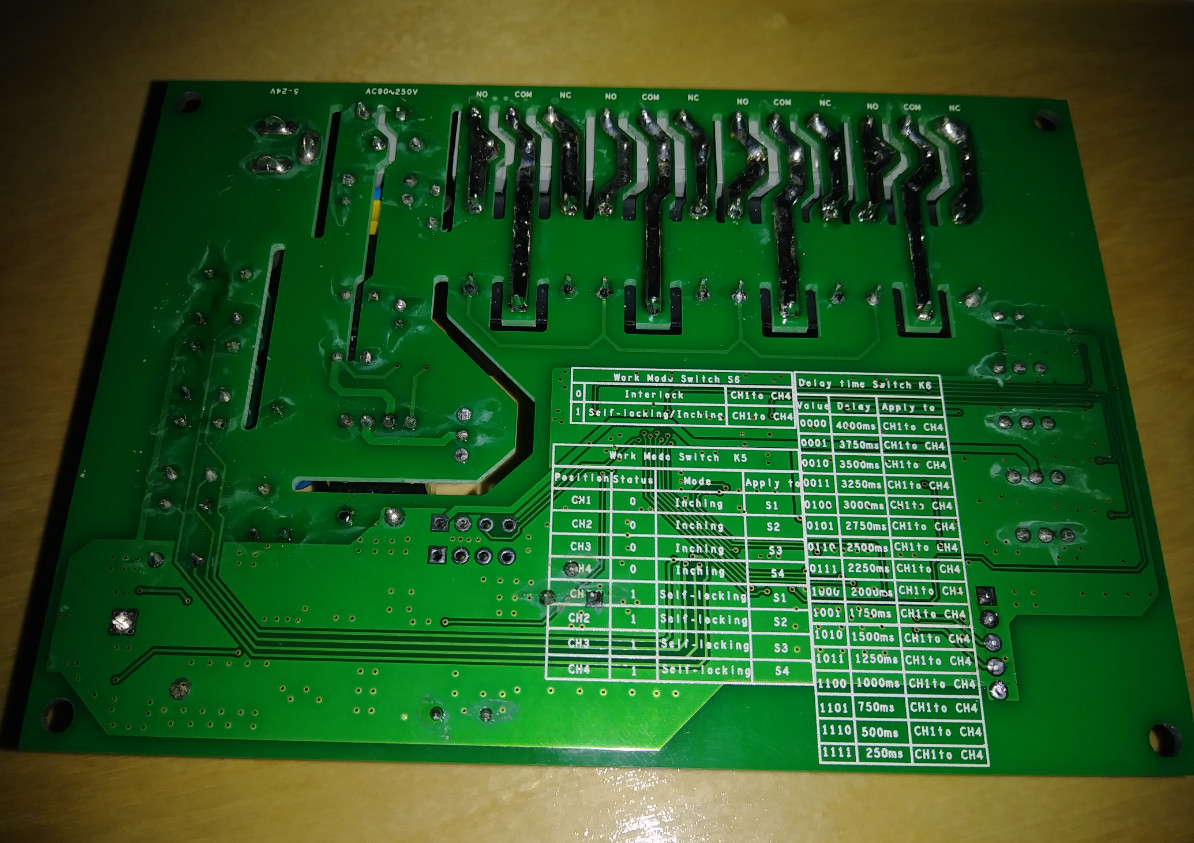
I also received the Sonoff 4ch Pro with 433mhz transmitter remote.
I tested it with stock Ewelink software and all tests done before worked. I quickly installed the alternative firmware from above, and again no loss in functionality. I was still able to pair and clear the 433 MHz remotes. It is weird that it does not indicate with a light that it is in pairing mode as of right now but when you press the button the light blinks when it is learned. The inching, self locking and interlock continued to work as well via switches. I can definitely see this being used for lighting, or if you needed to control multiple items in close proximity. Maybe simple access control. Possibilities are endless. On the product page, it shows wiring with motors as well which looks cool. If I find a unique or interesting project I will share.
The 4 button transmitter is very powerful. It transmits further than any of my other 433mhz devices.
Sonoff POW
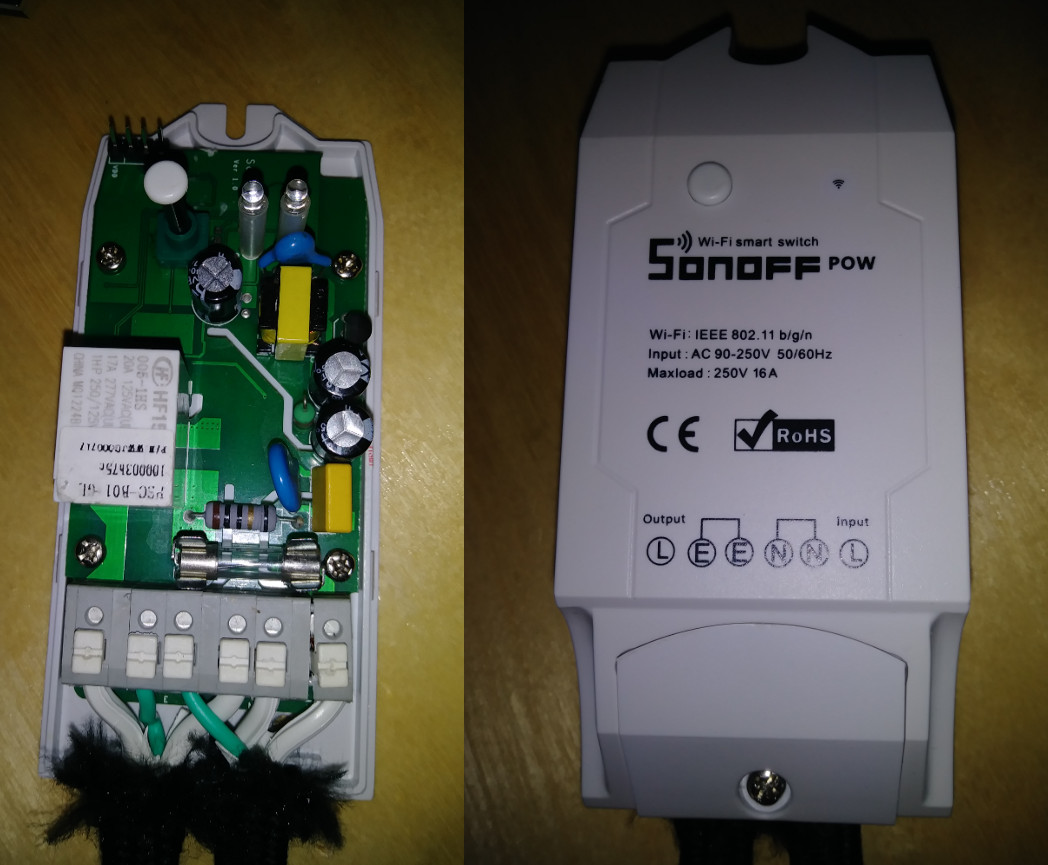
A buddy of mine gave me a Sonoff POW to play with. The Sonoff POW is very similar to the Sonoff Basic, but has the ability to measure power usage. I didn’t bother testing the stock software. I went straight to Arendst software. I didn’t have anything to measure power before and this is a welcome addition to my tools arsenal. I don’t need super accurate readings just a good idea what the draw is. I installed a light rated at 75w to test and got the results below. If a more accurate load is available you can calibrate the POW and instructions are in the Wiki.

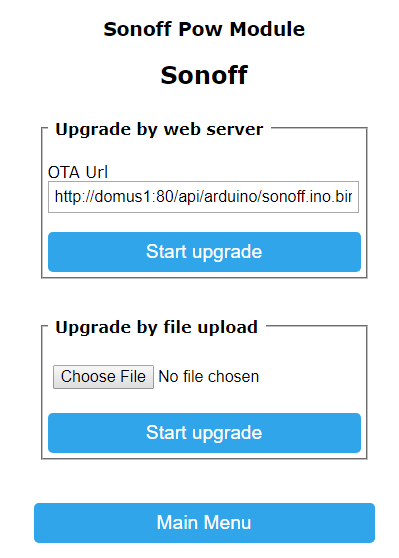
OTA Firmware
Who wants to drag all their devices back to the PC and flash new firmware? I finally checked it out. It is really simple to do.
First uncomment BE_MINIMAL then export compiled Binary. After a while you will have a bin file in your sketch folder.
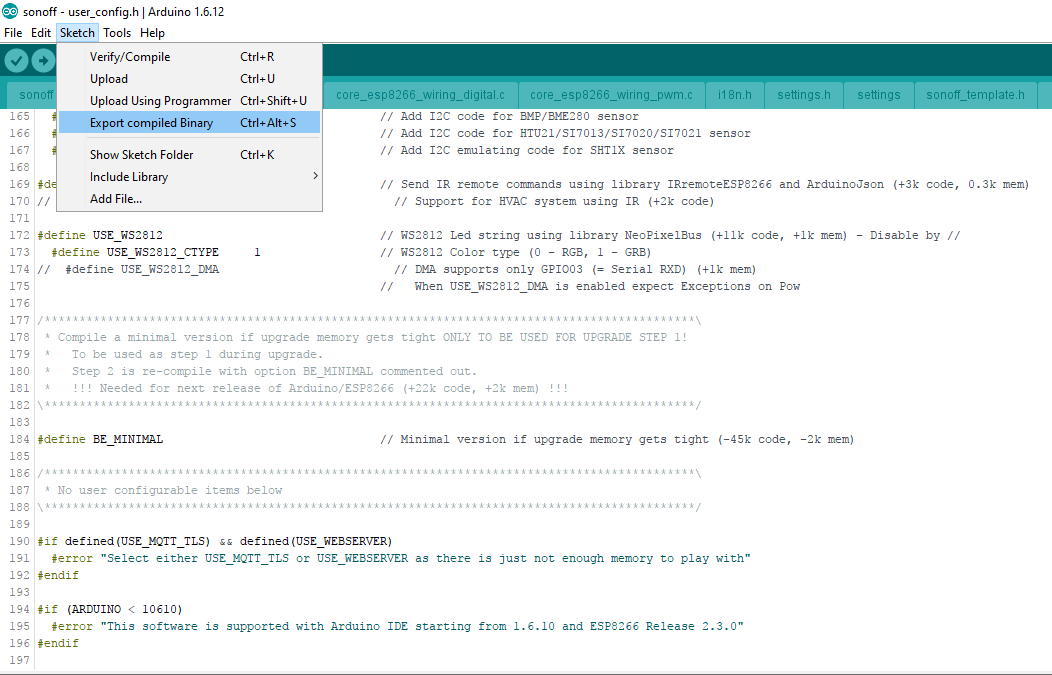
After uploading comment BE_MINIMAL, upload again. The 2 steps procedure is because he is running out of space with all the features. He is trying to reduce the code down, and hopefully make this a single step in the future. If you have a web server there are instructions to automate this.
 Conclusion
I would like to thank Itead Studio for sending the Sonoff RF Bridge, 4ch Pro and 4 button 433 MHz transmitter. They keep expanding their Sonoff line and make them hacker friendly. I would also like to thank Arendst for his tireless work on Sonoff-Tasmota firmware. If you are just looking to control your lights via Alexa, and don’t mind requiring the Internet to be available the stock firmware might work for you.

Karl is a technology enthusiast that contributes reviews of TV boxes, 3D printers, and other gadgets for makers.
Support CNX Software! Donate via cryptocurrencies, become a Patron on Patreon, or purchase goods on Amazon or Aliexpress. We also use affiliate links in articles to earn commissions if you make a purchase after clicking on those links.


