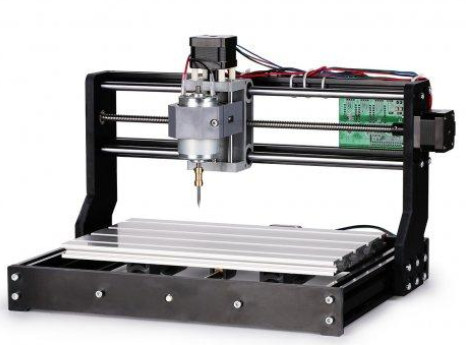
 Hey Karl here. Today we are going to look at something a little different. I am writing about my experiences with building Genmitsu 3018 CNC router upgraded version provided by Sainsmart for this review. While waiting on the unit to arrive I did some research and found that there are several different versions on the market labeled CNC xxxx. The xxxx represent the build volume in the x and y. So the one I was sent has a 300x180mm build volume. The 3018 is called upgraded because the new mounting for the X and Y rods and lead screws.
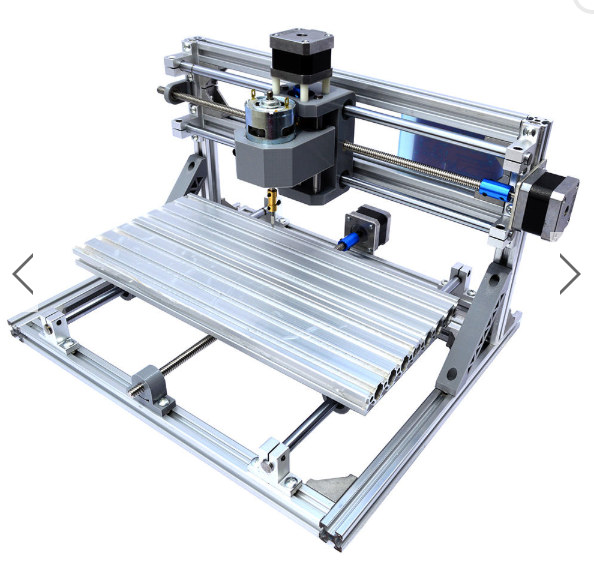
On the previous version these had to be mounted and manually aligned which from what I read can be a pain.
Building Genmitsu CNC 3018-PRO CNC Router
The build went very well. The 3018 user manual was mostly pictures but they called out anything that might be questionable. I had been talking about the CNC/engraver with my kids and they were excited to help build one evening after school. It took us about 1.5 hours to build and I was only able to keep their attention for about half the time. We put it together on our carport on a rug… my back wishes it was at the workbench. I normally put together in my shop but wanted them involved. I am a little above average height and my workbench is at my standing height in my shop so opted for the floor. I had three issues were I had to redo but all were my fault and easy to fix. I just didn’t pay attention to detail. I bet I could easily put it together by myself in about an hour under better circumstances. I did record the build but found it not very interesting and useful to share.
One thing to note. I did find a ball bearing in the box but can’t confirm it was from this kit. Everything seems tight and no slop in movement.
First Etches with CNC 3018-PRO

The kit came with a mini CD but I skipped using it and downloaded the documents and software from Sainsmart wiki. It has a digital copy of the instructions as well as some windows software and drivers and some gcode for testing. I connected the printer to my PC… I didn’t have to use the provided drivers…then loaded the example gcode. Before starting I positioned the bit at the bottom left hand corner with the tip barely touching. I set X, Y, and Z to 0 home position in the software. Then hit run. I etched the Sainsmart logo on a piece of acrylic with very little effort. My first pass wasn’t perfect, the s and a only partially showed. I am not sure if it is uneven bed or the acrylic was uneven. I started again and it was fine. While using the CNC router, I realized if that happens again I can just go down to 0 height then go 0.1mm lower and zero only the Z and start again if I have only partially etched something. I etched the rest of the examples with very little effort. I am doing just simple etches right now to get a feel for speeds and feeds. I think I have been very conservative. 600mm/min feed and 120mm/min plunge at .5mm depth per pass.
Windows and USB
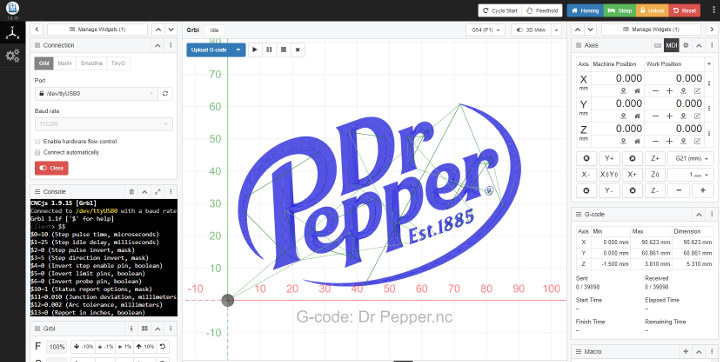
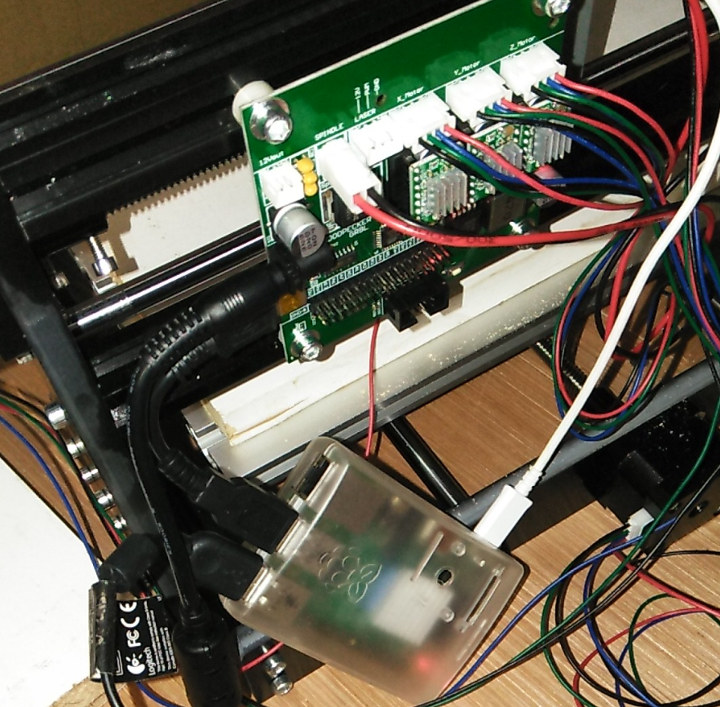
I really don’t think that a Windows machine is best suited to send gcode. I was using an old laptop that had Windows 10 on it. I had some issues with timing out when the screen turning off. The spindle would just stop until I moved the trackpad. I am sure there is a windows setting other then don’t turn off the screen while plugged in but wanted to go straight to a permanent solution. On one instance my battery drained and surprisingly when I plugged it back into mains power the etch resumed like nothing happened. I also had some issues with the provided cable. After a long period of time my laptop would loose connection. I have a tiny 3” mini USB cable that I used without issue. But It is really hard to use a cable like this with a bulky laptop. I found a web based app that I installed on a Raspberry Pi called CNCjs that is working pretty well for me. I did try the CNC plugin for Octoprint but without success.
1 gripe
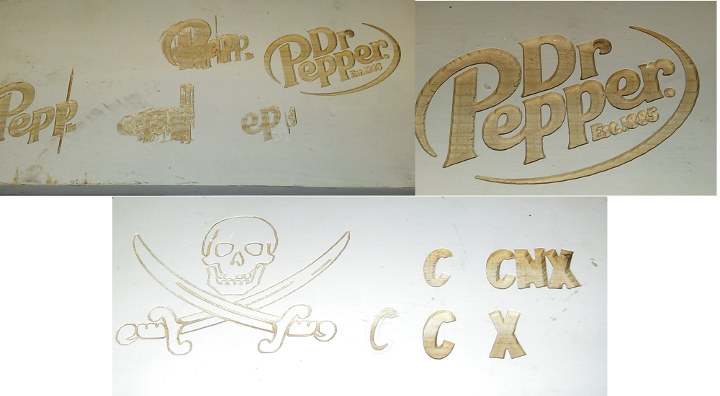
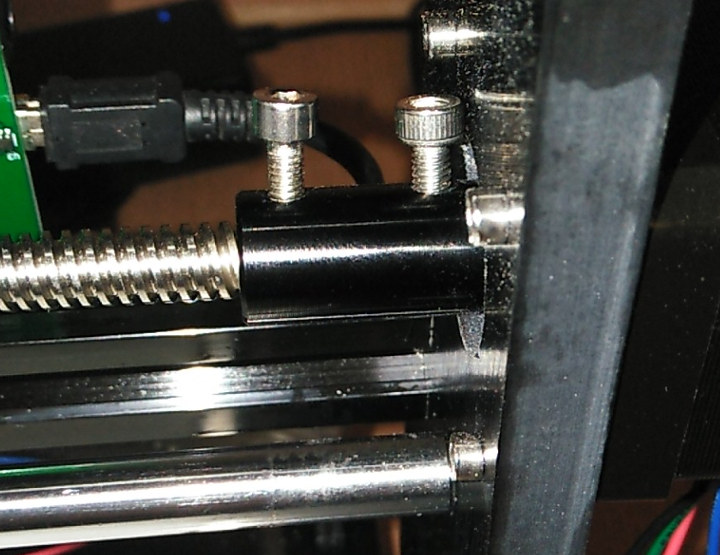
As you can see above I had some issues with the Dr Pepper logo. All of them were due to these grub screws coming out. I wish some threadlock was included. No matter how hard I tightened the grub screws they came loose. I couldn’t get enough torque on them. I had some m4 that I put in temporarily until I get some. I would leave but it reduces the build volume.
Random things
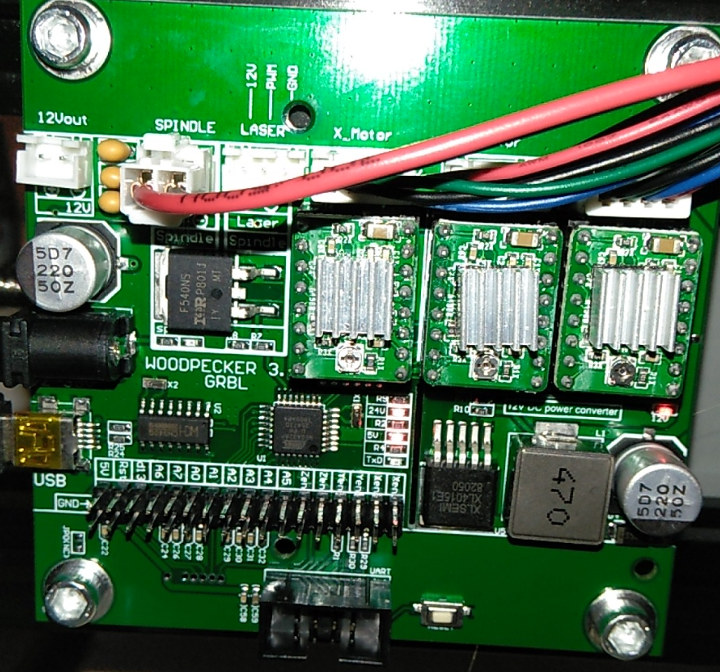
There is a very simple board provided. I did not have to adjust the stepper drivers so far. No missed steps but again I have been conservative. There is also a connector for a laser which could be interesting to explore. Grbl 1.1f is pre-loaded. I started with an older Raspberry PI to host CNCjs but 3+ is superior as far as speed goes. I recently purchased an infrared thermometer and so far everything is running cool, and nothing was over 40c.
 Testing and Wrap Up
So this is part 1 and initial testing and build. I want to test milling some pcb’s and have some blank pcb’s on the way from Amazon as well as some square end mills. I will test some hardwood lumber as well. I hope to get some carbon fiber sheets and finally test the dimensional accuracy. I might try an engraving on metal but I really don’t think the 3018 is up for any cutting. I have barely touched the surface and only done simple cuts. I still need to learn Fusion 360 cam. I used easel to generate the custom gcode. I tried a simple toolpath in fusion 360, but need to spend more time on it. There is a lot to it and need more time to master. If you have any tests you want to see leave a comment below or a project idea. I will record some cuts and fusion work.
Big thank you to Sainsmart for providing the 3018 to test and review, and to Gearbest for sending the Raspberry Pi 3B.
Continue reading “Genmitsu CNC Router Review – Part 1.5: Laser Attachment“

Karl is a technology enthusiast that contributes reviews of TV boxes, 3D printers, and other gadgets for makers.
Support CNX Software! Donate via cryptocurrencies, become a Patron on Patreon, or purchase goods on Amazon or Aliexpress. We also use affiliate links in articles to earn commissions if you make a purchase after clicking on those links.




What does the kit cost?, can it also do some light milling, or is it only for engraving?
About $270us. What material r u referring to for milling
I got the same kit but from another supplier, “grub screws coming out” is my major issue. I ordered my kit with an CNC spindle without laser engraver as i already got a K10 CO2 laser.
Have only done acrylic, PCB and wood cutting/drilling/engraving so far. ALU is up next, based on eariler experiance it should be no issue at all. feedrate/coolant/cut depth is critical as well as getting a ALU alloy that is CNC frinendly.
Got my machine about a year ago, came with an dated gbrl version, have to use a old version of bCNC as everything else just screams “grbl too old”. Will reflash when i get time.. any year now..
Good to know. Thank you for the feedback….maybe there is hope for some aluminum…..on a side note i just cut some 2020 aluminum extrusion on a chop saw made for wood and it was easy so i think there is hope for aluminum.
To secure screws that come loose use Loctite thread glue, the BLUE bottles NOT the red! I loctite all nuts bolts etc in vibrating machines like small engines etc, they can still be undone easily but wont vibrate loose.
I’m running the “old” 3018 and I drive the spindle with 36V and it now finally is able to cut stuff properly. I also use CNCjs and it works great.
So you just changed over to a 36v power supply with the same board and used the barrel connection to get faster spindle speeds?
i just received my CNC 3018-Pro. This is my 1st time Attempting at this, so please bare with me. I got it all set up & attempted my 1st test run & it was a total FLOP. Everything works, well almost everything words. It seems that the spindle moves left & right properly but no movement to go front & Back. It will only engrave left to right. Can you help & tell me what I possibly did wrong? Thank-you in advance
Lots of things. Drivers. Cabling. Stepper motor. Make sure to power down before testing.
Is there any example you can share as a walk through in setting up control to perform etch. I think that is the biggest, I have it put together but on clear instructions on use with software for first-time user. Any help with settings would great
Do you have to change the machine settings on easel to generate the gcode? I just got my 3018 and the software that came with it isn’t noob friendly
I changed the work area. Bit size and cut settings. Then under advanced I exported the gcode.
Hi Karl, I own the same 3018-pro but with the raspberry 3 and any available cnc software, I can connect to the woodpecker board, but I am not able to move any of the steppers. GRBL is 1.1, which is coming back in the terminal. G28.1 to set the new homing is not answering with a ‚ok‘ message.
I have downloaded the raspi image from https://wiki.protoneer.co.nz/Raspberry_Pi_CNC_User_Interface_SD_Card_Image
Is there something I have to change here?
Regards Michael
…from Germany
Can you use any image from the web on this machine? Or do you have to CAD draw your own images?
I use inkscape to convert or find a svg
The best I have used is Cambam. Try it you may find it better than inkscape which I find limited for routing.
Also use camodics for free gcodes applicable to grbl .
Hola a todos, me compre el 3018 cnc y no lo llegue a usar. Hace 2 días que estoy tratando de solucionar este problema.
Todos los motores dejaron de funcionar. Estaba realizando los ajustes fino del esqueleto hasta que no pude más.
Probé cambiando de puertos y de todo lo que he visto en Internet pero no encuentro una solución. Se habrá quemado la placa?
I ran this through Google translate. Sounds like steppers have stopped. Maybe check the power supply
Is there a way to spin a pen blank on this CNC. Some folks are making jigs for the smaller engravers that spin the blank as it is being engraved. Is there a way to do this with this machine? It would be wonderful to have a laser on this model and engravings would only be limited by your imagination. I see that their is a laser available, just need a jig!
Not enough Z axis travel for one to fit. Unless you can fab one yourself in micro size. With just engraving pens it could be possible. Don’t believe you will find a ready built and ready to go for the 3018.
I’m a silver smith and have very little experience with cnc machines, that being said I use Vetric cut2d software for design and it has an output platform but gives me 50 g code types to output in, for example, x-carve (mm)(*.gcode) do you know what file format to output for the 3018 pro cnc ? Thanks
Just generic gcode. It runs grbl.
Possible to use Apple Mac Pro? I just acquired a cnc 3018 max Pro which is the same machine.
Hello.
I acquired this machine, but did not find any document that describes the pins.
I’m mainly looking for the pins dedicated to z probe.
Do you have any idea where can I find this kind of information?
https://www.cnx-software.com/2019/06/18/review-sainsmart-genmitsu-cnc-router-3018-mx3/
hi I’m just curious what you were using the raspberry pi for ? Thanks!
I am using it to deliver gcode to the 3018. I use cncjs and laserweb. 2 small servers
Hi, just recently purchased a SainSmart Genmitsu CNC Router 3018-PRO with milling attachment. I want to purchase a laser module to use on powder coated aluminium , wood etc and was wondering if I could attach a 12 or 15w laser instead of the 5.5w?
1st time with a cnc and also computer. Kind of illiterate on computers. Im going to give it a go anyway. Any advice or? Much appreciated. Thanks and have a great day.
i have just assemble the 3018 pro, but where do I download the software from?
thank you
I purchased the CNC3-3018 PRO but I have a Mac Pro. Are there downloadable drivers for macOS Catalina? Thank you for your help
Hello, I purchased a 3018 pro router, but it does not have any software. how can I get software to do scroll work and letters. Thanks.
I purchased the Genmitsu 3020 Pro Max and was wondering what the best software solution would be to make simple phenolic labels for electrical equipment?