
Earlier this month FriendlyELEC released two new products namely NanoPi M4 metal case with heatsink and optional NVMe SSD adapter, and NanoPi M4V2 SBC, a minor upgrade to the original Rockchip RK3399 powered NanoPi M4 board with faster LPDRR4 memory, the addition of power & recovery buttons, and microphone input is now inside the audio jack instead of solder pads.
I received both this weekend, in the first part of the review I’ll show the items part of the package and then show how to assemble the kit. In the second part, I’ll focus on the new features of the board like memory bandwidth, as well as the thermal performance of the complete solution in both Android and Linux.
Unboxing

Instead of one kit, I actually received two. One kit basically includes NanoPi M4V2 board with internal antennas (which we won’t use here), and the metal case which comes with the NVMe SSD adapter for M4 as well as two external antennas, a thermal pad, spacers, and screws.
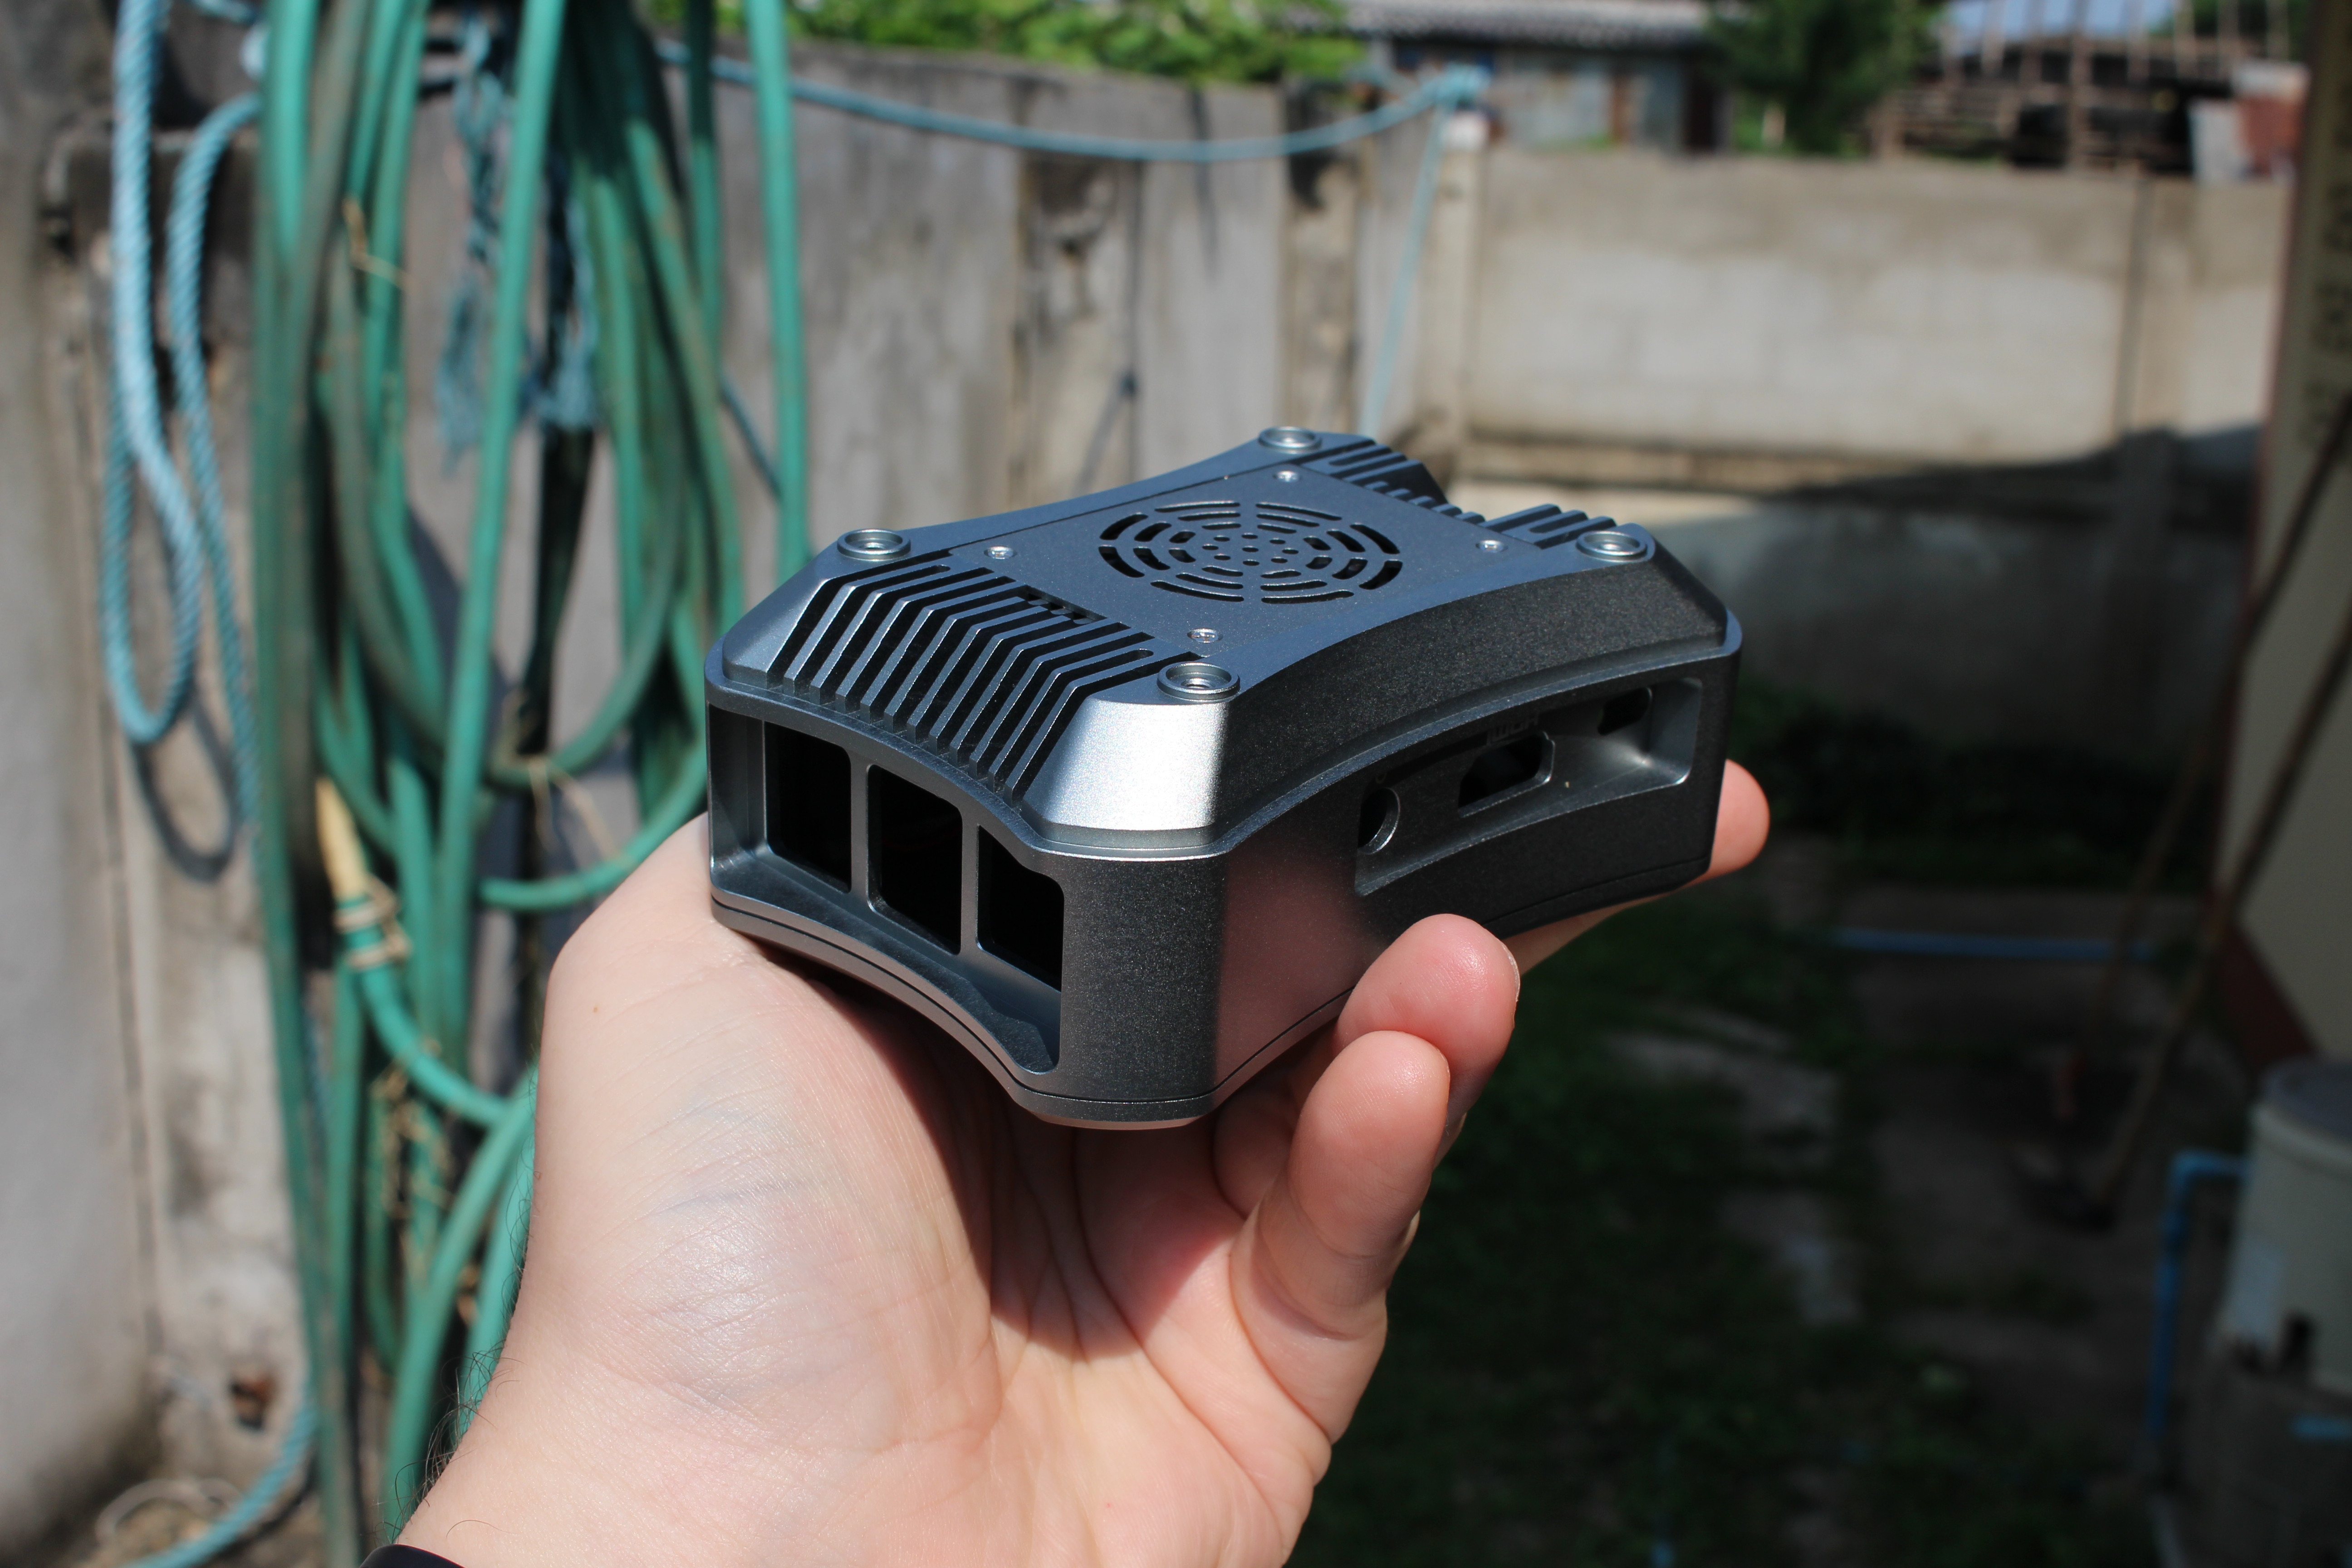
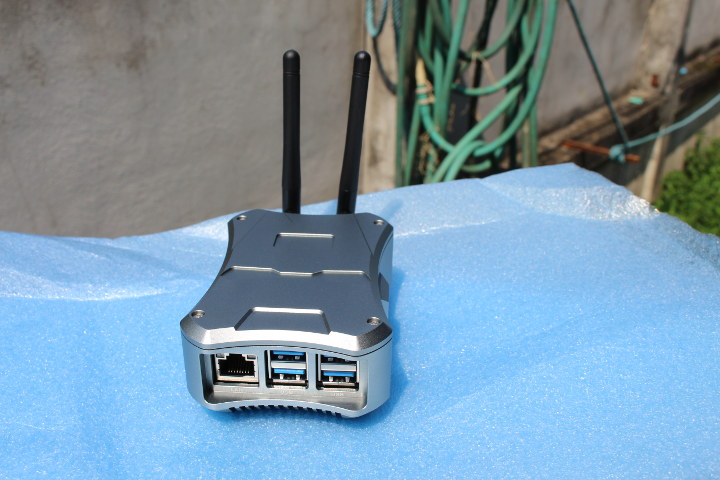
If we look at the metal enclosure itself, the pre-install fan section faces up, and in this view, we’ve got the openings for Ethernet, USB type-A & C ports, the audio jack, and HDMI port.
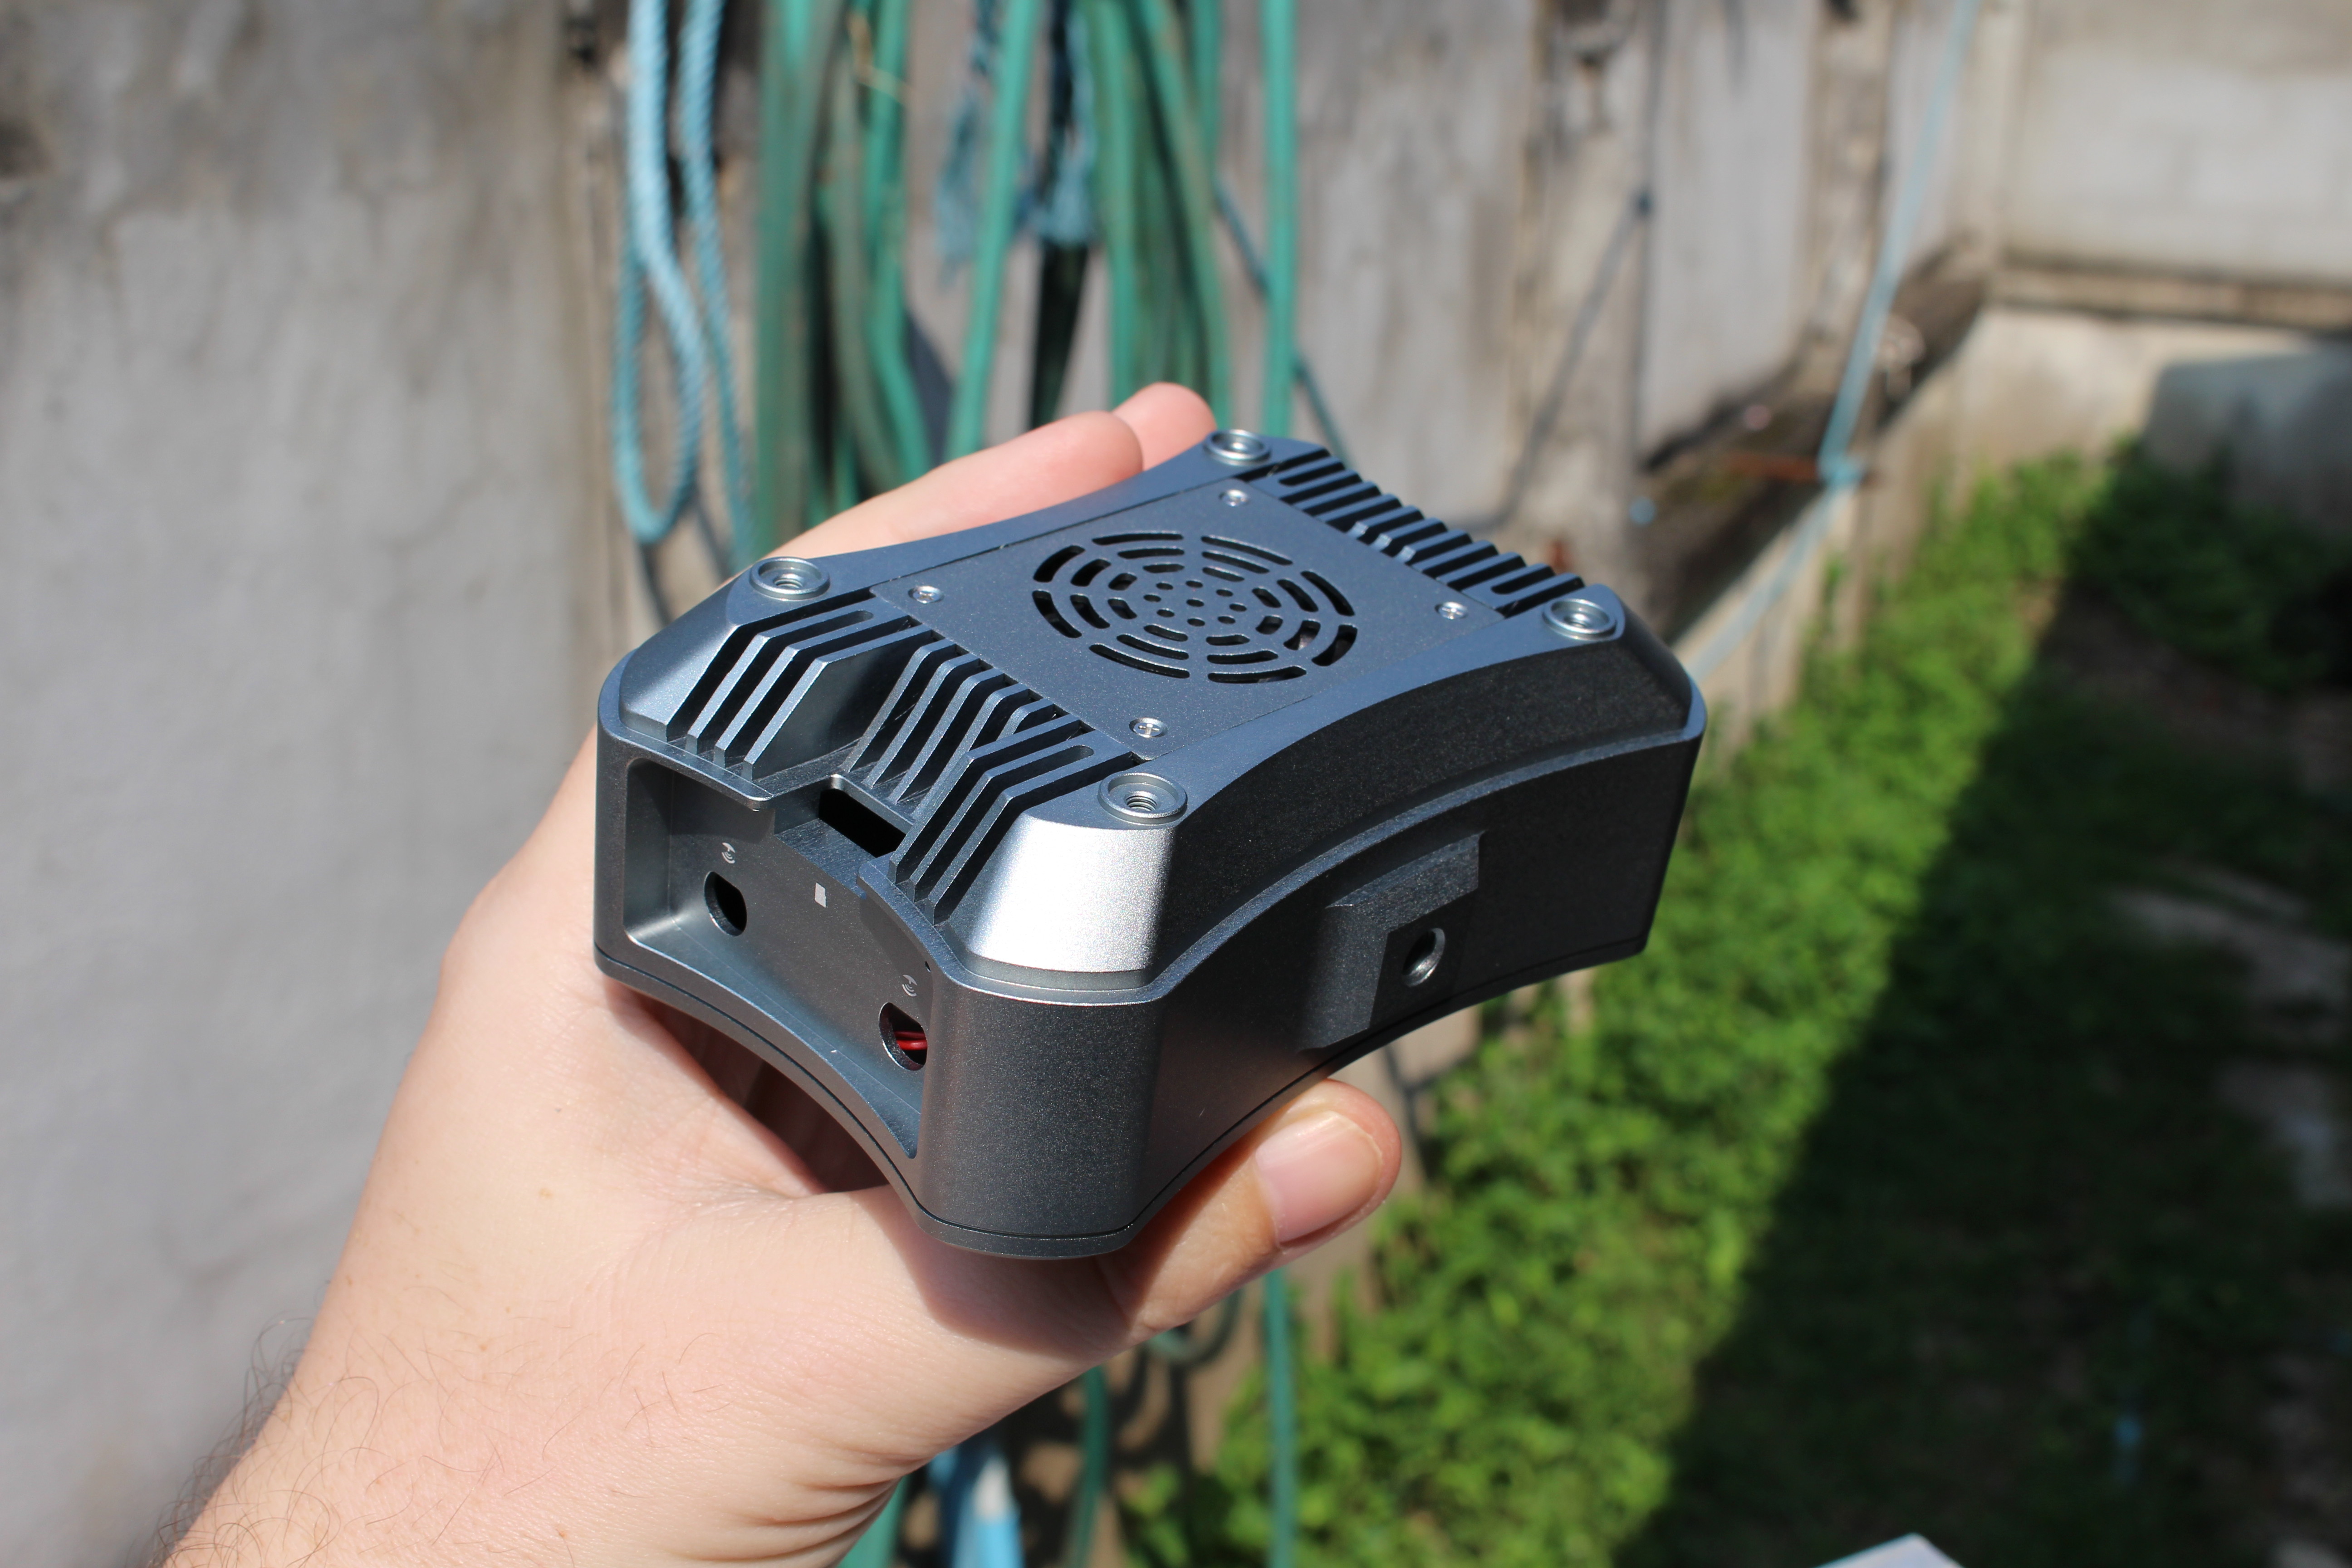
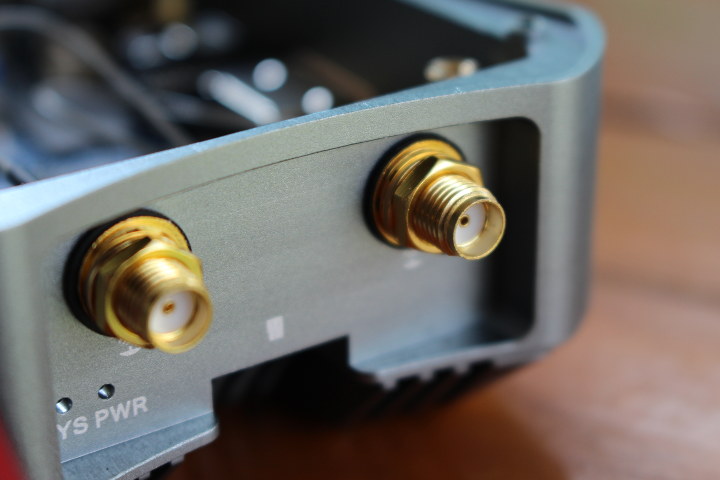
From this angle, we can see the antenna holes and a mounting thread that we’ll later on check for compatibility with off-the-shelf camera mounts.
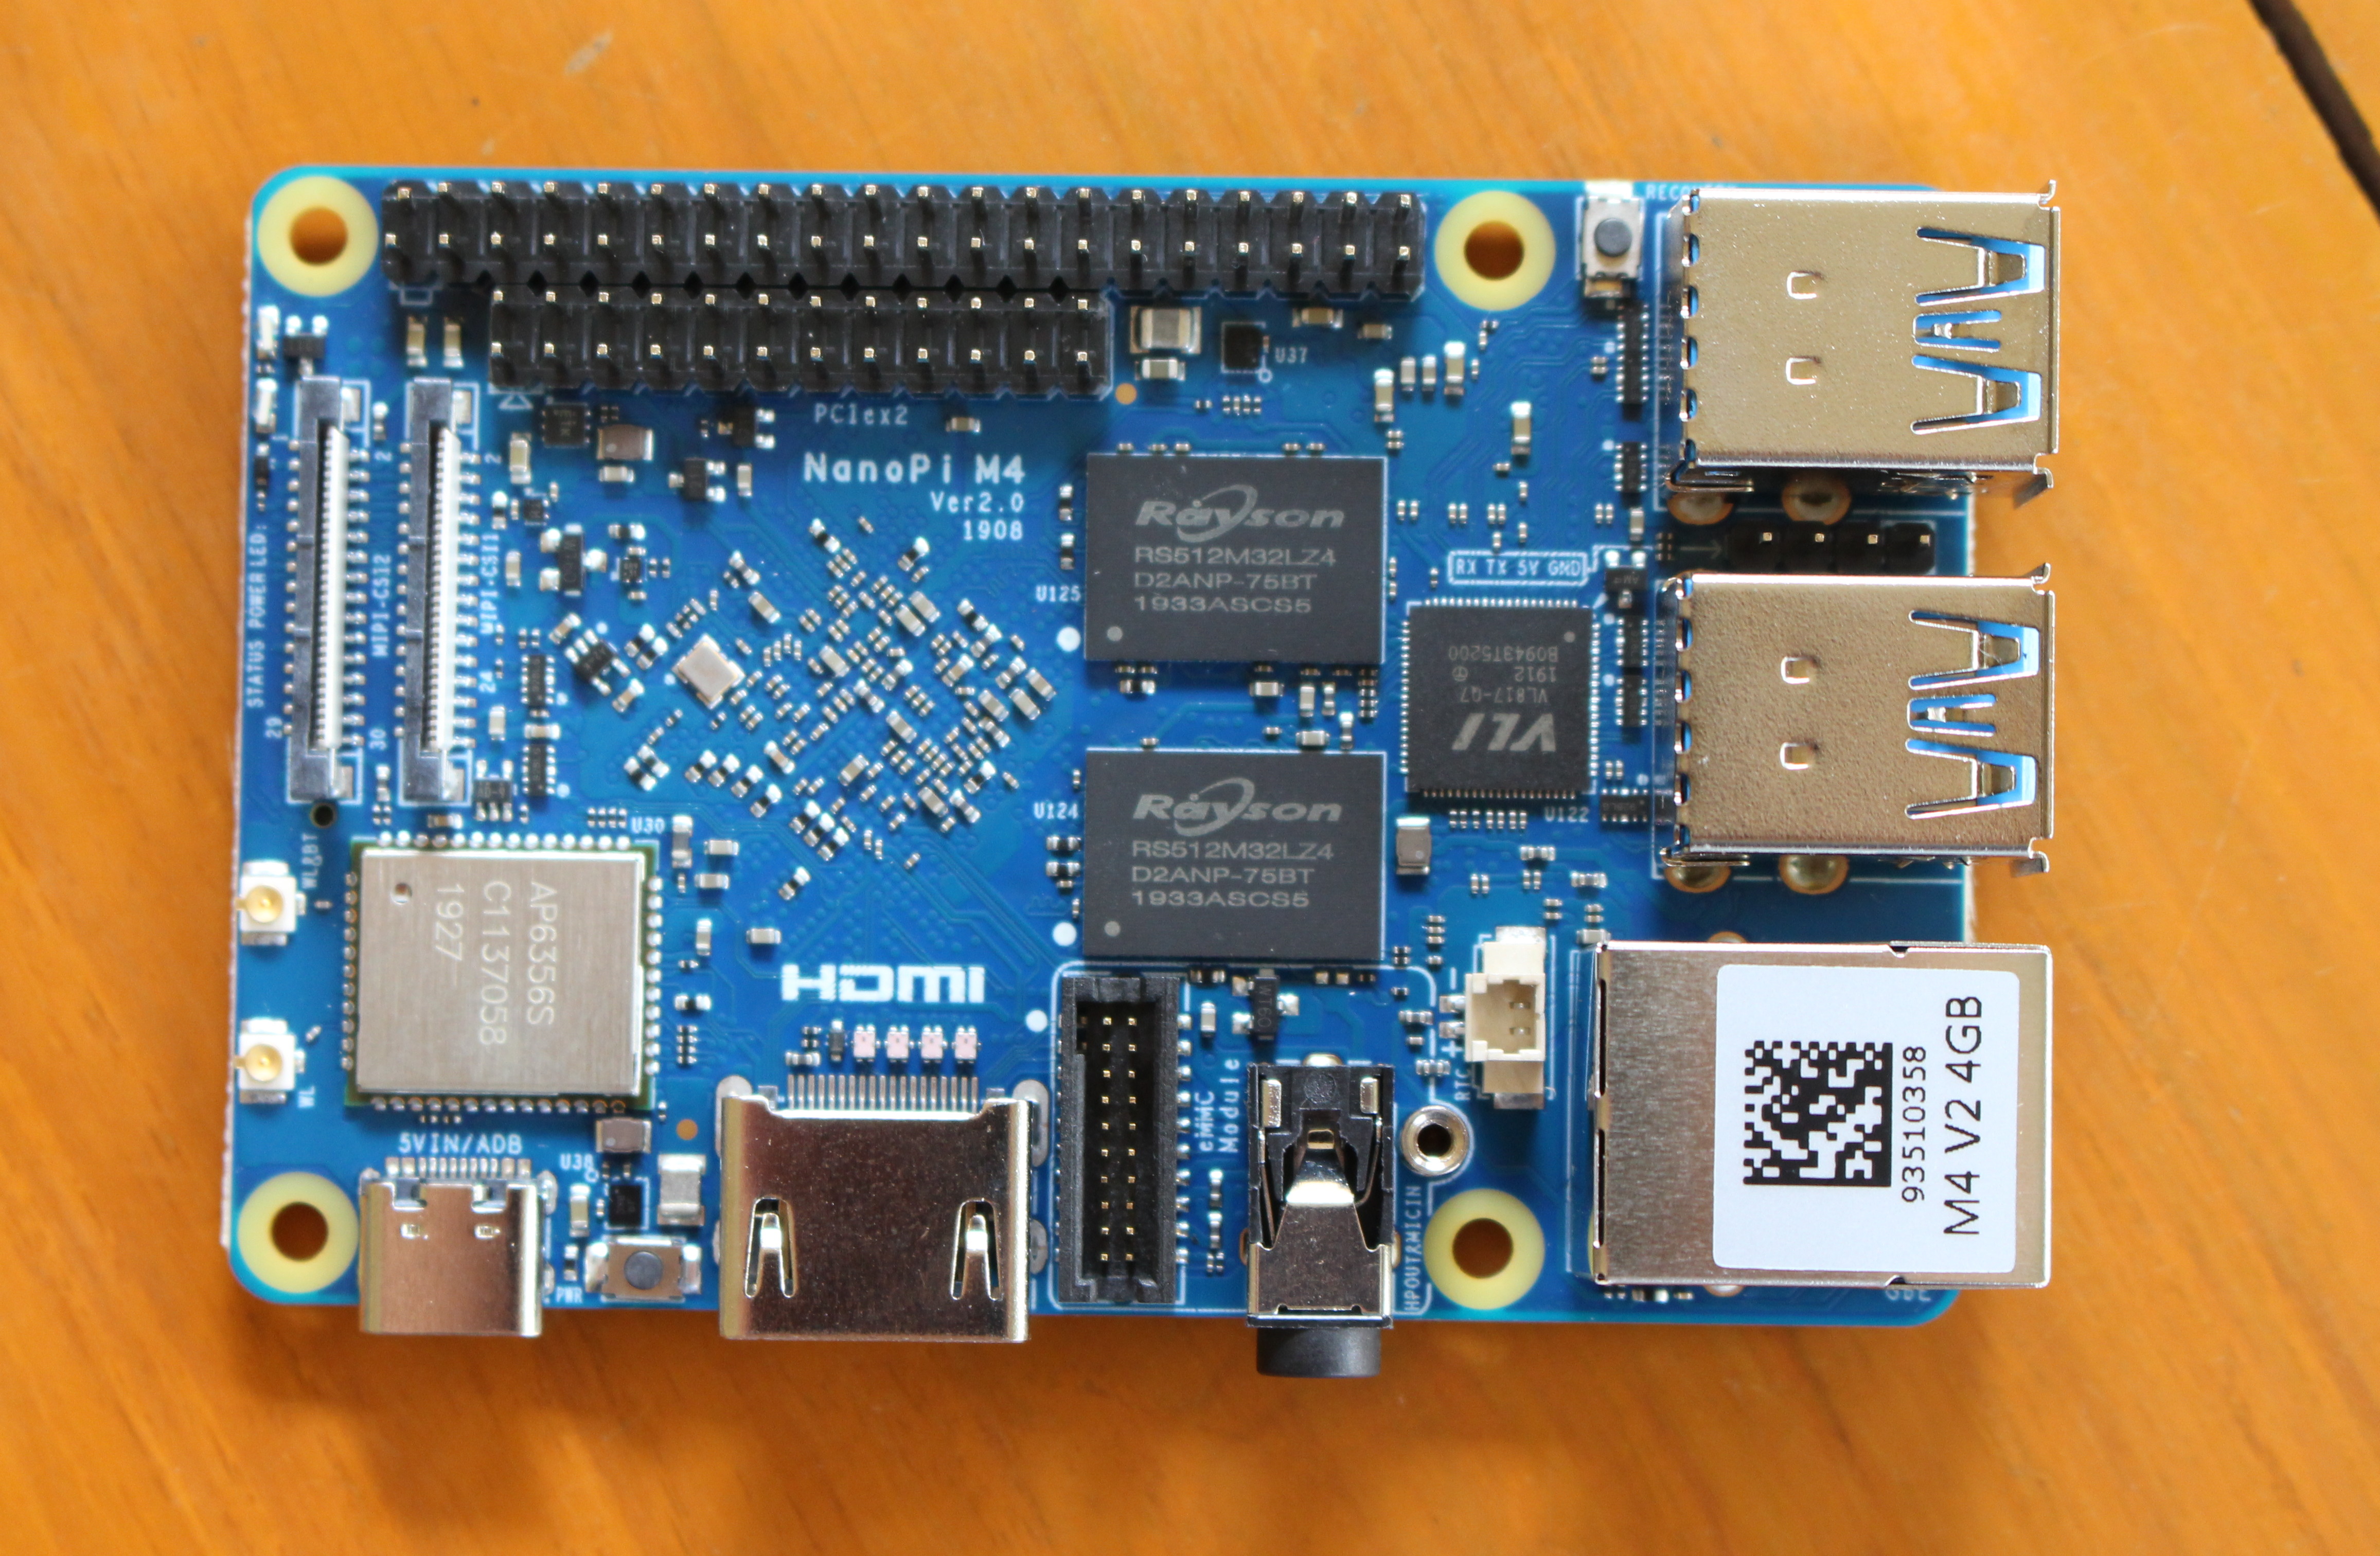
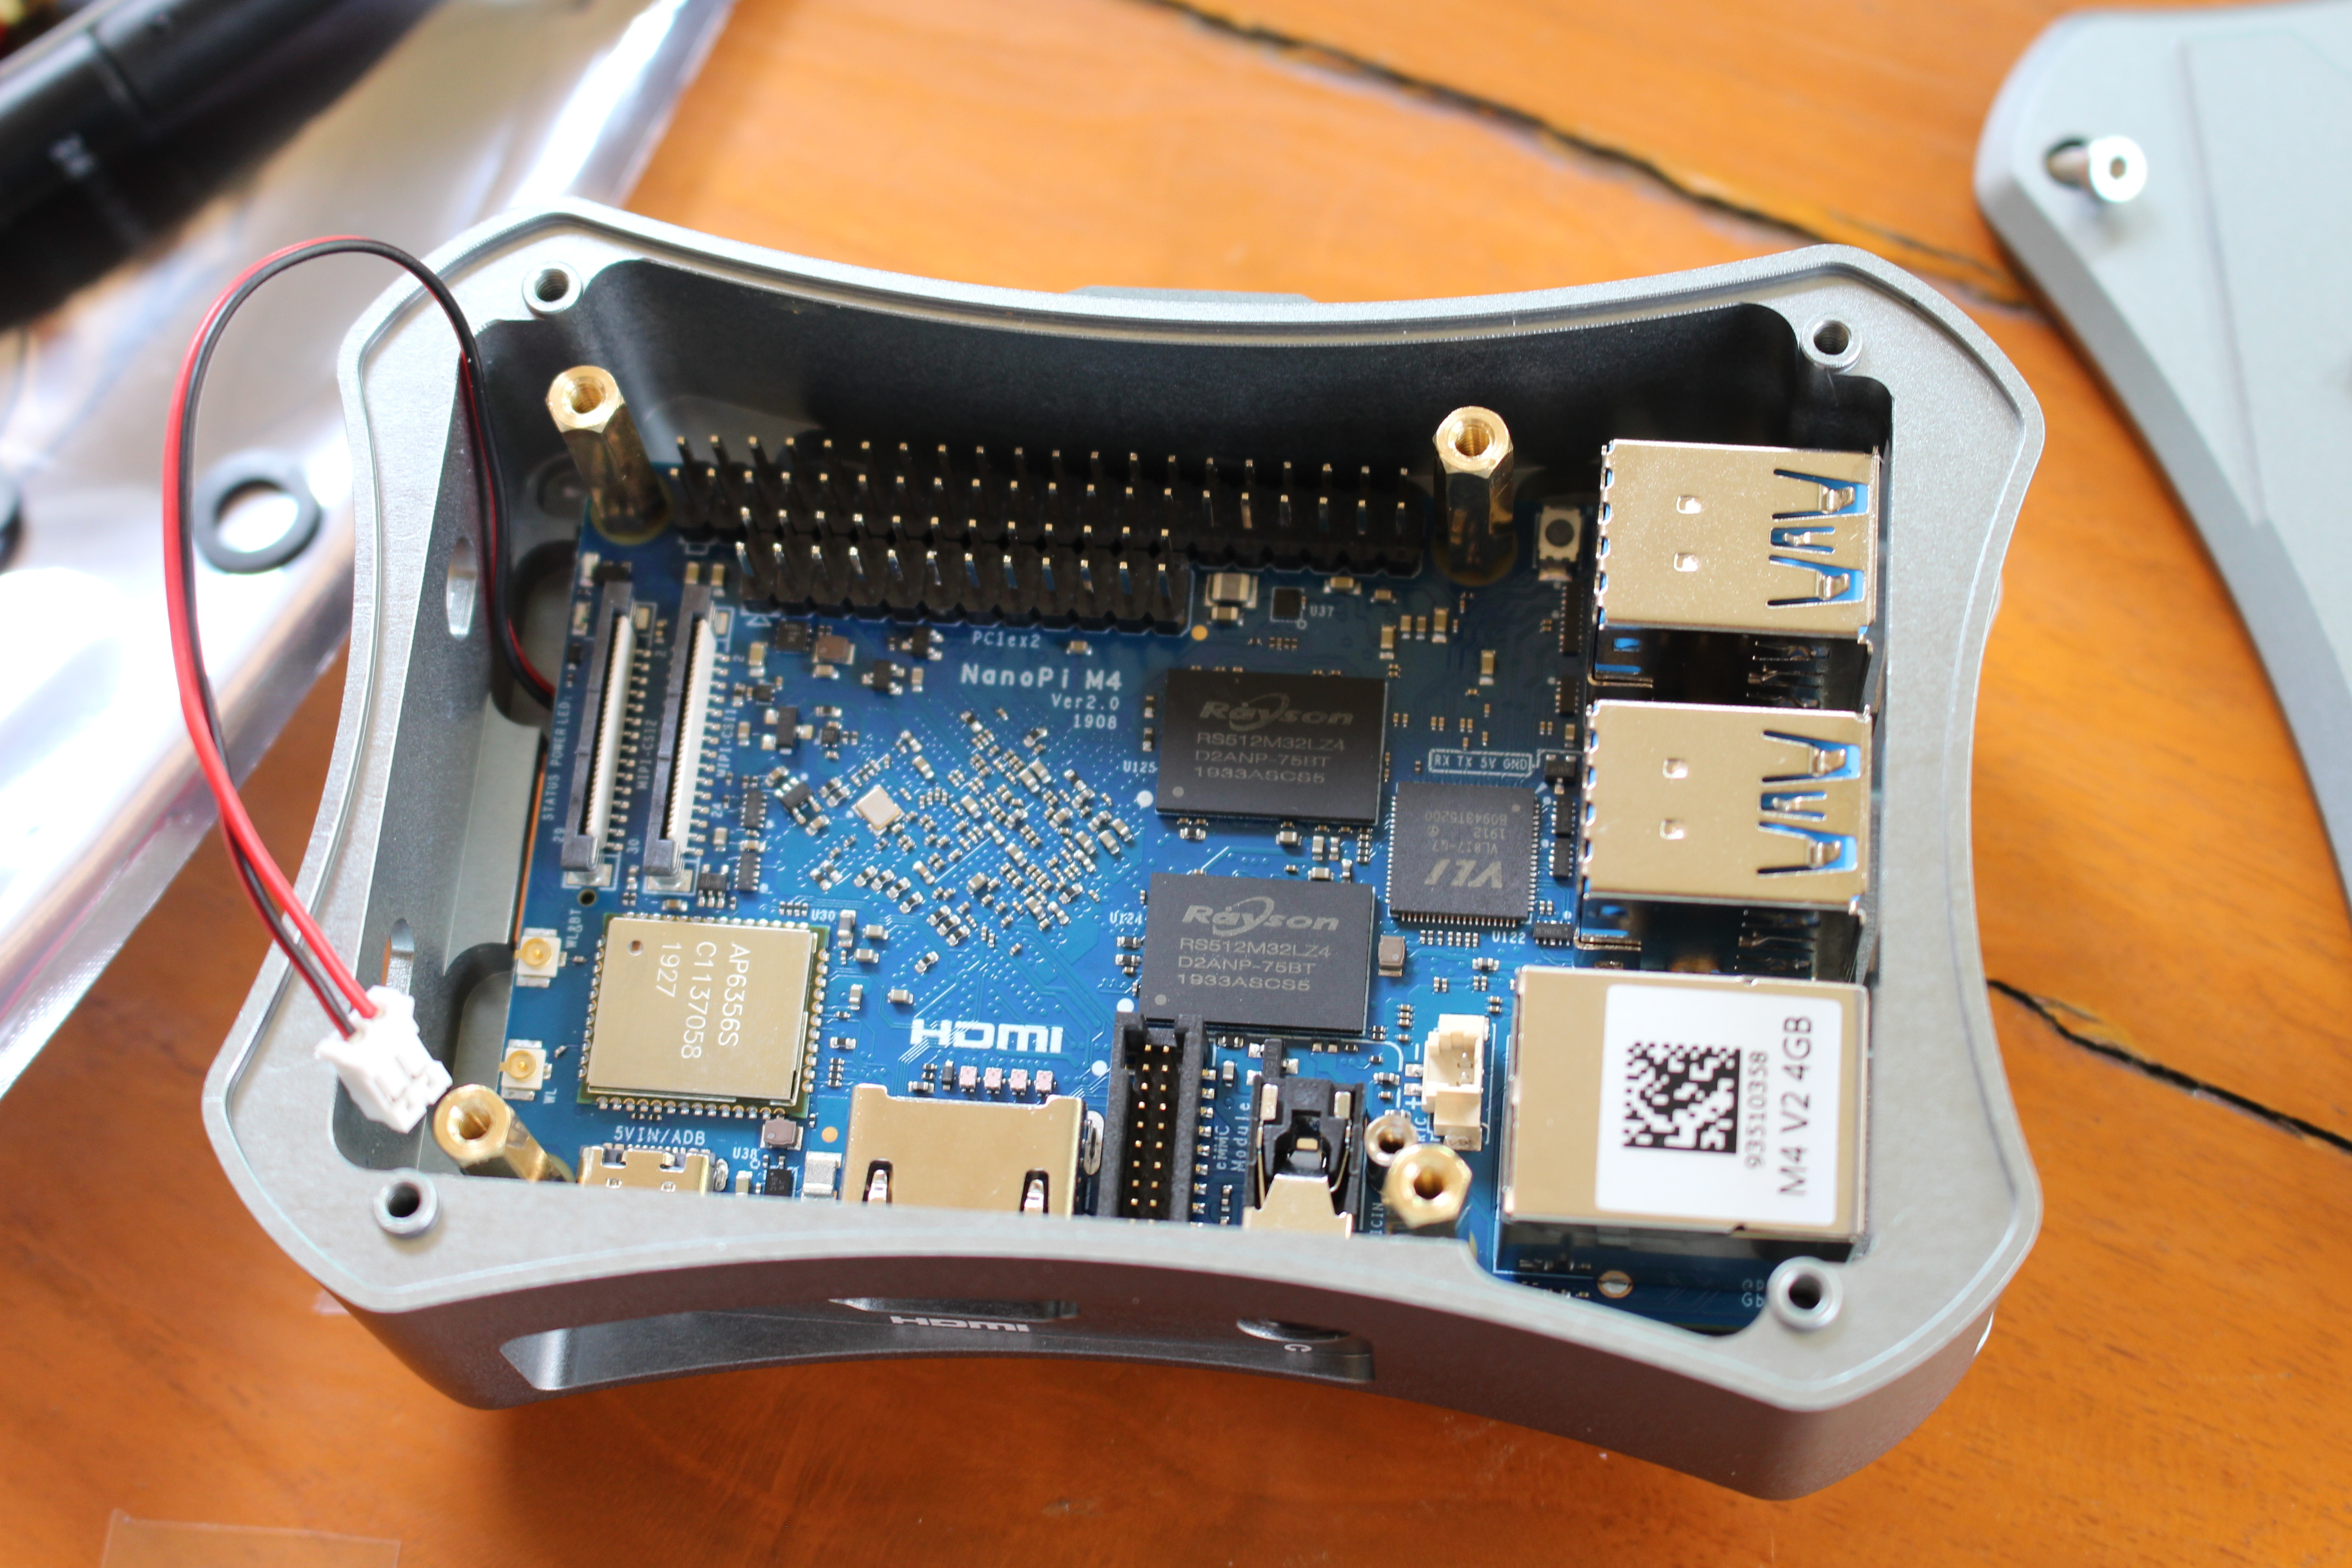
NanoPi M4V2 SBC looks very much like its predecessor with a 40-pin RPi header, a PCIe x2 header which will be used with the NVMe SSD adapter, two MIPI CSI ports (one multiplexed with MIPI DSI) , 4GB RAM, 4x USB 3.0 ports, Gigabit Ethernet, 802.11ac WiFI 5 and Bluetooth 4.1 module, USB type-C port, HDMI 2.0 port, and eMMC flash module connector.
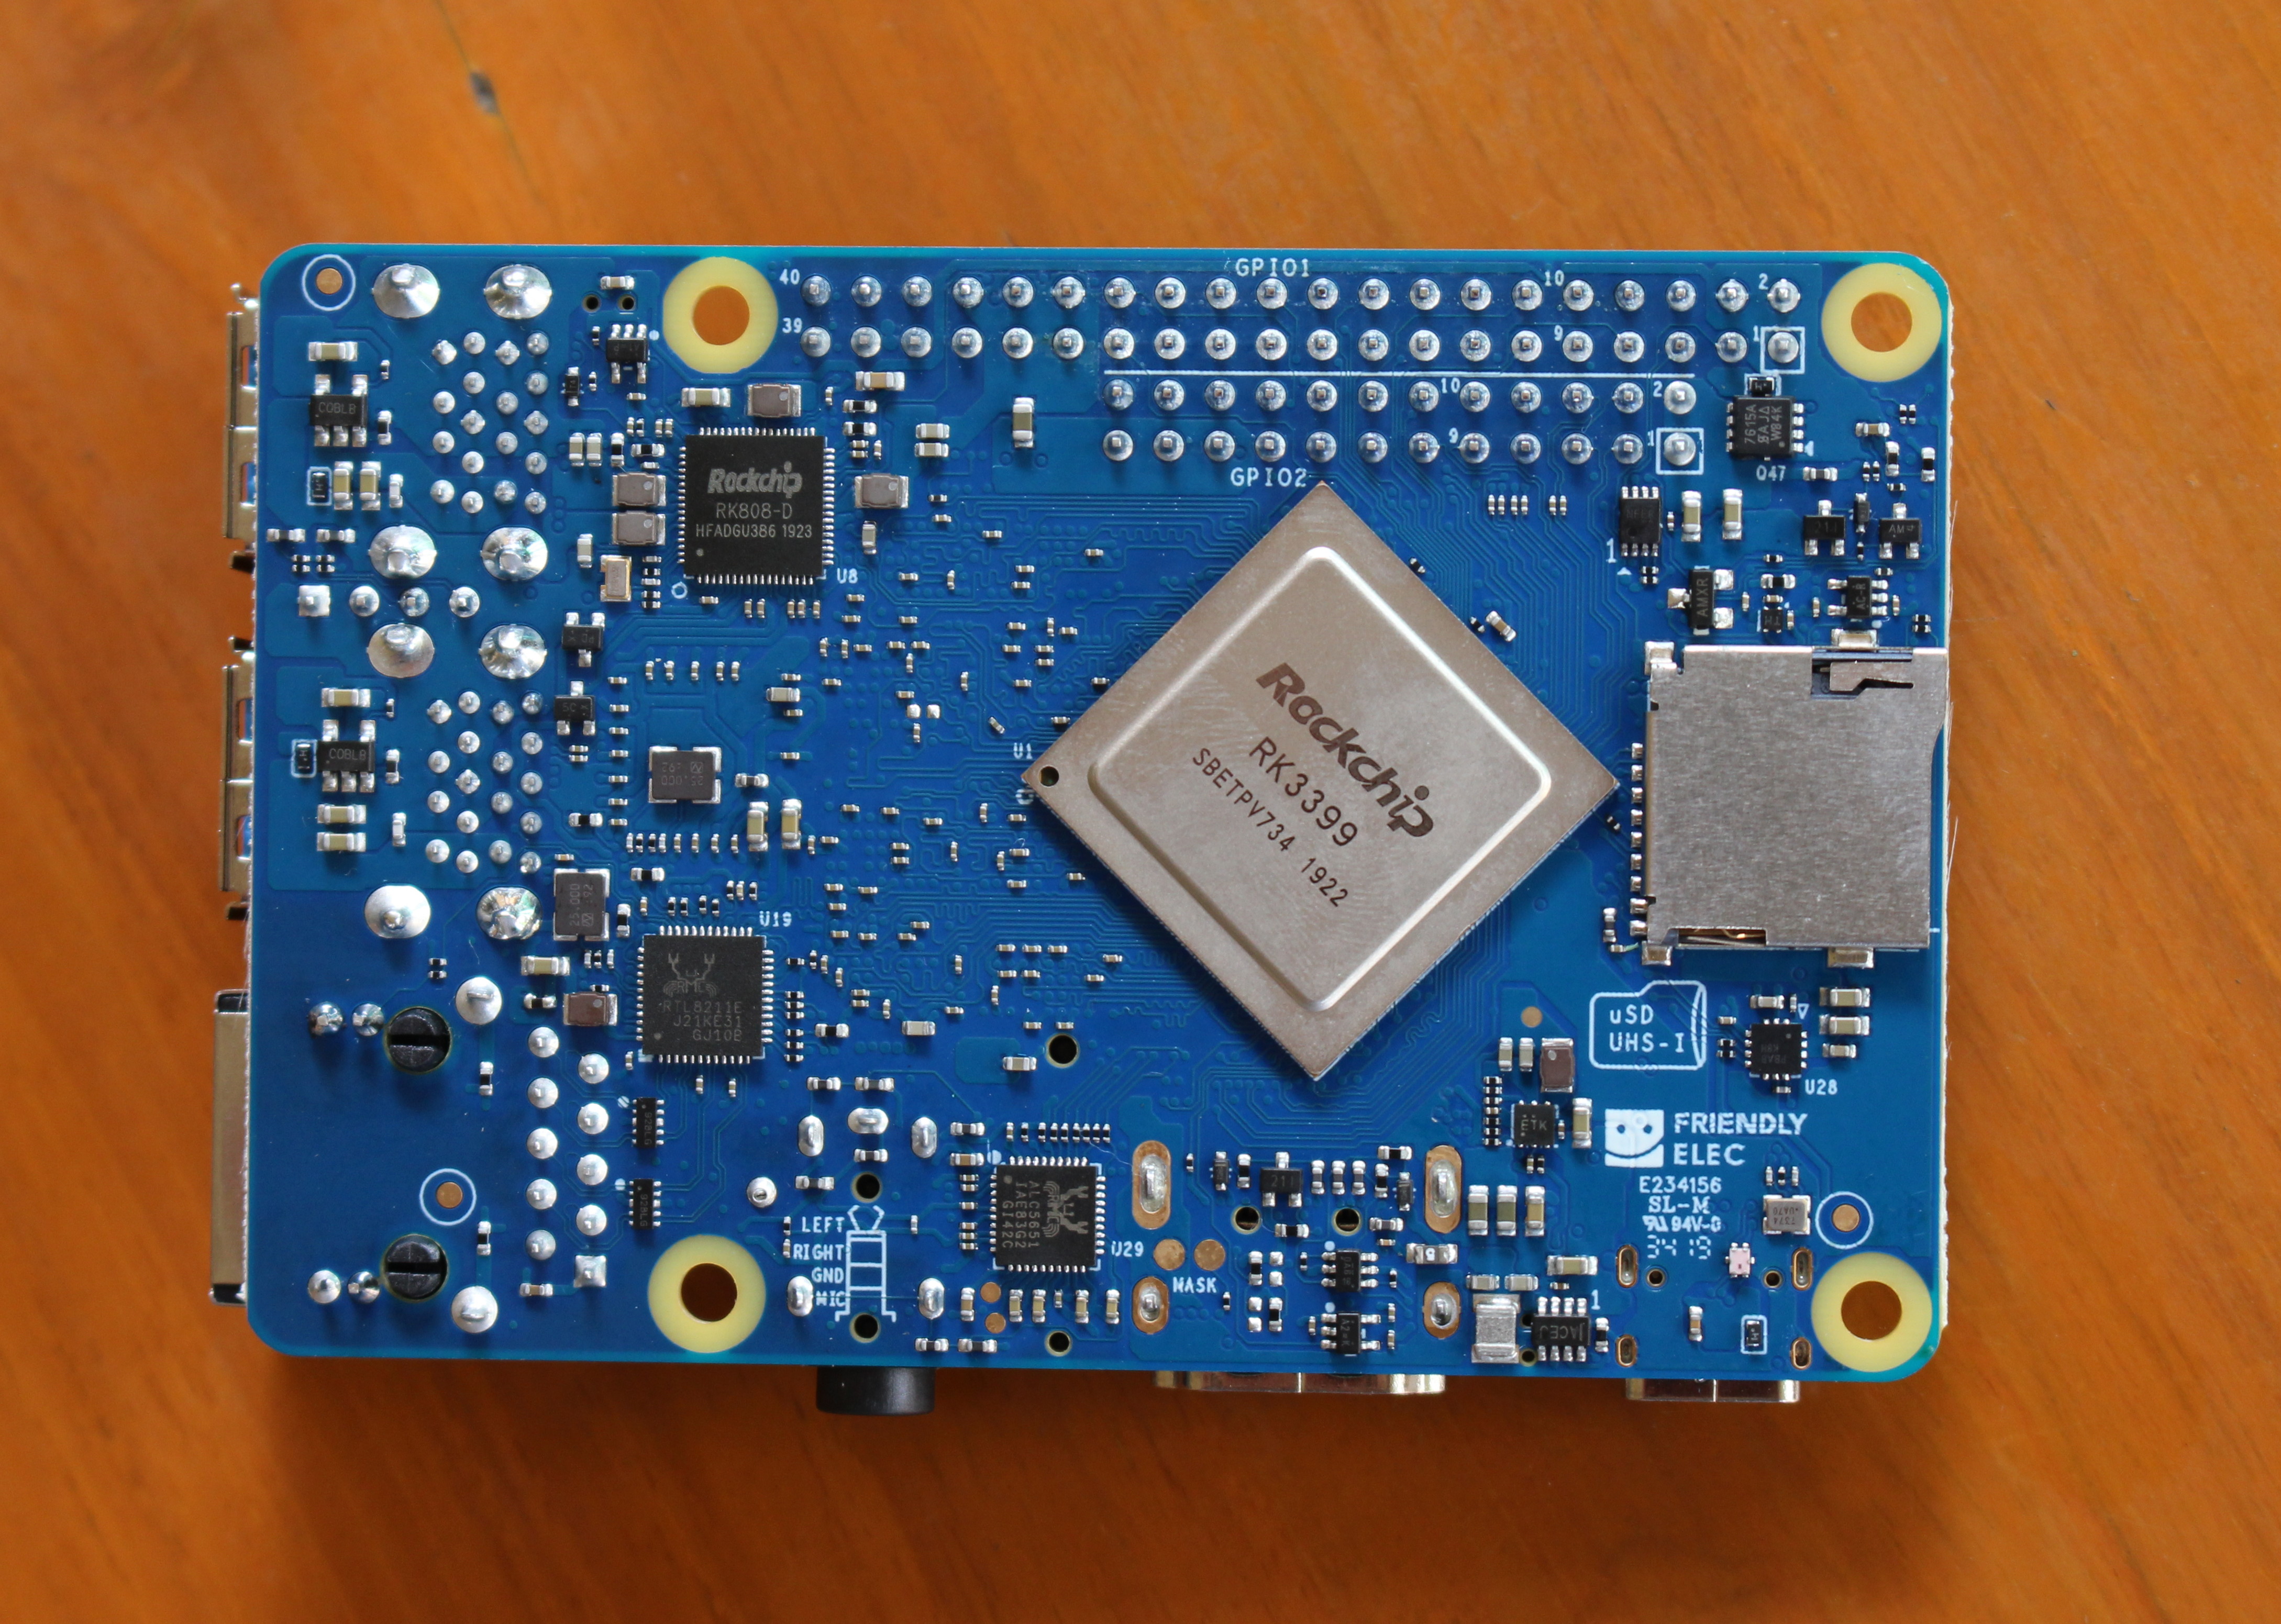
The bottom of the board features Rockchip RK3399 hexa-core processor, a microSD slot, the PMIC, as well as Realtek Ethernet and audio chips.
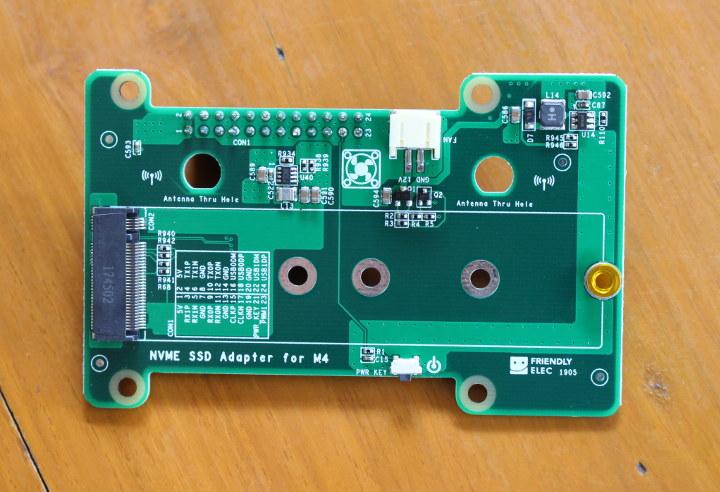
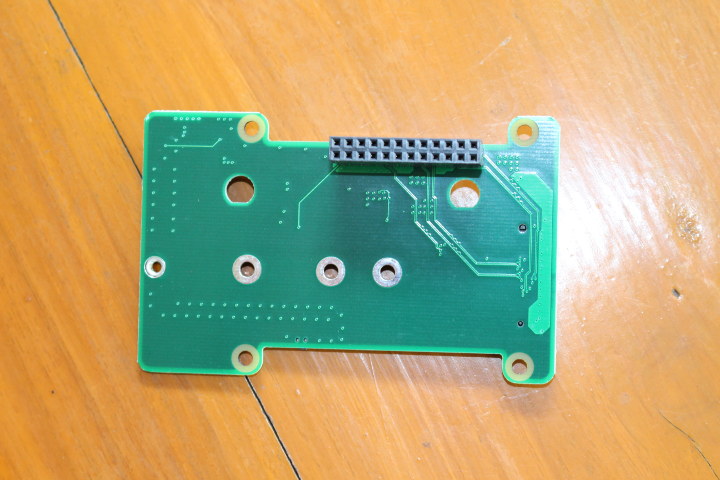
The NVME SSD adapter for NanoPi M4 includes an M.2 slot for 2280 M.2 NVMe (not SATA) SSD, a 12V fan connector, a power button, as well as the female header to connected to M4(V2) SBC.
NanoPi M4V2 Metal Case Assembly
Let’s get started with the assembled. First, loosen the top cover of the case with the provided screwdriver, peel off one of the plastic films from the thermal pad and placed it on the bottom part of the case as shown below.
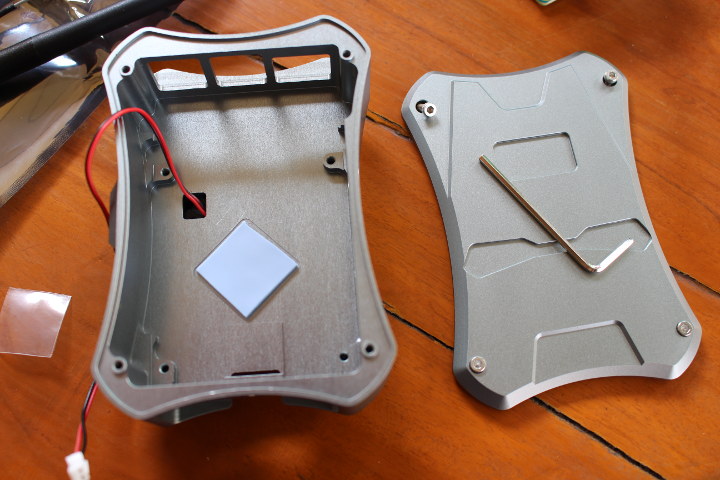
Peel off the remaining plastic film on the thermal pad, move the black & blue wires for the fan towards the antenna holes side, and push NanoPi M4/M4V2 board inside the case.
Tighten it with the four provided spacers. If you have big fingers it may be challenging, so use tools or find somebody with thinner fingers.
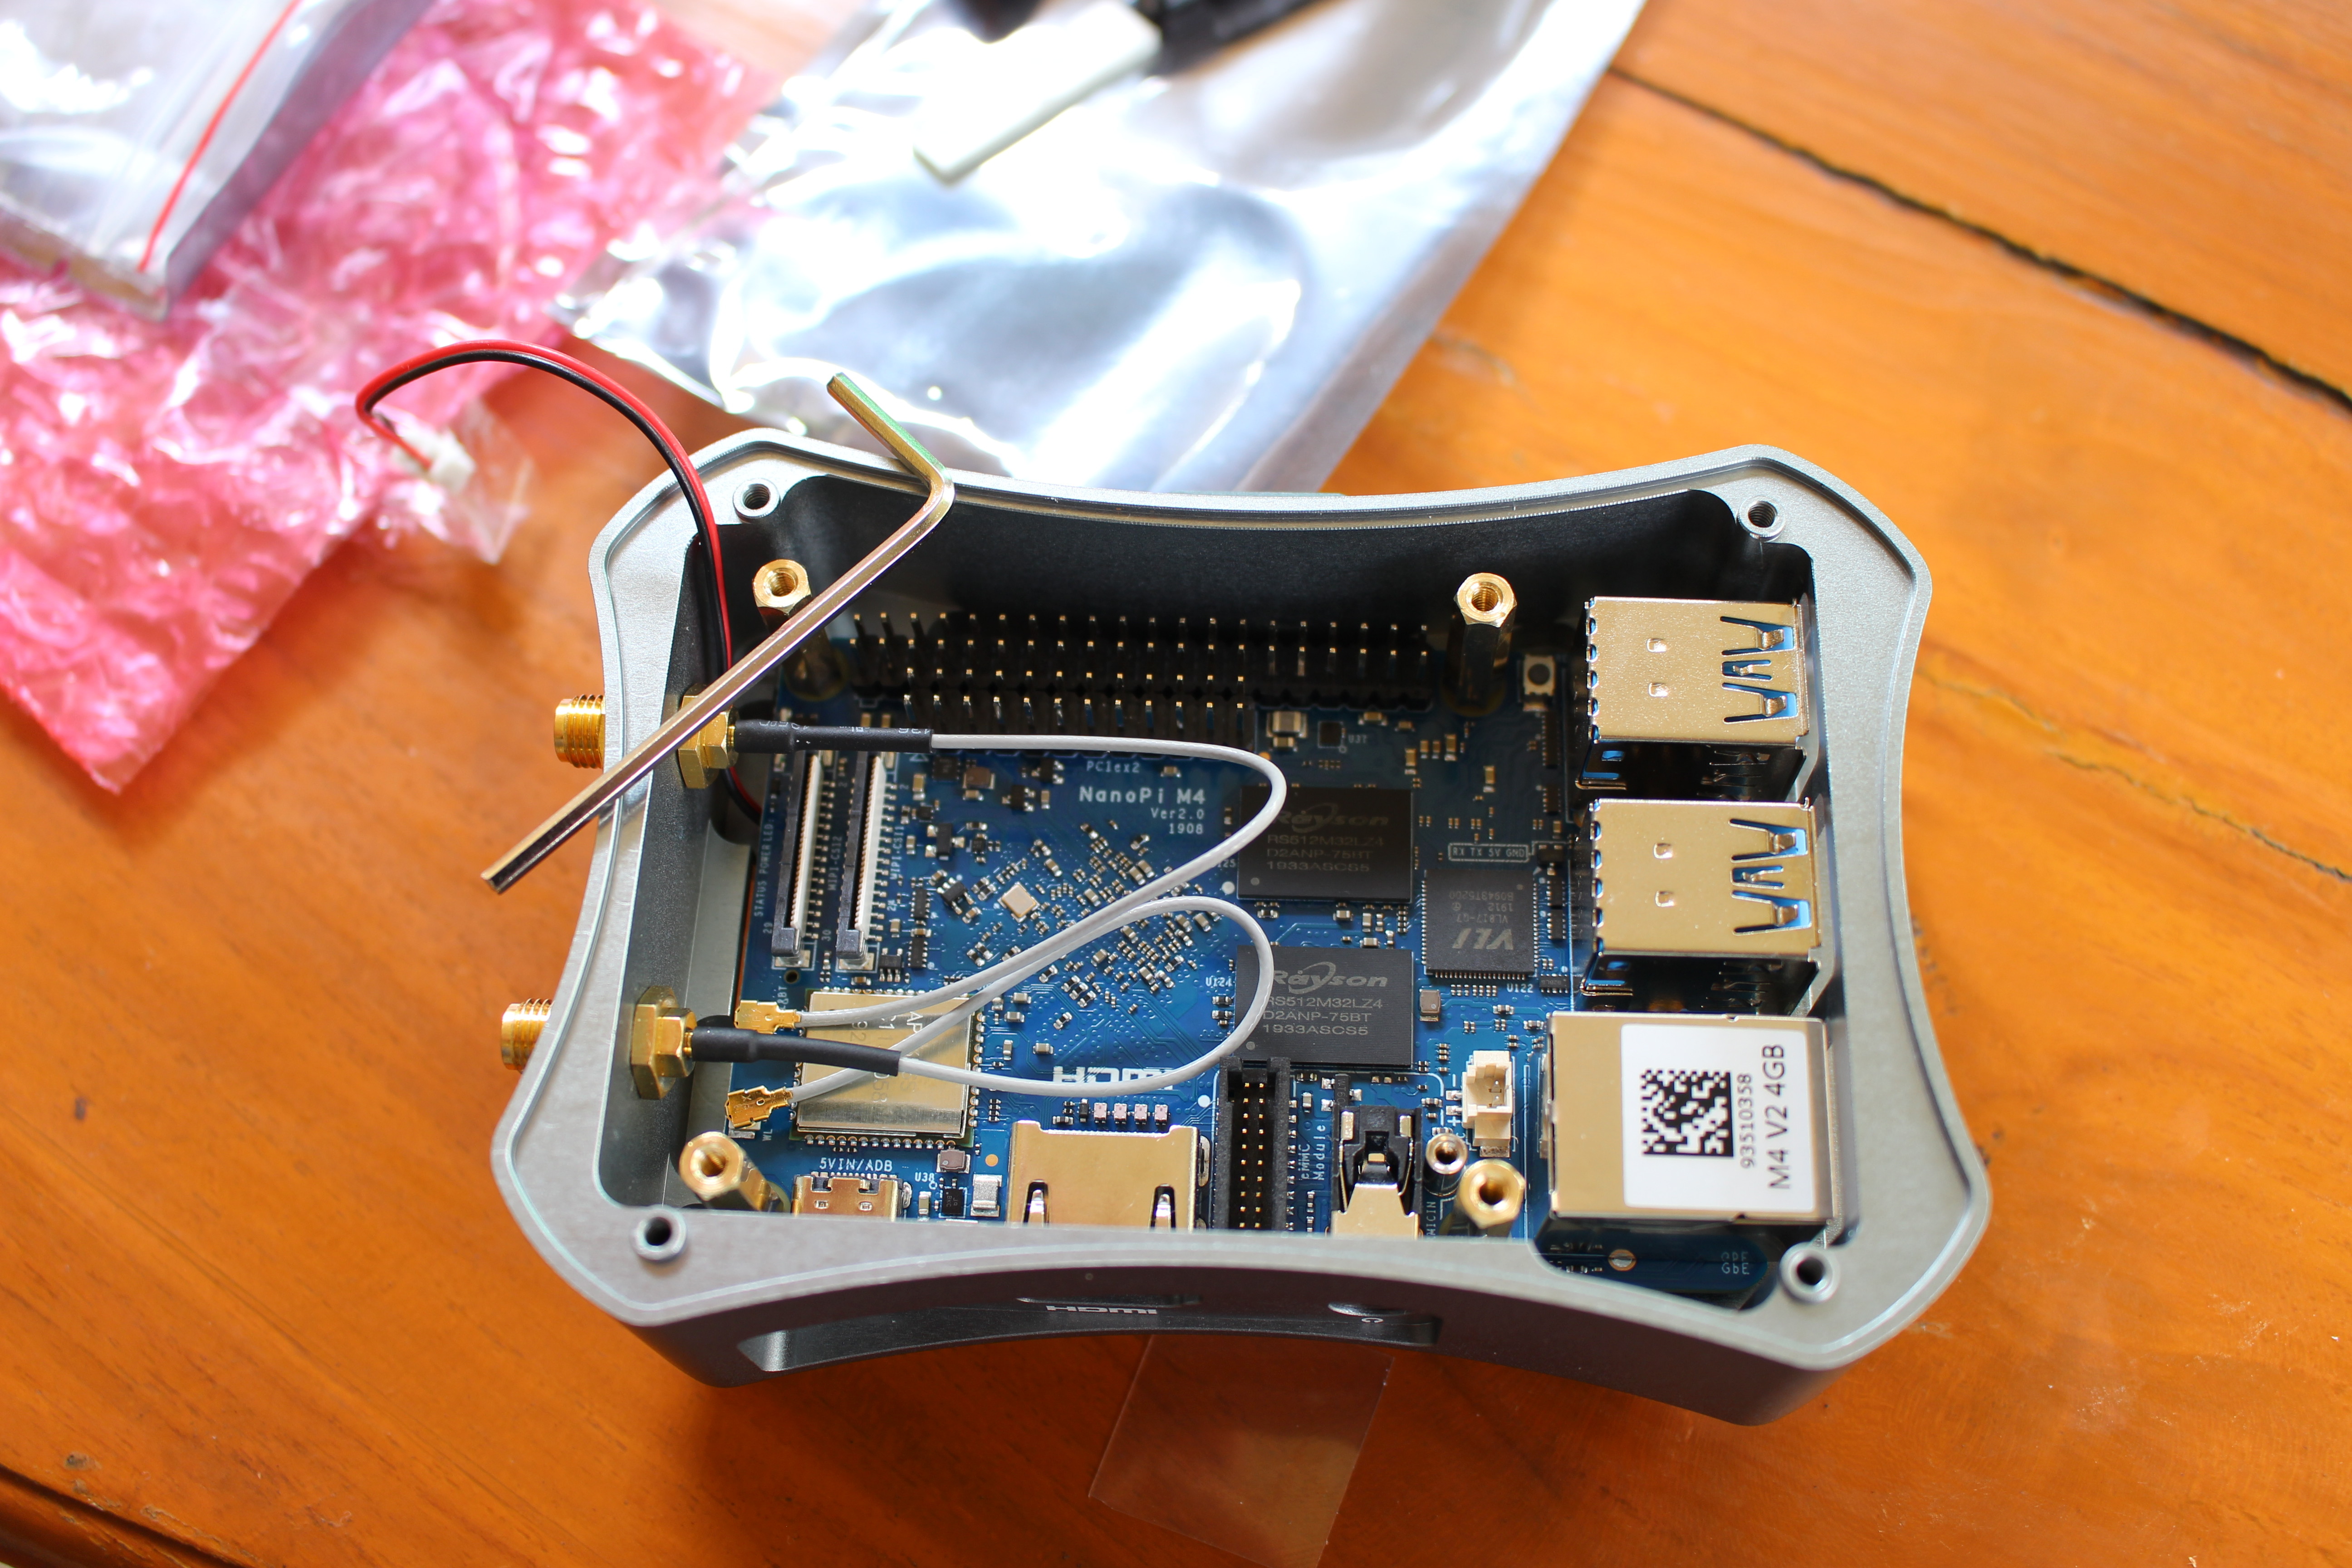
We can then install the antenna connectors to the two antenna holes of the case. Loosen and take out the nuts and other bits from the connectors, insert them, and from the outside insert the black rings and screw back the nuts as illustrated below.
I also had to connect the antenna connectors to the u.FL connectors and I used the provided screwdriver to push those into place.
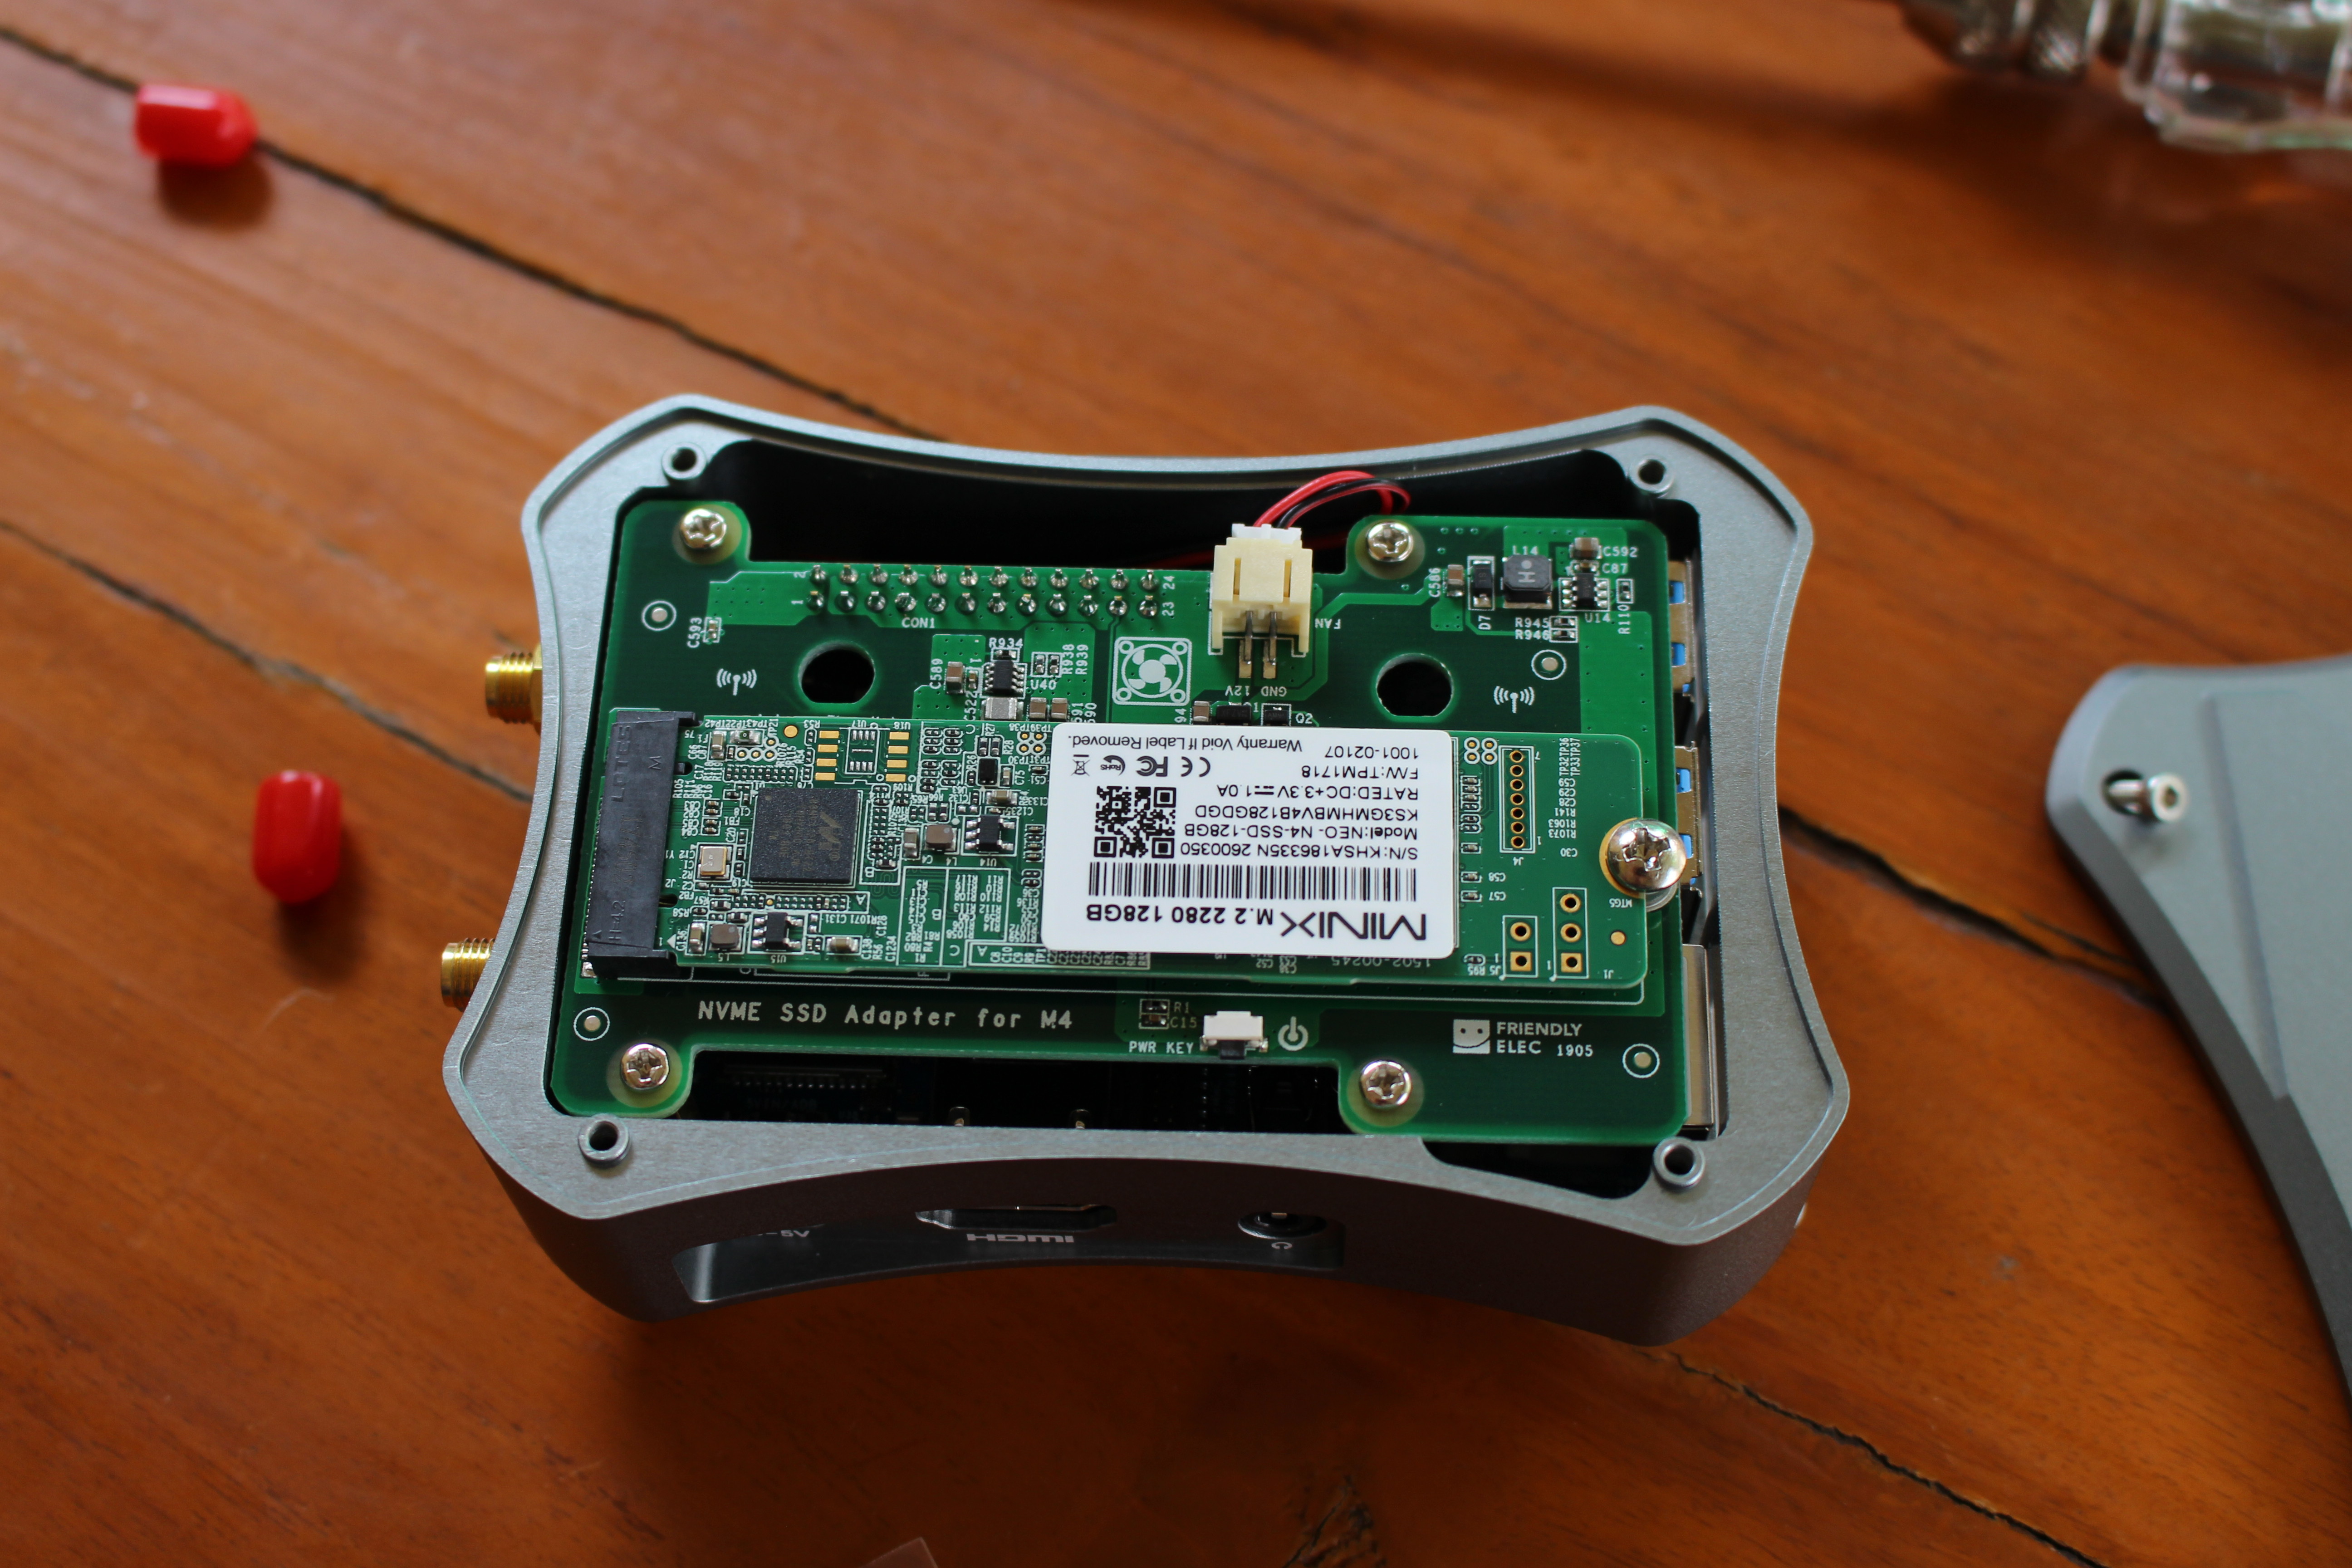
It’s now time to install the NVMe SSD adapter. First, we can connect the fan cable to the adapter before placing it on top of the spacers we previously tightened and securing the adapter with four screws.
We could now insert an NVMe SSD into the socket and secure it with the remaining screw. Inquiring minds may wonder why I’m using an M.2 SATA SSD above, and that’s because I don’t own an NVMe SSD just yet, and did so for illustration purpose only :).
The final steps are to put the top cover back, attach the two dual-band wireless antennas, and stick the four transparent rubber pads to the bottom of the pad (which I forgot to do before taking the photo below). We also need to flash an operating system and insert a MicroSD card into the opening right under the two antennas, but that’s something I’ll do in the second part of the review.
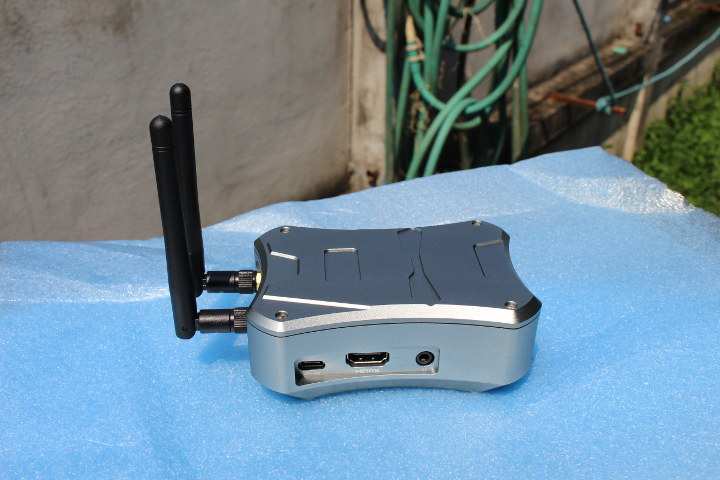
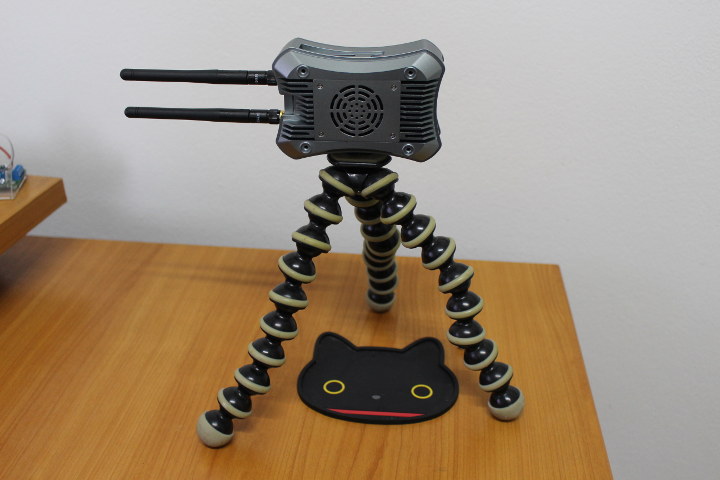
The case can be placed vertically too if you don’t intend to use the Gigabit Ethernet nor USB 3.0 ports.
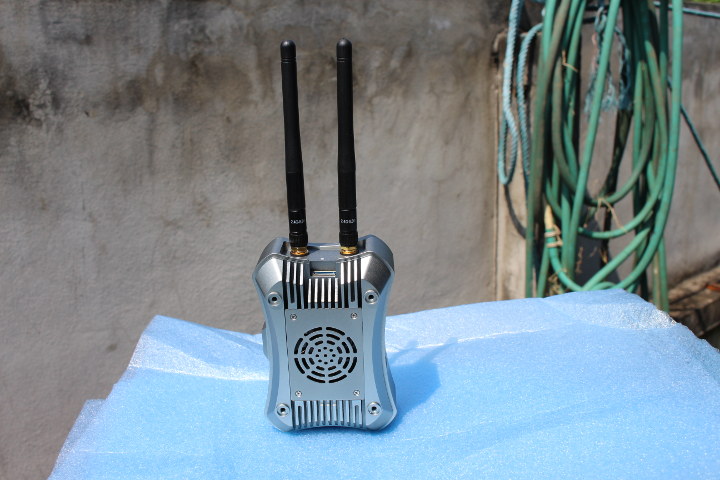
I could confirm the mounting thread also allows the case to be mounted to camera mounts or compatible threaded mounts.
I’d like to thank FriendlyELEC for sending a kit for review. If you’d like to reproduce my setup you’d need to get NanoPi M4V2 SBC plus the metal case for $98 plus shipping (Make sure to select “Metal Case w/ Cooling Fan(NVMe SSD Adapter included) (+$28.00)” option.
Continue reading NanoPi M4V2 Kit Review – Part 2: FriendlyCore Desktop.

Jean-Luc started CNX Software in 2010 as a part-time endeavor, before quitting his job as a software engineering manager, and starting to write daily news, and reviews full time later in 2011.
Support CNX Software! Donate via cryptocurrencies, become a Patron on Patreon, or purchase goods on Amazon or Aliexpress. We also use affiliate links in articles to earn commissions if you make a purchase after clicking on those links.


Is there any option to mount it behind a monitor using VESA ?
Are you aware friendlyelec launched awhile back, a replacement for older boards, a LCD 5″, a 64 GB eMMC and a Core6818 ?
If of interest
Looks like an automatic-targetting cannon system mounted on a tripod. 😀
The NVMe SSD, bootble?