Building a small cluster of Raspberry Pi boards or/and other compact single board computers requires you to handle power and cooling issues, as it may not be practical to have one power supply per board, and since boards are close to each other heat may build up.
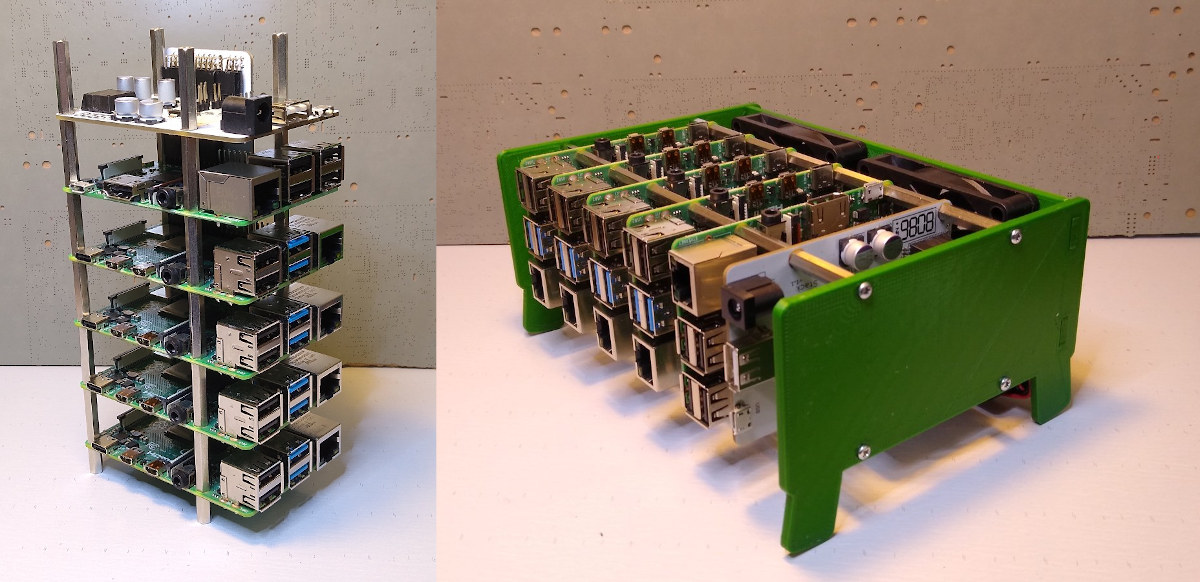
There are already off-the-shelf solutions such as rackmounts for Raspberry Pi SBCs or carrier boards for multiple Raspberry Pi Compute Modules but more often they do take not take care of all issues like mounting, power, and cooling. ClusterCTRL Stack offers a solution that can power up to 5 Raspberry Pi SBC’s via a 12V/24V power supply and control up to two fans. If you could also 3D print an enclosure for your cluster in order to attach the fan.
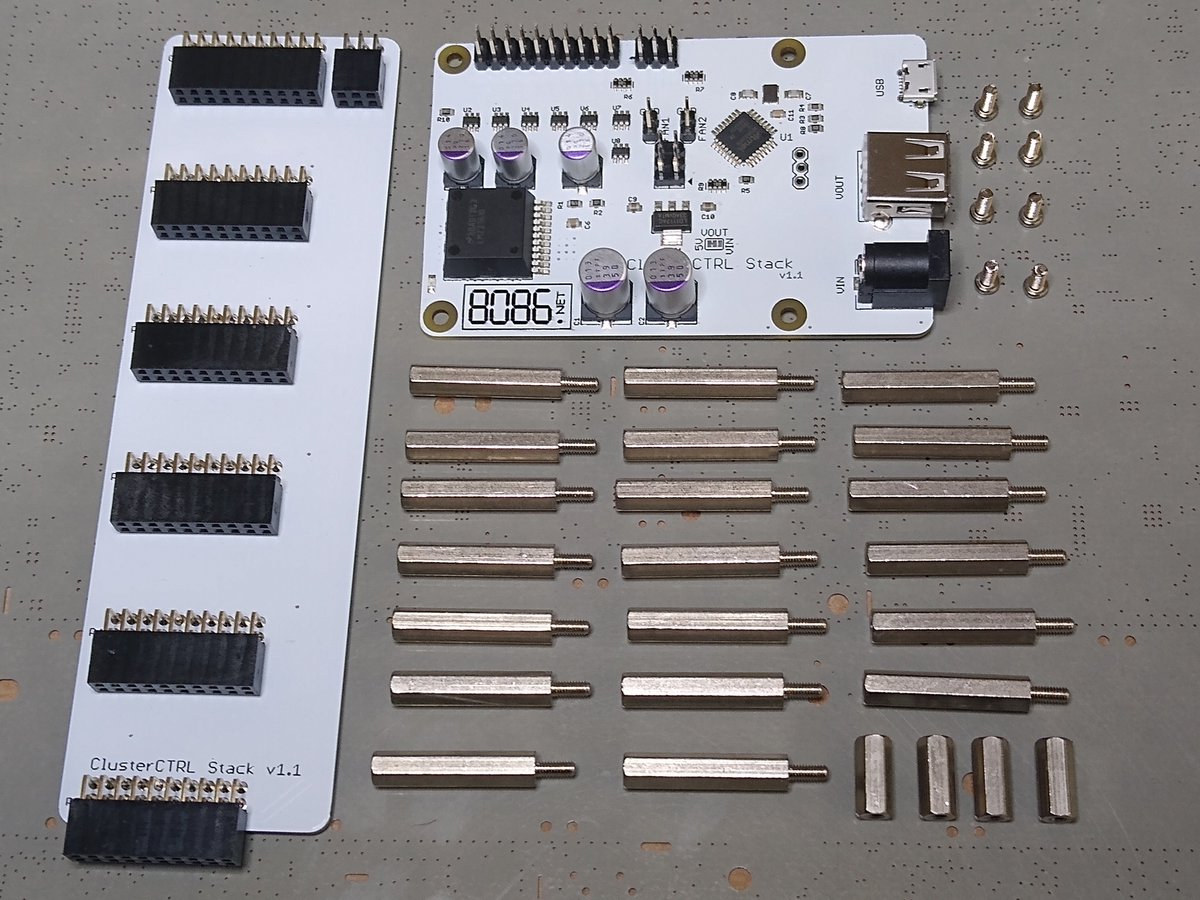
ClusterCTRL Stack is comprised of two boards with the following key features and specifications:
- Controller Board
- Power Input – 12-24V PSU.
- Power Output
- 20-pin header with 2x5V and 2xGND for each board.
- 1x USB Type-A port 5V power output to power a USB switch for example.
- Onboard 10 Amp 5.1V DC-DC regulator (2 Amp allowance per Pi).
- 6-pin header for monitoring of Raspberry Pi (1 GPIO pin per Pi).
- Connectors for 2 independently controlled fans.
- Configuration/Control Interface – 1x Micro USB to control individual Pi power, fan, auto power on, voltages, etc.
- Passive backplane
- 20+6 pin connectors (top) for ClusterCTRL Stack Controller.
- 20-pin connector for each of the five regular-sized Raspberry Pi (B+/2/3/3+/4).
- Connects GPIO BCM18 of each Raspberry Pi to the controller’s monitor header in order to turn on/off the corresponding fan as needed (P1/P2 = FAN1 and P3/P4/P5 = FAN2).

The kit includes the controller and backplane boards, as well as standoffs and screws. So you’ll need to provide a 12-24 V power supply with 5.5 mm 2.1/2.5mm barrel jack (60 Watts+), Raspberry Pi boards or compatible, and optionally 2x 70 mm 5V fans, a micro USB cable to connect to the controller board, and a Gigabit Ethernet Switch. The enclosure can be printed using those files.
Used in standalone, the kit will simply turn on each Raspberry Pi with a one-second delay after the power is applied, and BCM18 GPIO will be monitored to turn on/off the corresponding fan. You can install any OS, but you’ll need to modify /boot/config.txt on each Raspberry Pi as follow to automatically turn on the fan (at 75°C)
|
1 |
dtoverlay=gpio-fan,gpiopin=18,temp=75000 |
If you’ll get more control over your cluster if you install clusterctrl software and connect it to another Raspberry Pi via the micro USB port with the features including:
- Control power for each Raspberry Pi individually.
- Measures both the voltage supplied to the Raspberry Pi and the 12-24V input voltage.
- Configure power-on state (each individual Pi can be set on/off by default).
The easiest way to make a Controller Pi (Raspberry Pi board with clusterctrl software is to flash the pre-built binary to a MicroSD card. You could also install it manually on other OS images, but it gets a little complicated. You’ll find three methods to install clusterctrl software on the official website.
ClusterCTRL Stack is sold for $99 plus shipping on Tindie. As an aside, it’s made by 8086 Consultancy company that previously designed Cluster HAT enabling the connection of up to 4 Raspberry Pi Zero to one Raspberry Pi 2/3/4 board.

Jean-Luc started CNX Software in 2010 as a part-time endeavor, before quitting his job as a software engineering manager, and starting to write daily news, and reviews full time later in 2011.
Support CNX Software! Donate via cryptocurrencies, become a Patron on Patreon, or purchase goods on Amazon or Aliexpress


It looks an overall well-thought design. 2 Amp per board sounds like a low limit for a cluster, especially when boards start to heat up and DC-DC regulators start to lose in efficiency, but probably if boards are not overclocked it can remain OK. They should really ship large heat sinks with their kit. Fans without these are pointless, and it’s not as if these were very expensive. In addition since they fix the spacing between the boards, they know the exact room available hence the most optimal heat sink. It’s much harder for the end users to find the… Read more »
It obviously depends what you’re running but connecting via WiFi it uses about 36 Watts with all 5 running stress-ng and the fans on so there’s still some left for accessories too.
I’m not trying to be negative but can someone tell me a real use for something like this?
Surely if you need lots of Pis you really want a backplane that takes the compute modules,
has high voltage DC input, an on-board switch, proper remote management etc.
That’s precisely the point: “if you need lots of Pis”. I think those using Pis for development (ARM native development or just native builds for distros) might like this. The Pi4 is competitive and could possibly be used in such a case. It’s far from being the fastest ARM board around for sure, but at that price it’s not bad at all.
It depends on how many you need :))
https://www.servethehome.com/aoa-analysis-marvell-thunderx2-equals-190-raspberry-pi-4/
Amazing. So much efforts and then everything ruined by choosing a useless kitchen-sink benchmark’s ‘overall score’. Geekbench has a big emphasis on crypto and compression/decompression so if this is not representative for your real workload you’re just fooling yourself 🙂
Interesting article but it’s comparing apples and oranges. It solely focuses on the costs that can or cannot be factored. For example it considers that 190x4GB RAM is the same as 768 GB without considering the workloads’ granularity: if you need 2G you can’t fit two into an SBC while you can almost double the count on the server. It doesn’t take management costs into account (i.e. OS upgrades and accompanying down time). It forgets to mention that TX2 is 64-bit only and will not run 32-bit code. It’s talking about CI/CD but this typically is a case where you… Read more »
I could use it for running a small 3D printer farm with Octoprint.
Could you not do that with a single pi or just double-sided tape a pi onto each of the printers?
Not worth a hundie if you ask me. BUT very Kool and could use one if I had it. I’d rather copy the layout but I’d have to buy one or they make open and let me make it myself. Looks pretty simple if the pics were higher def you can see the the work from here alone. Include the extras and power supply maybe a cheap micro switch I go hundred, maybe. More like $80ish. Better housing and asthestics too will bring it up to hundred.. idk I be tossed on this for awhile and just keep the cheap… Read more »
I can’t find a schematic. When it comes to a gadget like this that costs a pricey $99.00 + $12.80 shipping, I need to see the design first. No schematic = no buy. And 2A / pi doesn’t cut it. If you need a cluster, you’re likely going to want to overclock.
Need something like this, I’m also open to alternatives,
My idea is a cluster of max 5 PI4 (8gb) to play with kubernetes
Enclosure and control is not a big deal
what I need is power, a single powerbrick for all the PIs
Actually you should focus on N-1 nodes, where N is the number of switch ports. You find plenty of cheap 5-port and 8-port switches so you should focus on 4 nodes or 7 nodes per cluster.