
In my early list of third-party Raspberry Pi RP2040 boards, I shortly mentioned Cytron Maker Pi Pico baseboard for Raspberry Pi Pico that exposes all pins via female headers, includes LEDs for all GPIOs pin, six Grove connectors, three user push-buttons, one RGB LED, a piezo buzzer, an audio jack, a MicroSD card, and an ESP-01 socket to add WiFi connectivity. The beta version sold for $5, and at the time I missed that included Raspberry Pi Pico board as well, so basically you got a free baseboard.
The Malaysian company has now sent me a review sample to play around with, so let’s have a closer at the hardware and code samples for the board.
Maker Pi Pico Unboxing and Specifications
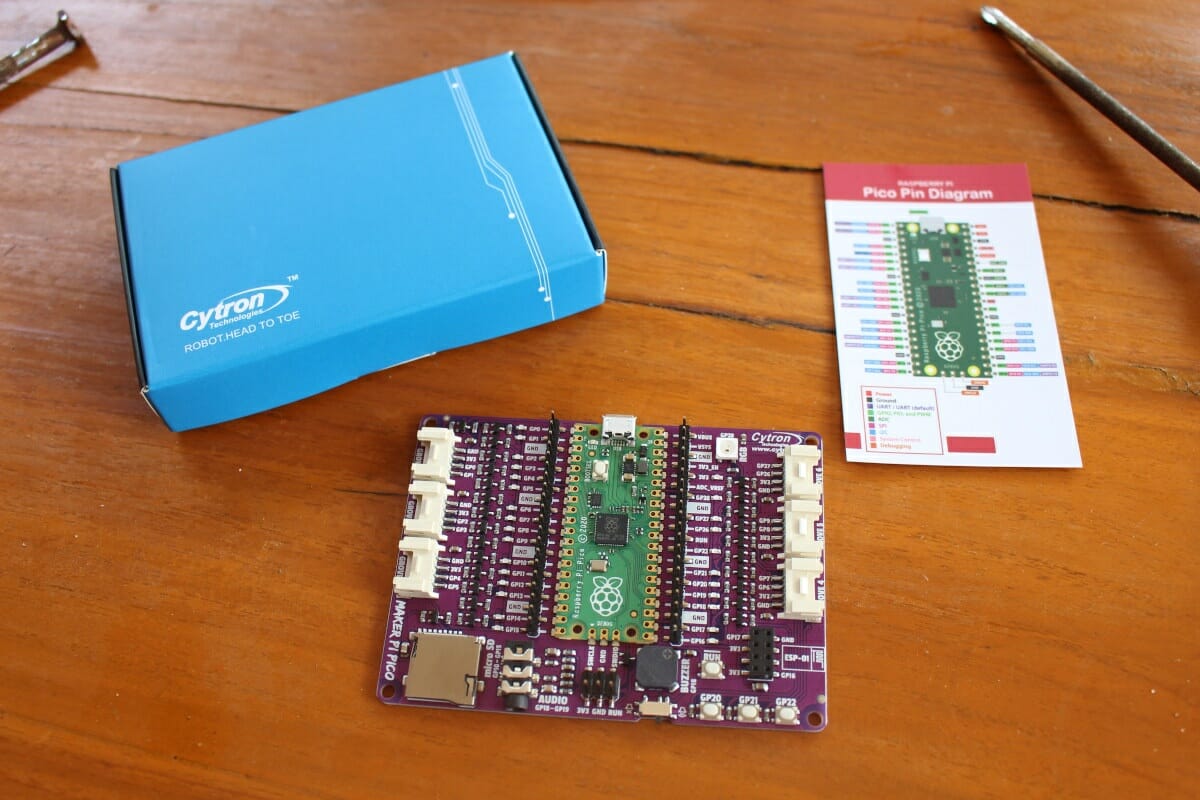
I received the board in Cytron package together with a pinout diagram for Raspberry Pi Pico, and we can see the latter is already soldered to Maker Pi Pico.
Maker Pi Pico specifications:
- Based on Raspberry Pi Pico
- Storage – MicroSD card slot connected to GP10-15
- Audio
- 1x Piezo buzzer connected to GP18 plus switch to turn it on/off
- 1x 3.5mm stereo audio jack connected to GP18-19
- Wireless connectivity – Socket for optional ESP-01 WiFi module (ESP8266 based)
- Expansion
- All Raspberry Pi Pico’s pins can be found on two 20 ways pin headers with LED indicators on all GPIO pins
- 6x Grove connectors (I2C, digital, analog, UART)
- Misc – 3x programmable push-button connected to GP20-22, Reset button, 1x RGB LED (NeoPixel) connected to GP28
- Power Supply – 5V via micro USB port on Raspberry Pi Pico
- Dimensions – 94 x 68.6 mm
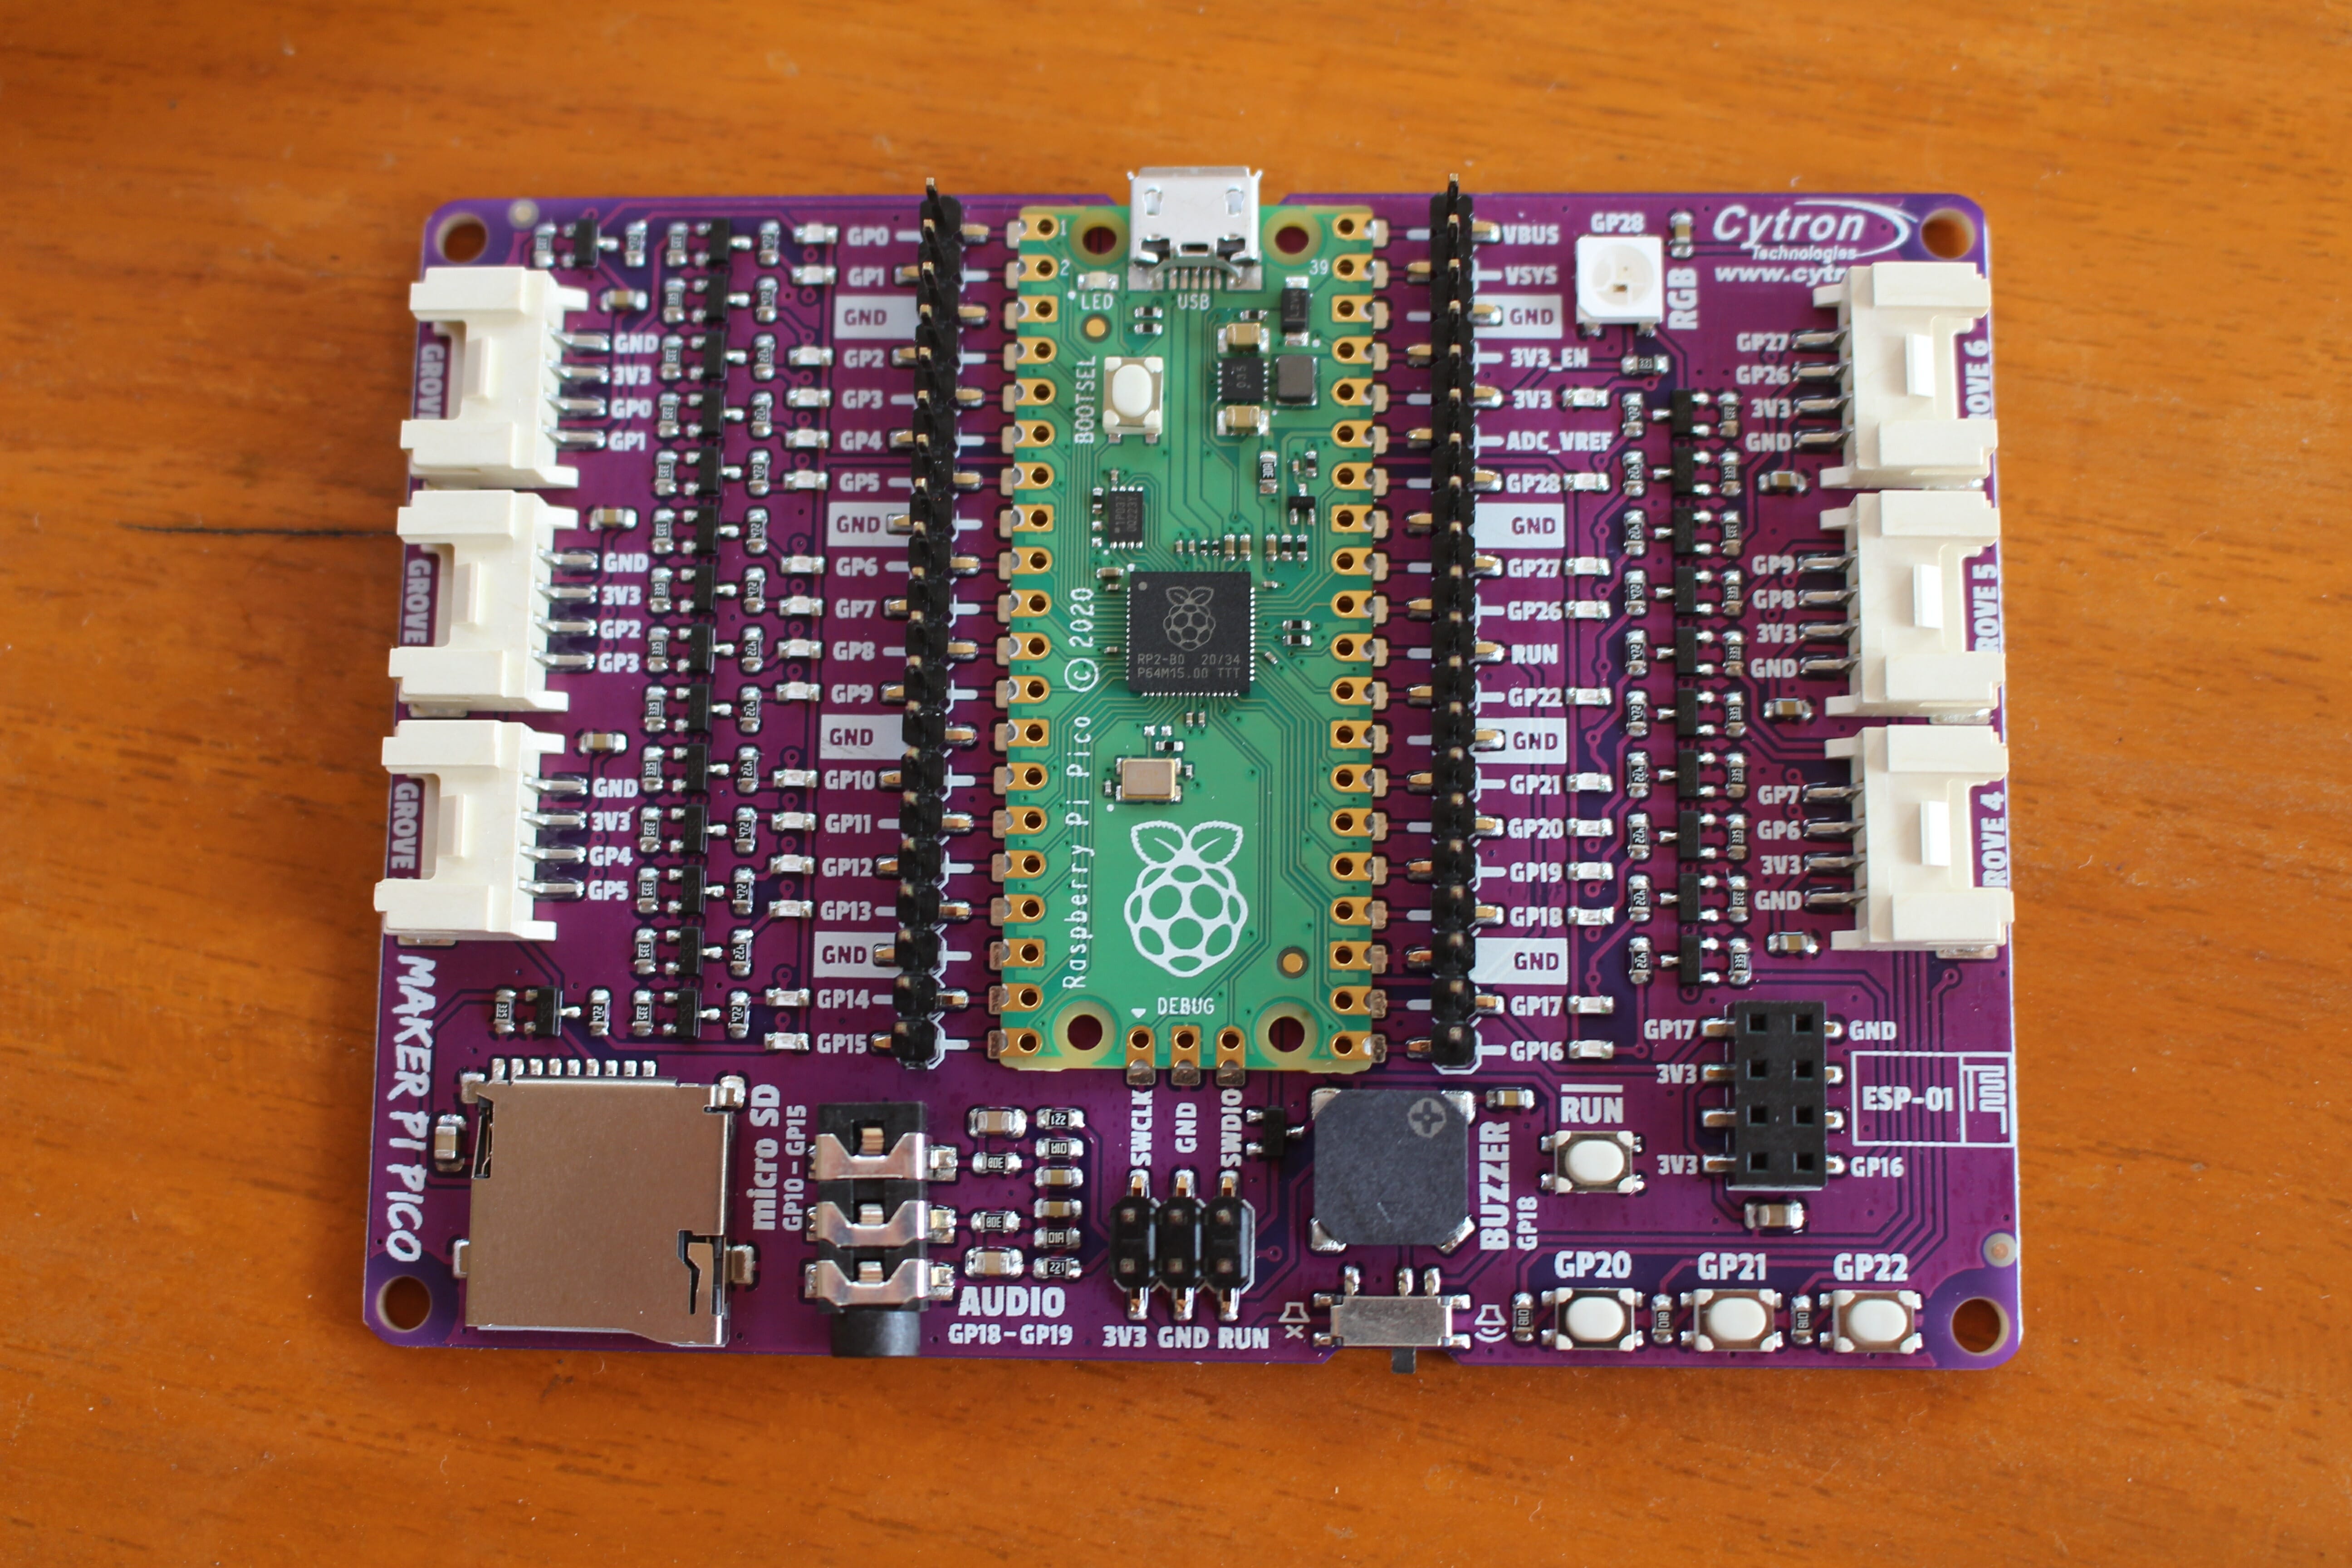
Everything is well marked so we know each I/Os are connected to which port, and the LED attached to each pin of the board makes it easy for debugging. I’d wish the Grove ports were clearly marked too to know which feature is available, but you’d have to look at the included Pico pin diagram to find out Grove 1 supports digital, I2C, or UART mode for example.
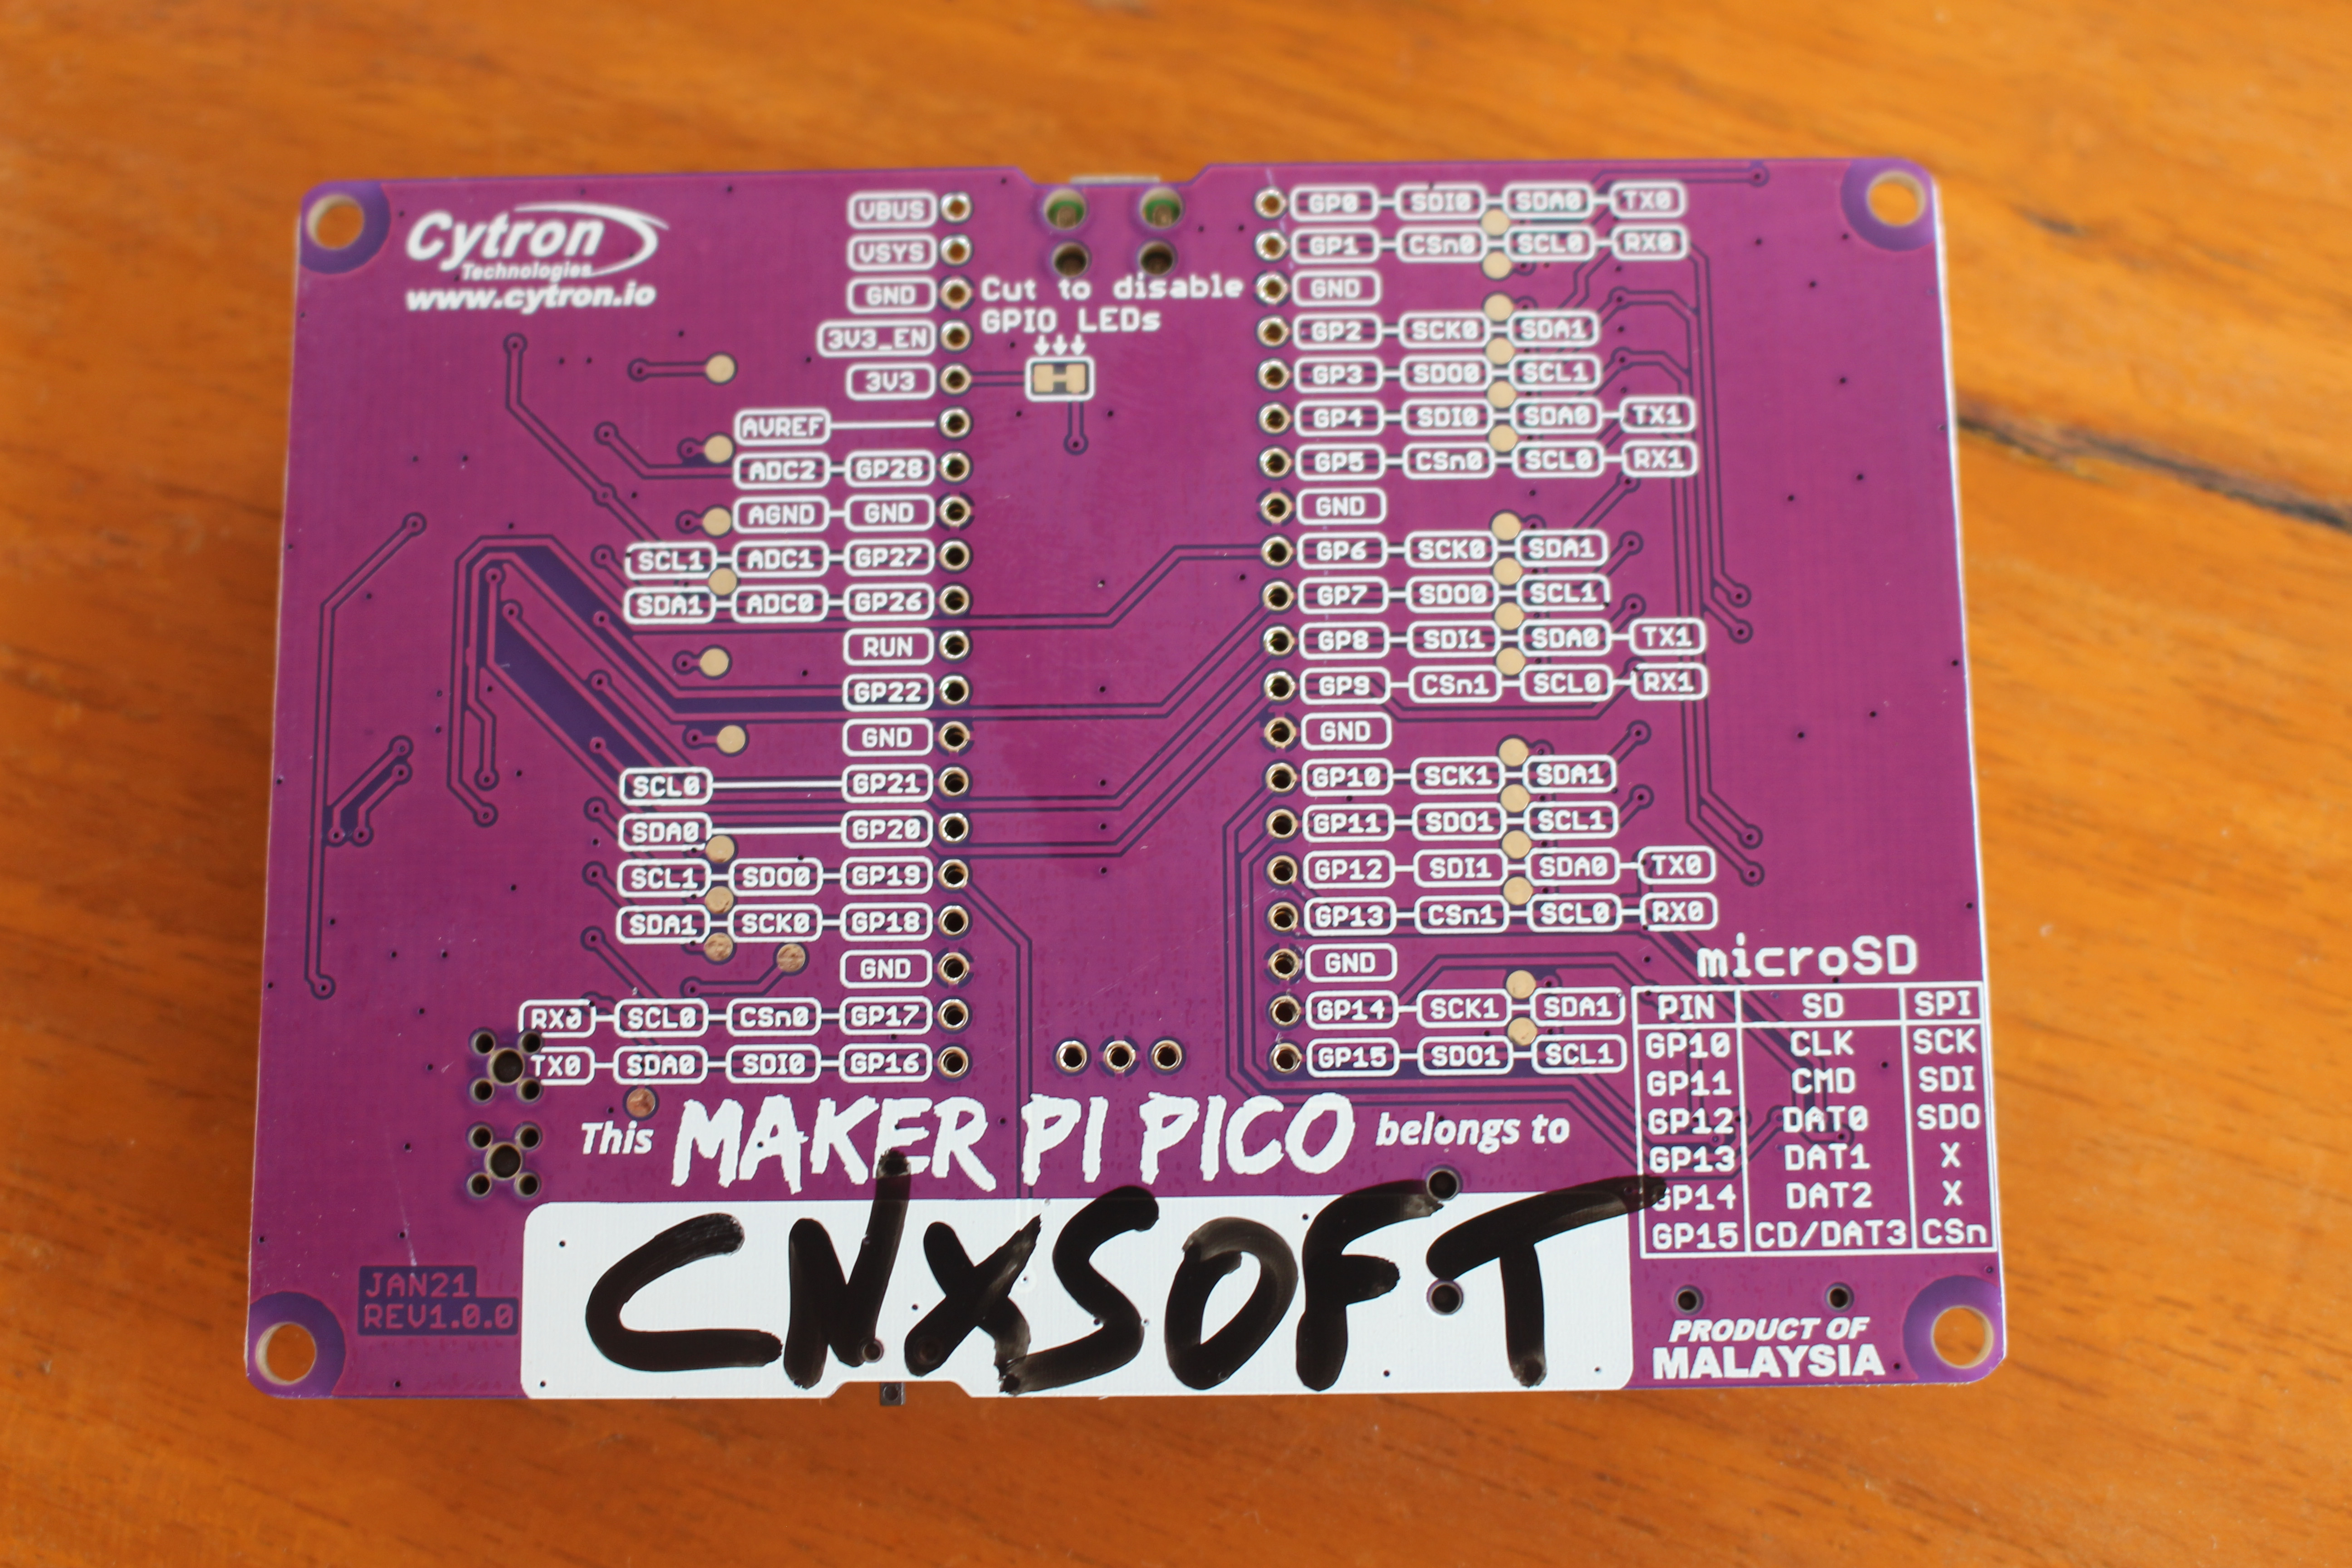
Since the board looks to be destined to the STEM education market, it’s nice to see there’s a white zone on the board to write to who the board belongs, so if Peter steals from Paul in the classroom, there’s proof!
The bottom of the board also includes more detailed markings, and if after a while all those GPIO LEDs get on your nerves, you can disable all of them by cutting a trace on the board (see “Cut to disabled GPIO LEDs” on silkscreen).
First boot and MicroPython LED blinking
Let’s play with the board by connecting a micro USB cable between a computer and the Raspberry Pi Pico.
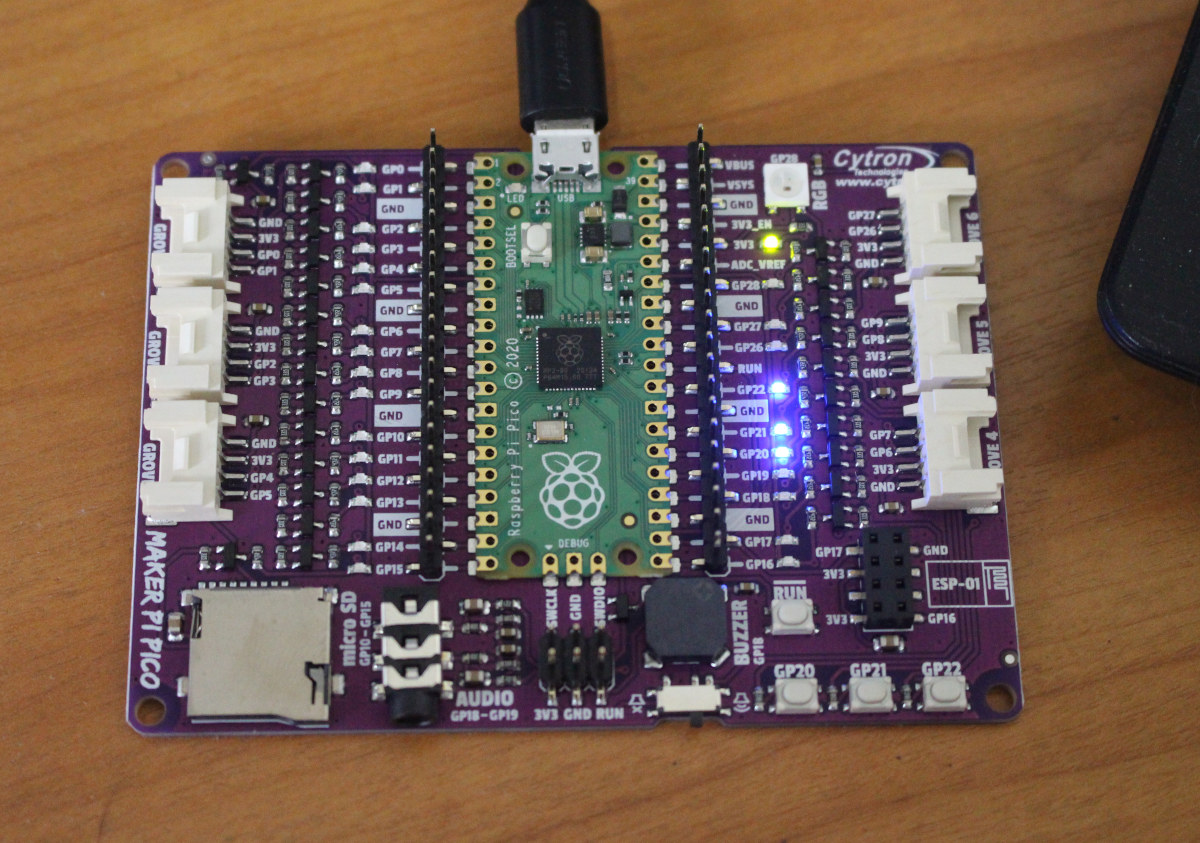
Some of the LEDs are on and music plays through the buzzer for a short time. That’s the pre-installed firmware. I then followed our Raspberry Pi Pico getting started guide to install MicroPython. I did not have to disconnect the micro USB cable, and instead, I simply pressed the Bootsel button on Raspberry Pi Pico, and the RUN button (aka Reset button) on Maker Pi Pico to enter bootloader mode. That means there’s no need to disconnect the cable each time you want to flash a UF2 file.
I copied rp2-pico-20210205-unstable-v1.14-8-g1f800cac3.uf2 file to RPI-RP2 drives and loaded my “alternate LED blinking MicroPython sample” that I used with a red LED on a breadboard. But this time, no need to wire a circuit on a breadboard since GP14 is already connected to one…
Maker Pi Pico and CIrcuitPython samples
But it’s not quite enough to just blink and LED on that board since it has some extra features, notably a microSD card, a 3.5mm audio jack and a buzzer.
Cytron has prepared some tutorials for the board, including a CircuitPython program to write a file on the microSD card. First, we’ll need to install CircuitPython on the board as explained on Adafruit website. It’s just the same as installing MicroPython, we need to enter bootloader mode, and copy the firmware in this case adafruit-circuitpython-raspberry_pi_pico-en_US-6.2.0-beta.2.uf2.
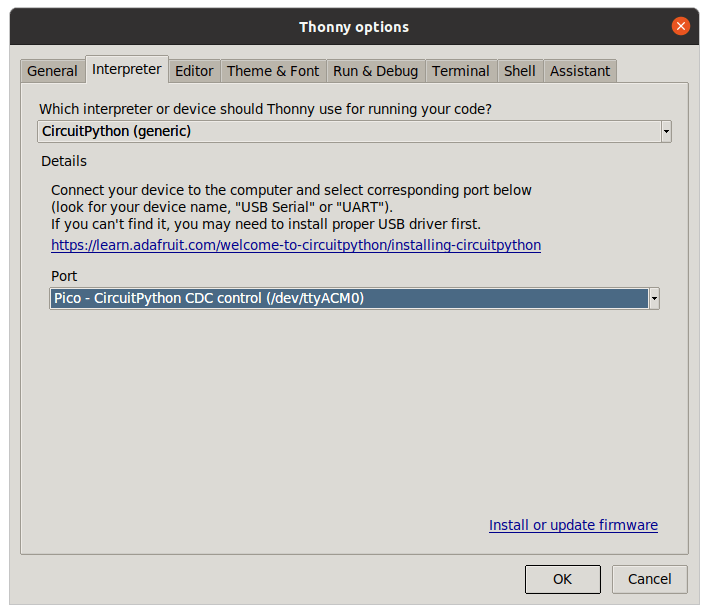
I then opened Thonny to run the sample provided by Cytron, and I had to change the Interpreter to CircuitPython (generic) and select the port “Pico -CircuitPython CDC control (/dev/ttyACM0).
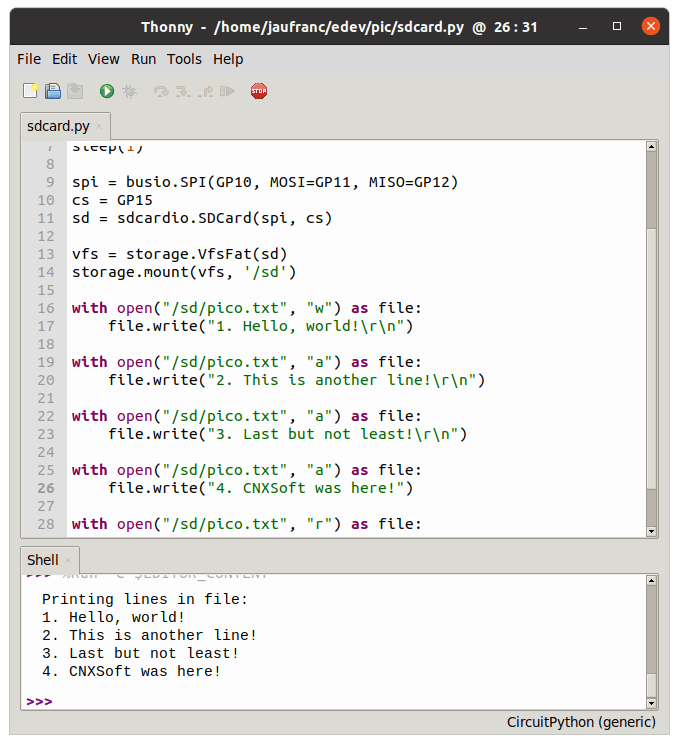
Here’s the source code to create a text file on the SD card and write some text in CircuitPython.
|
1 2 3 4 5 6 7 8 9 10 11 12 13 14 15 16 17 18 19 20 21 22 23 24 25 26 27 28 |
from board import * from time import * import busio import sdcardio import storage sleep(1) spi = busio.SPI(GP10, MOSI=GP11, MISO=GP12) cs = GP15 sd = sdcardio.SDCard(spi, cs) vfs = storage.VfsFat(sd) storage.mount(vfs, '/sd') with open("/sd/pico.txt", "w") as file: file.write("1. Hello, world!\r\n") with open("/sd/pico.txt", "a") as file: file.write("2. This is another line!\r\n") with open("/sd/pico.txt", "a") as file: file.write("3. Last but not least!") with open("/sd/pico.txt", "r") as file: print("Printing lines in file:") for line in file: print(line, end='') |
CircuitPython hides a lot of the complexity of performing the operation, so it’s almost as easy as writing the same program to create a file on a PC.
There’s no tutorial for the audio part at the time of writing, and at first I though to use the “pico-playground” sample for Raspberry Pi Pico VGA, SD Card, and Audio demo board, but looking at the schematics the design looks different, and I eventually found out MAKER-PI-PICO repository on Github with more CircuitPython and MicroPython samples, including the default firmware in Out-of-the-box Demo Code/MicroPython folder.
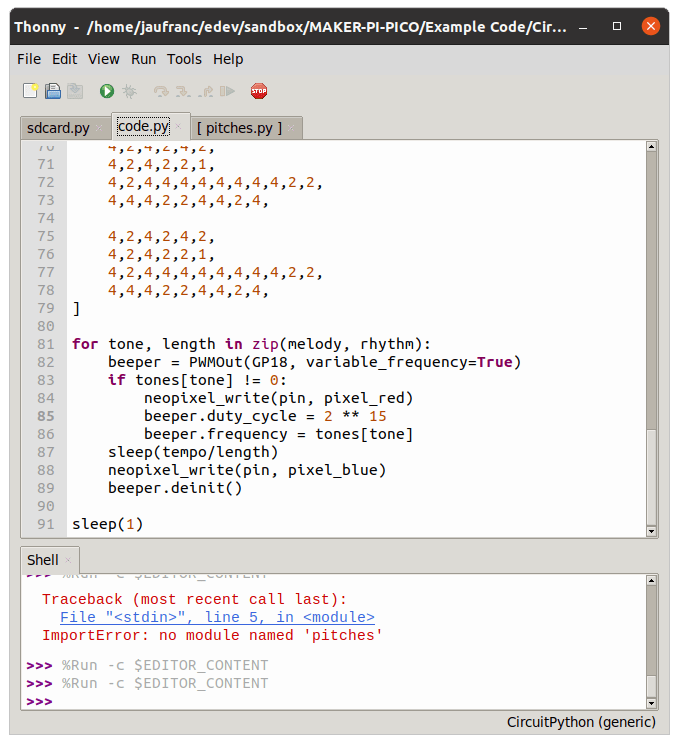
But since I’m specifically looking at audio code, there’s another CircuitPython sample in Example Code/CircuitPython/MelodyDoraemon/ with two files: code.py and pitches.py.
The former comes with the code to play a melody and control the Neopixel RGB LED, plus some arrays for the melody and rhythm, while the latter only contains an array for the tones used in the melody.
Check out the demo using both speakers and the buzzer below.
That’s all for this mini version. Maker Pi Pico is currently out of stock, but the next batch is coming soon for $10 or lower (currently $7.4) including Raspberry Pi Pico, and you can register your interest on Cytron store.

Jean-Luc started CNX Software in 2010 as a part-time endeavor, before quitting his job as a software engineering manager, and starting to write daily news, and reviews full time later in 2011.
Support CNX Software! Donate via cryptocurrencies, become a Patron on Patreon, or purchase goods on Amazon or Aliexpress


I’ve just been given the schematics: https://drive.google.com/file/d/1VNmgy9Z5xvXCAYgtTNeLGWKCtXTU9YqZ/view?fbclid=IwAR323aepDSKxHFCXKQYa6mT3ibPwunisxTM2ub-sae0euBxSzDUbe3Qxej0