
CNXSoft: This getting started guide was initially posted in Thai language by Suthinee Kerdkaew, and I’ve just translated her work into English with some minor edits.
As discussed in an earlier article, Maker Nano RP2040 is a board following the Arduino Nano form factor, but with a more powerful Raspberry Pi RP2040 microcontroller. The board also comes with plenty of LEDs, as well as two RGB LEDs, and a piezo buzzer for audio output.
Mr. Jean-Luc Aufranc has just given me a Maker Nano RP2040 board received from Cytron for review. I’ve never used a board before, so it’s my first experience, and in this article, I’ll try to program Maker Nano RP2040 with CircuitPython with three demos: a blinky sample, changing the color of the RGB LEDs, and playing a melody through the piezo buzzer. Let’s see if I can do it.
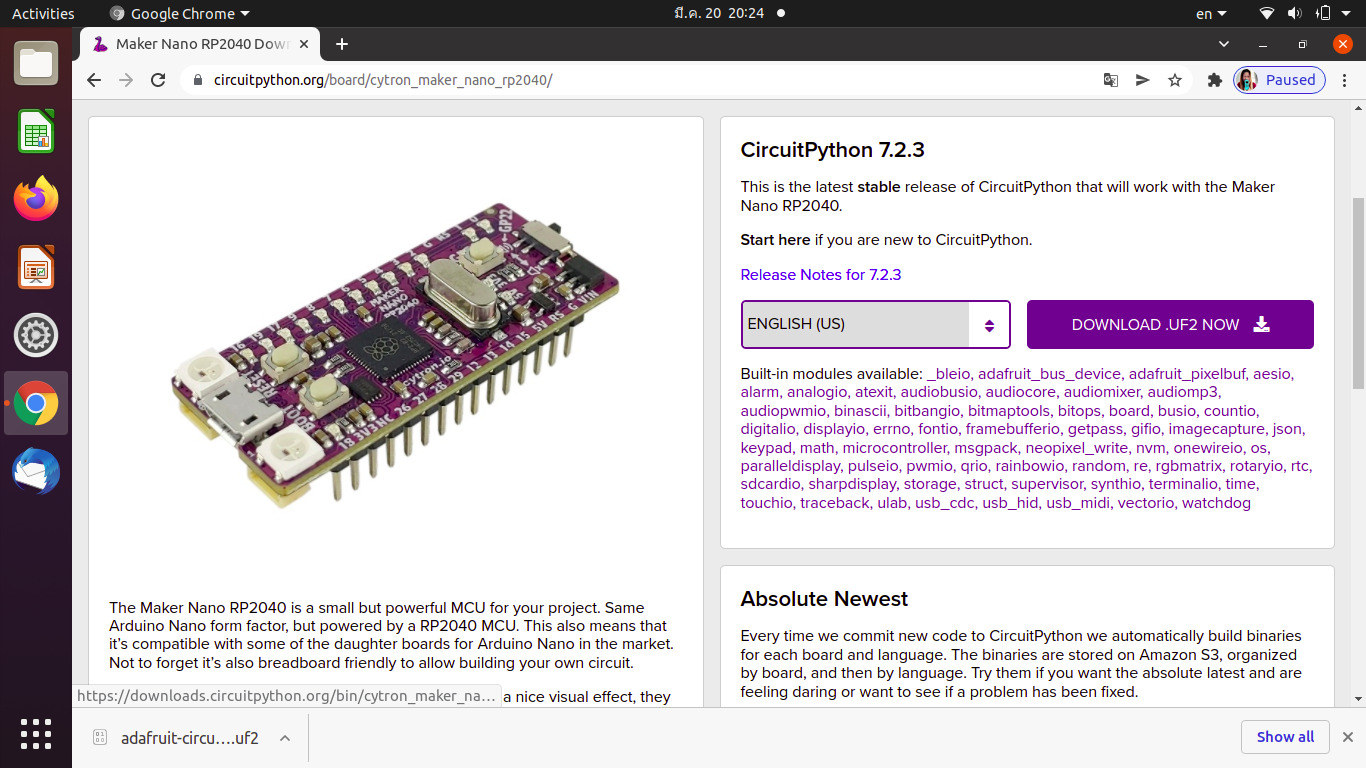
Let’s get started. I first downloaded the CircuitPython firmware from the official website. Simply select the language, and click on “DOWNLOAD.UF2 NOW”
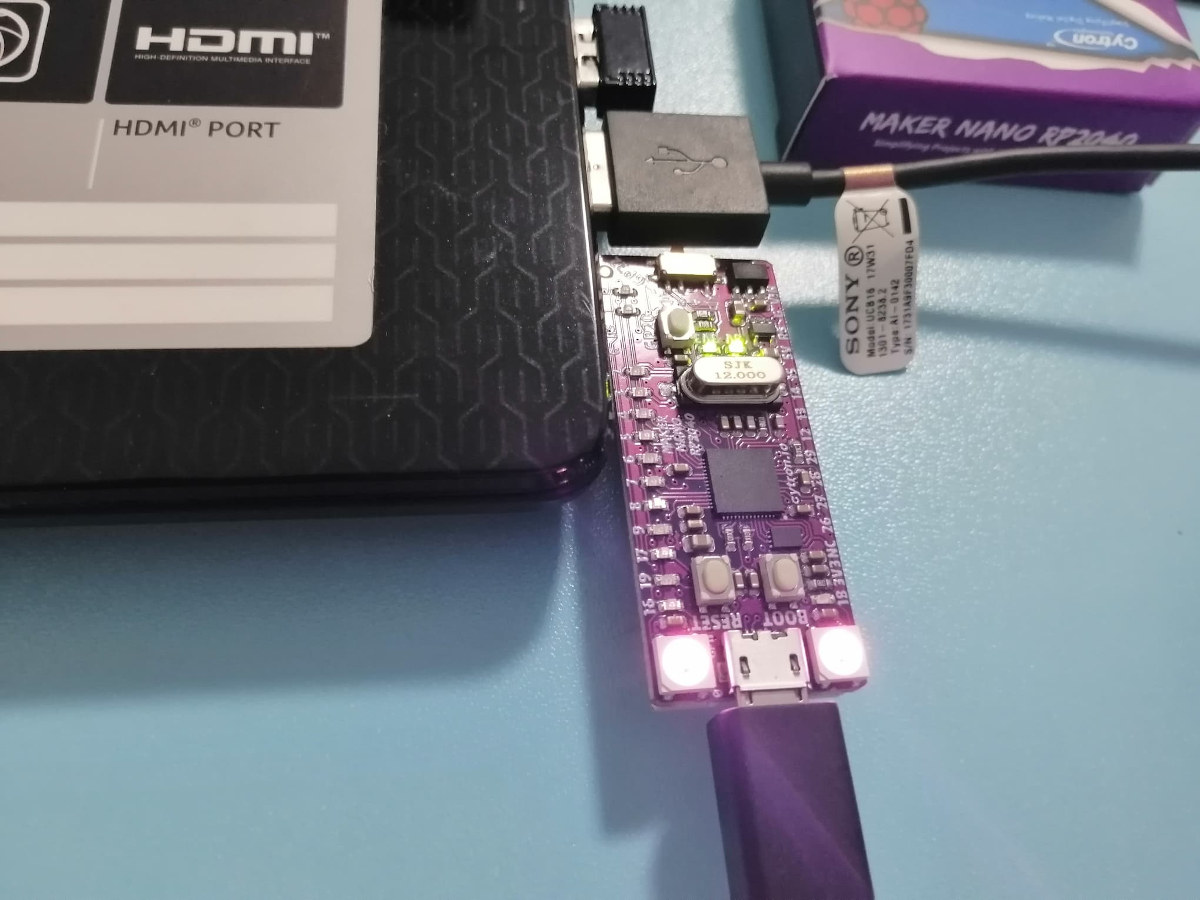
After downloading the file, I connected the board to my Ubuntu laptop with a Micro USB to USB cable. It will automatically mount a drive named “CIRCUITPY”. Oh! That means the Maker Nano RP2040 board comes pre-installed with CircuitPython, so we can use the board out of the box! But if you wanted to install the latest version of the firmware, you could do so using the same firmware update method as for Raspberry Pi Pico.
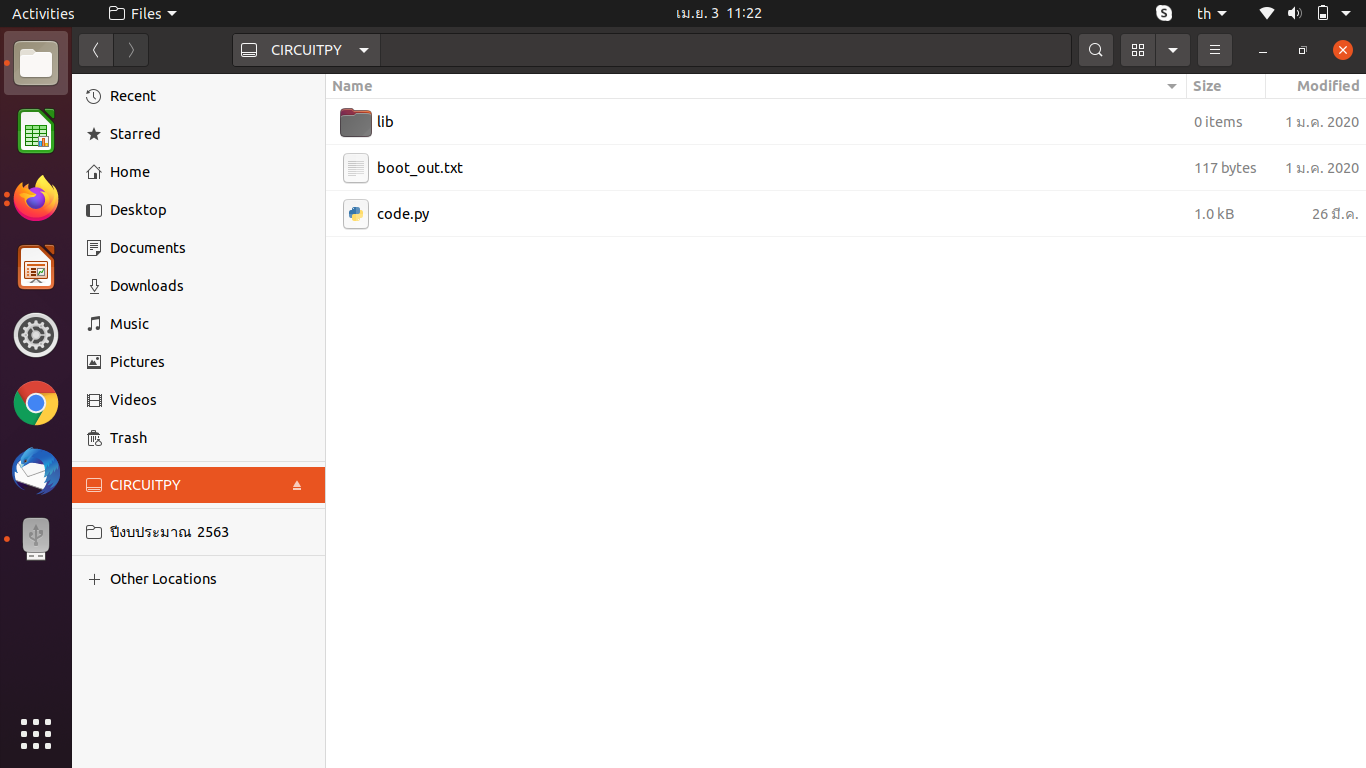
We can double-click on code.py to see the sample program pre-installed on the board. There’s a lot of code and it would be difficult for a beginner like me to understand.
CircuitPython “Blinky” sample
So I want to write a program that’s easy: the typical “blinky” program that blinks an LED regularly using CircuitPython. The code looks as follows:
|
1 2 3 4 5 6 7 8 9 10 11 12 13 14 15 16 17 |
import board import digitalio import time # Set pin 0 as digital output led = digitalio.DigitalInOut(board.GP0) led.direction = digitalio.Direction.OUTPUT # ------------------------------------------------- # FOREVER LOOP - Blink the LED every second (0.5s on, 0.5s off) # ------------------------------------------------- while True: led.value = True time.sleep(0.5) led.value = False time.sleep(0.5) |
We can see the blue LED connected to GPIO 0 turn on and off every 500 ms (1-second cycle) as shown in the video below.

Using the RGB LEDs on Maker Nano RP2040
In the next step, we will write a program in CircuitPython that changed the color of the two RGB LEDs upon pressing the button connected to GPIO 20. The first press will switch to red, the second to green, and the third to blue. Let’s start by double-clicking on code.py to change the code to:
|
1 2 3 4 5 6 7 8 9 10 11 12 13 14 15 16 17 18 19 20 21 22 23 24 25 26 27 28 29 30 31 32 33 34 35 36 37 38 39 40 41 42 |
import board import digitalio import neopixel import simpleio import time import pwmio # Initialize Neopixel RGB LEDs pixels = neopixel.NeoPixel(board.GP11, 2) pixels.fill(0) pixels.brightness = 0.1 # Initialize the button btn1 = digitalio.DigitalInOut(board.GP20) btn1.direction = digitalio.Direction.INPUT btn1.pull = digitalio.Pull.UP color = 0 state = 0 # ------------------------------------------------- # FOREVER LOOP: Check buttons & animate RGB LEDs # ------------------------------------------------- while True: # Check button 1 (GP20) if not btn1.value: # button 1 pressed # Change RGB LED color if state == 0: color = 0xFF0000 # RED state += 1 elif state == 1: color = 0x00FF00 # GREEN state += 1 else: color = 0x0000FF # BLUE state = 0 pixels.fill(color) # fill the color on both RGB LEDs # Sleep to debounce button (200ms delay to make sure multiple presses are not wrongly detected by the loop) time.sleep(0.2) |
We can now change the colors to red, green, and blue following the steps in the video below.

Playing a melody through the piezo buzzer
We’ll now play the melody “do re mi fa sol la si/ti” and in reverse using the piezo buzzer. For this, we’ll need to fill the frequencies in Hz for each music note in an array. Here’s our little program:
|
1 2 3 4 5 6 7 8 9 10 11 12 13 14 15 16 17 18 19 20 21 22 23 24 25 26 27 28 29 30 31 32 33 34 35 36 |
import board import digitalio import neopixel import simpleio import time import pwmio # Initialize Neopixel RGB LEDs pixels = neopixel.NeoPixel(board.GP11, 2) pixels.fill(0) pixels.brightness = 0.2 # Melody arrays: NOTE with the frequencies in HZ, and DURATION in seconds MELODY_NOTE = [262, 294, 330, 349, 392, 440, 494] MELODY_DURATION = [0.5, 0.5, 0.5, 0.5, 0.5, 0.5, 0.5] # Define pin connected to piezo PIEZO_PIN = board.GP22 for i in range(len(MELODY_NOTE)): # Play melody tones simpleio.tone(PIEZO_PIN, MELODY_NOTE[i], duration=MELODY_DURATION[i]) color = 0x7FFF * MELODY_NOTE[i] # Frequency based color pixels.fill(color) # fill the color on both RGB LEDs for x in range(len(MELODY_NOTE)-1, -1, -1): # Play melody tones in reverse order simpleio.tone(PIEZO_PIN, MELODY_NOTE[x], duration=MELODY_DURATION[x]) color = 0x1FFF * MELODY_NOTE[x] # Frequency based color pixels.fill(color) # fill the color on both RGB LEDs # ------------------------------------------------- # FOREVER LOOP # ------------------------------------------------- while True: time.sleep(1) |
We can hear the melody in the video below.

I could eventually program the board successfully! Finally, I must thank Jean-Luc Aufranc for his guidance during this review.

Jean-Luc started CNX Software in 2010 as a part-time endeavor, before quitting his job as a software engineering manager, and starting to write daily news, and reviews full time later in 2011.
Support CNX Software! Donate via cryptocurrencies, become a Patron on Patreon, or purchase goods on Amazon or Aliexpress. We also use affiliate links in articles to earn commissions if you make a purchase after clicking on those links.

