
Last week-end I installed ESPurna open source firmware with MQTT server on Sonoff POW WiFi switch, and the next step is find a way to draw power consumption charts in some web based interface. We could do this in the IoT cloud with services like Xively or ThingSpeak, but since one of the goals of replacing the default firmware was not to rely on a proprietary cloud based solution, I decided to find a way to draw those chart in a local server, and it so happens that ThingSpeak is also open source with the code available on Github. Hardware platforms like NanoPi NEO / NEO Air, or Orange Pi Zero boards appear to be particularly well suited for the task of running an MQTT broker and Thingspeak, but at first I wanted to install ThingSpeak in my own Ubuntu 16.04 computer to have a try.
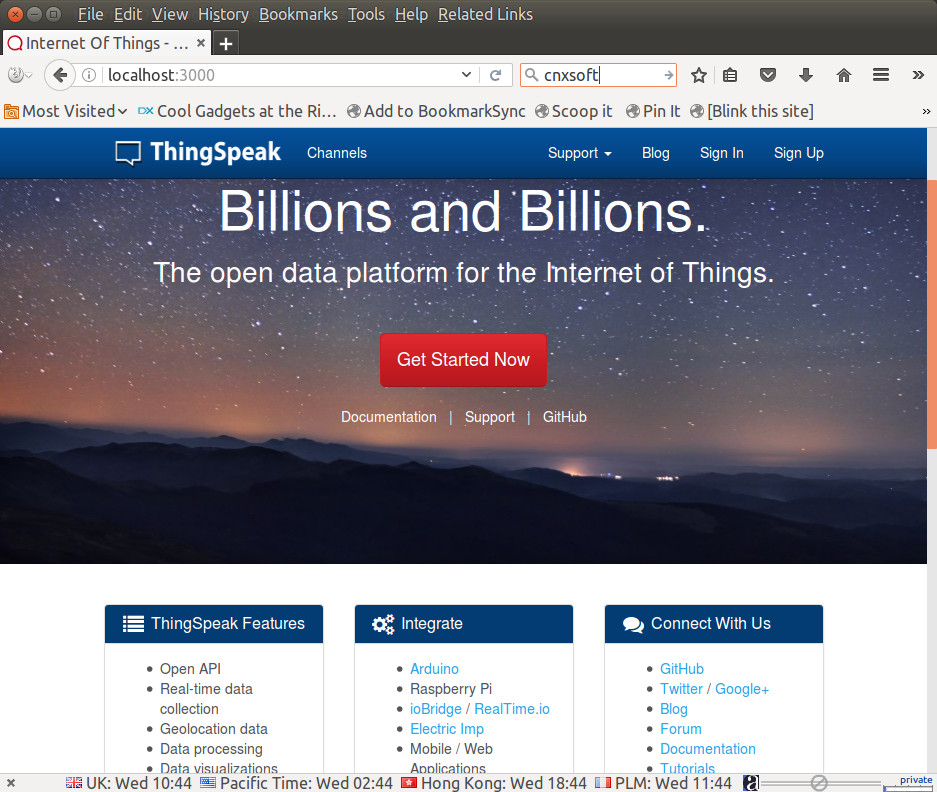
As you can see from the screenshot above I manage to do it, but it requires a bit more efforts than expected, as the project has not been updated since 2015, and does not work out of the box with the latest operating system.
I used various resources on the web including the instructions on Github, as well as this ThingSpeak script for Ubuntu 14.04, and a few other resources.
First we have to make sure Ubuntu 16.04 is fully upgraded:
|
1 2 |
sudo apt update sudo apt dist-upgrade |
Ubuntu 16.04 comes with Ruby 2.3, but we need the older Ruby 2.1.0 version for ThingSpeak, so let’s uninstall ruby to avoid conflicts:
|
1 |
sudo apt purge ruby |
Now we can install dependencies, Ruby 2.1.0, and Bundle:
|
1 2 3 4 5 |
sudo apt-get -y install build-essential mysql-server mysql-client libmysqlclient-dev libxml2-dev libxslt-dev git-core curl rubygems gpg2 --keyserver hkp://keys.gnupg.net --recv-keys 409B6B1796C275462A1703113804BB82D39DC0E3 curl -L https://get.rvm.io | bash -s stable source ~/.rvm/scripts/rvm rvm install ruby 2.1.0 |
Once this is done, we can get ThingSpeak source code and install it:
|
1 2 3 4 |
git clone https://github.com/iobridge/thingspeak.git cd thingspeak gem install bundler bundle install |
This looked successful so I moved on to database configuration:
|
1 |
cp config/database.yml.example config/database.yml |
It’s recommended to change the username and password in config/database.yml for test, development and production databases with your own for security purpose. Once it’s done, let’s try to create the databases:
|
1 |
rake db:create |
Sadly it starts with an error:
|
1 2 3 |
rake aborted! Bundler::GemRequireError: There was an error while trying to load the gem 'mysql2'. Gem Load Error is: uninitialized constant Mysql2::Client::SECURE_CONNECTION |
So I checked mysql2 version and upgraded it to see if it would fix the issue:
|
1 2 3 4 5 6 7 8 9 10 |
bundle show mysql2 /home/jaufranc/.rvm/gems/ruby-2.1.0@thingspeak/gems/mysql2-0.3.16 bundle update mysql2 bundle show mysql2 /home/jaufranc/.rvm/gems/ruby-2.1.0@thingspeak/gems/mysql2-0.4.5 rake db:create Specified 'mysql2' for database adapter, but the gem is not loaded. Add `gem 'mysql2'` to your Gemfile. |
The previous error is gone, but only to be replaced by a new one…
Finally, I found out (can’t find where anymore) that I had to edit Gemfile in ThingSpeak directory, and add an older version to mysql2:
|
1 |
gem 'mysql2', '~> 0.3.18' |
Let’s update mysql2, and try to create the databases again:
|
1 2 3 4 5 6 7 8 |
bundle update mysql2 bundle show mysql2 /home/jaufranc/.rvm/gems/ruby-2.1.0@thingspeak/gems/mysql2-0.3.21 rake db:create thingspeak_development already exists Mysql2::Error: Access denied for user 'thing-your-username'@'localhost' to database 'thingspeak_test': CREATE DATABASE `thingspeak_test` DEFAULT CHARACTER SET `utf8` COLLATE `utf8_unicode_ci` |
Damn a permission error. I could not find a proper fix, so at this point the title of the post should possibly become “How NOT to install Thingspeak in Ubuntu 16.04”, as although it will work, the steps below makes the installation insecure since I simply give full databases’ access to thing user. But that will do since I’ll only use it in my LAN, and maybe somebody will point to a secure solution to the issue.
[Update: Thanks to Arthur, I’ve got a more secure solution . I’ve left both insecure and secure workaround for reference, but obviously you should use the secure one, especially it’s not hard]
Insecure (don’t use it, I just left it to show what you should not do):
|
1 2 3 4 5 6 7 8 9 10 11 12 13 14 15 16 17 18 19 20 21 |
mysql -u root -p Enter password: Welcome to the MySQL monitor. Commands end with ; or \g. Your MySQL connection id is 25 Server version: 5.7.16-0ubuntu0.16.04.1 (Ubuntu) Copyright (c) 2000, 2016, Oracle and/or its affiliates. All rights reserved. Oracle is a registered trademark of Oracle Corporation and/or its affiliates. Other names may be trademarks of their respective owners. Type 'help;' or '\h' for help. Type '\c' to clear the current input statement. mysql> GRANT ALL PRIVILEGES ON *.* TO 'thing'@'localhost' WITH GRANT OPTION; Query OK, 0 rows affected (0.00 sec) mysql> commit; Query OK, 0 rows affected (0.00 sec) mysql> exit; Bye |
Secure way (strongly recommended):
|
1 2 3 4 5 6 7 8 9 10 11 12 13 14 15 16 17 18 19 20 21 22 23 24 25 26 27 28 29 30 31 32 33 34 35 36 37 |
mysql -u root -p Enter password: Welcome to the MySQL monitor. Commands end with ; or \g. Your MySQL connection id is 10 Server version: 5.7.16-0ubuntu0.16.10.1 (Ubuntu) Copyright (c) 2000, 2016, Oracle and/or its affiliates. All rights reserved. Oracle is a registered trademark of Oracle Corporation and/or its affiliates. Other names may be trademarks of their respective owners. Type 'help;' or '\h' for help. Type '\c' to clear the current input statement. mysql> show databases; +------------------------+ | Database | +------------------------+ | information_schema | | mysql | | performance_schema | | sys | | thingspeak_development | +------------------------+ 5 rows in set (0.03 sec) mysql> CREATE DATABASE `thingspeak_test` DEFAULT CHARACTER SET `utf8` COLLATE `utf8_unicode_ci`; Query OK, 1 row affected (0.00 sec) mysql> GRANT ALL PRIVILEGES ON `thingspeak_test`.* TO 'thing'@'localhost'; Query OK, 0 rows affected (0.00 sec) mysql> FLUSH PRIVILEGES; Query OK, 0 rows affected (0.00 sec) mysql> exit Bye |
This time I can create the databases for Thingspeak:
|
1 |
rake db:create |
So now we can go to the next step to load the database with some data required by Thingspeak to work:
|
1 |
rake db:schema:load |
Great! Yet another error:
|
1 2 3 |
-- create_table("active_admin_comments", {:force=>true}) rake aborted! ActiveRecord::StatementInvalid: Mysql2::Error: All parts of a PRIMARY KEY must be NOT NULL; if you need NULL in a key, use UNIQUE instead: CREATE TABLE `active_admin_comments` (`id` int(11) DEFAULT NULL auto_increment PRIMARY KEY, `namespace` varchar(255), `body` text, `resource_id` varchar(50) NOT NULL, `resource_type` varchar(50) NOT NULL, `author_id` int(11), `author_type` varchar(255), `created_at` datetime, `updated_at` datetime) ENGINE=InnoDB |
After spending a while for a solution I eventually found it in Rails Github with the reason being that MySQL 5.7 used in Ubuntu 16.04 does ot allows for NULL key.
We’ll need to create config/initializers/abstract_mysql2_adapter.rb file with:
|
1 2 3 4 |
# config/initializers/abstract_mysql2_adapter.rb class ActiveRecord::ConnectionAdapters::Mysql2Adapter NATIVE_DATABASE_TYPES[:primary_key] = "int(11) auto_increment PRIMARY KEY" end |
Then we need add the following line at the end of config/environment.db
|
1 |
require File.expand_path('../../config/initializers/abstract_mysql2_adapter', __FILE__) |
and run the command again:
|
1 |
rake db:schema:load |
Success! Finally…
The final step is to start the server:
|
1 2 3 4 5 6 7 8 |
rails server webrick => Booting WEBrick => Rails 4.0.5 application starting in development on http://0.0.0.0:3000 => Run `rails server -h` for more startup options => Ctrl-C to shutdown server [2016-12-07 17:43:04] INFO WEBrick 1.3.1 [2016-12-07 17:43:04] INFO ruby 2.1.0 (2013-12-25) [x86_64-linux] [2016-12-07 17:43:04] INFO WEBrick::HTTPServer#start: pid=17187 port=3000 |
Now start your web browser and you can access your local Thingspeak installation @ http://localhost:3000.
I’ll now have to study a little more about Thingspeak, install MQTT, as well as one of the MQTT to Thingspeak bridges available on the web, and see if I can plot power consumption data there.

Jean-Luc started CNX Software in 2010 as a part-time endeavor, before quitting his job as a software engineering manager, and starting to write daily news, and reviews full time later in 2011.
Support CNX Software! Donate via cryptocurrencies, become a Patron on Patreon, or purchase goods on Amazon or Aliexpress


