
The mailman delivered two parcels today, and interestingly enough they have a similar functionality measuring air quality and environmental data such as temperature. The first package was ITEAD Studio Sonoff SC environmental sensor with ESP8266, an Atmel MCU, DHT11 temperature & humidity sensor, a dust detector, a light sensor, and a microphone, while the second was v-Air Monitor vThings CO2 monitor v3 also based on ESP8266 with a CO2 sensor and other optional sensors. I’ll test both with their stock firmware later on, but today I’ll have a look at the hardware design.
v-Air Monitor vThings CO2 monitor specifications
While I’ve already written about Sonoff SC, it’s the first time I cover v.Air Monitor products, so let’s start with the specifications of vThings CO2 Monitor v3:
- SoC – Espressif ESP8266 WiSoC
- Connectivity
- 802.11 b/g/n WiFi
- Optional RF315 / 433 MHz RF module
- Sensors
- CO2 Sensor (one of them)
- CM1106 NDIR sensor with 3-day auto-calibration period and < ±(50ppm+5% reading) accuracy (default)
- CM1102 calibration-free sensor with best accuracy: < ±(40 ppm+2% of reading)
- CDM7160 calibration-free sensor with < 10ma power consumption and better accuracy < ±(50 ppm+3% of reading)
- Other optional sensors – Dust (PM 2.5 and PM 10), temperature, humidity, pressure
- CO2 Sensor (one of them)
The project is open source and open hardware based on vESPrino board, and you can easily program the board through micro USB, and custom the firmware that already supports HTTP and MQTT, OTA firmware updates, Apple Homekit (WIP), and Chrome app configuration (WIP). You’ll find source code and resources on Vladimir Savchenko’s github account.
Sonoff SC Teardown
Now that we have gone through both devices specifications, let’s check out Sonoff SC hardware.
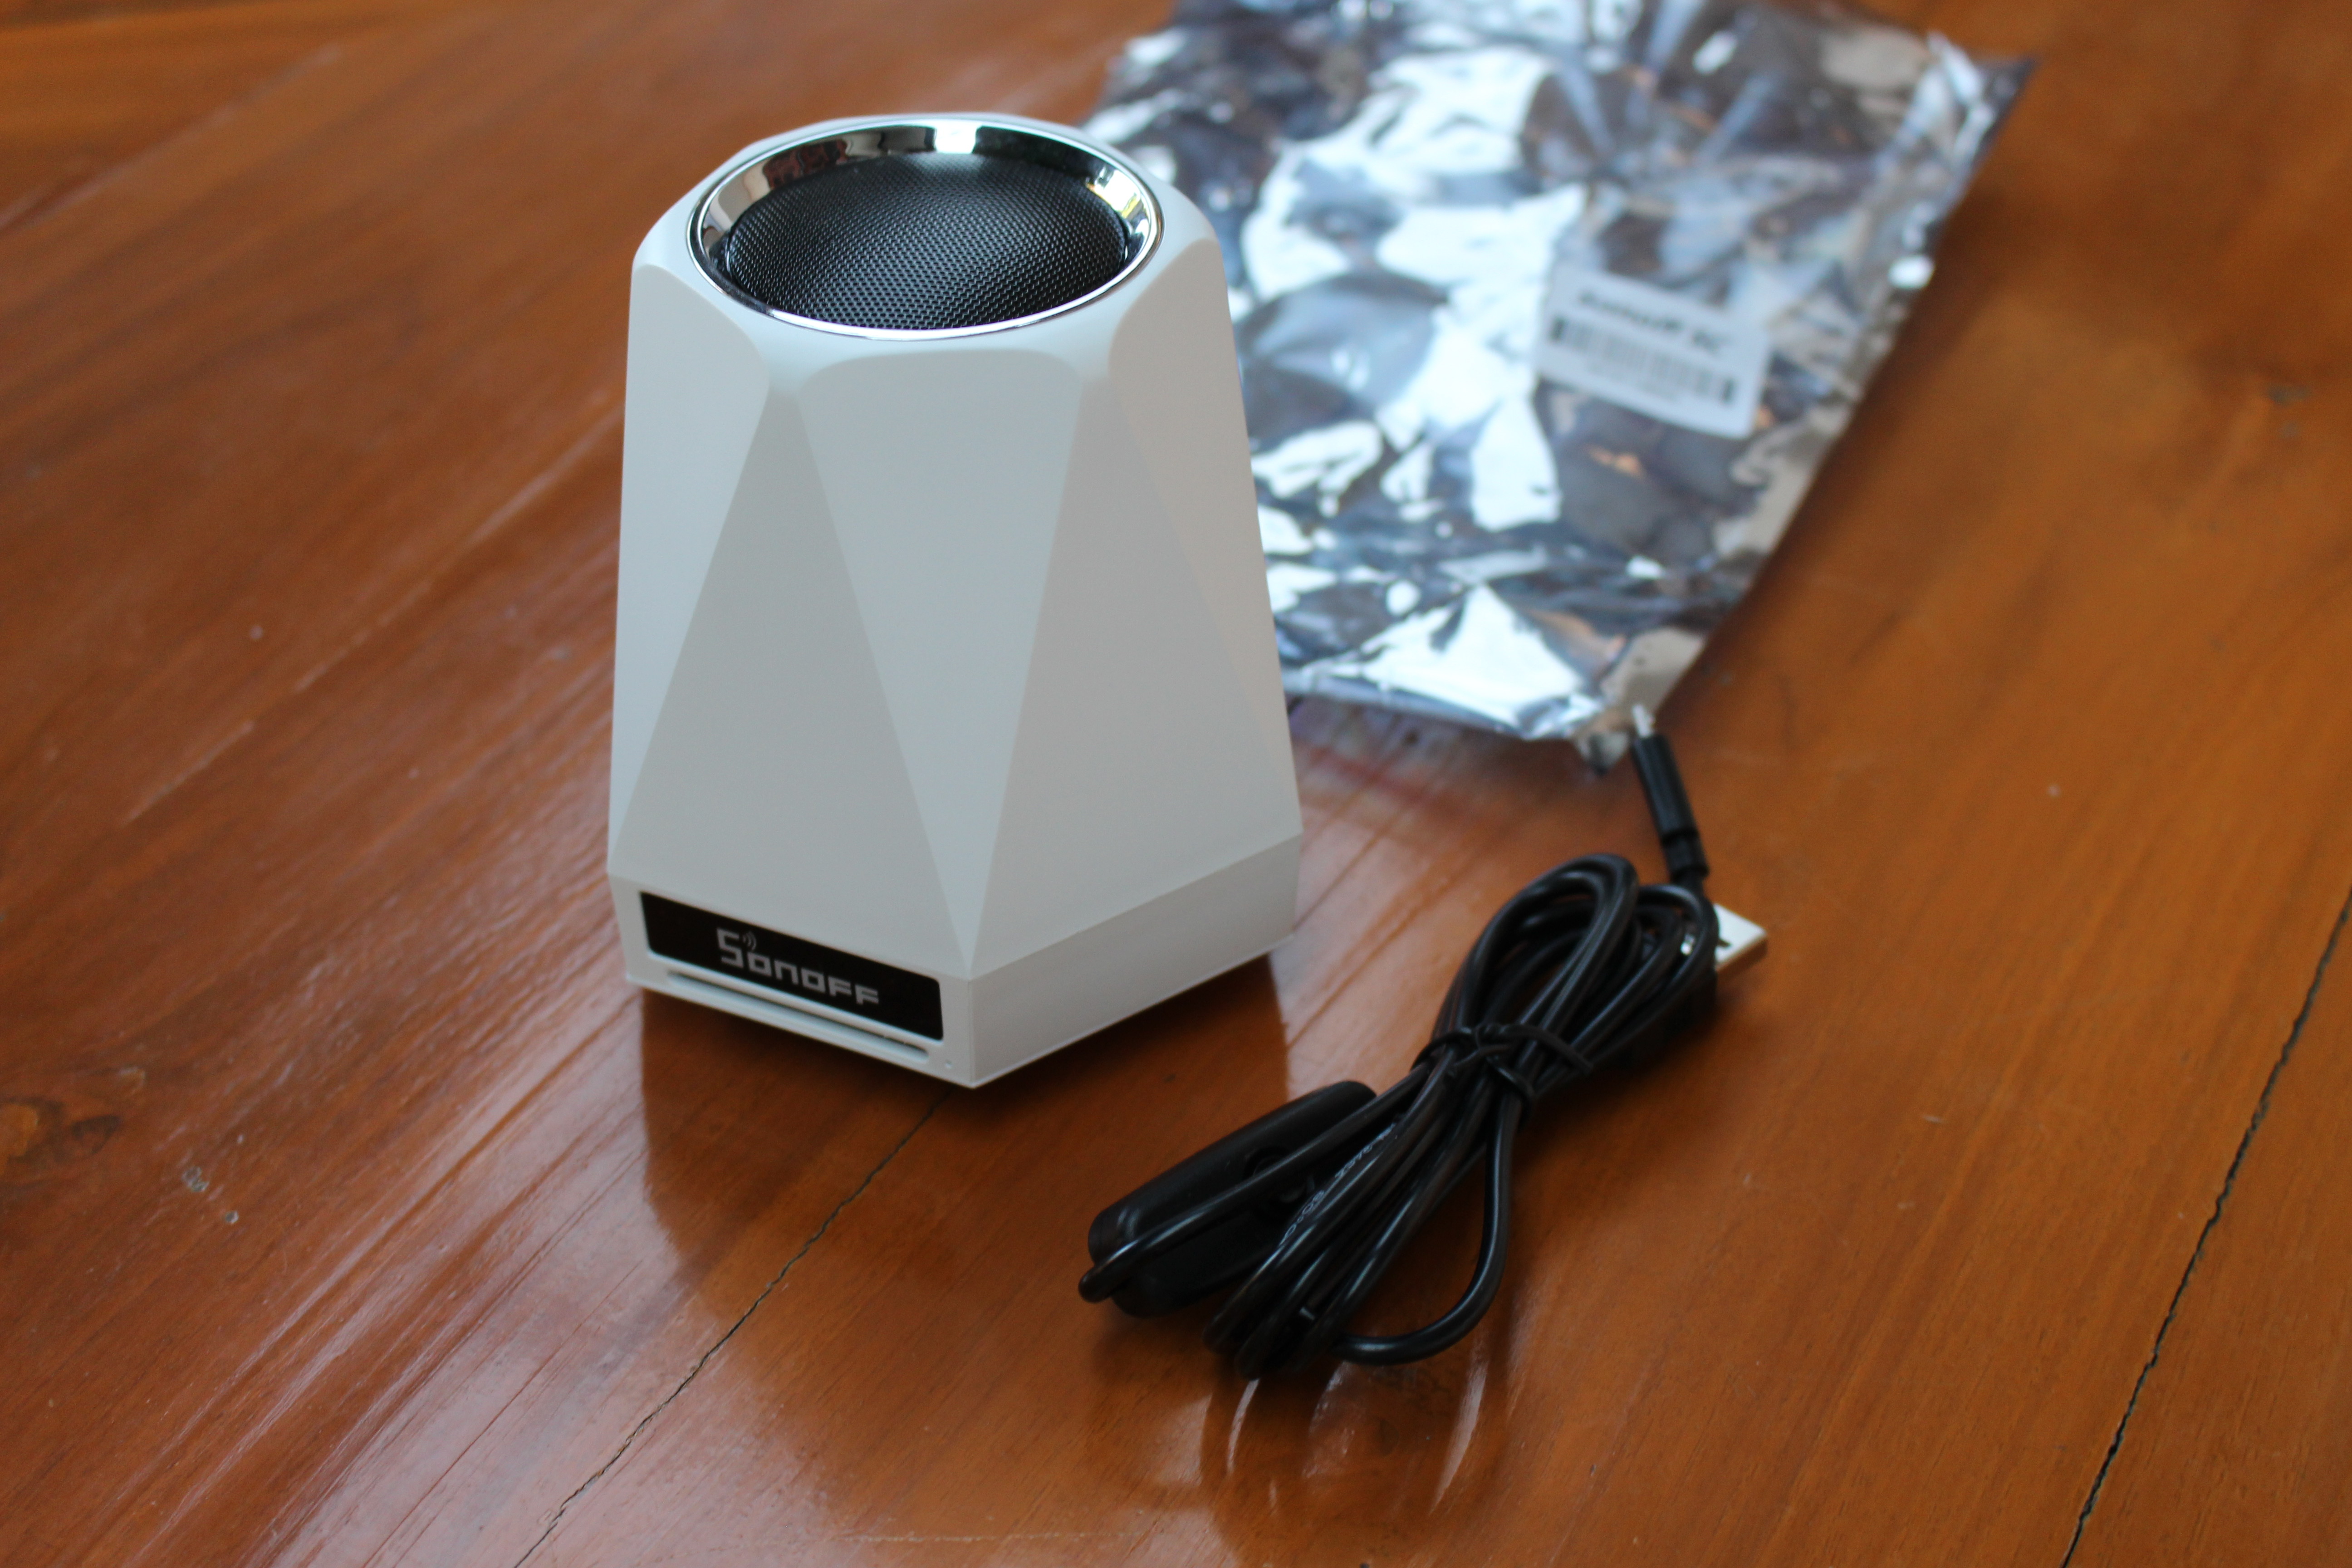
The device ships with a USB cable equipped with power switch, and both Sonoff SC and the cable are stored in their respective anti-static bag.
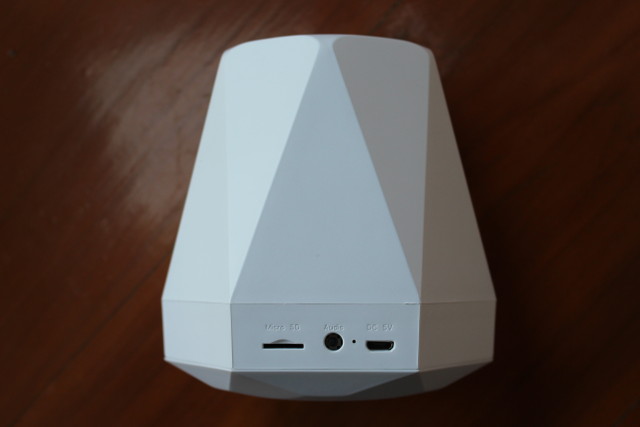
The back of the device comes with a micro SD slot to store data, an “Audio” button actually used for pairing with the mobile app, and a micro USB port for power.
 The device is very easy to open as you just need to loosen four screws.
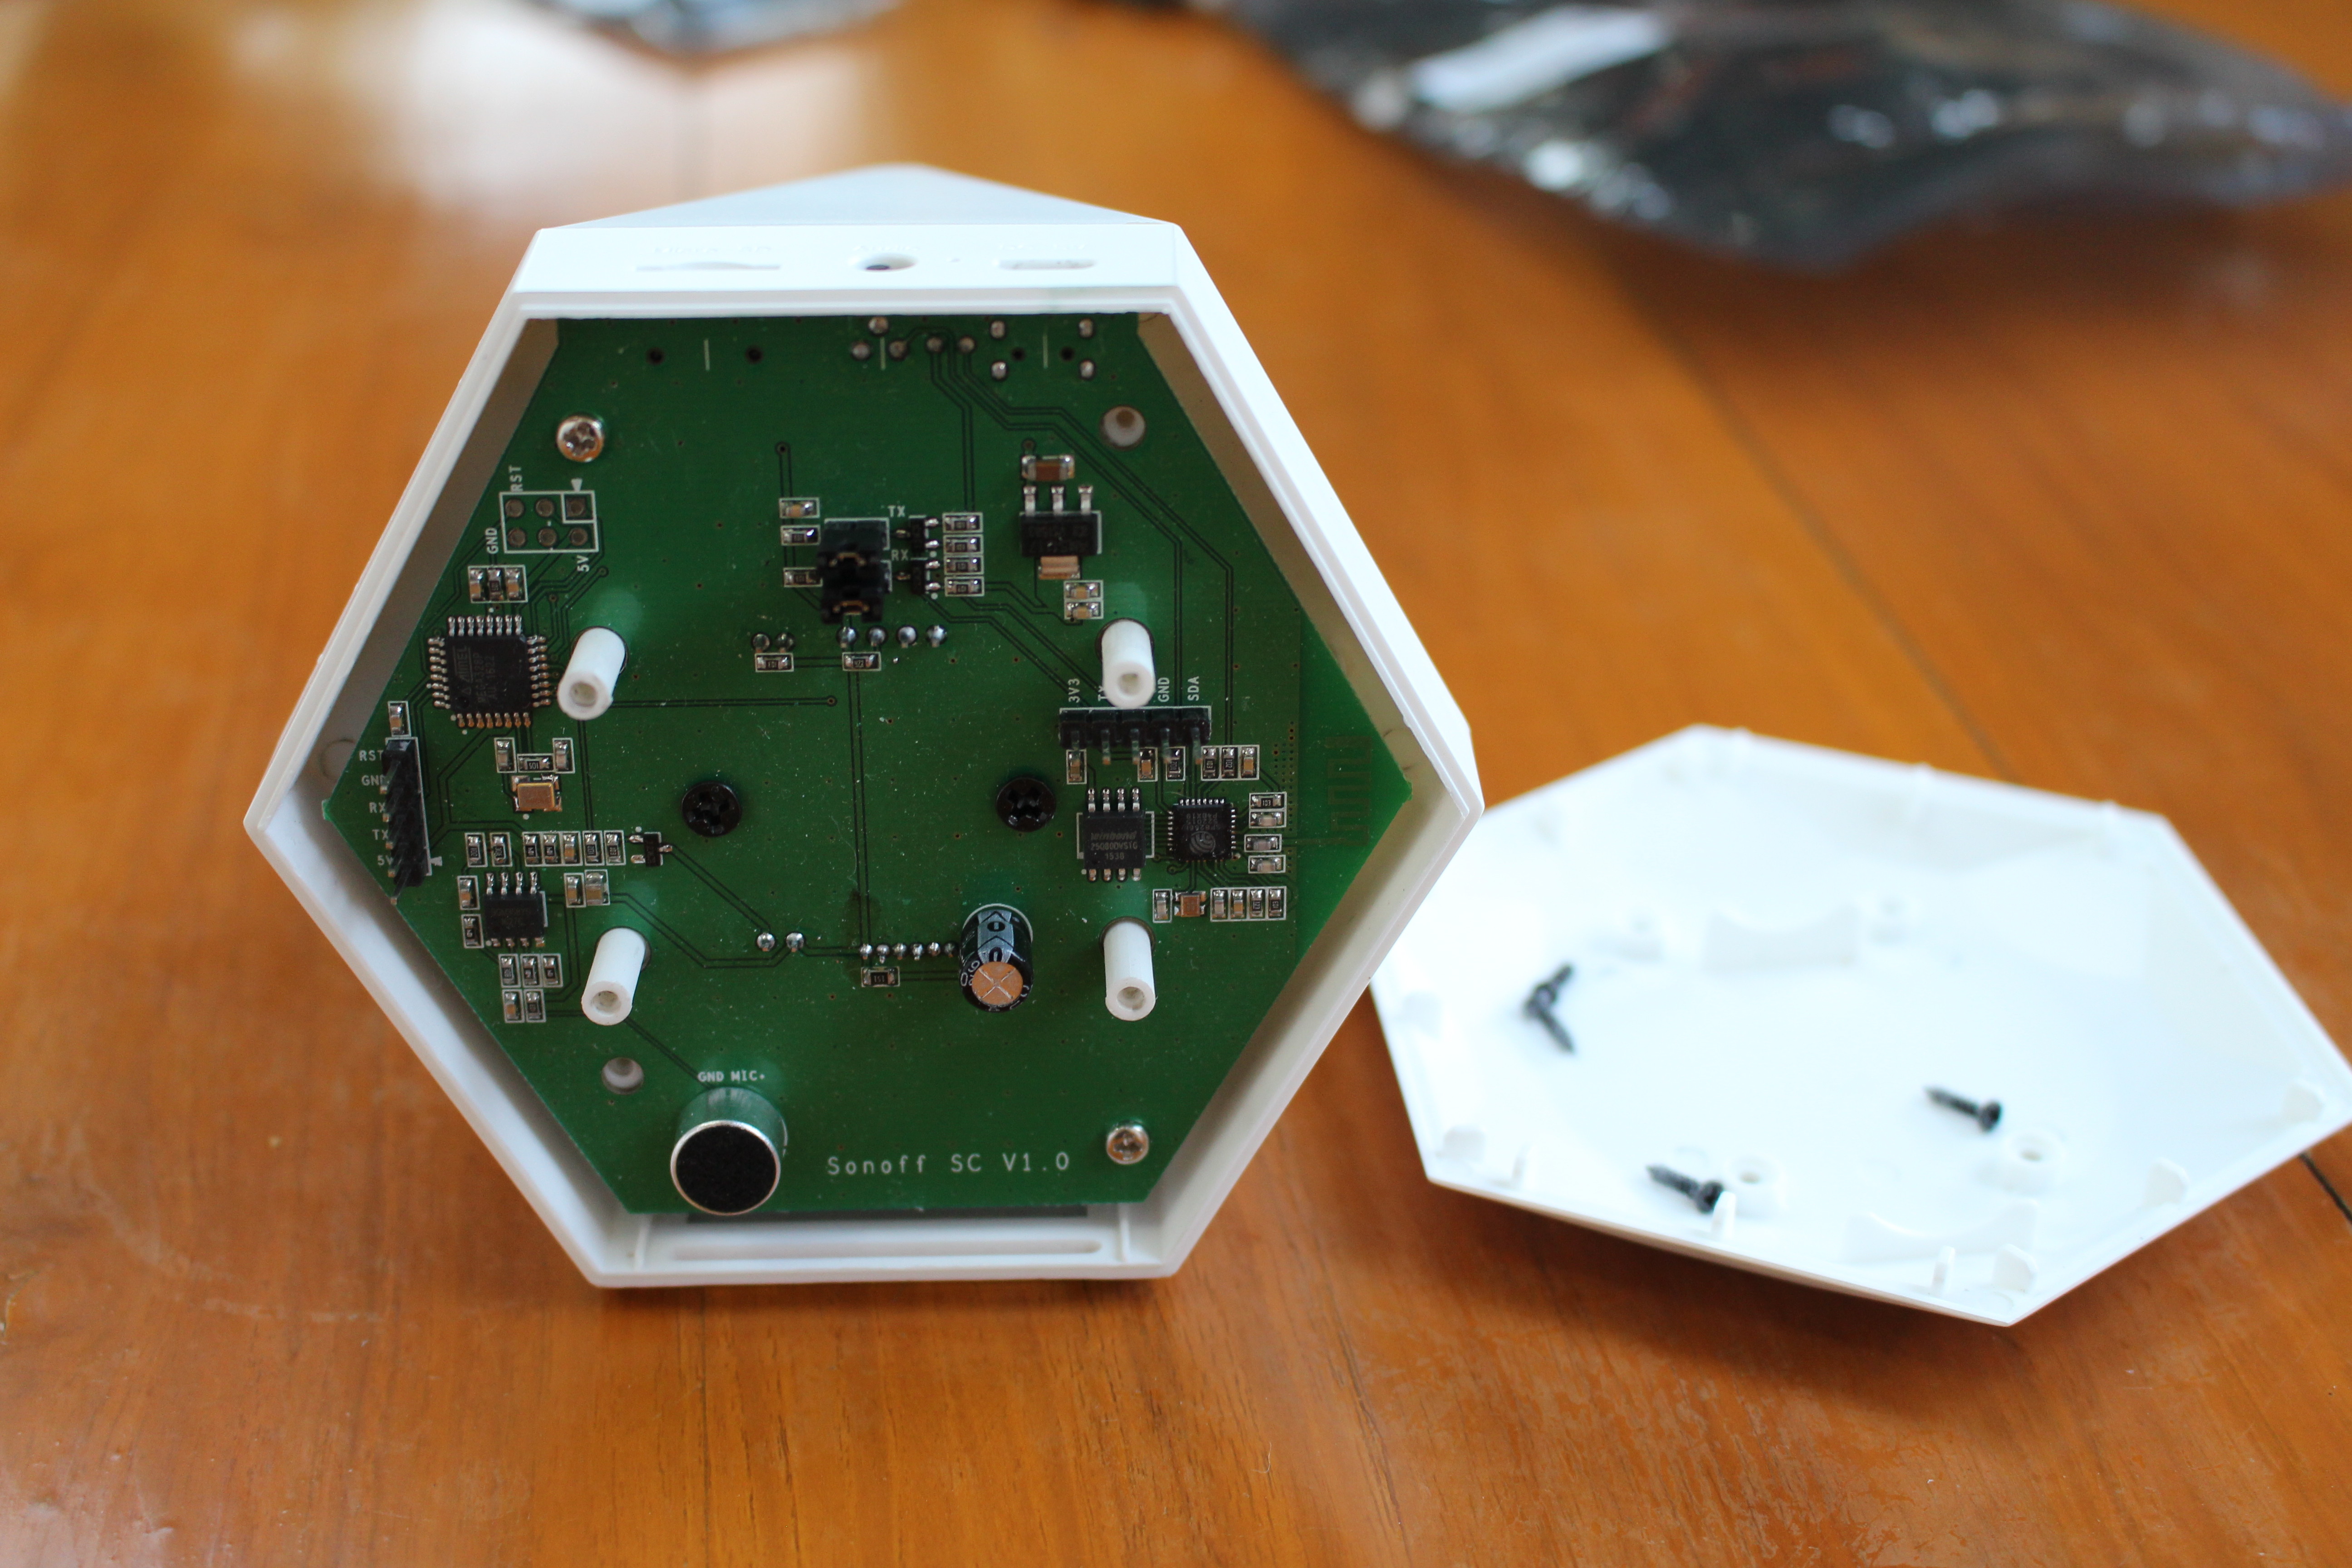
Removing the bottom cover gives you access to the main board with serial header for both ESP8266 and Atmel ATMega328 MCU. I understand that ESP8266 runs the AT commands firmware, and everything is mostly handled by the Atmel/Microchip MCU with the Arduino firmware available from the Wiki. The ESP8266 also has a SDA pin, that’s normally for I2C, but I don’t see any SCL pin, so it might just be used for one GPIO.. That side of the board also have the microphone used to detect noise levels.
If beside changing firmware, you also want to hack the hardware, for example changing sensors, you’ll need to remove the two “silver” screws to take out the complete system out of the case.
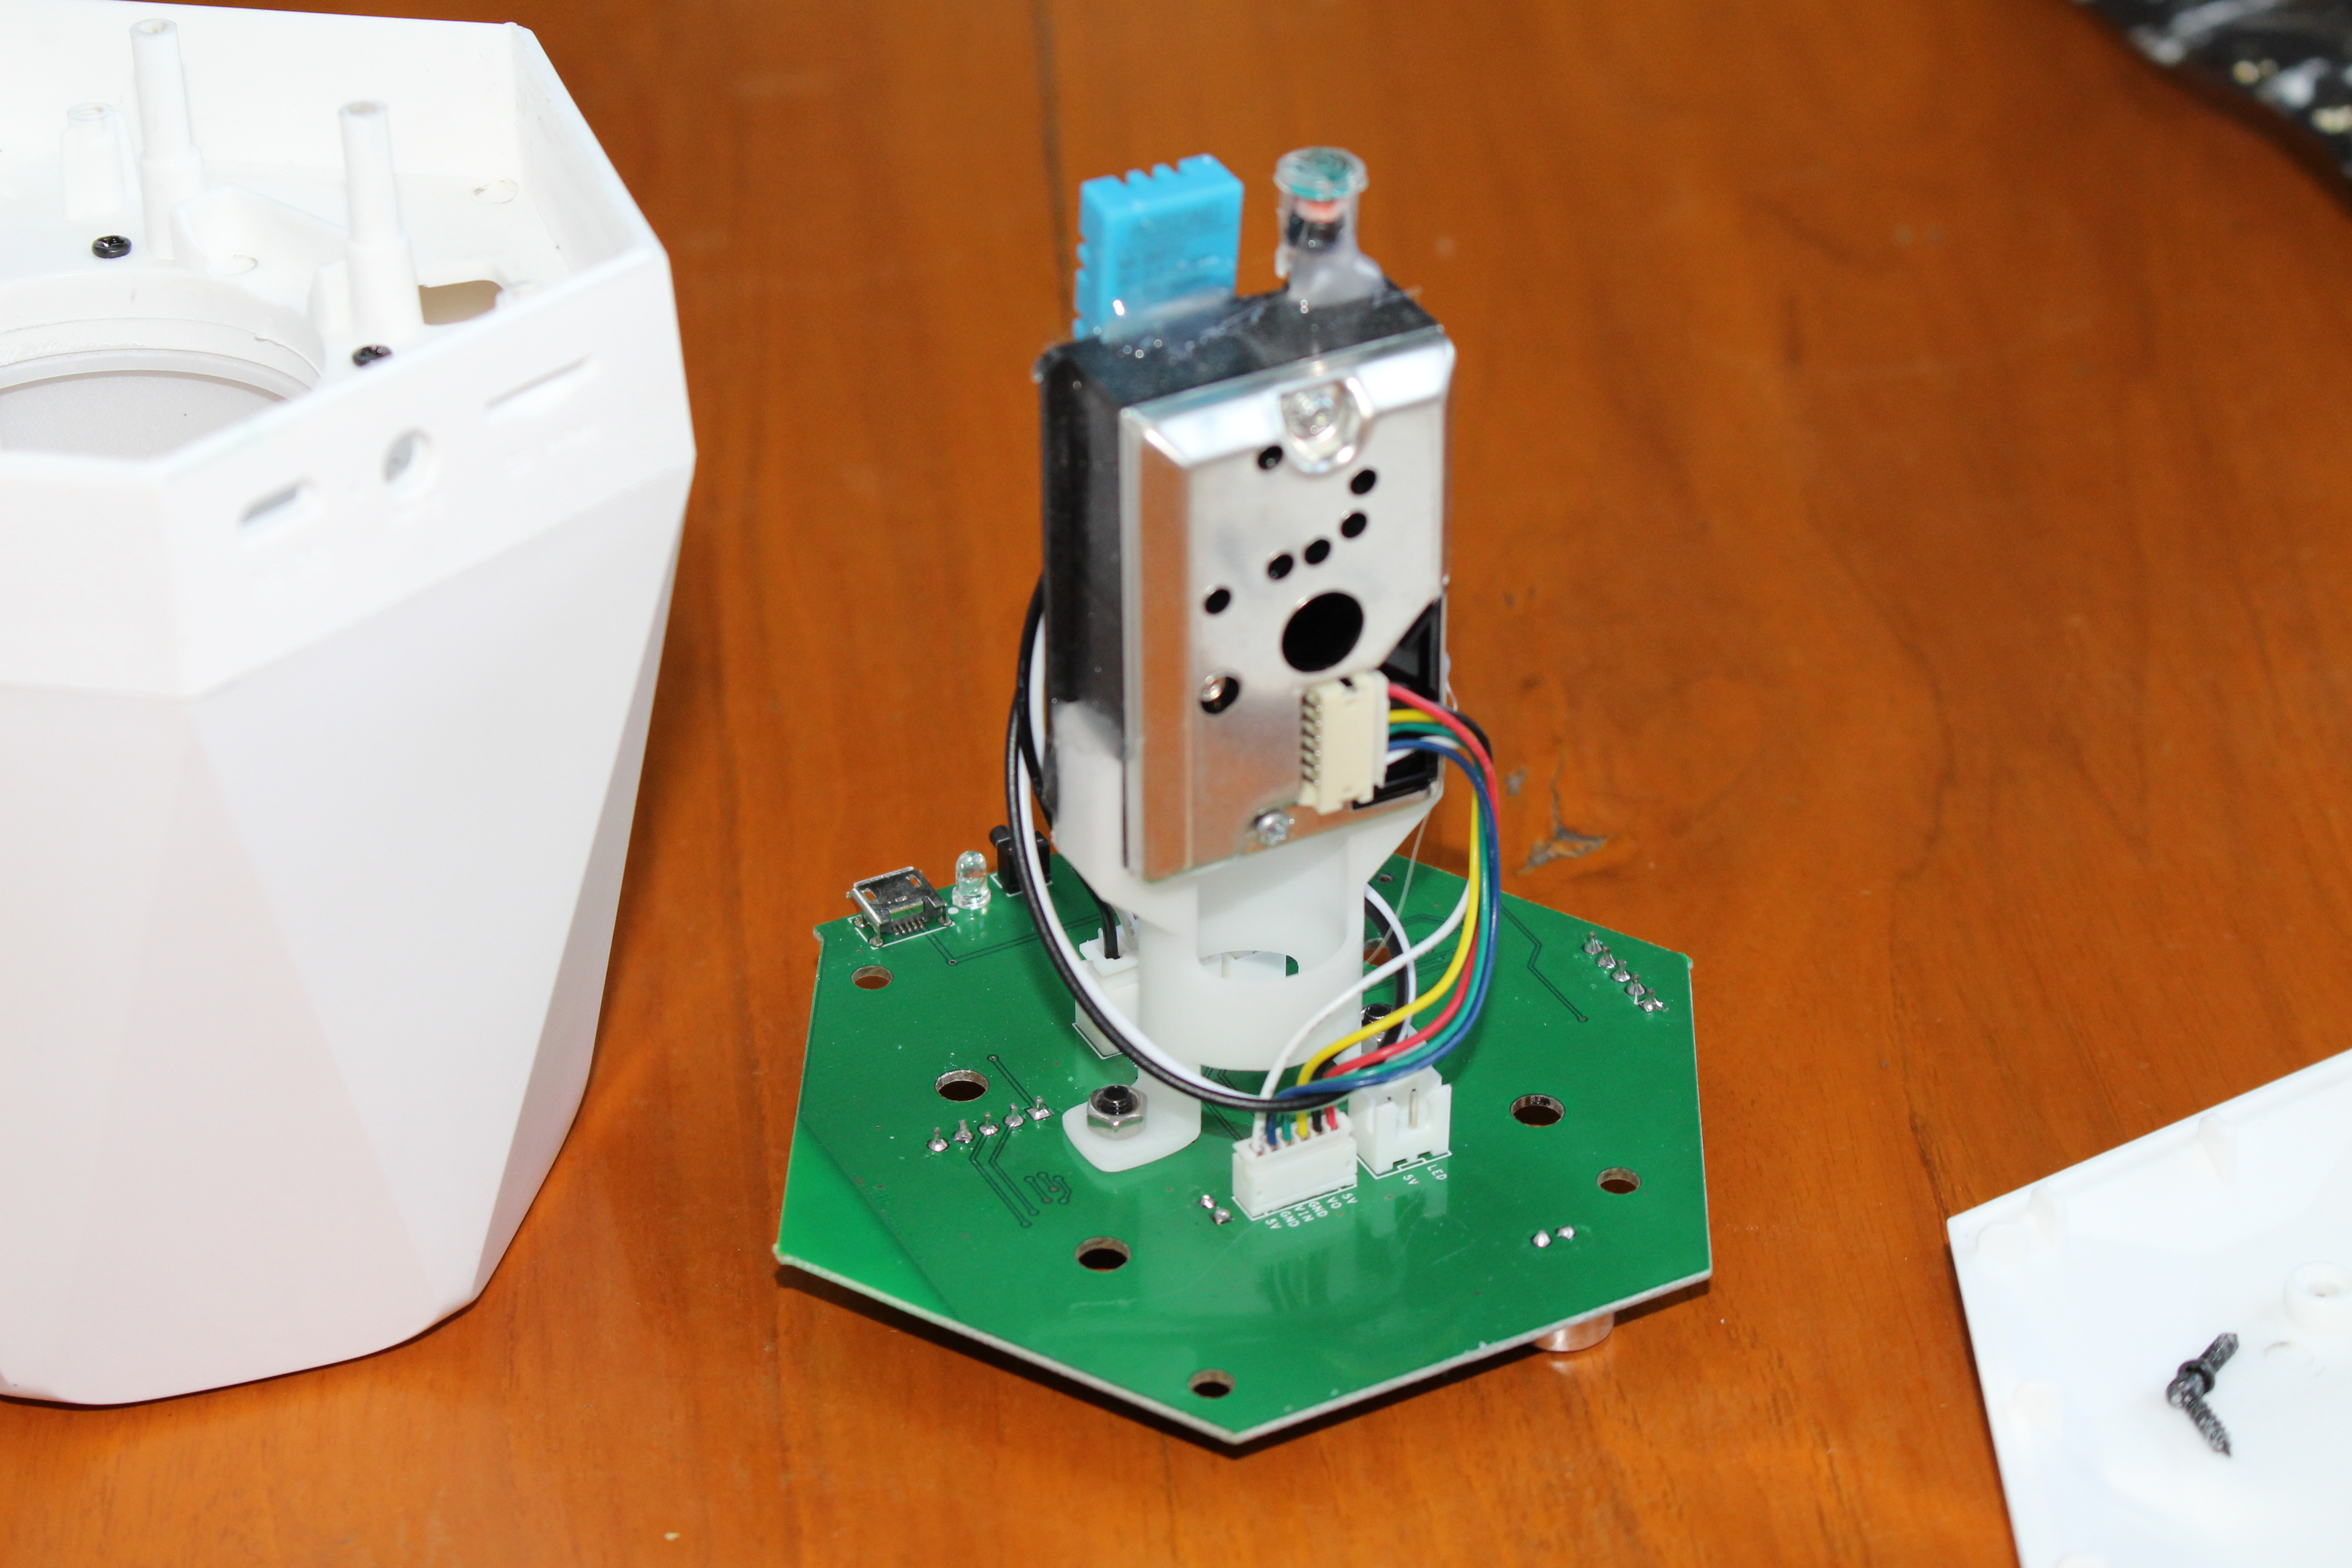
One side features Sharp GP2Y1010AU0F dust sensor connected to 5V, GND, and “VIN” (A1 pin) and “VO” (A5 pin), while the other shows DHT11 temperature and humidity sensor and the light sensor glued to the backside. I also asked the company to include the more accurate DHT22 sensor, as I plan to replace DHT11 with it later, and soldering is not even necessary.
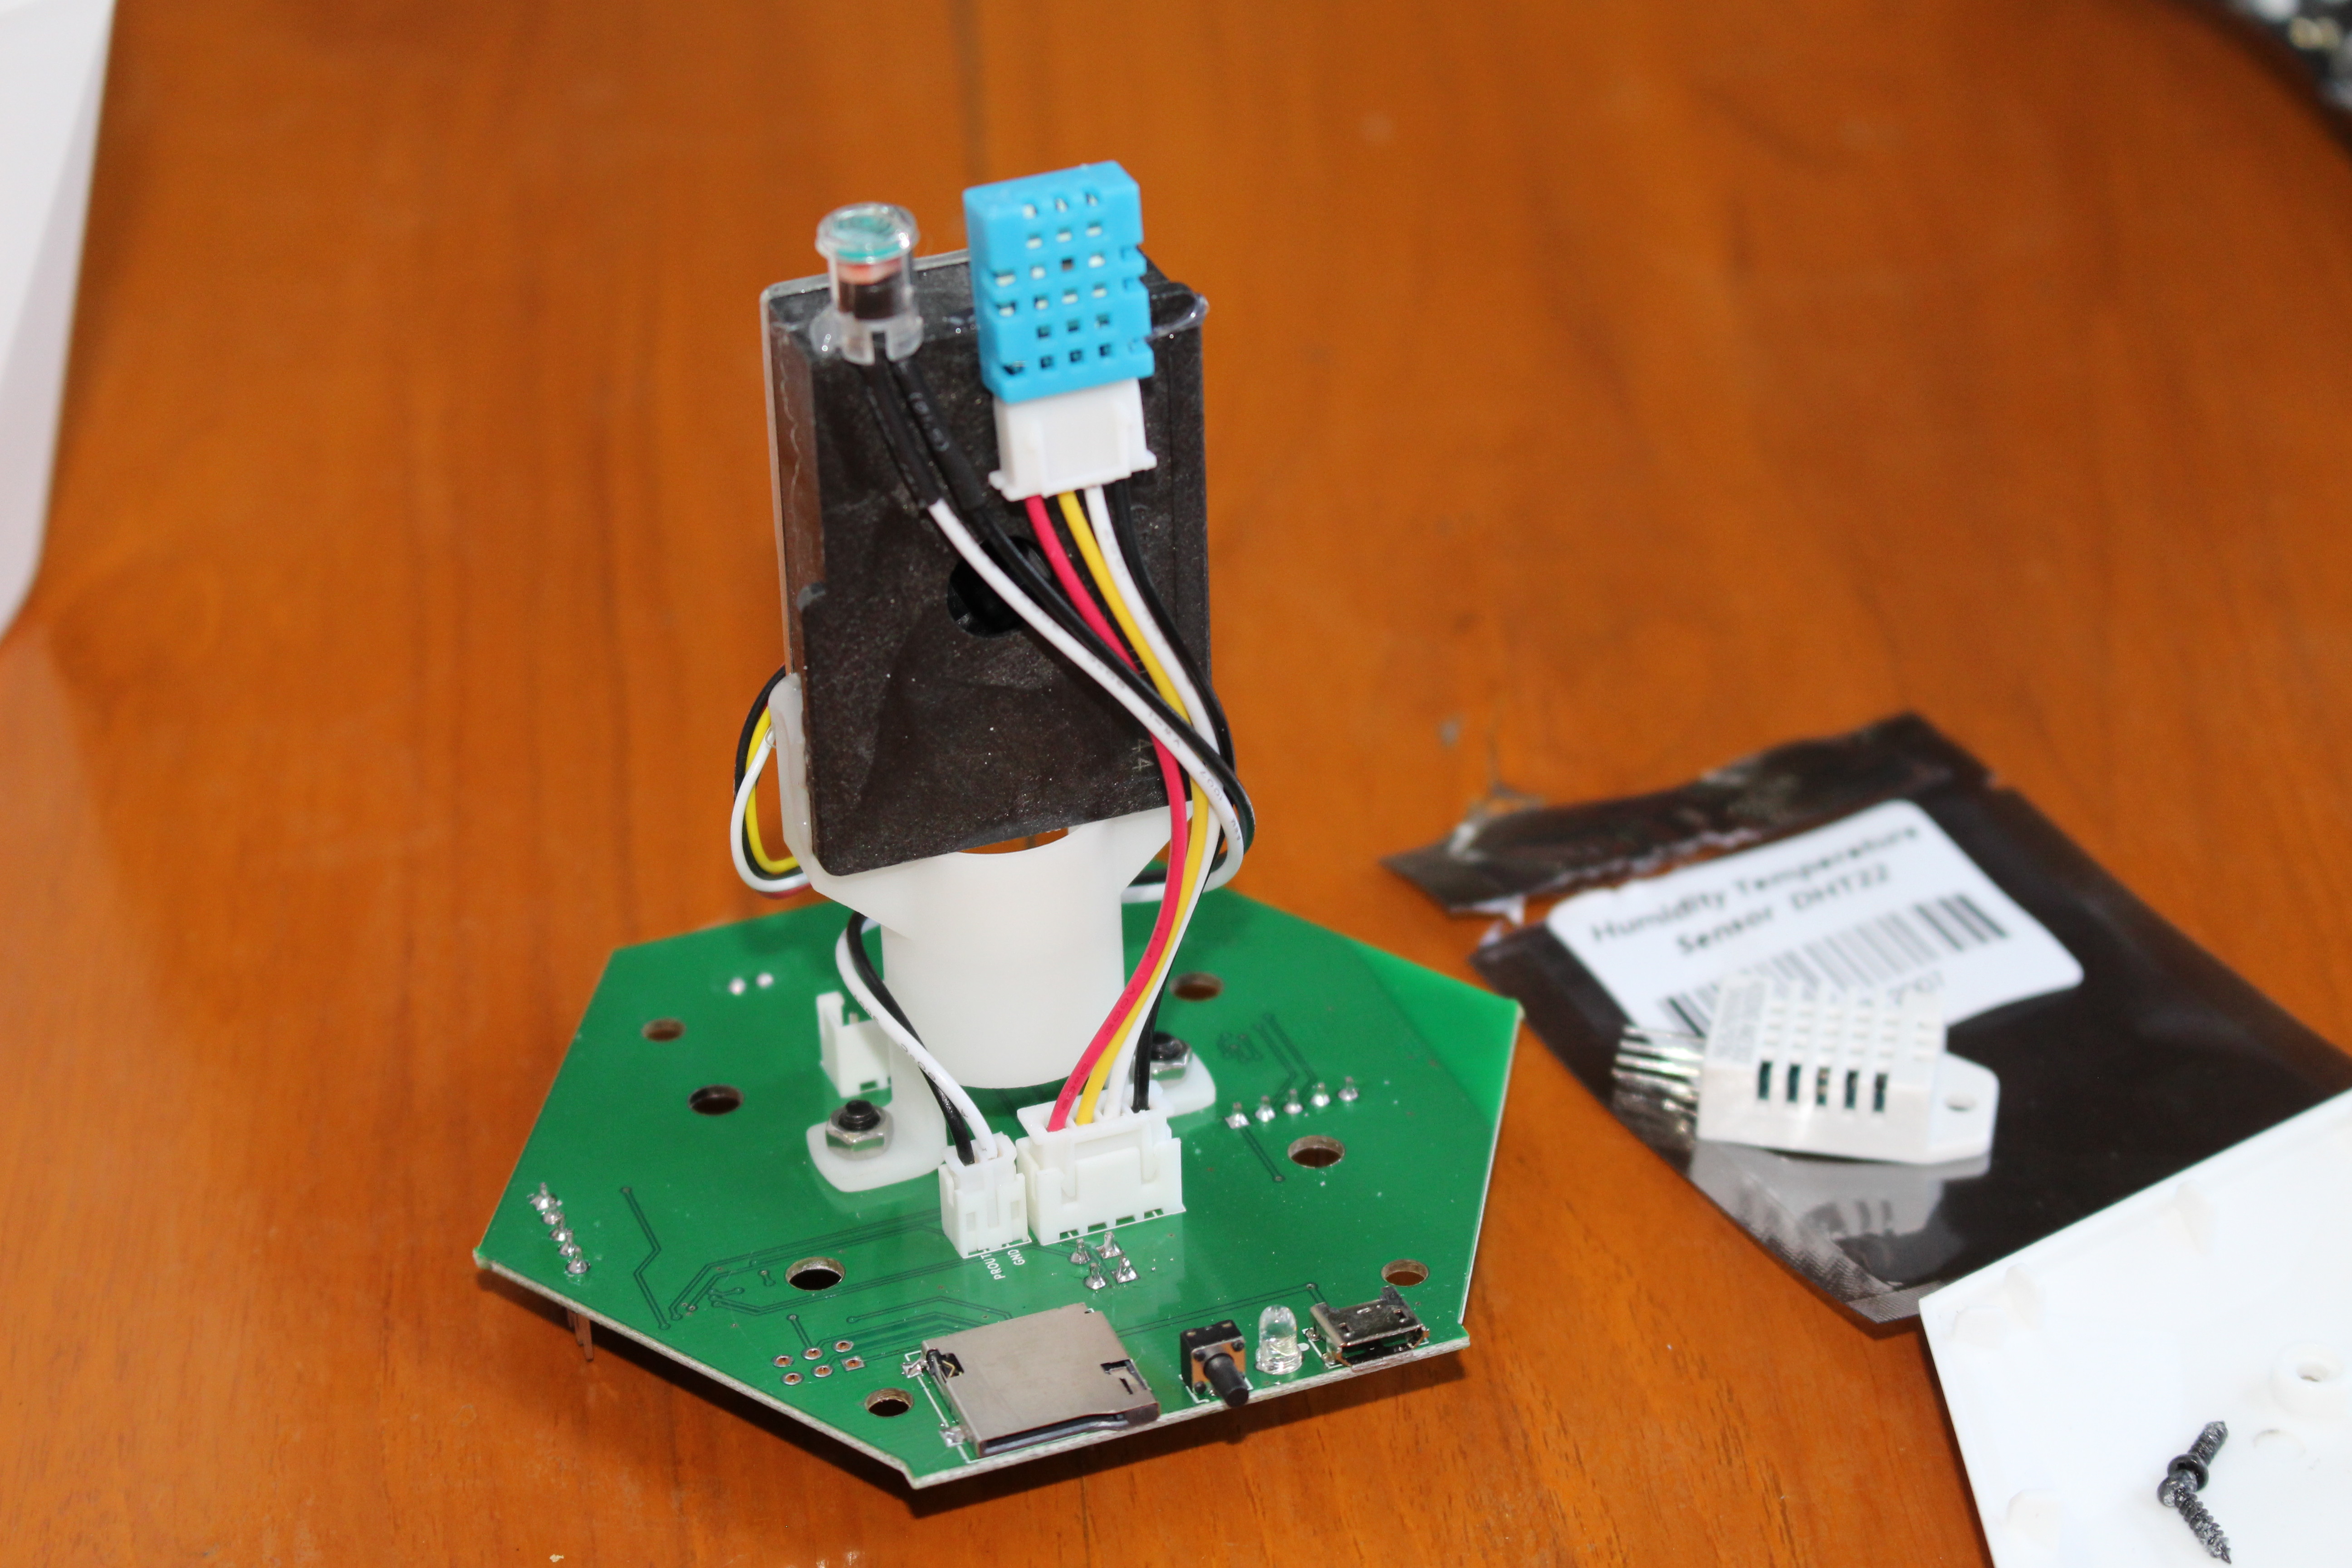
The two black screws holding the sensors’ holder were a bit loose, and I first thought it was due to a lack of quality assurance at the factory, but then I tried to reassemble it, and it would just not fit because of the “Audio” button… Then I realized the screws were actually loose by design in order to allow assembly of the system.
vThings CO2 Monitor Teardown
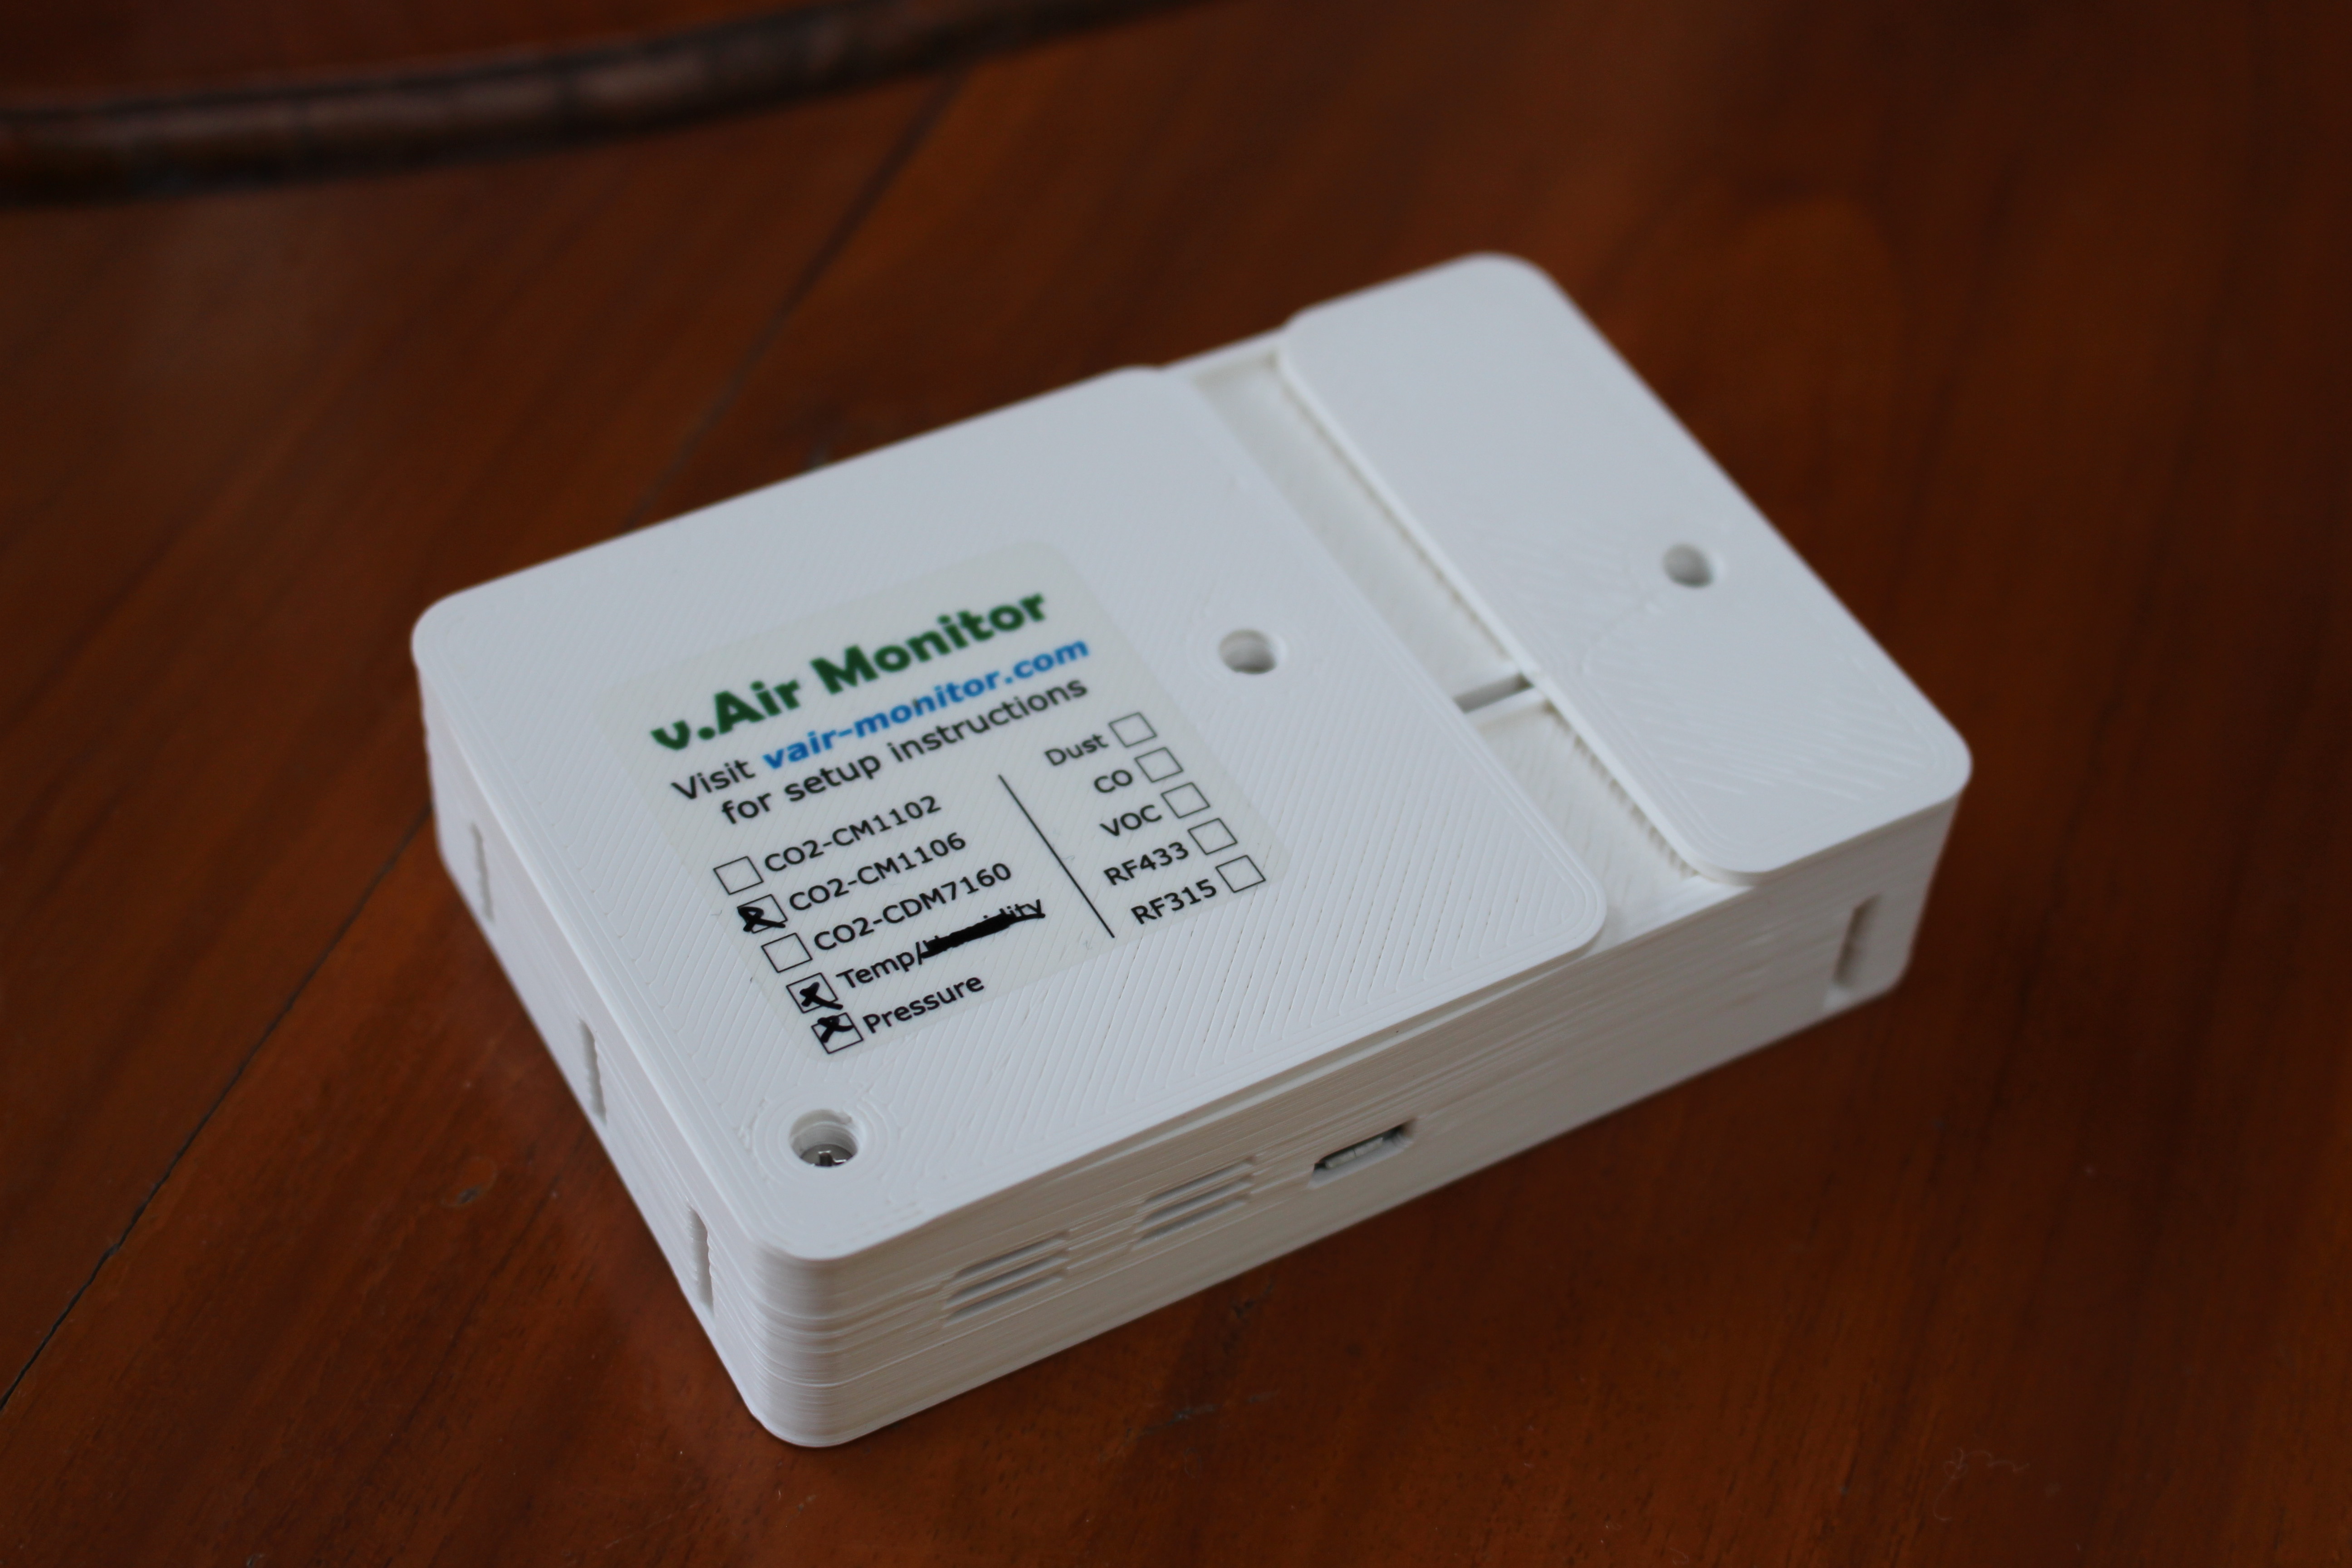
vThings “vAir Monitor” box has a sticker on top showing the option selected, and mine had CO2-CM1106, temperature and pressure selected. We can check this by loosening the three screws holding the two top covers of the 3D printed case.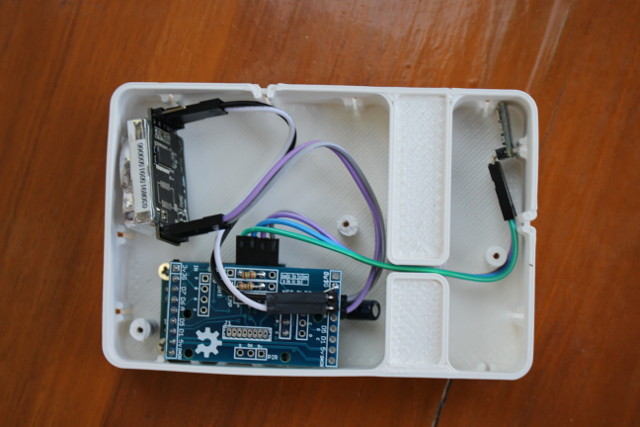 vESPrino ESP8266 board is screwed to the case, and connected to the CO2 monitor and the temperature & pressure sensor via 2.54mm jumper cables. The latter has its own compartment in order to avoid being influence by the other components. If you order a device without temperature sensor, you’ll get a smaller case without the extra compartment.

One we take everything out, we’ll see vESPrino board with an ESP8266 module, and vESPrino Cookie board connected to off-the-shelf CM1106 CO2 sensor, and BMP180 temperature and humidity sensor.
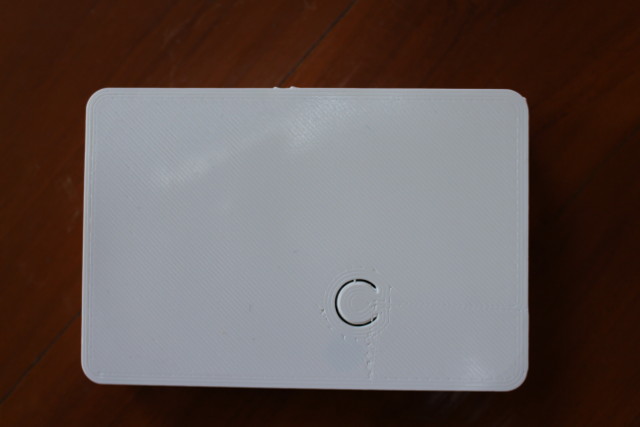 The bottom of the case gives access to vESPrino button that has no use for now. It’s even more easier to program than Sonoff SC since you don’t even to open the case to load your own custom firmware with programming done directly through the micro USB port.
Sonoff SC is sold on ITEAD Studio for $19.99 + shipping, while vThings CO2 Monitor v3 is sold for 60 Euros with CM1106 CO2 sensor, and more if you use a better CO2 sensor, or add extra environmental sensors with the price going up to 135 Euros with a dust sensor, CDM7160 CO2 sensor, temperature and humidity sensor, and RF connectivity. Bear in mind that both products have different kind of sensors, which explains the price difference.

Jean-Luc started CNX Software in 2010 as a part-time endeavor, before quitting his job as a software engineering manager, and starting to write daily news, and reviews full time later in 2011.
Support CNX Software! Donate via cryptocurrencies, become a Patron on Patreon, or purchase goods on Amazon or Aliexpress


I wonder how much the Sonoff costs are really cheap compared to other stuff
Some info / comparison about dust sensors @ http://aqicn.org/sensor/shinyei/
I have just ordered one of these.. I am looking forward to hacking it. A few things to note: The Sonoff has an SD card attached to the Atmega, but if you look in the arduino firmware for the sonoff, the SD card is not being used at all! It seems to be connected to the correct ports of the atMega, so it should be trivial to add logging functionality to the device. Not all the Atmega ports are used up in the schematic. D3, D4, D5, A0, A4 and A5 are unconnected. Should be easy enough to add data… Read more »