
Karl here with part 2 Exploring Raiscube R2. That is the official name by Raiscube. Gonna look at some more prints. Some mistakes I made in first part and some simple mods. Maybe not so much mistakes but an oversight.
Oversight / Mistake
So in the first part of Raiscube Prusa i3 review, I mentioned there were not very good instructions, and they sent a blank SD card with the kit. I was wrong. On first inspection, it looked like a factory sealed SD card but it is not. It is an 8 GB card with videos, instructions, pictures, parts list, STL, and gcode files as well as an old version of Cura. Not blank at all with about 1.5 GB of files. It didn’t include settings but if you install the latest Cura, it just takes a little tweaking to print well.
Official specs from SD card
| Brand | RAISCUBE |
| Model No. | R2 |
| Extruder Qty | Single |
| Machine Size | 450 x 420 x 480 mm |
| Printer Size | 210 x 210 x 210 mm |
| Package Size | 423 x 430 x 200 mm |
| Machine Weight | 8.0 kg |
| Gross Weight | 9.0 kg |
| Filament Colors | White ,Red,Black,Blue,Green ,Yellow etc. |
| Filament Diameter | 1.75 mm |
| Precision | Z axis: 0.004 mm; XY axis: 0.012 mm |
| Printing Precision | 0.1-0.2 mm |
| Layer Thickness | 0.1-0.4 mm |
| Nozzle diameter | 0.4 mm |
| Power Supply | 110/220V, 250W |
| Max Control Temp. Extruder | 260 °C |
| Max Temp. of HotBed | 100 °C |
| Recommend Temp. | ABS: Nozzle:235 °C Hot Bed:100 °C |
| PLA: Nozzle:200 °C Hot Bed:50 °C | |
| Printing Format | STL/OBJ/G-code |
| System Compatibility | Windows XP/Win7/Win 8/Linux/Mac |
| Language | English |
| Connecting | SD card/ USB |
YouTube Videos
RAISCUBE R2 Leveling&Printing
RAISCUBE R2 Installation Video
RAISCUBE R2 Installation DEMO
With that being said I am not sure I would have struggled as much had I known the videos were available. I watched some of the videos but it is hard to know if I would have made the same mistakes.
Free mod
One of the complaints I had in the first part was that I had to level the bed after every print. I have been watching and reading a lot on 3D printing, and I ran across a video that was talking about placing a nut between the screw and the build plate and after trying myself it makes so much sense. Not only is it going to help make a moving plate more rigid it will compress the springs more. There were extra nuts in the kit so this one is a simple welcome freebie. I haven’t leveled the bed much at all after this. I also think it improves quality as well keeping the build plate more rigid.
 Prints Before E3D Upgrade

New filament I just received. Some Blue WYZworks Blue PLA. I was tweaking at the bottom, so please ignore the under extrusion at the feet. I changed the flow back as soon as I noticed. All these prints are stock unless otherwise noted.
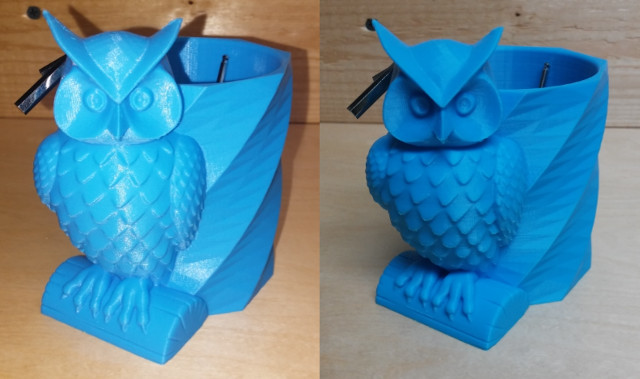
Another pre sliced file on sd card. Little trouble with overhangs. Overall prettygood. New tool holder
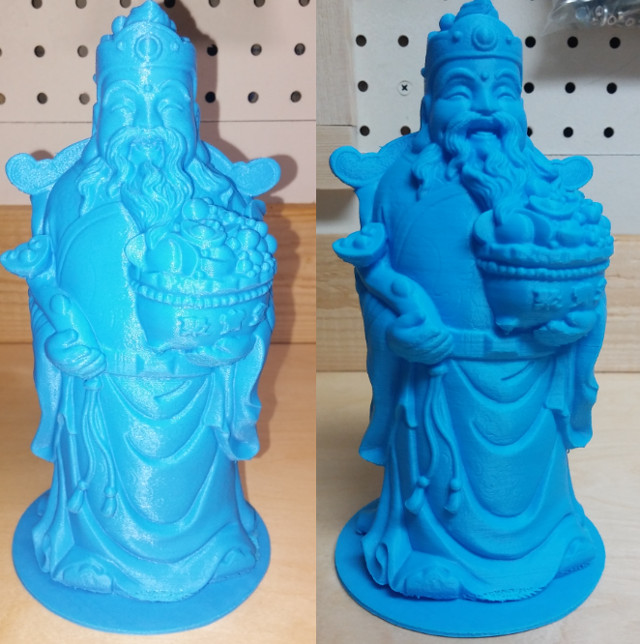
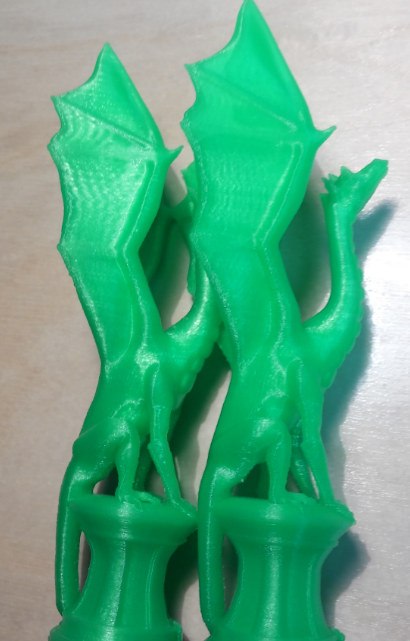
 Last and final print on SD card. Kids liked this. Prints in one piece and moves as soon as removed from the print bed.
 Moved into new office/work space, went onto thingiverse and printed off some hangers.

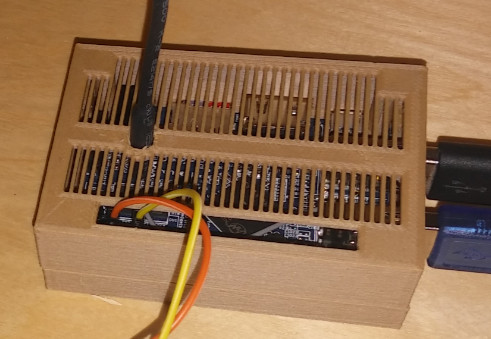
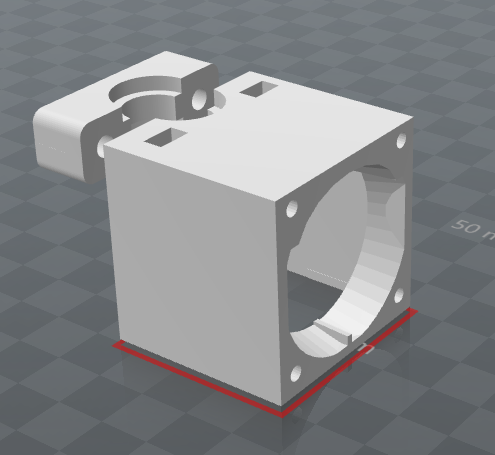
Orange Pi Lite development board case.
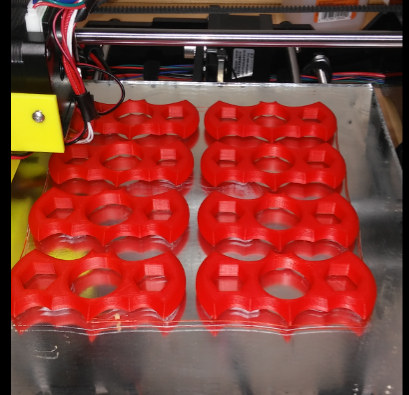
Joined the fidget spinner crowd, and printed off a bunch of these for son’s birthday party as gifts in different colors. About $1.30 each spinner.
E3D Clone
I have been working for a while on converting to a bowden style E3D clone. I have it mostly working but want to make sure I have a good working solution. My goal is to make it a simple upgrade with the least amount of work and modifications. It worked with the first iteration, until I started longer prints. I am pretty sure it is due to heat creeping up the heartbreak. I think with some Kapton tape insulating the hotend and new mount with bigger fan I can fix the issue.
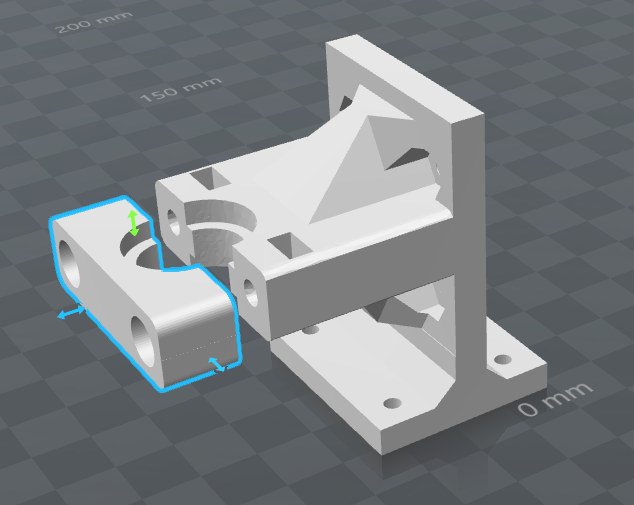
This printer prints really well stock without any modifications, but you have to print slower to avoid ringing. Ringing happens when the print head is accelerating and decelerating and reducing the weight of the x carriage helps reduce this. The R2 is a direct drive type printer. Which means the stepper motor that pushes the filament is on the x carriage. This can be changed to a bowden style and weight can be reduced substantially.
In addition, this converts to an all metal heatbreak. The stock R2 has a short PTFE tube in the heatbreak which limits your temperature to max of 245 deg. Above 245 the PTFE starts to burn and melt and release bad fumes.
I think this is a winner. Using 40mm fan instead of 30mm, and not obstructing airflow.
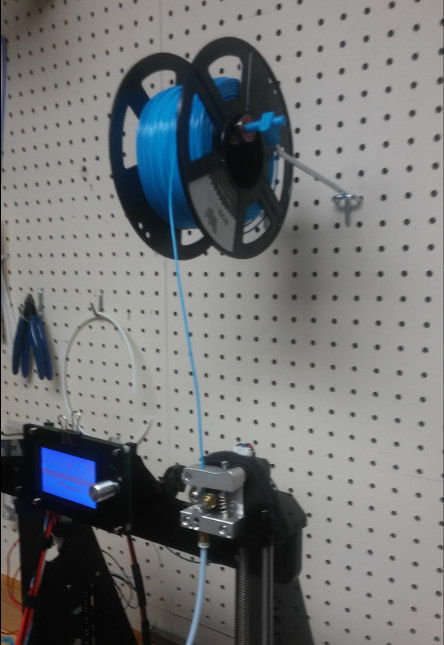
Filament Reel
One additional benefit changing to a bowden style is that you filament reel doesn’t have to turn as freely to get better prints. If you are printing stock you can improve your prints just by making the filament flow better to the hotend. Initially I raised the spool holder to above and behind the printer to improve the flow. With the stock setup when the direct drive is moving around if there is friction on the spool it will slightly twist the hotend as it is moving. I am talking about .1mm variance but you can see this on your prints. There are several spool holders on thingiverse, I am using this one with some bearings that I modified for my needs.
3D Builder
I had been using TinkerCAD to make modifications to parts, but I just noticed windows 10 has a program called 3D Builder built in. It is working OK for what I do most of the time. It is rudimentary for 3D modeling but I find it useful for what I need. TinkerCAD still seems better for slightly more complex stuff but for some simple changes 3D Builder opens quickly and I don’t have to log in. It might be that I have used TinkerCAD more.
Closing Thoughts
Wow! This has been challenging for me to work through the troubleshooting on the E3D upgrade. Stock printing with this printer yields good results. Only if you want to print faster is the E3D really necessary. As long as jamming doesn’t happen with this new design I should be able to share on Thingiverse, and final short write up and comparison. If you would like to purchase this printer you can use this code CNXPrusa on Gearbest and grab it for $179.99.
After the next E3D upgrade article, I’ll be working on TEVO Tarantula 3D printer next sold on GearBest for $418.59. Pretty excited about this one.

Karl is a technology enthusiast that contributes reviews of TV boxes, 3D printers, and other gadgets for makers.
Support CNX Software! Donate via cryptocurrencies, become a Patron on Patreon, or purchase goods on Amazon or Aliexpress. We also use affiliate links in articles to earn commissions if you make a purchase after clicking on those links.


