Today we are going to take a first look at the Creality CR-10 3D printer. This is a multipart series with the first part being unboxing and initial setup. I have no experience with 3D printing, and when I found out I would be doing this review I was ecstatic. It took a while to get shipped because of the wild popularity at Gearbest. I believe supply has caught up with demand. While waiting I read as much as I could about 3D printing. and I am glad I did.
Creality CR-10 3D Printer Specifications
- 300 x 300 x 400mm build volume
- Nozzle diameter: 0.4mm
- Memory card offline print: SD card
- Prints up to 80mm/s (but slower is better)
- File format: G-code, JPG, OBJ, STL (I have only done g-code)
- 1.75mm
- Software – Cura; octoprint compatible
CR-10 3D Printer Unboxing and Setup
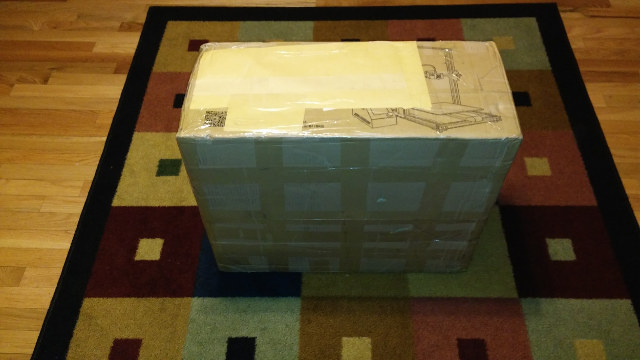
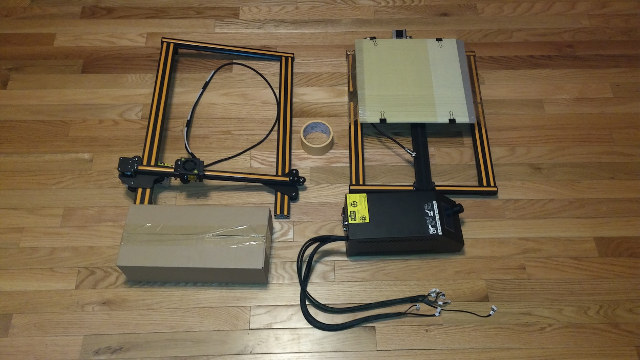
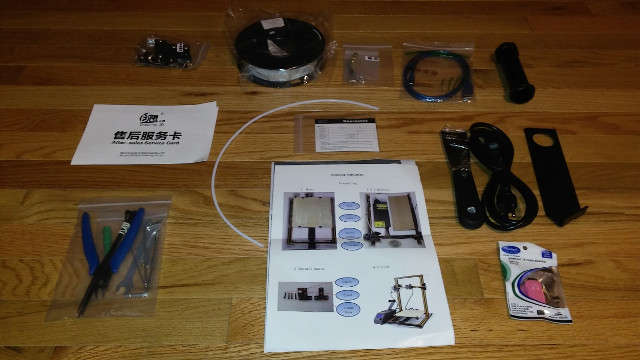
I had the CR-10 assembled and printing in about an hour. I had a completed successful cat a couple hours later. There is one file of a cat on the sdcard pre-sliced. It was just a handful of bolts and some electrical connections. I read a couple other reviews and some beds were loose and wobbly. I didn’t have that issue. I did go over and tighten them after a week when I noticed a couple were not making good contact.The printed instructions were not complete but detailed instructions were on the sdcard. I loaded the assembly instructions on my cell phone and worked off of it. All the tools to work on the printer are included including some extra parts. Really the only thing I had to do is level the bed. To do this, I turned on the unit and told the printer to “autohome”. X and Y were good but Z wasn’t. Z was not triggering its limit switch, which I installed. I turned the controller off and adjusted the Z limit switch. Then told it to home again. In the settings, I disabled the stepper motors and took a regular sheet of paper and I leveled the bed. This is done by moving the print head around to the 4 corners and turning the thumb wheels until friction is felt. I went around 4 times to make sure it was level and I felt the same friction at each point.
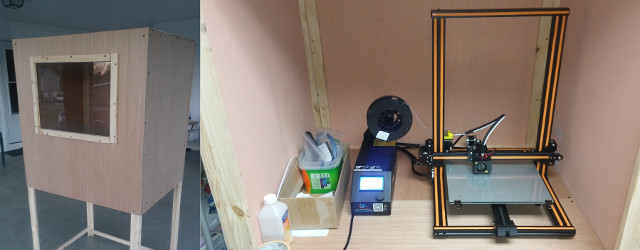
I don’t have a good place to print that is ventilated. I do want to try abs so a warm ventilated box is necessary, so I built this box and is the final resting place for the CR-10.
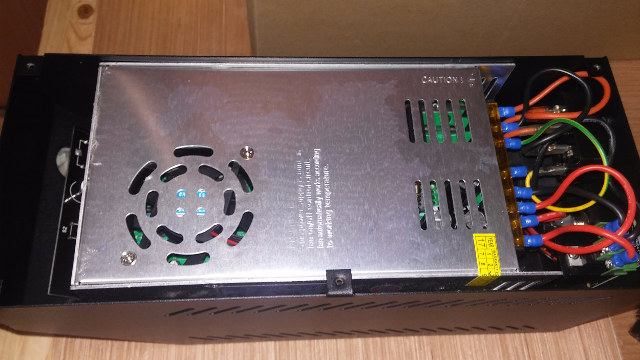
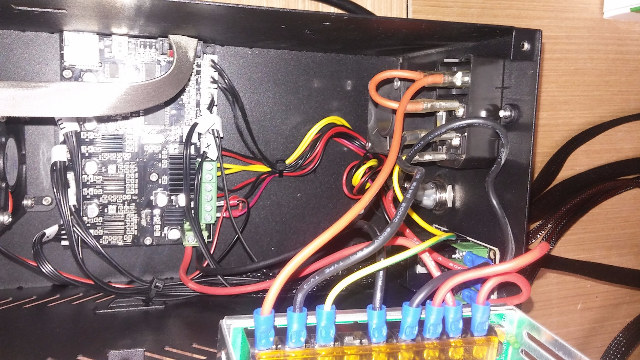
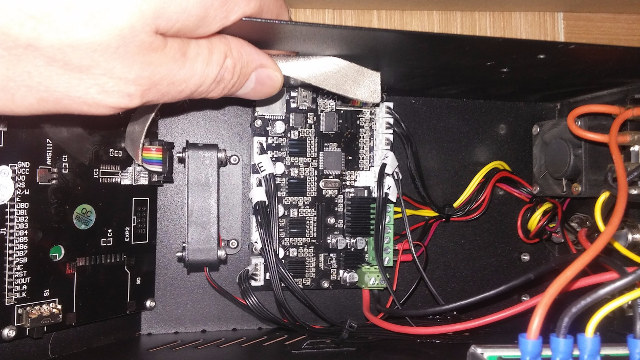
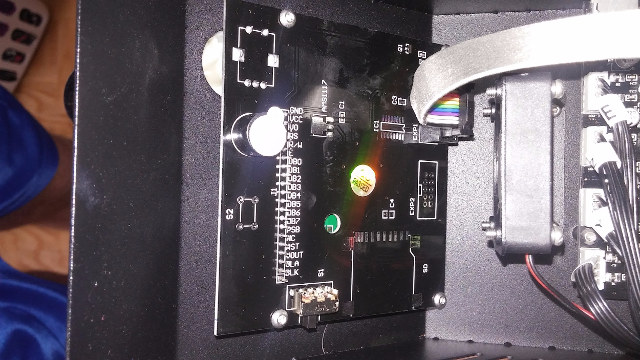
Inside the Control Box
It’s neat and orderly inside the control box. Wires seemed adequately sized. I read reviews of some lower cost printers not using proper gauge wire and rated connectors and wires charring. These pictures are after 2 weeks and I didn’t notice any visual indication of issues. There is also a mosfet included which was one of the upgrades on the more intense DIY kits.
First prints on CR-10 3D Printer
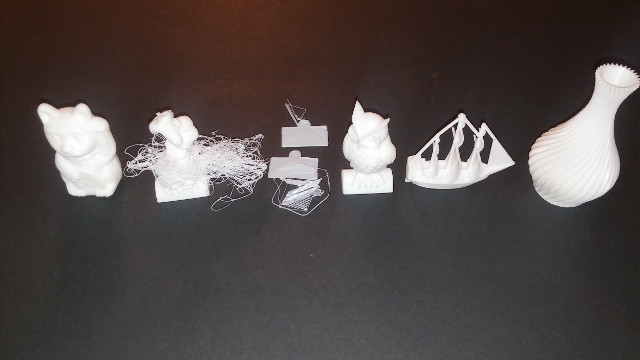
The supplied cat already sliced and ready to print was perfect. The next night I loaded I wanted to get my kids involved so I pulled in Thingiverse. Thingiverse is a website where people upload 3D files that you can download for free. I had my kids each pick out something to print. Daughter picked out an owl. Son picked a pirate ship. So one print down I was confident to start slicing my own. Loaded latest Cura from their website, because it was newer than the one supplied on the SD card. Cura has profiles to tweak settings and I found a profile on the Facebook user group page. Loaded it sliced the owl first and started printing. It was looking good so I went to bed. The next morning I woke up to a mess. About a quarter of the way up broke loose, and first failed print. I didn’t think too much about it. Started again and it kept on coming loose. I tried new tape that was provided. No go. During my research I read hair spray works. It didn’t for me. Then I found a purple glue stick from kids stash which I read works. Boom stuck hard. Works the best and every time for me. I only use a very light and sticks very well. I also didn’t want to use hairspray because it is messy. I was afraid it would gum up the printer with over spray. I could take the bed off bet then have to level every time.
After getting sticking issue resolved I went on to print to print everything successfully with the supplied filament.
Slicer
When you have a 3D object that you want to print it needs to be sliced. Slicing takes the 3D object and puts it in a file format the printer uses called Gcode. There are many slicers out there. The printer comes with an older version of Cura. I opted for a newer version to get more features. More features is better? There are a ton of tweaks you can change to adjust the print quality as well as dialing in filament. Not all filament is the same. I will go more in depth later.
Facebook Group
Although I wish it was a real forum I have found the CR-10 Facebook group helpful. I really recommend joining and reading through the posts. It helps to see what other people are doing. As of the last couple days, the firmware is starting to be modded to the latest. This is a really good sign. It’s a pretty large group with 1,800 members and overall I found it very helpful. It is kinda hard to tame all the variables in the slicers.
Final Thoughts
I have some red, black, and wood filament I have been printing with for a couple days now. I am sticking with small prints to gain confidence and conserve filament. I have run into some blobs and zits on the filament that I purchased. I will go more in depth when I find out how to overcome this. I will also go deeper into the slicer and settings and troubleshooting once I figure it out. I know it can print well with this white PLA provided. I feel like 3D printing is an art form and need to be able to tame these settings. I have been watching it print trying to become one with the printer.
So far I am really happy with the results. I am calling these prints with the white PLA perfect . The printer is extremely easy to use. Big build volume. Unlike some other kits where it takes 8-9 hours to put together and you have to print some modifications to print good quality prints. This one is pretty much plug and play so far.
I would like to thank GearBest for sending the CR-10 3D printer to review, and if you are interested in the printer you could purchase it from their website for $405.99 plus shipping. [Update: using coupon 3DCR10 will bring the price down to $401.99; Update 2: GBCR10 coupon brings that down to $399.99]
Continue reading “Creality CR-10 3D Printer Review – Part 2: Tips & Tricks, Octoprint, and Craftware“.
Karl is a technology enthusiast that contributes reviews of TV boxes, 3D printers, and other gadgets for makers.
Support CNX Software! Donate via cryptocurrencies, become a Patron on Patreon, or purchase goods on Amazon or Aliexpress




Surprised you haven’t printed a NanoPi case of thingverse,
@Theguyuk
I guess Karl might not have a NanoPi NEO.
I did finish a case for a friend in tinkercad last night. Still need to print it. He gave me the dimensions and he is going to mount it under his TV where the stand was connected. It will be a part of the next post.
As someone who got into 3d printing just under a year ago and can remember all of his mistakes, may I make some suggestions and recommendations? Materials: Forget ABS. It’s hard to print with and a worse plastic than PETG. PETG is stronger than PLA and ABS. It’s flexible like ABS and it’s pretty impact resistant. It has insanely good layer bonding–no delamination like ABS. Print bed: glue stick works well, but requires frequent reapplication. Also, the bottom of your prints end up with glue all over them, so you’ll need to wash every print. When you was them, you… Read more »
Been looking for a cheap but good clone of Prusa i3 kit / assembled printer myself.
Prusa i3 kit from Josef Prusa is original open source 3D printer most clone today.
I read good things about ”Malyan M150 i3”
Sold as “Monoprise Maker Select 3D Printer v2” in USA by same manufacturer.
Build area of most i3 printers are smaller but they are known for high quality.
Both of those can be found less than $320(US) including shipping worldwide.
@Harley
Check out the facebook or forum page of each one to get an idea of end user satisfaction.
Hallo,
I got problem with bed leveling. There are 6 wheels on the bottom , that should keep the bed in right way. But it seems to me they are not mounted well . There is still some play of bed during leveling. If I touch the leveling screw (any) I can move the bed up and down because it seemed the wheels are not touching a “rail” so tight. Here is the play.
Any solution how to cope with this problem ?
@naschd
Loosen the wheels then apply pressure towards the rail while tightening them. I had to do on mine as well.
part 2 here http://www.cnx-software.com/2017/05/05/creality-cr-10-3d-printer-review-part-2-tips-tricks-octoprint-and-craftware/
Naschid, the rubbery wheels on the bottom that roll up and down the track are actually mounted on eccentric bosses. Meaning that if you take a wrench and turn them, they will pinch the track more or less. There is no reason to loosen the hex key on the bottom before you do that. I had this problem too and the vendor gave me this info. Now no play whatsoever in the print bed 🙂
Sorry i missed that post Thank you Andrei.
I have just bought a cr-10s and having problem printing, I was told that the extruded light should be on and mine isn’t working but where is it, the motor on the feeder is not working due to the fact ,as I’m told, that the light is not on any help would be appreciated.
?♂️
Not sure of exact setup. But make sure hotend is hot. It won’t extrude while cold. Make sure all connections are good. Continuity etc