
I reviewed some Nextion touchscreen a while ago. Those were 2.4″ and 5″ serial TFT displays with optional resistive touch support that could be used in standalone mode, or connected to an MCU board over UART to control external hardware. The user interface could be designed and emulated in Windows based Nextion Editor program before uploading it to the display via UART or micro SD card. ITEAD Studio has recently launched Nextion Enhanced NX8048K070 family of 7″ displays with resistive or capacitive touch panels, and support for GPIOs. The company sent me the capacitive model with enclosure for evaluation, so I’ll have a quick look at the hardware and Nextion Editor in this mini review.
Nextion Enhanced NX8048K070_011C Unboxing
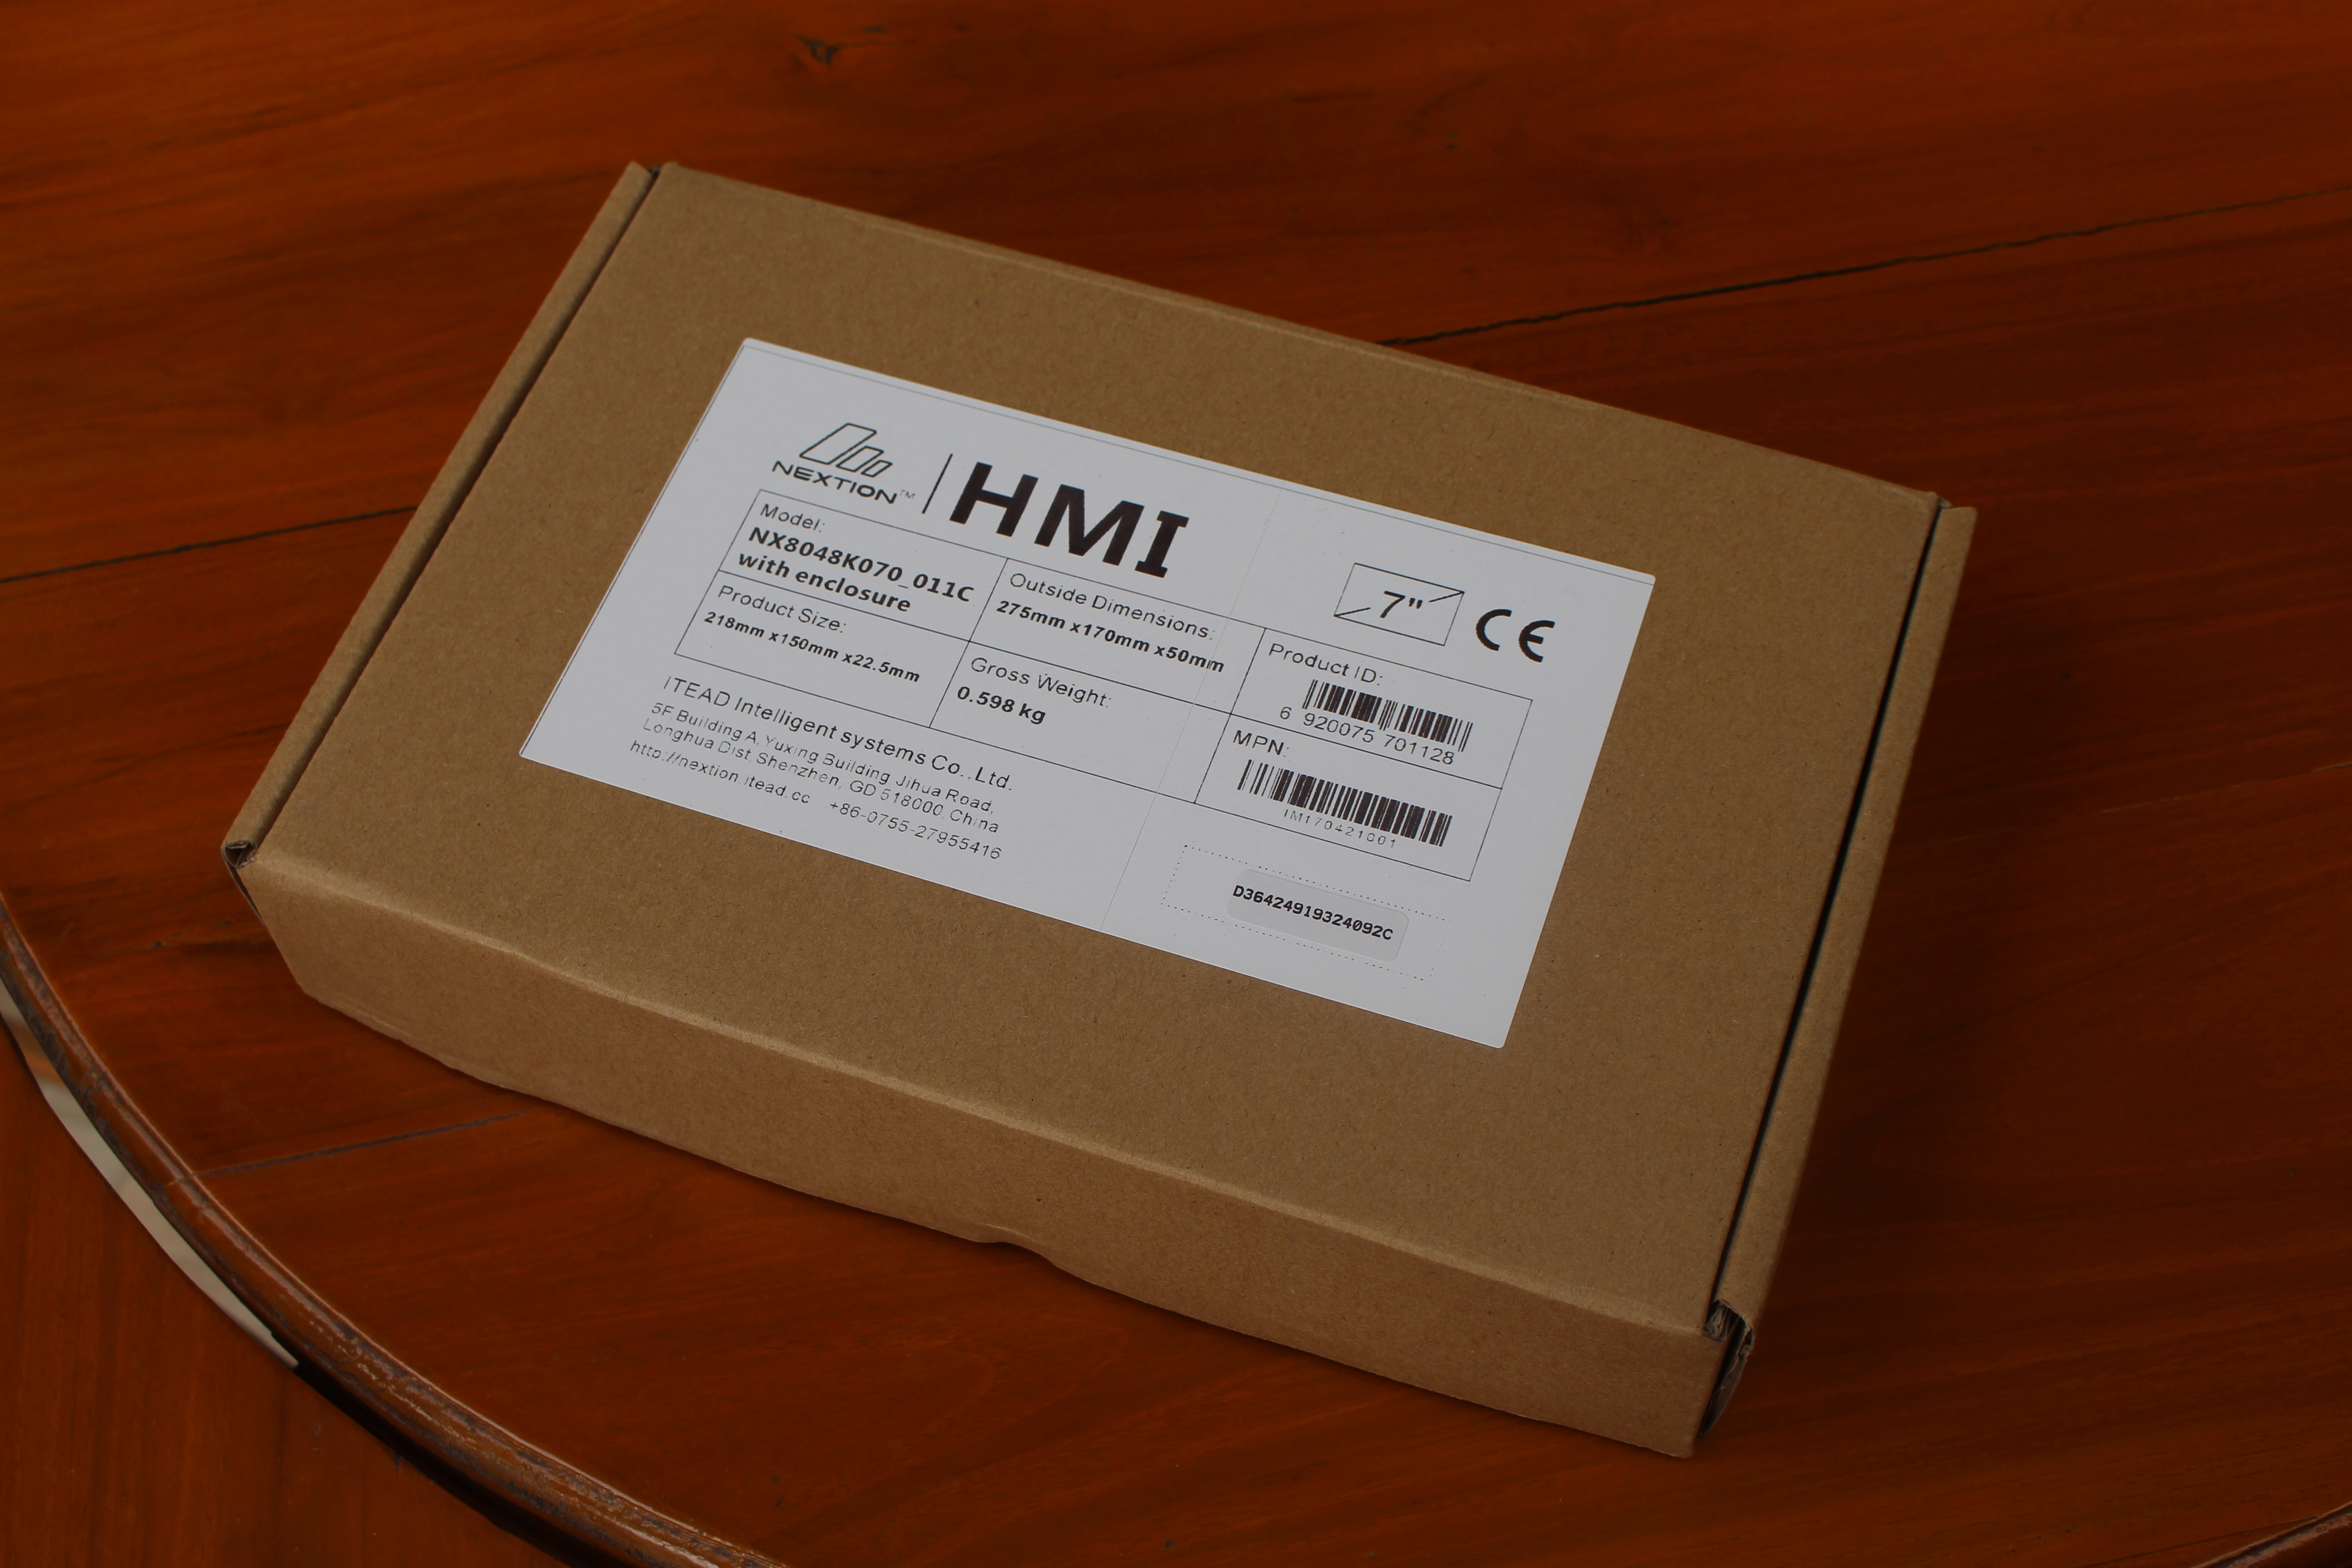
I received it in a package from “ITEAD intelligent solutions” with basic description with
- Model: NX8048L070_011C with enclosure
- Outside dimensions : 275 x 170 x 50 mm (That’s the package dimensions)
- Product size: 218 x 150 x 22.5 mm
- Gross weight: 0.598kg
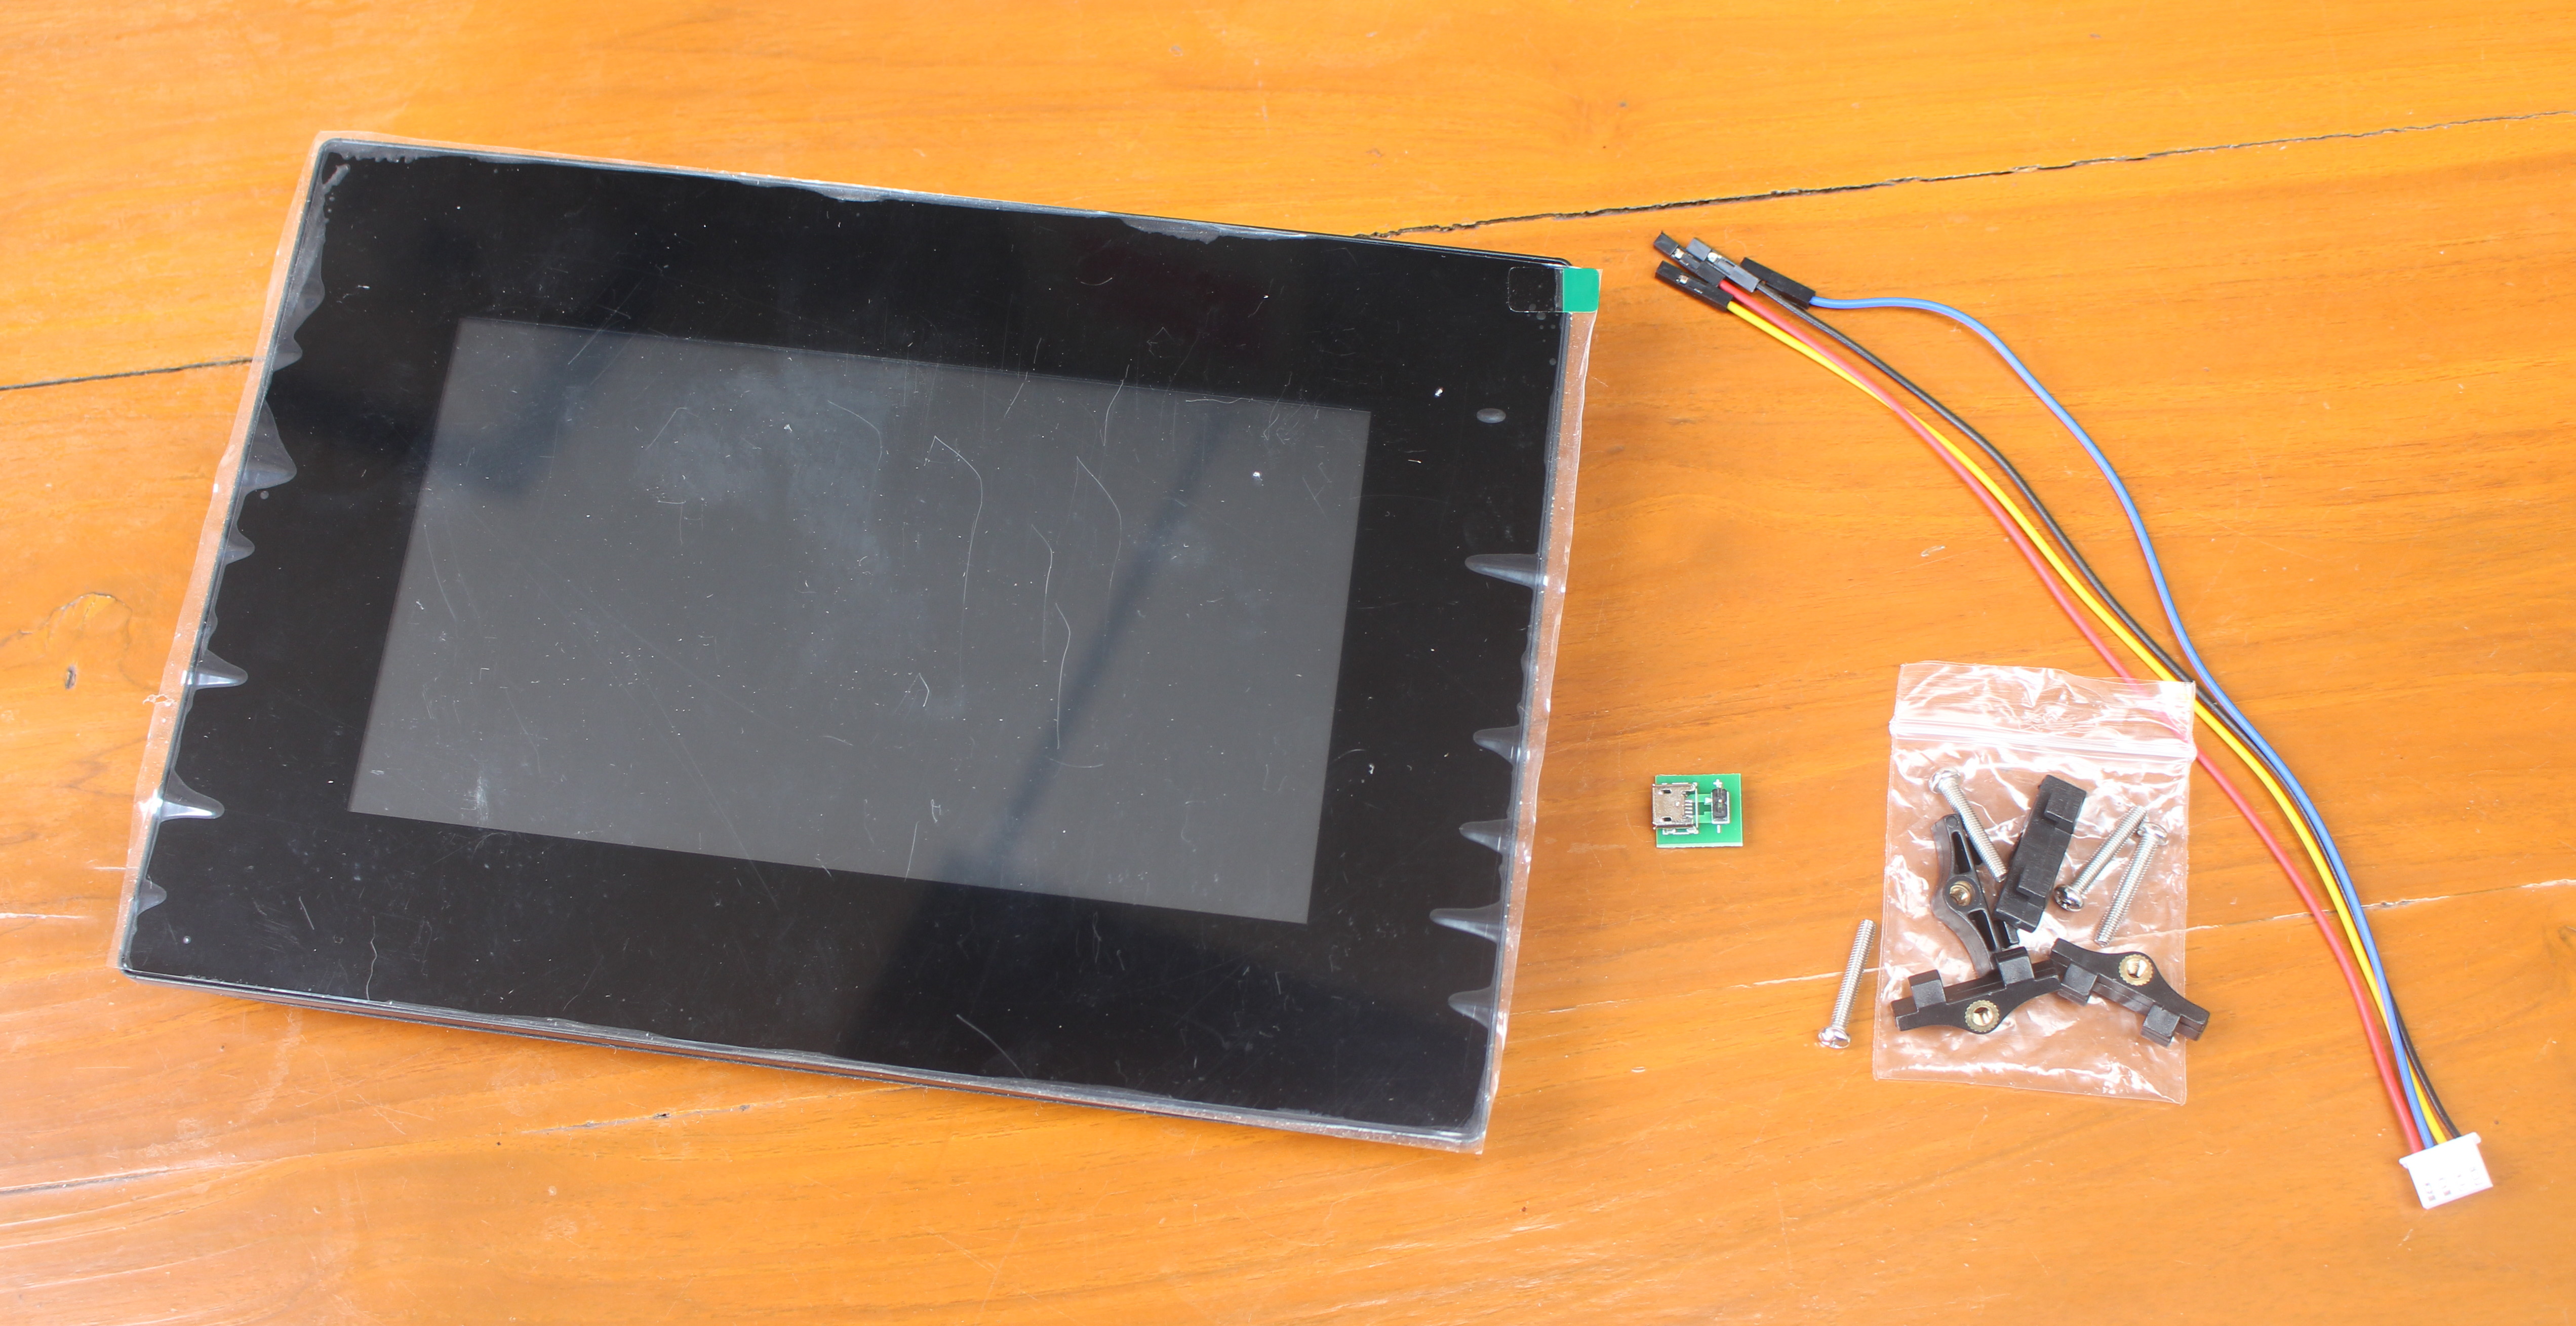
The display comes with a UART cable, or small micro USB power board, and a wall mounting kit.
If we check the other side of the display, we’ll find the UART connector on the left, a micro USB slot on the bottom right, and the GPIO connector that inconveniently requires a flat cable, so you’d have to make your own board to connect external hardware, or purchase the company’s $5 expansion board, which is not included in the kit by default. There’s also the almost-compulsory typo found on many devices made in China: “Human Mechine Interface”.

The thickness is indeed 22 mm, but if you fully embed the display into a wall, the visible thickness will be 6 mm.
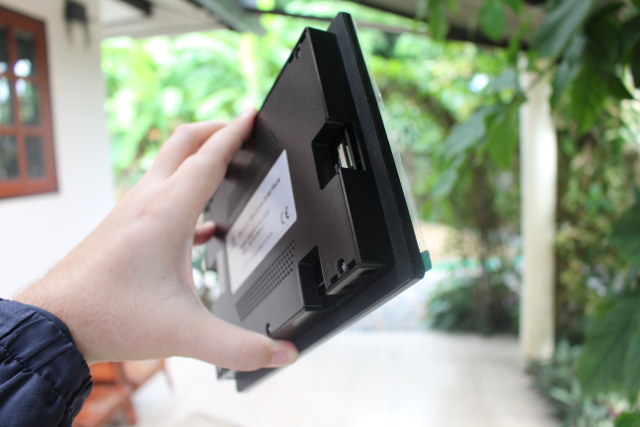
You may have to open the bottom cover, as you’ll need to add a battery in case you want to use the RTC function.

Let’s have a look an the main IC while we have the case open:
- MCU – GD32F103 MCU (STM32F103 clone) ARM Cortex M3 micro-controller
- CPLD – (Intel) Altera MAX II EPM570T144C5N CPLD
- SDRAM – Winbond W9864G6KH68MB SDRAM @ 166 MHz
- Flash – Winbond 25Q256FVFF 32MB SPI flash
I close the case back, and power the display via the micro USB power supply board, and a USB power adapter.
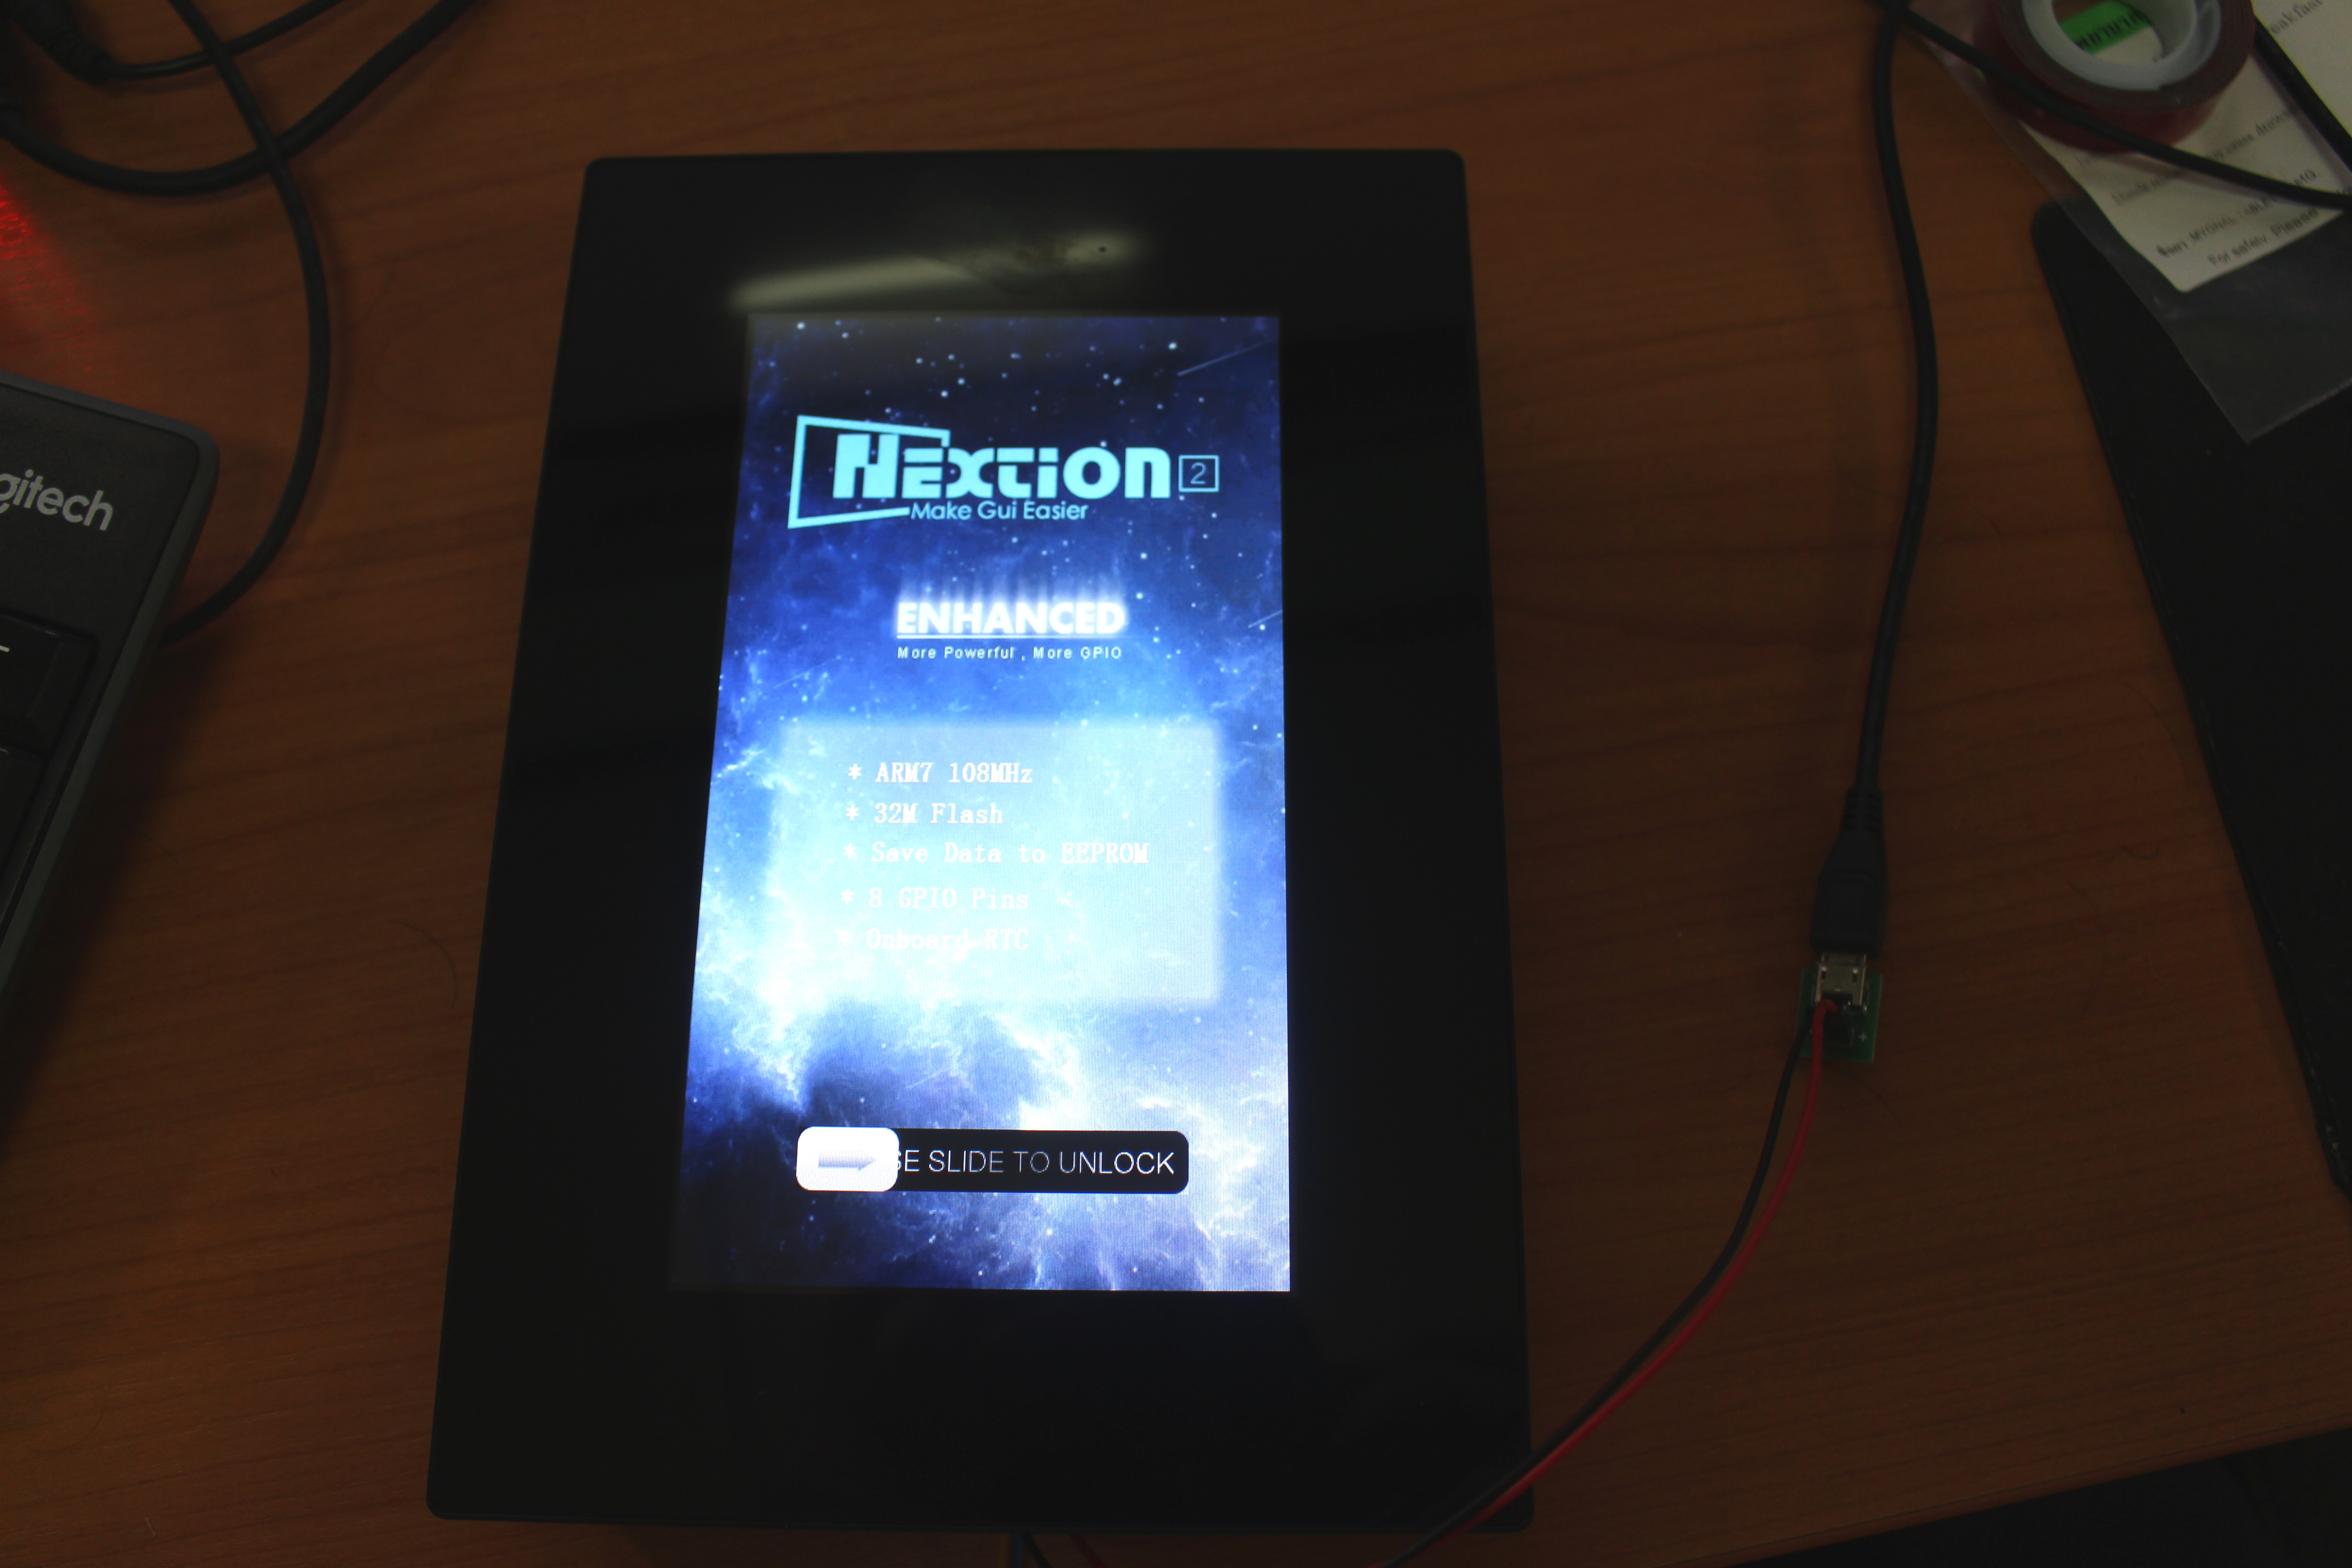
It’s a simple demo with a background image, some text, a slider, and 4 different pages, which I’ll demonstrate below after doing some simple modifications.
Nextion Editor and NX8048K070 Demo Sample
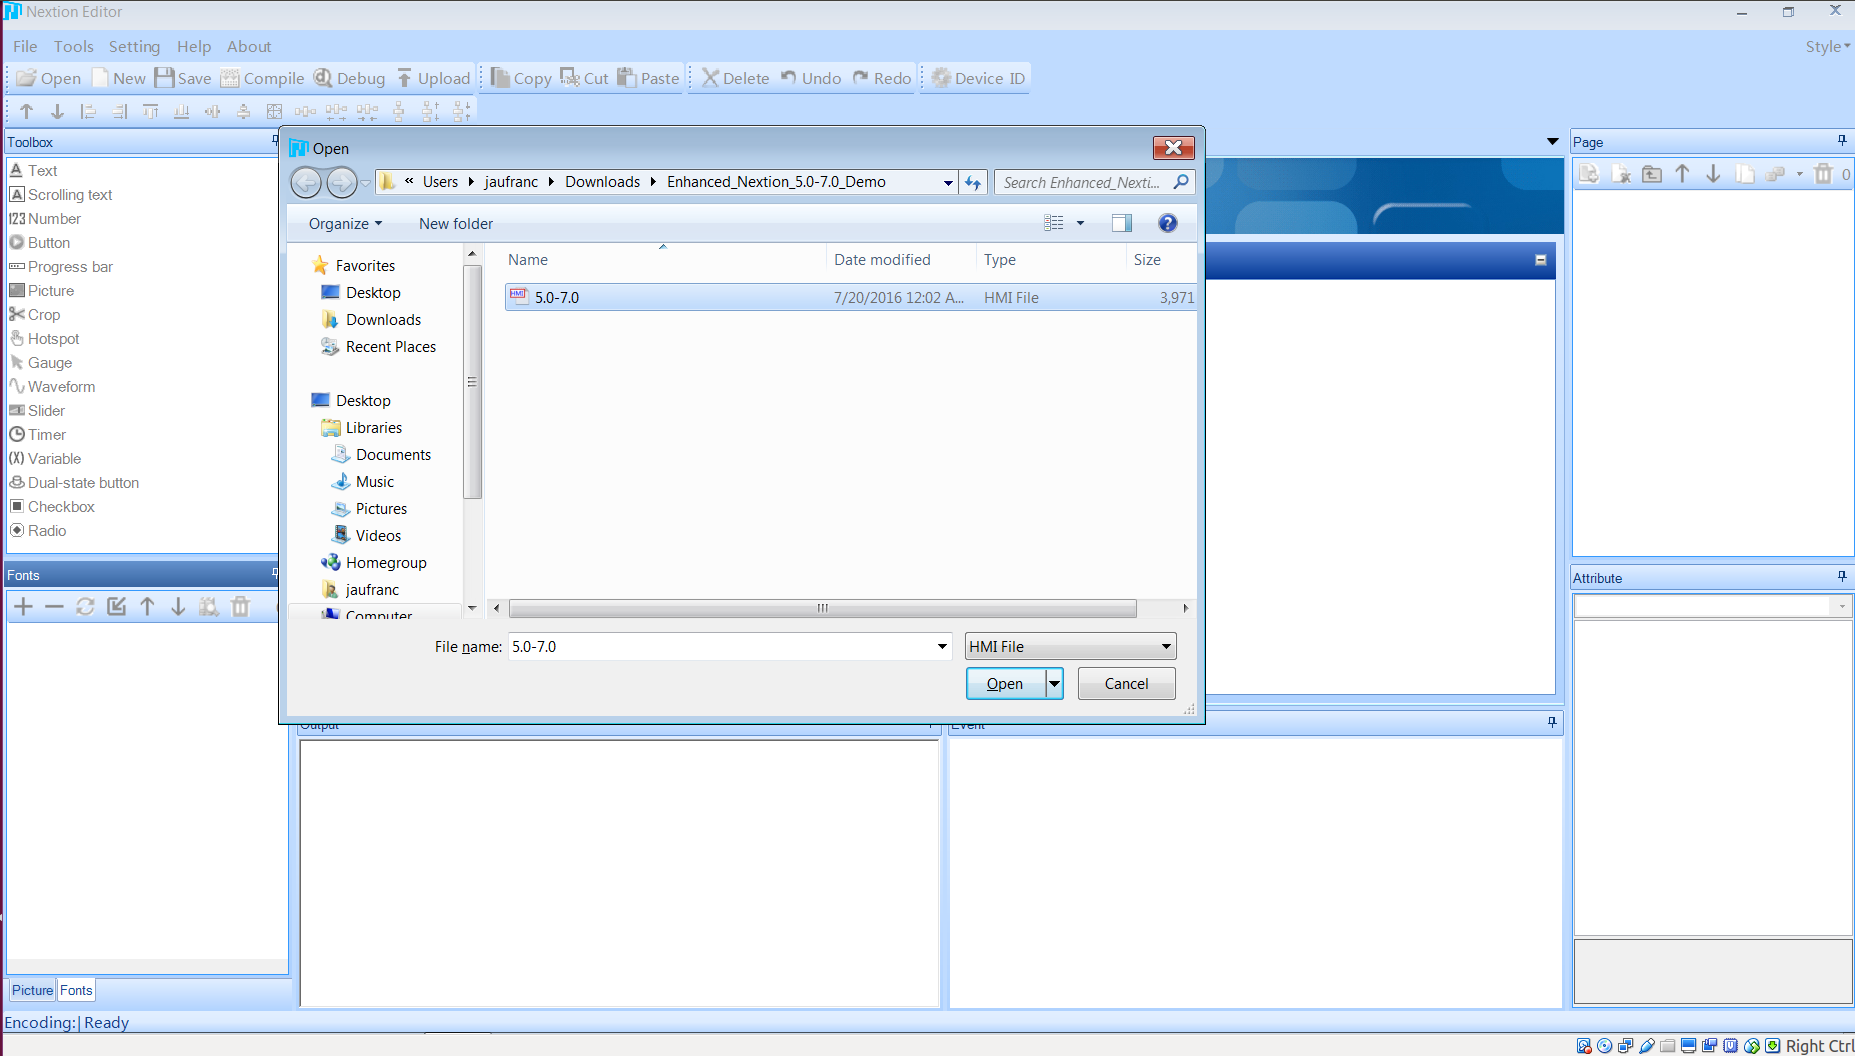
Nextion Editor is a Windows program, but a while ago, I was told it also worked with Wine in Ubuntu. So I downloaded the latest version (v0.47), and while the installation started, it eventually failed in Ubuntu 16.04. So I reverted to using Windows 7 in VirtualBox. I also downloaded and extracted Enhanced_Nextion_5.0-7.0_Demo.zip found at the bottom of Wiki page, which I then opened from Nextion Editor.
The user interface will allow you to add various items from the Toolbox including text, scrolling text, numbers, buttons, pictures, progress bars, gauges, check boxes, and so on. As with the previous version, you’ll also need to import and convert font with a fixed size. The demo already has four of those defined. You can also add and link several pages with 4 pages used in the demo, and the Attributes section is used to defined parameters for the selected item
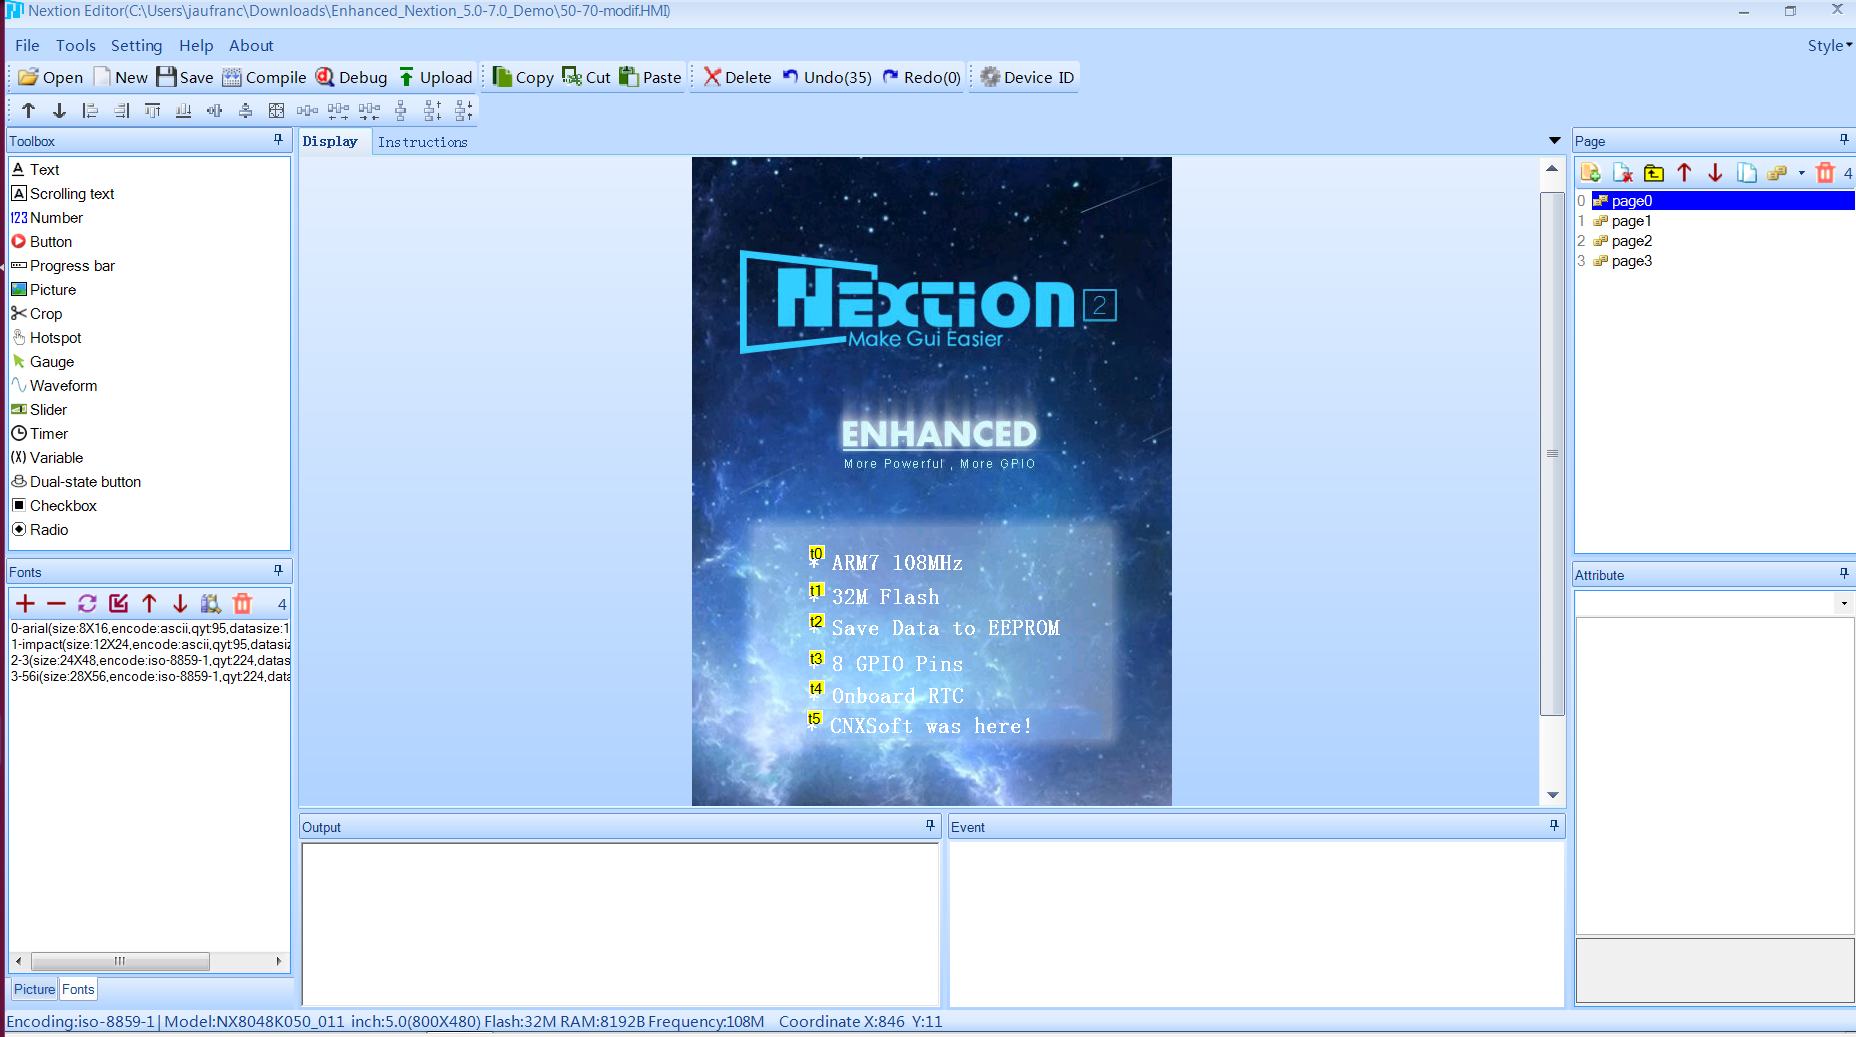
I just added text. It should have been easy, but I was very confused at the beginning, since nothing would show up when I clicked on “Text” in toolbox. I could change the attributes, but the text would not be displayed. I went back to check the old review, and I used “Add Component” menu in Nextion v0.30 at the time, but that menu does not exist anymore. Finally, I noticed the 800×480 display was not shown completely, on the text was located on the top left of the UI. I delete the dozen text items I had created, and added “CNXSoft was here!” at the end of the list. The user interface is not really intuitive, so I’d still recommend to read the user guide, even some of the parts are outdated, as it should help getting started, and they have examples with Arduino. To control GPIOs on the display, you’d need to use cfgpio code. In case, you run into troubles because the documentation is not quite as good as expected, you can always try your luck in the forums.
You can click on Compile to check for errors in your user interface, and then Debug to launch the simulator.
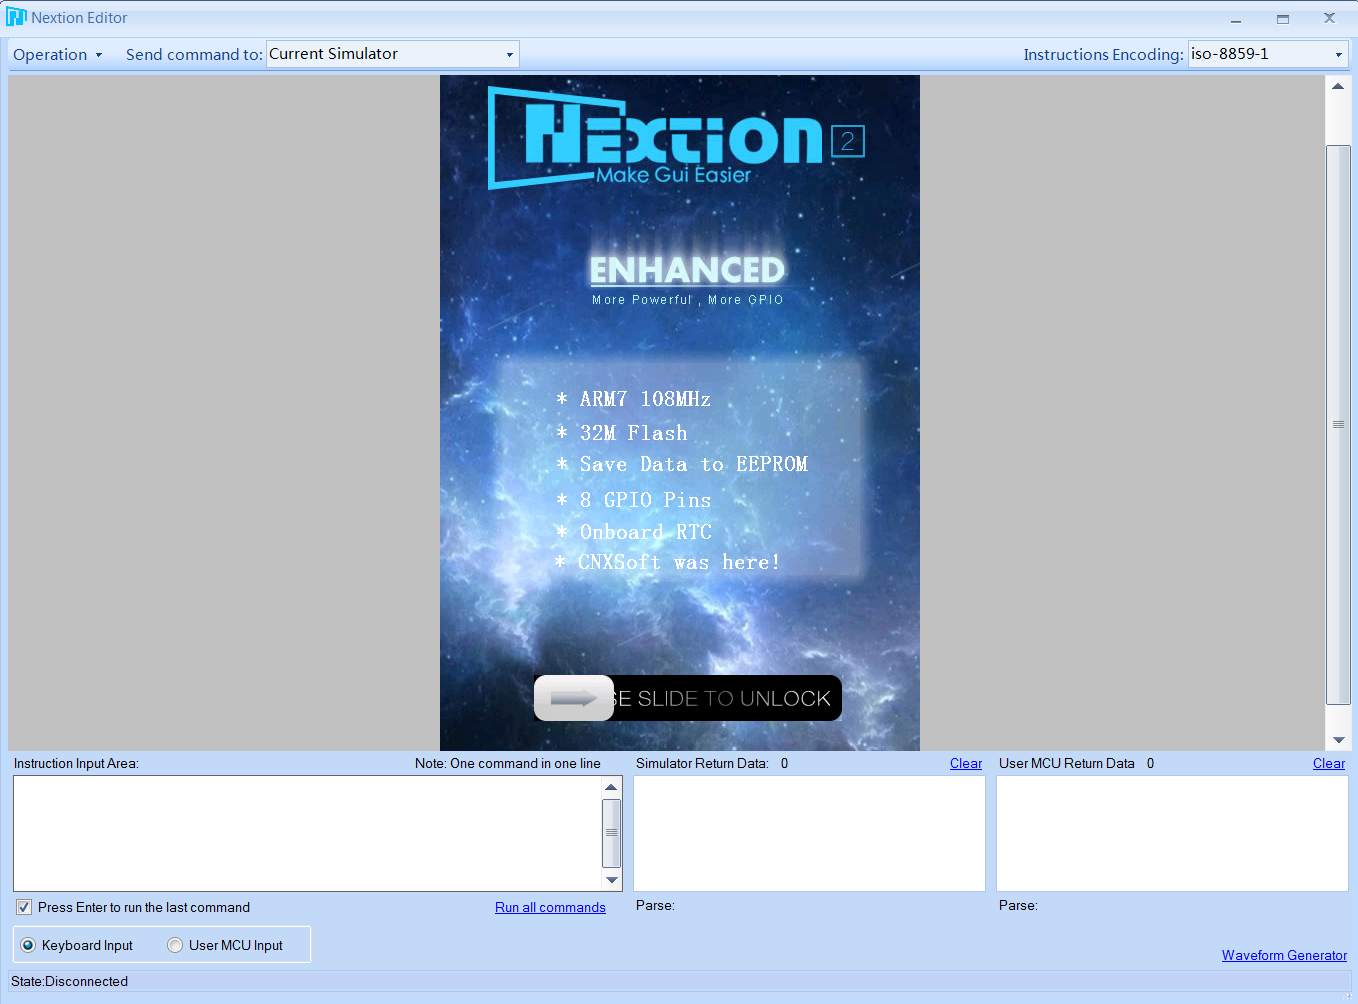 This will allow you to test the UI as if it was running in the display itself. You can even send keyboard or MCU commands. Once you are happy with the results, click on Operation->Upload to Nextion to upload the UI to the display. I had some troubles getting the display work when I connected it through my serial debug board via USB hub (the display would blink), but the problem was solved by connecting it directly to the USB power from my computer. The upload still failed as the demo is configured for the 5.0″ board, and it correctly detected a 7.0″ board. The fix was easy, as I just had to select Device ID, and change NX8048K050_011 to NX8048K070_011.
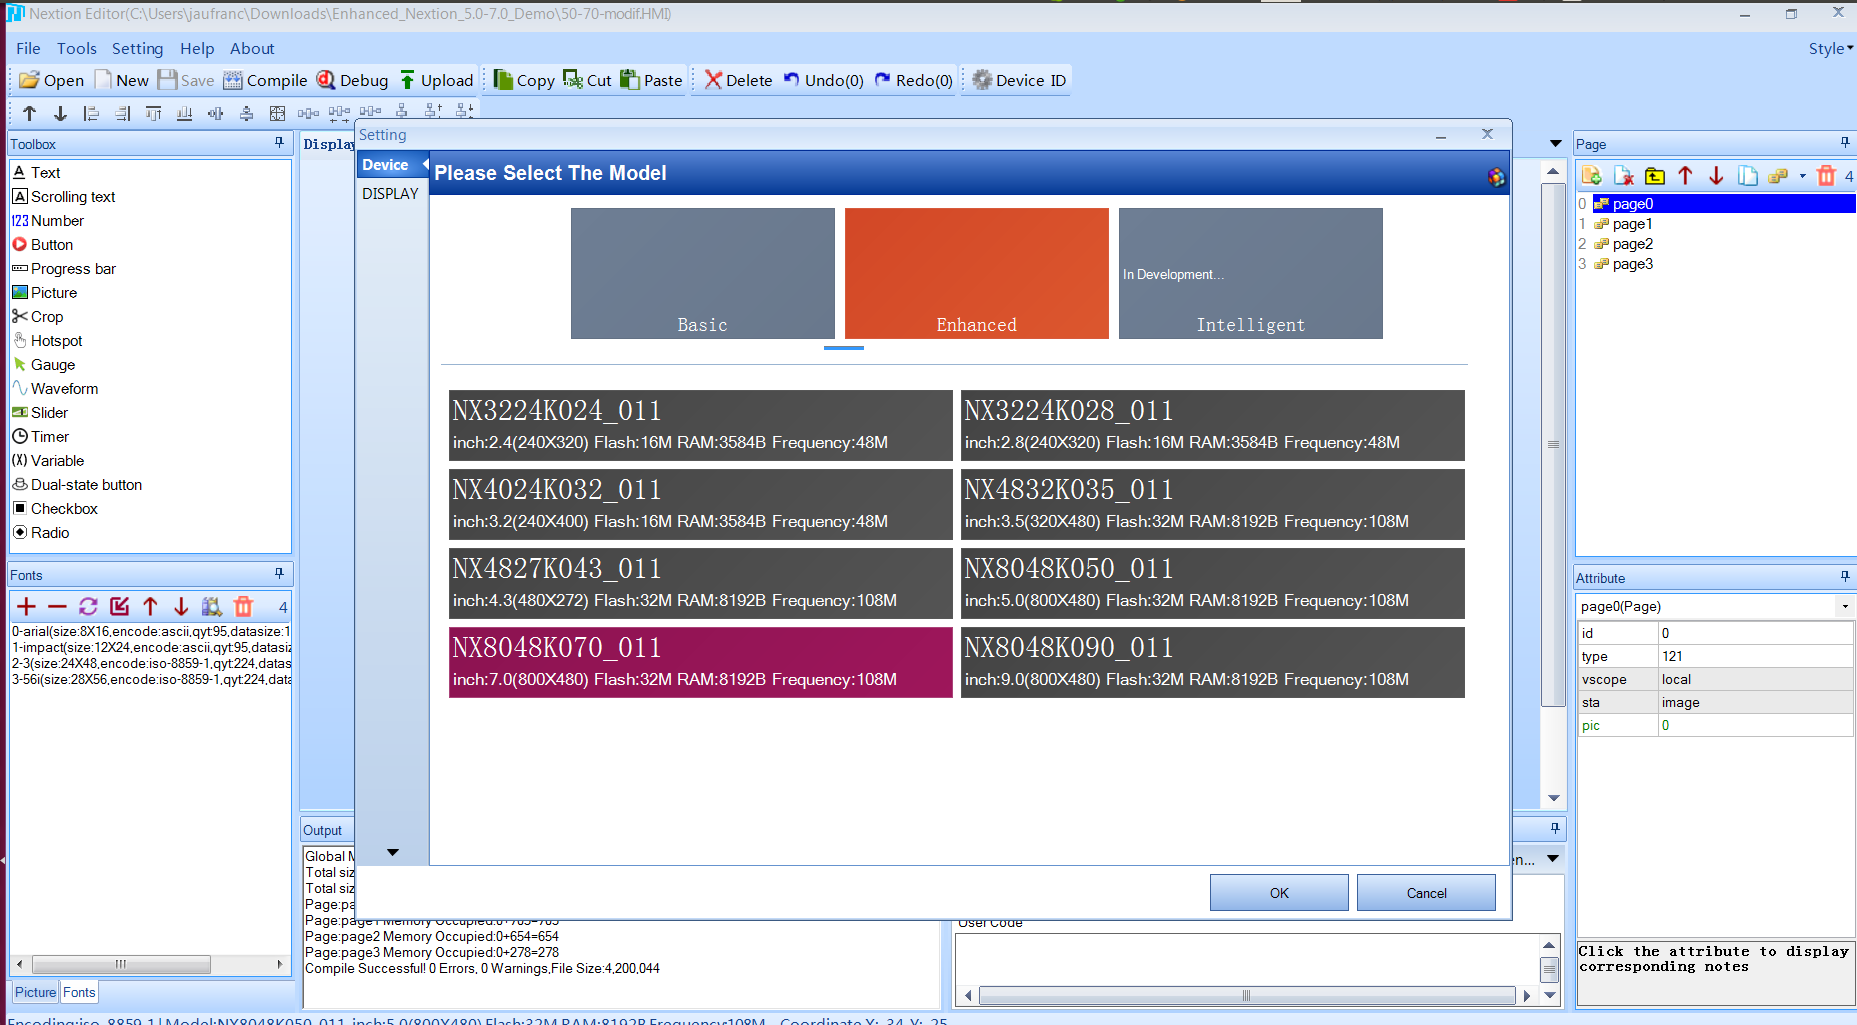
After that the upload could start with the Nextion display properly detected.
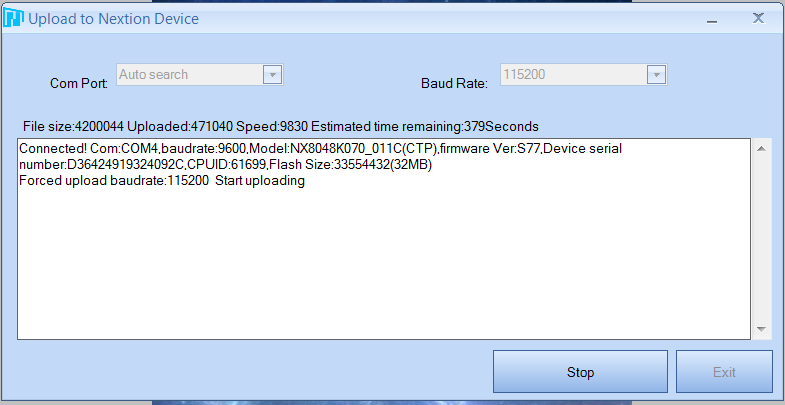
It took 6 minutes and 35 seconds to upload the ~4MB user interface to the display, so it’s not really fast. That mean if you have ~32MB UI, it would take close to 50 minutes. In that case, it would be much faster load the UI from the micro SD card. In that case, you need to copy the .tft file found via Nextion->File->Open build folder.
Here’s a quick overview and demo.
Nextion Enhanced 7″ display can be purchased for $88 with resistive touch and $108 with capacitive touch.

Jean-Luc started CNX Software in 2010 as a part-time endeavor, before quitting his job as a software engineering manager, and starting to write daily news, and reviews full time later in 2011.
Support CNX Software! Donate via cryptocurrencies, become a Patron on Patreon, or purchase goods on Amazon or Aliexpress


Fanatastic concept! Price is not too bad. But I key element is missing — MTBF? How long will this last running 24/7? In other words, is it a product for serious HMI applications — or a nice toy for hobbyists? The lack of MTBF data suggests the latter..
@jqpabc123
I’ve asked the company’s about MTBF data, and they confirmed they don’t have any. Maybe their products are too new to have this type of data.
So it can not be used for industrial applications? Such as that of the company 4dsystem
Is that MTBF parameter so important? Excuse my ignorance