
Karl here. Going to review the Tevo Tarantula 3D printer a little differently this time. With this build process, I need to space over several days due to time and working on many projects at once. I am logging each session with dates and times. I rarely have big blocks of time to work on my projects with working a full time job, and 2 children. I think this is indicative of a lot of people so wanted to give it a try. If you like this format let me know. If you are new to 3D printing, I would suggest reading the 3D Printer Basics section from Raiscube R2 review.
Tevo Tarantula Specs
- Bed Size – 200x280x200
- Extruder – all metal dual color
- Bed Leveling – Auto
- Extruder Style – Bowden
- Materials – Metal Frame with some Acrylic parts
- Heated Bed – Yes
- Filament – 1.75
- Filament Included – 2 colors 0.5 kg each
- Power Supply – 12V / 25A
- Board – MKS Base 1.4
3D Printer Build Timeline
6.25.17 12:15-12:30
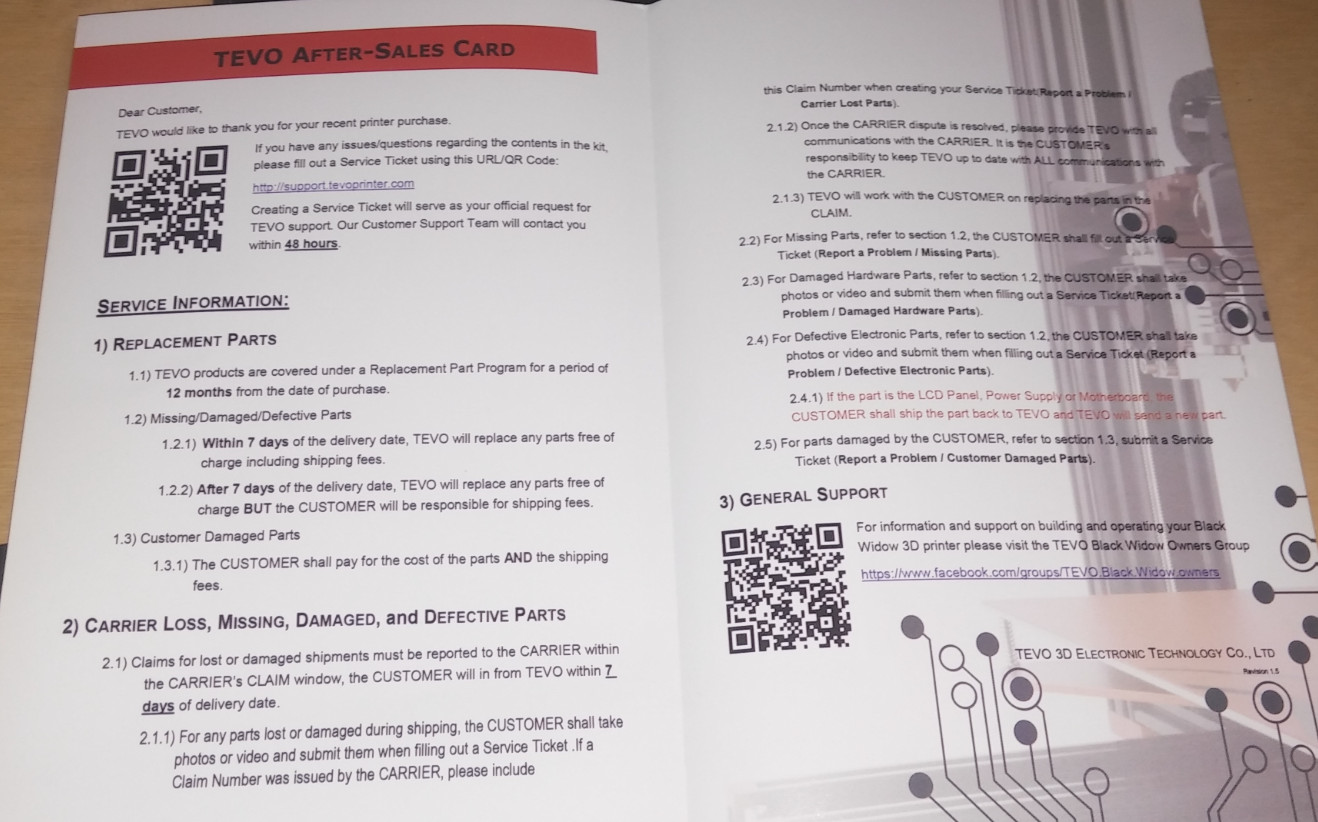
Getting started late, basic unboxing for tonight so won’t count it against build time.. Looking good so far. Manual looks excellent upon first look, but seems to be for single extruder. After sales card? Will monitor Facebook Group to see if it is real. One thing caught my eye is the heated bed is insulated from the factory. That is a plus.

6.26.17 10:50-12:25 ~1.5hours
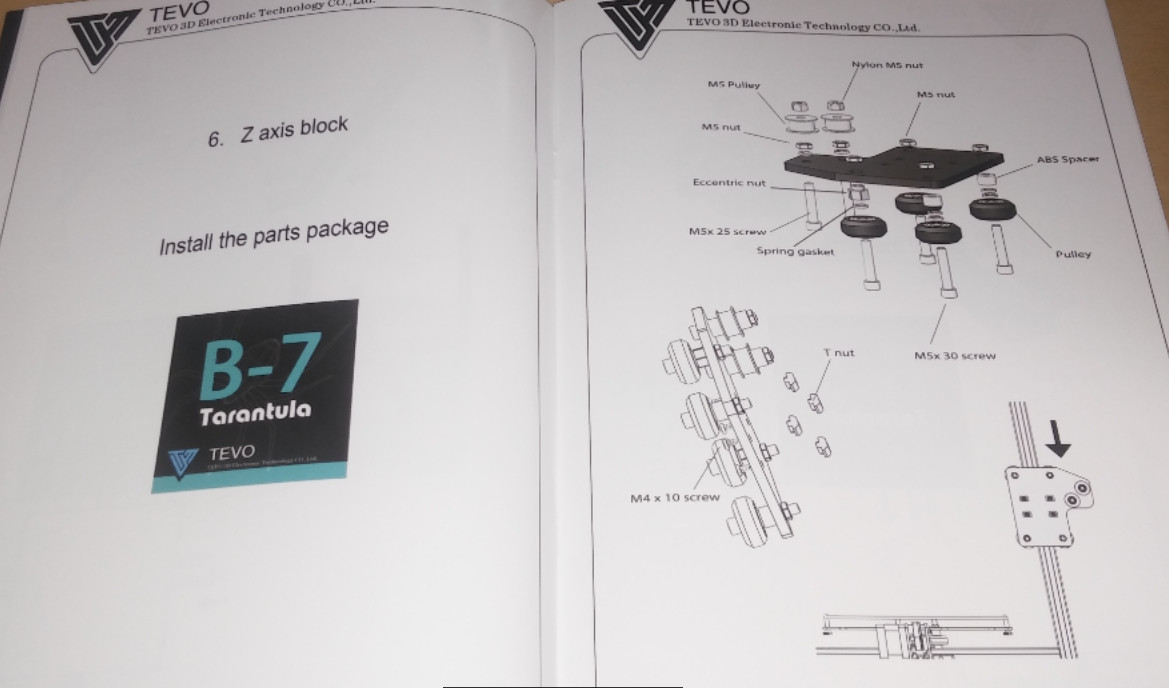
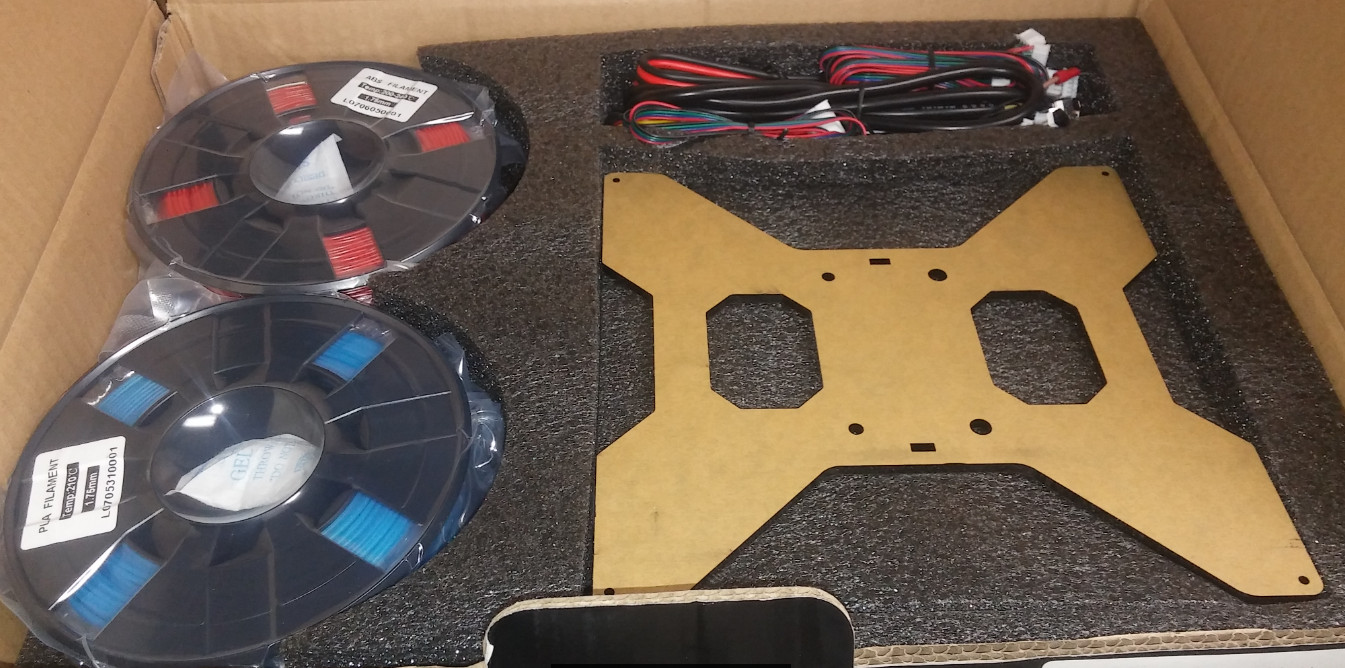
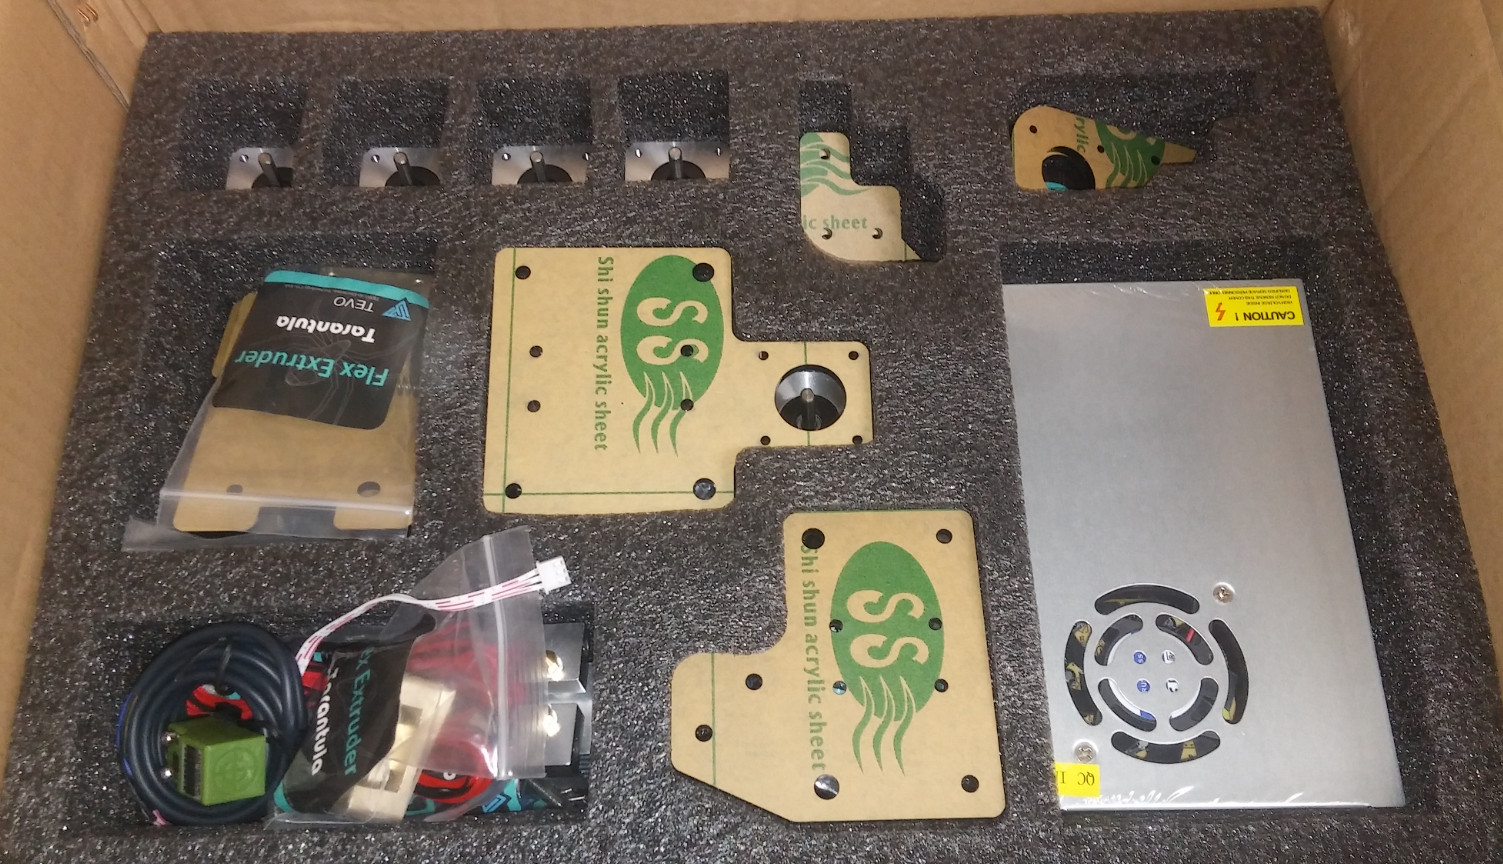
Really the first build session tonight. Spread all the parts around my work area in foam parts.Went smooth after I figured out I needed to look at the parts list, and to find some of the parts. All the small parts are in bags and labeled. The metal frame is called out on the left page, as well as the small parts but the acrylic pieces are not. Need to find the acrylic pieces by the picture. Once I figured that out the build sped up. Have to pay attention to orientation in the pictures. Only the orientation of the x axis stepper motor so far contradicts itself in the pictures. The bed is shown in the picture installed but kind of skips it on the page. I put the remaining piece parts in the bag for now. Will wait until end to install. Make it easier to install the belt. Also on the frame not really tightening everything until the end and make sure everything is square. If you never have worked with eccentric nuts, they are nuts that the hole in the center is off set.
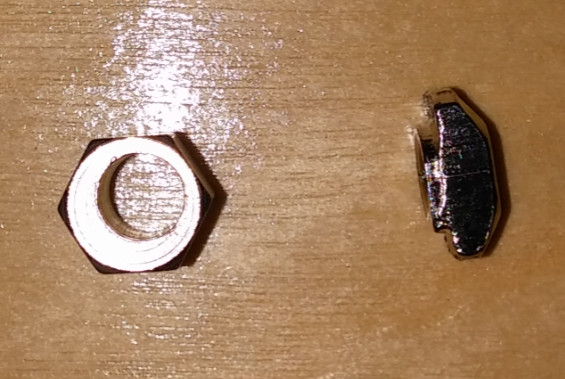 They are used on the wheels and you turn them to tighten the wheels into the rails to get a nice smooth tight movement. One other non standard nut is the t-nut. They are used to connect the rails together. Loosely screw them on the screw and slide them in the groove and when you tighten the screw the nut turns until it locks in and finish tightening.
6.27.17 11:10-1:25 ~2.25 hours
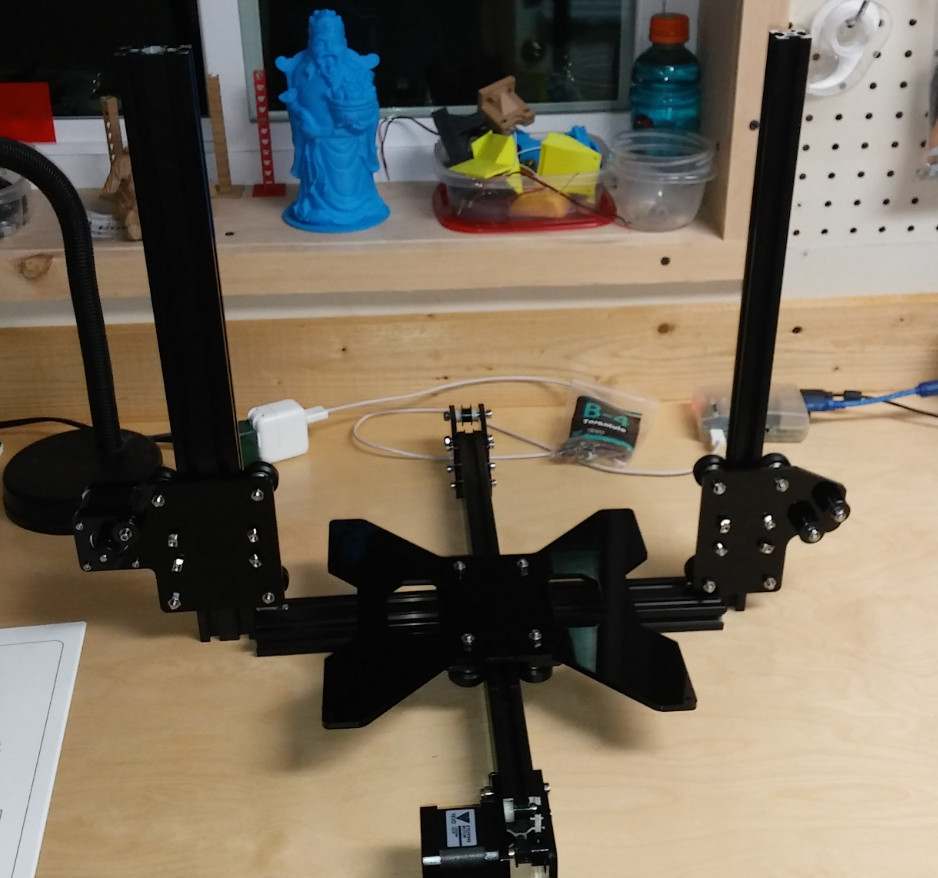
Starting the next steps. Should have been an easy uneventful night, but it was slow. I have the main frame together. Instructions differ because of the dual extrusion but with a little common sense it is was easy to overcome. I did have to resort to looking at the picture of the built system on the first page to get orientation. I had to widen 3 holes in the acrylic for the hotend to mount. I’m afraid my belts are too tight x and y are not the easiest to move. I’ll try stick stock at first but frame seems wobbly. Think a good candidate to mount on piece of plywood. Feeding the filament from the bottom is the way it shows to mount the extruder motors but isn’t good for my setup. I like to feed from above. I used 2 extra screws to stiffen the heated bed like in the Raiscube R2. I tightened everything up and ready for the electronics. Very late need to get some sleep.
6.28.17 6:55-1:00 5 hours
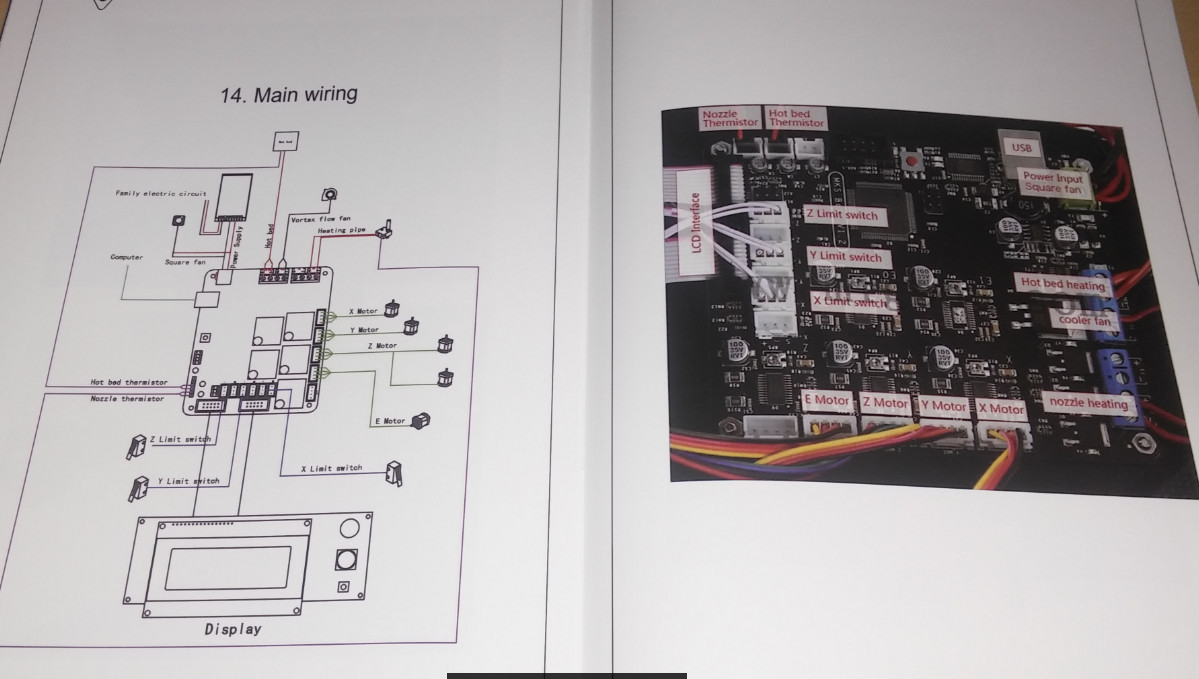
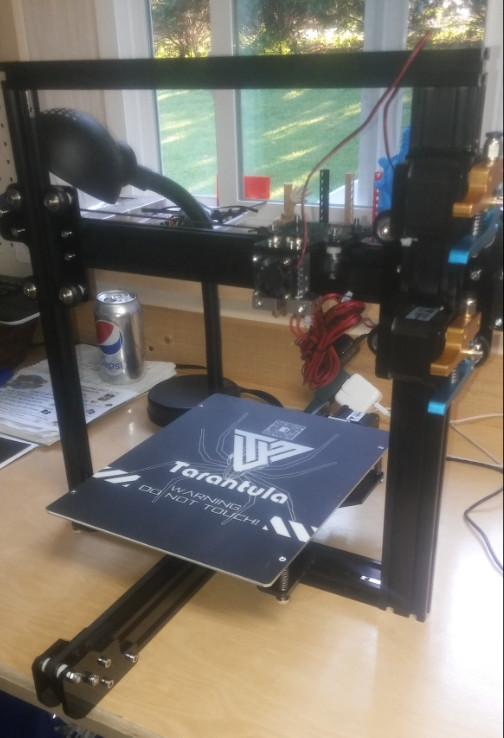
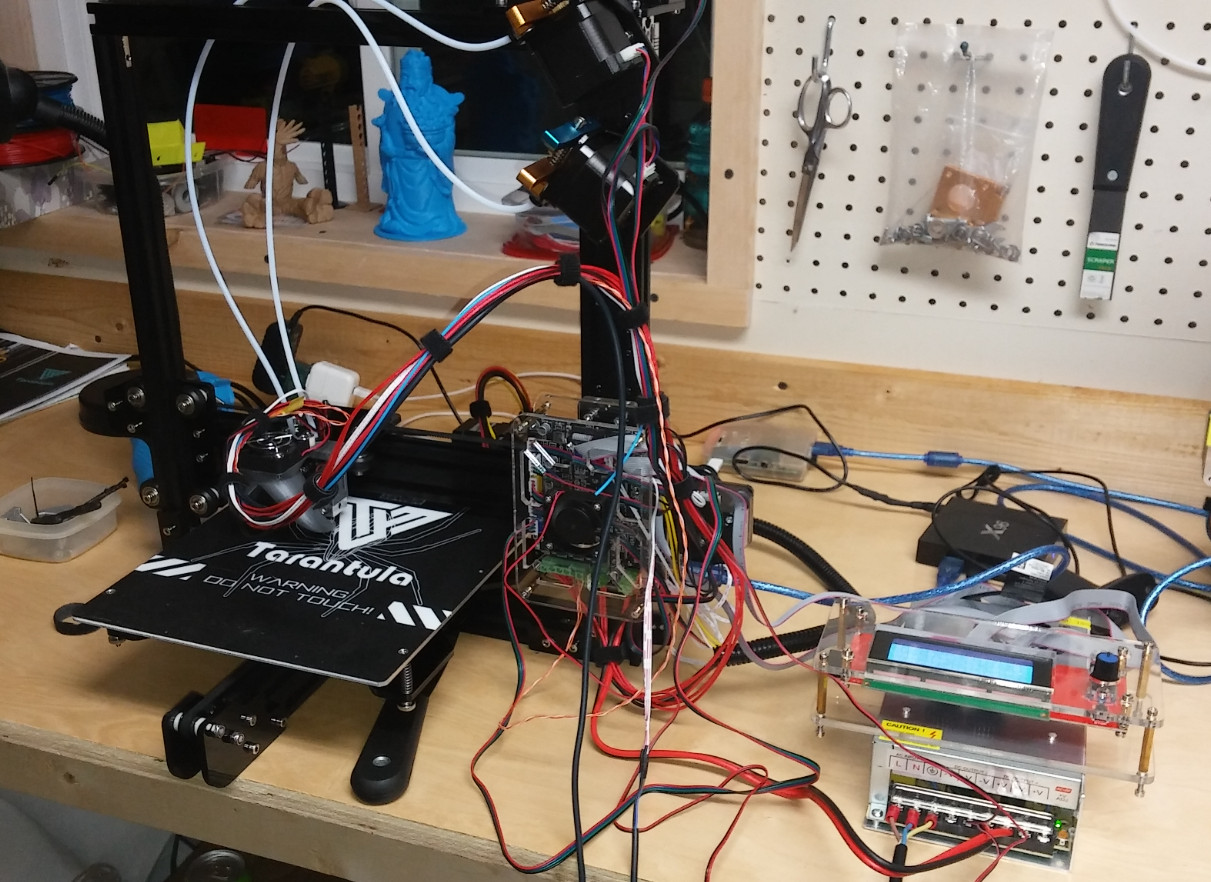
Going through the remaining bags and seeing what is in the instructions, and if not installing it. I installed z stepper motor parts and some bracing. Put together all the electronics. Had to do some guessing on what plugs in where. Most connections are modular. I tinned the main power from the power supply, so I didn’t have any stragglers, and have a short. The power to the heated bed seems to be 2 zones. Two wires are clamped together and are very close in the screw down terminal. There is no case for the power supply. After getting everything together I took it apart and reorganized extruder motors. I set on angles using one as a brace. There is a lot mounted on the right arm and very cramped for space. Removed screen from top and placed on top power supply. Wobbles printer too much, if printing. Can’t figure out how to mount auto level sensor. After turning on, I went through all the checks. Move x, Move y, Move z, home, and level the printbed, while it is warm. I had to flip the y stepper because moving in wrong direction, and corrected thermistor connection. First test print failed. I went all in, and did a 2 color frog from Thingiverse. Filament that came with seems like junk. Second print better but definitely needs cooling, and used some filament that I had. Missed a picture before mounting fan below.
6.30.17
Build process is complete now, and it is a mess. Not too worried, until I get it printing. Printed parts cooler fan on Raiscube R2, and mounted it. Got some lithium grease from O’reilly Auto Parts to lube z axis screw. It was squealing, when it was moving up and down. I found the place to mount the auto level sensor, and it is on back of the extruder. Terrible place, but not sure where else to mount. Took everything apart and mounted it. Spent quite a bit of time to start printing, but can’t adjust without taking apart. Now to level I think I am going to see feasibility to drill a hole in x axis to get to the mounting screws to tweak the height. Z axis offset seems to get reset every time I set through the menu on the display. I connected fan for the parts cooler to the board and hotend fan directly to the power supply with the board cooling fan. It is very quiet, and my concerns with having too tight of belts was unwarranted. It moves freely and smoothly.
7.1.17
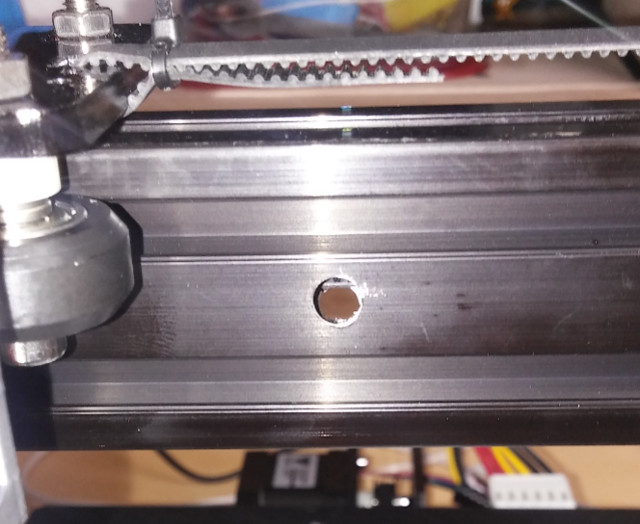
To tackle this auto level sensor, and try to drill tonight if it lines up with a cavity. Don’t think this is going to work now that I look, but will still give it a shot. I have some hex with the balls on the end, so going to hit it at an angle. Surprisingly it worked really well. Success. I am able to tighten and loosen the auto level sensor. Opened Cura added the G29 G-Code to auto bed level in the start script. But ran into issues. Had to use 3 lines. Home, raise 5mm then auto level. If the z was already in home position and started to auto level it would throw an error. If you try this drilling method be sure to remove the belt first.
|
1 2 3 4 5 |
G28 ;Home G0 X0 Y0 Z5 ;Raise 5mm G29 ;Auto Level |
I have also been doing research. Seems like everyone is upgrading firmware to the latest Marlin or Repetier. Tevo makes it surprisingly easy to upgrade. They kind of encourage it by hosting firmware. Not quite ready to do that yet. Hopefully get a first print tonight on stock.
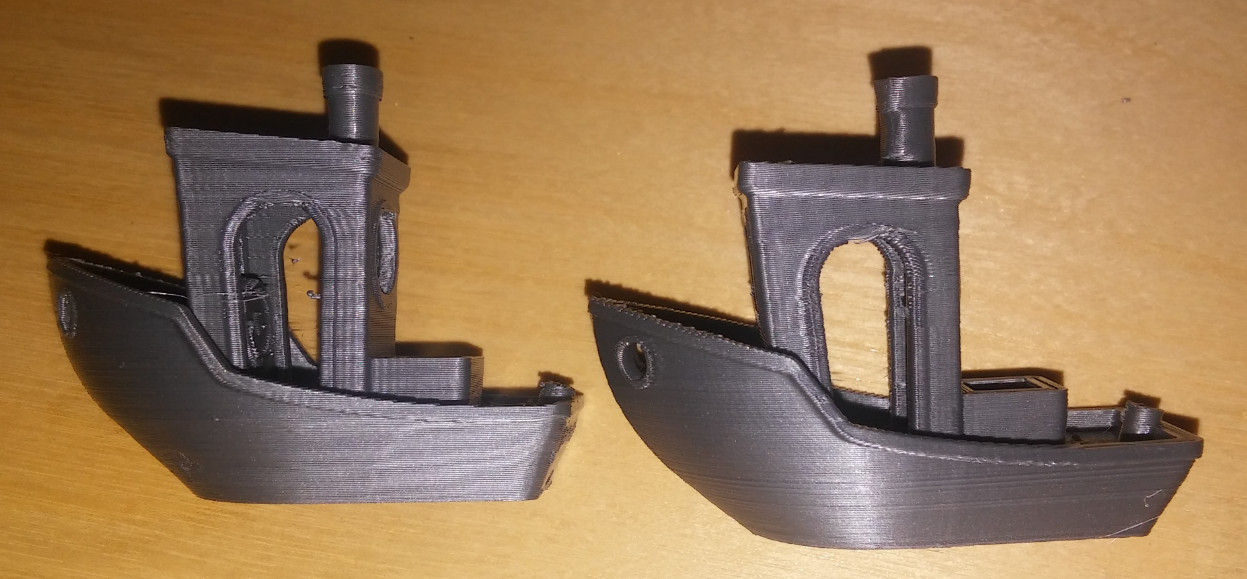
Auto bed leveling seemed to work. Seems like it is only 3-point in this firmware. I think in most recent 3D printers 9-point bed leveling is standard. First layers seems good so far. Fan kicked in at the second level. Printing Benchy at 60mm per second. It didn’t turn out the greatest but it is a start. Slicing with latest Cura…Will slice with Craftware, and print again. Unfortunately I am forced to use Cura with 2 hotends. Craftware doesn’t support it.
7.2.17
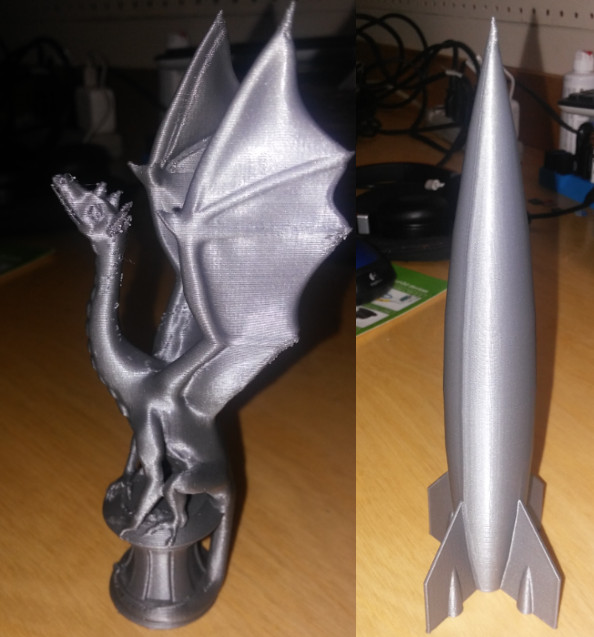
Printing rocket first tonight sliced by Craftware. Will print Benchy again, when complete sliced by Craftware. I got fed up with the auto-level and back to manual leveling. It was too inconsistent. Sometimes seemed too close other times too far. Just a few prints with only minor tweaking. Biggest thing I have are little buggers on travel moves. Not stringing per say. Left benchy is Cura, Right is Craftware.
First Impressions
So it took several days, and some tuning but it is printing. l still have some way to go. I thought I was going to like the auto leveling, but seems more of a hassle and not totally reliable. Manual leveling is not difficult. I have only printed on glass so using this surface to print on is pretty nice. No messy glue sticks and no warping so far. The manual was OK, but I had to infer some to build. The board is a MKS Base V1.4, and it is fully loaded with features. I am glad Tevo included a fan to cool it. I am surprised that a part cooling fan wasn’t included. It is a must to print in my opinion on any printer. The power supply is rated 25A, and when the heated bed and hotend turn on all the fans slow down considerably, so don’t know how true that is. I have some HIPS on the way as well as some flexible PLA. HIPS is a water soluble filament. I will use it for support via the second extruder. Once printed I will put it in a warm bucket of water and in theory it should dissolve and leave no trace of supports. I will also try some 2 color prints and flexible filament. I’m going to look at stiffening the frame as well. I only tracked my time for the initial build and it was about 9 hours. Then I had about 4-5 reconfiguring and test printing.
I would like to thank Gearbest for sending this printer. If you are interested, you can purchase it on their store for $418.59 includding worldwide shipping [Update: If you use TEVODUAL coupon, price will go down to $349.99]. Note that there are various models of Tevo Tarantula with 200×200 or 200×280 (large) beds, single or dual extruder, with or without auto-leveling, and the one reviewed here is the higher end model with all a large bed, dual extruder for bi-color prints, and auto-leveling.
[Update: Continue reading “2017 Tevo Tarantula Dual Extruder 3D Printer Review – Part 2: Auto-Leveling, Dual Color Prints, Flex Filament” ]

Jean-Luc started CNX Software in 2010 as a part-time endeavor, before quitting his job as a software engineering manager, and starting to write daily news, and reviews full time later in 2011.
Support CNX Software! Donate via cryptocurrencies, become a Patron on Patreon, or purchase goods on Amazon or Aliexpress


Hi Karl, how this 3D printer compares to Creality CR-10? I’m planning on buying my first 3D printer and have a dillemma which one to choose (~400 USD buget).
@Marek I bought the Anet A8 and I’m really happy with this. You have, in some way trouble but this is a general 3D Printing thing (calibrating the surface or prints are not sticking to the surface.) This printer only cost around 150 Dollar. So it is one of the cheapest. The CR-10 ist really nice if you want to print big things but this needs much time. I can recommend you to take this money, buy a different extruder, buy other parts and filament and play with this. If you know how you need to print and what you… Read more »
I cant say right now but it really depends on your needs. CR-10 build volume is larger. Tevo is dual extruder. Build is night and day difference so far. CR-10 is about and hour vs 10 or so on Tevo. If you can wait I saw a Tevo Tornado that seems best of both worlds. https://www.facebook.com/TEVO3DPrinters/posts/1409594449134166