
Karl here with the final article on Raiscube R2 3D printer for now. Going to talk about the challenges of this upgrade, and how to do it yourself. This has been one of the most frustrating projects that I have worked on. I set 3 goals for this upgrade:
- Simple as possible
- Least amount of modification to the printer
- ability to revert back
I don’t feel like I met my goals but I feel like I made it 90%. Trying to meet the simple as possible with least amount of modifications is what caused me so much grief.
What is needed
- E3D Hotend for $9.56 on GearBest
- Kapton Tape for $1.87
- Thermal paste
- Rotary cutting tool (maybe hacksaw good luck with that)
- Shrink tube or electrical tape
- Wire
- 3 printed parts on Thingiverse
- Zip Ties & Velcro
E3D Installation Steps
- Print 3 parts from Thingiverse above with 50% infill and .2 mm layer height
- Remove all the spiral wrap around all your wiring.
- Remove the tape for the fans, and disconnect all the wires going to them.
- Remove all the hardware off the x carriage and remove the metal x carriage bracket.
- First raise your x carriage most of the way up.
- Remove 3 screws holding on the cooling fans: 2 on the front 1 on the back.
- Remove the fan of stepper motor with 2 screws holding the fan on.
- Remove 2 on the bottom of the carriage to remove the stepper motor and hotend assembly.
- Remove the hotend from the stepper motor with the 2 setscrews on the front of the stepper motor the hotend will fall out.
- Follow heater cartridge and thermistor back to the board and disconnect.
- Remove the x belt from the carriage by cutting the 2 zip ties
- Remove the 9 screws on the back holding the bracket
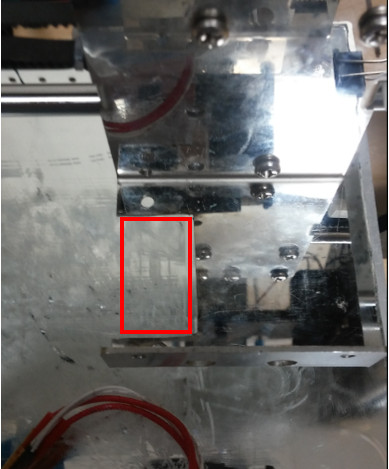
- Now with your rotary tool remove a 32mmx20mm rectangle to make space for new hotend. Leave the 2 screws holes that mount the stepper motor in the event you want to revert back. Direct drives are sometimes easier with flexible filaments.

- Take the fan that was used to cool the stepper motor and install on the parts cooler.
- Assemble the E3D clone and bracket
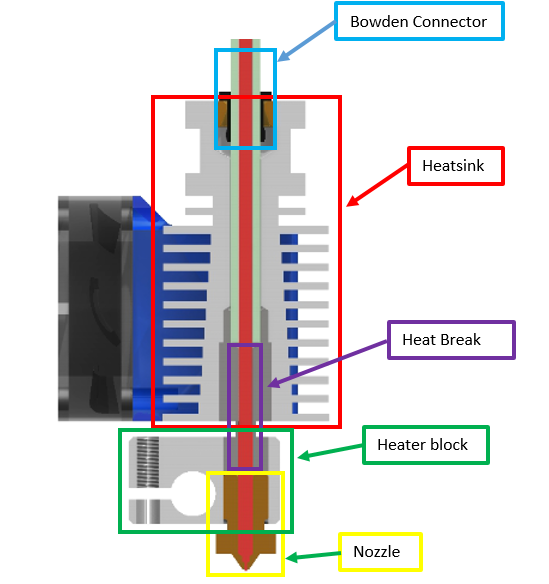
- Disassemble the parts into bowden connector, heatsink, heat break, heater block, and nozzle. Leave the heater cartridge, and and thermistor in the heater block.
- Tighten the nozzle all the way into the heater block and back off between and ¼ and ½ a turn.
- Hand tight the heat break until it reaches the nozzle and take 2 pliers and tighten snugly. Be careful not to damage heater cartridge and thermistor. Don’t over tighten.
- Put some thermal paste on the top part of the heat break and screw on heatsink hand tight.
- Screw on bowden connector.
- Wrap the kapton tape around the heater block to insulate it from cooling fan. Wrap several times covering top bottom and sides.
- Mount on 3D printer bracket from thingiverse. Use some screws and bolts leftover from build. Sandwich between mount and clamp.

- Make the modified x carriage bracket and reinstall.
- Screw in all 9, and install the E3D assembly in bottom 2 left most screws.
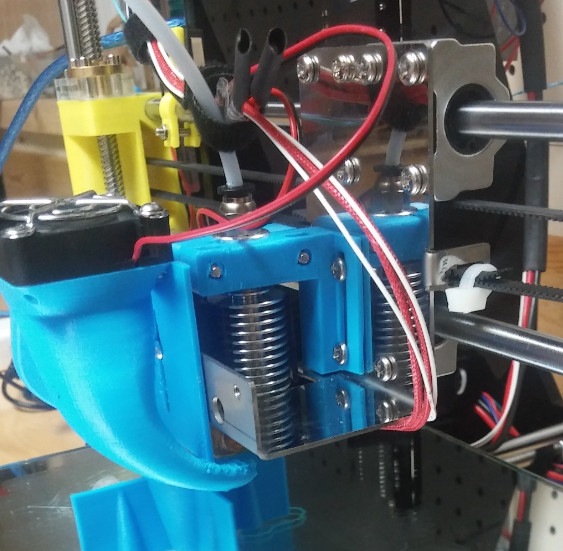
- Install fan that came with the hotend with notched part up ensuring the fan is covering the bottom most fin.
- Install the new parts cooler in the left most screw hole that held old cooler.
- Run a new wire from the main power terminals feeding the board and connect to the fan that is cooling the hotend. It is imperative that this is running 100% at all times.
- Connect the parts cooler fan to the wire that goes to the fan terminal.
- Velcro the stepper motor to the top of the printer on the right side in the orientation that suits your needs. I feed mine from above.
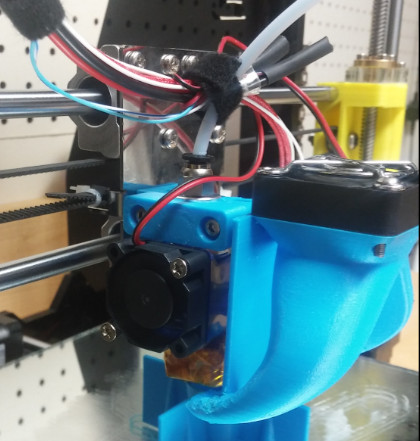
- Lower the x axis by hand while screwing the Z couplers together and set the hot end the furthest away from the extruder stepper motor.
- Cut the bowden tube to suitable length to allow free movement and not bind. Keep in mind it will need to move all the way to the top.
- Install the bowden connector in stepper motor.
- On the end of of the bowden tube going to the hotend, bevel the outside edge with a knife and measure back 45mm and make a mark with a pen.
- Insert the marked end with the bevel into the hotend until the mark is as close as you can to the connector
- Press the other end into connector on stepper motor.
- Connect stepper motor wire.
- Either reinstall spiral wrap or use velcro to manage all your wires back the board and connect the hotend, and thermistor to the terminals.
- Adjust endstops and relevel the bed.

Printing
I have found I need to lower my print temperature from stock, and keep retractions down around 2.5mm. E3D recommends 2mm for direct drives and slightly longer on bowden setups. 2.5mm has worked well for me and turning down the temperature.
Wrap up
I don’t have anything that can weigh these small weights accurately but going by specs I removed about 184 grams or .4 lbs. Not too shabby. That is quite a bit of weight not being thrown around allowing faster speeds. It should be able to print at higher temps as well with an all metal heat break and allow more kinds of filament.
I wanted to explain why I had so much trouble with this upgrade. The step where removing a bit of the bracket is what caused it. I really didn’t want to do such an invasive modification to the printer and I tested several different mounts. I could never keep the heat break cool enough and it caused the heat to creep up the heat break and jam. It would work for about an hour then it would jam. Having an hour between iterations, and all that filament made this take a long time.
I would keep the piece that was cut out in case you need to go back to stock for some reason. The fan cooling the extruder stepper motor will blow down on your part and might cause issues. Some metal tape should be fine. Not a lot of heat should be transferred, and the glue should not burn.
I would really like to thank Gearbest for sponsoring this upgrade. If you do decide to perform this upgrade please think about purchasing from them (Coupon: CNXPrusa may help).

Karl is a technology enthusiast that contributes reviews of TV boxes, 3D printers, and other gadgets for makers.
Support CNX Software! Donate via cryptocurrencies, become a Patron on Patreon, or purchase goods on Amazon or Aliexpress


to be honest
if you buy a e3d clone, aliexpress and use 4.1mm throat tube, other sucks.
@bam1a
Can you explain why? The one I received is working very well. Maybe the same?
I did google and the 4.1 throat tube looks the same. I can measure tonight.
all good information but I can’t find mainsail printer.cfg for raiscube