
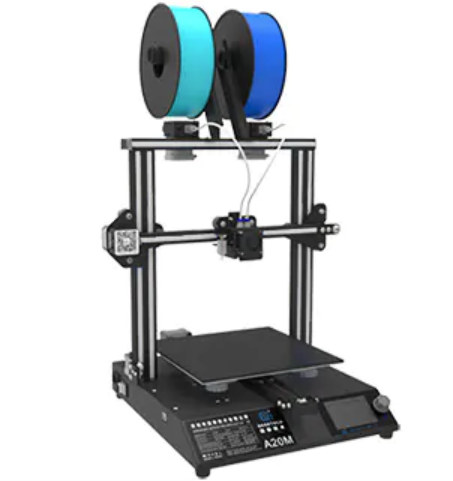
Hey Karl here with a 3D printer review. I know it has been a while for a printer review and grateful for Gearbest sending the review unit. They shipped me the Geeetech A20M a single nozzle, mixing, dual extruder 3D printer. Man that was a mouth full. It is a follow up to the A10M which is similar but a smaller build volume. The A20M clocks in with a 255x255x255mm build volume. My last foray with a multi material printer was a Tevo Tarantula and it was mildly successful. I didn’t realize that this was a mixing extruder and the implications. I have done some very cool looking prints due to the fact that it’s a mixing extruder.
QC Issues
I always come to expect some QC issues with these low cost printers. But I have to say that this printer has had the most. Let me list with fixes
- Z stepper motor bent…..replace z stepper motor
- Fan for part cooling died…..designed new parts cooler and replaced with 40mm axial fan
- Fan will not shut off any more…..nothing to do but install switch to turn off manually
- 2040 that the bed rides on is wavy and needed replacing….replaced with some 2040 that I have on hand.
- Stepper drivers needed vref adjusting.
I always join the Facebook group. I see 1 maybe 2 issues at a time on 1 printer. One good thing is Geeetech seems to always make it right. After sale support is superb. But please be advised that when purchasing from Gearbest that they will send any replacement parts, and not Geeetech direct. Please keep that in mind. I’ve also seen the Geeetech representatives assist with resolving issues with other vendors even though they didn’t buy from Geeetech directly.
Specs
- 255x255x255mm build volume
- 24V System
- Bowden Style
- Not an all metal hotend
- 1.75mm filament
- Mostly extruded aluminum frame
- Special nozzle to reduce purge
- Filament runout detection
- Power Fail
- Really Loud Fans….hehehehe
- Super Plate….aka diamond glass aka ultrabase…aka best build platform imo
Build
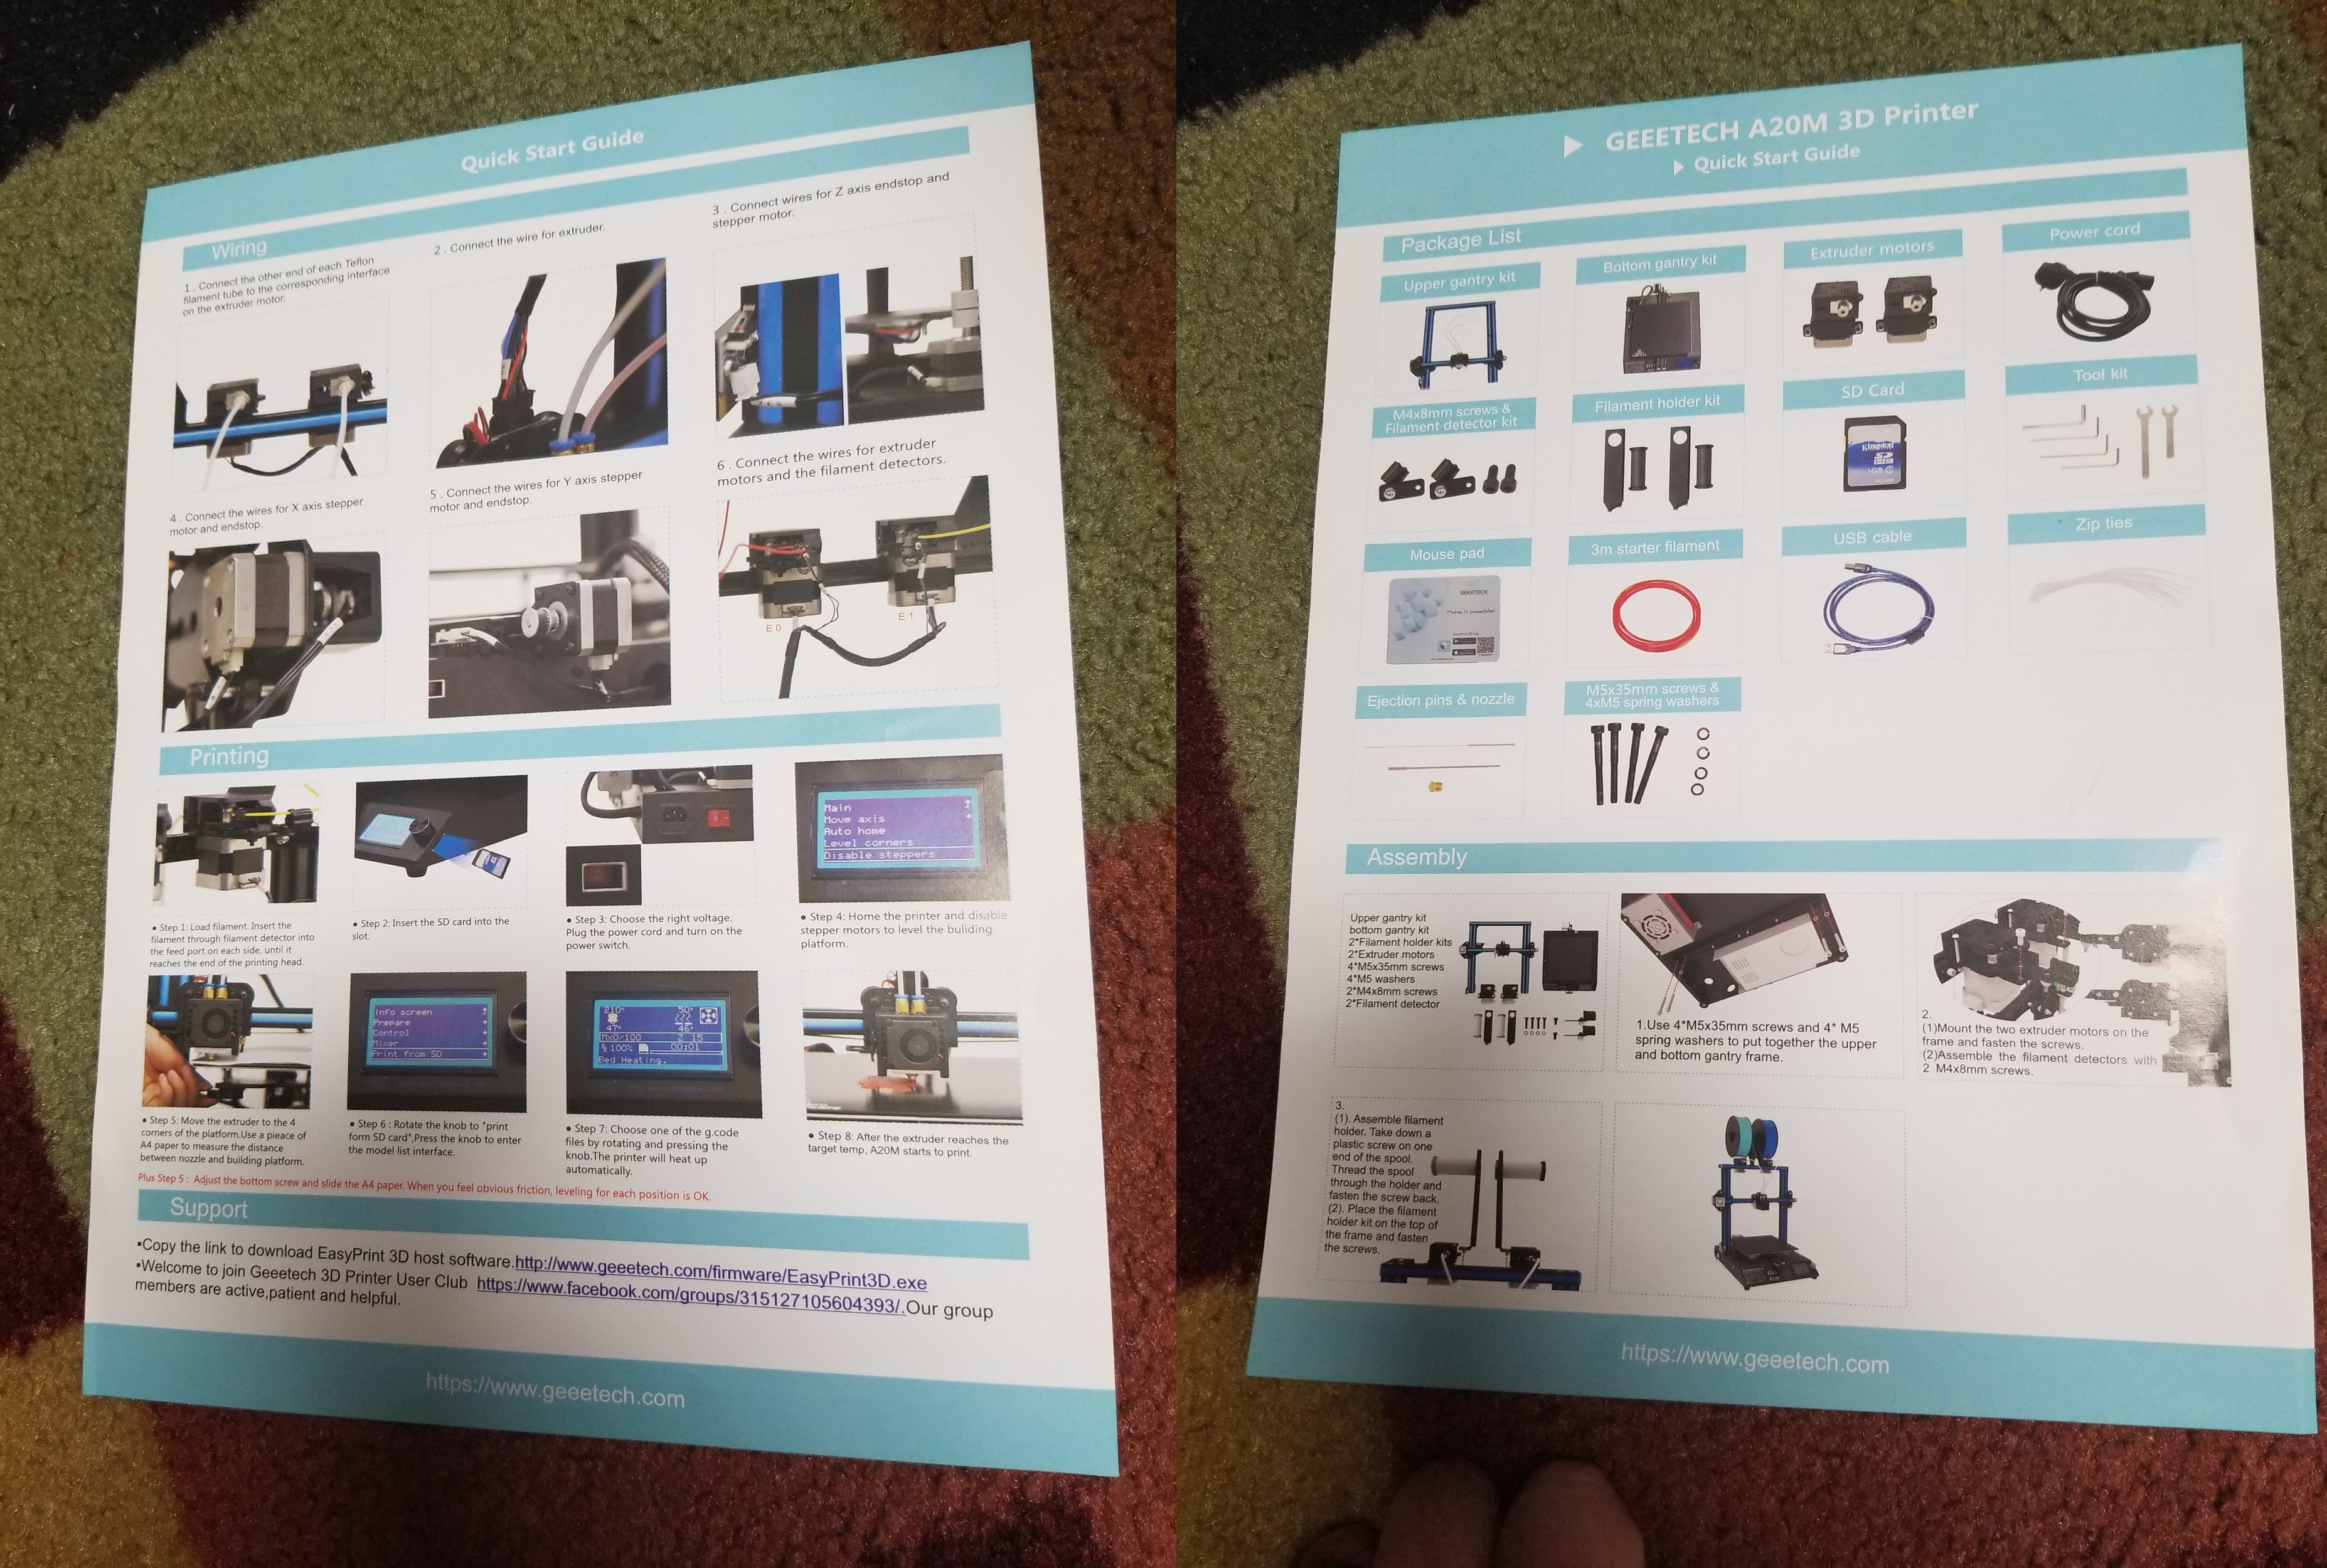
The build process was not terrible but for a first printer it could be challenging. 1 double sided paper was included for instructions. It took about an hour when all was said and done. I had to tighten all the eccentric nuts with the hotend carriage being the hardest. I thought something got bent and I finally realized that I had to hold the bolt because it was spinning with the nut. There were a couple extra bolt holes that helped hold on the shroud and i added those to keep from wiggling.
Firmware
Boy I was surprised to see Scott Lahteine aka thinkyhead post modified firmware for the AXXM family of printers on facebook. Scott is a major contributor to the Marlin project. He forked the firmware from Geeetech and started making improvements here. Since then Geeetech has taken in his changes into his branch. Thankfully Geeetech is sharing all their code and the improvements that they are making are helping the main marlin branch as well. Kudos to Geeetech. I highly recommend upgrading the firmware as soon as you get it if you decide to purchase. One of my favorite features in marlin is enable now, baby stepping. Baby stepping allows you to adjust the Z height on the fly to get that perfect first layer. Just after the print starts its first movement double press the control knob and then you can adjust the nozzle up and down very slowly. I’m not sure what comes from the factory now but it won’t hurt to flash the latest from GitHub.
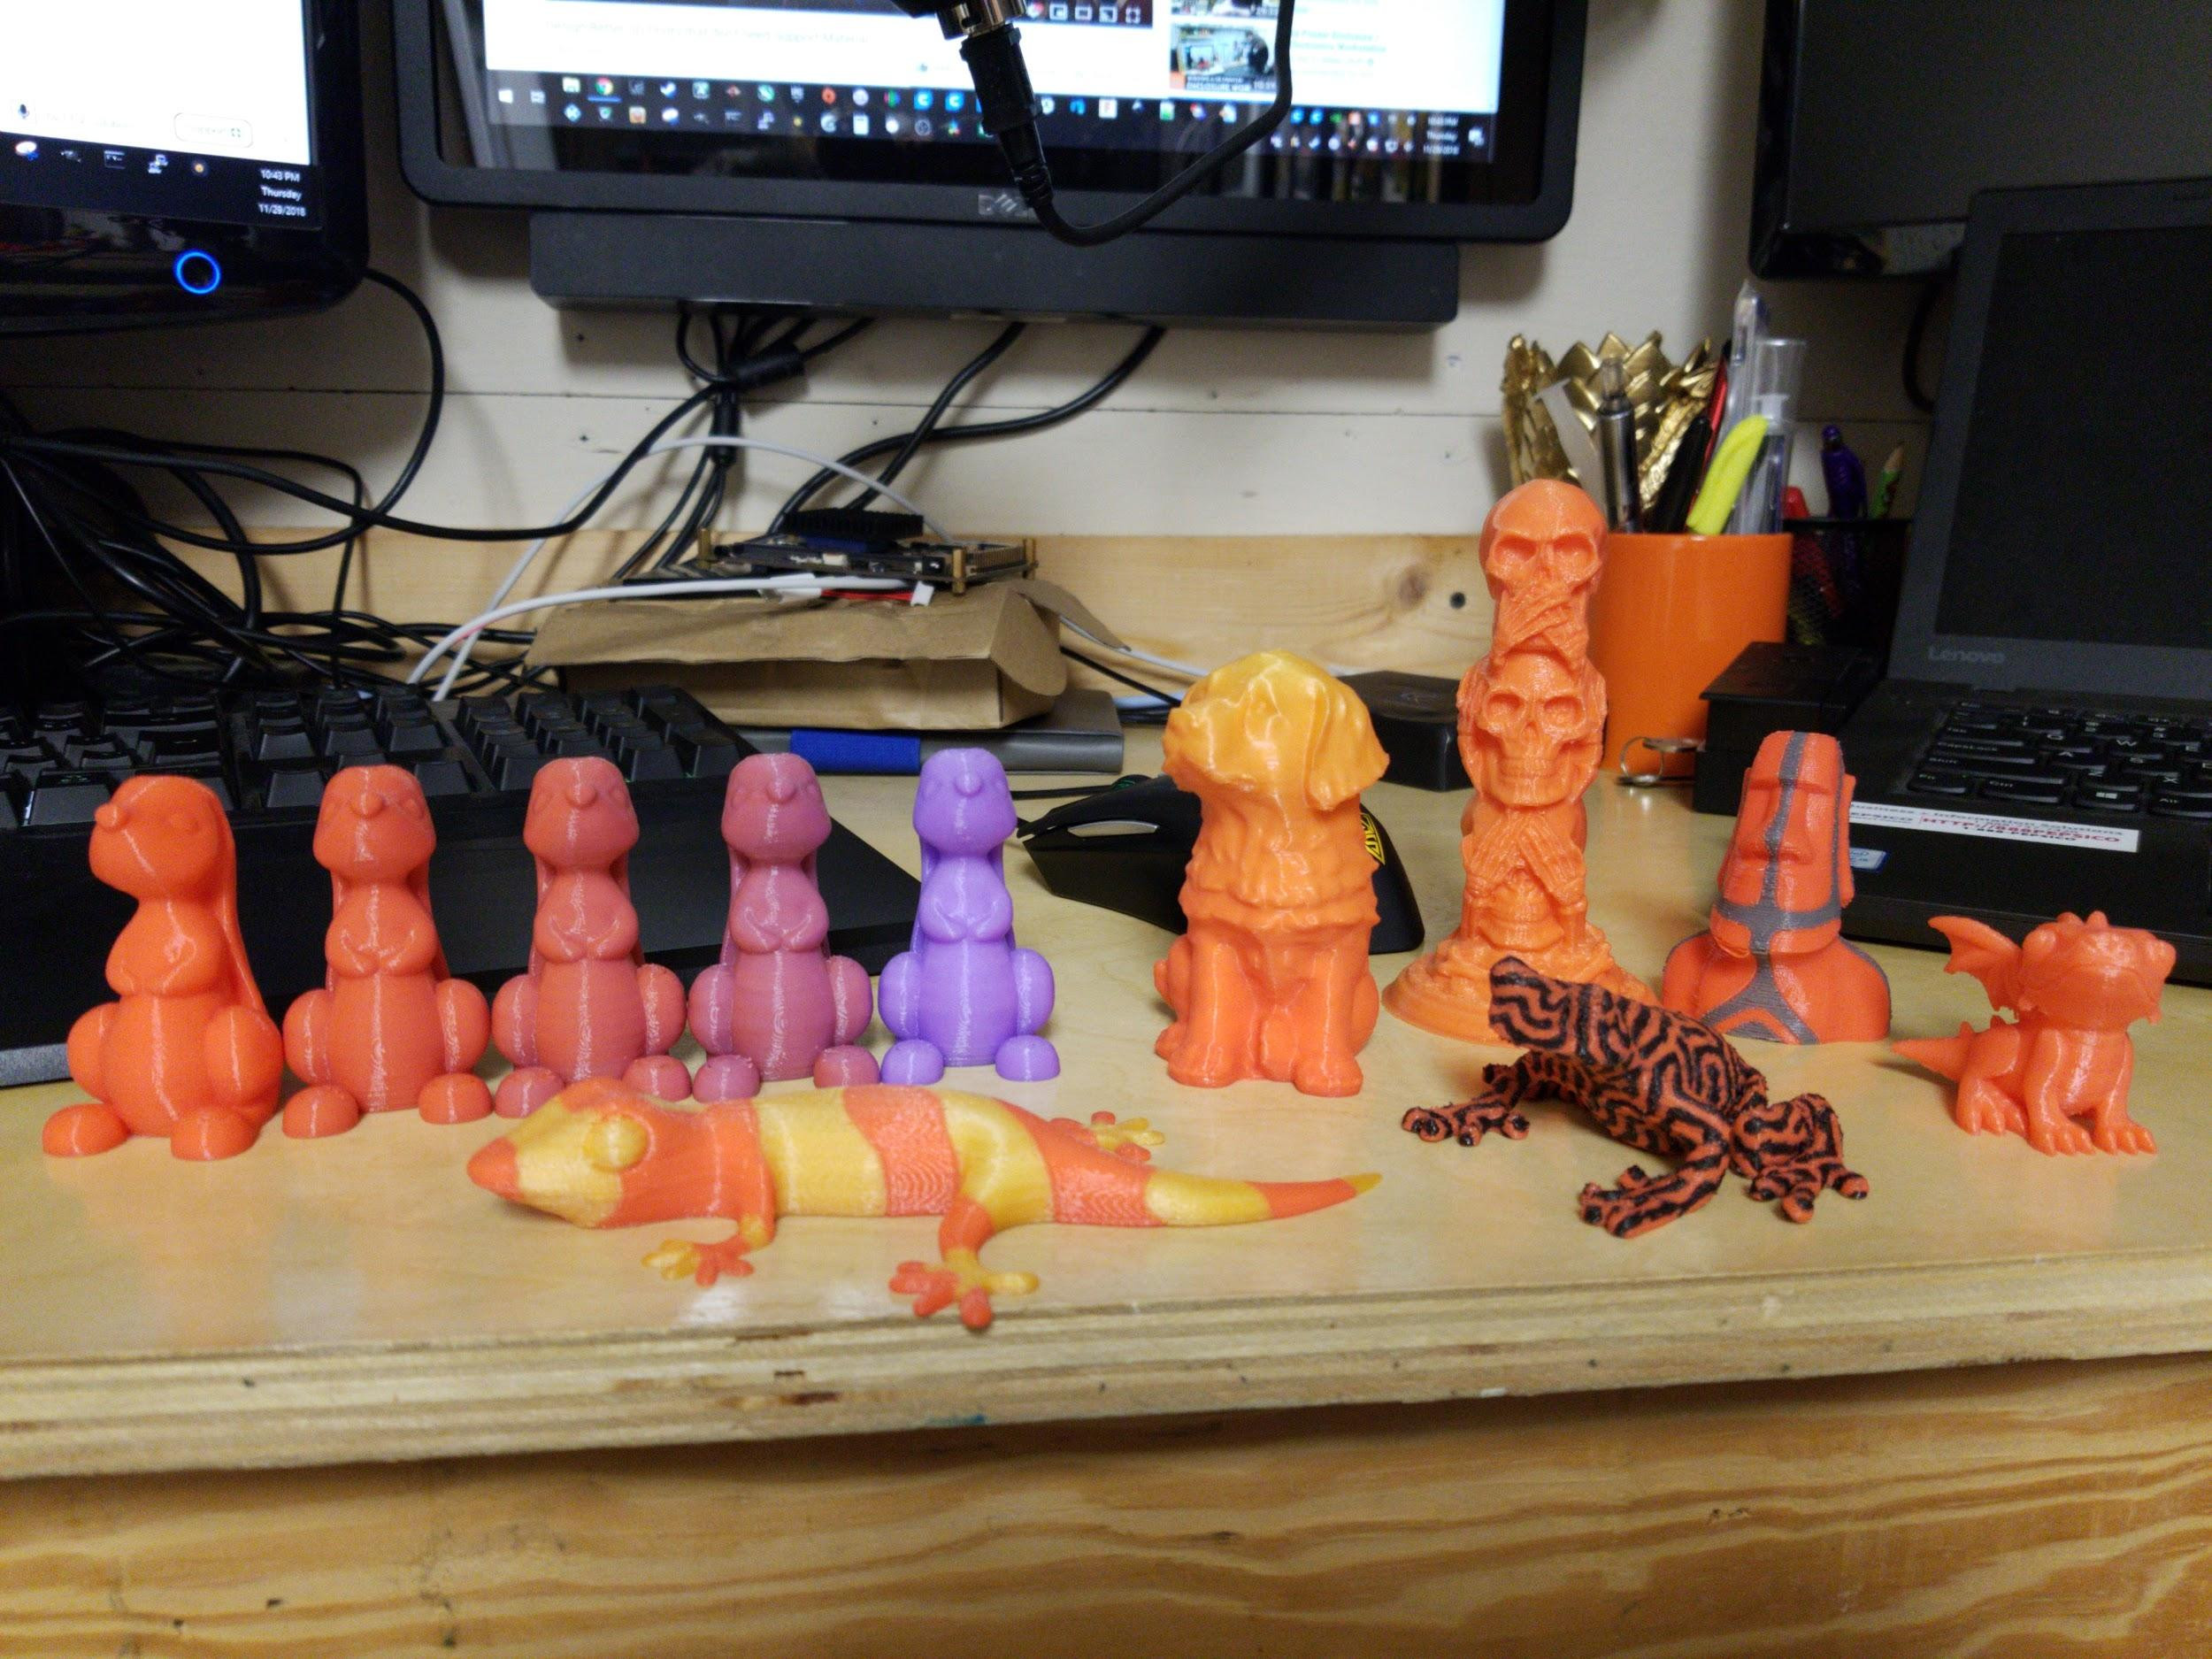
Gradients
The print on the left is not cleaned up and straight off the printer, while the one in the center is one of the first prints with Z wobble.
One of the cool things that can be done with this printer is slowly transition from one extruder to the other. You have the ability to set a transition through the menu and with the tool that they developed. With the tool you can go one step further and do multiple gradients like in the picture above. I did two transitions from orange to yellow and then back to orange. Please keep in mind I was still tuning this printer at this point. I recently put in a feature request so you could do multiple gradients with multiple tools. What I mean by that is if you are doing a two color print I could gradients one tool one way and the other tool the other way another way.
Not all filaments blend together perfectly as you can see in the picture above. Or maybe I didn’t print hot enough to mix well. In the picture above I was mixing brown and blue and I’ve got a weird effect and the filaments did not mix well. It’s a cool effect where the brown was mostly on one side and blue on the other. I was also testing the build height to its max and you can see that by the top I was not able to print the entire 255 mm. I was only able to print 250 before I started getting issues.
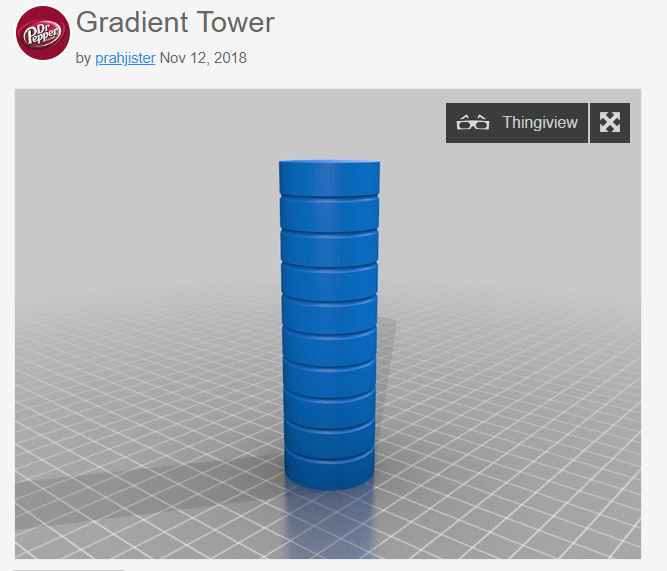
I designed this stl file to help test mixtures. It is 100 mm tall and each rib is 10 mm. This way you can experiment mixing filaments to find your desired color/mixture. So if trying the mixture your to achieve ends on the 4th rib you know you need a 60% 40% mixture. I really want to do more experimenting with mixing different kinds of filaments. I did a few mixtures so far. I was hoping that mixing a clear PLA with a solid would increase shininess like a silk filament and was mildly successful.
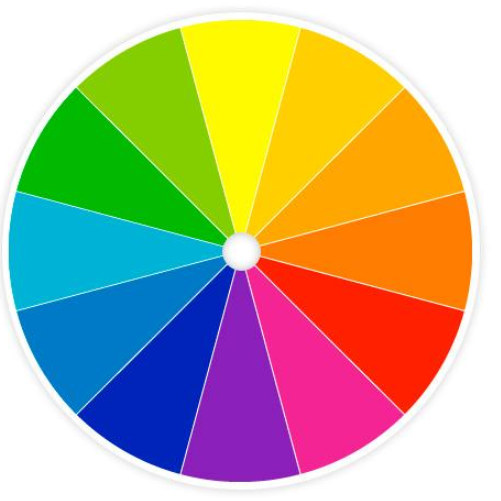
Remember roygbiv.
Multi Material / Multicolor / Mixing / Virtual Extruders
Finally the part that I wanted to share with you the most. OK….So the A20M comes with a 2 color mixing hotend.. You might think to yourself that we can do only 2 colors. WRONG. You can setup virtual extruders with predefined mixtures in your starting gcode in your slicer. I ended up making a guide in the Facebook group with all the settings and a small how to. It wasn’t exactly straight forward so I shared my experiences in the guide. You can argue that you can have 100 different shades but it is difficult to really see differences of a couple percent. As a starting point I chose 5 and they can be tweaked from there. 100/0 75/25 50/50 25/75 and 0/100. Nice even numbers. You can see in the top right-hand corner I’ve got five different extruders available.
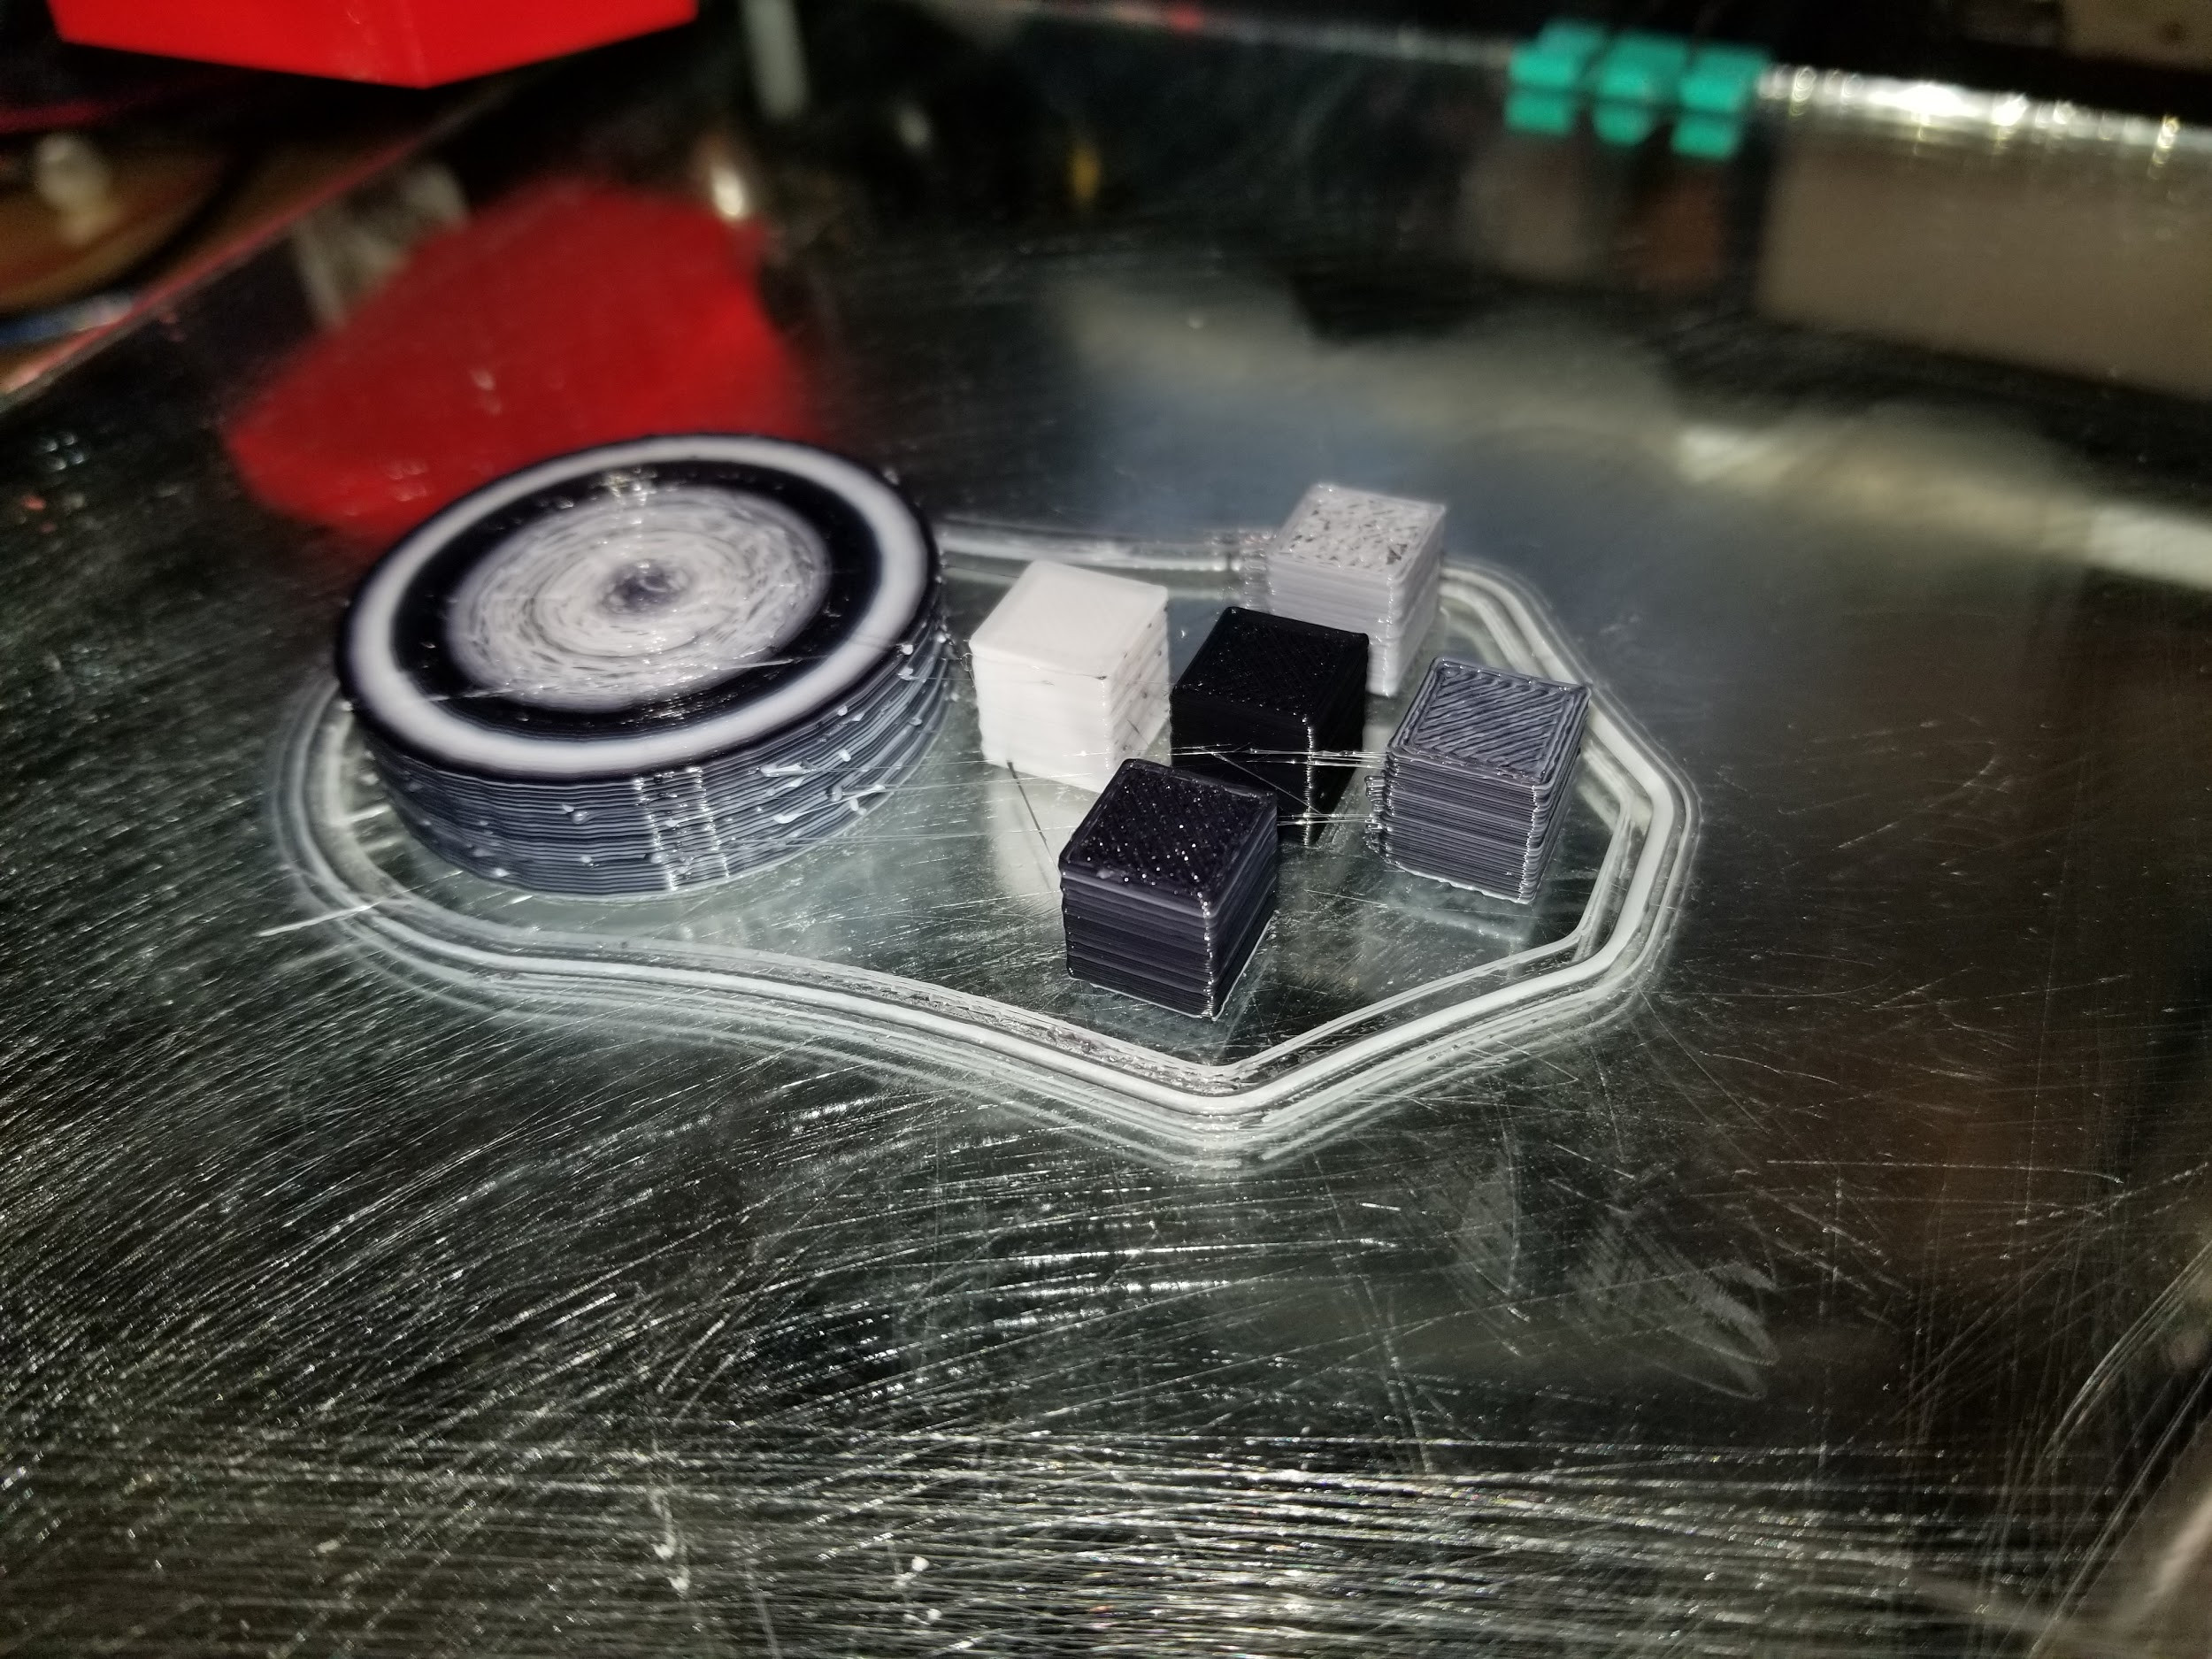
Here in this picture was of my first test with virtual extruders. I didn’t have a big enough purge block so the test cubes are a inconsistent. I loaded white and black into the printer and then assigned each cube a different virtual extruder.
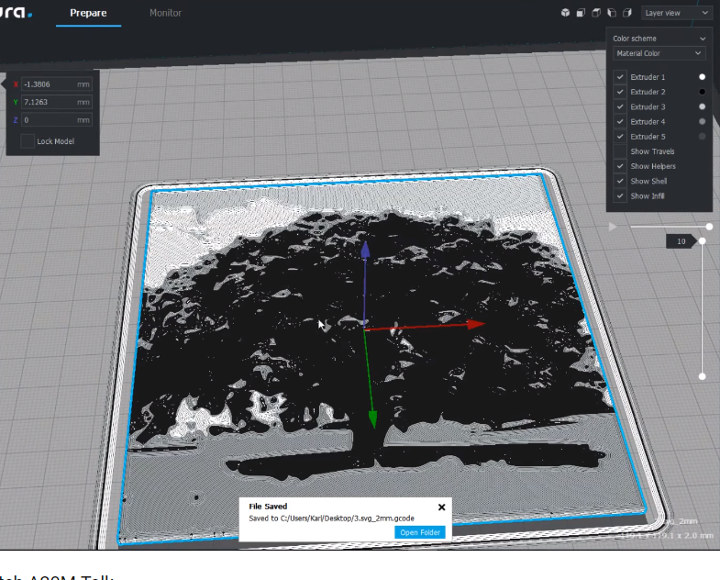
I did a live stream on my YouTube channel and at the end I was showing where I was testing out taking a picture in inkscape and converting down to five colors to make printable. I never did print it but I think it’s a proof-of-concept and there’s a snapshot above.
Settings / Setup
In the past when setting up Cura it has been pretty easy and I was able to dial in a printer very quickly. I have a guide that I am working on activity like I mentioned previously but will share some of the aha moments.
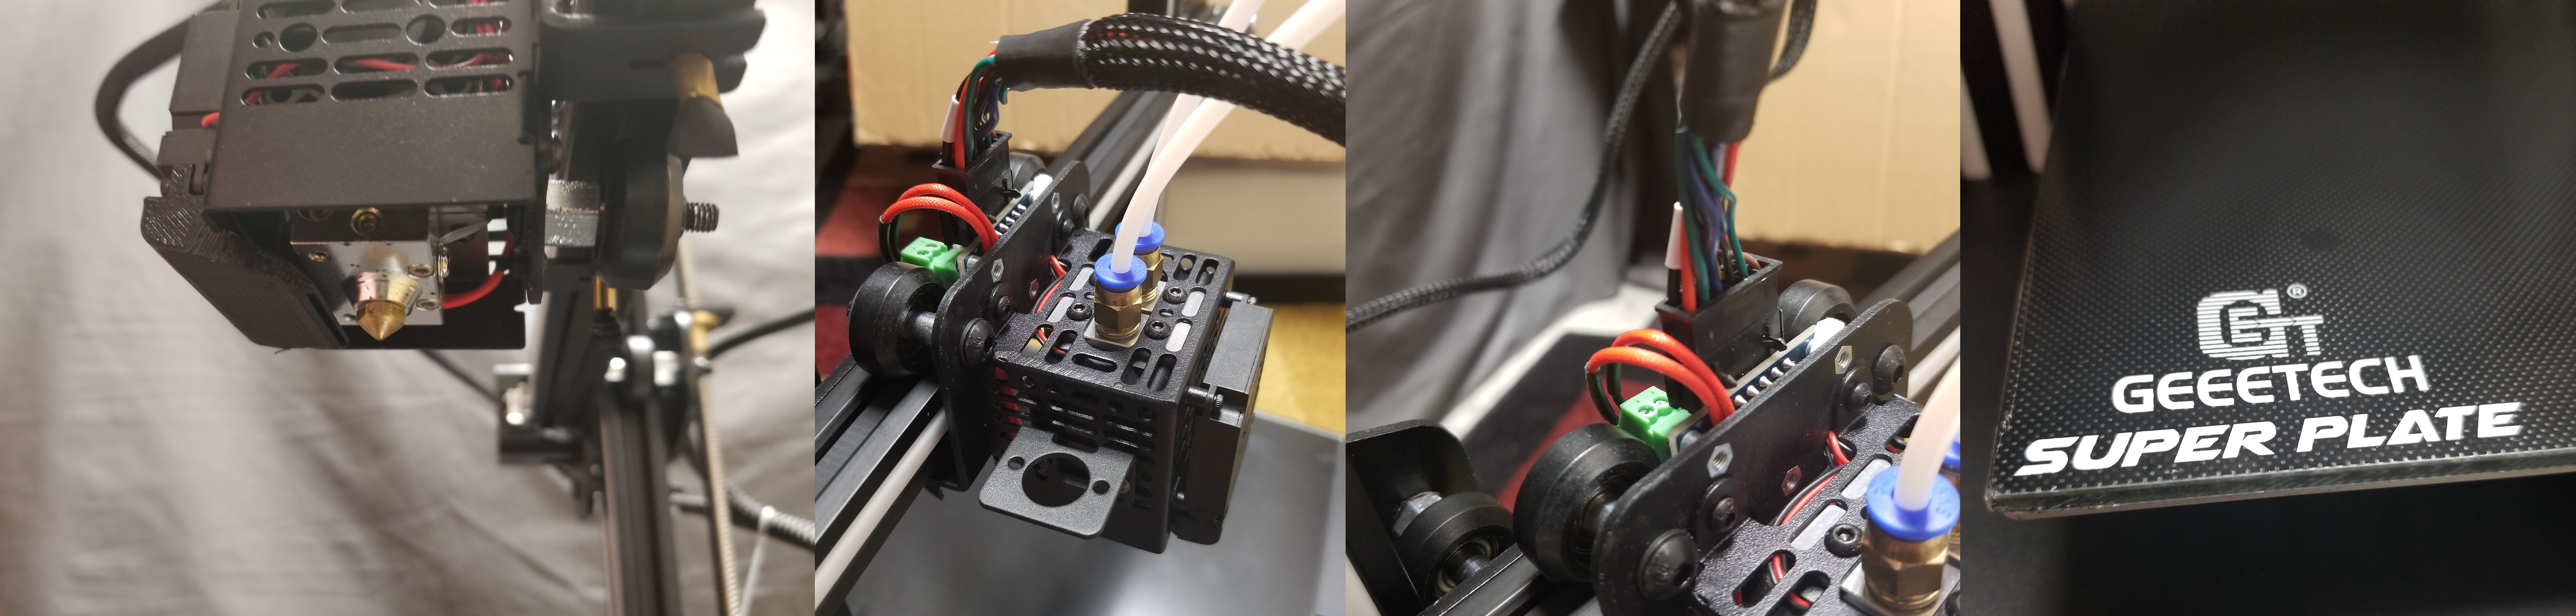
Jam jam jam jam jam jam….I fought this for a long time thinking that I was getting a jam. Take everything apart clean start again. I wasn’t actually jamming in hindsight. The a20m has a 3:1 extruder for a reason. It takes a lot of force to push filament through the hotend. With that being said you have to tighten the gear that pushes the filament through the nozzle nearly all the way. I have mine set to max. I can barely load and unload the filament. Once I did this I had no more jamming issues. Took a long time to figure this out.
Stringing
Stringing took a while to figure out for me. In the past all I did was adjust temps retractions and air flow and be done. Biggest thing I did to resolve this is increase my travel speed to 150mm/s as well as previous settings.
Flow
From the factory the printer appears to have an issue with the e-steps in firmware. The extruder is set to 340 steps per mm in firmware. To push 100 mm the stepper is supposed to take 34,000 steps. I ran through the calibration process and calculated with one filament that I needed about 420 steps per mm. That is a 20% do delta. You can either calibrate and correct the e-steps or adjust the flow. I opted to adjust flow. I set my flow to 115-120 for most filaments but I had one that I had to adjust down to 105 or it was pushing way too much out. With a single extruder setup you can adjust flow on the fly. But right now on this printer when you adjust the flow it applies to both extruders
Z
In my opinion I only think there is one flaw in the design of this printer and that is the distance from the Z stepper motor to the bracket that holds the Z nut. Typically they are farther apart and allow for a little more forgiving in Z mechanism. It took me a while to get this all lined up and get rid of the Z wobble. An easy fix is for Geetech to implement it to move the on off switch and place the Z motor in the body to increase the distance. They would have to install a longer lead screw.
Nozzle
They provide a special nozzle with this printer. Only available through Geeetech. I was curious as to why and Bruce on the Facebook group nailed it. They designed a nozzle with mk10 threads but much smaller inner volume so less filament needs to be purged. Here is his post quoted where he compared.
I printed some purge tests. at 0.20mm layer height. ( just long rectangles 20mm wide)
I was switching between a dark Blue, and White.
with the old style geeetech nozzle, it took 30mm x 20mm to purge out the blue. With the MK10, it took 160mm x 20mm to purge !!!! 5.33 times MORE purge to switch colors.
So, we do some math. The volume inside the Geeetech nozzle is 28.27 mm³. The volume inside the MK10 nozzle…. 150.79mm³. Roughly 5.28 times the volume.
So the math works out. 5.28 times the volume, 5.33 times the amount of purge.
Ok, well, that , to me, says that the MK10 nozzle on A10M or A20M for color printing, is pretty much UNUSABLE.
I suppose if you’re only printing one color, or maybe gradient prints, it is “ok”. But, even the gradient prints will suffer , because it will take 5x longer to change colors, so you would have to account for that distance when calculating the gradient/layer height change
Thanks Bruce!
Final Thought
I really like mixing nozzle now that I have had time with one. And from looking at the mixing software I would bet they have a 3 material in the works.. The potential for experimenting with not only colors but different materials is awesome in my opinion.
It took me a long time to get dialed in. Adding a second color/ mixing hotend increases the difficulty. Overall the printer has been fair.
The good news is Geeetech sells the hot end by itself. This coupled with a couple 3 to 1 extruders can turn any printer into a multi-material mixing beast.
I have spent nearly 3 months tinkering and probably 2kg of filament. First month was fail fail fail until I realized the extruders need to be super tight. Keep in mind I only get a couple hours a night after the kids go to bed and “jams” take a while before they occur. Then it was on to fixing the mechanical stuff and testing.
I still want to play with mixing more. Multiple colors are cool, but waste so much filament.
Now the question is… would I recommend this printer. My answer is maybe. I see quite a few really good prints on Facebook right out of the box but I didn’t experience that. The test prints printed well but were under extruded and had a Z wobble. If I was not seeing the success and only this one sample I would not recommend. I can say that the hotend and the extruders are good so if you are the tinkering type I definitely see them as a nice upgrade to an existing printer….just crank down to grab the filament tightly.
That is all I have. I really appreciate GearBest and their patience while I put the A20m through its paces. You can buy “GEEETECH A20M Mix-color 3D Printer” from them for $329.99 with coupon code A20M11.

Karl is a technology enthusiast that contributes reviews of TV boxes, 3D printers, and other gadgets for makers.
Support CNX Software! Donate via cryptocurrencies, become a Patron on Patreon, or purchase goods on Amazon or Aliexpress. We also use affiliate links in articles to earn commissions if you make a purchase after clicking on those links.


I like the orange-black (thanks to the Dual Extruder) frog in the second picture! It looks like the azureus frog … which was the logo of the great Azureus bittorrent program. 🙂
Nozzle purge is an interesting issue that had not occurred to me about multi-color tech. Thanks for the article!
Talking about color prints, I find this talk on color reproduction extremely educational: https://www.youtube.com/watch?v=9SC1DAj1ZKk
My initial reaction was to ask why they put on some special nozzle and force to purchase through them. I think it is justified after his experiment.
Thank you for your article! Check out material splicer, which mixes colours! https://www.youtube.com/watch?v=7UVG9WLHMBQ
Yes the pallete and now there is a pallete plus. And Marco reps is one of favorite YouTubers.
Hello John …
I’m facing the issue you have with the brown & blue …
I always have bad mix of the colors … the color of extruder 0 on the right of the object , and the other color on the left .
It’s not really mixing color … while it was the main reason I bought this model.
Thanks in advance if you can help me with real & good mixing colors
( I’ll try your tower … and analyze the gcode .. to see temperatures , etc )
PS : you says : “I ended up making a guide in the Facebook group” … what group .. or do you have a pdf of this guide ?