
We started to read about Khadas VIM3 in May of this year as an Amlogic S922X development board with an M.2 socket for NVMe SSD, and 802.11ac WiFi 5 & Bluetooth 5.0 wireless module. Eventually, Shenzhen Wesion decided to change the processor to Amlogic A311D before the launch last month, since it does not cost much more, but includes a 5.0 TOPS neural processing engine.
The company has sent me a Khadas VIM3 kit for evaluation and review. Before going through the software part, and especially the tools for the NPU which will be one of the highlights of the board, I’ll check out what I received today, and show how to assemble the kit.
Khadas VIM3 Kit Unboxing
The package is rather boring…
But what’s really important is what’s inside…
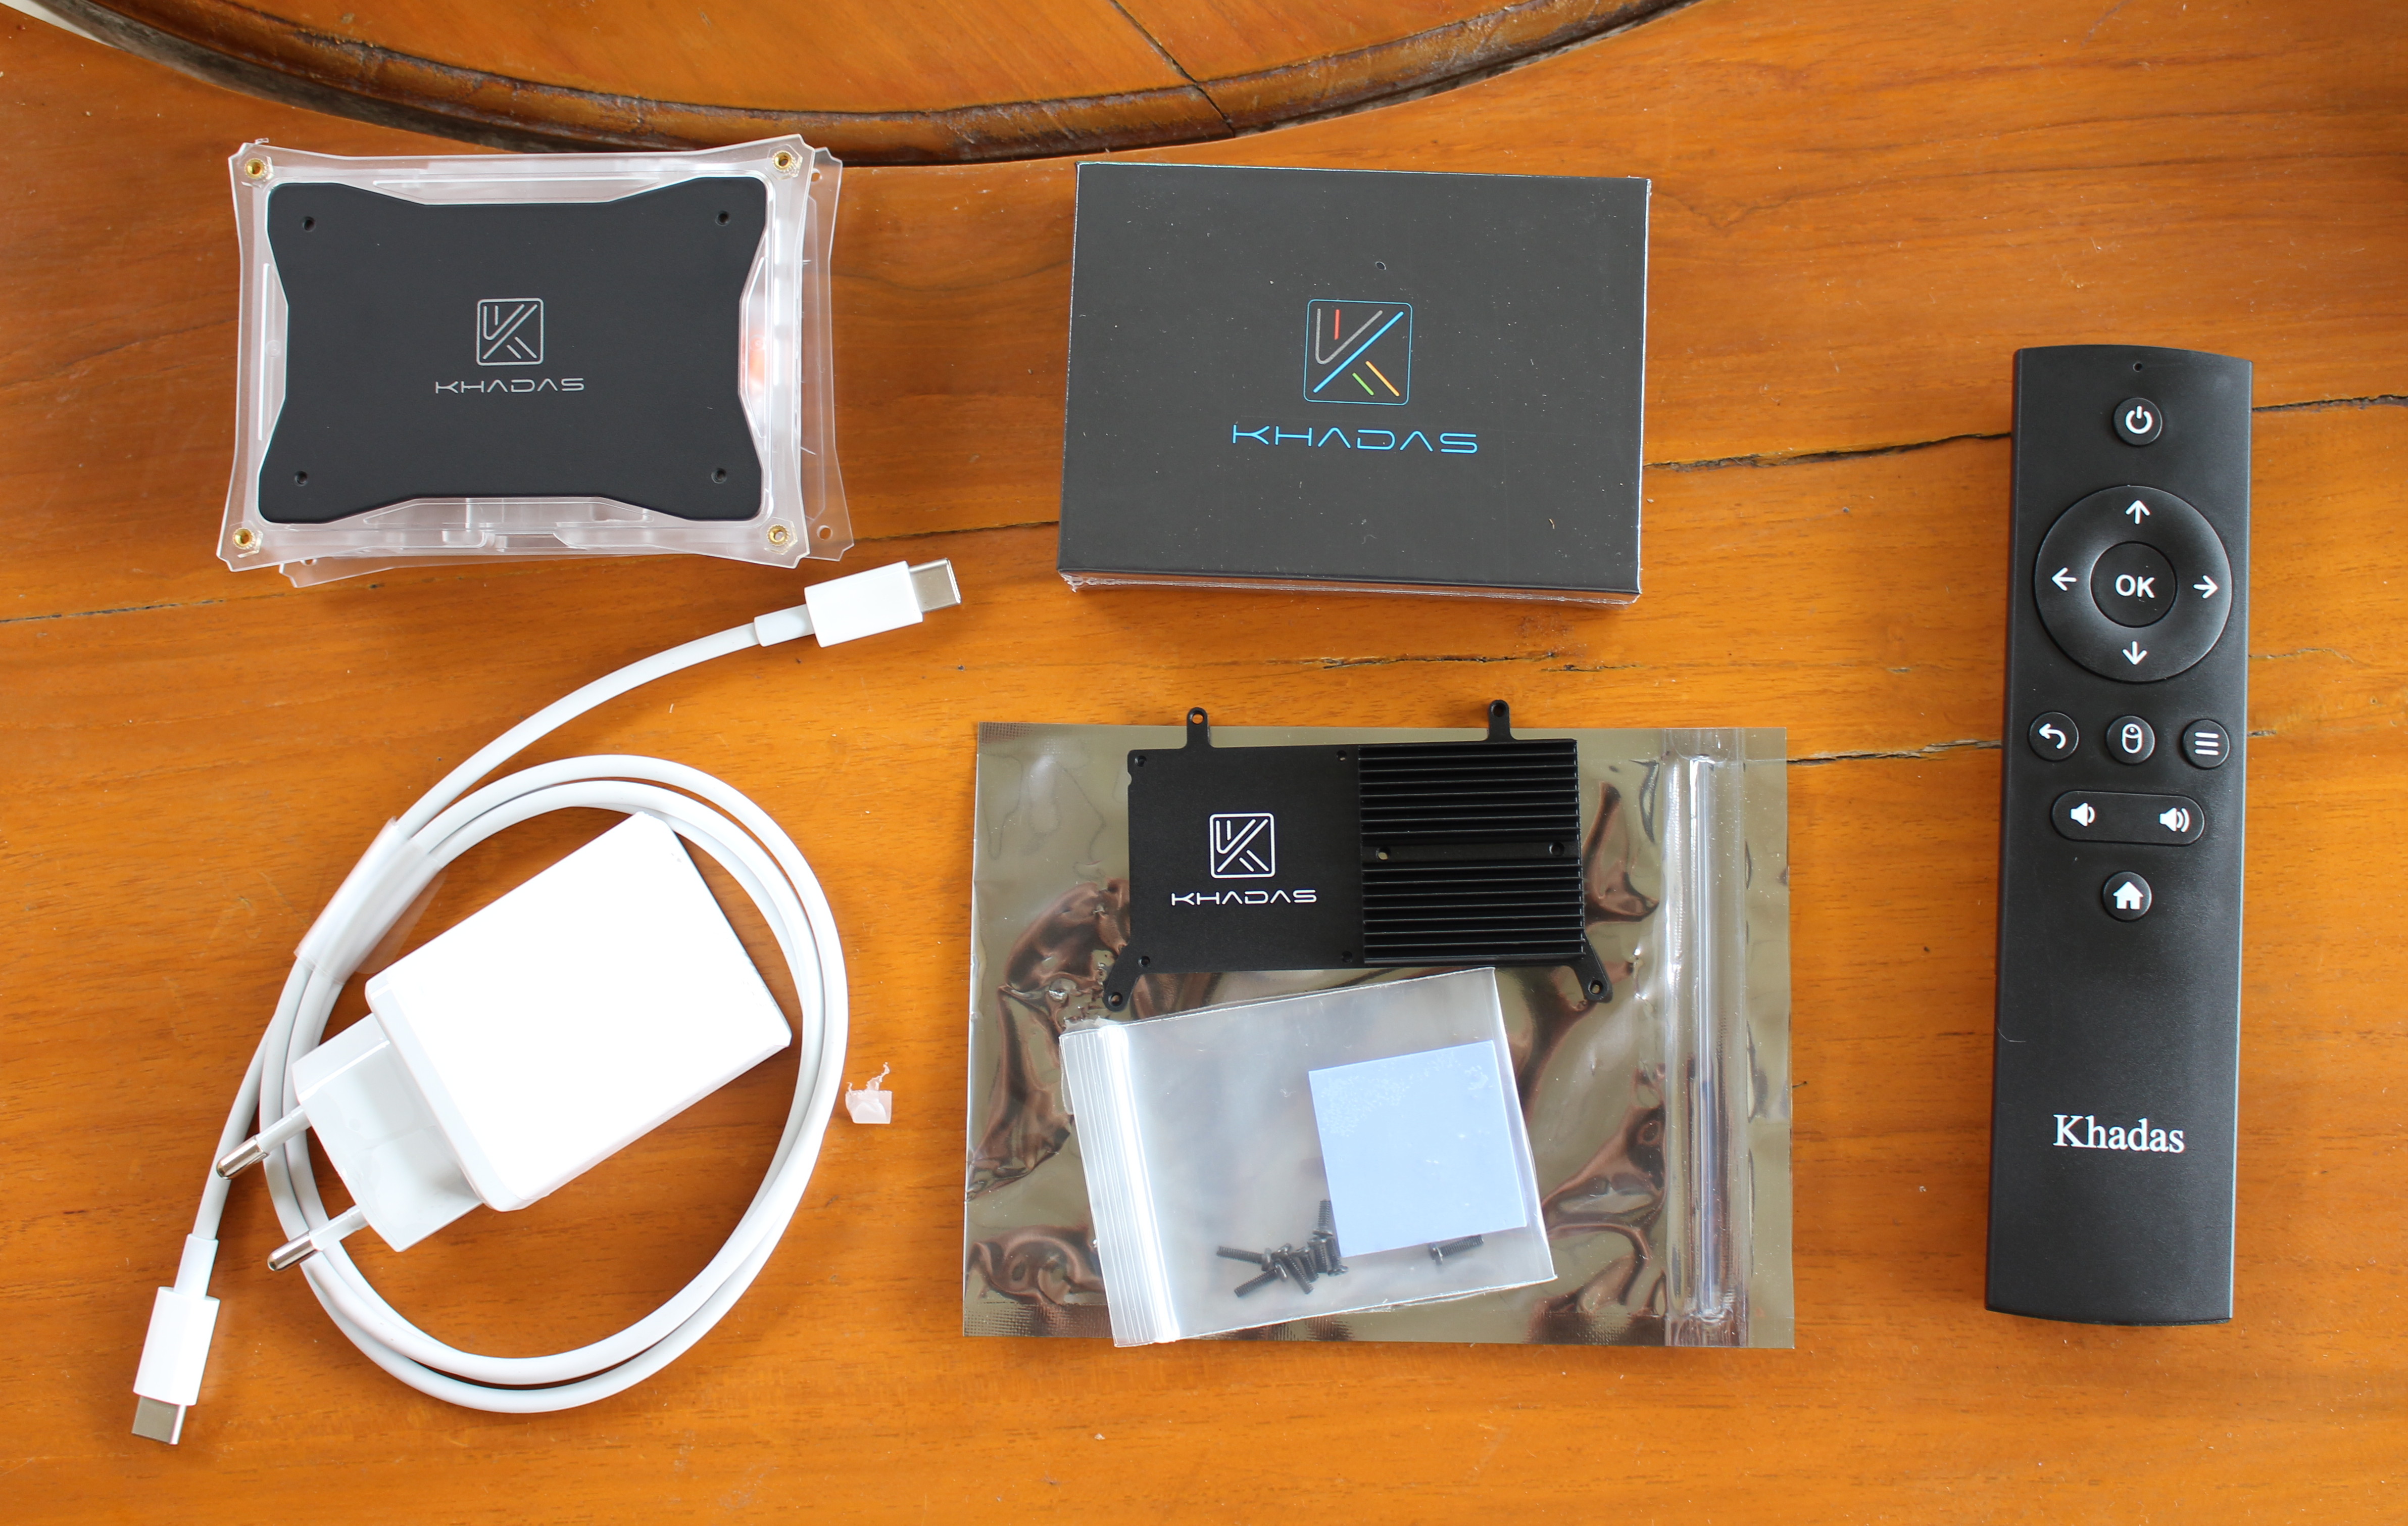
We’ve got an enclosure, a smaller package with the board itself, a USB-C power supply, a thermal pad + heatsink kit, and an IR remote control.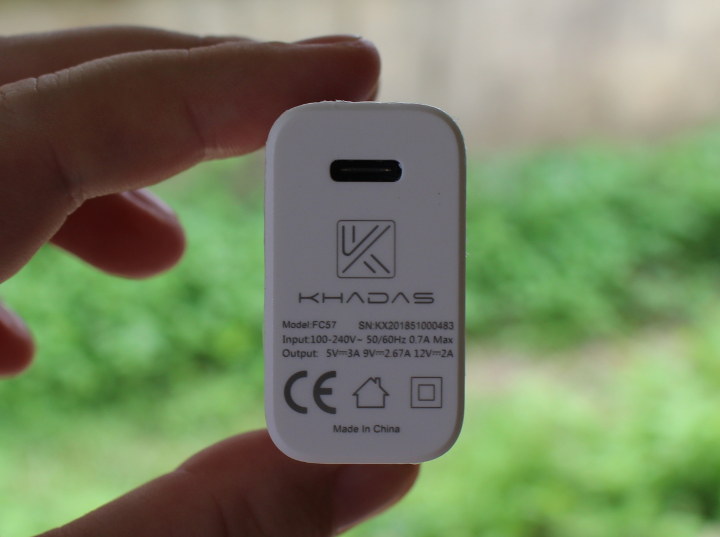
The USB-C power supply supports USB PD (Power Delivery) with 5V/3A, 9V/2.67A, and 12V/2A modes.
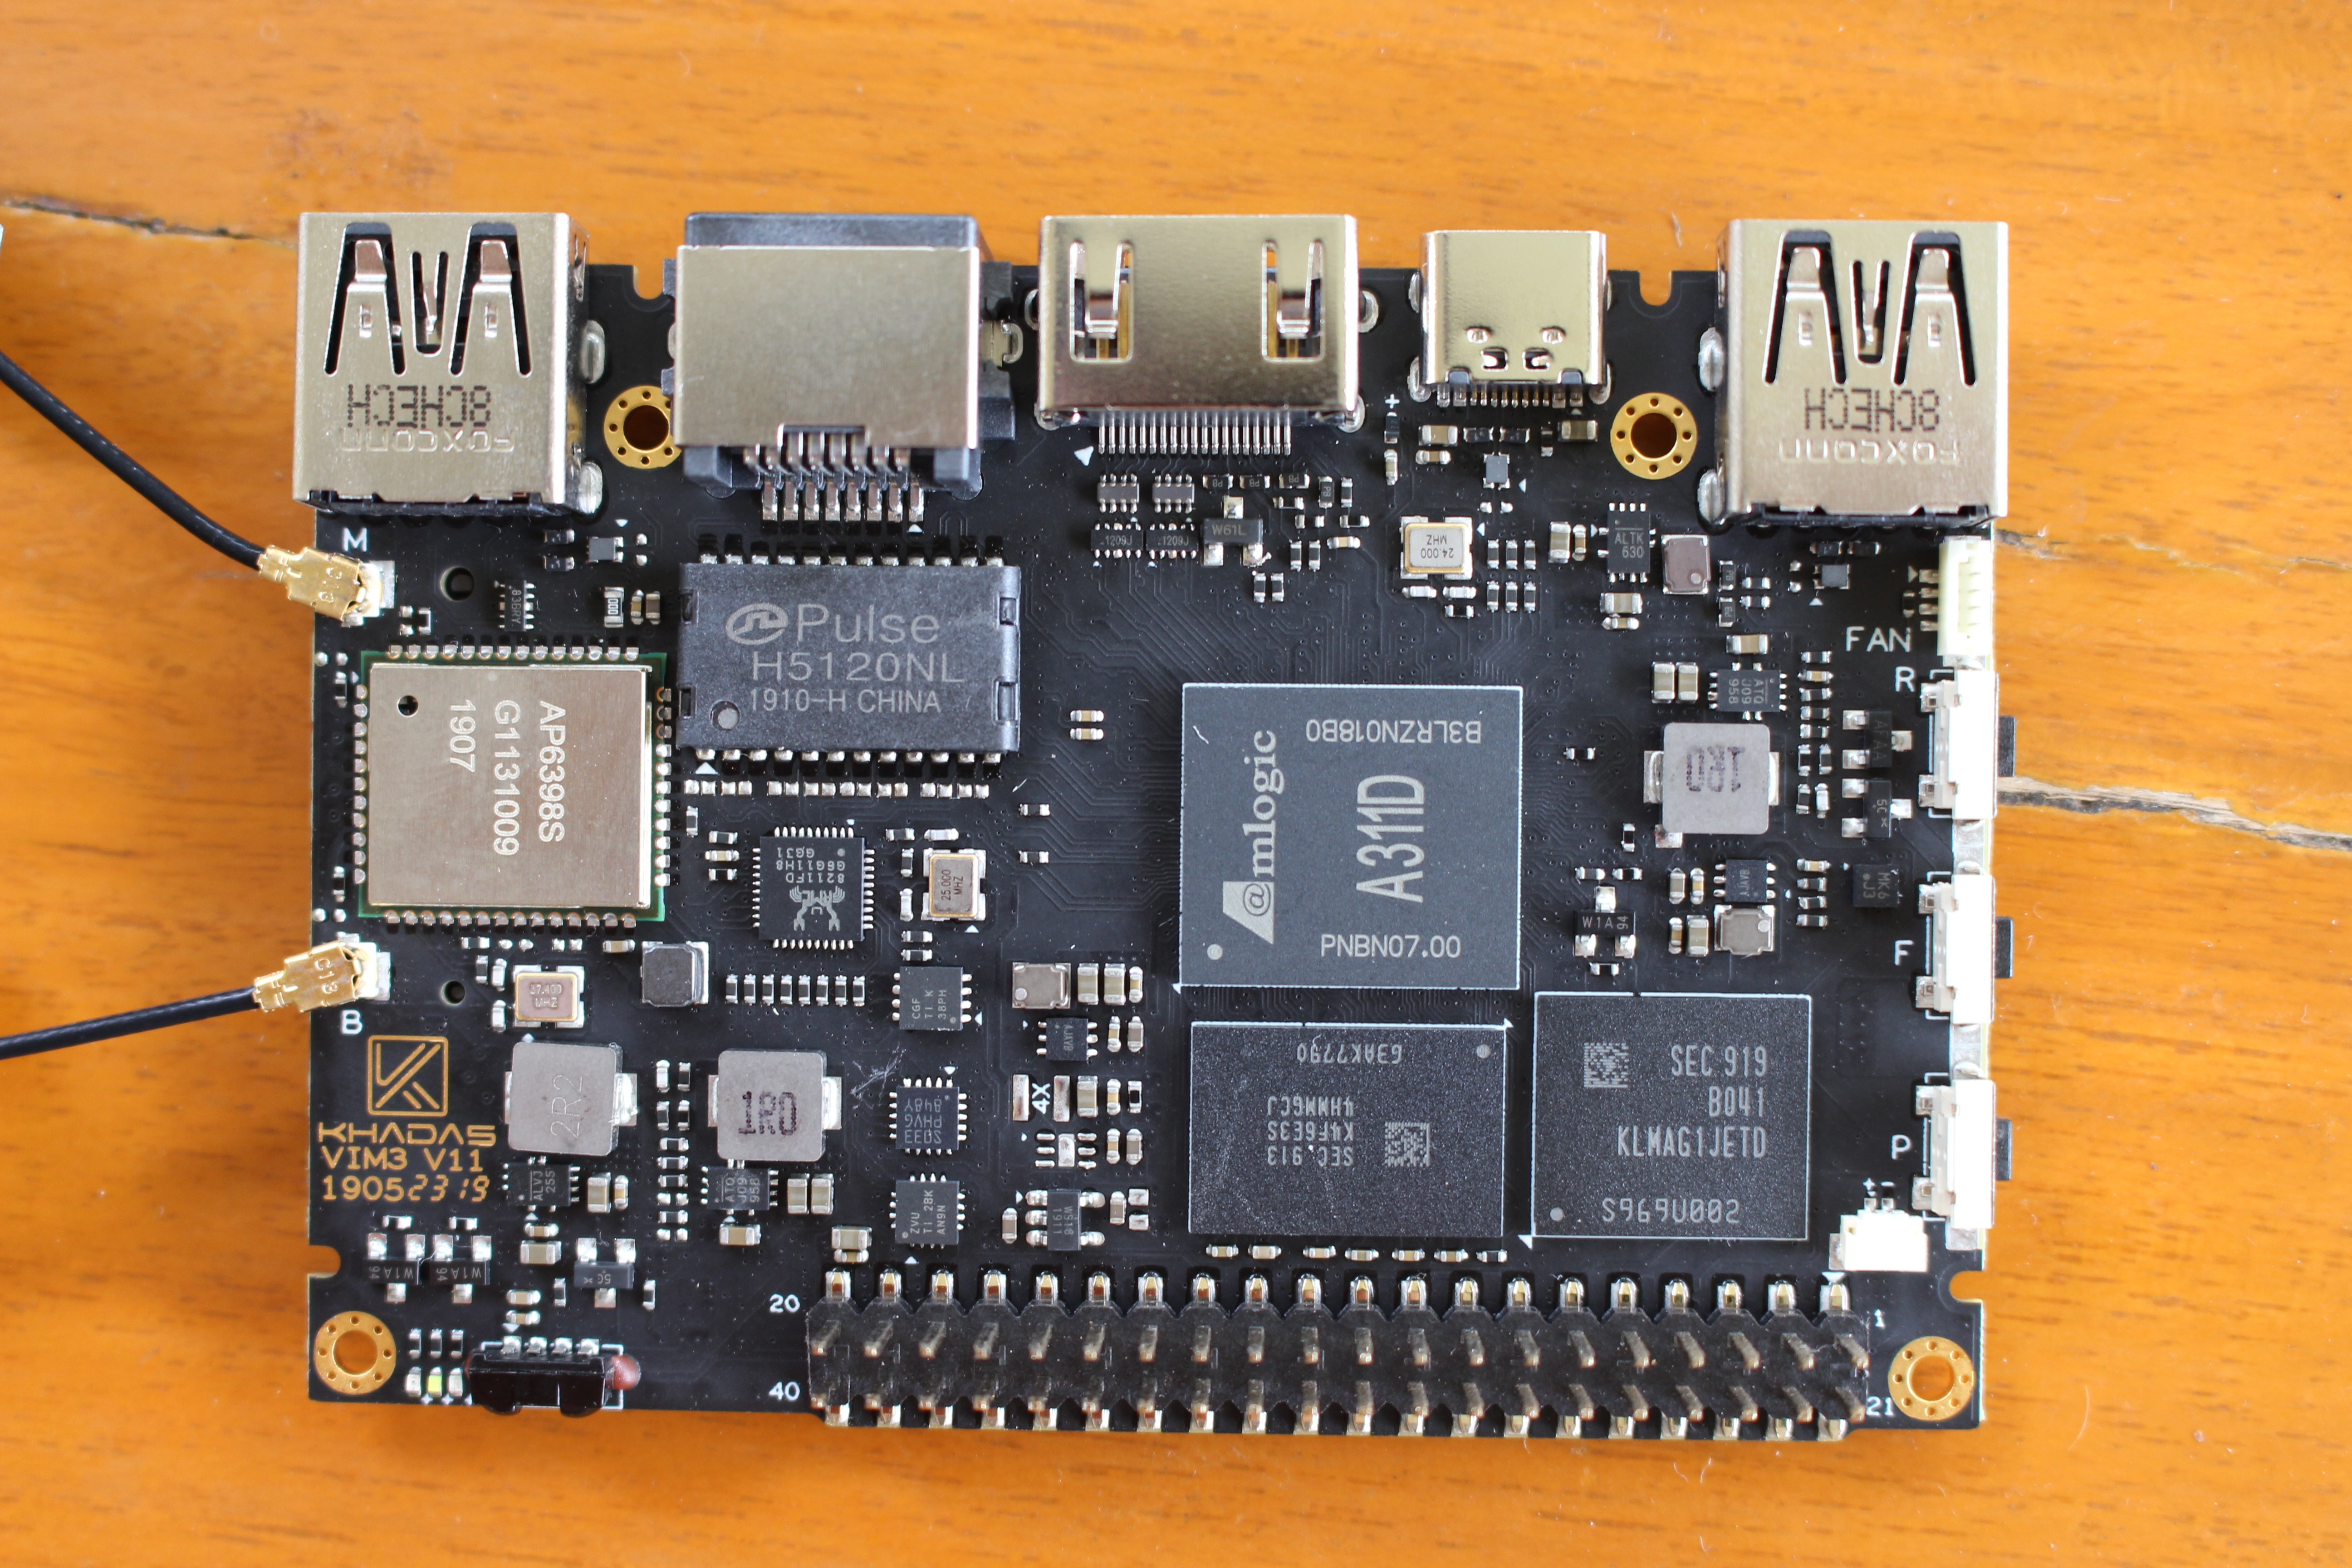
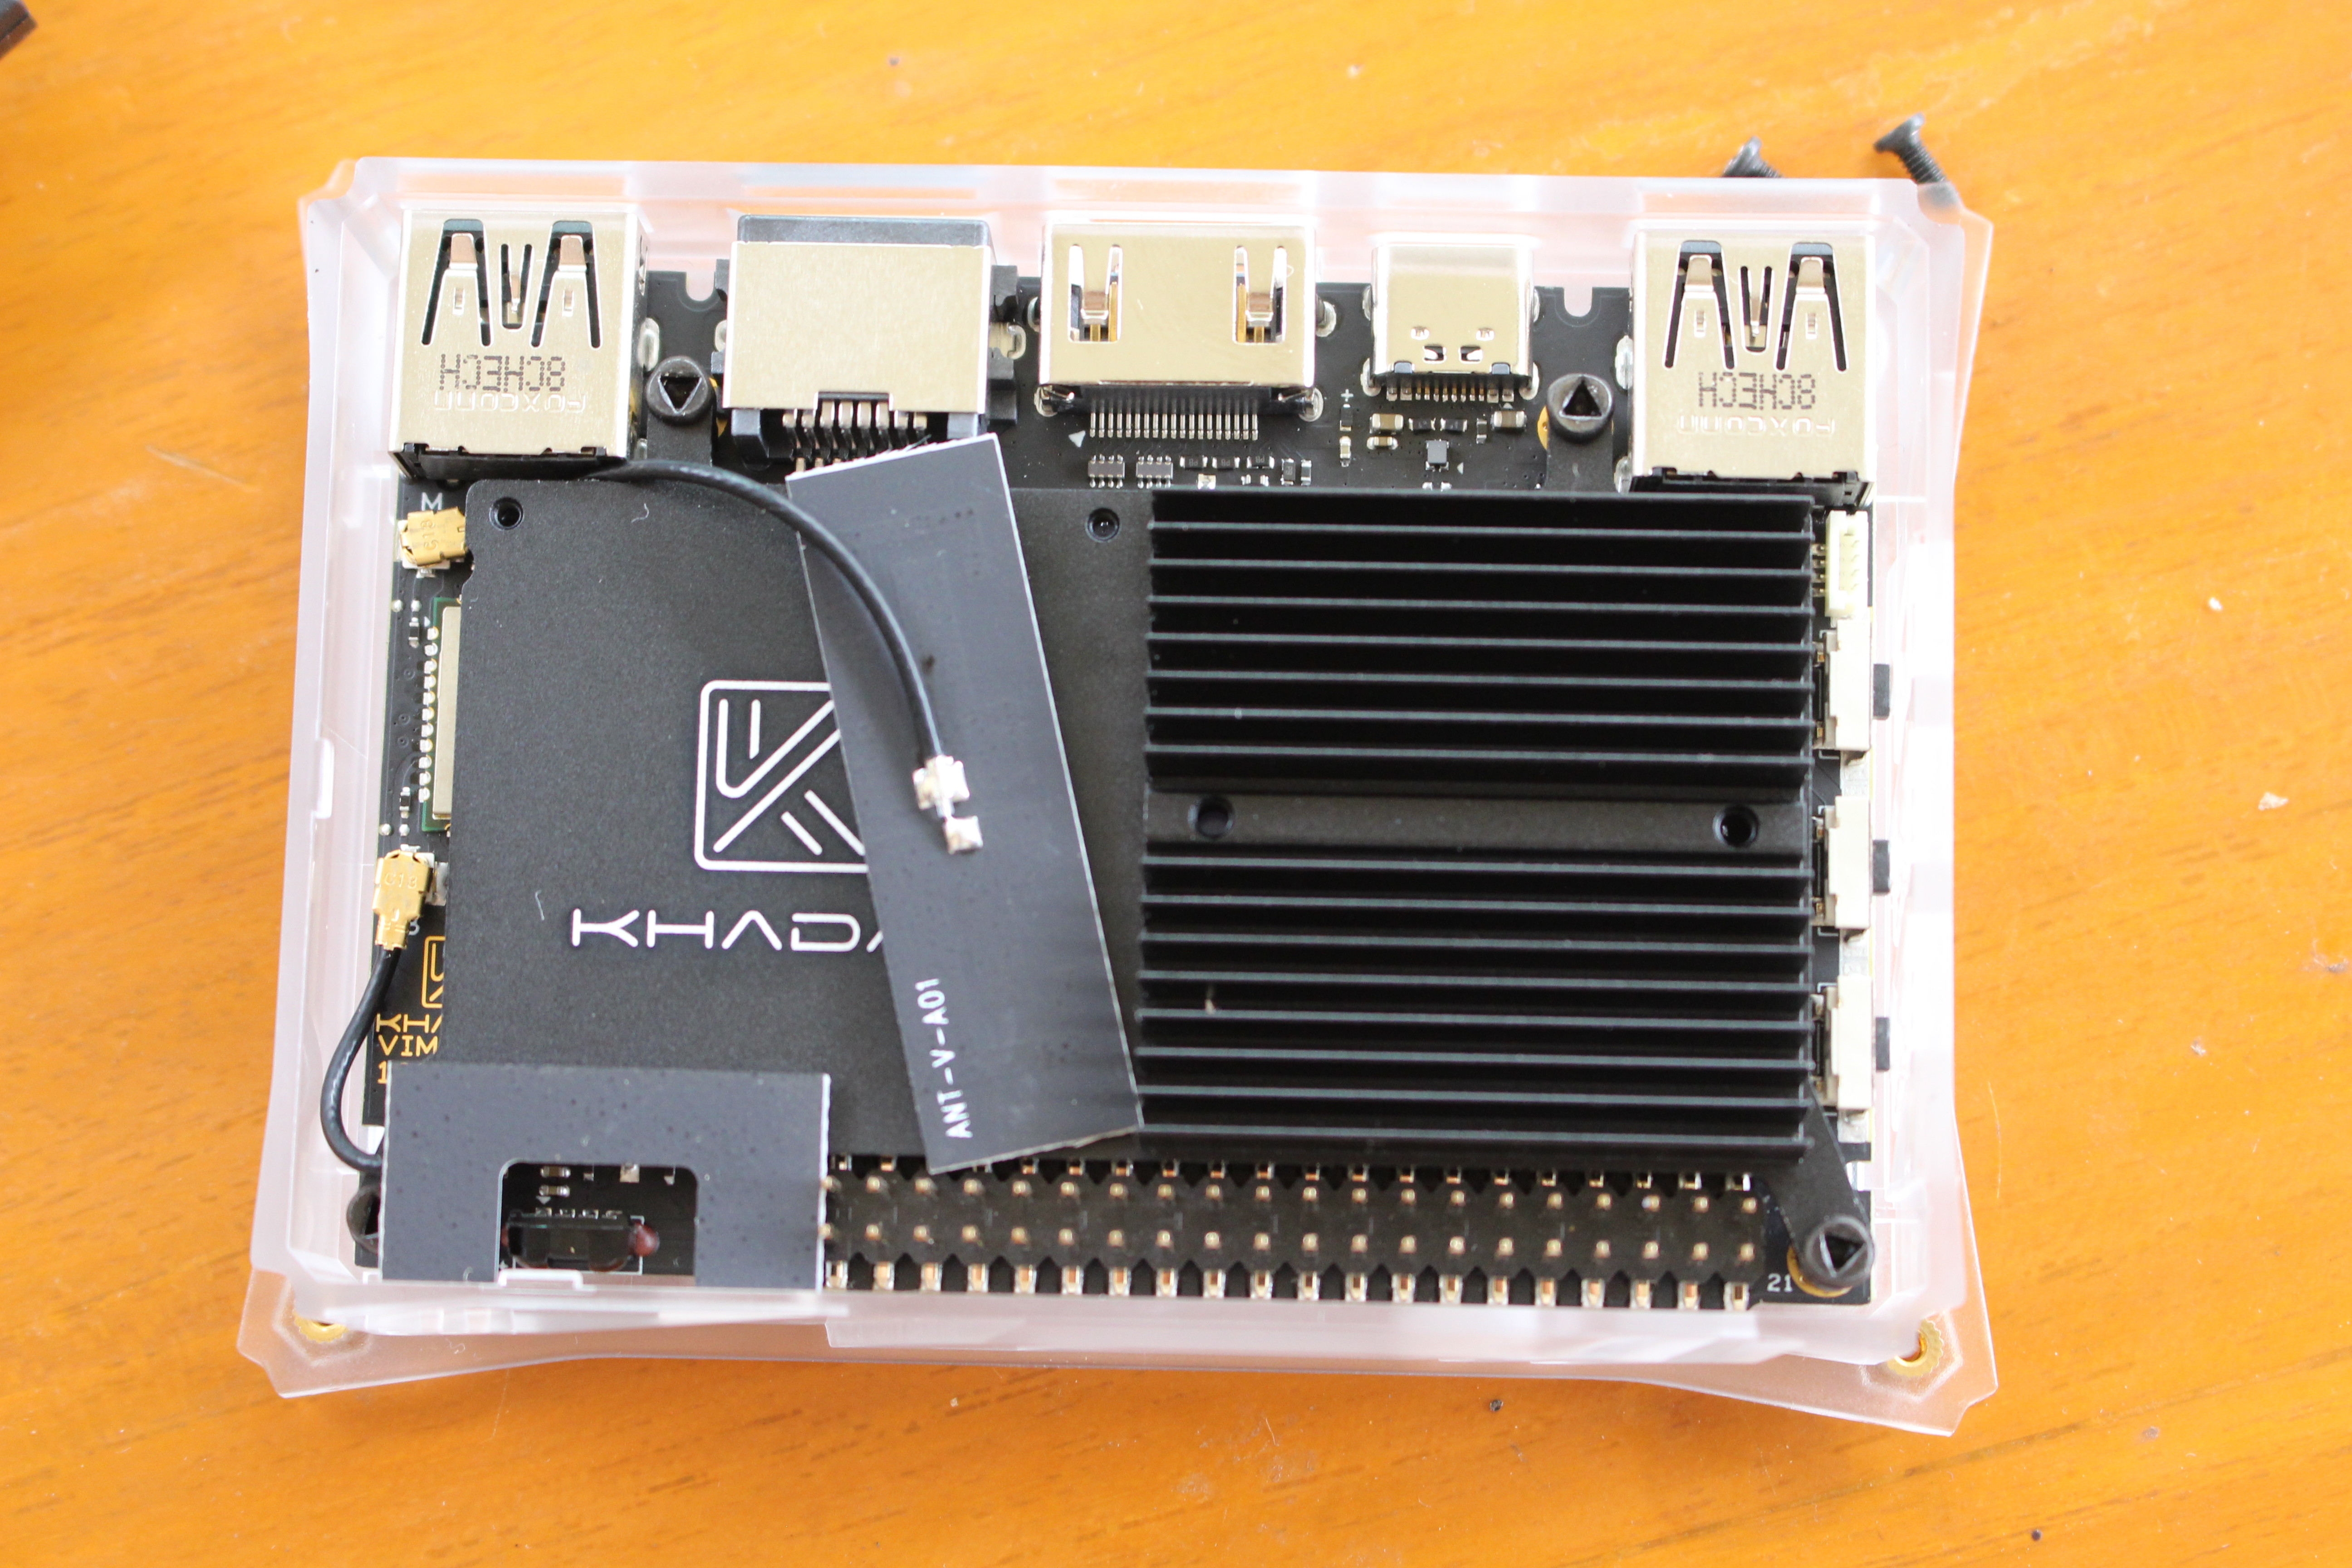
That’s the top of the board with Amlogic A311D processor, memory, storage, and other components and ports listed in the specifications. The storage device is KLMAG1JETD-B041 eMMC flash with 16GB capacity, meaning I got Khadas VIM3 Basic with 2GB RAM as well. Two u.FL antennas for the wireless module are also included with the board.

The bottom of the board includes the M.2 NVMe socket, MIPI CSI for a camera, as well as MIPI DSI and TP (Touch Panel) for connecting a touchscreen display.
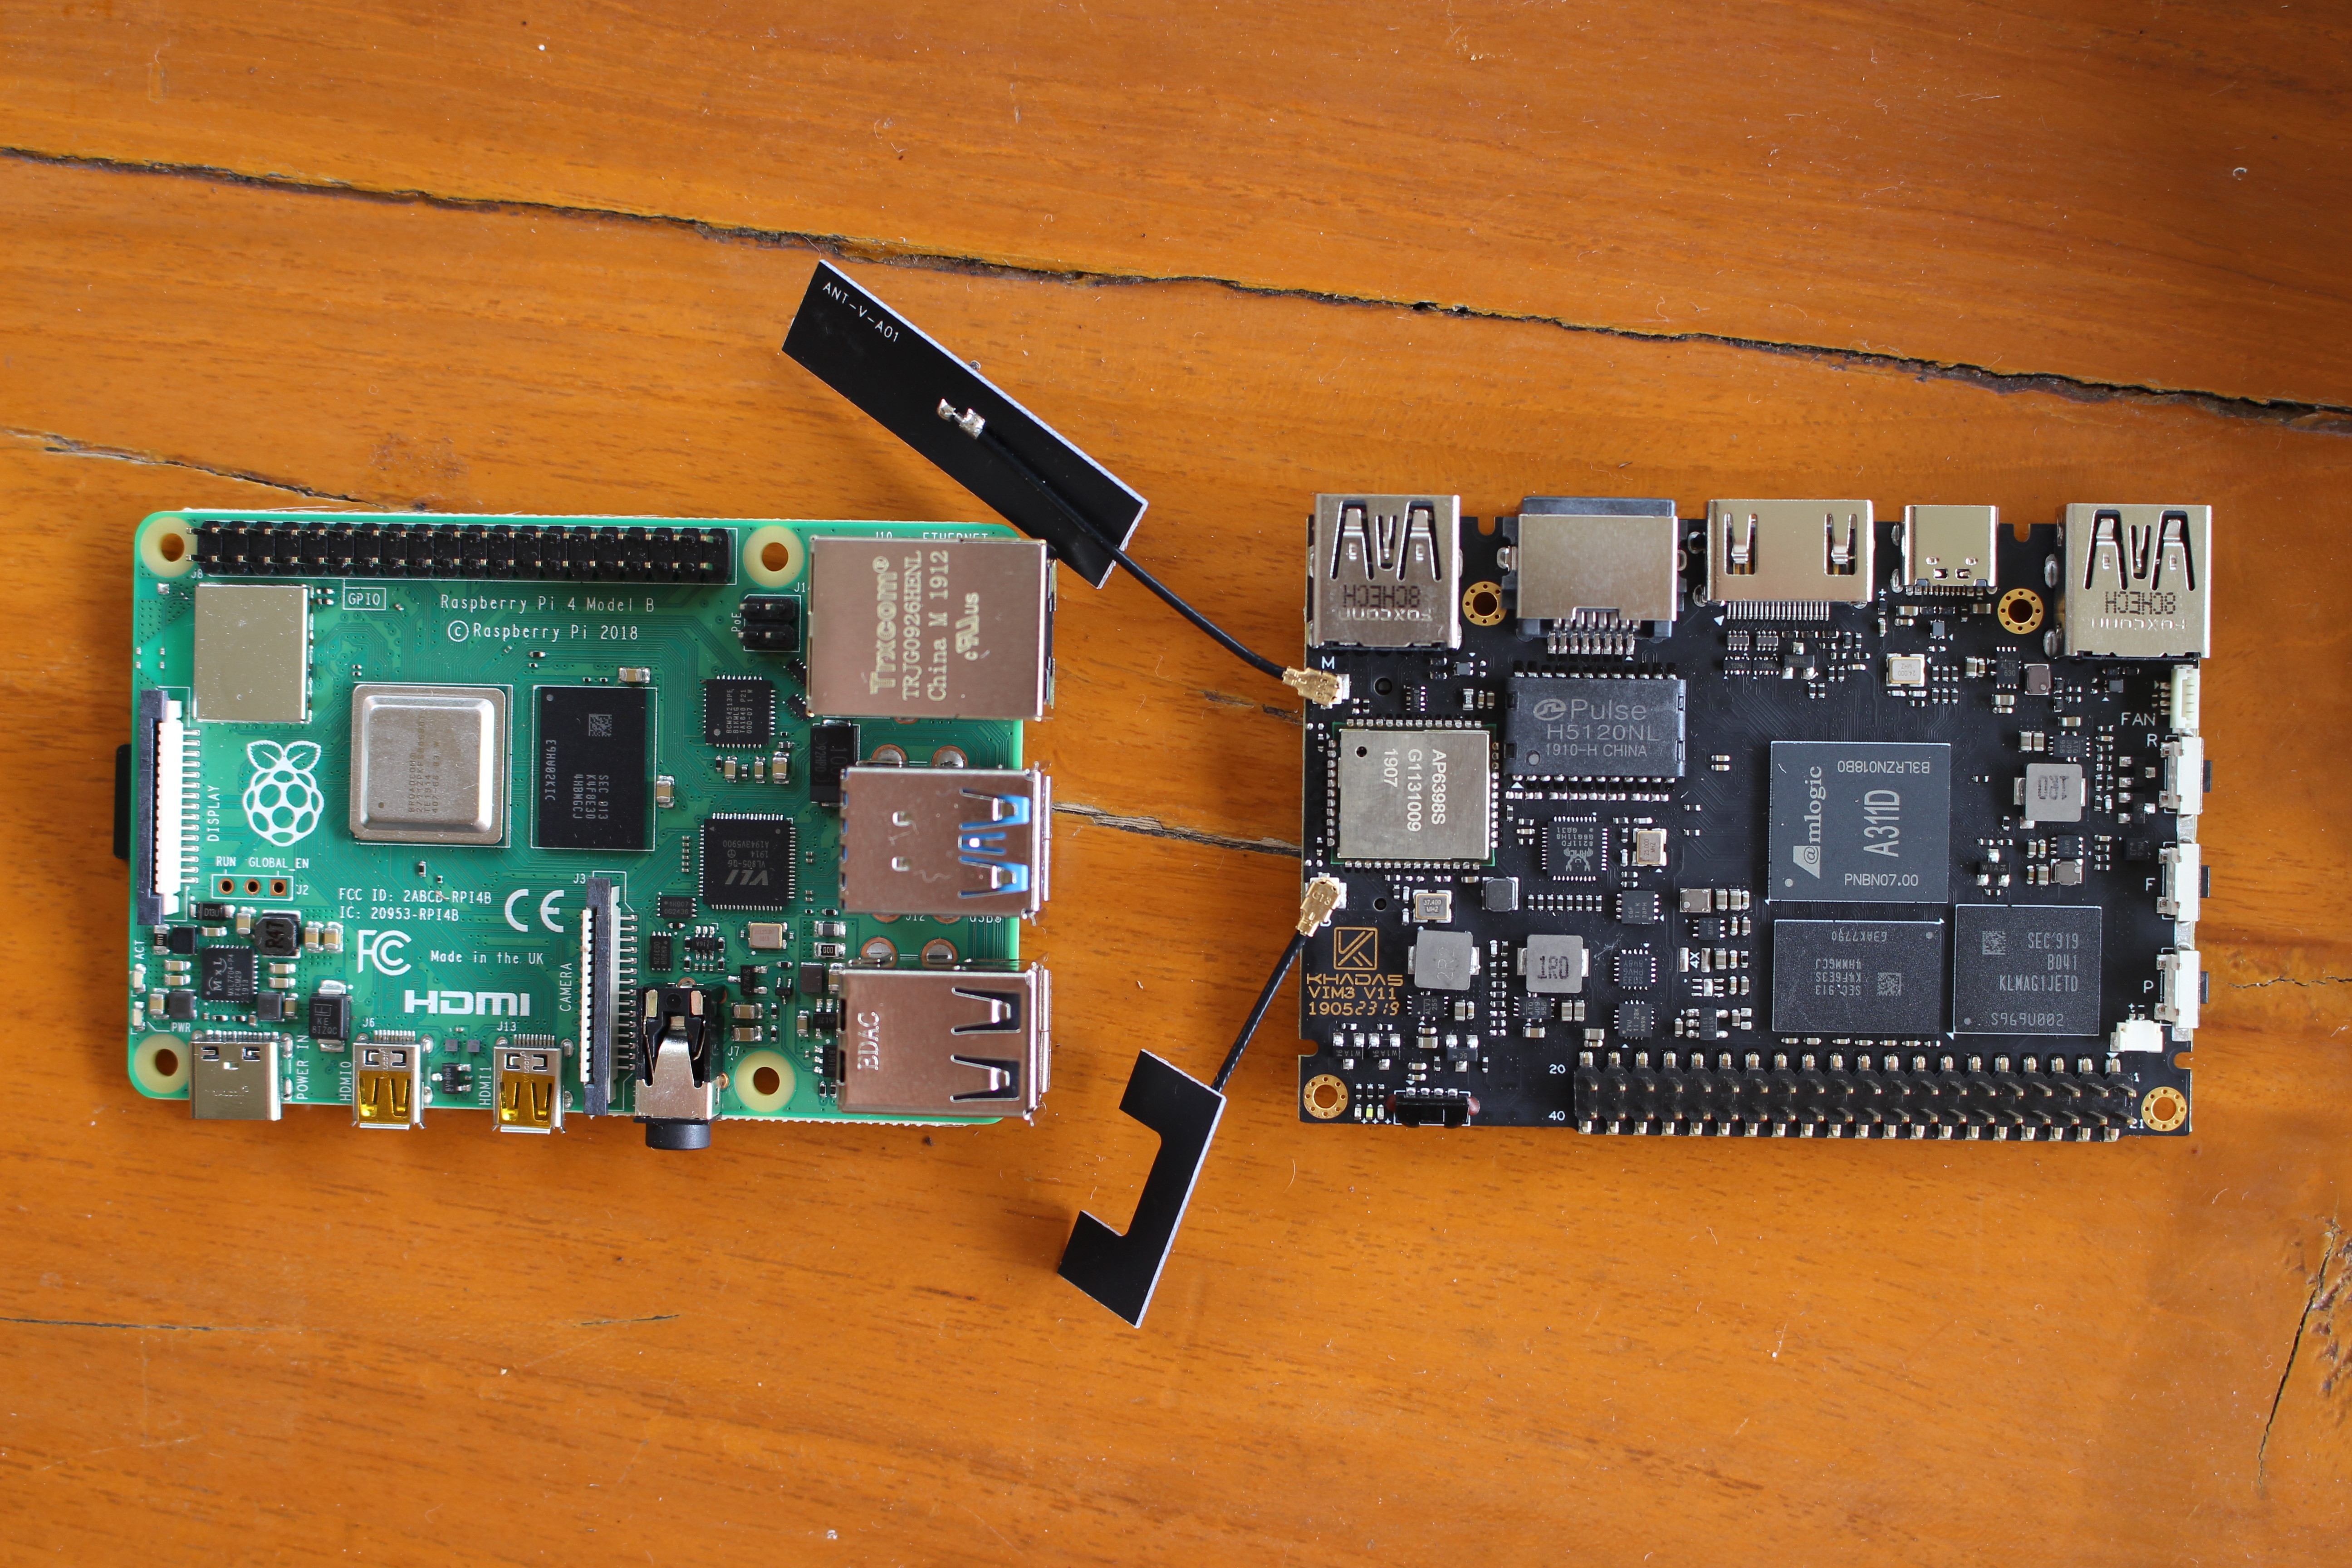
Khadas VIM3 is about the same size as Raspberry Pi 4 model B, but obviously, the arrangement of the ports is completely different.
Khadas VIM3 Kit Assembly
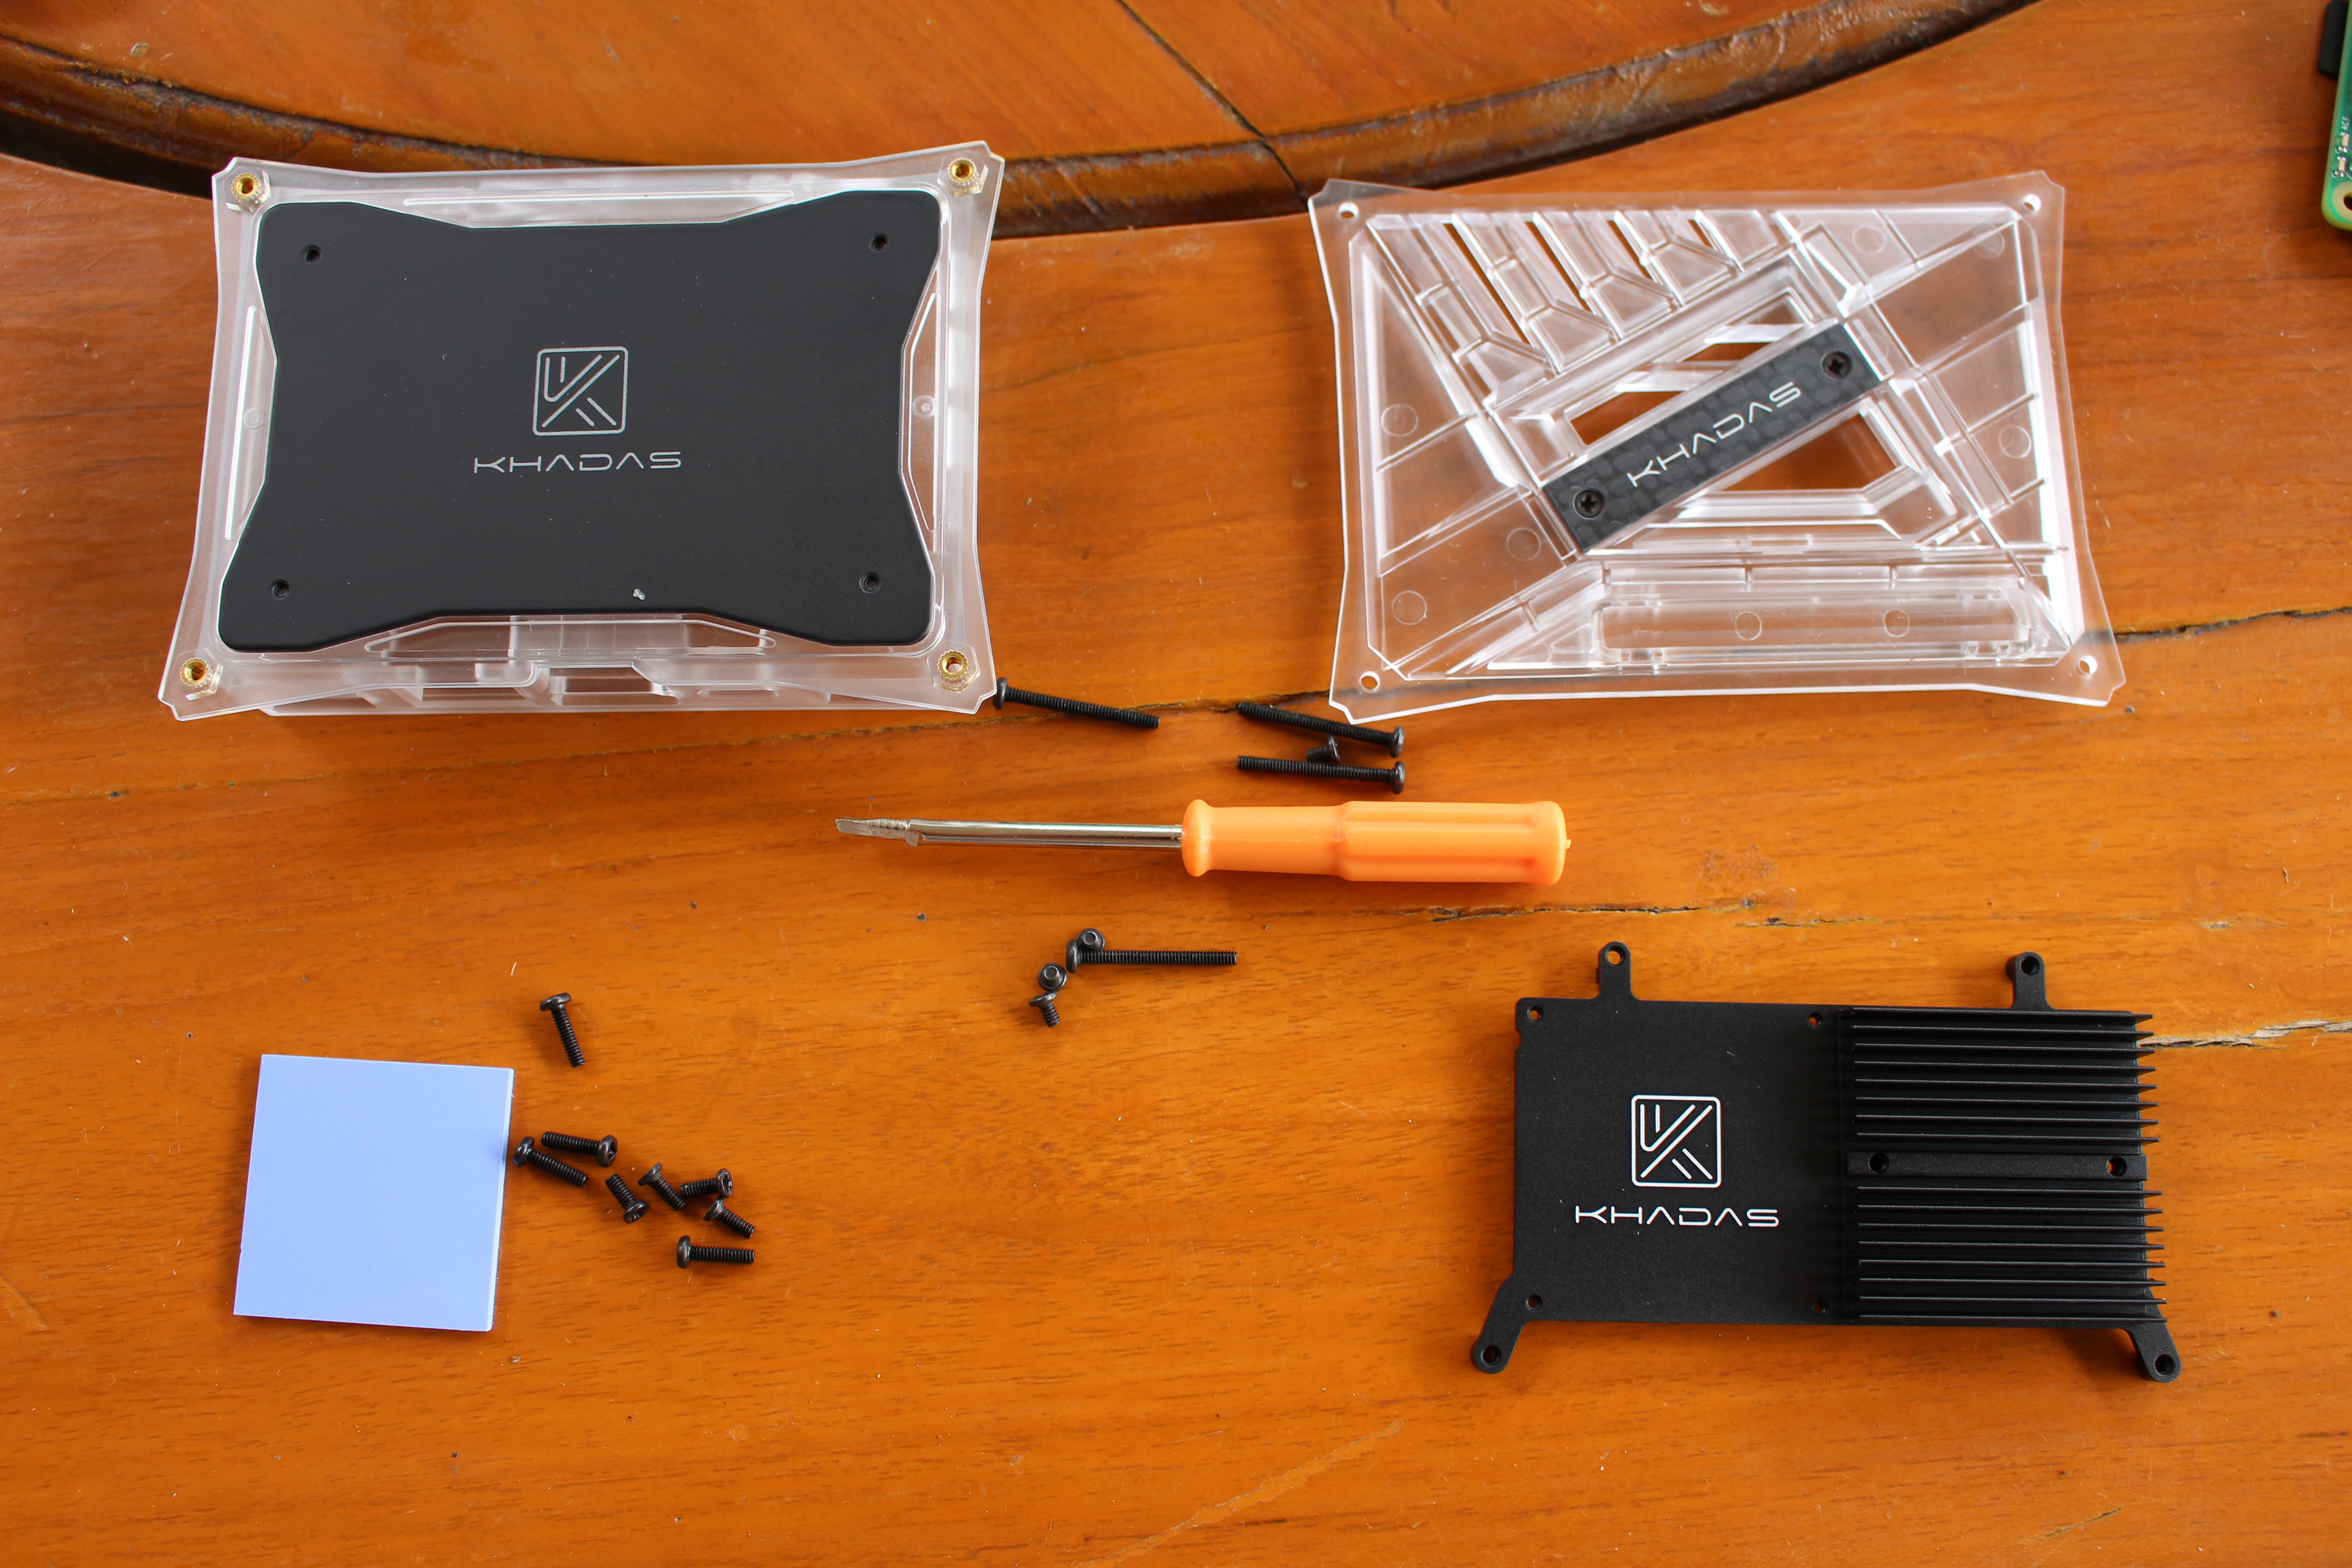
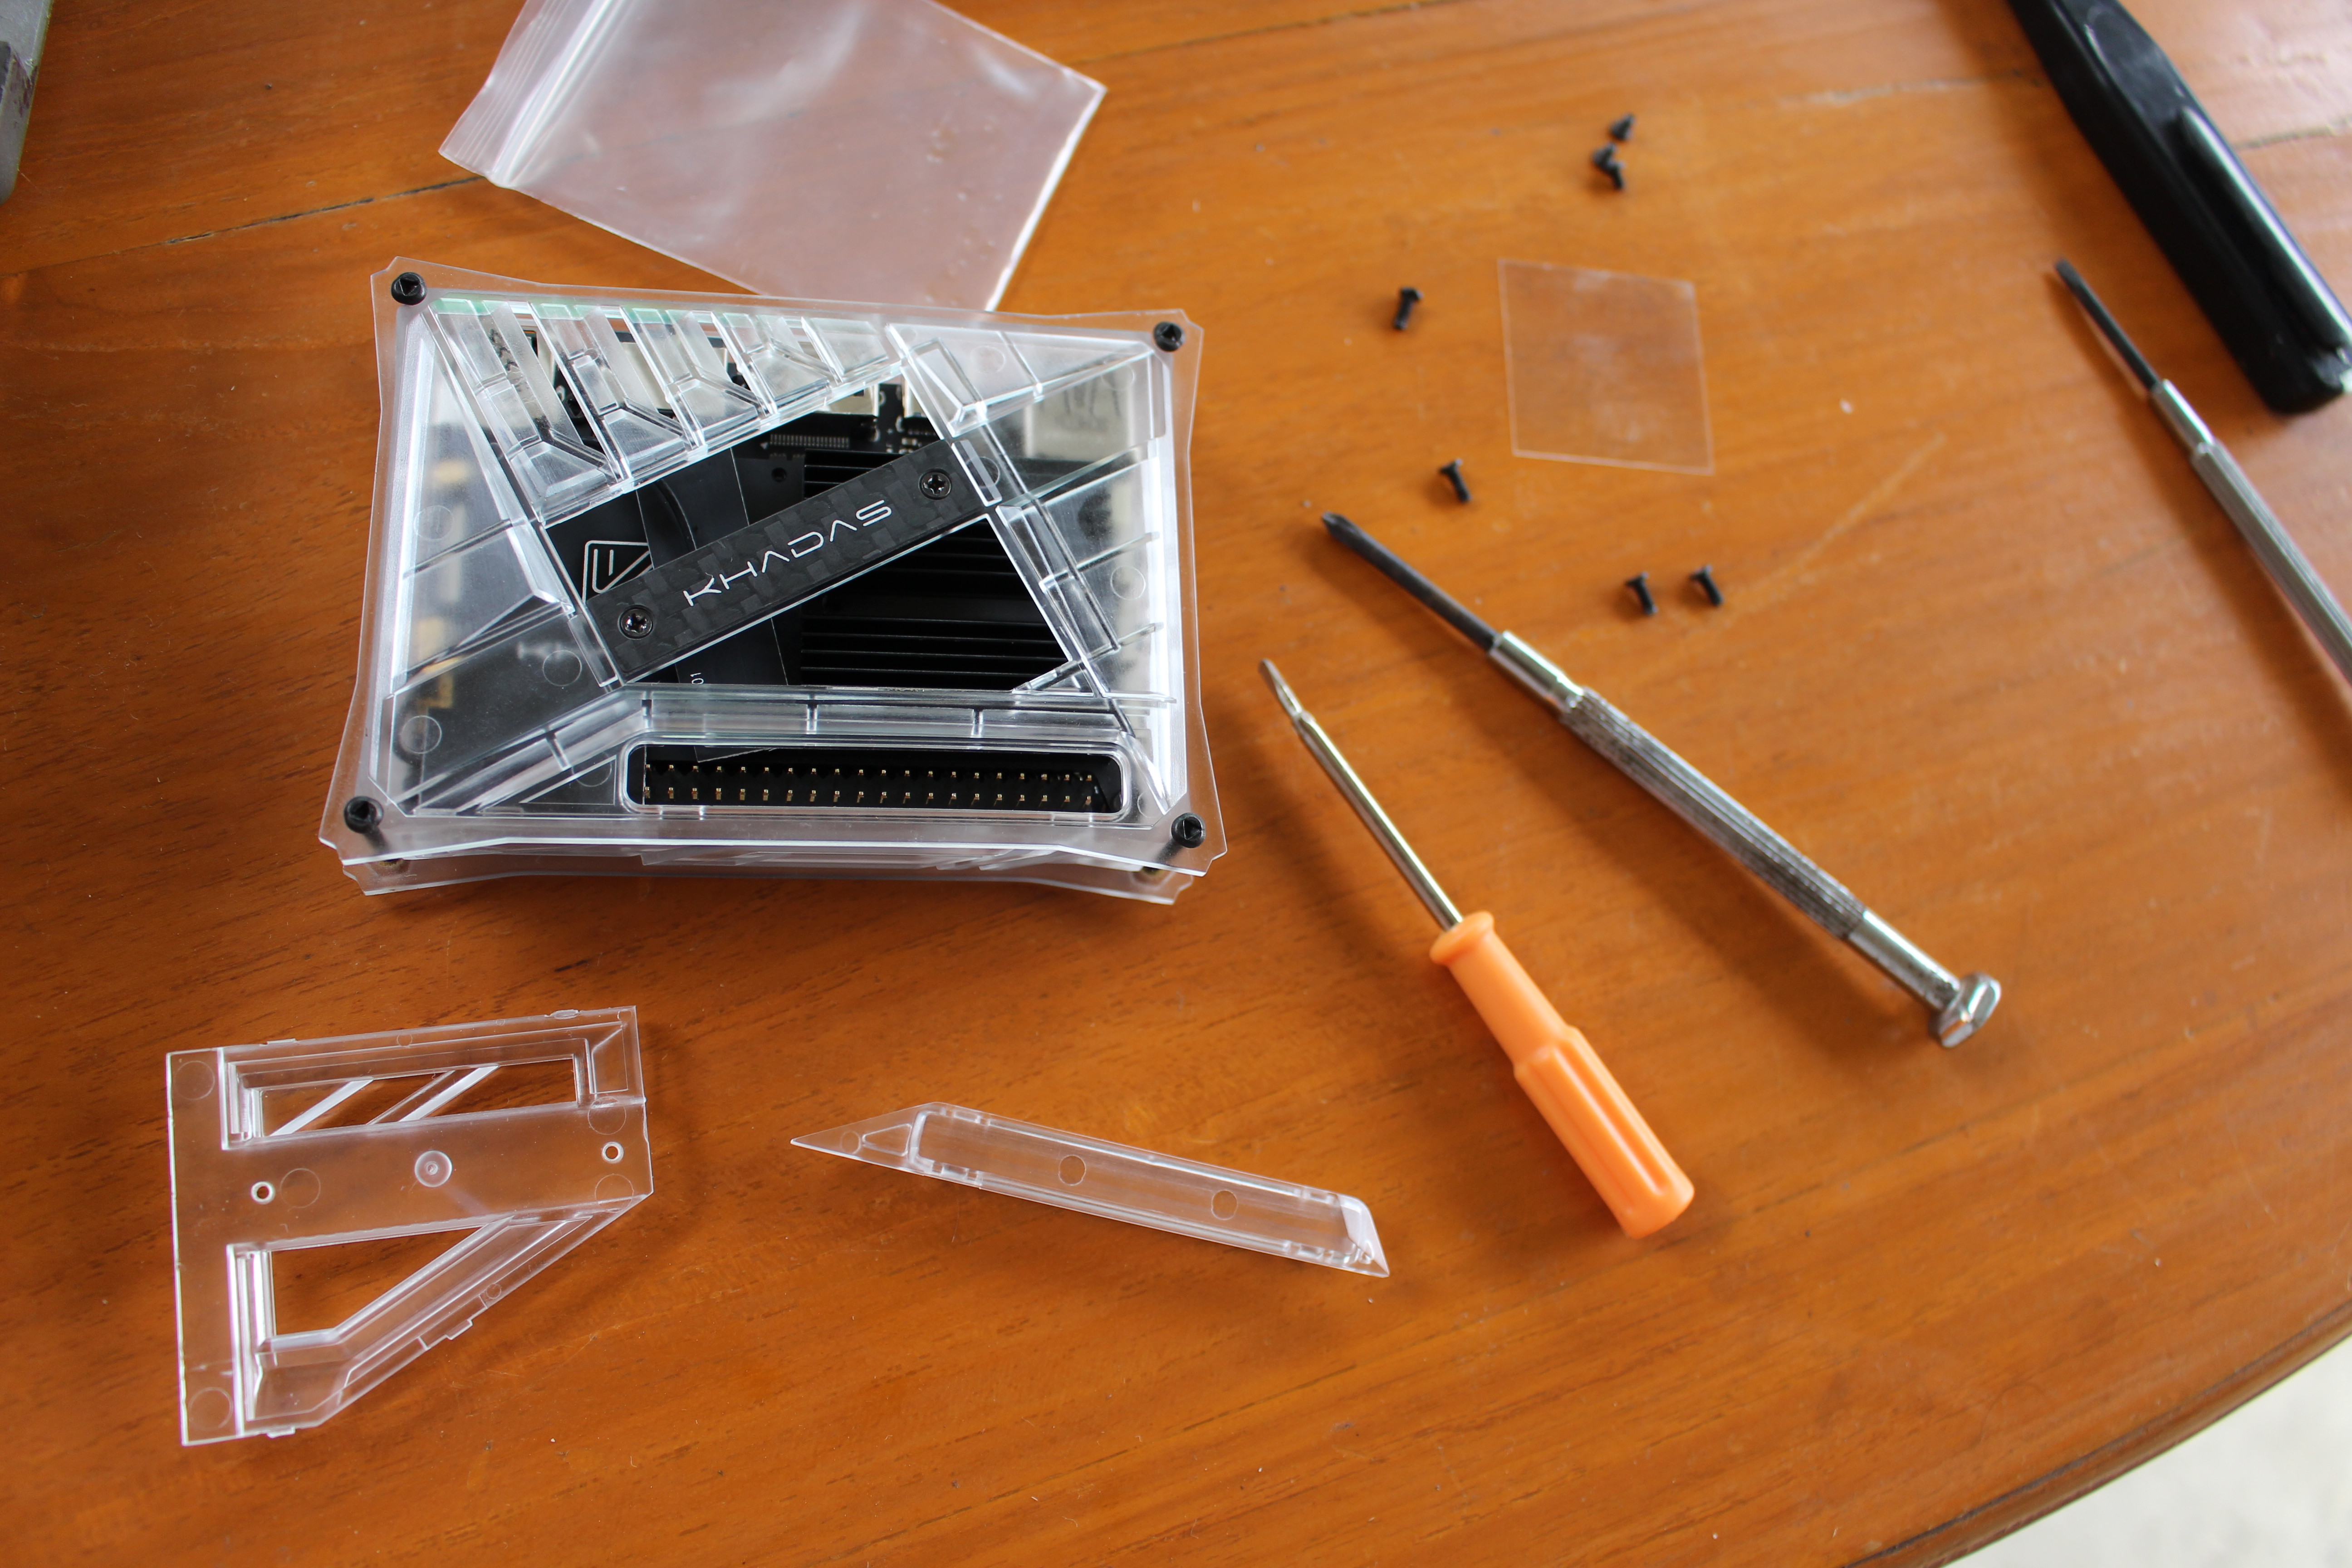
The case comes in two parts and includes screws as well as a screwdriver. If you’re wondering why a screwdriver is included, the reason will come to light soon enough: the design relies on weird triangular head screws.
The first step is to pell of the film on the thermal pad, and install it on VIM3 board. At first, I thought it was a good idea to cover as much “skin” as possible.

But eventually, I move it to the left a little since the component marked 1R0 is a little higher, and the heatsink will not firmly press the processor if the thermal pad is on 1R0 as well.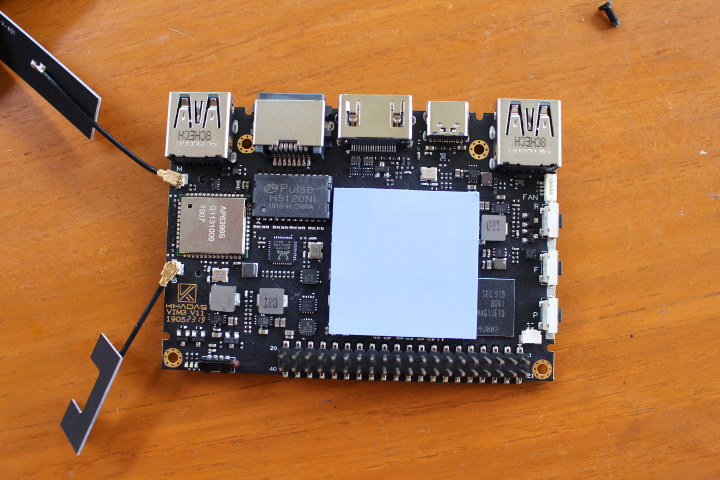
The bottom of the case has mounting holes that align with the through holes in the board and the heatsink.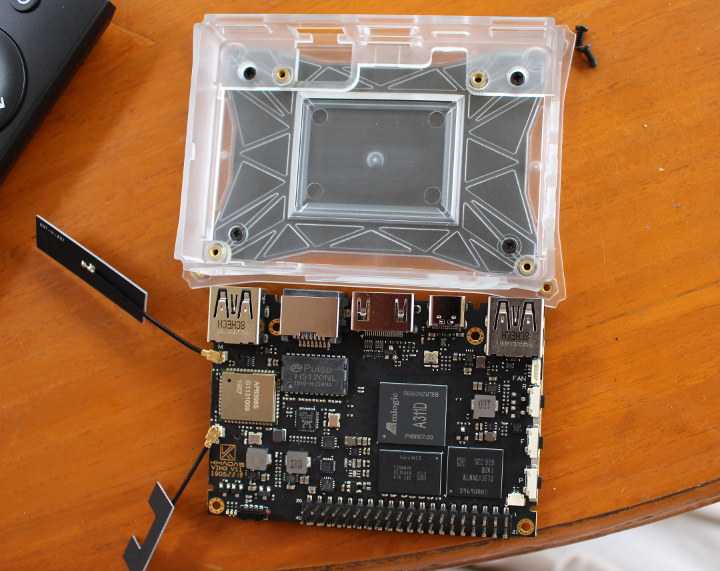 So we can mount those together, moving the antenna on top, and tighten everything with the triangular head screwdriver using the 4 longer screws from the heatsink + thermal pad set.
Now I was getting ready for the last and easiest step to tighten the top cover… Except it would not fit…
It turns out Khadas enclosure is somewhat modular. So you can takeout a plastic part to expose the 40-pin GPIO header to the outside world. You can also remove one of the top pieces by loosening the two screws at the top, and give – barely – enough height space for the heatsink.
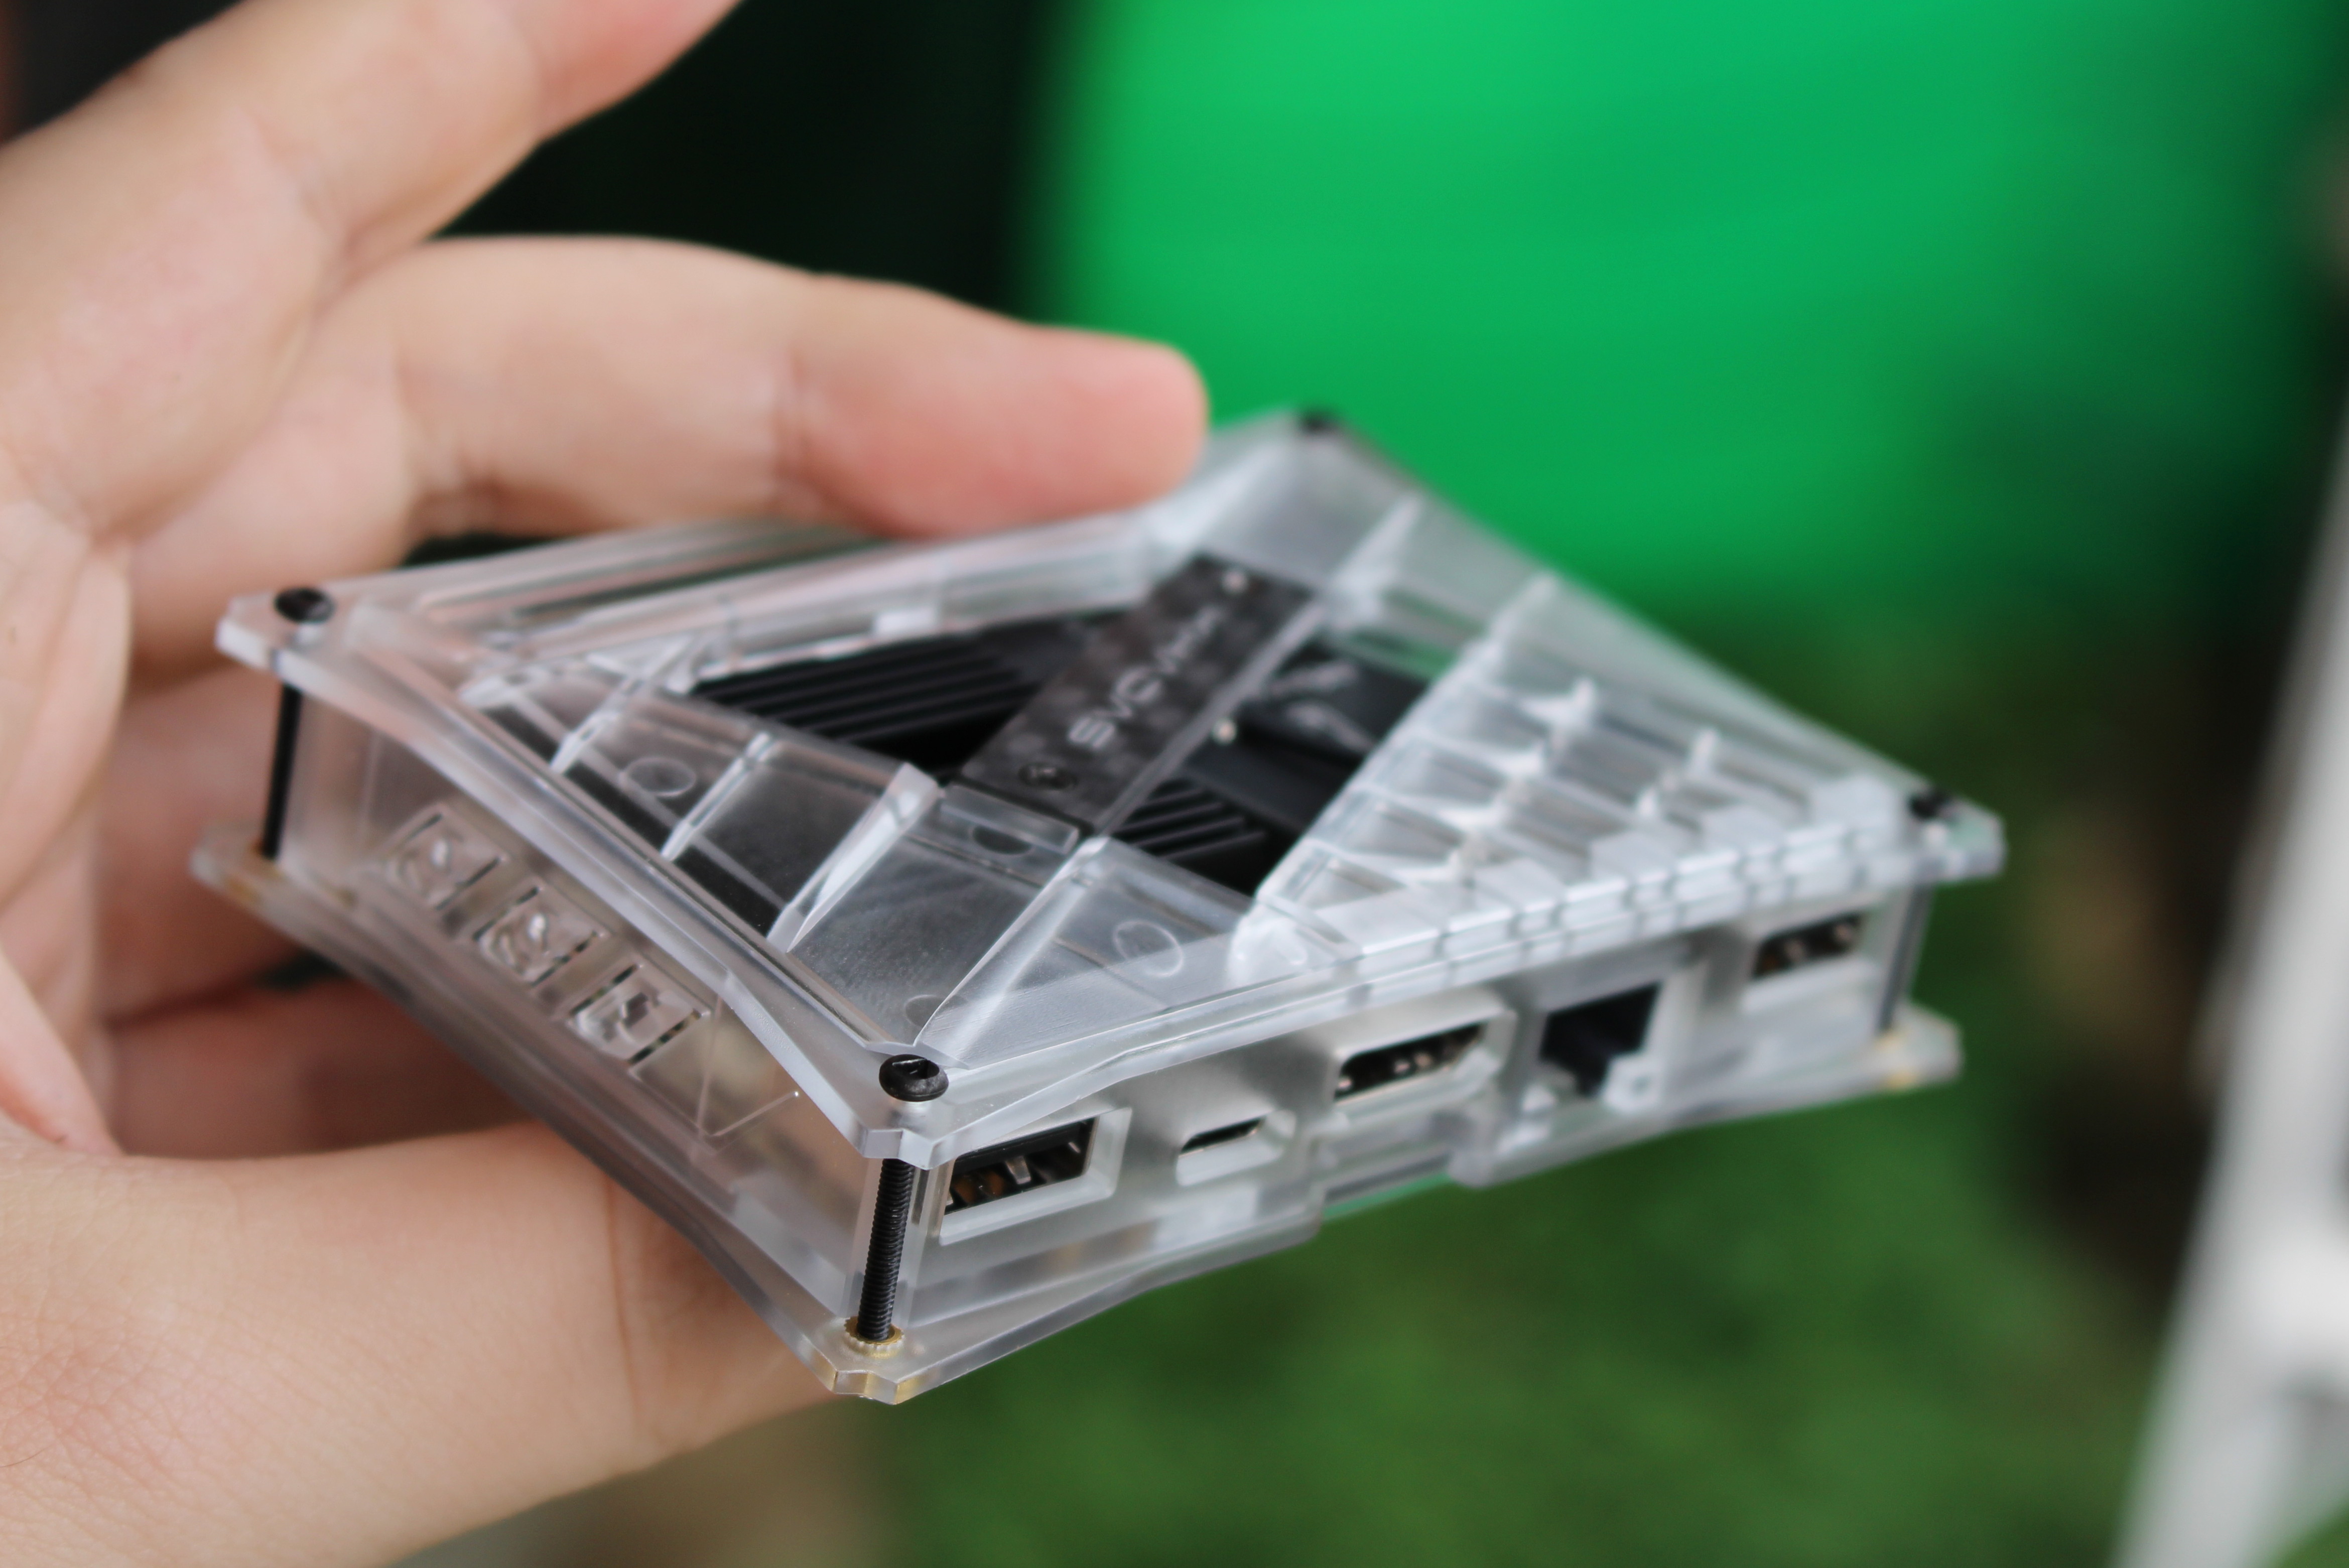
I tightened the four long screws from the case kit, and that’s the final result.
Khadas VIM3 Basic normally sells for $99.99, but there’s a $20 coupon valid until July 22. Use Public_VIM3_Basic or Public_VIM3_Pro depending on the board you plan to purchase. If you’d like to get the exact kit featured in this review, you’ll need to add $9.90 for the 24W USB-C power adapter, $3.90 for the USB-C cable, $9.90 for the heatsink + thermal pad, $14.90 for the DIY case, and $4.20 for the IR remote control. The total would be $122.70 including free shipping.
Continue reading
- Khadas VIM3 (Amlogic A311D) Benchmarks & System Info in Android 9
- Android Gaming on Khadas VIM3 SBC (Video)

Jean-Luc started CNX Software in 2010 as a part-time endeavor, before quitting his job as a software engineering manager, and starting to write daily news, and reviews full time later in 2011.
Support CNX Software! Donate via cryptocurrencies, become a Patron on Patreon, or purchase goods on Amazon or Aliexpress


So funny! I would just have cut off that corner of the thermal pad with some sciccors 😀 😀
Hi Jean:
Thanks for the review!
Actually, the two Wi-Fi Antennas can be assembled to the each side of the mid-frame:
I guess you guys don’t know much about Wi-Fi signal, right? You want to keep the Wi-Fi antennas as far away from metal and other PCBs as possible to get a good signal. What you’re doing is a terrible idea imho.
Sure thing we know that 🙂
We already maximized the space from the antennas to the heatsink when we design the new VIMs Heatsink, and we finally balanced the Wi-Fi permanence and 3705 cooling fan.
Check out below link for the VIM3 Wi-Fi Performance:
https://drive.google.com/file/d/1XU4_x2vq65mem2VmjSsmC7M6YF0uS9ix/view
I think Jean will also do performance test again in the next Review 🙂
Seven meters isn’t really a lot of range to test Wi-Fi over.
Obviously this is a development board, not a Wi-Fi router, but it seems like all the SBC board guys have the same issues with Wi-Fi design, it’s more or less terrible.
Try doing some USB 3.0 data transfers while using 2.4GHz Wi-Fi or Bluetooth at the same time and see how well the two wireless protocols work. Just a hint for your next board, don’t put the USB 3.0 next to 2.4GHz wireless radios or antenna connectors.
Specs says that vim3 have one 1 lane….so,is it possible to use the M2 connector via adapter with a pcie-x1 dvb-tuner-card?
Interesting idea!
Will feedback to our R & D team 🙂
PCIe Quad or Octo DVB. tuner cards are available,so the idea is to build small and low-power IPTV-servers with a VIM3
I use it with a usb atsc tuner for local tv and kodi
Althought there is m.2 socket , but how to fixed it with a M.2 SSD. I don’t see screw hole
We just design the M2X Extension Board with PoE, 4G LTE, and 2280 NVMe SSD converter:

More details here:
https://www.khadas.com/product-page/m2x-extension-board?tdsourcetag=s_pctim_aiomsg
Does anyone know of a case that can take the VIM3 + the M2X extension board? Looking for a good solution. Thanks!
I am looking for the same thing. It would be awesome if they would come up with an extension case kit that would convert the original case into one that includes the extension board in it.
Is anyone here from Canada? I want to know if this is going to get stalled and taxed by Customs.
You can buy the VIM3 when it’s available on our Canada Distributor:
https://corpshadow.biz/khadas