
Last summer, Google released the Local Home SDK developer preview which allows developers to run actions and use resources on the local device rather than in the Cloud for lower latency.
One company that updated its devices is Yeelight whose WiFi smart lights have now been enhanced with the Google Local Home SDK helping deliver a latency of less than 0.3 seconds, so you don’t need to wait after your voice command has been processed by Google Assistant.
Unboxing of Yeelight Smart LED Bulb 1S (Color)
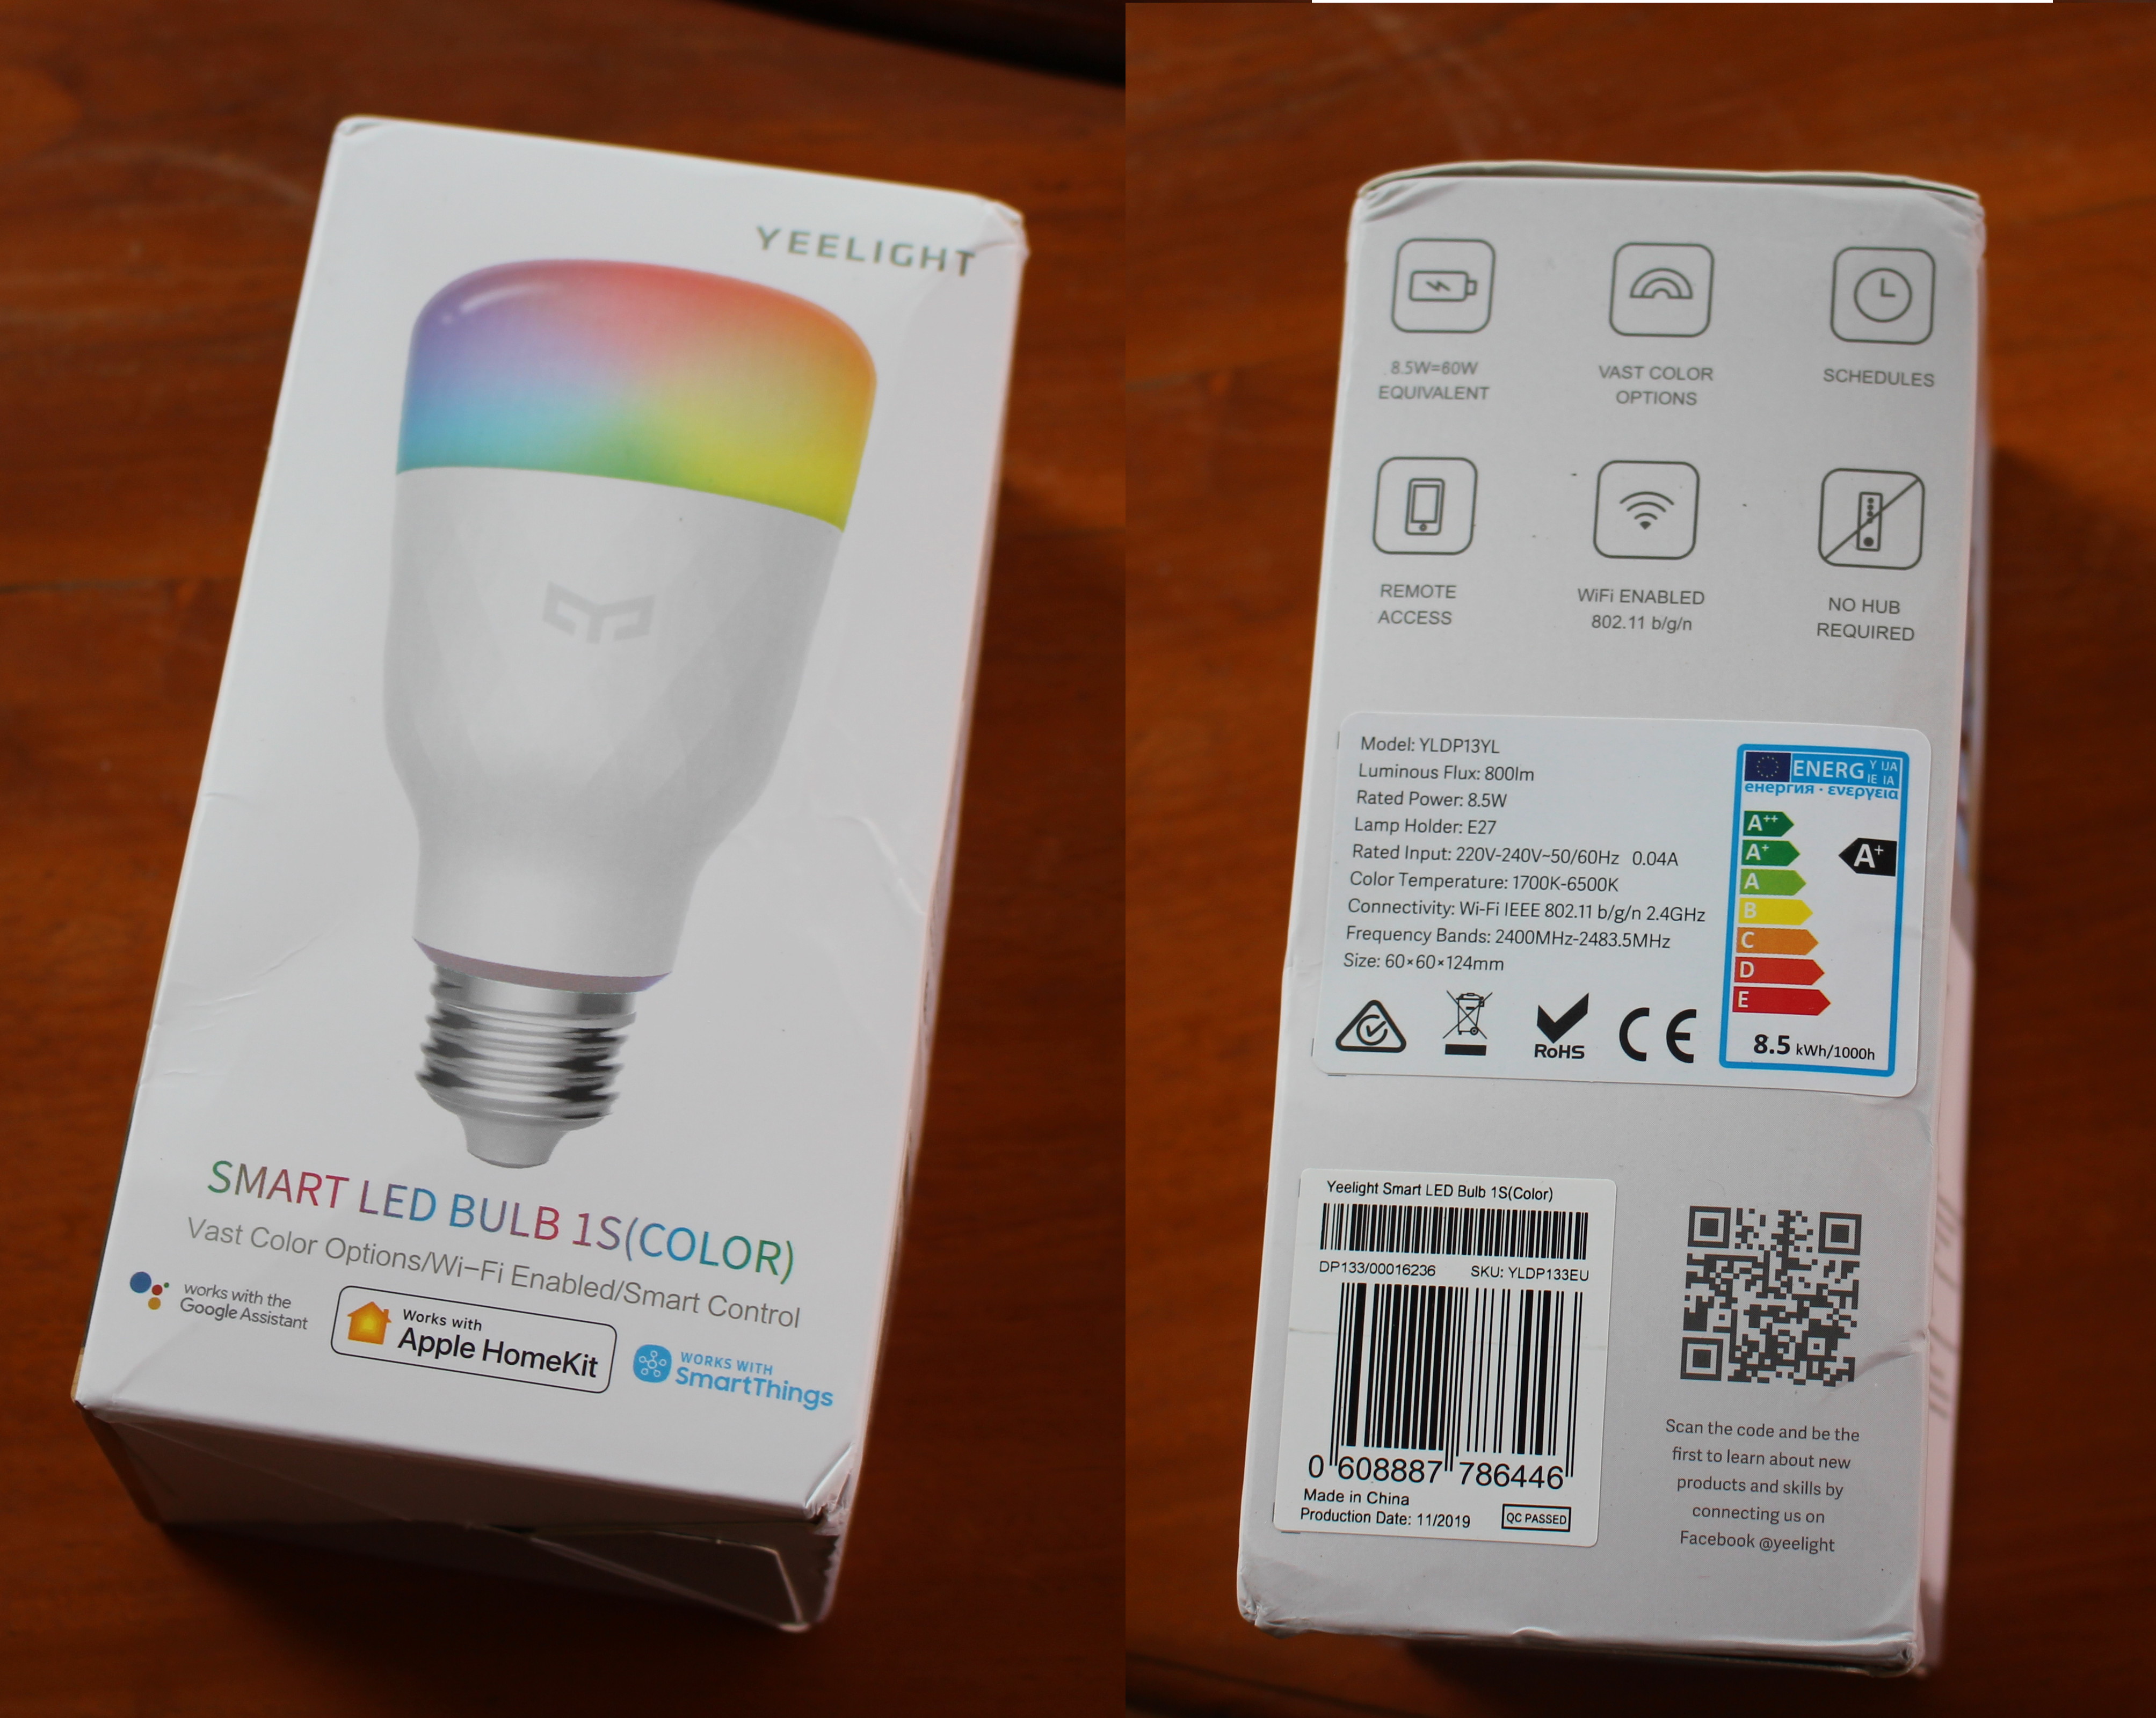 The package has some useful information about the light bulb including some specifications such as its 8.5W rated power, and integration with services such as Google Assistant, Apple HomeKit, and SmartThings.

The light bulb comes with a multi-lingual user manual (English, French, German, Russian, Spanish, and Polish) explaining how to get started.
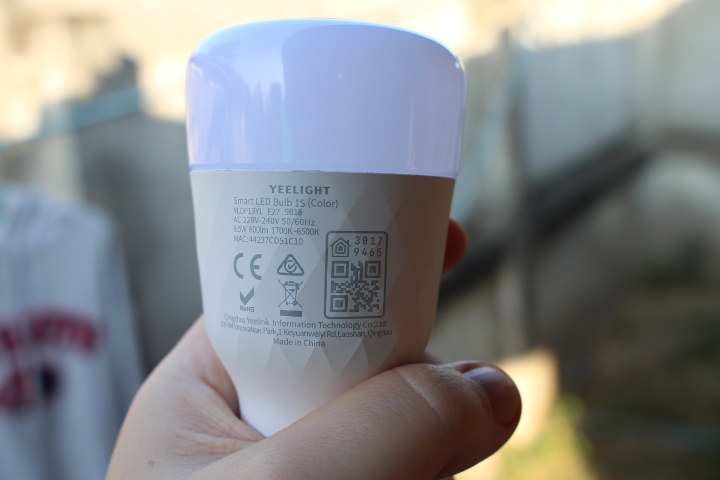
The specific model of the light bulb I received is YLDP13YL with an E27 holder and designed for 220V-240V mains supply, but the user manual also shows other models made by the company.
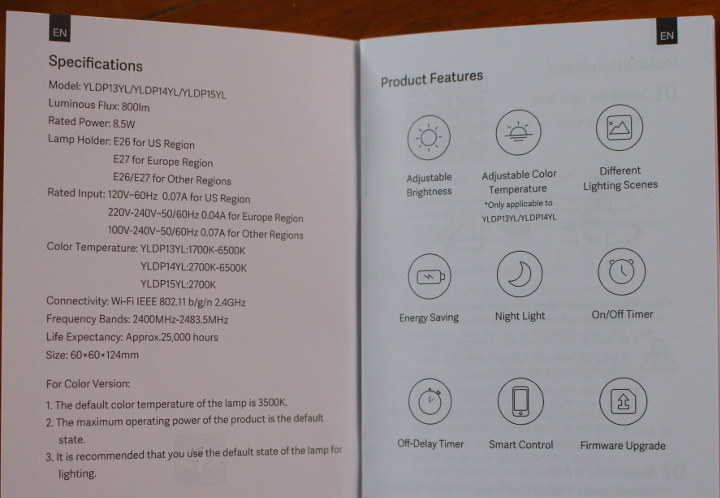
They differ in terms of lamp holder (E27/E26), rated power, and color temperature.
Yeelight App
The easiest way to get started is with Yeelight mobile app available for Android and iOS. I installed the former on Xiaomi Mi A2 smartphone with Android 9.0 operating system.
Once you start the app, you’ll be asked to select the server closest to your location (auto-detected), and log into or register to the Xiaomi Mi service.
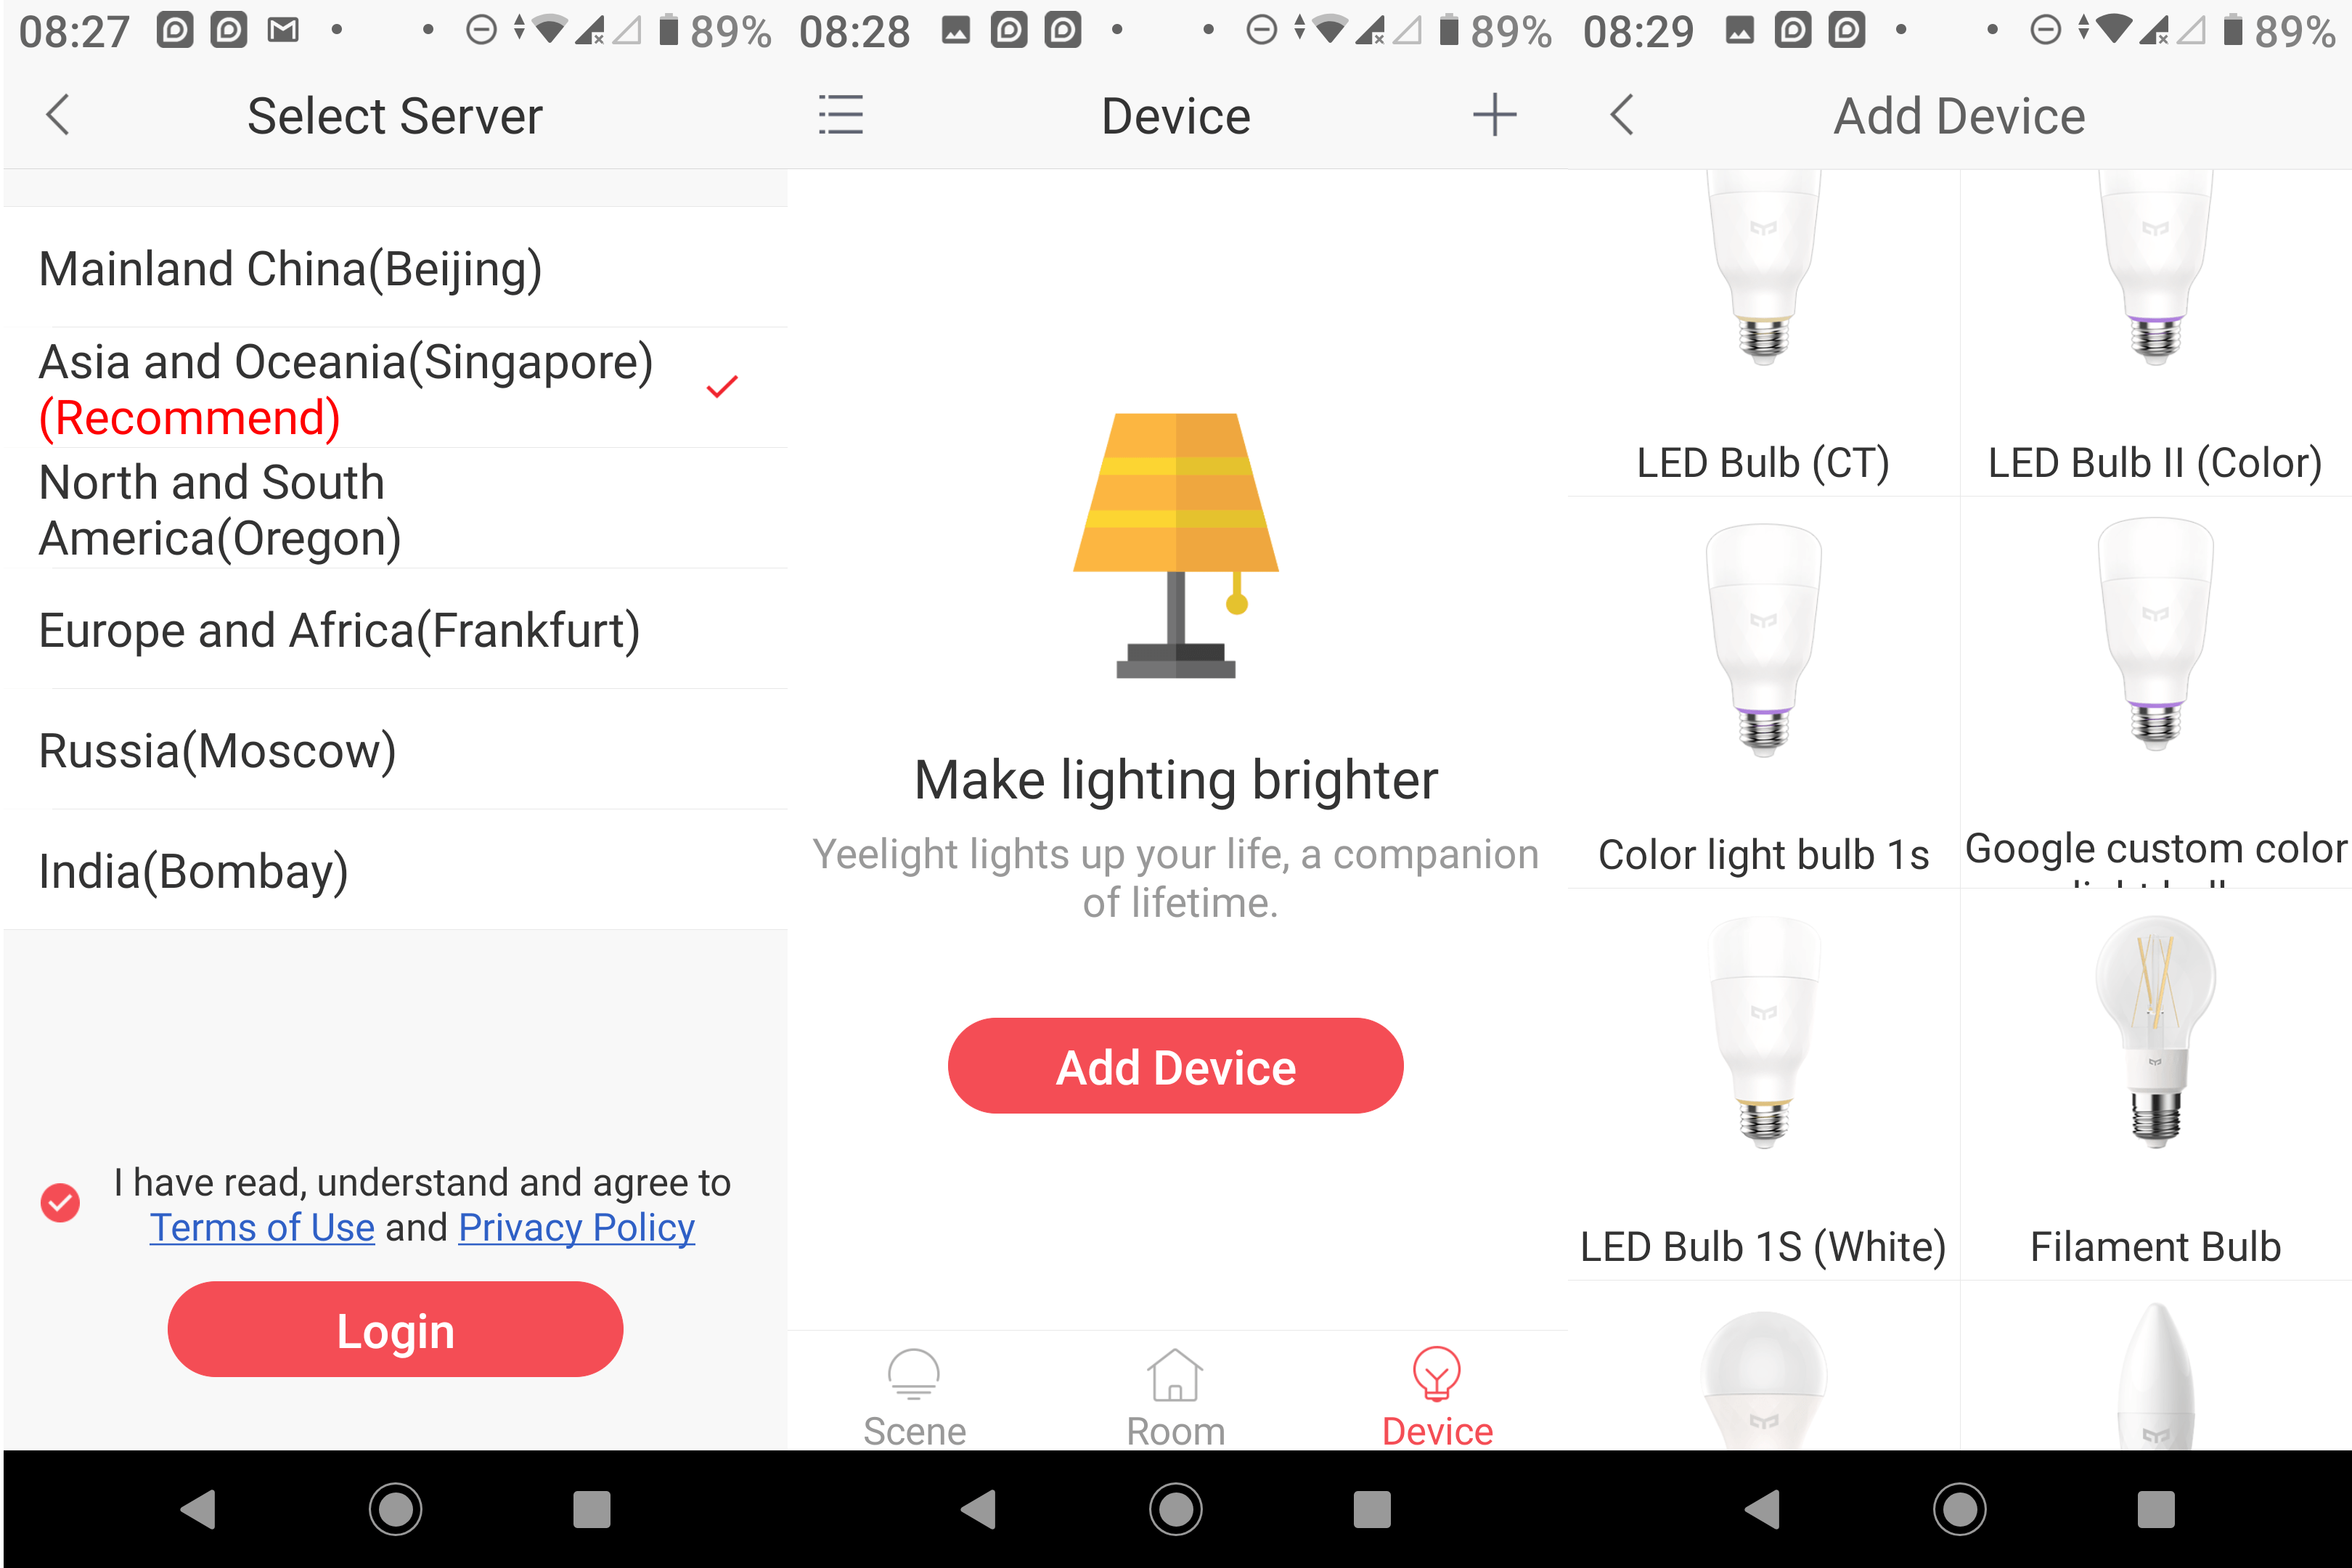
Then you can tap on Add Device and select Color light bulb 1s from the list or whatever model you’ve purchased.

Make sure your device is turned on, and tap on Next to start scanning for devices. It should soon enough find the MAC address of your device(s), let you set the name of your light bulb, and then configure WiFi in the next step. Note your smartphone must be in the same 2.4GHz network as you’ll configure your light bulb. I’m using 802.11ac normally, so I had to switch first.
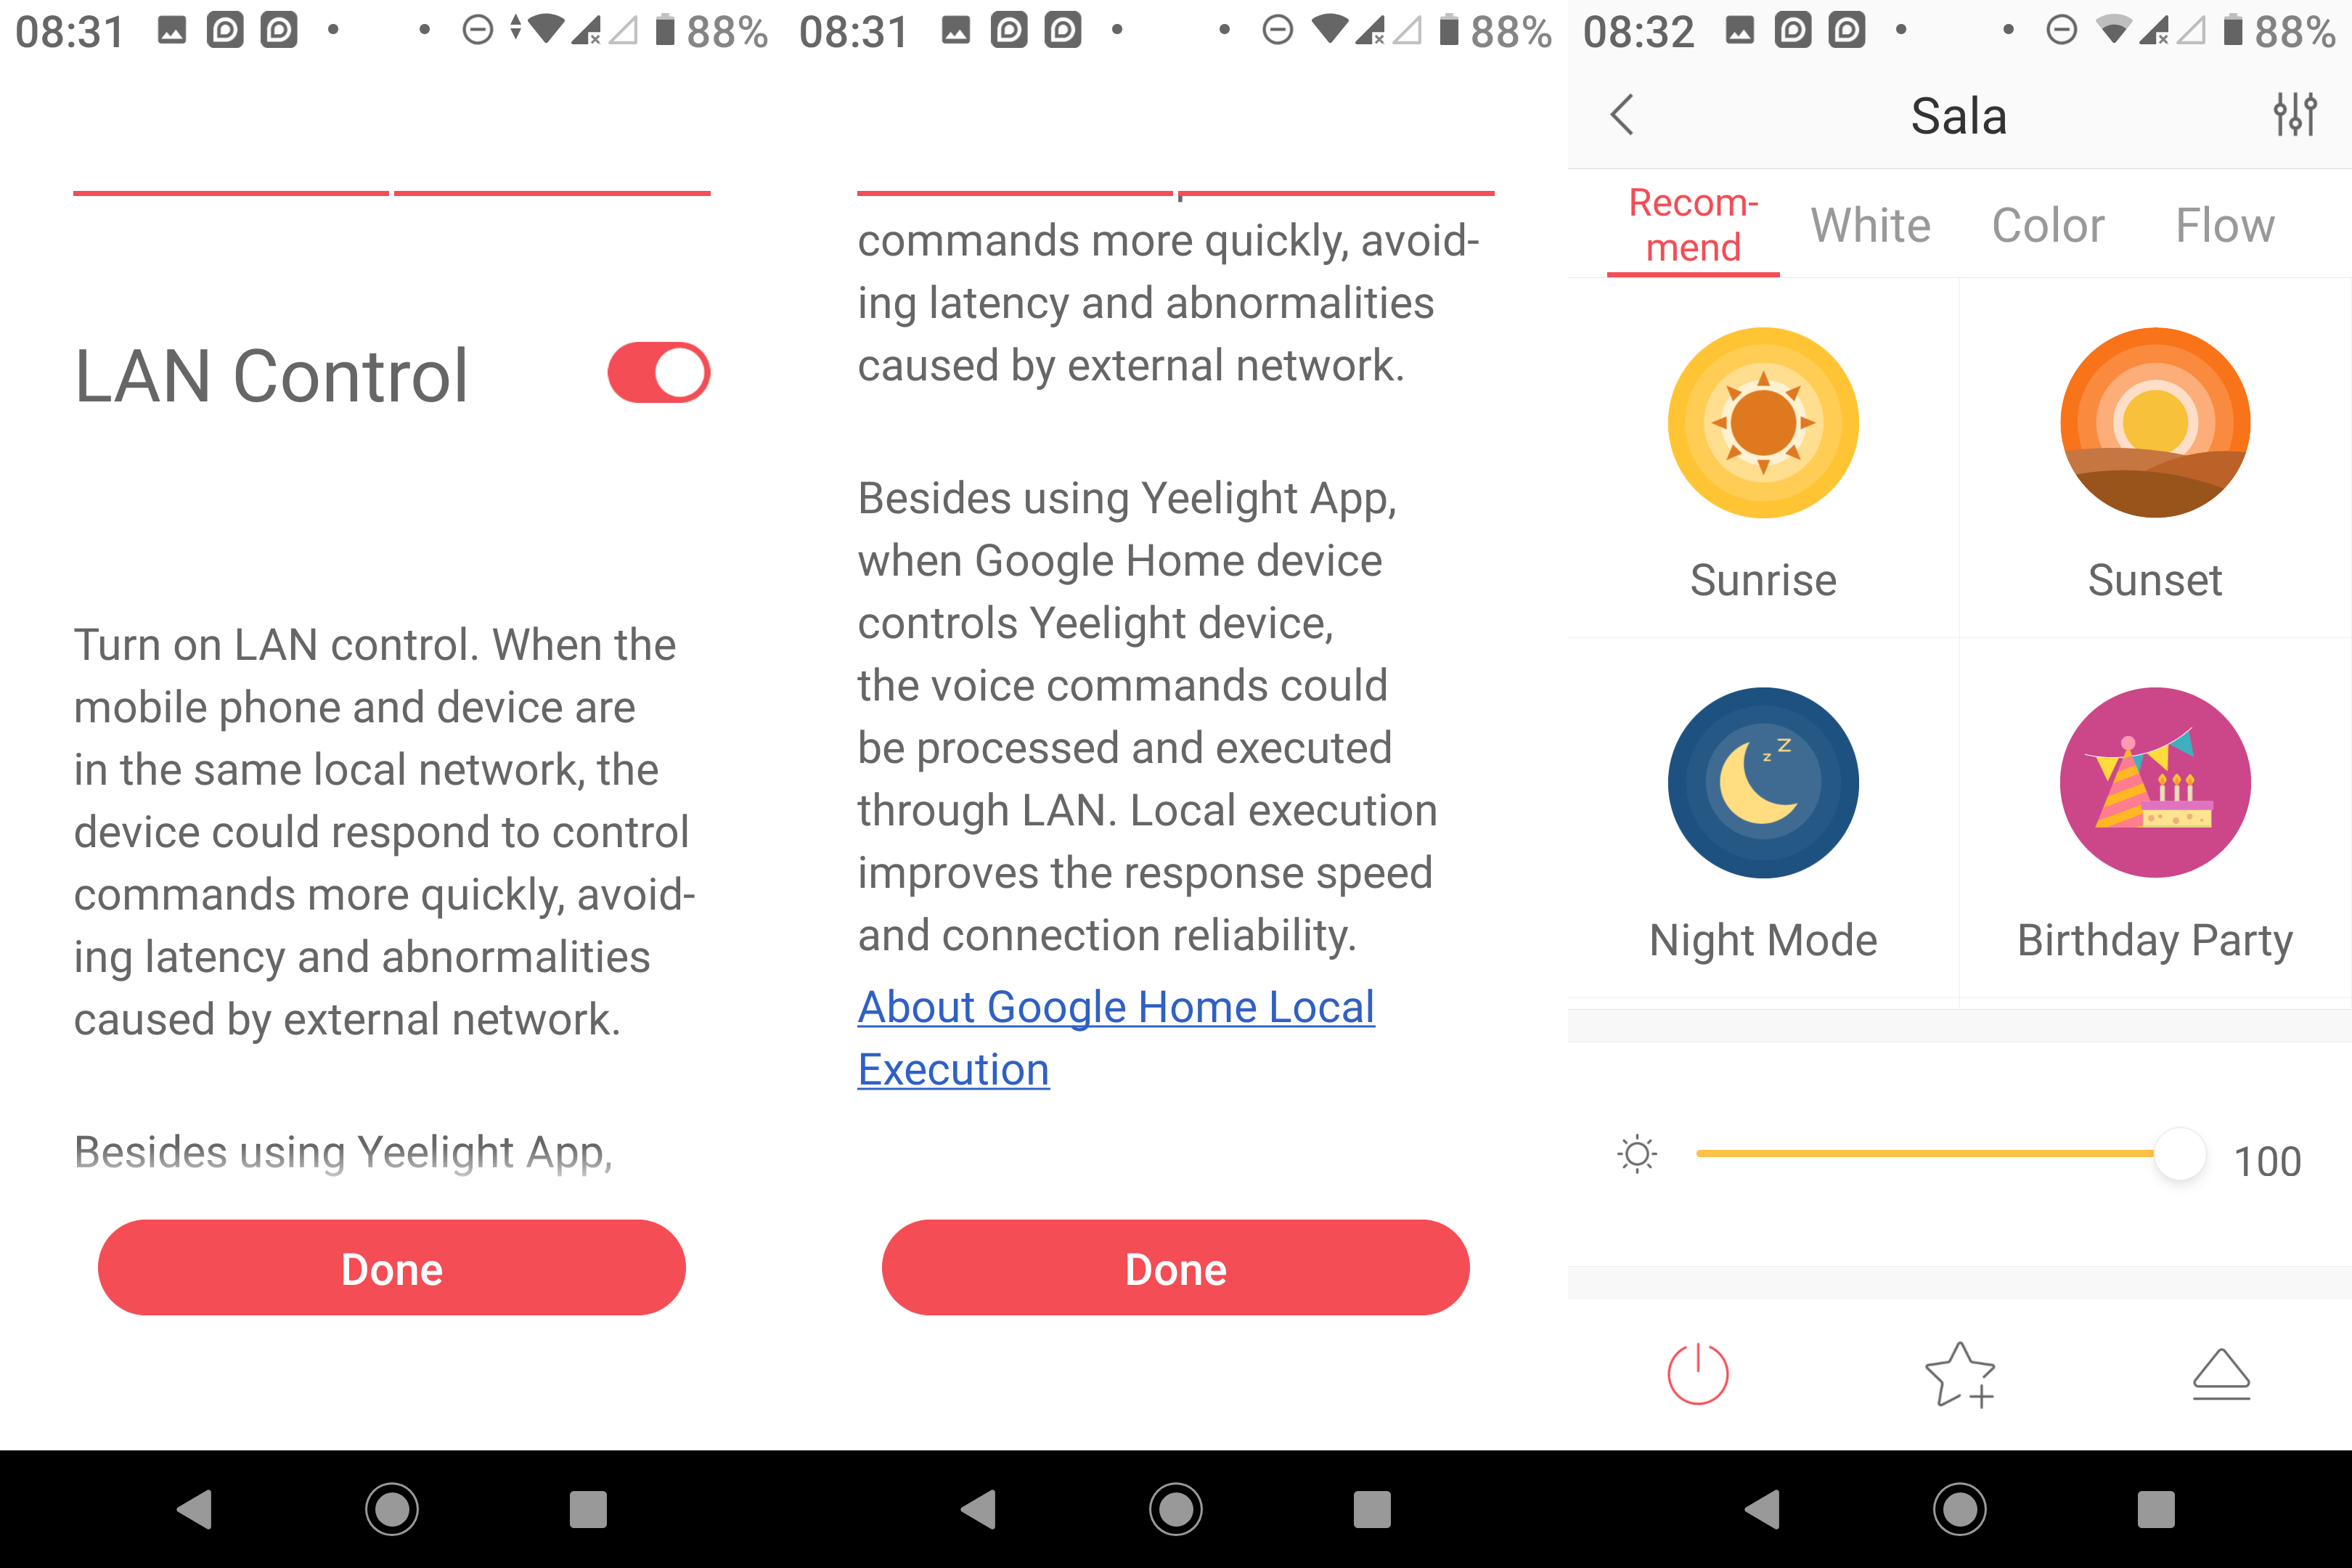
You’ll probably want to enable LAN control as well as which will make your light(s) more responsive than having to go through the cloud each time. LAN control can be used with both the Yeelight app and Google (Local) Home. That’s the last step and you’re now ready to control the light with some default color schemes and adjust the brightness in the main menu.
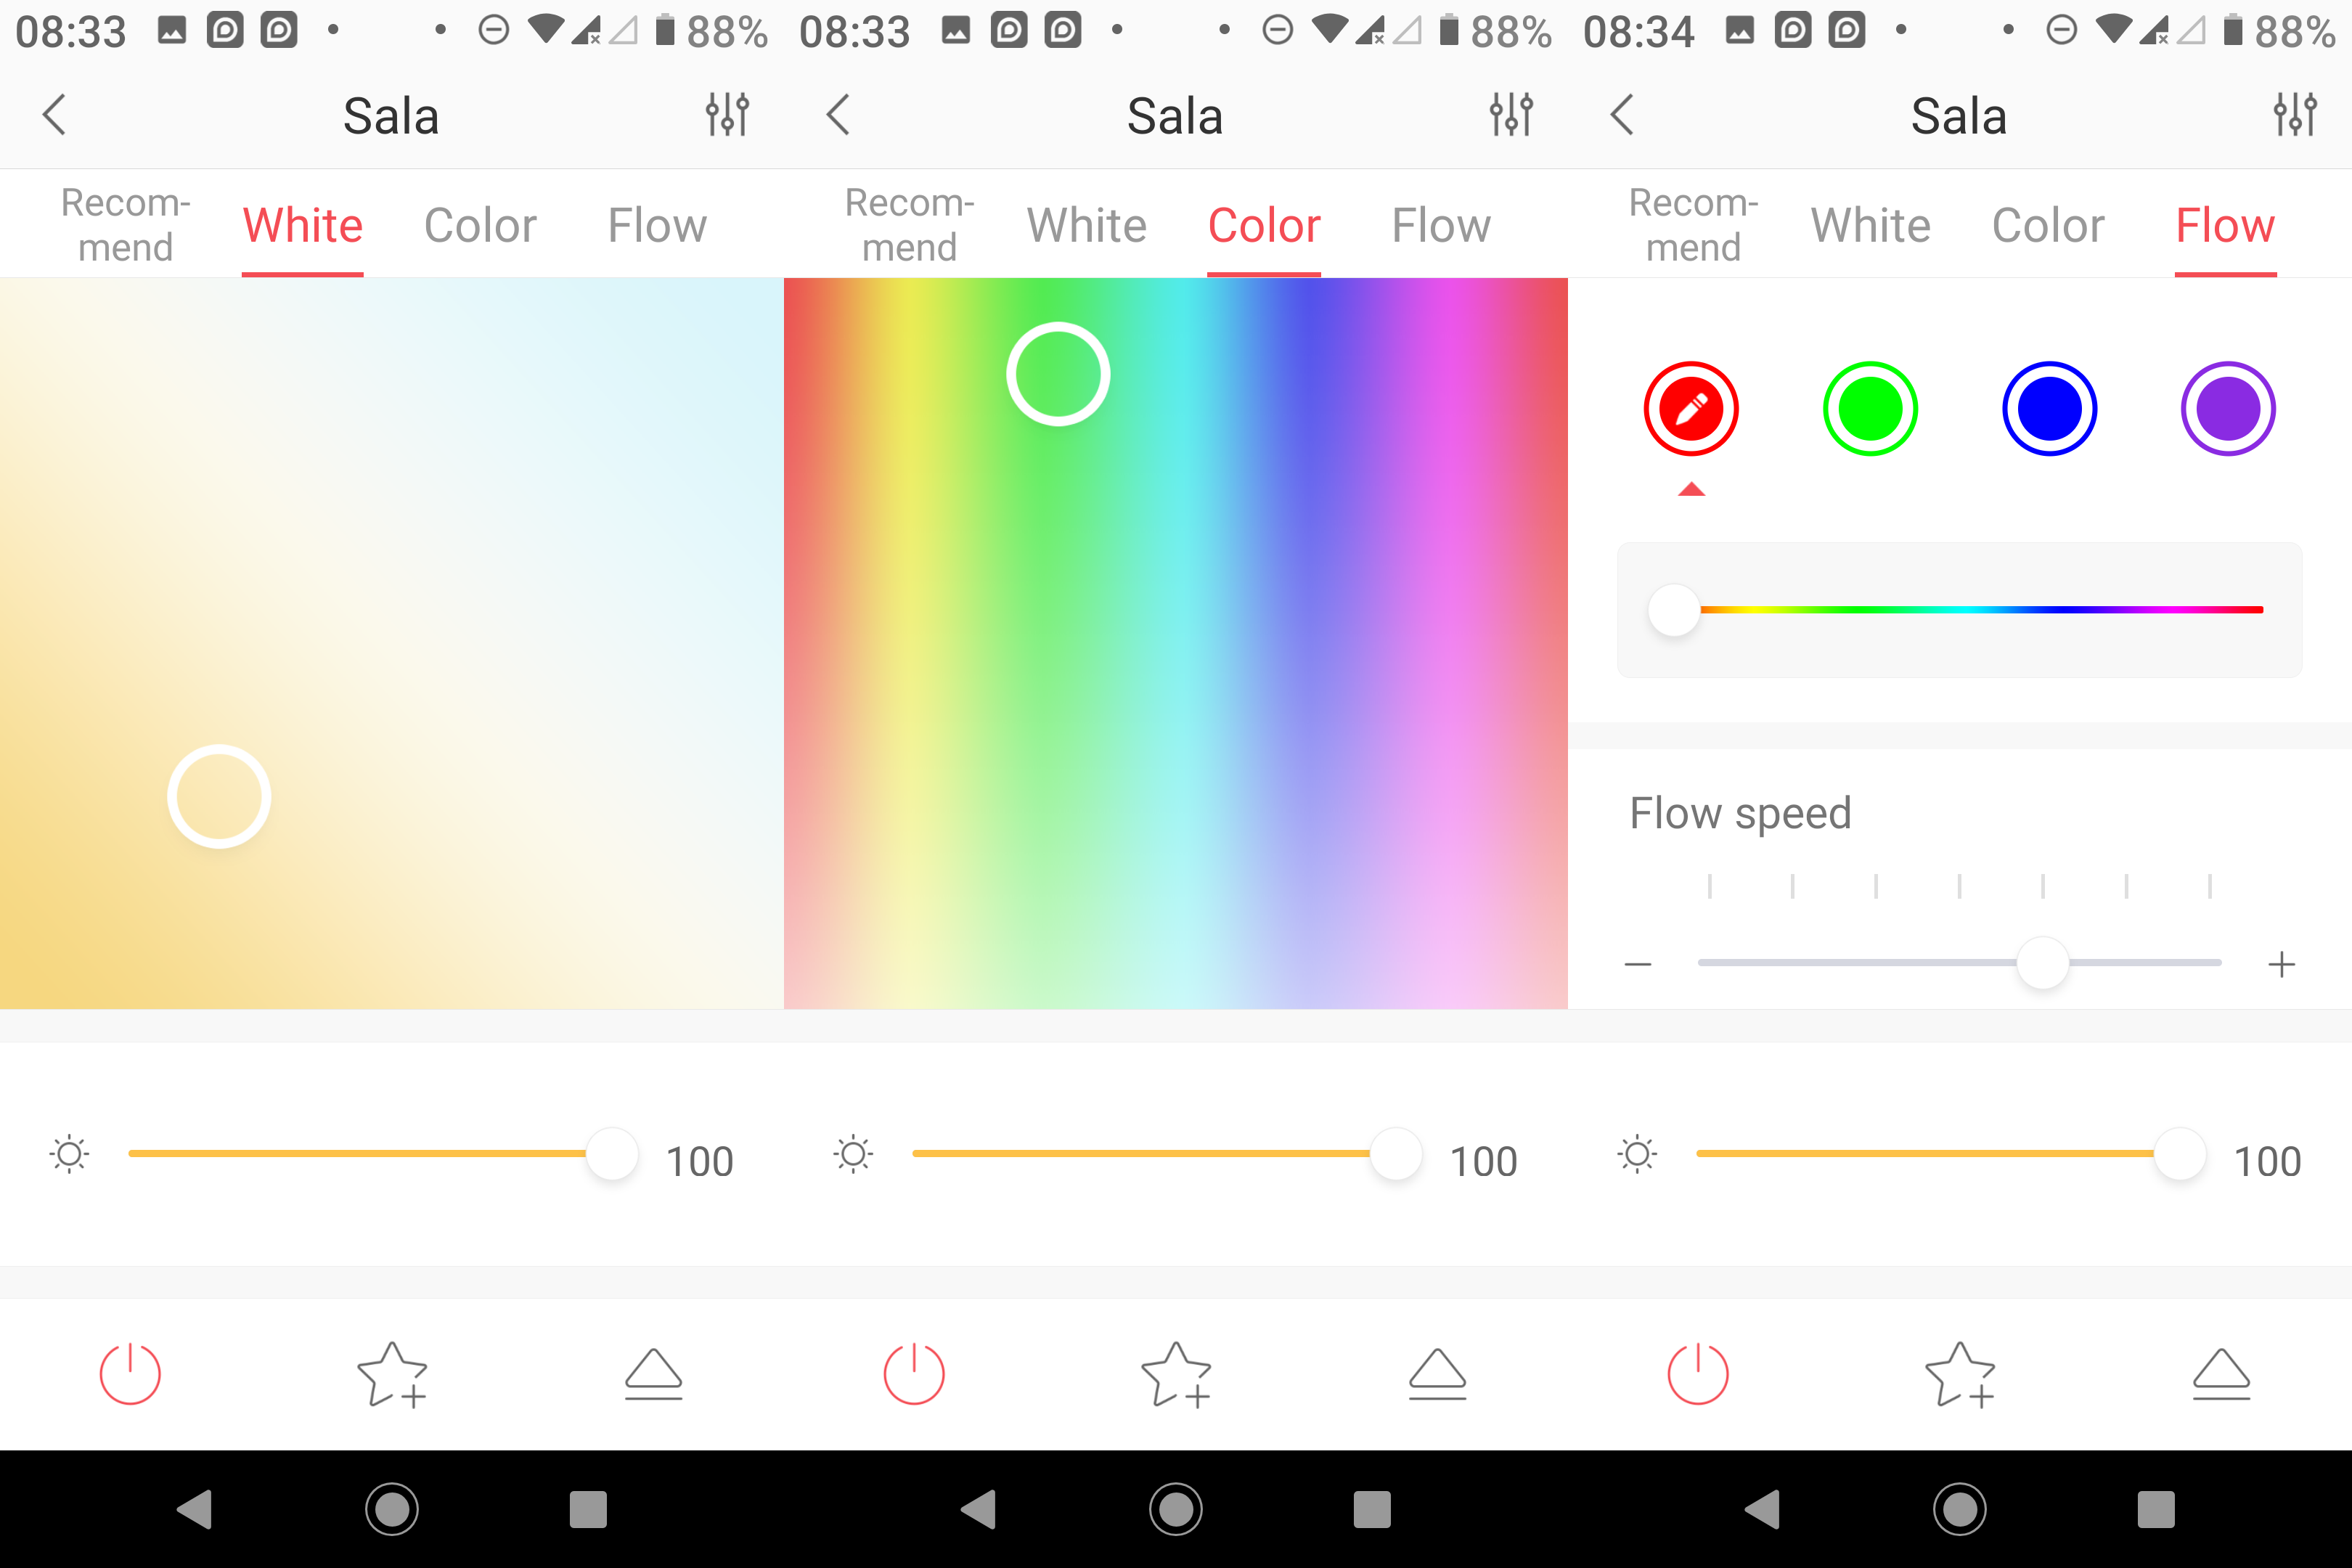
There are also tabs to control the temperature and brightness of the white light, select other colors, and the “Flow” tab will make the light cycles through various colors at a speed of your choice.
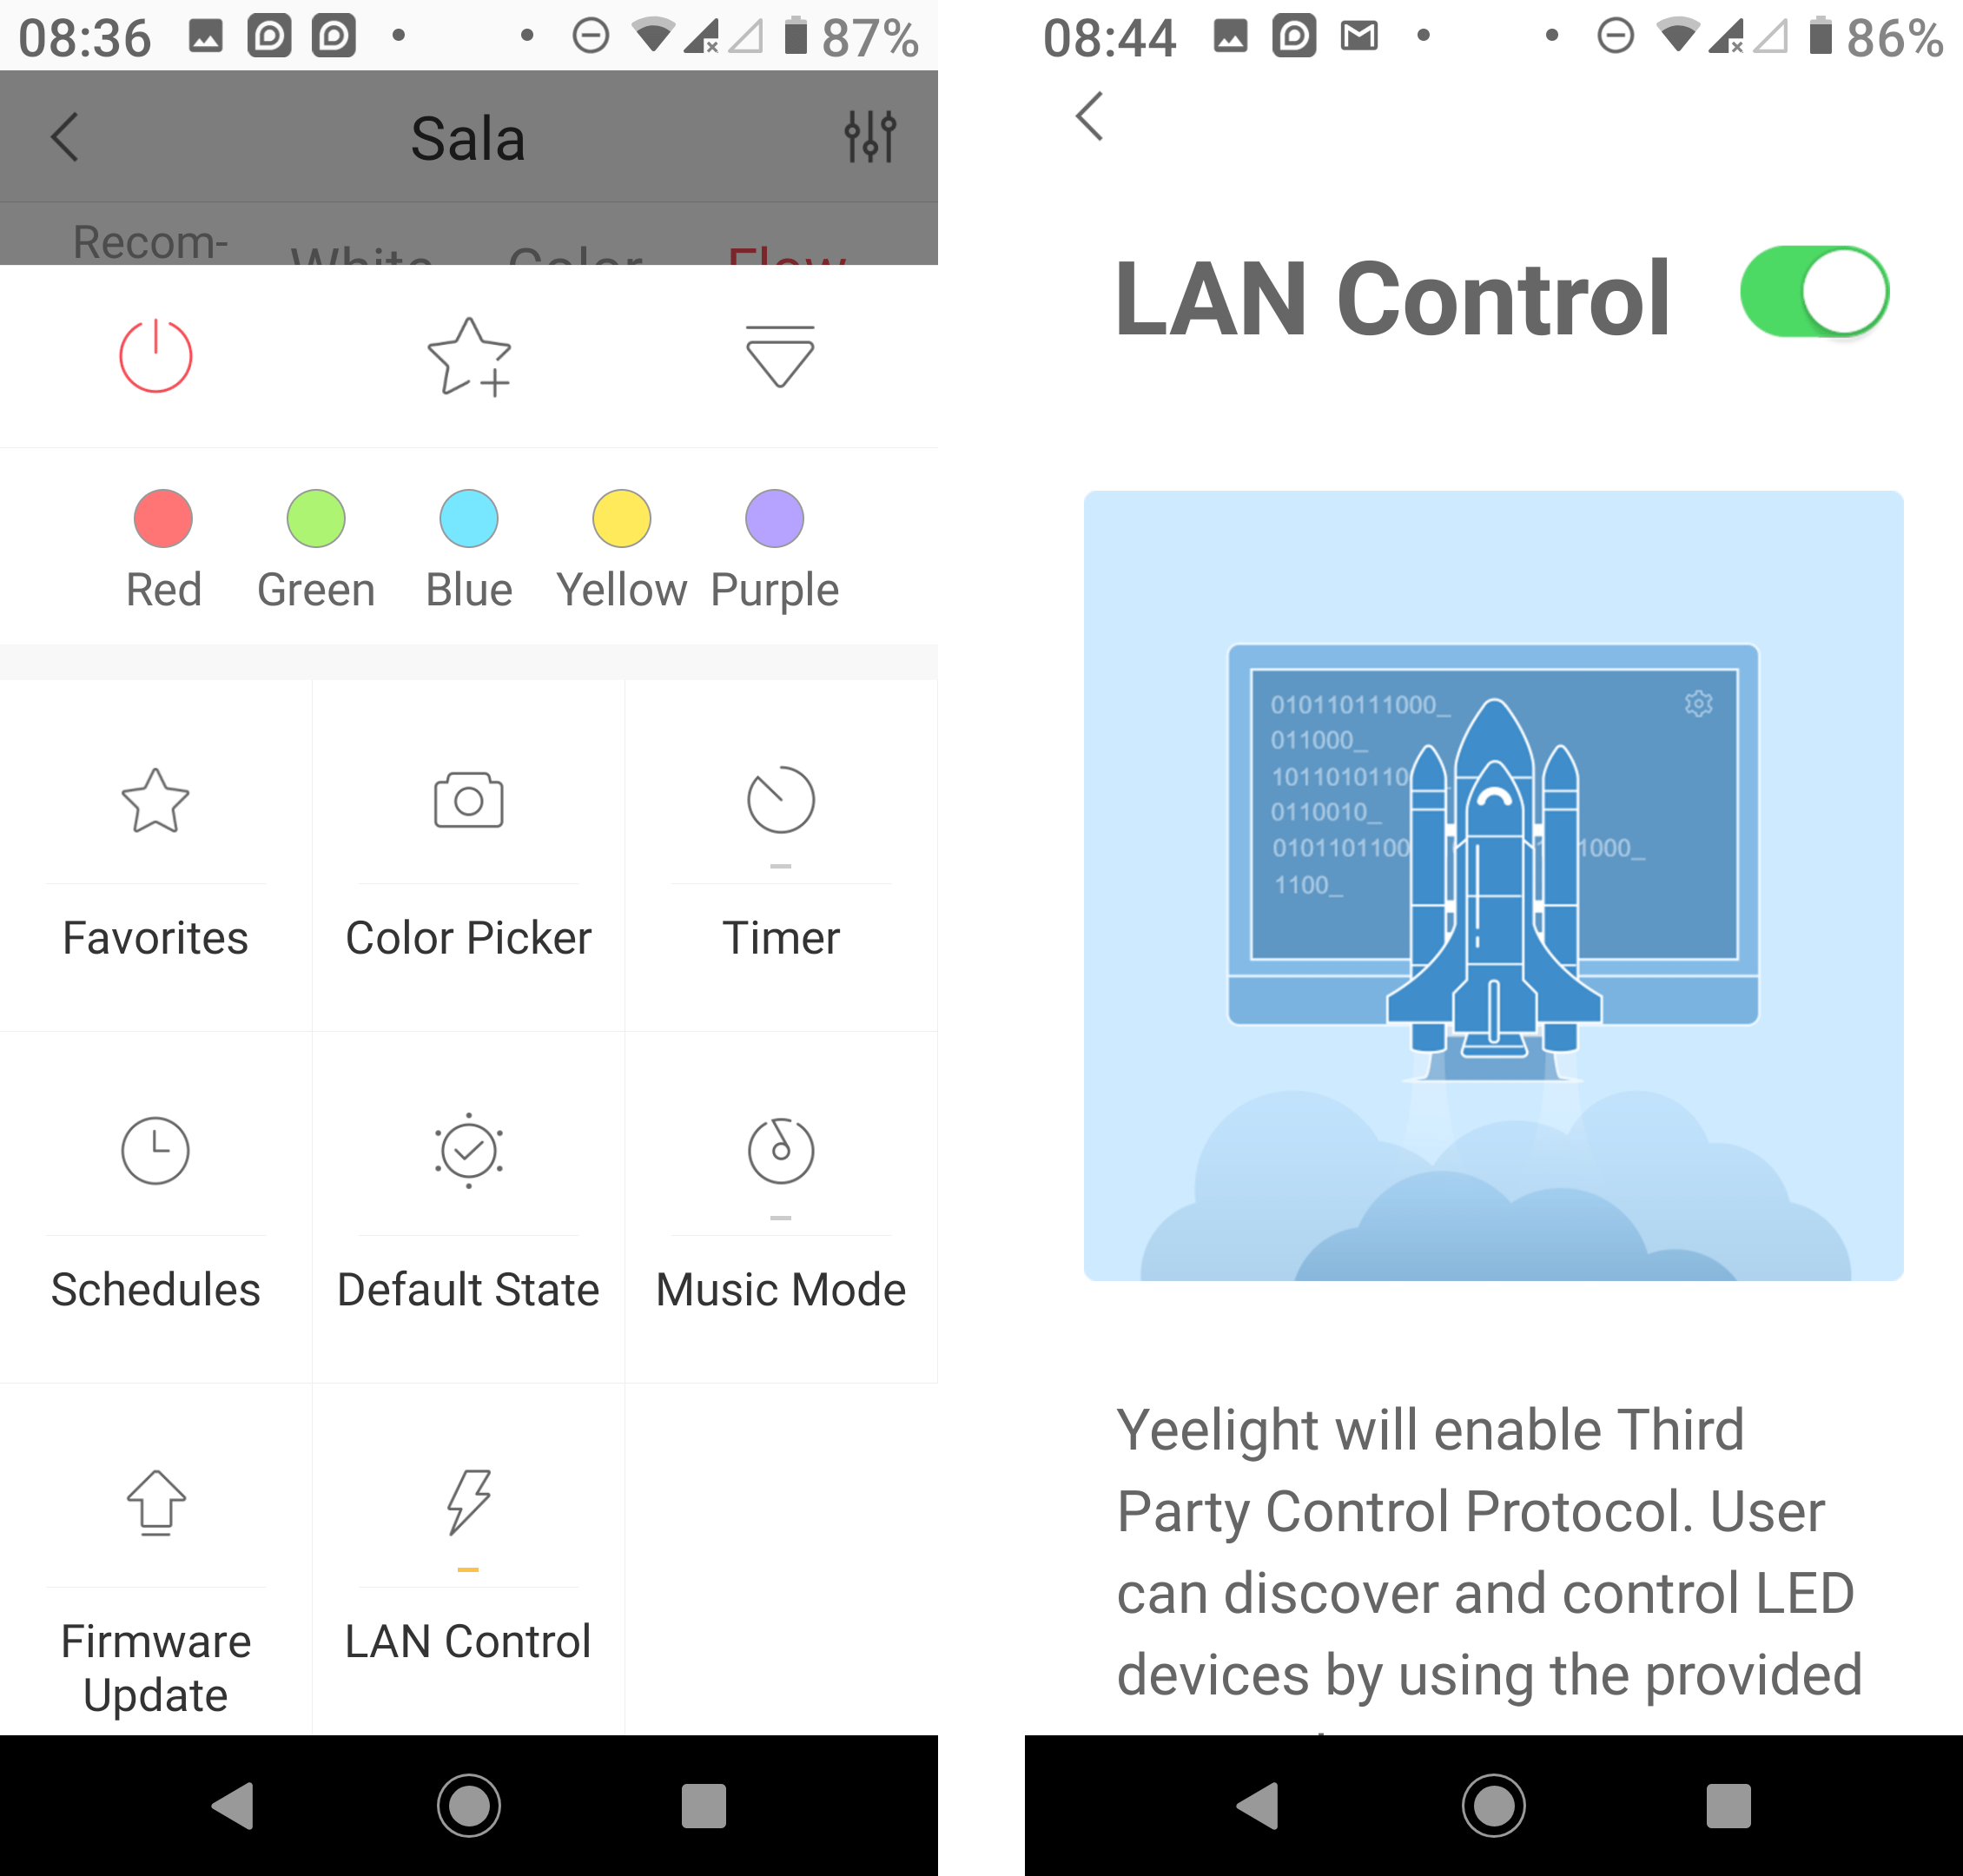
Tapping on the triangle icon on the bottom bar inside the app will bring more options with shortcuts to common colors, favorites, a color picker, icons to set timers, define schedules, synchronize the light to music, change LAN control setting and upgrade the firmware.
Firmware Update and Factory Reset
Everything was working well, so I decided to check for firmware updates. There was a new firmware detected, so I went ahead, and it failed at around 60%. It resulted in my losing control of the light. It would be stuck to the latest color I selected (green), and I could still turn it on and off with the physical switch, but it would just show offline in the app.
So I decided to read the user manual to try to reset the device to factory settings. The method is to turn on and off the light 5 times with 2 seconds interval, and once it was done the light changed to white like the very first time I used it.
It looked good, but I could not add the light bulb to Yeelight anymore. I was told to connect my phone WiFi to “yeelink-light-color***” SSID during setup, but all I got was “YLBulbColor1s-***” SSID. I tried anyway, but no luck. After various failed attempts, and more discussion with Yeelight employees, I tried to factory reset again, and finally, I could see “yeelink-light-color***” SSID, and regain control of my light bulb. I was later explained that “YLBulbColor1s” is needed for Apple Homekit, and it’s unclear why my light bulb was in this state.
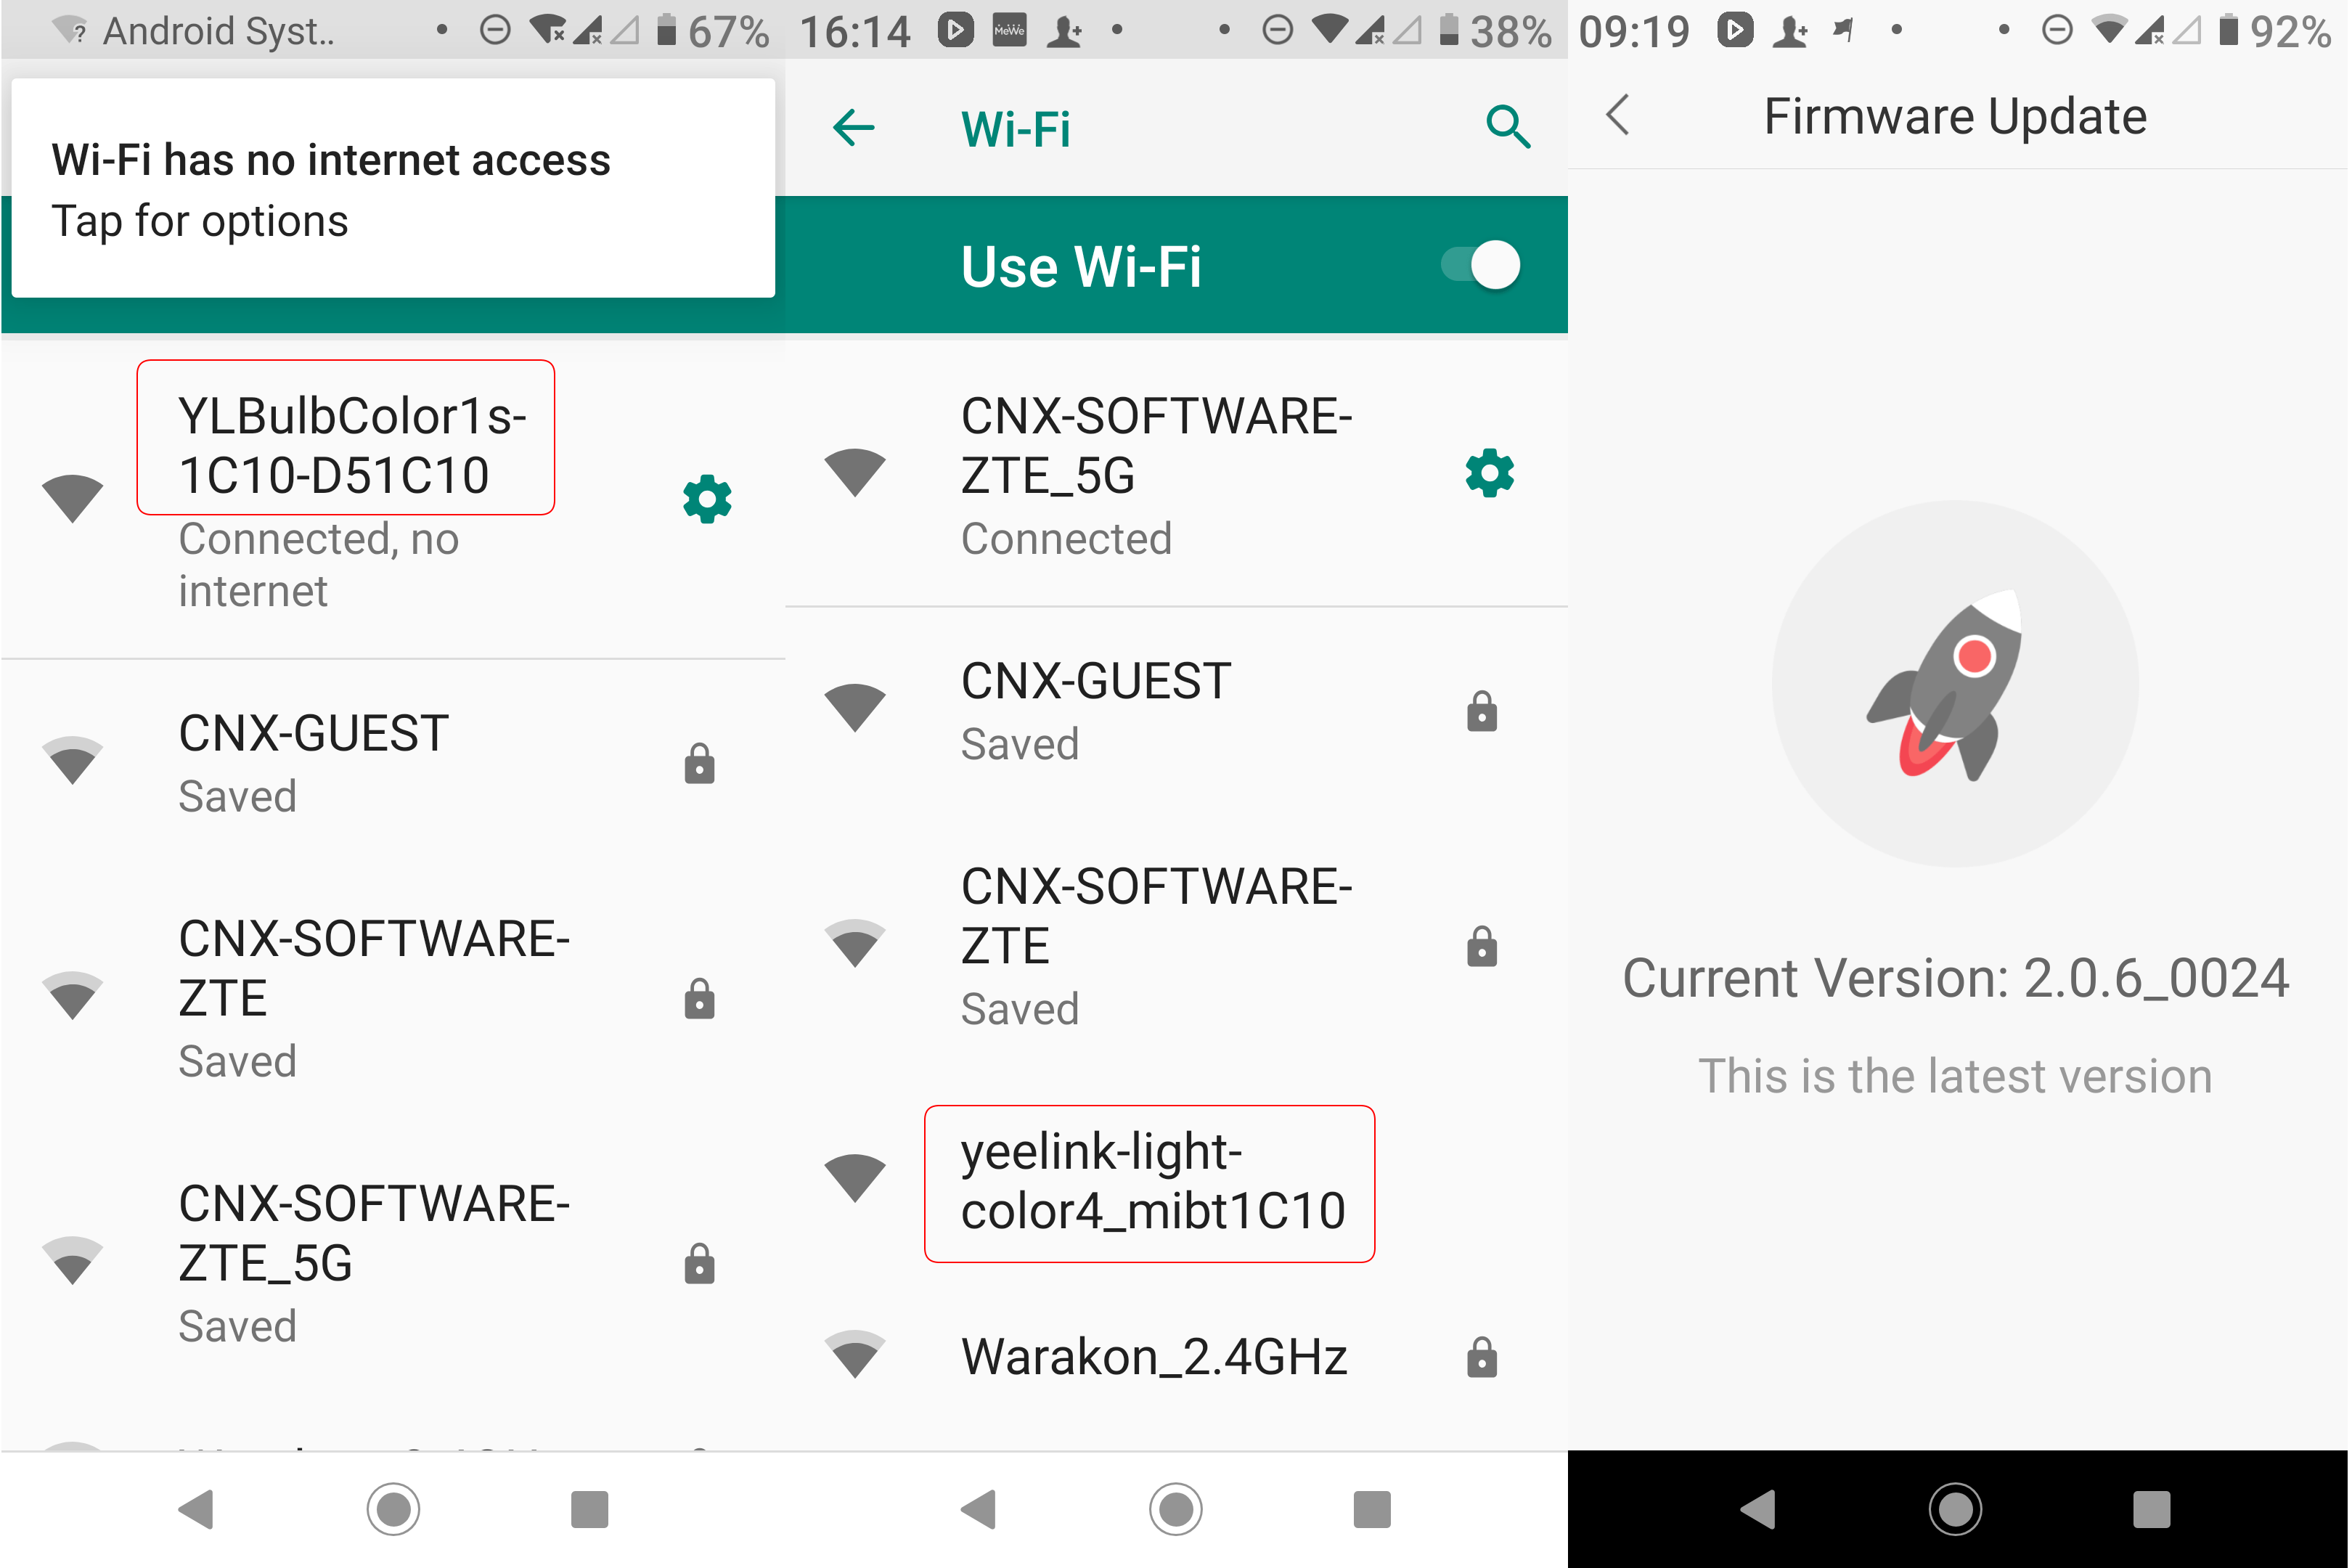
Despite the firmware update “failing” last time around, it showed I had the latest version (2.0.6_0024 at the time of writing).
Google Home Control
You’ll need to have Google app, as well as Google Home and Google Assistant apps installed and enabled on your phone. The first time I tried it said Google Assistant was not supported by your phone, and as I have an Android One phone it was really unexpected. It turns out I had disabled the Google app on my phone to avoid some annoyances and re-enabling it fixed the issue with Google Assistant.
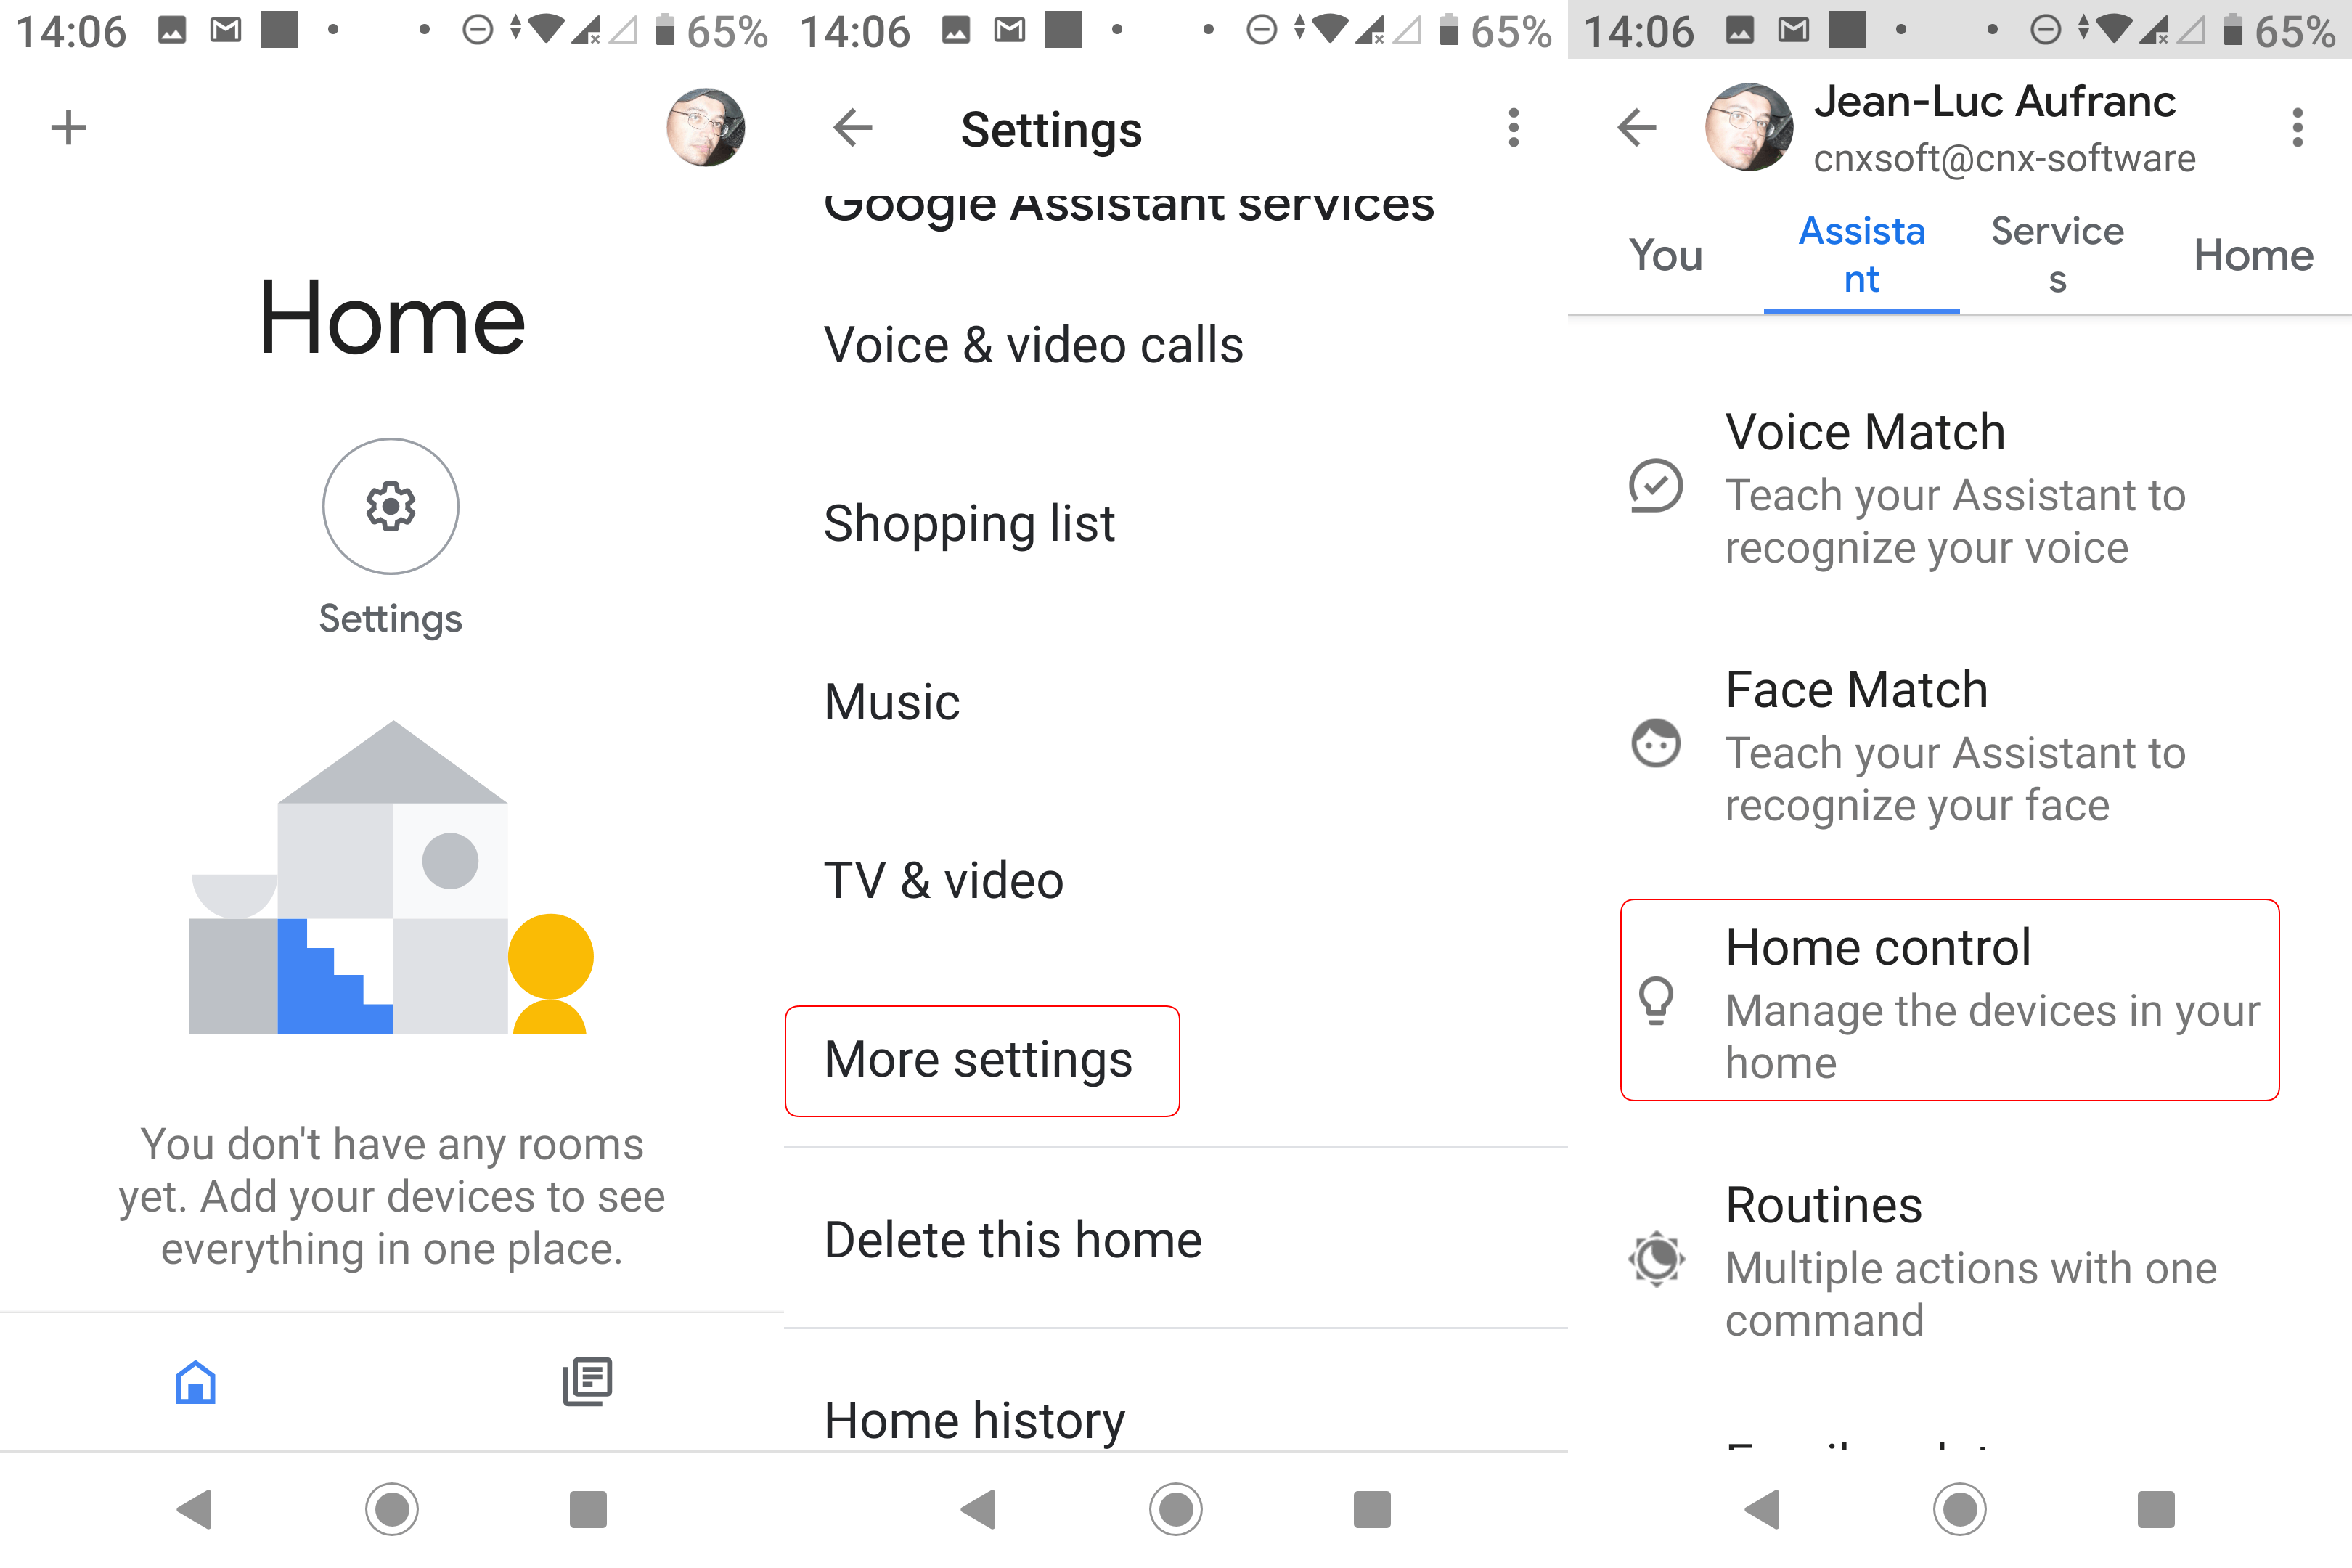
First, launch Google Home, tap on your profile icon/photo on the top right corner to access the Settings, tap on More settings, select the Assistant tab, and tap on Home control.
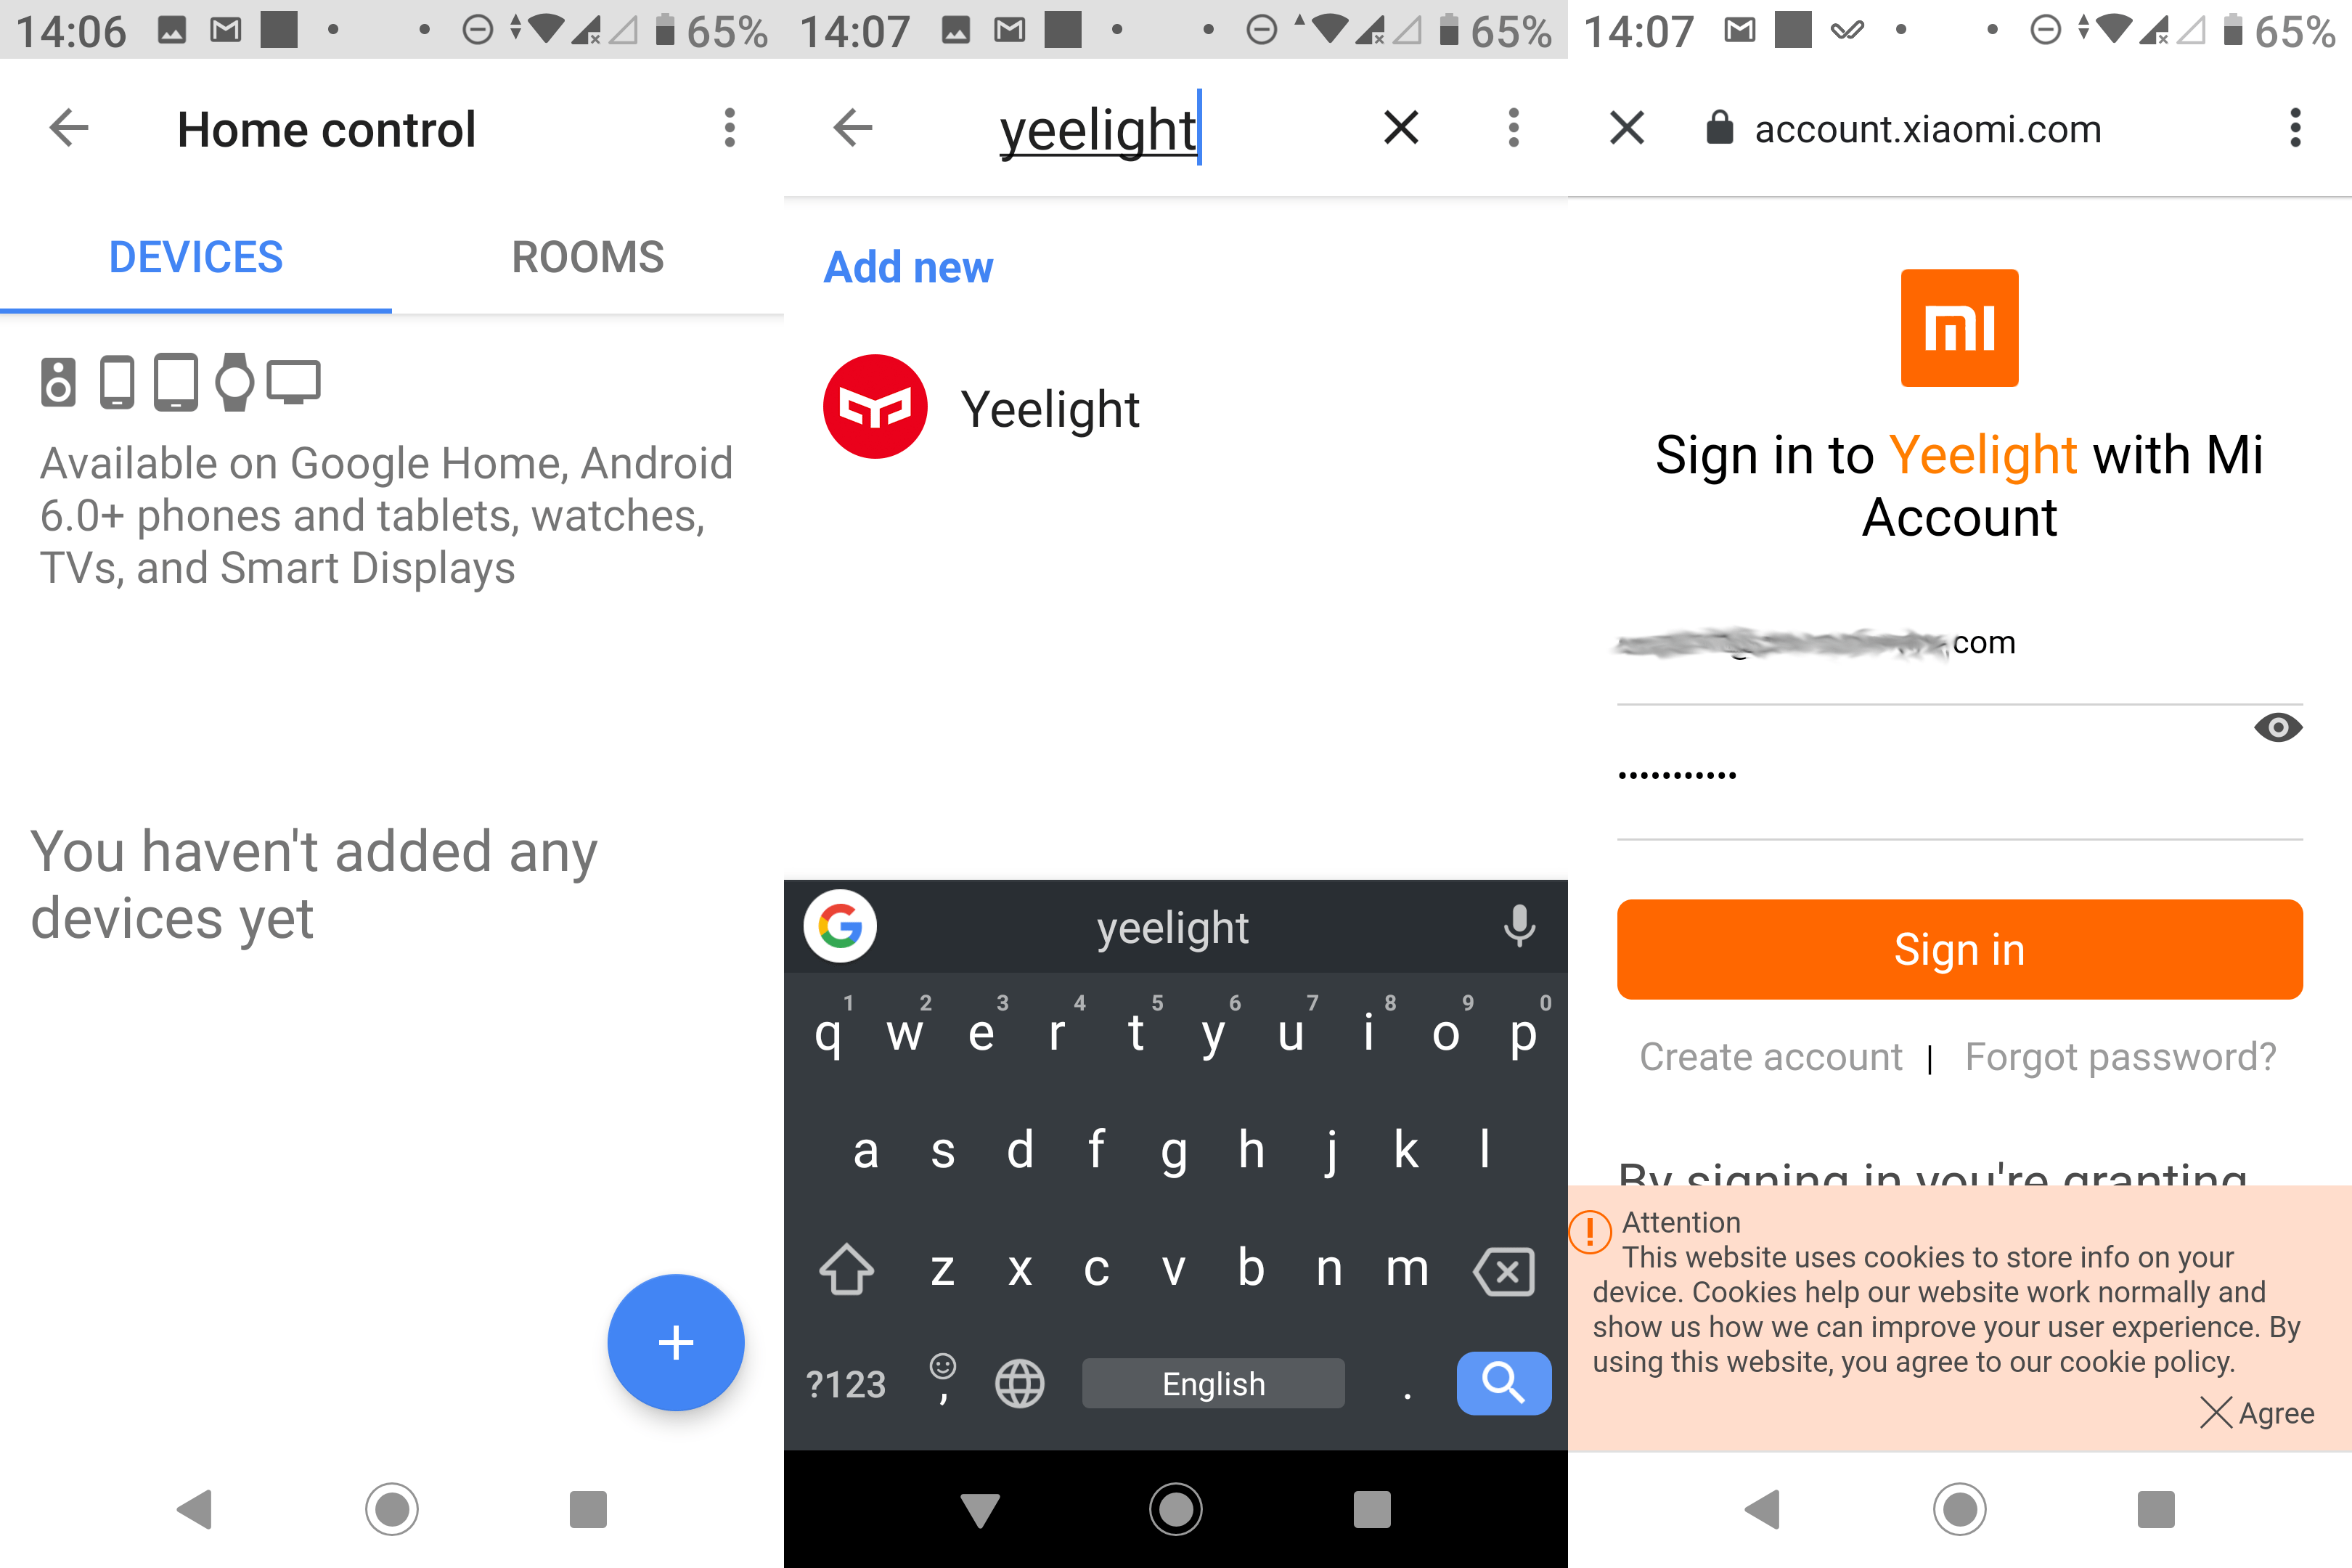
Click on the + icon, and search for Yeelight. Select the service and log into your Mi account.
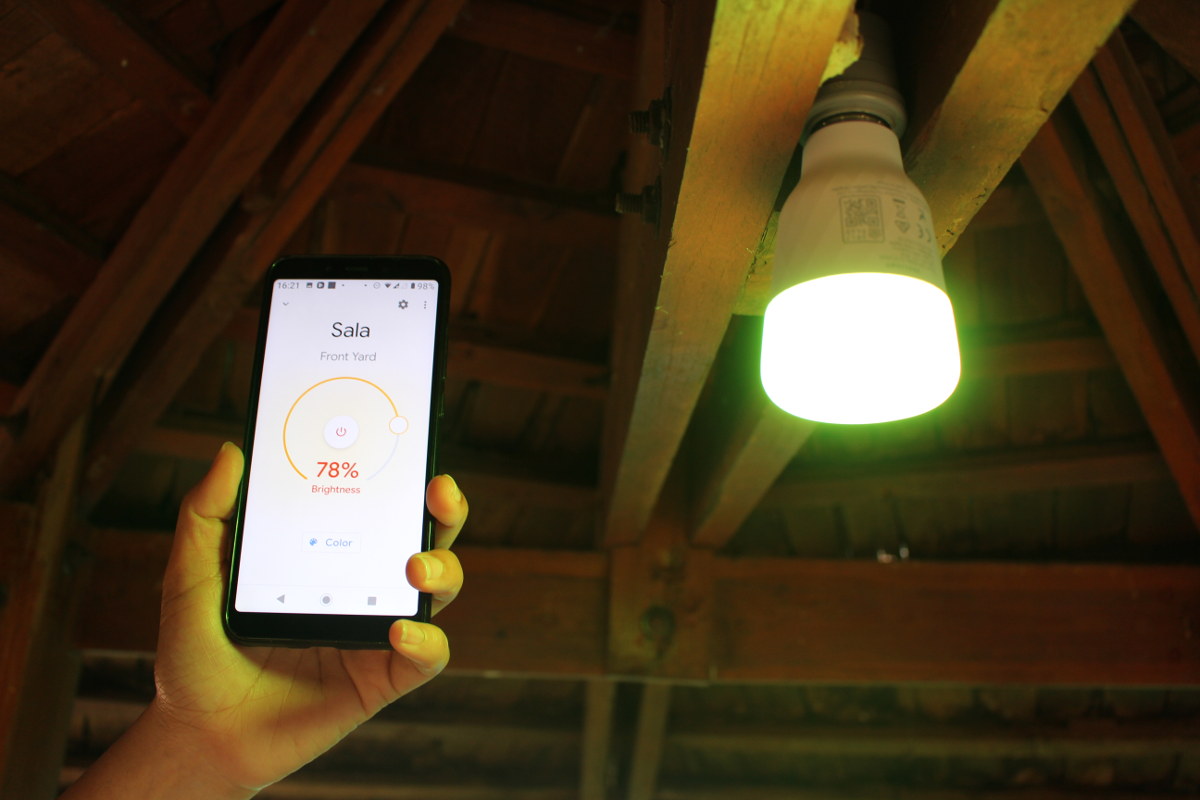
All good! Now you should see the light in Google Home, and you can issue voice command after saying “OK Google” or “Hey Google” to turn on and off the light, set the color and brightness.
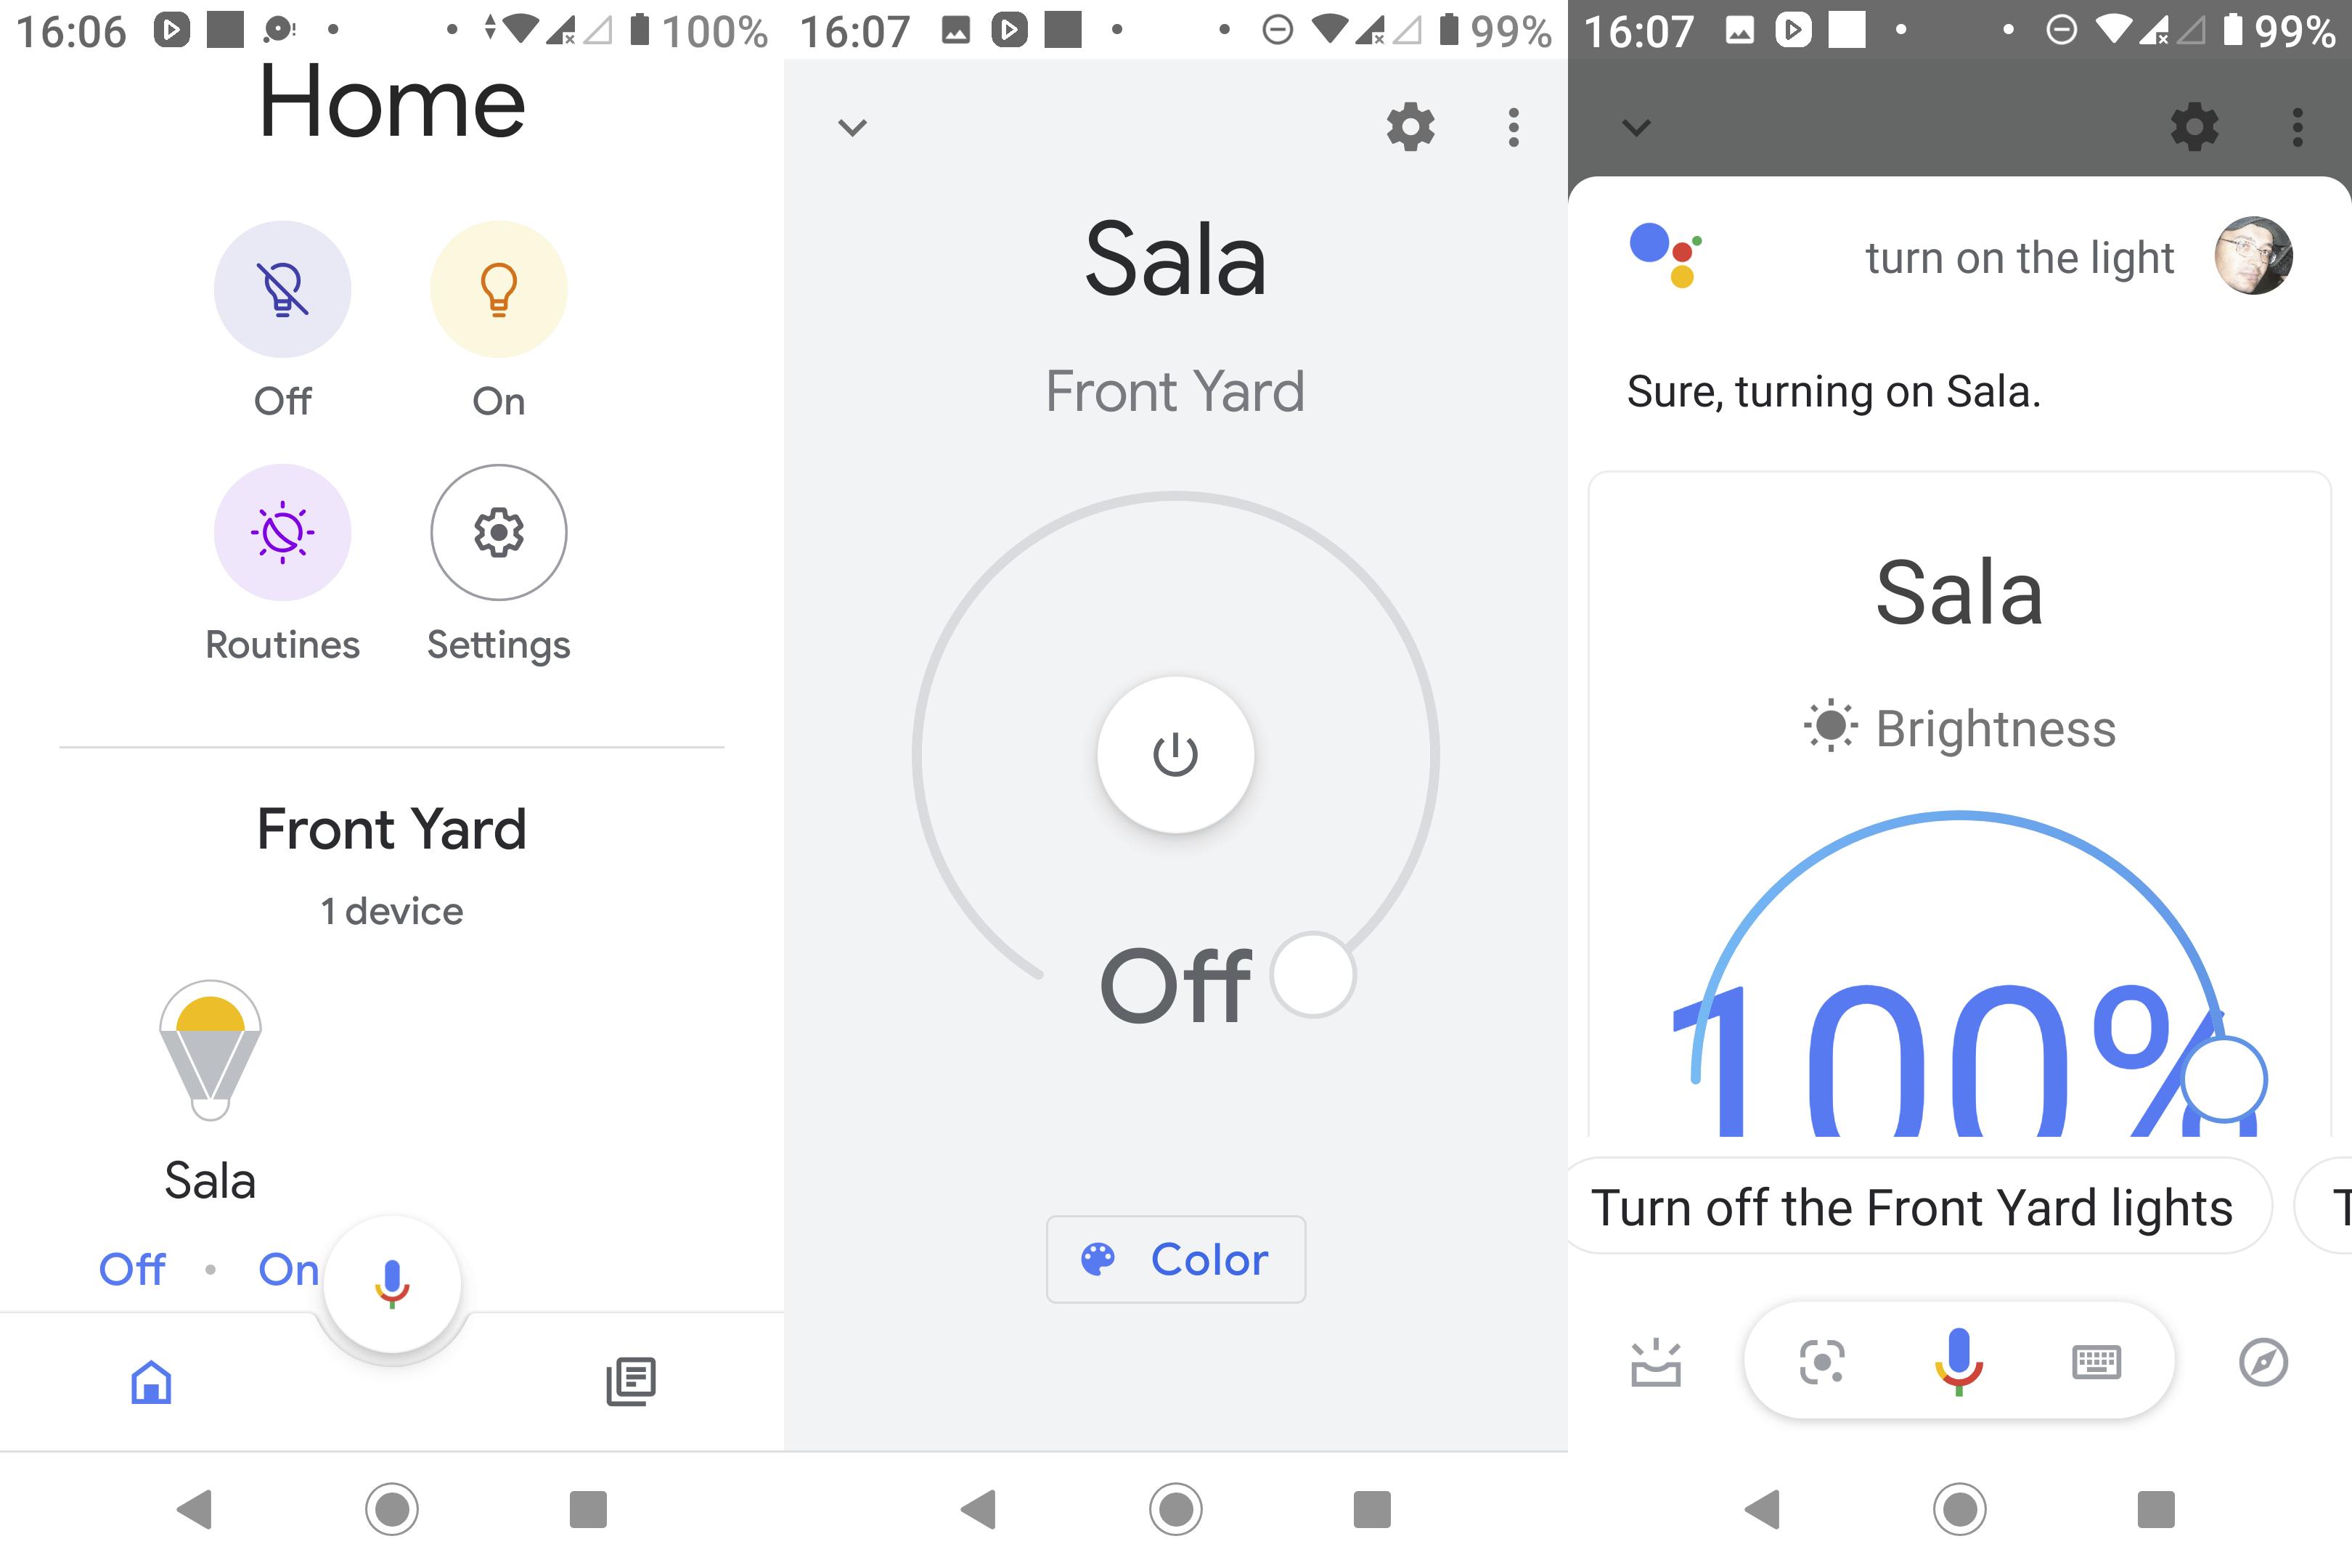
I’ve shot a video to show the responsiveness of the commands. I’m using simple commands like “Turn on the light” since I have only one light, but if you have more than one, you’d have to be more specific given the name of the light or room, for instance, “Turn on the front yard light”.

After asking Google to turn on the light, I was expecting it to be aware of the context, but saying “adjust the brightness to 100%” instead adjusted the brightness of my phone display. Try again with “adjust the brightness of the light to 100%” worked fine. I called my light “Sala”, and since Google Assistant kept referring to it as “Sala”, I tried with “change Sala to green”, but it started a web search instead. So It’s important to insert the word light in any of your commands.
Note that voice commands still need to be processed in the Cloud, so if the Internet connection from your router drops it won’t work. So there’s still a delay for natural voice processing. For Google Local Home to work you’ll also need Google Home hardware with both connected in the same local network. Since I don’t have Google Home smart home, I’m then unable to leverage the Local Home SDK and faster response time.
I tried without voice command simply using the On/Off button in Google Home app, and it takes around 2 seconds, and as expected, if I disconnect the fiber from my router I’m unable to control the light.
I’d like to thank Yeelight for sending a sample for review. Yeelight Smart LED Bulb 1S (Color) can be purchased for $40 and up on sites like GearBest or Banggood, and Amazon offers some other Yeelight smart bulb options as well.

Jean-Luc started CNX Software in 2010 as a part-time endeavor, before quitting his job as a software engineering manager, and starting to write daily news, and reviews full time later in 2011.
Support CNX Software! Donate via cryptocurrencies, become a Patron on Patreon, or purchase goods on Amazon or Aliexpress. We also use affiliate links in articles to earn commissions if you make a purchase after clicking on those links.


CRI?
Nothing on the package, but the company just answered the Color rendering index (CRI) was 80.