
Good day. Karl here. It has been a while since I have submitted any articles. I got burned out and my normal day job picked up considerably. I have been keeping busy but not with anything I would share by itself. I will start out with an update on what I have been up to. You can skip to the 3D printer retraction calibration section with the release of the Calibration Generator tool if you are not interested.
What have I been up to?
First, I have been doing a lot of gaming. Been playing Fortnite, Red Dead Redemption 2, and some other random games. I am trying hard to keep up with my son.
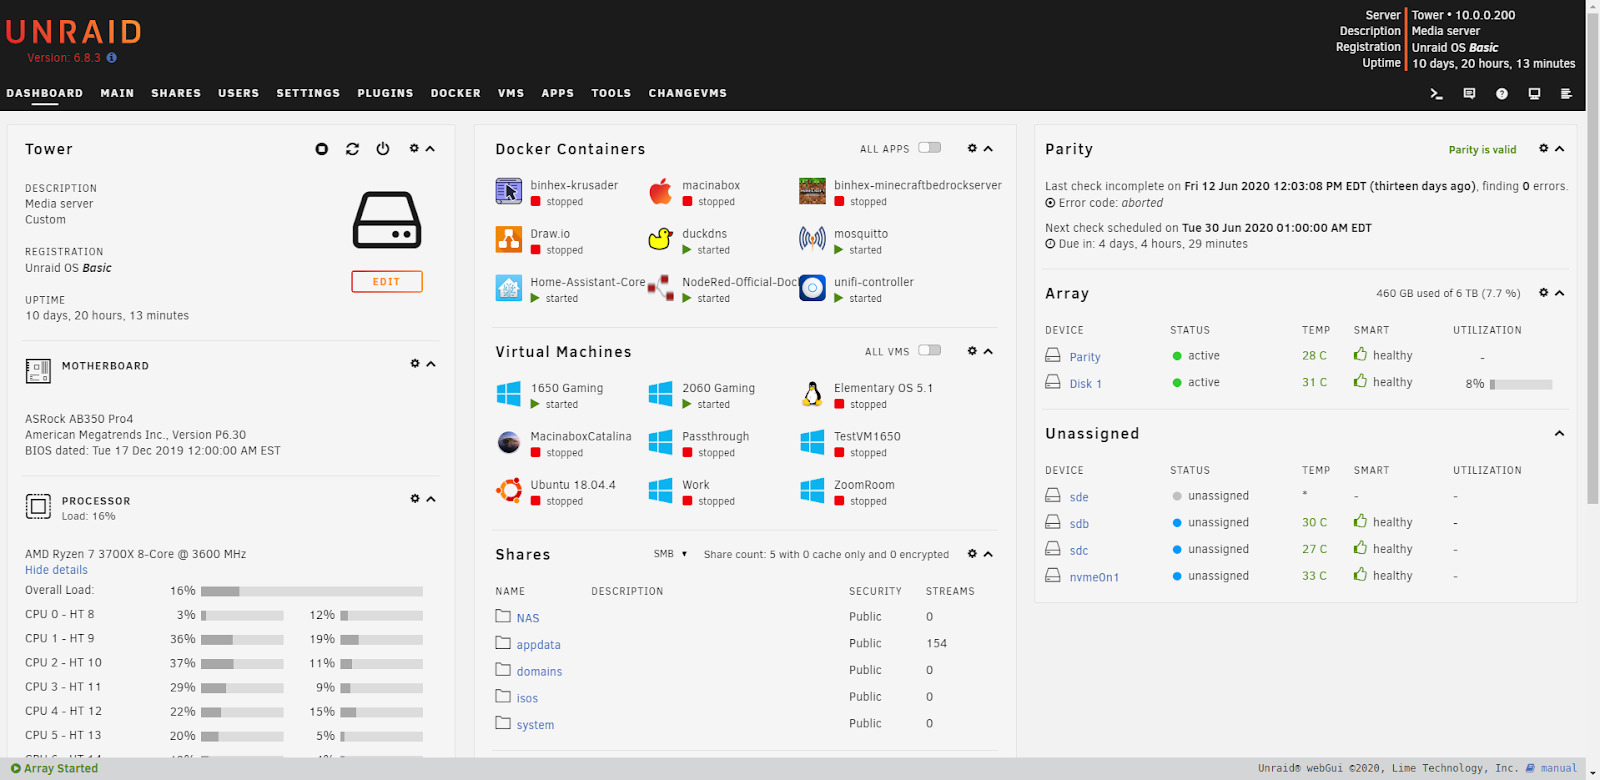
Unraid OS. So many things to explore and learn. Docker, VM’s, and storage. There is so much goodness in this OS. I was able to consolidate several services into one box. I had a standalone NAS drive that I went way too long trusting my data with and a small windows box that had an atom processor which ran Home Assistant and my Unifi controller. What started my journey with Unraid was my son’s interest in PC gaming. I didn’t want to buy a whole new PC so I went down the “2 gamers 1 pc” path and now can run 2 gaming machines with 2 discreet graphics cards off of one box. Additionally, I added a SATA card, 2 USB PCIe boards for hotplug USB passthrough. It is such a pain not passing an entire USB controller through. Finally, I added a couple of hard drives for storage and parity.
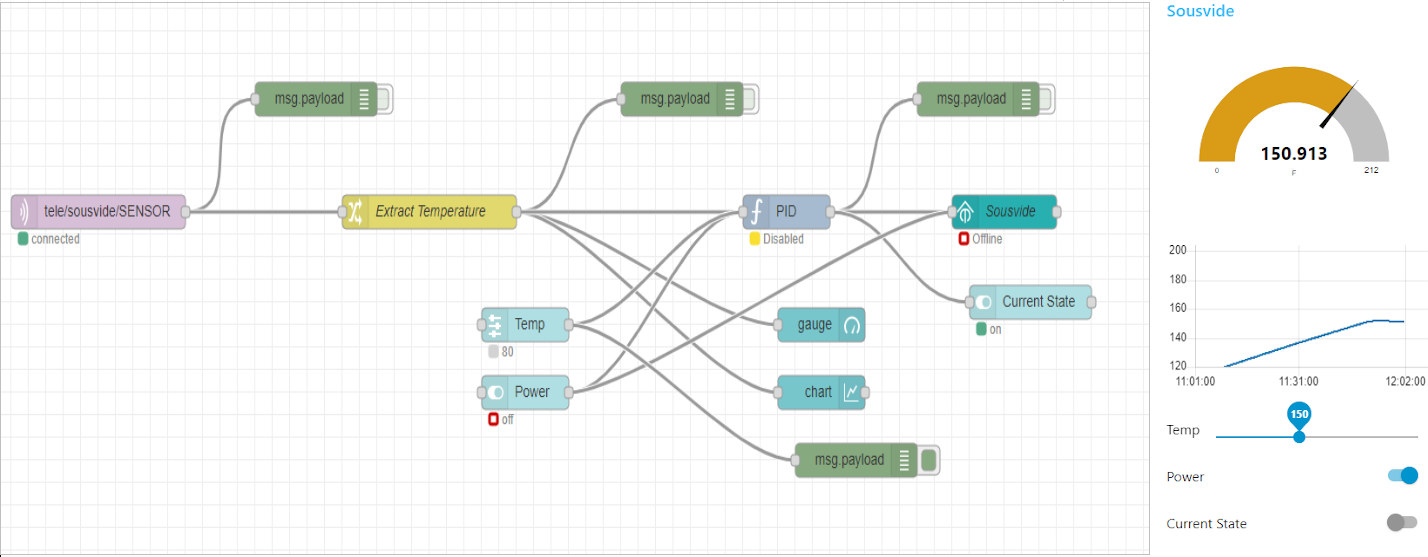
I have been reading and watching about sous-vide cooking and made a slow cooker sous-vide machine. It lacks a circulator but it seems just as effective. Sous-vide cooking is cooking at a precise temperature in a water bath. I chunk whatever I want to cook in a ziplock back with spices and let it cook. I wasn’t about to spend a minimum of $100 for one of the machines to find out it wasn’t worth it. I spent about $7 for a temp sensor paired with a Sonoff basic I already had. I am happy with the setup and it seems to stay within a few degrees with only slight overshoot. Setup took a couple of hours and I am very satisfied with the results. Carrots are fantastic, probably my favorite thing to cook so far. I have cooked some country-style ribs and some inexpensive cuts of beef. This is one of my newer projects so I haven’t done a lot of experimenting.

Finally, I remodeled my office and did a big purge. I work from home and started to get self-conscious about my workspace. I had pegboards on all my walls. Just didn’t look very professional. I installed Zoom rooms and felt obligated to be on video on all calls. I have a couple of clean walls now so I don’t have to rely on virtual backgrounds. I just need to position my camera strategically. I still have some things I would like to do, but I’m much happier with my office now. Enough rambling… Let’s get down to business.
3D Printer Retraction Calibration Vol II
Back in September 2019, I wrote an article entitled “How to Easily Calibrate Retraction in 3D Printers” It is where I first came up with the idea of how to systematically find the best retraction settings. This article expands on that. Since then I received a lot of feedback and help with testing. The spreadsheet was clunky and not the easiest to use. The spreadsheet laid the foundation and proof of concept and this application expands on that. Some people had issues and I wasn’t clear on a few items. I wanted to make it easier to use and add additional features that would have been very difficult if not impossible to do in google sheets.
Calibration Generator – Who and what is this for?
Anyone can use the Calibration Generator tool but is most useful for custom or modified stock printers. If you have a stock printer you can easily use the settings that have proven to work and shared by others from various sources from around the interwebs.
Let’s define a few things and discuss what retraction is. First, a 3D printer pushes a plastic filament through a heated nozzle and deposits plastic one layer at a time to form an object. I believe we all understand this. But, not all movements require molten plastic to come out of the nozzle. If a 3d printer only stopped pushing the filament during theses non extruding moves, the nozzle would ooze due to pressure build-up. This is where retraction comes into play. Retraction is when the motor pushing the filament through the heated nozzle runs backward to help alleviate this pressure. This introduces the first fundamental parameter. How far do we need to pull the filament back? Aka retraction distance. Then we need to talk about at what speed. Aka retraction speed. So far we have 2 variables. Retraction distance and speed. These 2 variables have the most influence on stringing and oozing and can be frustrating/ time consuming finding the perfect combination. Additionally, nozzle temperature and the part cooling influence this as well but will touch on this more later.
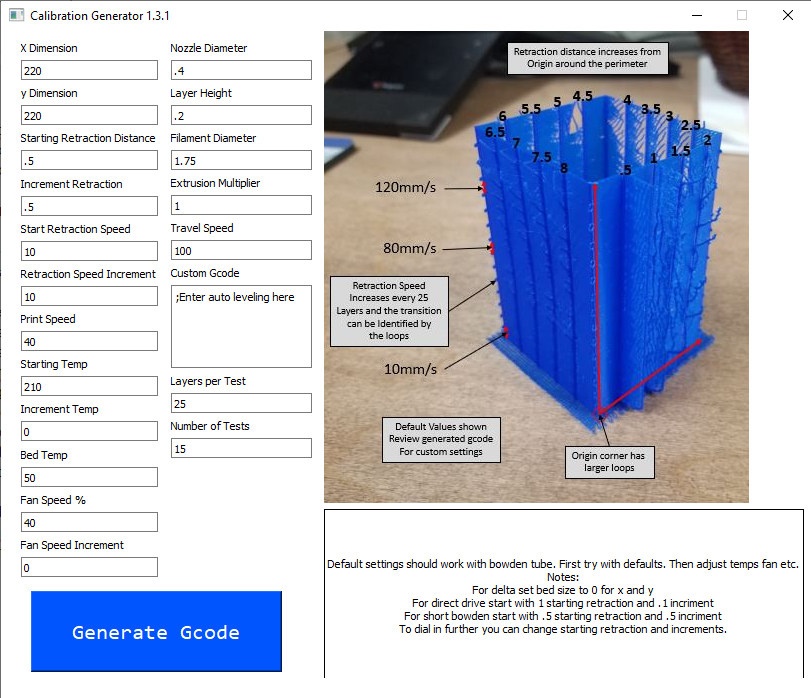
Before I created the previous spreadsheet I would try different combinations of speed and distance with a test model. This was time-consuming and where the Calibration Generator tool comes into play. It generates g-code based on user inputs to systematically test different combinations of speed and distance. Additionally from feedback, some additional parameters can be tested as well.
Source, Security, and other OS’s
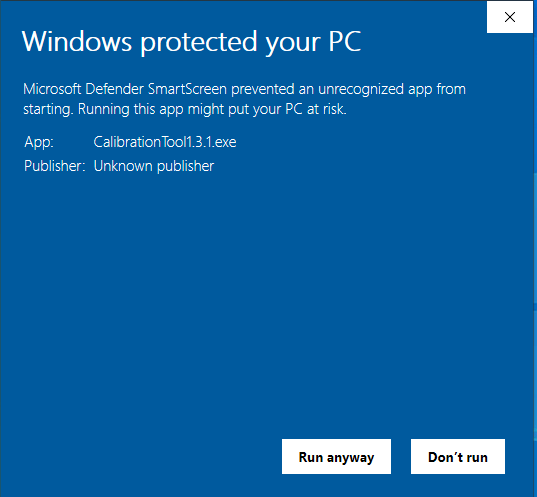
I created this program in Python and PyQT, and the executable is not signed. It looks like it would cost about $500 per year to purchase a certificate. If you have any concerns all source code is available on Github. Please forgive my code. I am not a programmer. I attempted to compile for Ubuntu and macOS but with my limited skills, I was not successful. Maybe the next step is to create a website to truly make this universal. [Update: It works on Ubuntu 20.04, see comments section]

- Y Dimension: Input your printers y size here. For delta printers set to 0.
- Starting Retraction Distance: This is the first retraction distance that will be tested in mm.
- Increment Retraction: Retraction distance that is added to each subsequent test in mm. The default settings of .5 starting retraction distance and .5 increment retraction will generate gcode that tests .5,1,1.5,2,2.5,3,3.5,4,4.5,5,5.5,6,6.5,7,7.5,8 retraction distances.
- Start Retraction Speed: This is the first retraction speed that will be tested.
- Retraction Speed Increment: Retraction speed that is added to each subsequent test. The default settings of 10 starting retraction speed and 10 retraction speed increment will generate gcode that tests 10,20,30,40,50,60,70,80,90,100,110,120,130,140,150 mm/s retraction speeds.
- Print Speed: Printing speed in mm/s
- Starting Temp: First nozzle temperature that will be tested in C
- Increment Temp: Temperature increased each subsequent test in C
- Bed Temp: Bed Temperature in C
- Fan Speed %: First fan speed that will be tested 0-100%
- Fan Speed Increment: Fan speed that is added to each subsequent test in %
- Nozzle Diameter: Diameter of the nozzle in mm
- Layer Height: Layer height in mm
- Filament Diameter: Filament diameter in mm
- Extrusion Multiplier: Extrusion multiplier .9 will extrude slightly less. 1.1 will extruder slightly more
- Travel Speed: Travel speed in mm/s
- Custom Gcode: Add any custom gcode or autobed leveling here.
- Layers per Test: Number of layers in each test group (Affects height on the print)
- Numbers of Tests: Number of tests (Affects height and affects how many Retraction Speeds, Nozzle Temperatures, and Fan Temperatures will be tested)
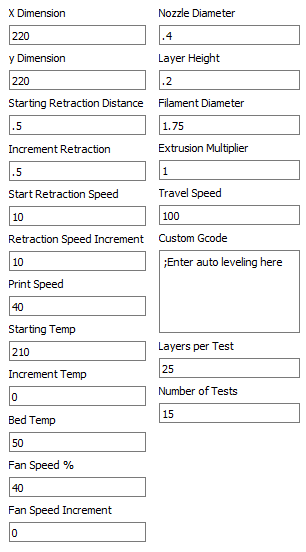
Any incremental variable can be set to 0 to statically assign the variable. Only test 1 of the following incremental variables at a time. Retraction Speed Increment, Increment Temp, Fan Speed Increment. Set the remaining to 0. Review variables by height in gcode.
Once all your variables are set press Generate Gcode. Save the gcode somewhere easy to find and open with a text editor.
Before we look at the gcode let’s understand what we are printing. Pictures and animated gif will help to explain.
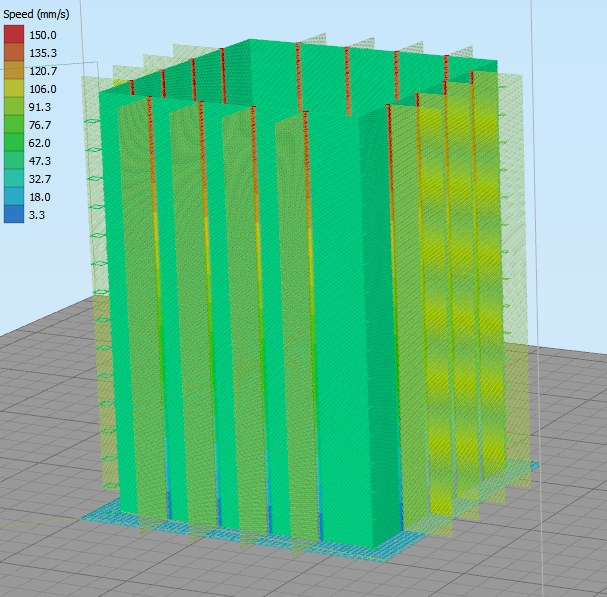

- At the start of each new test, there is a loop. The origin has a larger loop.
- The dots indicate where the retraction points are
- The retraction distance increases incrementally at each new dot
- The non-extruding movement represented with yellow lines
- In the picture above, you can see where the retraction speed increases as you go up the tower
Here is an example with everything default. You will need this to identify optimal settings and analyze the print.
|
1 2 3 4 5 6 7 8 9 10 11 12 13 14 15 16 17 18 19 20 21 22 23 24 25 26 27 28 29 30 31 32 33 34 35 36 37 38 39 40 41 42 43 44 45 46 47 48 49 50 51 52 53 54 55 56 57 58 59 60 61 62 63 64 65 66 |
;Calibration Generator 1.3.1 ; ; ;Retraction Distance from the top looking down ; ; 6.00 5.50 5.00 4.50 ; | | | | ; ;6.50- -4.00 ; ; ;7.00- -3.50 ; ; ;7.50- -3.00 ; ; ;8.00- -2.50 ; ; | | | | ; 0.50 1.00 1.50 2.00 ; ; ;Variables by Height ; ;Height Retraction Nozzle Fan ; Speed Temp Speed ; ;25 layers 150.00 210.00 40.00 ;25 layers 140.00 210.00 40.00 ;25 layers 130.00 210.00 40.00 ;25 layers 120.00 210.00 40.00 ;25 layers 110.00 210.00 40.00 ;25 layers 100.00 210.00 40.00 ;25 layers 90.00 210.00 40.00 ;25 layers 80.00 210.00 40.00 ;25 layers 70.00 210.00 40.00 ;25 layers 60.00 210.00 40.00 ;25 layers 50.00 210.00 40.00 ;25 layers 40.00 210.00 40.00 ;25 layers 30.00 210.00 40.00 ;25 layers 20.00 210.00 40.00 ;25 layers 10.00 210.00 40.00 ; ; ;All inputs ; ;Dimension X 220 ;Dimension Y 220 ;Starting Retraction Distance 0.5 ;Increment Retraction 0.5 ;Start Retraction Speed 10.0 ;Retraction Speed Increment 10.0 ;Print Speed 40.0 ;Starting Temp 210 ;Increment Temp 0 ;Bed Temp 50 ;Fan Speed 40 ;Fan Speed Increment 0 ;Nozzle Diameter 0.4 ;Layer Height 0.2 ;Filament Diameter 1.75 ;Extrusion Multiplier 1.0 ;Layers Per Test 25.0 ;Number of Tests 15.0 ... |
The first section is to help identify the retraction distance. The perspective is from a top-down view with the origin at the bottom left between .5 and 8mm. Starting Retraction Distance and Increment Retraction dictate what retraction lengths are tested. Defaults are shown.
Variables by height show the Retraction Speed, Nozzle Temp, and Fan Speeds based on Layers per Test and Number of Tests. If the Number of Tests was set to 10 Testing would stop at a retraction speed of 100mm/s. This area shows the variables when looking from the side. Defaults are shown.
All Inputs show all the input variables for reference.
Send the gcode to your printer via your usual method. I have not tested with Octoprint.
Open Mind and Setup
Please go into this with an open mind. Please try defaults first before deviating from the default values, especially when it comes to printing temps and fan speeds. All the defaults are for PLA and you will need to adjust accordingly for other materials.
Direct drive. Traditionally with direct drive printers, retraction distances are relatively short compared to Bowden style printers. I would recommend deviating from the default .5 increment retraction to a .25 increment retraction with a direct drive.
Fan Speed. If you have a sir blows a lot fan(s) I recommend the slower fan speed. Cooling is one of the easier printer mods and I feel is very easy to push too much air and influence the print in a negative way. I am sorry I don’t know how to quantify this without special tools. In my experience, a whoosh is better than a jet of air.
Hotend temps. In my experience, 210°C is the sweet spot with PLA filament, 235-240°C for PETG/ABS. This tool tunes retraction to the material and temperature. So far I have only had to deviate adding 5°C to get rid of little wisps of filament.
Caveats and Unknowns
This all sounds wonderful but we don’t live in a perfect world. I have had a few people share results that were unreadable. I don’t know why but all the tests look the same. I don’t know if a firmware issue or maybe calibration issue. Or maybe the gcode is malformed. The printers I have have been obvious and easy to read. On the Sovol SV01, I did have to be very critical and magnify the retraction points to find the best speed. If you run into results like this I created a Facebook group for this software, so we can share experiences and figure out why some printers behave this way.
Please note is that I only have a limited amount of printers to test with so my experiences are limited to these and the dozen or so people I have worked with. If you have time please share your experiences on the Facebook group. This will absolutely help.
After some time I will do an additional article sharing any gained knowledge from the FB group.
Thank you
A really huge shout out to Gene. There would be absolutely no way that I could have got this done this quickly without his help. He helped me get the building blocks for the program setup during a live stream.
Here is a link to the Windows version of Calibration Generator tool.
Happy Printing!

Karl is a technology enthusiast that contributes reviews of TV boxes, 3D printers, and other gadgets for makers.
Support CNX Software! Donate via cryptocurrencies, become a Patron on Patreon, or purchase goods on Amazon or Aliexpress


I have no problem building it and running it in Ubuntu 20.04:
then
And finally, I can run it as follows:
https://www.cnx-software.com/wp-content/uploads/2020/07/Calibration-Generator-Ubuntu-20.04.jpg
Excellent. Thank you
Is there supposed to be a bump at every test location? Are we looking for the smallest bump without a void? Are we looking for the thickest wall with minimal material?
Thanks!
Works on Mac as well
Says the file has a Trojan Virus and gets blocked by my computer.
Yes I got that too on one of my vm’s. I contacted Microsoft about it once already for a previous version. To get around this I went into security panel and told it was ok and restore.
Thanks, Karl. Great work!
There was a bug in my extrusion calculation that has been corrected now. 1.3.3 is now live.
The temporary webpage is updated, link up above is updated, as well as github
I tried this out, worked well, then had under extrusion issues, so i used a fresh piece of filament, but now I can’t get it to work. It just goes to the corner of the print bed and starts to extrude filament at high speed. Any idea what might cause this?
I use a mixture of elative and absolute coordinates. If you stop the print before it finishes you have to reboot. Rebooting the printer will put it back to absolute.
Thanks, I figured it out and your program is amazing! However, 40 tests later, I have to conclude the filament was the problem.
So, a couple things. It works perfectly fine with Octoprint. Just FYI.
Second, I love this tool. But what’s missing from the description above or maybe in the app itself is a description of what we’re looking for. How to interpret the results. Are we looking for no side trees, ideally? Fewer branches? What would a “perfect” print look like?
Yes I’m not clear on that as well. What should we optimize for?
Yeah, was a ‘neat’ looking print. But … NOW WHAT?
I can guess, but it would be really nice if the author told us what to do with the results..
If you read his original article he talks about what to look for in better detail: https://www.cnx-software.com/2019/09/05/how-to-easily-calibrate-retraction-in-3d-printers/
I was able to purchase a domain. All further updates will be to the webpage @
http://www.retractioncalibration.com/
I don’t know if you sill use this site, seeing how these comments are 3+ years old…BUT after many different test prints and styles…yours has been the most helpful and insightful, bar none. I just want to say thank you. You have alleviated a very deep and ungodly frustrating thorn in my side. A thousand times thank you.
I’m happy to see you are pushing the project. Did you consider the z-hop option?
Thanks for your effort
Cool test, you can clearly see how long the retraction should be and what speed can be achieved.
It would be great to add an option to test extruder acceleration.
I put a BMG extruder with a gearbox and realized that I need a small acceleration to get a high speed, but not too low, otherwise the retraction is too smooth.
Super, many thank’s
Thanks for doing this. I’m sure a lot of work went into this. I’m working on honing in my calibration right now.
be sure to use the latest @ retractioncalibration.com….I added a way to print just the mesh over the holiday. I forgot about the acceleration request above and will do that soon
Karl thank’s a lot for this tool/
But in first strings of generated G-code you need add instruction
M203 E ;After E, value of maximal feed rate in test
which will increase maximal feed rate, because if do not do this 3D printer up feed rate to maximal in firmware of printer and no more.
A note on running this on Ubuntu 20.04 and printing with Octoprint: The generated gcode threw an error on Octoprint about “Layer indicator not found in file”. In RetCalMain.py, I changed “Layer ” to “LAYER:” in all of the lines that print the layers, re-ran pyuic5, and tried again, and the resulting gcode made octoprint happy. I am not sure if LAYER is case sensitive, but I am sure that Octoprint expects the colon rather than the space. Oh, and “pip3 install” can be run without sudo, but in the example here, it either needs to be caled with sudo,… Read more »
Works on macOS Catalina as well!
Hi Carl, I can’t make it print on my Ultimaker 3. I generate the .gcode with the default numbers, send it to the printer via cloud but nothing happens. When I try to print it from a USB drive for a split second the printer screen says ETA is 0 min 0 sec and then returns to the default screen. I tried changing the X and Y dimensions from 200 each to 233 and 215 respectively (as per my U3 settings), to no avail. Is there anything I’m missing here? Do I need to select the extruder for the job,… Read more »
what should the best result look like?
The file is flagged as a Trojan (GenericTorjan) by Avast and Win10
That was one of the reasons I changed over to a website. It was being flagged as a virus. Please use retractioncalibration.com. Thank you
Hi
any solution how set print the tower on second hotend ? always print on the first ? I got Climber 7
For the Lerge K , it does not work, in the generated code there are no necessary commands for changing the retract and speed
https://www.lerdge.com/document/detail/G10
thanks, seems like a well thought project. i printed it with PLA, from the default settings from the website, looks absolutely identical from the bottom to the top, no changes visible at all 🙂 nmy printer doesnt want to be improved
Really wanted to thank you for the retraction calibration generator. I have been struggling not with classic stringing so much as… fuzz. Once I reached a point where the normal stringing was no longer happening, no amount of further adjustment seemed to eliminate the really fine fuzz. Most of the posts about similar issues always had responses saying to lower the print temperature, but that didn’t help. Then I came across your generator. With the stock settings, I was clearly able to see when the retraction distance and speed stopped making a difference, so then I left those static and… Read more »
Awesome work. It would be great to have a section to interpret the results (perhaps show examples of good/bad results). Thanks
This is great and all, but as many others have said; You go through all this effort to create a domain with really, really terrible instructions. What should we be looking for.
I realise this is free, but someone else could take your idea, write a good set of instructions on how to use it and there goes your idea. All because one was usable. Being technically correct is not enough because a significant portion of people can’t use it.
#JustSaying
Thank you for this guide. Once I read the instructions on how the tower was set up, each point going around the tower increases the retraction distance and as you move up the speed of retraction increases, I was easily able to figure out how far and how fast to adjust my settings. I’ve printed twice now with the new settings and haven’t seen one string.
am having issue when saving the .gcode it saves as an empty file and errors out then closes after i save (even ran as admin)
new to printing, don’t understand how to interpret the results?
used ender 3 pro w/skr mini 3, microswiss, bltouch – new to me
gone through the entire printer setup – teachingtechyt.github.io
esun pla+ 220C
1st run .5-2mm, 5-50mm/sec – all vanes spaghetti
2nd run, .1-1.6mm, 5-50mm/sec – all vanes spaghetti
3rd run, 1.5-3.0mm, 10-100mm/sec – all vanes spaghetti
4th run, .5-2mm, 50mm/sec, temp 190-235 – waiting to finish
can’t seem to get any vane without spaghetti
not sure what other factors?
printed xyz cube perfectly, 3dbenchy had stringing
Mark, your Ender 3 Pro, and I have one just like it, except no BL-Touch, is a bowden tube printer, you’ll need a minimum of 2mm retraction, I use PLA at 215C. direct drive has hardly any slack in the filament drive, bowden’s have quite a lot, you must also make sure each end of the bowden tube is fixed to the fitting with no forward/reverse movement as you pull and push on the tube. Start at 2.0 with 0.1 increments and 10mm/s with 5mm increments and 40% cooling..
Hello Karl,
I hope it’s ok that I mentioned you about Orca Slicer: https://github.com/SoftFever/OrcaSlicer/discussions/922
I currently can’t get it to run properly for my Bambulab, but it would be a good calibration tool in Orca Slicer after all.
Maybe you two could come together and collaborate and make this happen?
Many greetings
Clamsy
I think I broke the online code generator, but before I did that, this incredibly useful tool solved a nagging problem with a Cr6SE with a MicroSwiss all metal hot end. The incremental temperature and retraction is pure genius. I always run part cooling fans at 100%, but they are all directional…. Any chance you could do something similar for bridging.? Thank you v. much.
Something strange going on with my ender 3v2. When I run the calibration one of 2 things happen. 1) When it starts laying down the raft the extruder starts going warp speed, so fast that it immediately “strips” the filament and the extruder gear teeth become clogged with filament powder… Then I reboot the printer ( as I read can help) then when I restart the print and let it run sithout stopping, pausing, or editing, 2) It goes into the print but the extruder does nothing at all and no filament comes out. Its so bizarre. My start gcode… Read more »
Hello people, can anyone tell me why the G Code Generator does not work? After pressing the Generate G code button, it throws an error, is this the case for everyone?
“No space left on device” may give a clue 🙂
But you can do it online too now: http://retractioncalibration.com/
I had some complaints over errors yesterday. I am out of town and will need to reboot the server when I get back on Friday.
can you reboot the server again please and thanks
Just an FYI, your server that is hosting your calibration app is out of space.
I’m not sure how to interpret my result. I thought it was 2.5, but I still get stringing.
I would love to see an update to this tool that allows one of the variables under test to be extra length on de-retract.