
Earlier this year, I discovered a new (to me) category of devices that look useful for electronics projects with smart tweezers Colibri ST-5S that integrate an LCR meter and can help quickly identify SMD components. I also noted some cheaper, but bulky models selling on Aliexpress for $15 and up.
I’ve now received another compact model, yet affordable, as Seeed Studio sent me Miniware DT71 smart tweezers for review. As we’ll see in this getting started guide, DT71 can be used both as a multimeter and a signal generator and sells for around $59 plus shipping.
Miniware DT71 Smart Tweezers Unboxing
Let’s first see what I received. the tweezers are stored in a plastic box that contains three parts.
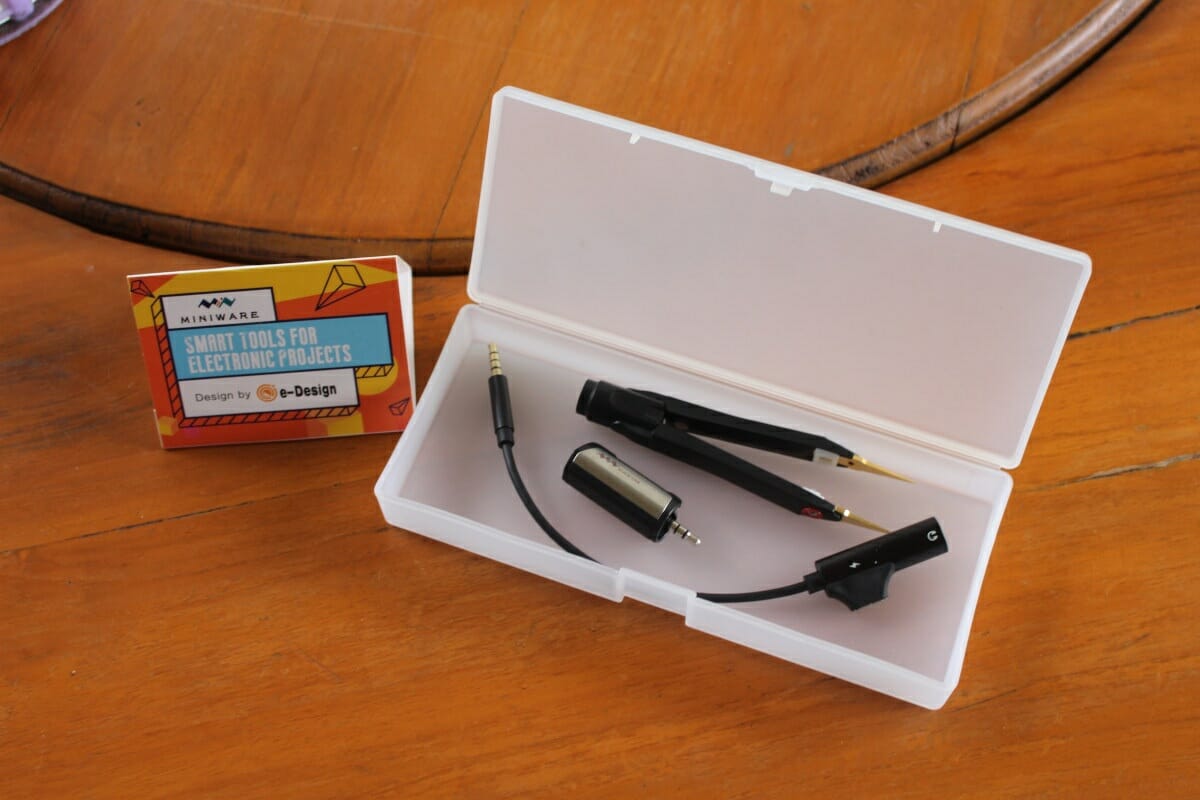
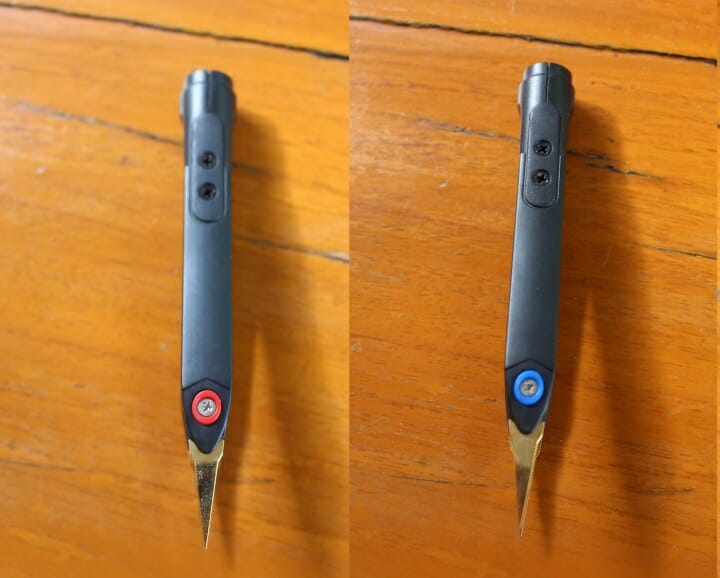
First, the arms fitted with replaceable tips clearly marked as positive (red) and negative (blue).
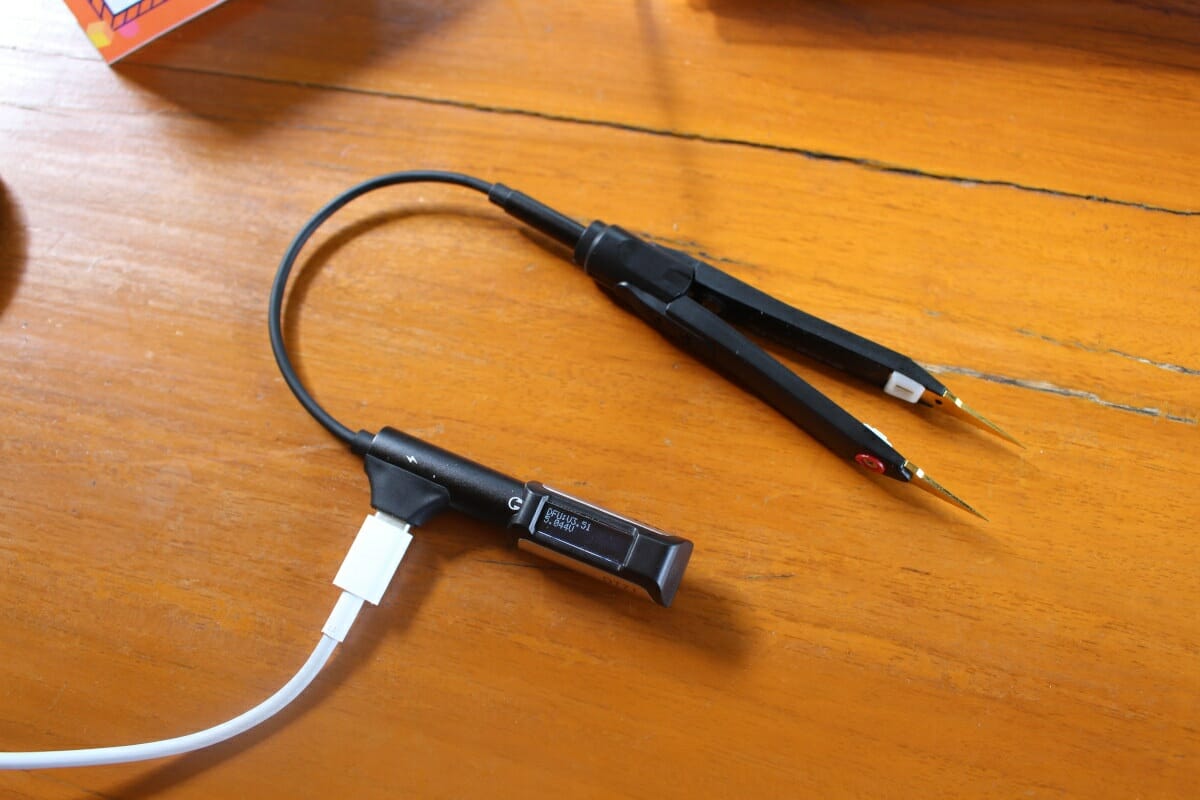
There’s a 3.5mm audio jack that allows us to connect the microcontroller unit with a display, and touch button on the top. We can also connect an additional cable used for charging and data connection to a PC in order to customize various parameters and upgrade the firmware as well see in this review.
Miniware DT71 specifications and key features
- Display – 360° rotatable controller with OLED screen with automatic identification of left/right-hand operation
- Touch button on top of the controller to change modes/function with short and long pressed
- Magnetic test arms
- Multimeter functions
- Resistance – 0.1 Ohm to 2 MOhm
- Diode – 0.1 V to 0.3 V
- Capacitance – 0.1 pF – 400 uF
- Inductance – 1 uH to 50 mH
- Frequency – 10 Hz to 20 MHz
- Voltage – 1 mV to 40 V DC
- Automatically identify SMDs including resistor, capacitor, inductor, and diode, showing both main and secondary parameters
- Signal Generator – Sine wave, noise, pulse wave, and user-defined wave
- Built-in dual lithium batteries in test arms and controller
- Dimensions – Controller: 47mm; test arms:: 106mm
- Weight – 22 grams
I’d recommend downloading the user manual before using the tweezers.
Components, Voltage, Frequency Measurements, and Signal Generator
After charging the tweezers for about two hours, I could turn them on by shortcircuiting the tips. It will then stay on with a 60 seconds inactivity timer that will make it turn off automatically.
I then did the following measurements as showcased in the video embedded further below:
- DIP resistor and capacitor measurements (sorry no SMT components here)
- Diode voltage drop measurement and LED testing
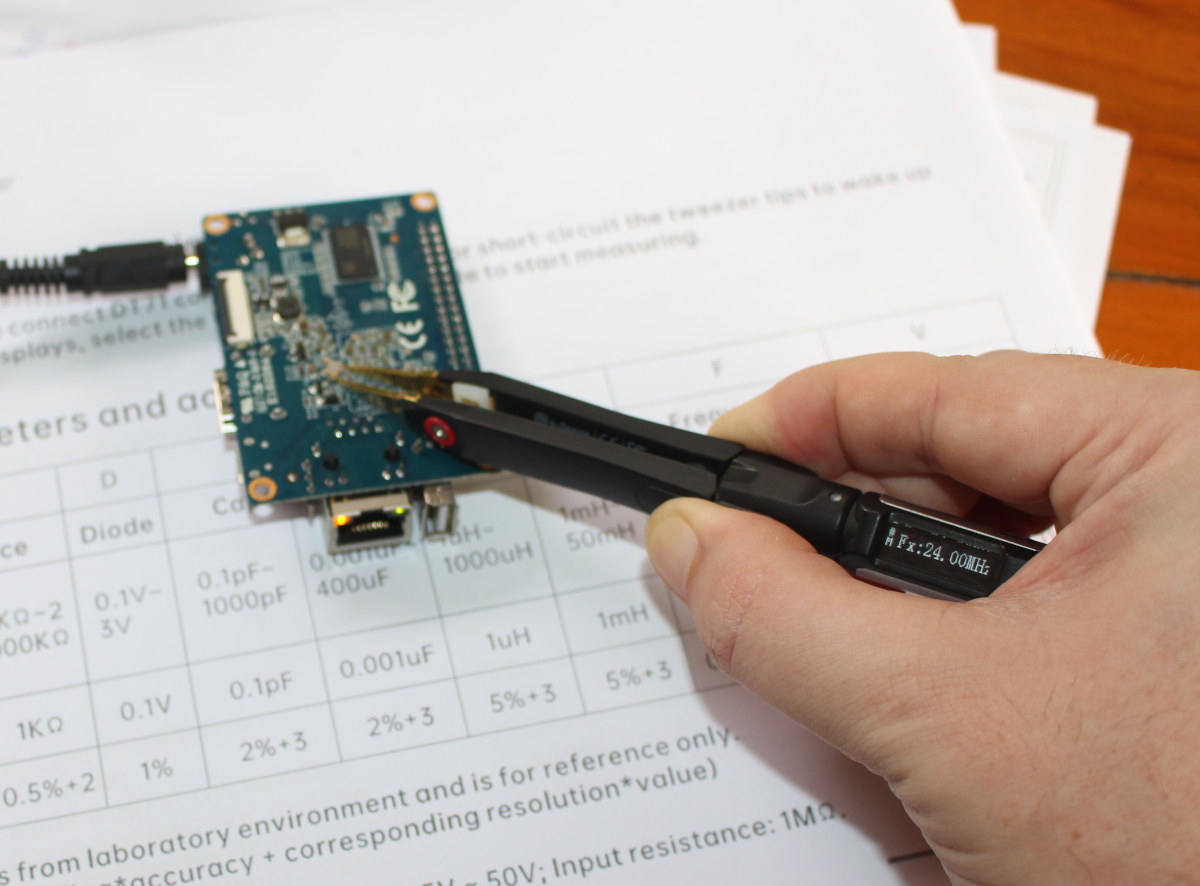
- Inductance, frequency, and voltage measurement on Orange Pi One v1.1 SBC
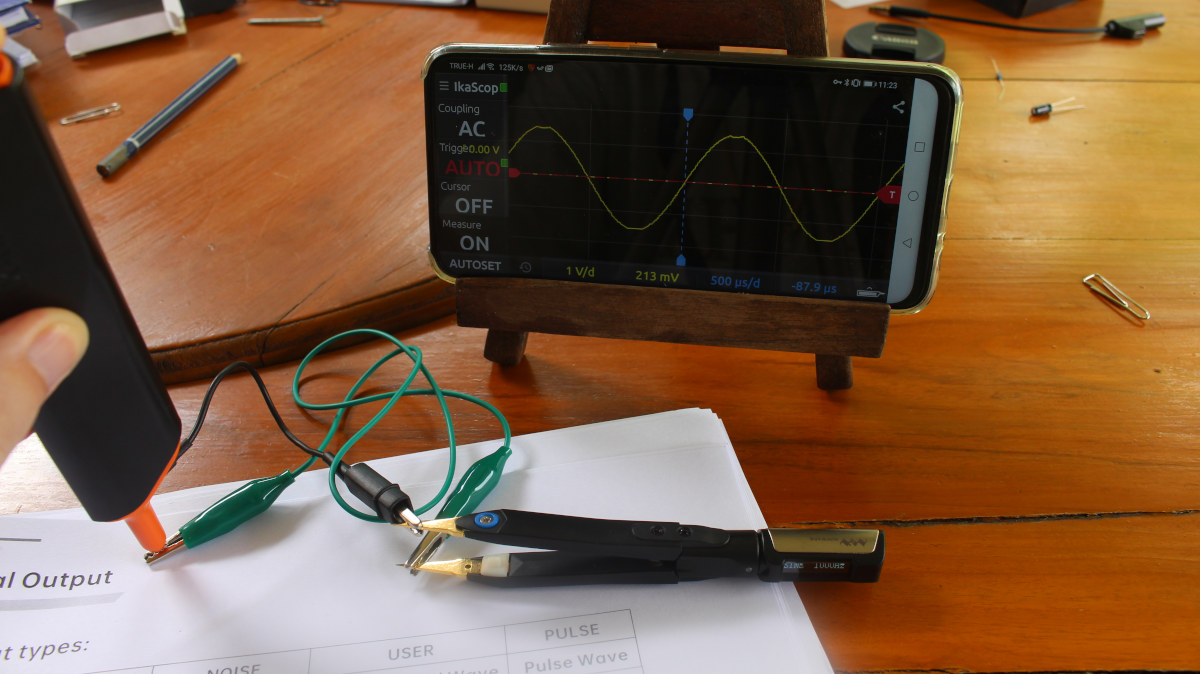
I then switched to the signal generator mode, checking out sinewave, noise, user-defined signal, and square wave using Ikascope WS200 WiFi “pen” oscilloscope.

It works well, and the main issue I had is that I would sometimes accidentally touch the tip of the controller unit and inadvertently change the mode of operation. When measuring components soldering to a board, you have to consider other components in parallel/series connected to the board, but it’s a good way to check whether you get the value you expect from your circuitry.
DT71 Smart Tweezers Settings and Firmware Update
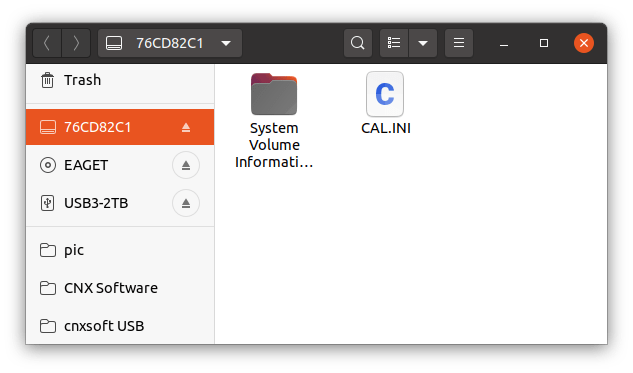
You can access the tweezers by connecting the controller unit via a USB-C cable through the adapter shipping with Miniware DT71. You should then see a new USB drive with an 8-digit name show up on your computer with CAL.INI file.
Let’s open the file in the editor to find out some of the parameters that can be adjusted:
|
1 2 3 4 5 6 7 8 9 10 11 12 13 14 15 16 17 18 19 20 21 22 23 24 |
/****************************************************** DT71 calibration parameter file ******************************************************/ SLEEP_TIME=60 DISPLAY_DIRECTION=4 OLED_BRIGHTNESS=2 USER_WAVEFORM = { 0x7FF, 0x87F, 0x8FF, 0x97E, 0x9FC, 0xA77, 0xAF0, 0xB66, 0xBD9, 0xC48, 0xCB2, 0xD18, 0xD78, 0xDD3, 0xE29, 0xE77, 0xEC0, 0xF01, 0xF3C, 0xF6F, 0xF9A, 0xFBE, 0xFDA, 0xFEE, 0xFFA, 0xFFE, 0xFFA, 0xFEE, 0xFDA, 0xFBE, 0xF9A, 0xF6F, 0xF3C, 0xF01, 0xEC0, 0xE77, 0xE29, 0xDD3, 0xD78, 0xD18, 0xCB2, 0xC48, 0xBD9, 0xB66, 0xAF0, 0xA77, 0x9FC, 0x97E, 0x8FF, 0x87F, 0x7FE, 0x77E, 0x6FE, 0x67F, 0x601, 0x586, 0x50D, 0x496, 0x424, 0x3B5, 0x34B, 0x2E5, 0x285, 0x22A, 0x1D4, 0x186, 0x13D, 0x0FC, 0x0C1, 0x08E, 0x063, 0x03F, 0x023, 0x00F, 0x003, 0x000, 0x003, 0x00F, 0x023, 0x03F, 0x063, 0x08E, 0x0C1, 0x0FC, 0x13D, 0x186, 0x1D5, 0x22A, 0x285, 0x2E5, 0x34B, 0x3B5, 0x424, 0x497, 0x50D, 0x586, 0x601, 0x67F, 0x6FE, 0x77E, 0x000, 0x000, 0x000, 0x000, 0x000, 0x000, 0x000, 0x000, 0x000, 0x000, 0x000, 0x000, 0x000, 0x000, 0x000, 0x000, 0x000, 0x000, 0x000, 0x000, 0x000, 0x000, 0x000, 0x000, 0x000, 0x000, 0x000, 0x000, } CALRB_K0 = 0.000, 0.000, 0.000, -11.021, -10.140, 68.149, 0.052, -0.051, 0.000, 0.000, 0.000, CALRB_K1 = 1.006, 1.005, 1.009, 1.021, 1.021, 1.003, 1.000, 1.000, 1.000, 1.000, 0.000, |
You’ll have to look into the user manual to understand each parameter, but for example, you can set SLEEP_TIME between 30 and 999 seconds, and the USER_WAVEFORM defines a waveform with 100 data points using 3-digit hexadecimal numbers representing 0 to 3V. There are also other parameters not shown in the default CAL.INI including SINE_FREQ_OPT, NOISE_FREQ_OPT, USER_FREQ_OPT, and PULSE_FREQ_OPT that default preset frequencies for the signal generator from 200Hz to 100 KHz.
Firmware update also works through the USB drive. I could not find any new firmware file, so I did not test it, but if there’s ever a new firmware on minidso forum, you could be able to copy DT71.hex to the drive, wait for it to be renamed to DT71.rdy to confirm a successful firmware update.
Conclusion
Miniware DT71 is really a useful tool for electronics enthusiasts and engineers. It allows you to check out SMT (and DIP) components, debug your board, take voltage and frequency measurements, and even generate signals for testing. I find it more convenient compared to using test leads from a typical multimeter since I can just use one hand for measurements. The only real downside I found was that the touch button is quite sensitive to it’s easy to accidentally change mode. It’s also true does not entirely replace a multimeter as the range may be more limited, and features like AC voltage (thankfully) are not supported, and obviously it’s not quite as powerful and versatile as a proper signal generator, but you can’t beat the portability and affordability.
I’d like to thank Seed Studio for sending a review sample. If you are interested in Miniware DT71 smart tweezers, there’s available on Seeed Studio for $59, or also find it on Aliexpress, Banggood, and other online shops.

Jean-Luc started CNX Software in 2010 as a part-time endeavor, before quitting his job as a software engineering manager, and starting to write daily news, and reviews full time later in 2011.
Support CNX Software! Donate via cryptocurrencies, become a Patron on Patreon, or purchase goods on Amazon or Aliexpress. We also use affiliate links in articles to earn commissions if you make a purchase after clicking on those links.


Thanks for posting this review! This is quite interesting… I have experience with the Colibri ones you mentioned (and had done a posting about previously). It looks quite feature rich, and at an overall cost of less than even a tip replacement of the other ones. May need to pick up a pair of these and give them a closer look.
Hi, thanks for posting this. I got mine one week ago and I’m pretty happy with it as well. I had the same troubles with the capacitive push button, which is way too sensitive for me as well. And when trying to enter your link to the forum or the direct download link on the orignal web page I get on either page a Malwarebytes warning as well as also a Google Chrome warning entering this page, as it is suspicted to have fishing code on it! Did anyone else tried this link already? Is there already a new firmware available?
One additional tip I heard from the EEVblog once: It would make sense to always remove the measuring head from the tip, as long as the device is not used, as otherwise the battery seems to be depleeted quite fastly…