
Karl here. I teased this article in the final review of the Genmitsu PROVerXL 4030 CNC Router. I was really happy with the base kit. You can check out all my thoughts there. SainSmart recently released an extension kit that I have now had for a few weeks. It increases the stock size from 300 x 400 to 600 x 600. That is what we are here to check out today. When I inquired about the kit I didn’t realize how boring a review of the kit would be but I will do my best to bring some additional value beyond just unboxing and building experience.
Unboxing
The parts list is minimal
- 2x Y-axis Aluminum Extrusion (lead screw included)
- 2x X-axis Aluminum Extrusion (lead screw included)
- 2x Front/Back Plate
- 7x Drag Chain
- 9x Drag Chain
- 4x Hexagonal Wrench, 4mm, 3mm, 2.5mm, 1 mm
The original kit came with some decent length wires, new ones are not necessary. The instructions are great. I yoloed it and referenced the manual when I had a question. I ended up only having 2. How to move the spindle over. Which was outlined well. I used deduction to answer the second question myself. Included are 2 different lengths of drag chain to extend the existing ones. I didn’t know which went on the X and which went on the Y-axis. My thoughts were since the Y-axis was increasing the most I would install the longer length of drag chain on it. Seems fine so far. It took me about 3 hours to disassemble and rebuild. I ran into a couple of issues. I put Loctite on the grub screws for the couplers and I had a heck of a time removing the first one. If you did the same I would not use the included Allen wrench. Although they are the good kind with the ball on the end. It was not ideal in this situation. I ended up rounding the one grub screw before I moved to my set with T handles and flat ends. The other trouble I had was working on the floor. It just sucks.
Workout
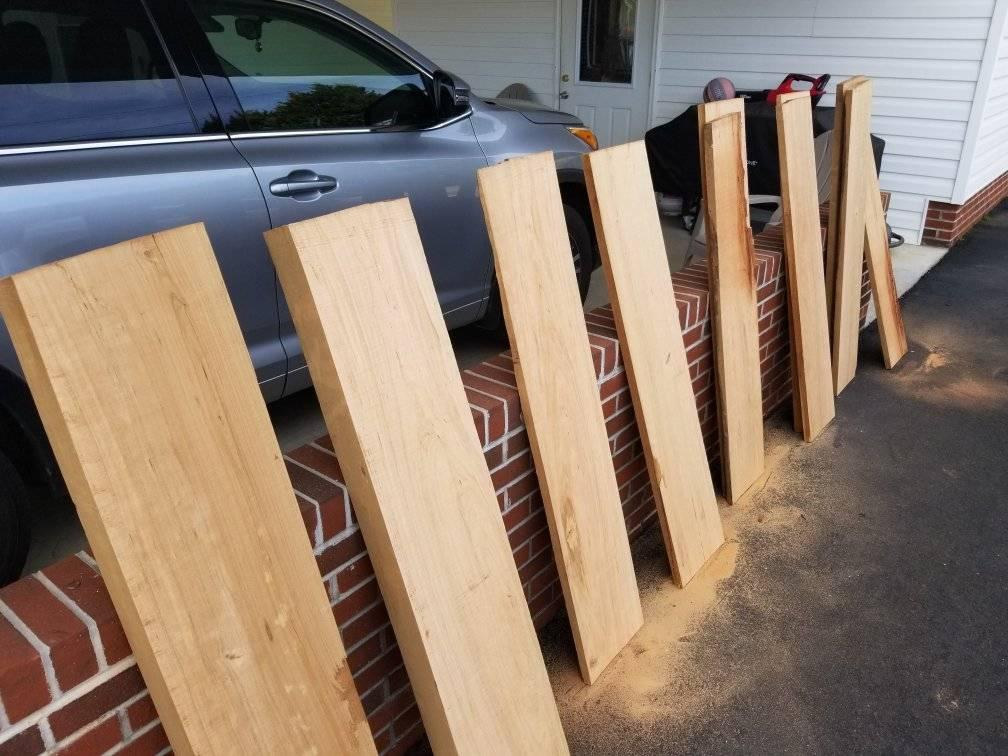
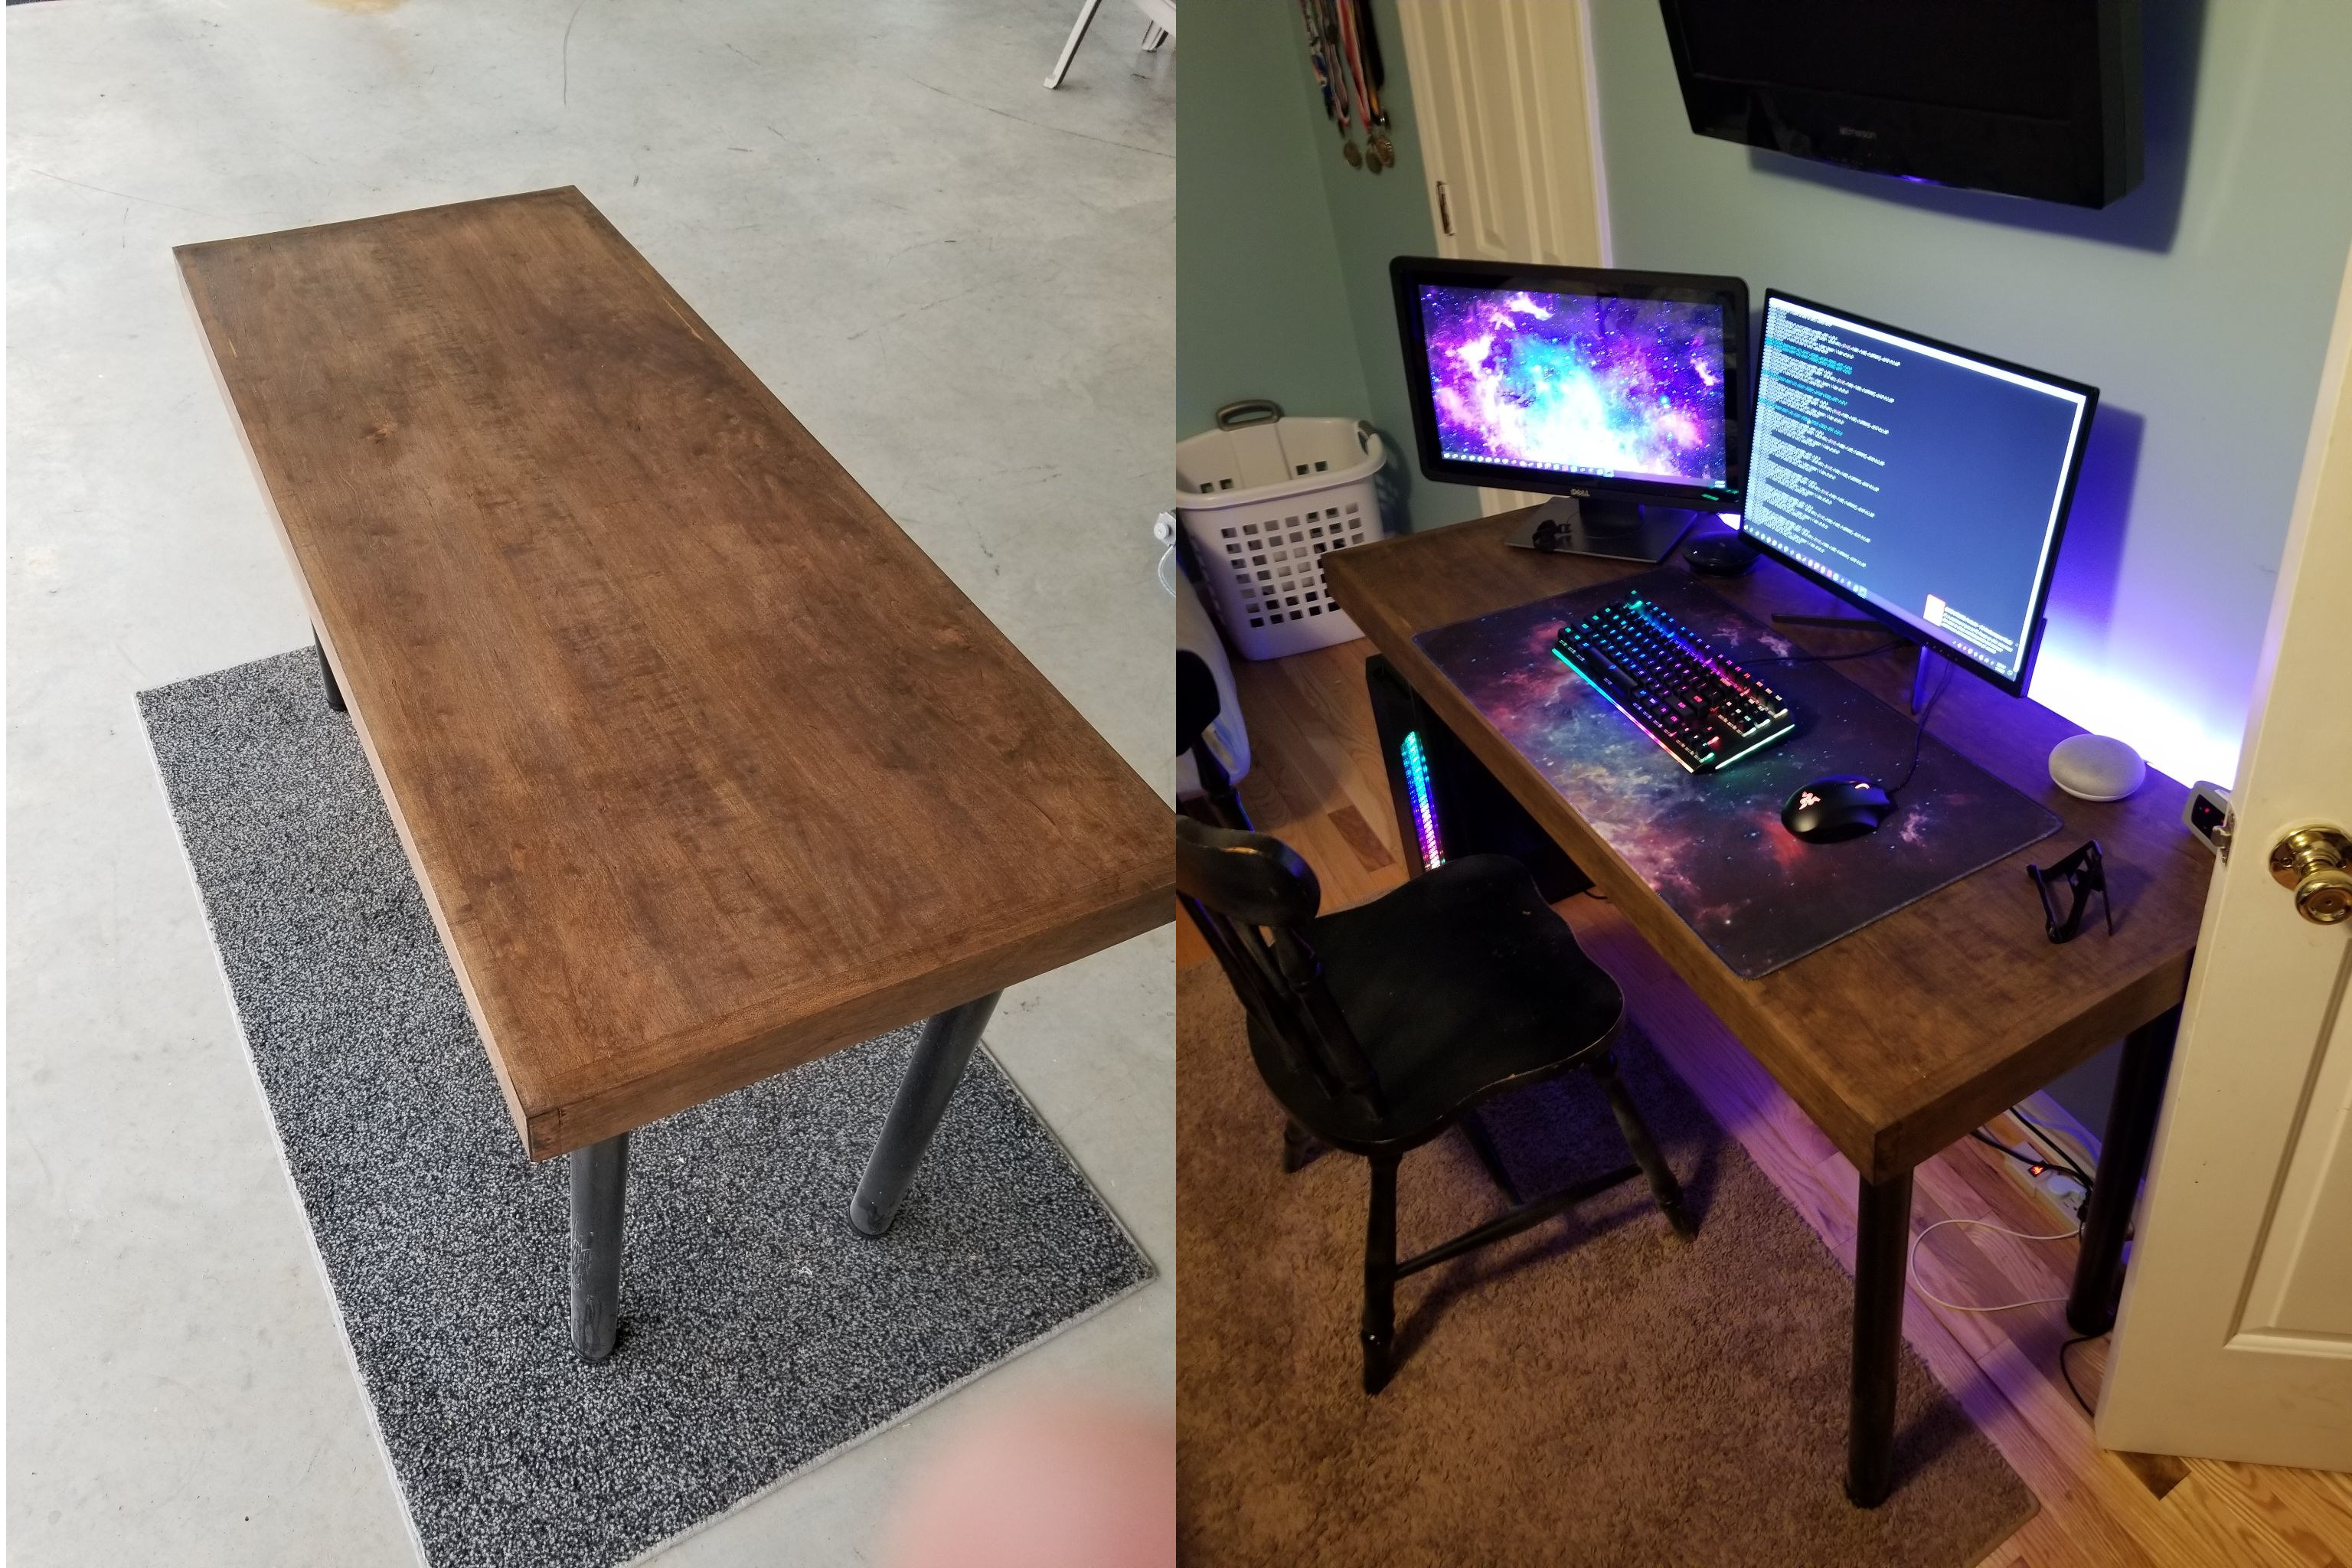
A little back story first. I wanted some nice wood to make projects with. While reading some forums, I read that getting rough-cut lumber was the way to go. I did some networking and found that my small town has a lumber yard. I called him and he had 1 log of dried cherry that he gave me a heck of a deal on. For $100 I got to pick how it was cut. I ended up with about 5 1”x12”x8” and 1 3”x12”x8. He cut them down to 4’ lengths so I could transport them. I was originally going to use the thicker pieces for smaller projects but that changed quickly. My son had a small computer desk. He was complaining about the size. Next thing you know I had my next project. Build a desk. Working with the original kit built my confidence up so I said let’s give it a shot. I had already used some wood and surfaced the rough cut lumber with the router and realized that was for the birds. Took way too long. I again networked and found out that one of the scoutmasters had a planer. I loaded the lumber up and spent a couple of hours planing all the lumber over at his house. I will pick one up myself the next time I get some rough cut. I purchased an electric hand plane to join the slabs. I originally got one from Harbor Freight that I returned. The boot on it was loose. I went to Lowe’s Hardware and bought another one there. A dowel kit, straps, lots of clamps, glue, and time later I had a glued-up slab. This was about the time I found out that I was getting this extension kit for review. Timing couldn’t have been more perfect. I finished the slab with a trim piece around the edge. I finished the top by hand. Everything lined up well so just some sanding. The bottom was another story. I attempted to use the electric planer on the bottom but it wasn’t pretty.

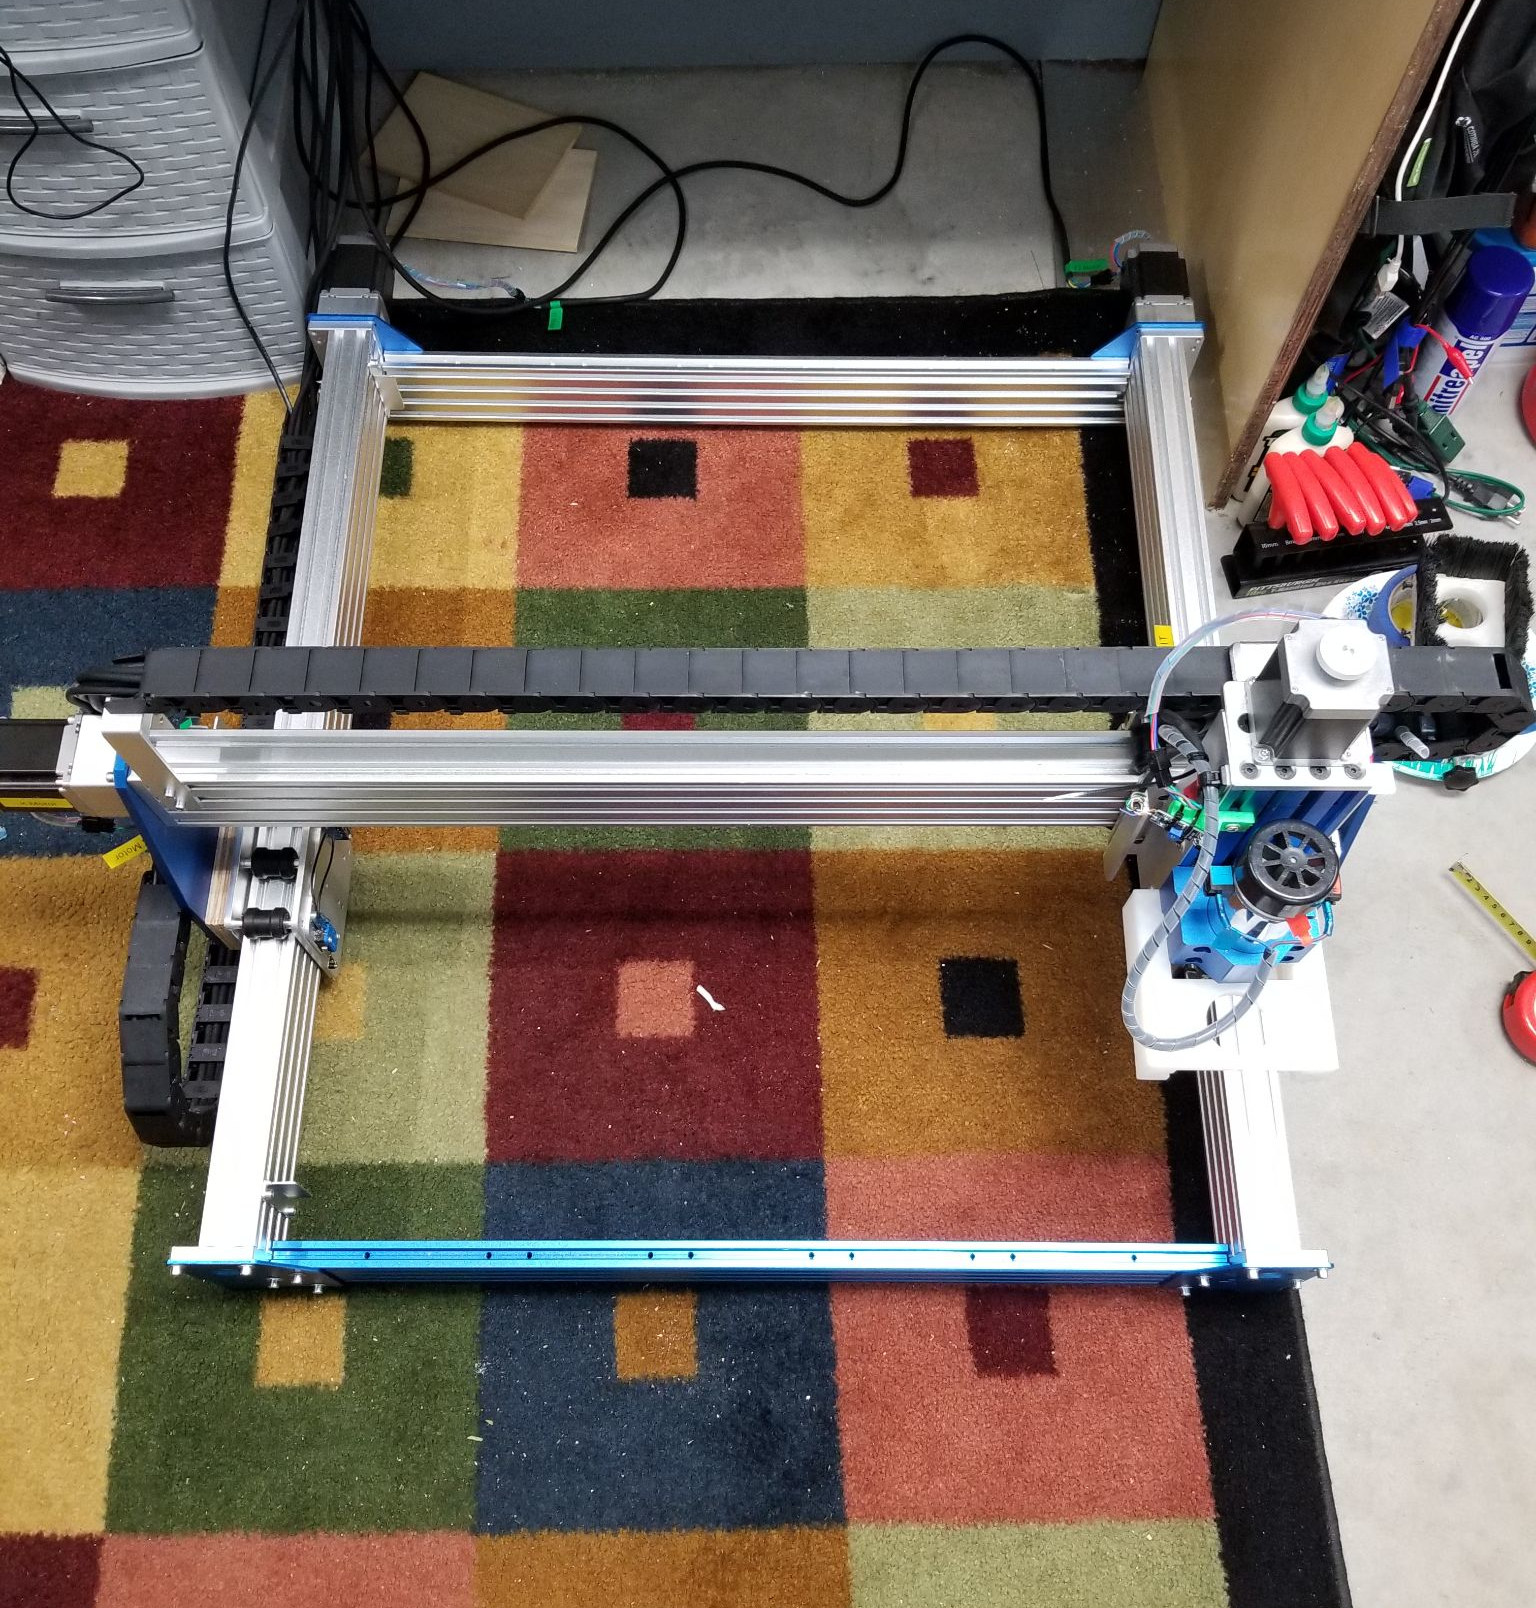
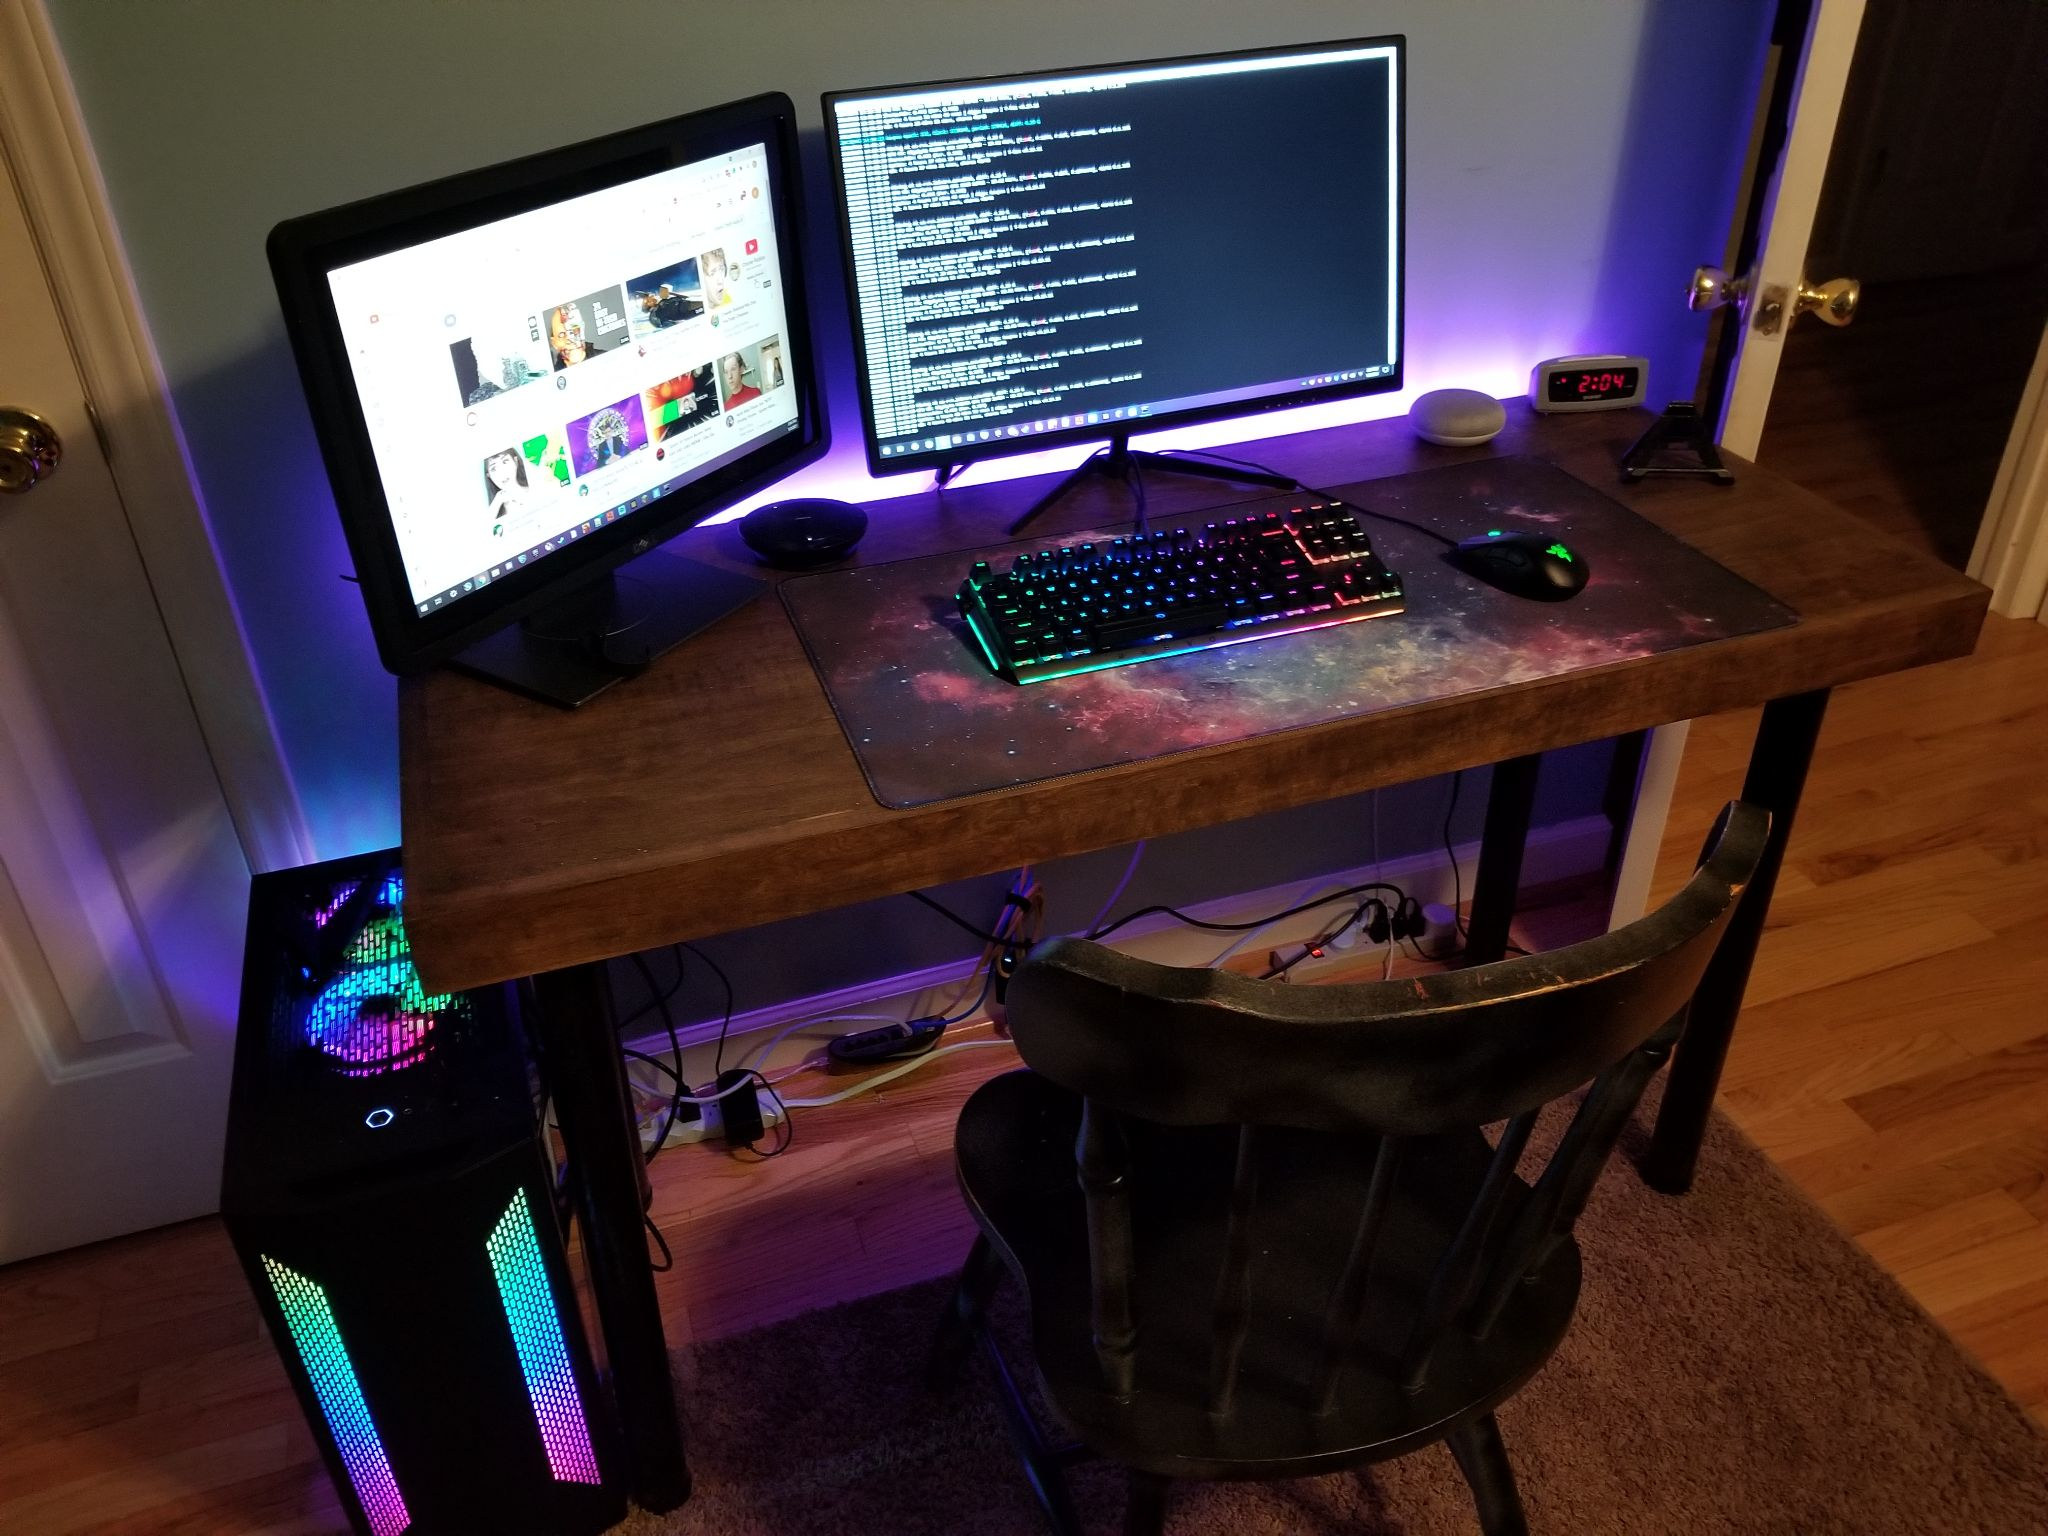
Here is where the workout for the machine begins. I built the kit on a Saturday morning and was done about noon. I had been working on this for about 3 weeks here and there and was ready to finish. I then started the surfacing process. I put nearly 9 hours on it on Saturday, surfacing it in 3 stages. I completed the last bit Sunday morning. It was a very small area. I didn’t realize it at the time but I could have done it in 2 stages. The machine has about 640mm on the Y-axis. The spindle reaches out quite far over the front. And I removed the endstops altogether on the Y-axis. What was really awesome was that I did not have to tram the spindle. You can see in the night picture it had machining marks but to the touch it was smooth. After 20 minutes of sanding, they were gone. I finished the bottom with some Polystain and installed the legs. Finally, I sanded the top to 440 grit and stained it. I was extremely proud of this project and there would have been no way that I could have gotten the bottom looking as good as it did without a CNC….At least not with the tools that I have.
Problem
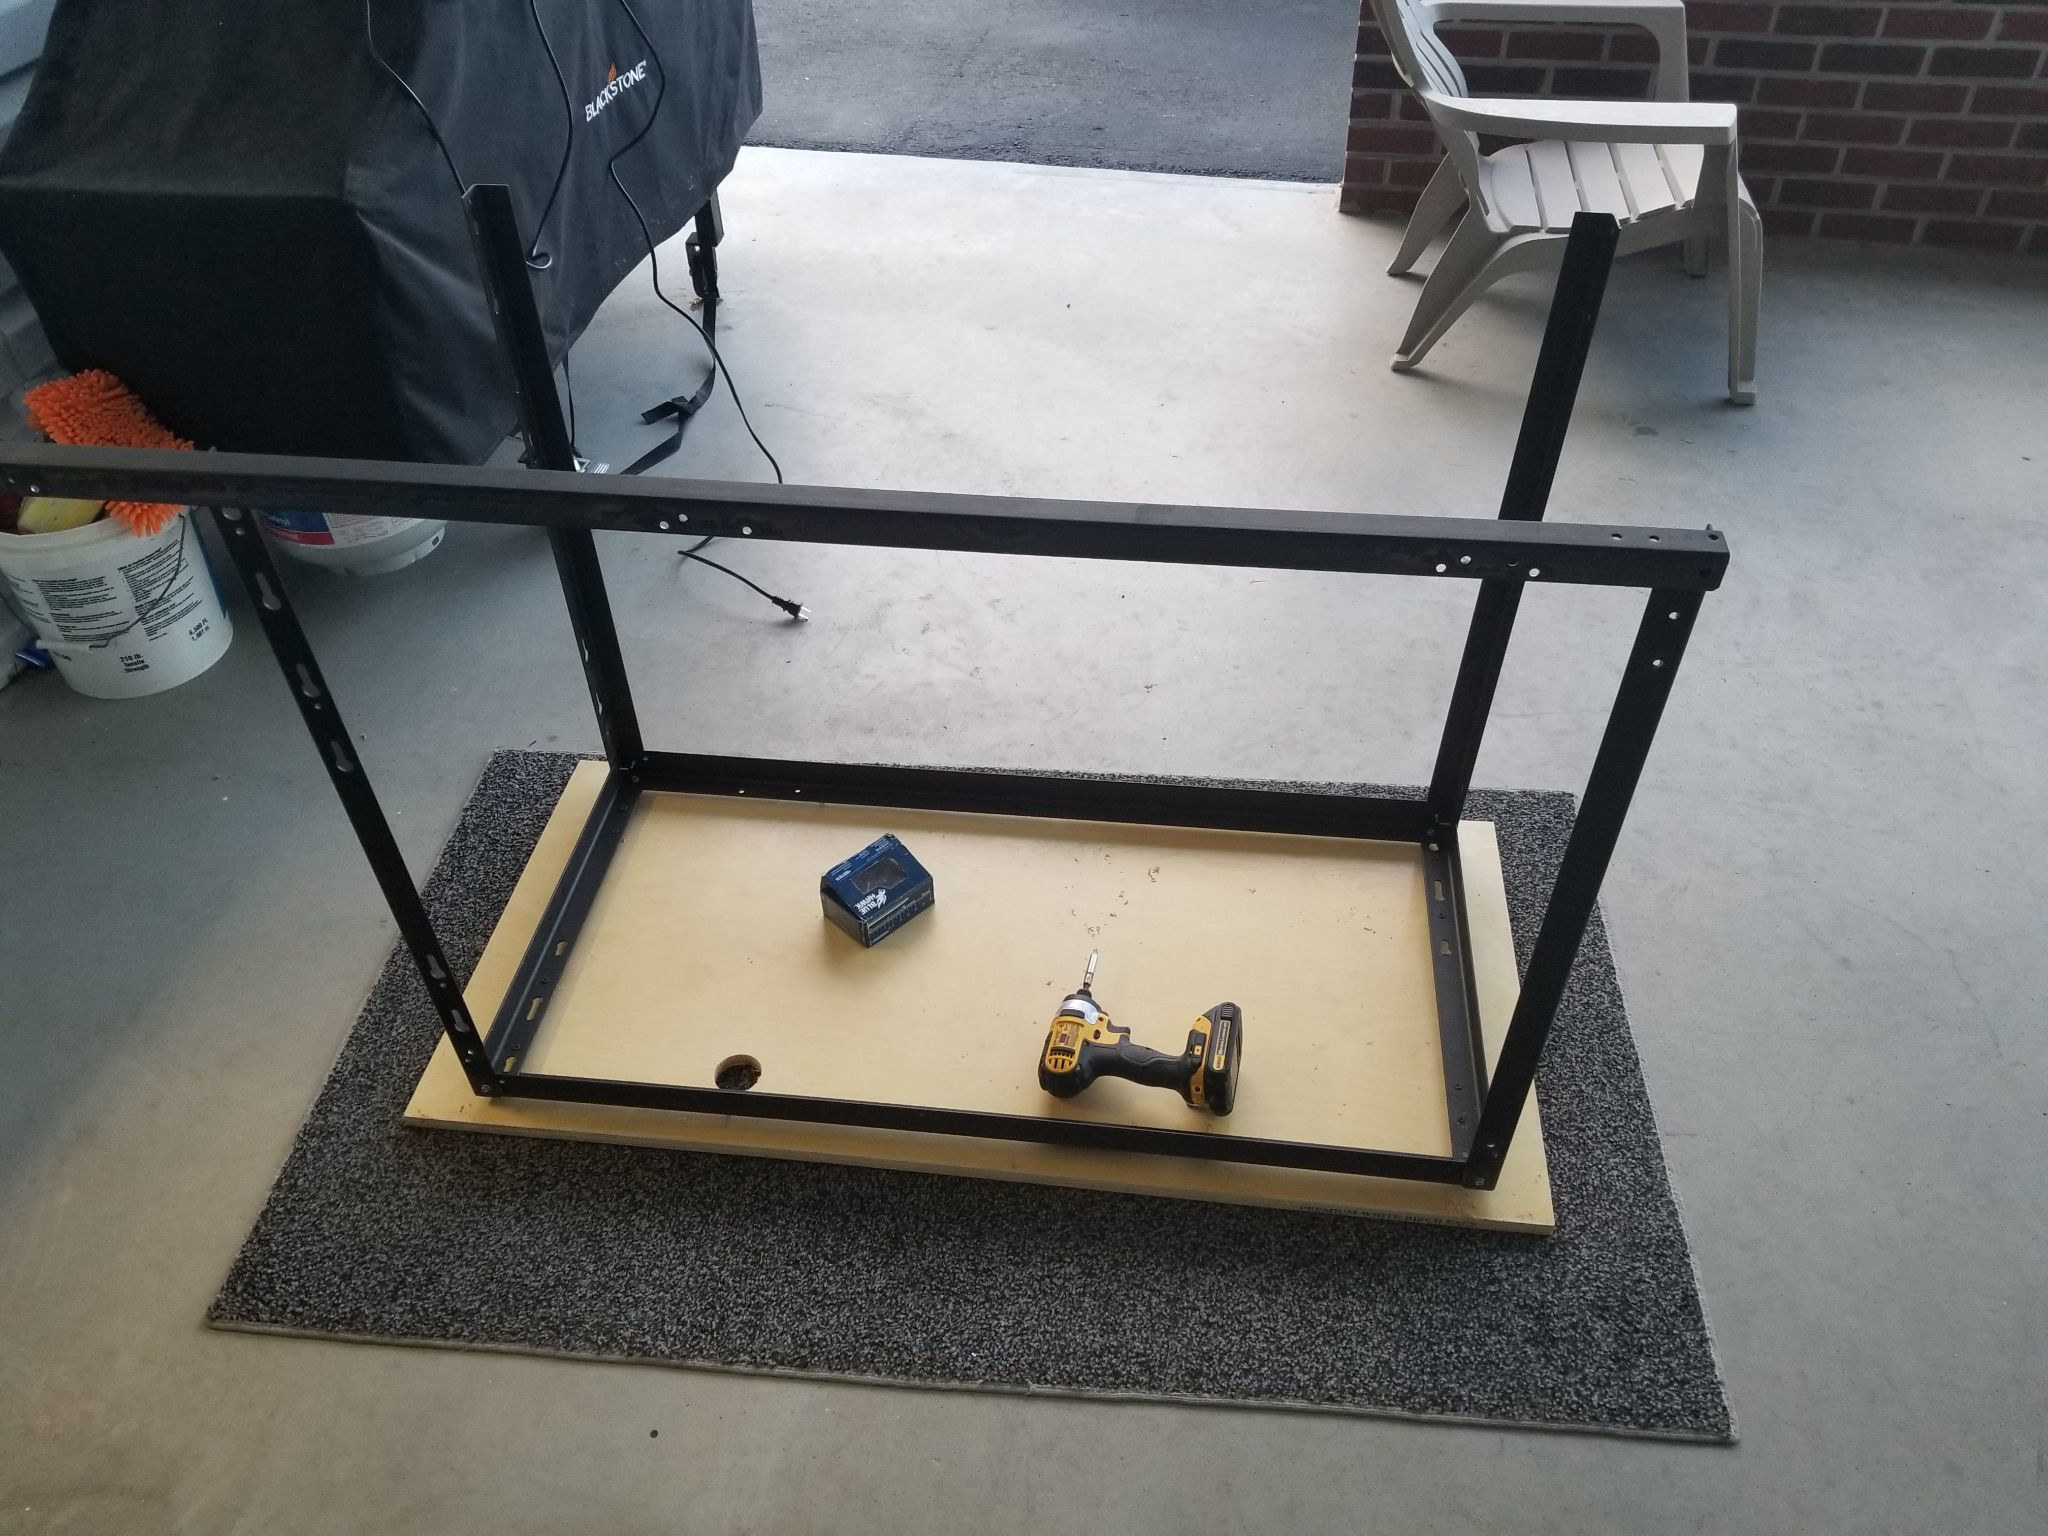
My workshop/office is about 7’x17’ and now the machine is huge. I was also tired of working off the floor so I tried to kill 2 birds with one stone. A folding cart. The folding part is to reduce the storage area as well as allow it to fit through my 3’ door. It cost me about $10 to make. Wood was my first thought but it is so expensive right now. After a little thought, I posted on Facebook if anyone had an old bed frame. I was willing to pay but got one for free. The frame was for a king-size bed and just barely enough angle iron. I had 2 1’ sections left. If you are interested in the dimensions let me know and I can draw them up and share them in the Sainsmart FB group.
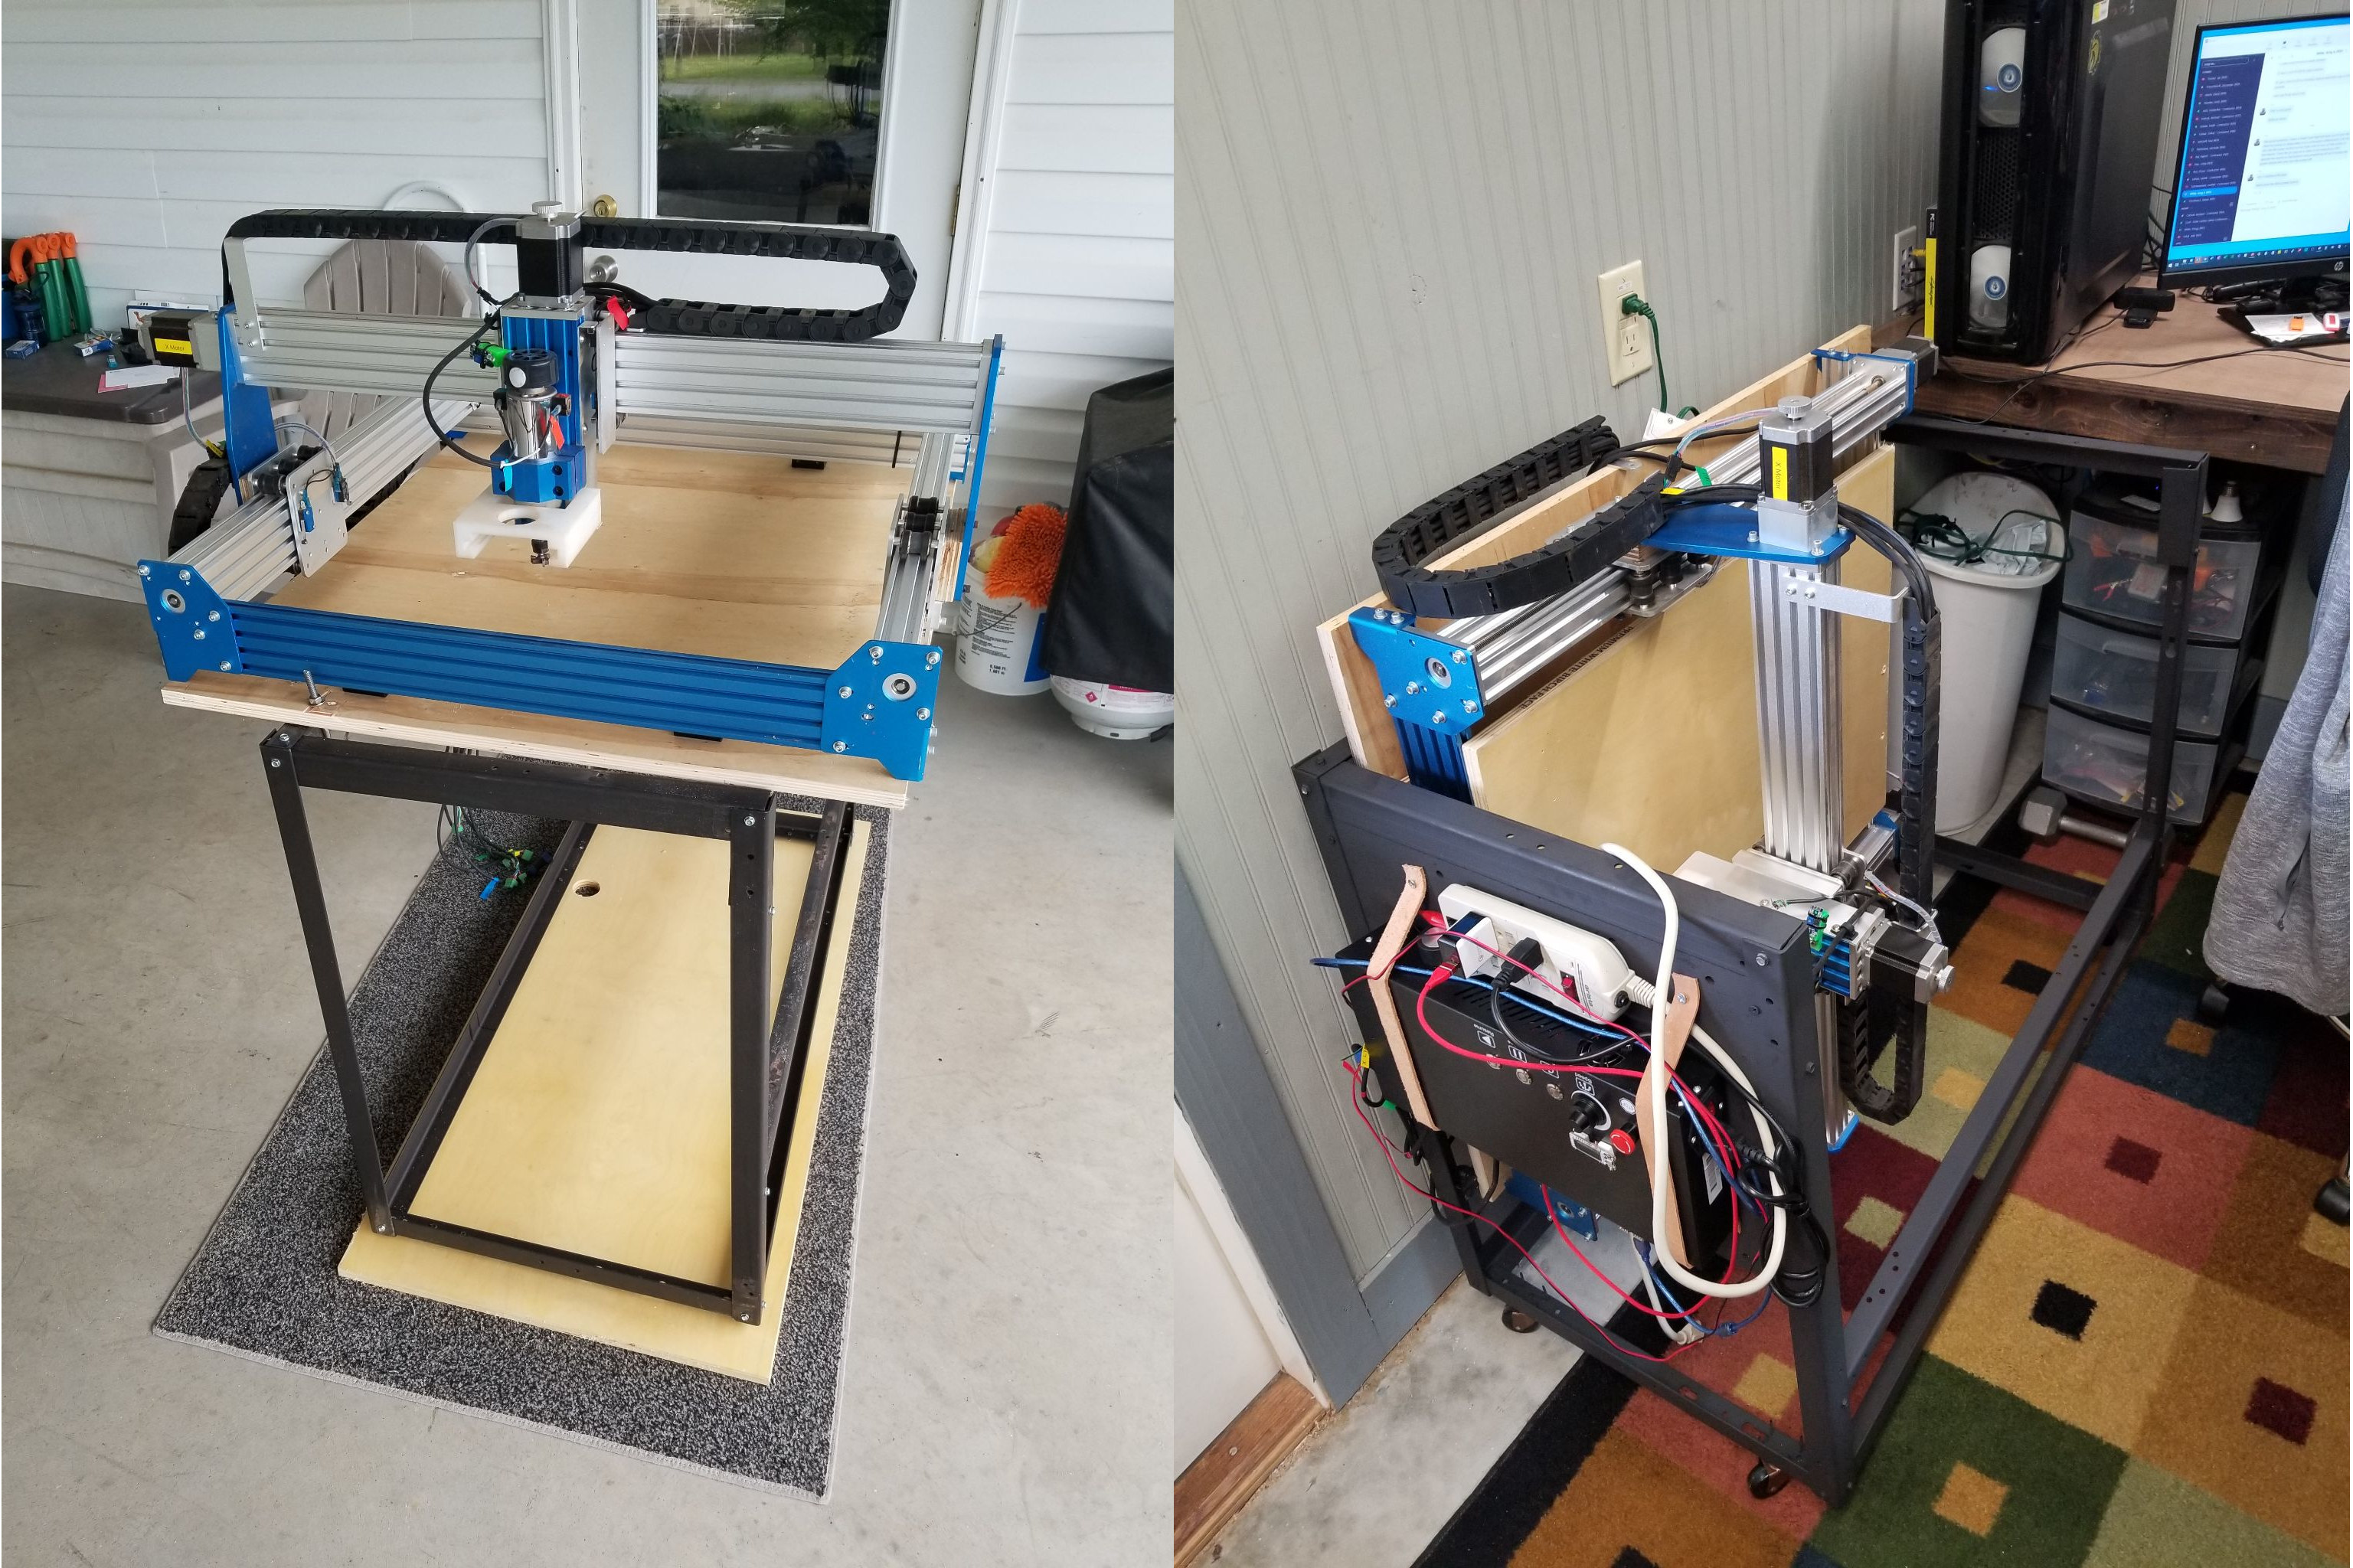
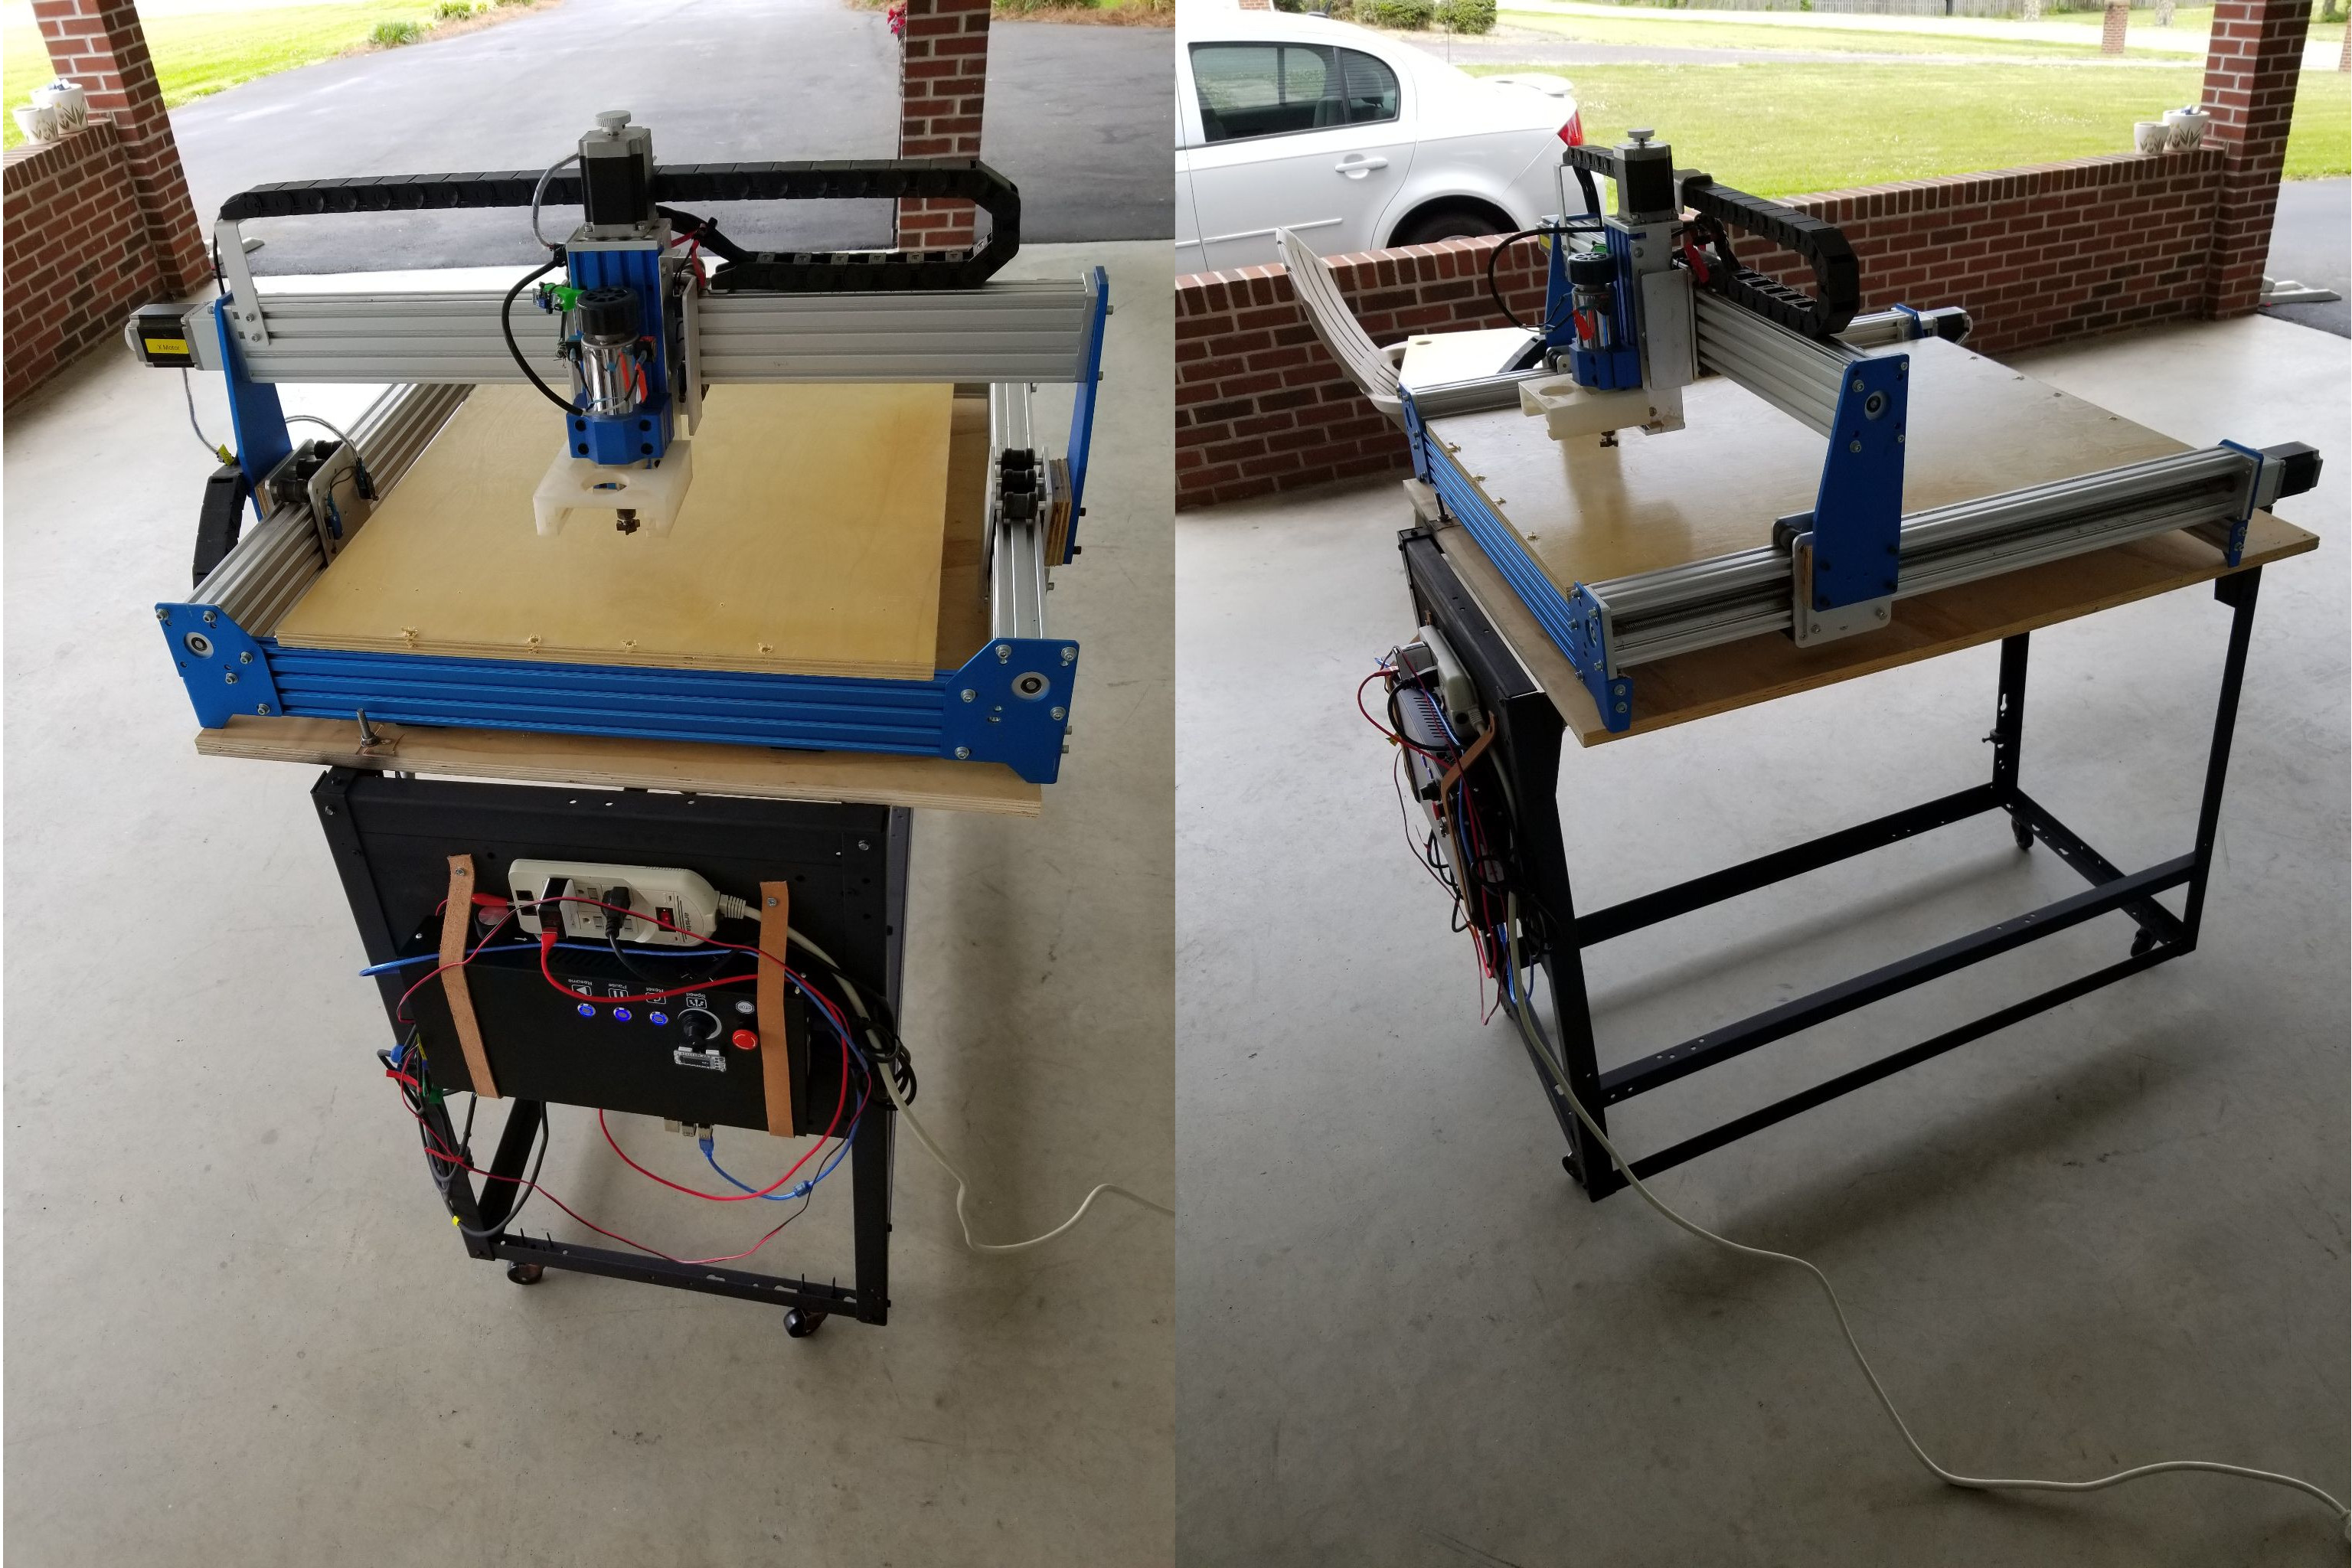
I am super happy with the way it turned out. Easy to move around and store and I can raise and lower the machine by myself. My only concern is long-term storage while hanging. I am not the first person to do this with a similar size machine and couldn’t find any evidence that it caused issues.
Final thoughts
Thanks for joining me on my CNC adventures and a big thank you to SainSmart for sending the extension kit. It was easy to assemble and the documentation very detailed. I could only find one potential flaw. The machine might need support under the spoil board. I surfaced my spoil board and there is about a 4mm drop in the middle. It is an old scrap. I thought I had it stored well but I can’t be certain. If I notice any additional sagging over time I will add a piece of 2040 down the middle. 800mm length is about $10 USD + shipping so it is an inexpensive fix. If you are interested in picking one up, you can do so on Sainsmart shop for $349 USD. Thank you.

Karl is a technology enthusiast that contributes reviews of TV boxes, 3D printers, and other gadgets for makers.
Support CNX Software! Donate via cryptocurrencies, become a Patron on Patreon, or purchase goods on Amazon or Aliexpress. We also use affiliate links in articles to earn commissions if you make a purchase after clicking on those links.


