
OpenScan is an open-source DIY 3D scanner that relies on Photogrammetry and works with Raspberry Pi camera modules, compatible ArduCam modules, as well as DSLR cameras, or the camera from your smartphone.
The open-source project was brought to my attention after I wrote about the Creality CR-Scan Lizard 3D scanner. The OpenScan kits include 3D printed parts such as gears, two stepper motors, a Raspberry Pi shield, and a Ringlight module to take photos of a particular object from different angles in an efficient manner.
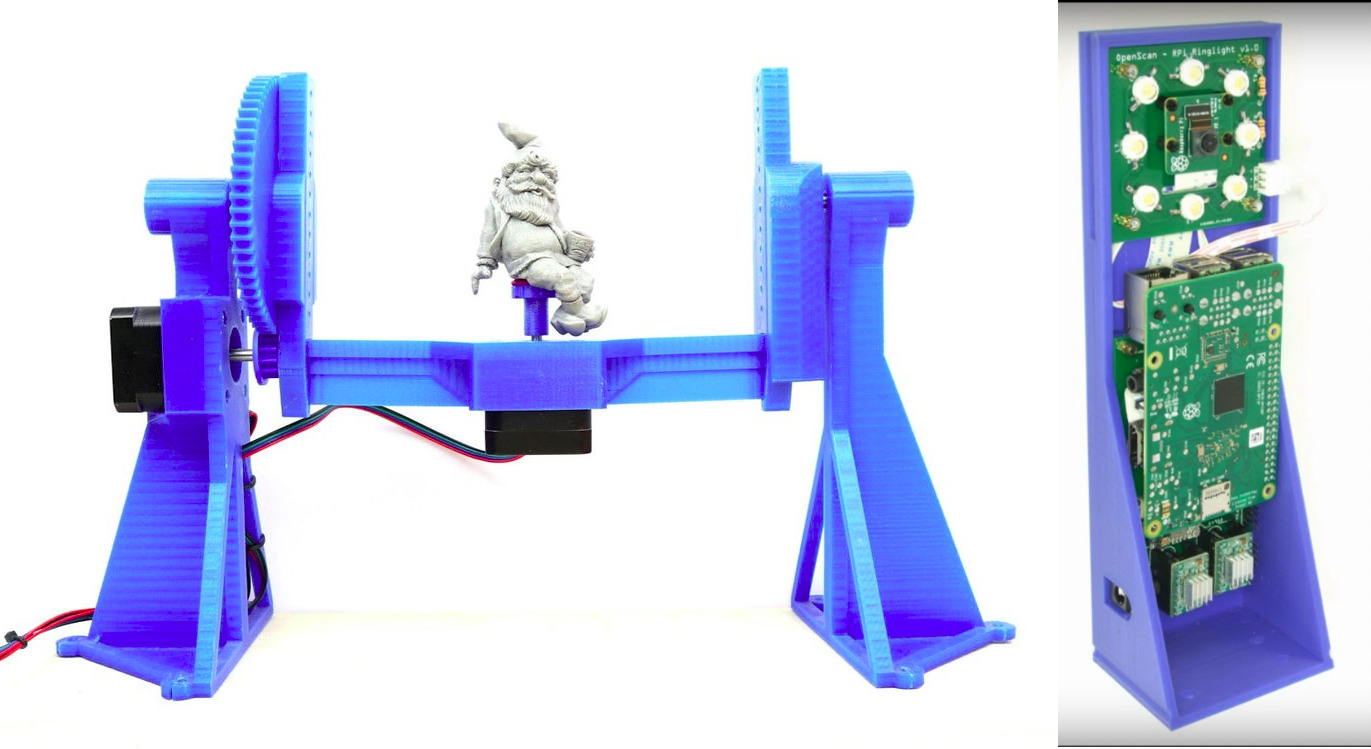
The OpenScan Classic kit above allows for 18x18x18cm scans and comes with the following components:
- 1x Nema 17 Stepper Motor (13Ncm)
- 1x Nema 17 Stepper Motor (40Ncm)
- 2x A4988 Stepper driver
- 1x Power Supply 12V/2A (5.5-2.5mm plug)
- 1x Optional Bluetooth remote shutter control for smartphones
If you’re going to use the Raspberry Pi as shown on the right side of the image, you’ll also need
- Raspberry Pi 3B+ SBC or compatible,
- 8MP Raspberry Pi Camera 8MP with 15cm ribbon cable (or compatible like Arducam 16MP)
- 1x Pi Shield (either pre-soldered or solder-yourself)
- 1x Pi Camera Ringlight (optional but highly recommended), pre-soldered or solder-yourself
- 8x M3x8mm, 10x M3x12mm, 8x M3 nuts, 50x6mm steel rod, 2x 1m stepper motor cable
Alternatively, you could use a smartphone or a compatible DSLR camera with a ring light mounted on a tripod. There used to be an Arduino kit, but it has now been deprecated.
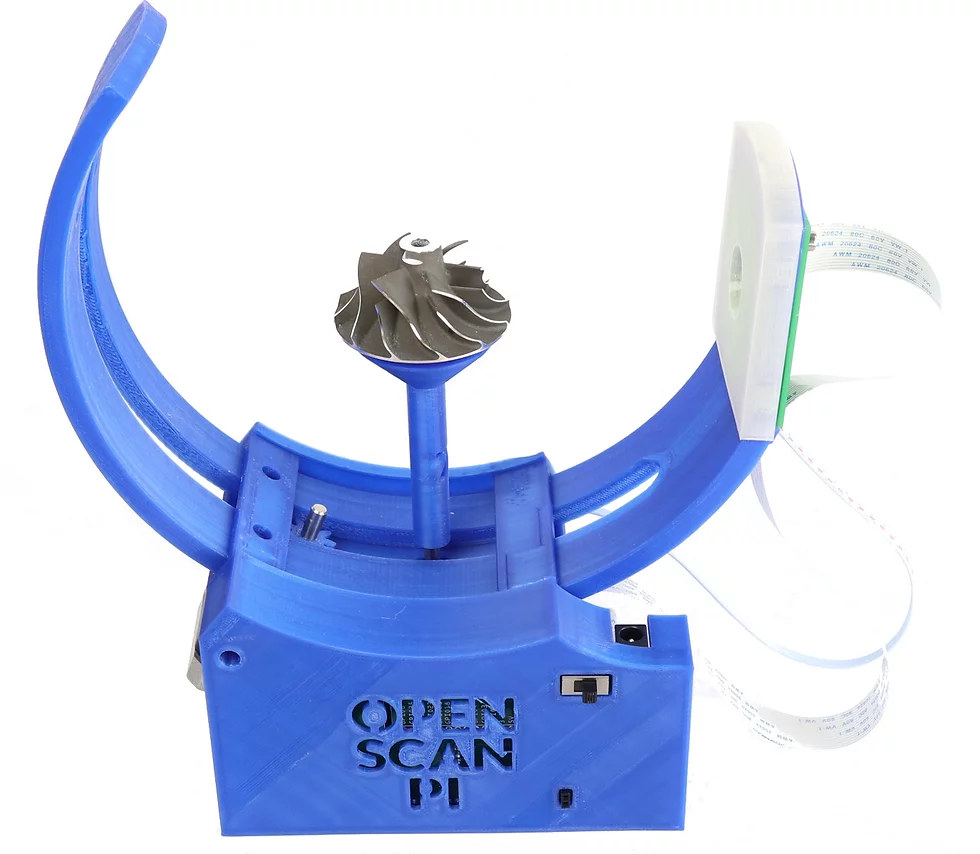
An alternative design is the OpenScan Mini pictured above with the Raspberry Pi camera and ring light attached to it, and suitable for scans up to 8x8x8 cm.
The system would then take photos from different angles under the same light conditions thanks to the ring light. Depending on the complexity of the object, you may have to take hundreds of photos. The photos can be imported to Photogrammetry software for processing. Open-source Photogrammetry programs include VisualSFM that’s fast but only outputs point clouds, as well as Meshroom and Colmap with mesh and texture support, but you’ll need a machine equipped with a CUDA-capable GPU for both. Meshroom is the most popular and actively developed.
There’s also the OpenScanCloud that will process the photo in the cloud with minimum user intervention. It’s free thanks to a donation, but usage is limited, and whether it can stay up and running may depend on the continuous support from donations. Here’s a short demo of how this all works.
You’ll find the latest Python software for Raspberry Pi and a custom Raspberry Pi OS image on Github, and 3D files for the scanner and Raspberry Pi shield on Thingiverse.
The easiest way to get started would be to purchase one of the kits directly from the project’s shop for 107 Euros and up. Note that a complete kit with pre-soldered boards, a Raspberry Pi 3B+, and an Arducam 16MP camera module goes for around 298 Euros including VAT.
It’s also possible to use photogrammetry without a kit, for example for larger objects, by simply taking photos of the object by yourself, but results can be mixed as found out by “Making for Motorsport” when comparing CR-Scan Lizard 3D scanner with photogrammetry using only a DSLR camera. It should be noted that both methods also required editing of the 3D model to remove “dirt” and adjust some shapes.

Jean-Luc started CNX Software in 2010 as a part-time endeavor, before quitting his job as a software engineering manager, and starting to write daily news, and reviews full time later in 2011.
Support CNX Software! Donate via cryptocurrencies, become a Patron on Patreon, or purchase goods on Amazon or Aliexpress


Its funny 20yrs+ into this, the same basic software limitation of post processing and cleaning on basic shapes is still unresolved for photo based 3d. So many input solutions yet still no way to just put the thing in there and output a solid object without spending more time than what a pro modeler would take to recreate it with only a few reference pictures.
I used Kinect module with USB 3.0 converter on a model, rotating around Z axis only. The most annoying part of a process was clean-up.
I created an Arduino powered jig last year that operates in a similar manner but can also trigger your SLR camera, and is small enough to be printed on a standard resin printer such as the Mars.
https://www.youtube.com/watch?v=i0hbsJ68MWk&t=23s&ab_channel=ReborneArt