
I’ve now had time to play with TwoTrees TS2 laser engraver after doing an unboxing and providing assembly instructions last month, so I can report my experience in this review using LaserGRBL program and MKSLaser mobile app. Note that this is my first laser engraver, and I’ll detail the many issues and mistakes I’ve come across so it might be useful to other beginners.
Testing TS2 laser engraver assembly
Before doing some engravings and cuts, we’ll have to test the TS2 to make sure it was properly assembled and we can operate it normally. The company is recommending the open-source and free LaserGRBL or the paid Lightburn program to control the TS2. I went with the former which happens to only work in Windows or macOS, while most of my hardware is running Linux or Android. So I dug out an older HDMI PC stick, the MeLE PCG01 running Windows 10, that despite its underwhelming specifications (Atom Z3735F, 2GB RAM, and 32GB flash) did the job just fine. I just have to connect it to the laser controller using the provided (blue) USB cable and a USB hub.

TwoTrees did not feel it useful to have a power button on the TS2 laser engraver, so instead, we need to use the emergency button to turn the device on and off. It works too. I won’t go through the LaserGRBL program interface since Note already did that in the TOOCA Laser L1 review. I had no problems connecting to the laser using COM3 at 115,200 bps. I could move the laser module along the X-axis, but not along the Y-axis. It was stuck and with a rattling sound as if something was stuck.
That’s because I did not understand the “About the adjustment method of the eccentric nut” section on page 27 of the user manual and both “synchronous wheels” need to be loosened on both sides as shown below.

Once this was done, I could move TS2’s laser module along both X-axis and Y-axis with LaserGRBL program, or even just by hand. From there I could start laser engraving with some level of success but I soon discovered one issue with “Homing”, the process of moving the laser module to 0,0 coordinates, from time to time with a similar rattling sound. It turns out a thick cable was on the way and prevented the Y-axis from reaching the limit switch, but somehow only sometimes.

I had to partially disassemble the laser engraver to move the cable inside, and the issue went away.

I did not have to make any other modifications with regard to the assembly, but I had still more to learn.

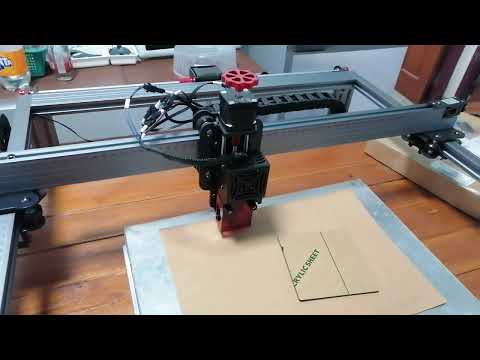
Another interesting tidbit is that the probe would only go as low as about 2.6 cm about the desk, so I had to cut a cooking tray placed upside down as you can see in the very first photo. Since I was not allowed to use this for cutting, I also purchased a honeycomb working table for which I paid under $30 on Aliexpress.

But it happens to be only around 2.2mm thick, so the probe could still not reach materials that were 4-5mm thick or less.

So I had to make it a little higher using some wooden blocks on four sides. This is actually not needed for manual focus, but required for the auto focus function.

The first engravings – Beginner’s luck
TwoTrees provides two samples based on their logo for engraving and cutting in the provided microSD card. So let’s start with that.
![]()
The logo is only black and white, as in “not grayscale”, and we are recommended to select Line to Line Tracing for this type of image. We can click next to select the speed, laser option (mostly power), and size and position of the image.

I selected 6,000mm/min speed and 50% power for cardboard material following the data provided by the handy reference tables provided in the user manual for engraving and cutting various materials.

I also used an offset, since I find it easier to follow what’s going on that starting at 0,0. Once we click on create we can access the image will soon show up in LaserGRBL interface.
![]()
At the time of the review, I would typically click on the Homing button to calibrate the position, then Corner to make the laser go into the bottom left corner, adjust the position of the material, then click on the frame button that will draw a rectangle around the area with the laser at low power. Once everything is in place I would click on the green button to start engraving, not forgetting to wear protection goggles beforehand.

And I found it looked OK. So I then imported a simplified version of the CNXSoft logo that’s basically a Tux logo with CNXSOFT written on it and converted into grayscale.
![]()
We are told to select 1-bit DW Dithering for grayscale images instead of Line to Line Tracing, and I went ahead and used the same settings since I was going to engrave on the same cardboard panel.
 Just the size was bigger, and I also found it looked good.

I also shot a video during the process for reference. The video is played at 8x speed.

I carried on with a small steel metal plate. When I first used 3,000mm/s speed and 100% laser power as listed in the table it was really pale, so I changed the speed to 600mm/s, and the results looked nice to me. Somehow I and my girlfriend can even see colors, but it may be a trick from our brains.

At that point, I felt like that laser engraving thing is just too easy and I’m a pro!
It’s getting bad and ugly
But then I switch to leather or a leather-like material.

It actually looks better in the photo above than in real life. If we look at a specific angle we can see the logo as above but in most cases, it’s hardly visible. Eventually, I found out that leather may not be well suited to grayscale images and text or a simple logo may be better, and the same is true for black acrylic and other dark materials.
But when I switched to plywood and wood, it got really ugly.


I thought they might be a problem. I read that the laser lens may get dirty after a while, and even though the laser engraver was in operation I still cleaned the lens following some of the instructions from the TS2 playlist on YouTube. But it did not help.
TwoTrees TS2 laser auto-focus
But then I realized I never adjusted the Z-axis except to prevent the laser module from hitting the material. Facepalm time! There’s a Z-axis auto-focus section on page 28 of the TS2 user manual both for Lightburn and LaserGRBL, and I skipped that part.
For LaserGRBL, it involves loading the TS2-CustomButton.zbn file to add icons specific to the TS2 laser engraver including some for the Z-axis for automatic height adjustment for engraving or cutting.
![]()
The LaserGRBL interface looks as below after installation.

That means I did wrong all that time and was only lucky at the beginning, The proper procedure changes a bit. After Homing, I would double-click around the middle of the image and then click on Carve to have the probe go down and automatically adjust the height for engraving (around 7mm above the probe), then click on the “find edge on outline” to make sure the position of the material is fine, and click on Homing again, before clicking on the green arrow on the top left to start the engraving process. If I do not go back to 0,0 coordinates before starting, the laser engraver would just consider the last point as the origin and move top right from there starting to engrave my desk…

But the good news is that I’m back in business, and proper engraving.

I might still need to work on adjusting the settings for optimal results, but at least we can work and improve from there. Two things I did not mention so far. Laser engraving (and cutting) is noisy and generates smoke and smells.

It’s noisy because the TS2 laser engraver has three fans, one in the laser module, and two in the controllers that work at all times even when the laser module is not working. The process also produces smoke and smells so it’s important to have good ventilation.

I did try to engrave the TwoTrees logo on the provided acrylic plate using the parameters from the table, but I find the result disappointing. One important with laser engraving is to experiment with settings until you find the right one for your design and material. It can take several tries and materials can run out pretty fast. With the benefit of hindsight, I should have probably tried with smaller image sizes to experiment with various settings.
Laser cutting
Now that we have done some engravings, let’s try to cut plywood using the TwoTrees logo for testing.

We need to select “Vectorize!” in the “Conversion Tool” section. I was wondering what “Centerline” would do, but it would not work as my low-end PC stick runs Windows 10 32-bit, and this feature only works with a 64-bit OS. Nevertheless, this is not an issue for our use case, so let’s click Next.

The table recommends 450mm/minute speed for a 2mm thick plywood panel, but to make sure it cuts through I went with 400mm/min. Note even if the top of the honeycomb plate is around 3 centimeters above the table, you’ll need some protection or it will engrave your table. A metallic plate does the job. I used the one I received with Creality Ender-3 S1 Pro’s laser module kit.

It worked just fine, although there are some burns on the edge design. Those can be prevented with an air pump. The TwoTrees TS2 laser engraver does support air assist, but a pump was not provided with the kit. The design on the bottom left was done with S-MAX set to 100 (10%) instead of 1,000 (100%).
Then I decided to combine laser engraving and cutting for CNXSoft logo. I just create an image with the edge of the logo in GIMP using the Edge detection feature plus some cleanup.

I suppose it might be possible to create a file to engrave and cut in one pass, but I did the engraving file and then loaded another file for cutting. I used 450mm/min speed this time around as it’s enough.
![]()
The final result probably lacks the contrast I had on the cardboard. Either it’s a material thing, or I would have to adjust the settings.
MKSLaser mobile app for Android
The control board (Makerbase MKS DLC32) is based on ESP32, so the laser engraver can be connected to WiFi, and controlled through the MKSLaser app for Android.

We just need to find Laser_XXXXX SSID connect to it and enter the password 12345678. There’s no way that I could find to switch to station mode, so the laser engraver is working on access point mode at all, and it’s not possible to easily change the password either. Nevertheless, once we are connected we can start the MKSMaker app, tap on the top right icon, and connect to the IP address 192.168.4.1.

If we tap on Material, we get a few cliparts including the car above which we can engrave with different styles (Gray, Strong, Sketch, or Dither), and configure the size, speed, and laser power. What is not available are offsets and autofocus. So we have to start at 0,0 and manually adjust the height of the laser so that the probe is 7mm above the material.

The left side looks OK, but the right side is badly burnt. I could not see why at first but then realized I made another rookie mistake. The small ring is actually slightly thicker than the wooden pad, so the right side was around 1mm higher than the left side.

The Creation section allows you to draw shapes and write text, as well as import photos. I went with the latter and selected Sketch. It takes about one minute to transfer the data to the MicroSD card in the TS2 laser engraver and begin the engraving process. I also created a rectangle image to cut out the result.

The engraving process went fine, but as we’ve seen above the cutting process created some burnt areas around the edges because an air pump was not installed.

Those are not too noticeable once we install the result in a frame that was provided as part of the free materials kit that came with the TS2 laser engraver
ESP32-Web interface
The user manual also mentioned it’s possible to access a web interface named ESP32-WEB. We just need to connect to the Laser_XXXXX SSID as e did for the mobile app, and then type the IP address of the engraver (192.168.4.1) into a web browser.

We can control the position and power of the laser from the interface, but its usefulness is limited because we can’t create images. The dashboard will just show existing designs based on NC or G-Code found in the MicroSD card.
 The Settings allows the user to modify the same parameters as found in the LaserGRBL program.

Makerbase MKS DLC32 control board
TwoTrees provides some optional accessories for the TS2 laser engraver such as a touchscreen display, so the control panel is made to be opened.

Inside we’ll find the Makerbase MKS DLC32 V2.1 control board based on ESP32-WROOM-32U wireless module, and whose design is partially open-source (PDF schematics and PCB layout) and shared on GitHub. The firmware appears to only be shared in binary form.
Conclusion
Since the TwoTrees TS2 is my very first laser engraver I can’t make a comparison, but the build quality looks good to me, and it was an interesting learning experience. The autofocus function is nice since we don’t need to manually adjust the height of the laser module like on some other models.
I’d like to thank TwoTrees for sending the TS2 for review. The laser engraver is now available for $599, but you can save $100 with coupon CN100. I’d also recommend getting a honeycomb working table and an air pump, especially if you are going to cut wood or acrylic panels with the laser engraver.

Jean-Luc started CNX Software in 2010 as a part-time endeavor, before quitting his job as a software engineering manager, and starting to write daily news, and reviews full time later in 2011.
Support CNX Software! Donate via cryptocurrencies, become a Patron on Patreon, or purchase goods on Amazon or Aliexpress. We also use affiliate links in articles to earn commissions if you make a purchase after clicking on those links.

