
SeeedStudio introduced BeagleBone Green Wireless based on BeagleBone Green, but replacing the Ethernet port by a Wilink8 WiFi and Bluetooth module, and providing 4 USB ports in total. I’ve also ready taken some picture of the board, and Grove Base Cape to addition the company’s add-on boards via I2C, UART, analog, or digital interfaces. So today, I’ll report about my experience getting started with the board.
First Boot of BeagleBone Green Wireless
Since the board comes with a Debian image installed on the internal 4GB eMMC flash, checking out the board should be really easy. The Wiki may help, but for a first try to check the board is indeed working, you can simply connect it to a 5V power supply, or the USB port of your computer to port it up.
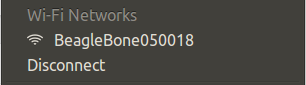
I’m using a development machine running Ubuntu 14.04 with both Ethernet connected to my router, and a WiFi USB dongle which I used to find and connect to BeagleBoneXXXXXX access point. You’ll get assigned an IP address (e.g. 192.168.8.138), and can access the board using 192.168.8.1.
 Alternatively, you could use the micro USB to USB cable to connect the board over IP. In Linux, it just works, but in Windows or Mac OS X, you may need to following the instructions to install the drivers.
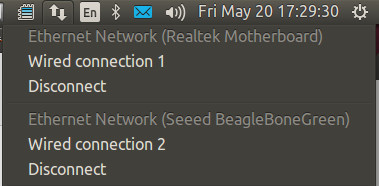
You should see a new ethX device in your computer in 192.168.7.x subnet
|
1 2 3 4 5 6 7 8 9 |
jaufranc@FX8350:~$ ifconfig eth2 eth2 Link encap:Ethernet HWaddr 88:c2:55:89:0d:25 inet addr:192.168.7.4 Bcast:192.168.7.255 Mask:255.255.255.0 inet6 addr: fe80::8ac2:55ff:fe89:d25/64 Scope:Link UP BROADCAST RUNNING MULTICAST MTU:1500 Metric:1 RX packets:47 errors:3 dropped:0 overruns:0 frame:3 TX packets:109 errors:0 dropped:0 overruns:0 carrier:0 collisions:0 txqueuelen:1000 RX bytes:8596 (8.5 KB) TX bytes:21054 (21.0 KB) |
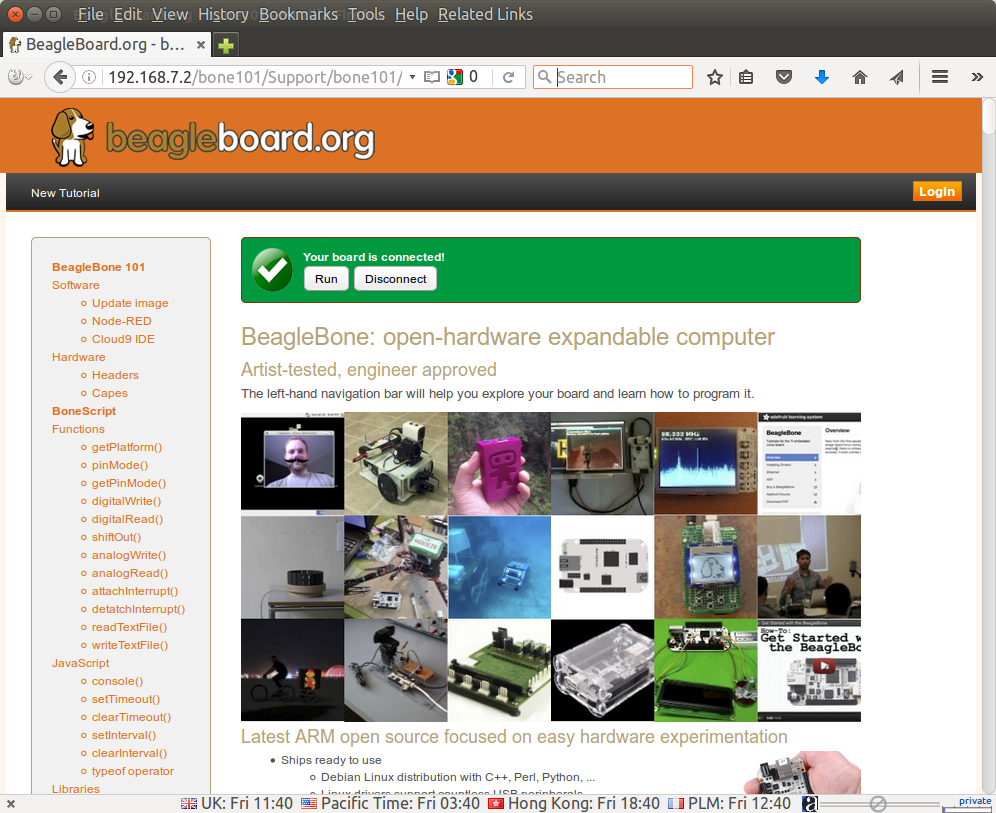
Now you can start your favorite web browser, and access the board using http://192.168.8.1 (WiFi), or http://192.168.7.2 (USB Ethernet gadget) to get access to some documentation in the board, and links to tools like Node-RED, Cloud9 IDE, and BoneScript.
Updating Firmware Image
Now that we’ve made sure we’ve received a working board, it might be a good idea to update the firmware. Bear in mind that the board will officially start shipping on May 30, 2016, and I got an early board, so the final image may differ.
I’ve open a terminal to download, extract, and flash the image to a 16GB micro SD card (4GB or greater required):
|
1 2 3 4 |
wget https://rcn-ee.net/rootfs/bb.org/testing/2016-05-16/seeed-iot/bone-debian-8.4-seeed-iot-armhf-2016-05-16-4gb.img.xz xz -d bone-debian-8.4-seeed-iot-armhf-2016-05-16-4gb.img.xz sudo dd if=bone-debian-8.4-seeed-iot-armhf-2016-05-16-4gb.img | pv | sudo dd of=/dev/sdX bs=16M sync |
Replace sdX in the command line above, your own SD card device which you can check with lsblk.
This is an installer image designed to install Debian in the internal storage of the board. While the board is turned off, insert the micro SD card, hold the USER button (on board or Cape), connect the power supply, release the button, and the installation should start. The instructions mention that all 4 USRx LEDs will be lit solid when the update is complete and that it may take up to 45 minutes. So I went for dinner, and when I came back over one hour later, I did not see the LEDs were on, so I waited a little longer. But eventually, I decided to turn off the board, remove the micro SD card, and boot the board again.
After connecting to the BeagleBone SSID, I access the board with SSH successfully:
|
1 2 3 4 5 6 7 8 9 10 11 12 13 |
jaufranc@FX8350:~$ ssh root@192.168.8.1 Debian GNU/Linux 8 BeagleBoard.org Debian Image 2016-05-16 Support/FAQ: http://elinux.org/Beagleboard:BeagleBoneBlack_Debian default username:password is [debian:temppwd] Last login: Mon May 16 13:09:58 2016 from fx8350 root@beaglebone:~# jaufranc@FX8350:~$ route |
The date was 2016/05/16, so the update was successful.
BeagleBone Green Wireless Network Configuration
So far, everything went rather smoothly, but setting up networking was more of a challenge.
Since I now had two network interfaces on my computer with Ethernet to my router and WiFi to BeagleBone Green Wireless (BBGW), Internet traffic was routed to both, and since BBGW had no network connection I often had problems accessing the net to browse the web or send emails. So I had two options: change the routing table or connect the board to my router. I tried the routing table method first, which looked as follows initially:
|
1 2 3 4 5 |
jaufranc@FX8350:~$ ip route default via 192.168.0.1 dev eth0 proto static 192.168.0.0/24 dev eth0 proto kernel scope link src 192.168.0.104 metric 1 192.168.8.0/24 dev wlan1 proto kernel scope link src 192.168.8.138 metric 9 |
After my attempt at changing metric to a high value did not work as expected, I changed the route from “link” to “host” for WiFi so that only the local traffic is routed there.
|
1 2 3 4 5 6 7 |
sudo ip route del 192.168.8.0/24 sudo ip route add 192.168.8.1 dev wlan1 proto kernel scope host src 192.168.8.138 ip route default via 192.168.0.1 dev eth0 proto static 192.168.0.0/24 dev eth0 proto kernel scope link src 192.168.0.104 metric 1 192.168.8.1 dev wlan1 proto kernel scope host src 192.168.8.138 |
This did not work that well either, so I went with plan B to connect the board to my router. Network connections in BBGW:
|
1 2 3 4 5 6 7 8 9 10 11 12 13 14 15 16 17 18 19 20 21 22 23 24 25 26 27 28 29 30 31 32 33 |
root@beaglebone:~# ifconfig SoftAp0 Link encap:Ethernet HWaddr 88:c2:55:89:0d:23 inet addr:192.168.8.1 Bcast:192.168.8.255 Mask:255.255.255.0 inet6 addr: fe80::8ac2:55ff:fe89:d23/64 Scope:Link UP BROADCAST RUNNING MULTICAST MTU:1500 Metric:1 RX packets:12543 errors:0 dropped:11 overruns:0 frame:0 TX packets:17356 errors:0 dropped:0 overruns:0 carrier:0 collisions:0 txqueuelen:1000 RX bytes:1515052 (1.4 MiB) TX bytes:16624946 (15.8 MiB) lo Link encap:Local Loopback inet addr:127.0.0.1 Mask:255.0.0.0 inet6 addr: ::1/128 Scope:Host UP LOOPBACK RUNNING MTU:65536 Metric:1 RX packets:1735 errors:0 dropped:0 overruns:0 frame:0 TX packets:1735 errors:0 dropped:0 overruns:0 carrier:0 collisions:0 txqueuelen:1 RX bytes:144015 (140.6 KiB) TX bytes:144015 (140.6 KiB) usb0 Link encap:Ethernet HWaddr 88:c2:55:89:0d:20 inet addr:192.168.7.2 Bcast:192.168.7.255 Mask:255.255.255.0 UP BROADCAST MULTICAST MTU:1500 Metric:1 RX packets:0 errors:0 dropped:0 overruns:0 frame:0 TX packets:0 errors:0 dropped:0 overruns:0 carrier:0 collisions:0 txqueuelen:1000 RX bytes:0 (0.0 B) TX bytes:0 (0.0 B) wlan0 Link encap:Ethernet HWaddr de:ad:be:ef:00:00 UP BROADCAST MULTICAST DYNAMIC MTU:1500 Metric:1 RX packets:0 errors:0 dropped:0 overruns:0 frame:0 TX packets:0 errors:0 dropped:0 overruns:0 carrier:0 collisions:0 txqueuelen:1000 RX bytes:0 (0.0 B) TX bytes:0 (0.0 B) |
So we wan t to configure wlan0 to connect to my router. Remember that only 2.4 GHz can work, as the board does not support 5 GHz.
So I edited /etc/network/interfaces with vi, and added the following four line at the end of the file:
|
1 2 3 4 |
auto wlan0 iface wlan0 inet dhcp wpa-ssid {ssid} wpa-psk {password} |
I save the done, and brought down and up the interface:
|
1 2 3 4 5 6 7 8 9 10 11 12 |
ifdown wlan0 ifup wlan0 root@beaglebone:~# ifconfig wlan0 wlan0 Link encap:Ethernet HWaddr 2c:f7:f1:06:00:24 inet addr:192.168.0.112 Bcast:192.168.0.255 Mask:255.255.255.0 inet6 addr: fe80::2ef7:f1ff:fe06:24/64 Scope:Link UP BROADCAST RUNNING MULTICAST DYNAMIC MTU:1500 Metric:1 RX packets:25169 errors:0 dropped:0 overruns:0 frame:0 TX packets:7390 errors:0 dropped:0 overruns:0 carrier:0 collisions:0 txqueuelen:1000 RX bytes:4446154 (4.2 MiB) TX bytes:10797321 (10.2 MiB) |
Awesome! Only problem is that after reboot, wlan0 would not acquire an IP address, and I had to run ifdown and ifup manually again.
I switched to static IP address configuration:
|
1 2 3 4 5 6 7 8 |
auto wlan0 #iface wlan0 inet dhcp iface wlan0 inet static address 192.168.0.222 netmask 255.255.255.0 gateway 192.168.0.1 wpa-ssid {ssid} wpa-psk {password} |
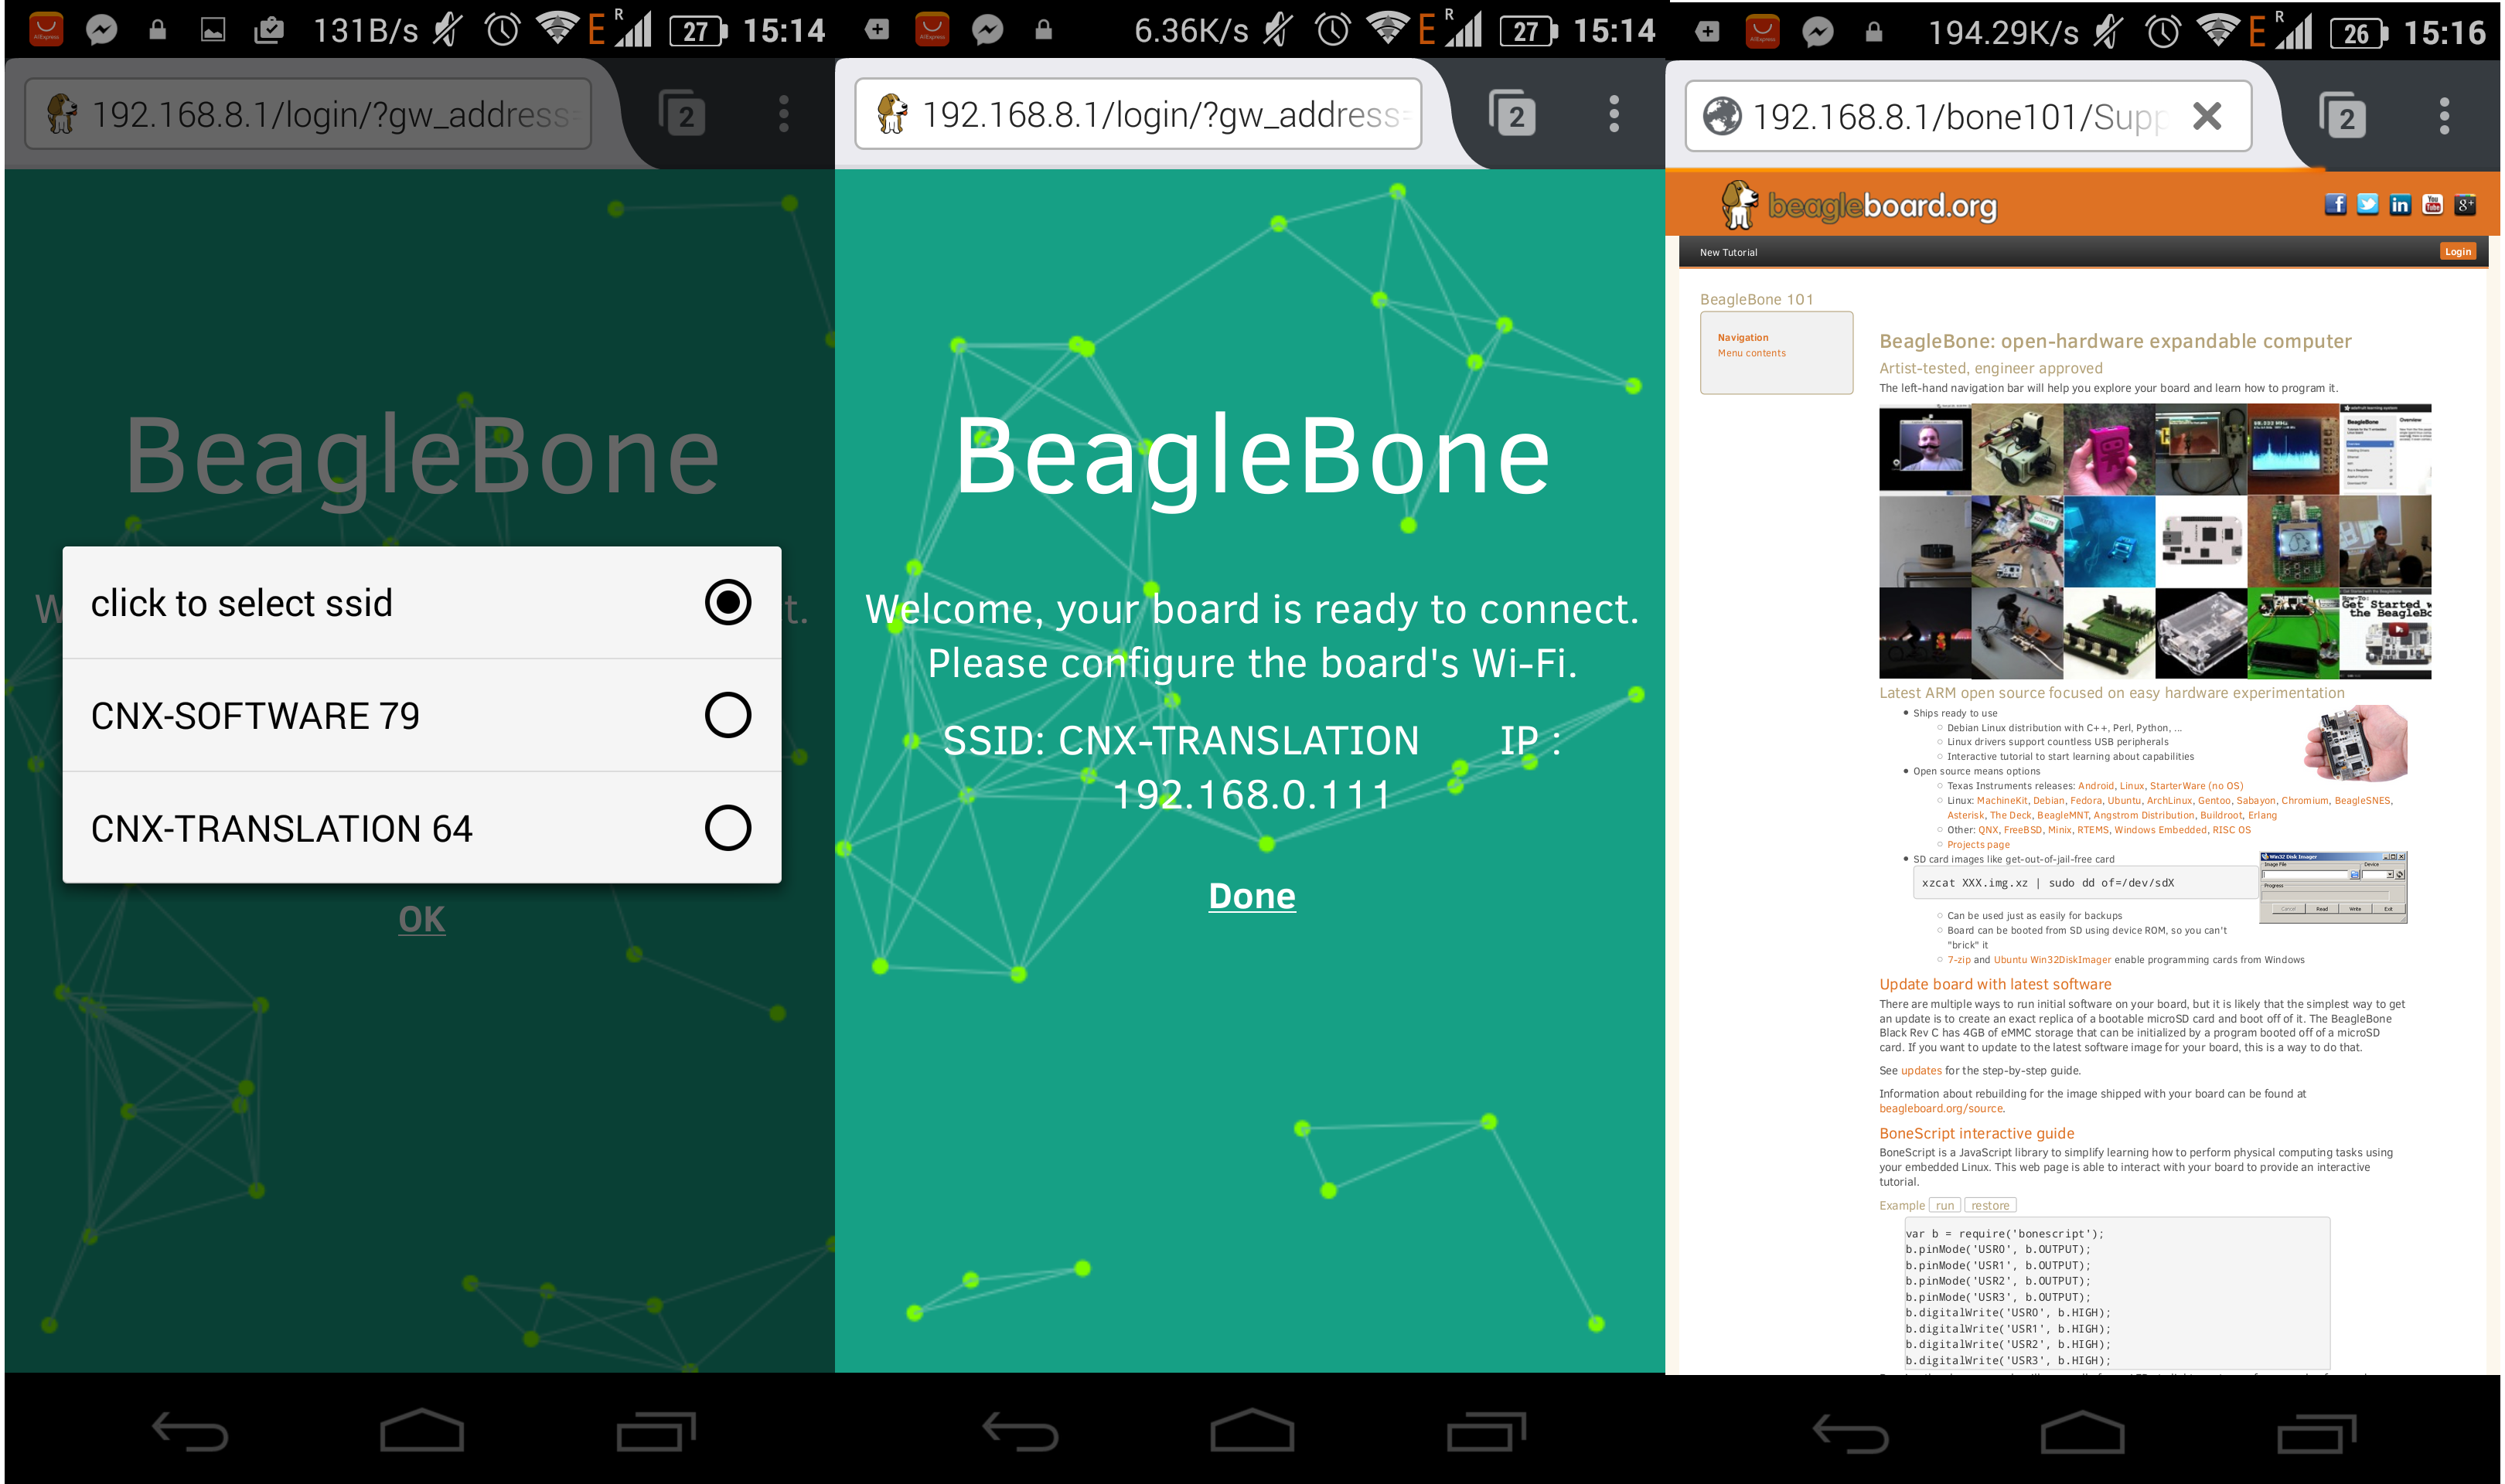
But the same problem occurred, so I asked on the beta group mailing list, and was informed that I could configure that using my smartphone. Simply connect BBGW AP, go to the sign-in page (http://192.168.8.1/login), click the select SSID, and enter password. That method is also mention in the system reference manual.
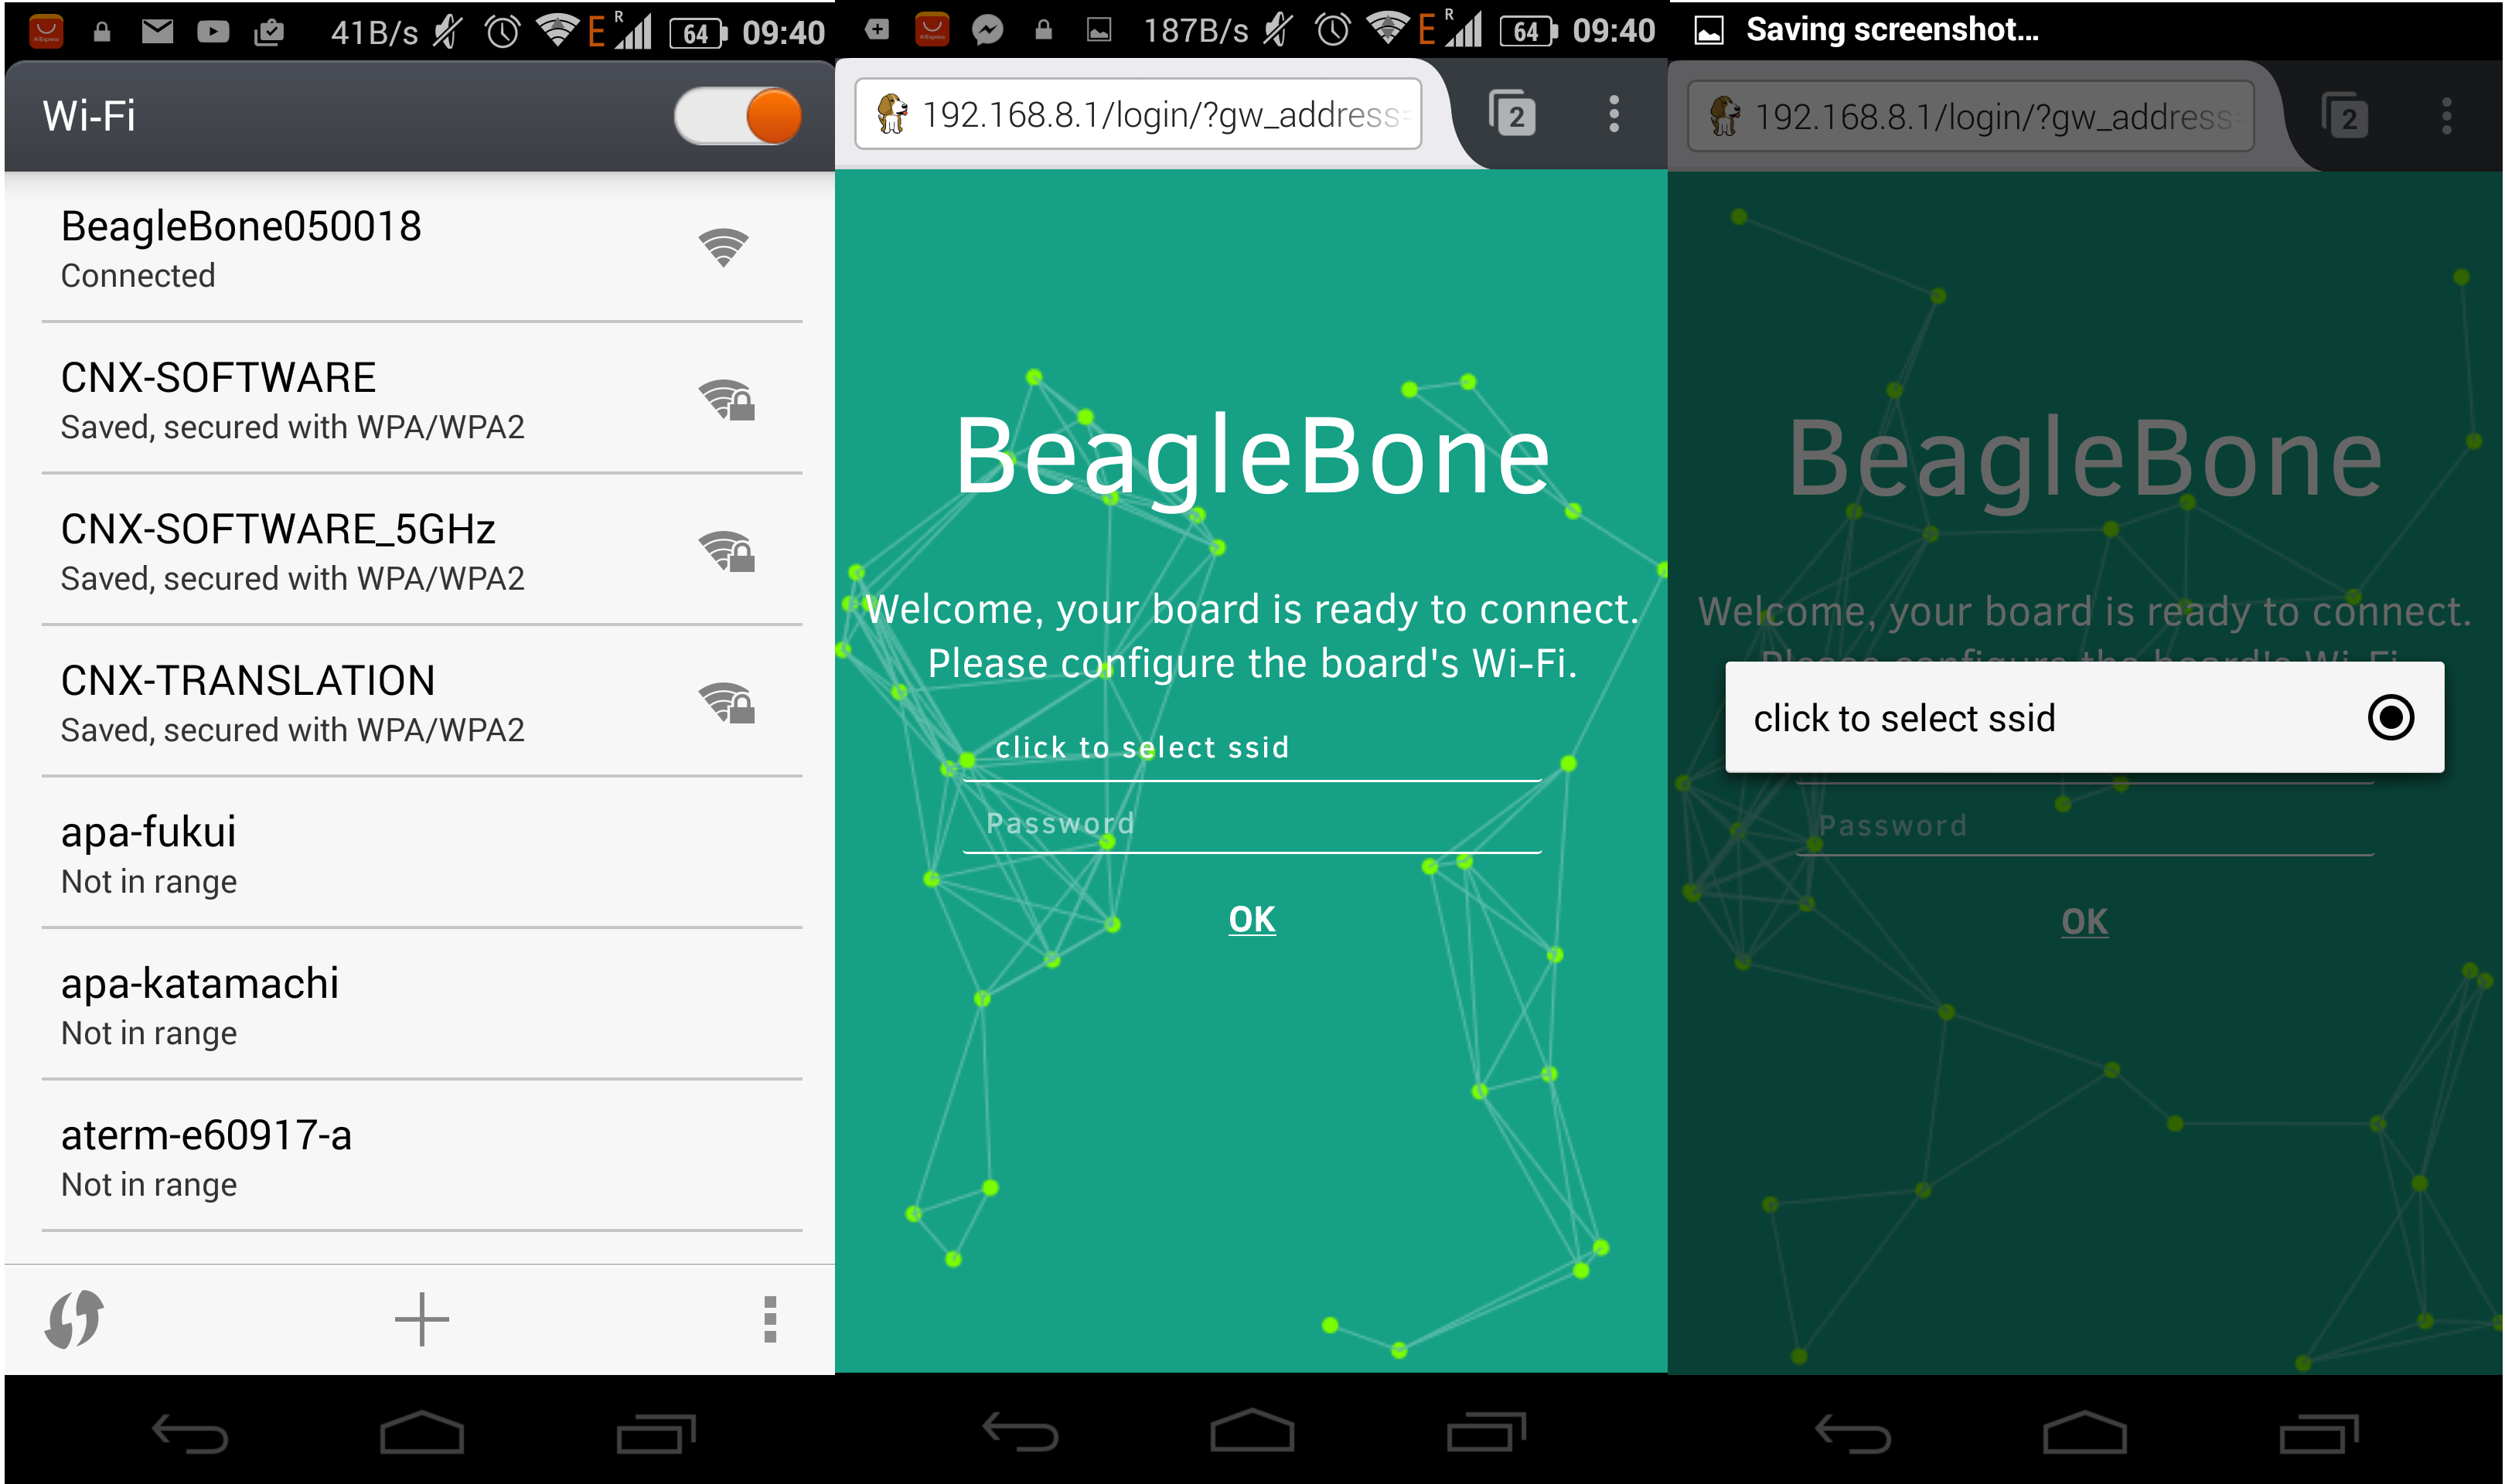
That’s supposed to be so easy, but sadly it did not work at all for me the first time as none of the ESSID were detected, but I tried the day after, and it eventually worked… I just don’t know why…
I could connect to 192.168.0.111 on my local network, even after a reboot. Good.
Node-RED in BeagleBone Green Wireless
Node-RED is a tool for wiring together hardware devices, APIs and online services in new and interesting ways, and it’s one of the tools available in BBGW web interface. The link is actually hardcoded to http:192.168.7.2:1880, which is a bug, but you can easily access the page using your own IP and 1880 port. I found one example for BeagleBone Black to turn on and off user LEDs, which I imported into Node-RED, and Deployed to the board.
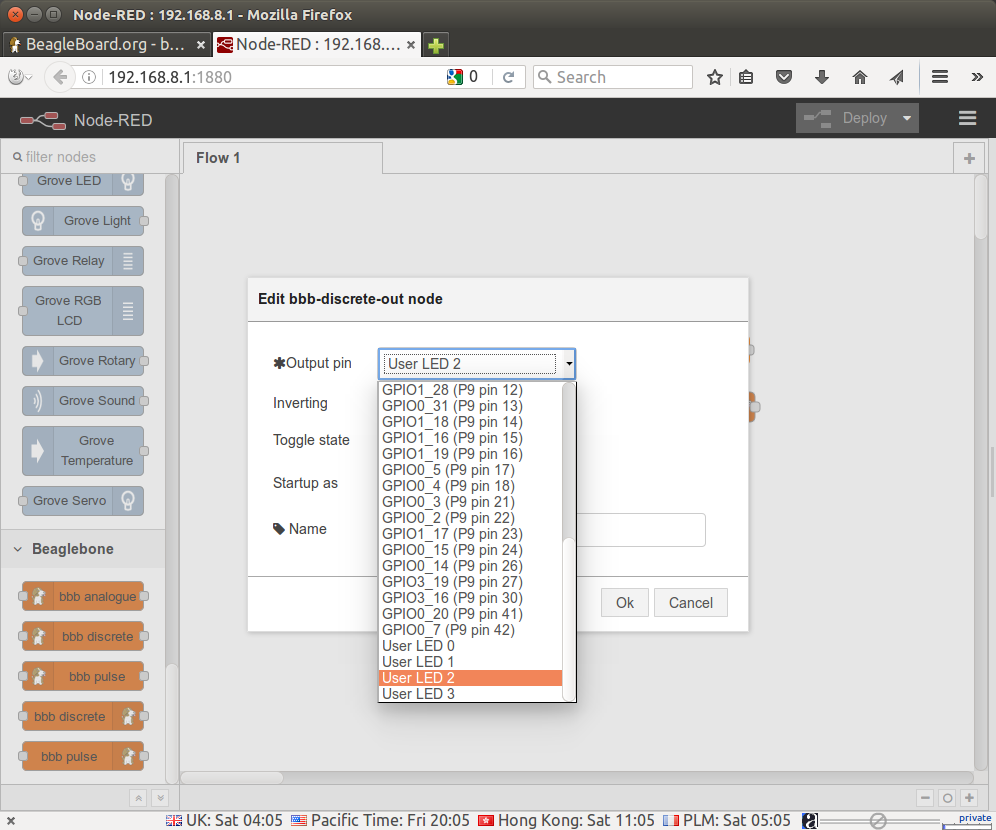
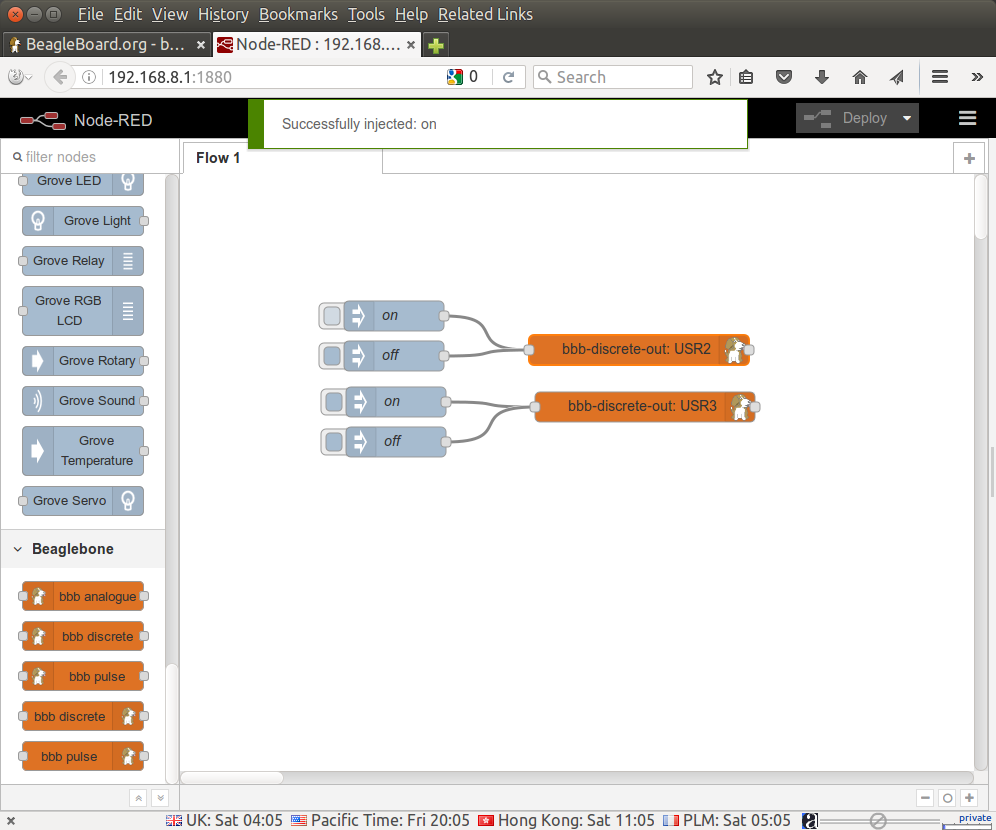 Click on the square on the left of the “on” / “off” injector with turn on or off LED 2 or 3. You can change settings of one block by double-clicking on it, and I’ve done so for bbb-discrete-out: USR2. You can see it will let you select whatever output pin supported by the board, change the name, invert values and so on.
The Blue gray “injectors” will either “0” or “1” string to the bbb-discrete-out nodes to change the GPIO status.
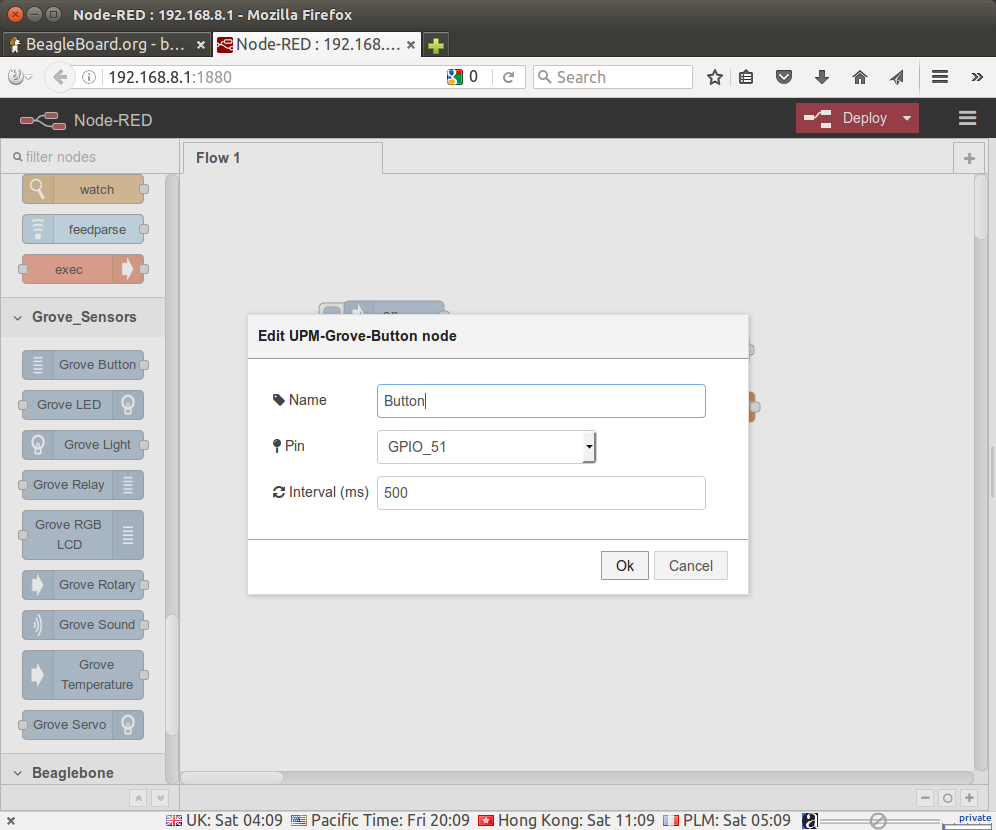
One interesting part of the BeagleBone Green boards are Grove connectors for add-on modules with the same name.
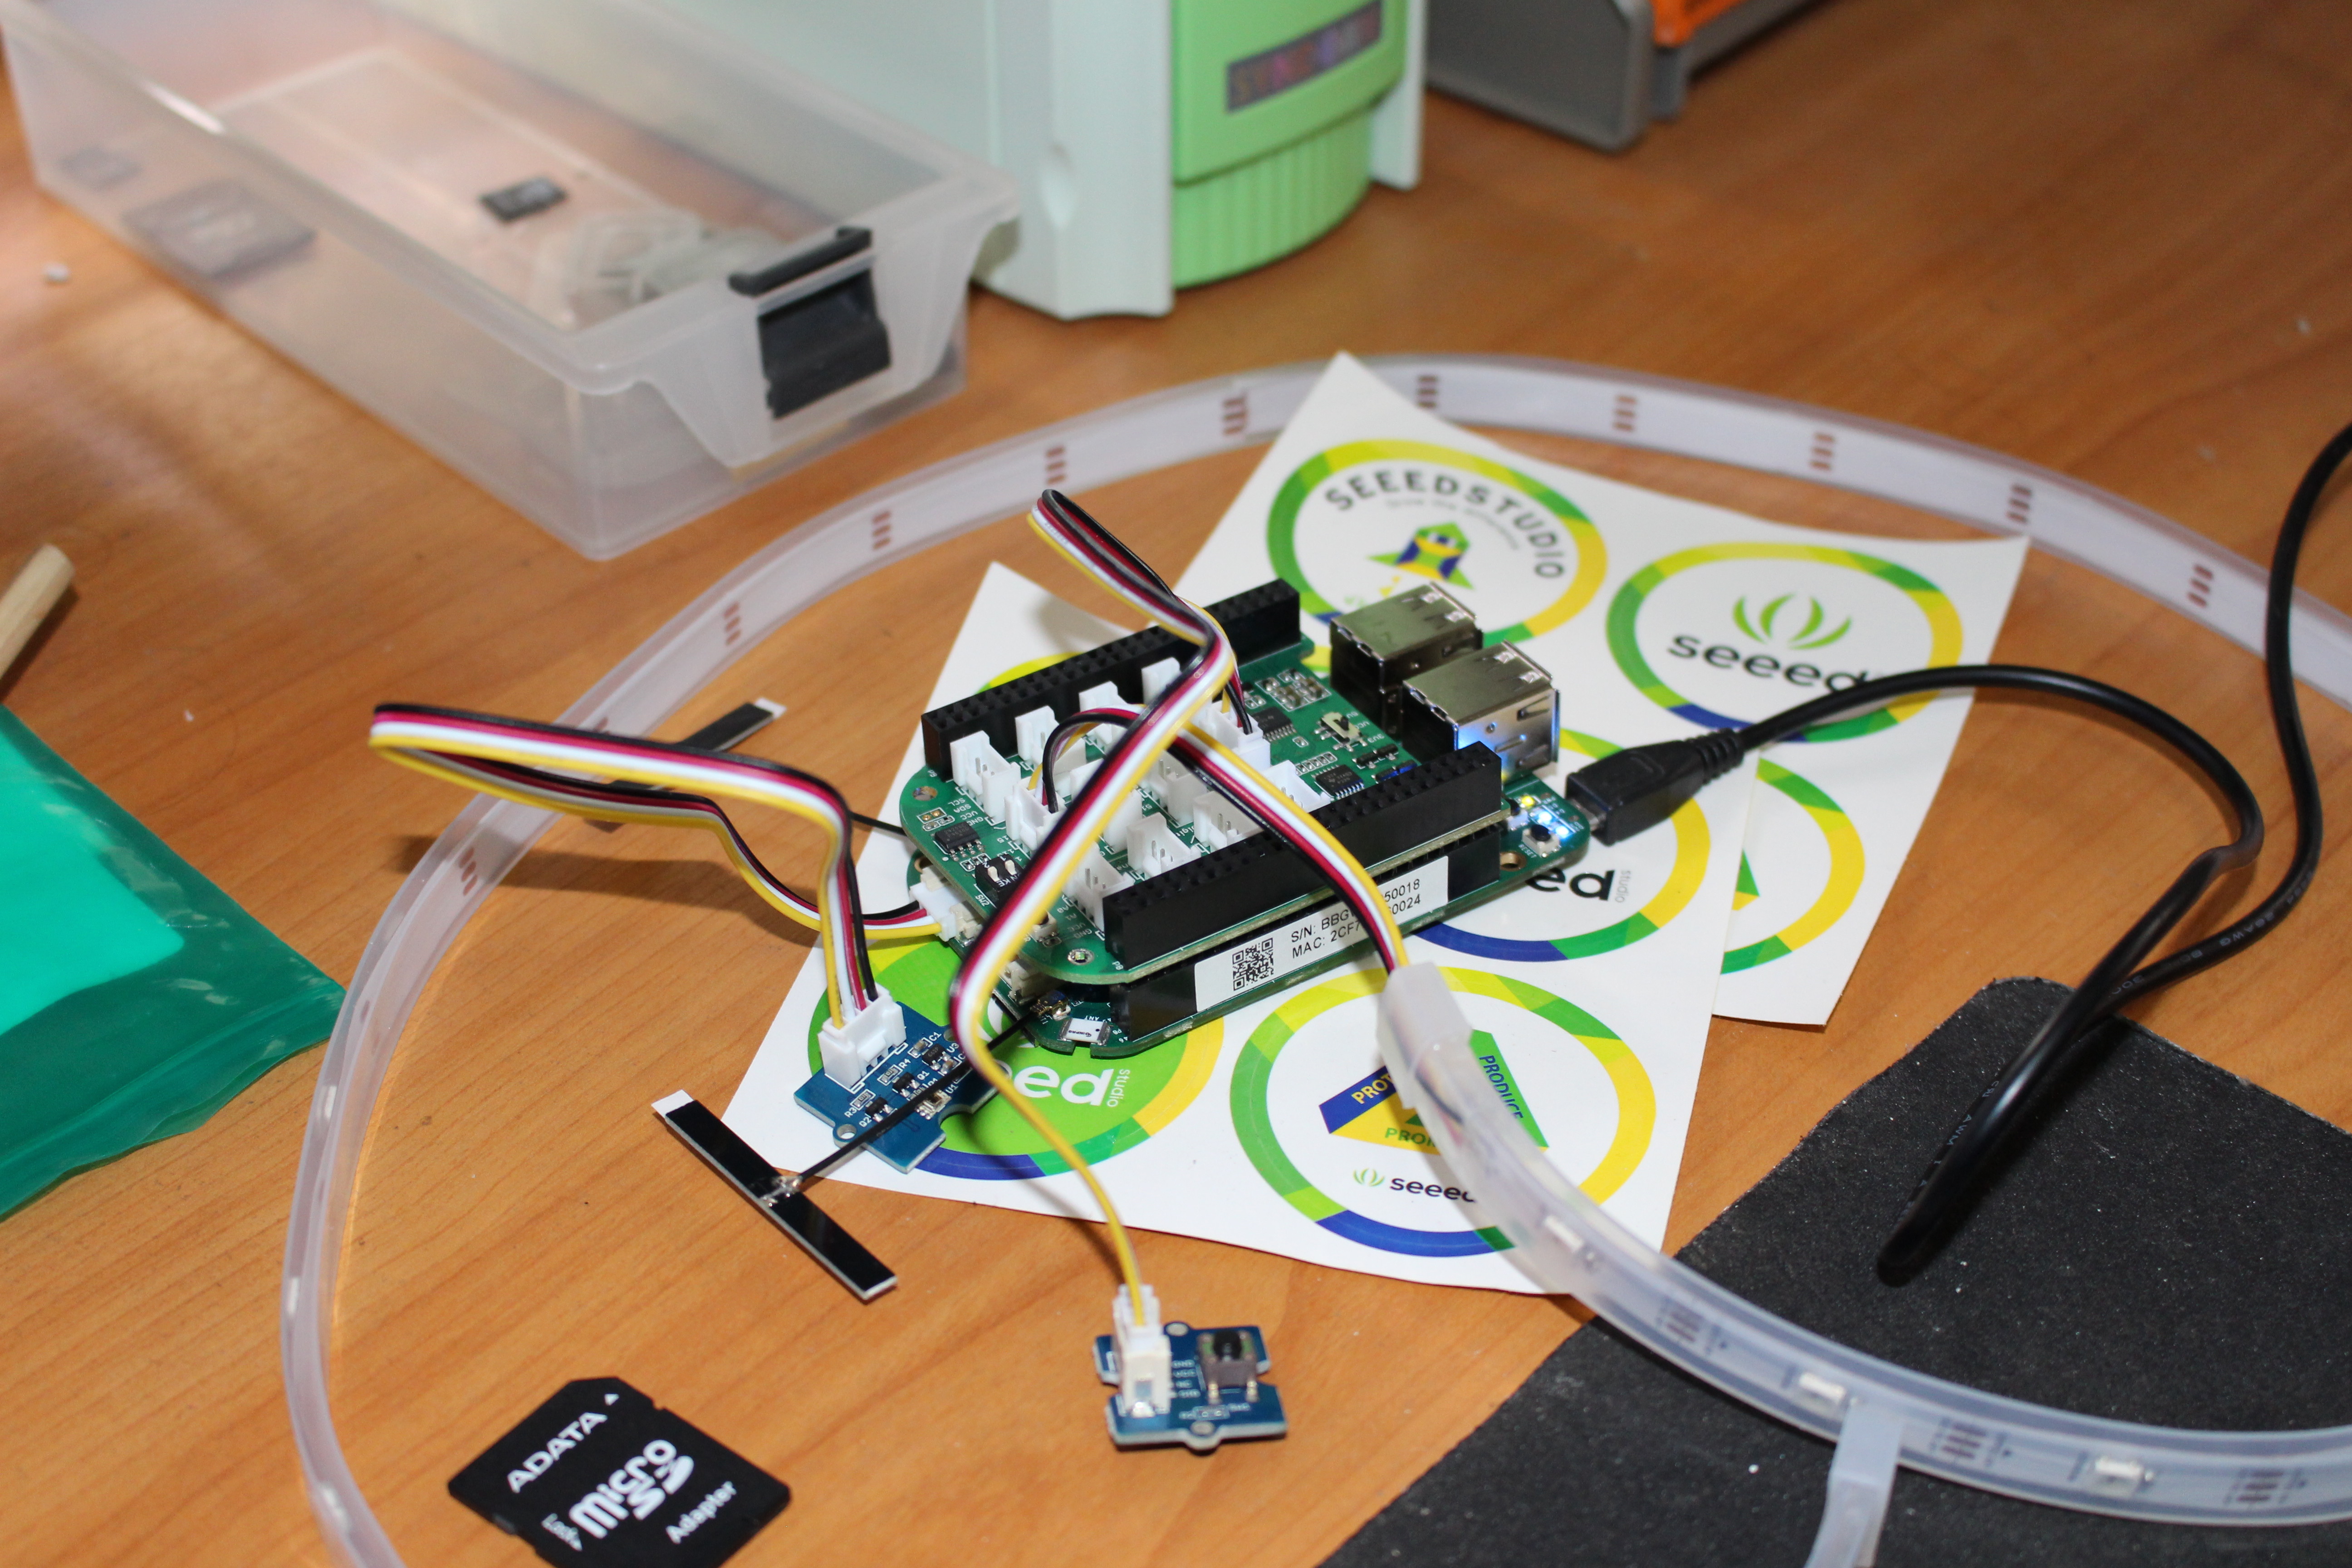
I’ve connected Grove LED strip (Digital I/O), Grove Button (Digital I/O), and a digital light sensor (I2C), but Node-RED does not list the LED strip , and only shows the analog Grove light sensor, so I was left with the Grove Button connected to GPIO 51 as marked on the silkscreen of the Grove connector on the cape. So I dragged and dropped Grove Button in Node-RED, and configured it to poll for GPIO_51 every 500 ms.
 I planned to turn on and off some user LEDs, but connecting directly to bbb-discrete-out node for USR2 LED did not work. The problem is that I could not find documentation for this, except something about GrovePi, which explains that the Grove Button sends a JSON object containing a ‘state’ key:
|
1 |
{ state: true } |
So I probably would have to use another block to convert that JSON objects into “0” or “1” strings to controlled the LED/GPIOs. I’m not quite familiar enough with Node-RED, so I switched to testing Cloud9 IDE. [Update: There’s a tutorial using Node-RED, WioLink and BBGW, but it currently lacks in details]
Cloud9 IDE on BeagleBone Green Wireless
Cloud9 is a cloud based development environment that you can access using http://<IP_address>:3000.
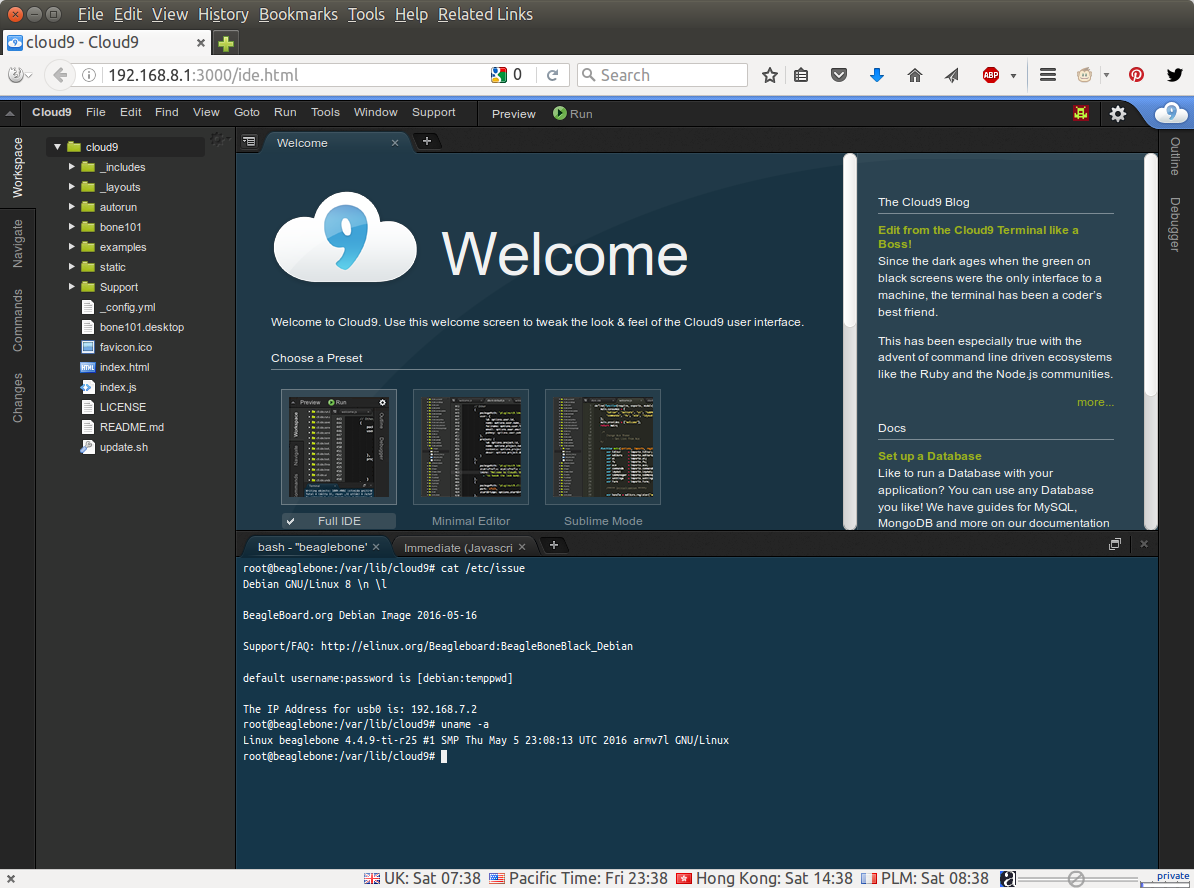
The first neat thing I noticed is that you have access to the console as root from within the web browser, so SSH is not even needed with the board. I quickly checked the OS version (Debian GNU Linux 8) and kernel version (Linux 4.4.9-ti-r25) to test it out. We’ll also find several Python examples for BBG and Grove modules in the left panel.
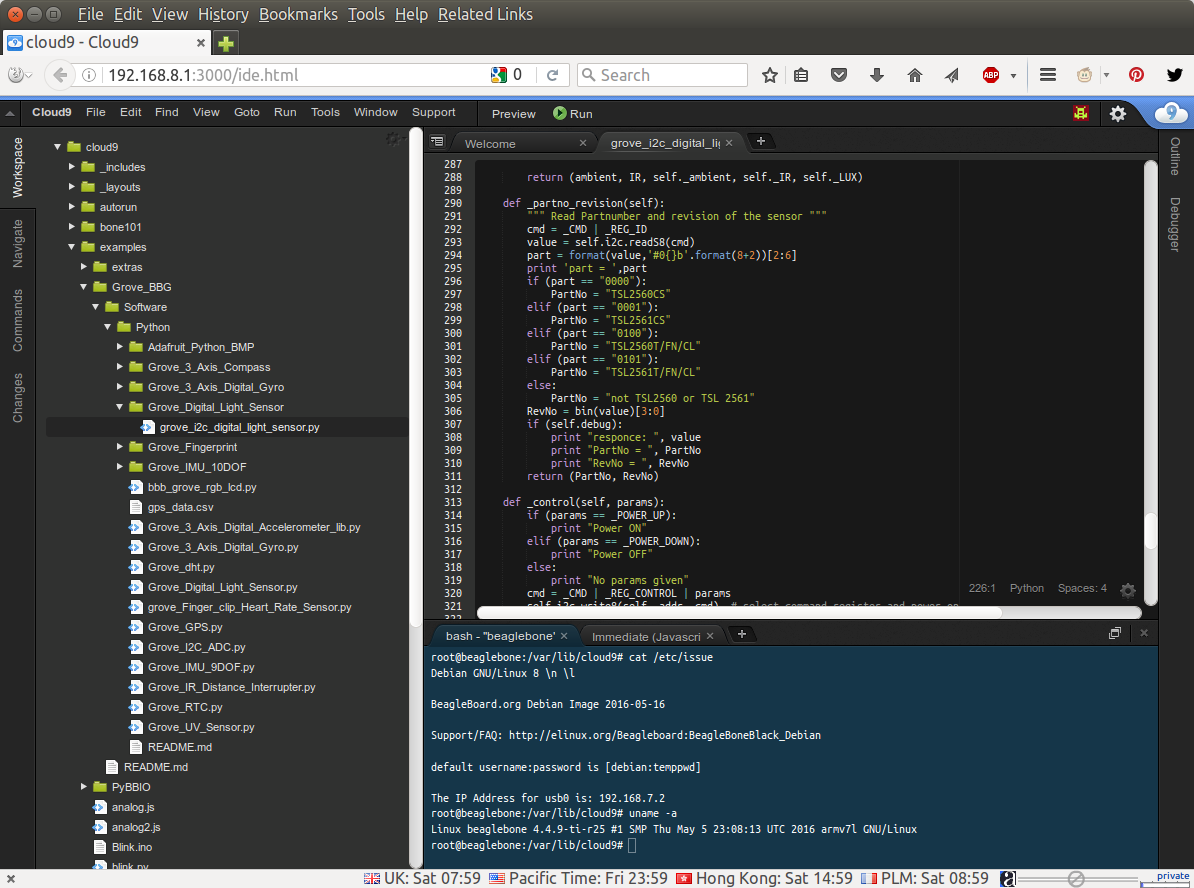
I’ve open grove_i2x_digital_light_sensor.py demo program.
|
1 2 3 4 |
Traceback (most recent call last): File "/var/lib/cloud9/examples/Grove_BBG/Software/Python/Grove_Digital_Light_Sensor/grove_i2c_digital_light_sensor.py", line 77, in <module> import smbus ImportError: No module named smbus |
Access the terminal in the board to install the missing module
|
1 2 3 |
apt update apt upgrade apt install python-smbus |
Another error:
|
1 2 3 |
File "/var/lib/cloud9/examples/Grove_BBG/Software/Python/Grove_Digital_Light_Sensor/grove_i2c_digital_light_sensor.py", line 114, in <module> I2C_SMBUS = smbus.SMBus(1) IOError: [Errno 2] No such file or directory |
So I’ve checked the I2C interfaces in the board:
|
1 2 3 |
i2cdetect -l i2c-0 i2c OMAP I2C adapter I2C adapter i2c-2 i2c OMAP I2C adapter I2C adapter |
There’s no i2c-1, so I changed the code to try with I2C-2 used with the Grove connector on BBGW:
|
1 |
I2C_SMBUS = smbus.SMBus(2) |
And it went a little further:
|
1 2 3 4 5 6 7 8 9 |
Traceback (most recent call last): File "/var/lib/cloud9/examples/Grove_BBG/Software/Python/Grove_Digital_Light_Sensor/grove_i2c_digital_light_sensor.py", line 365, in <module> main() File "/var/lib/cloud9/examples/Grove_BBG/Software/Python/Grove_Digital_Light_Sensor/grove_i2c_digital_light_sensor.py", line 328, in main TSL2561._init__(I2C_SMBUS, I2C_ADDRESS,1) File "/var/lib/cloud9/examples/Grove_BBG/Software/Python/Grove_Digital_Light_Sensor/grove_i2c_digital_light_sensor.py", line 162, in _init__ self.i2c = Adafruit_I2C(addr) File "build/bdist.linux-armv7l/egg/Adafruit_I2C.py", line 17, in __init__ IOError: [Errno 2] No such file or directory |
I stopped there as it’s clear the sample have not been ported to the board, and to compound the issue Seeed Studio Wiki is currently down.
So I’ve had my share of issues with BeagleBone Green Wireless, but remember that the board is not shipping yet, so they still have time to improve the firmware and especially documentation. Yet I was expecting an easier experience considering the board leverages code and documentation from BeagleBone Black (software compatible), and there’s only about 10 days left before the retail boards ship.
If you are interested in the board, you can purchase BeagleBone Green Wireless for $44.50, the Grove Base Cape for $9.90, and various Grove modules on Seeed Studio website.

Jean-Luc started CNX Software in 2010 as a part-time endeavor, before quitting his job as a software engineering manager, and starting to write daily news, and reviews full time later in 2011.
Support CNX Software! Donate via cryptocurrencies, become a Patron on Patreon, or purchase goods on Amazon or Aliexpress


I reviewed this too – and generally towards the end very much in favour – but there’s a potential dark side – they’ve taken over Apache – so that programs you may add in that use port 80 don’t any more – it’s on port 8080 and not everything likes that. My script for adding node-red nodes works on most of these SBCs but just does not like this one – I had to install many of the nodes as root. And as for SQLITE and Mosquitto – the latter installed as normal – but doesn’t work – and the… Read more »
What’s a typical use case for such a board? (Sorry didn’t read through the whole).
@Fossxplorer
The main advantage of BeagleBone Black/Green boards are the many I/Os, and PRU for real-time I/Os, so you don’t really need an external MCU to control external hardware with such requirements. Robots, drones, CNC machines are some projects that can leverage the board.
BeagleBone Green Wireless could also be used as an IoT gateway.
smbus fixed beaglebone green /green wl 🙂
now works with i2c and adc 🙂
https://twitter.com/TaftekPl/status/736299006100406272