
NanoPi Duo is an inexpensive Allwinner H2+ quad core board with 256MB or 512MB RAM that can fit into a breadboard, and FriendELEC also provides a starter kit with a carrier board, heatsink, enclosure, USB debug board and cable, as well as optional accessories such as an half-length SSD drive. The company sent me two kits for review, so I’ll first check out what I got, and show how to assemble the kit, before actually playing with the board and kit next month.
NanoPi Duo Starter Kit Unboxing
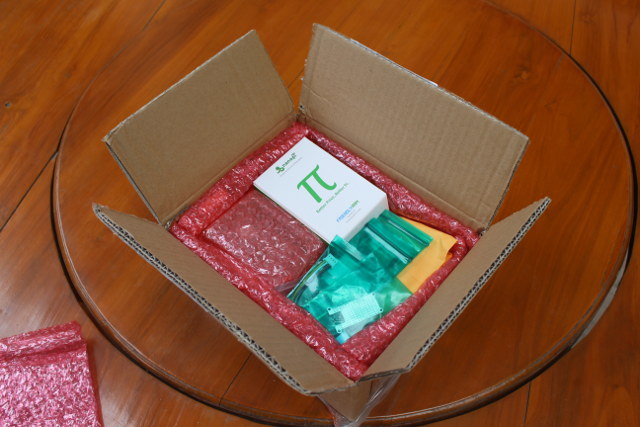
I got a bunch of boxes and bubble wraps in the package…
… and indeed received two identical kits.
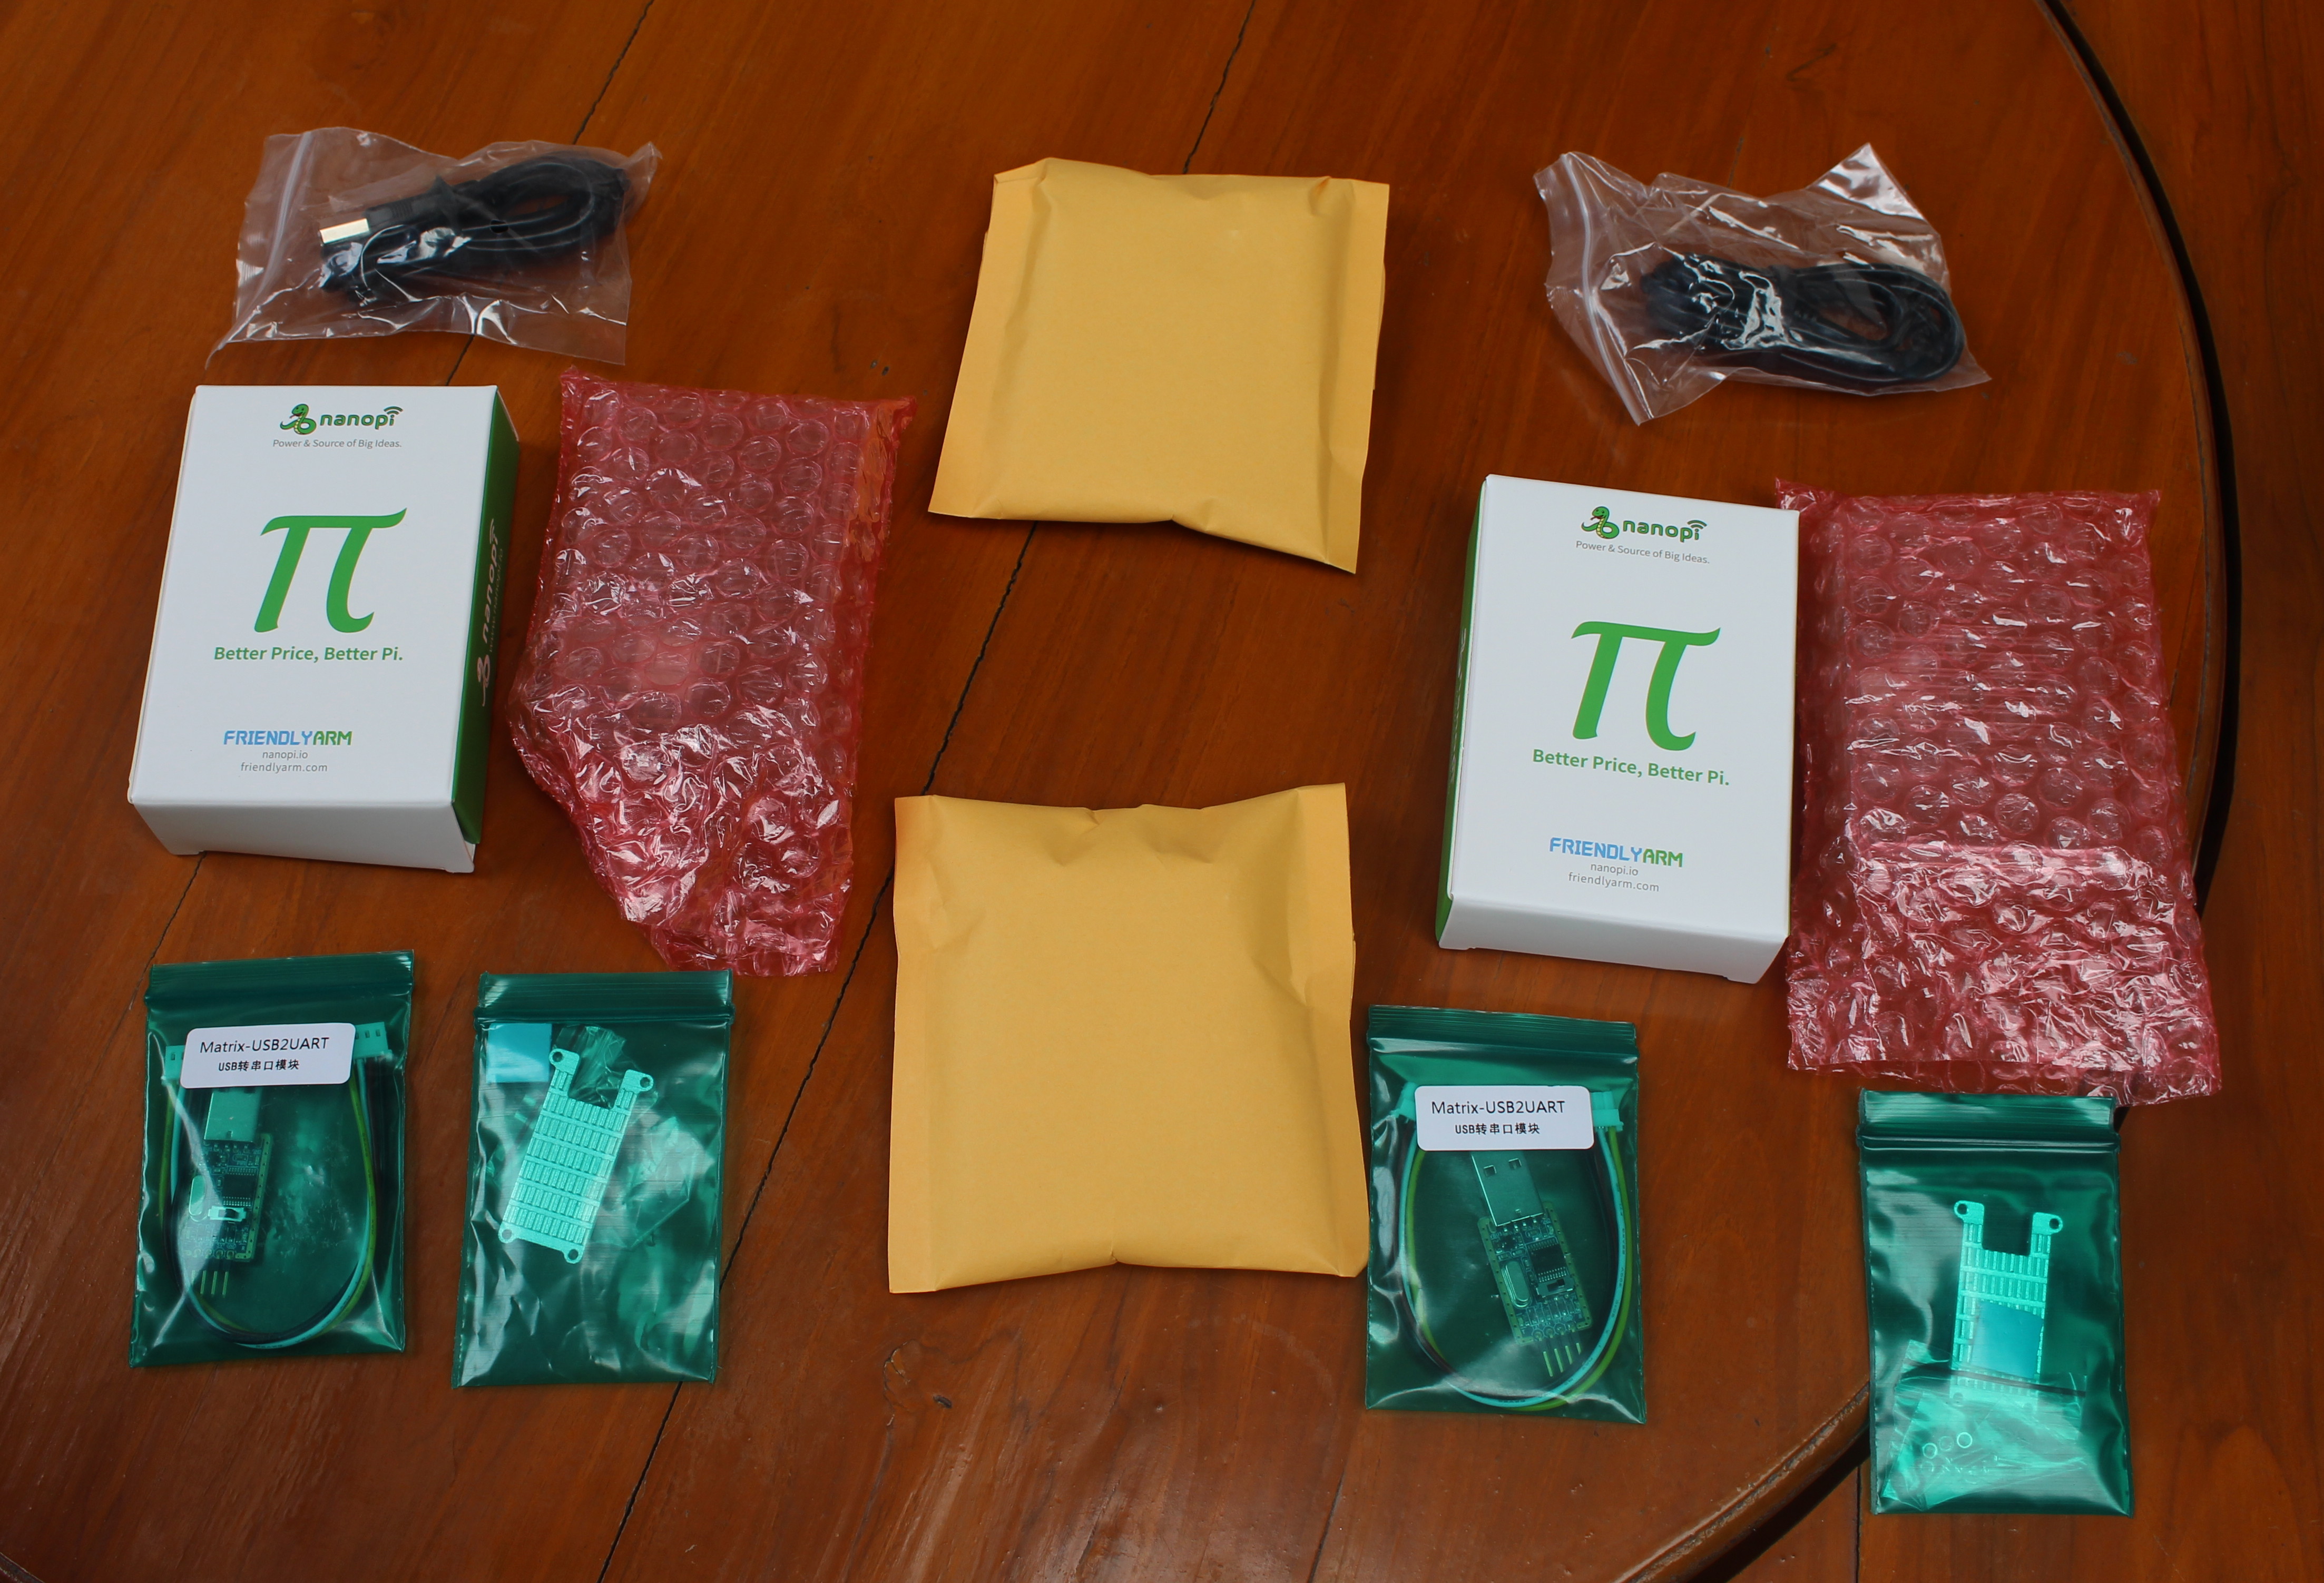
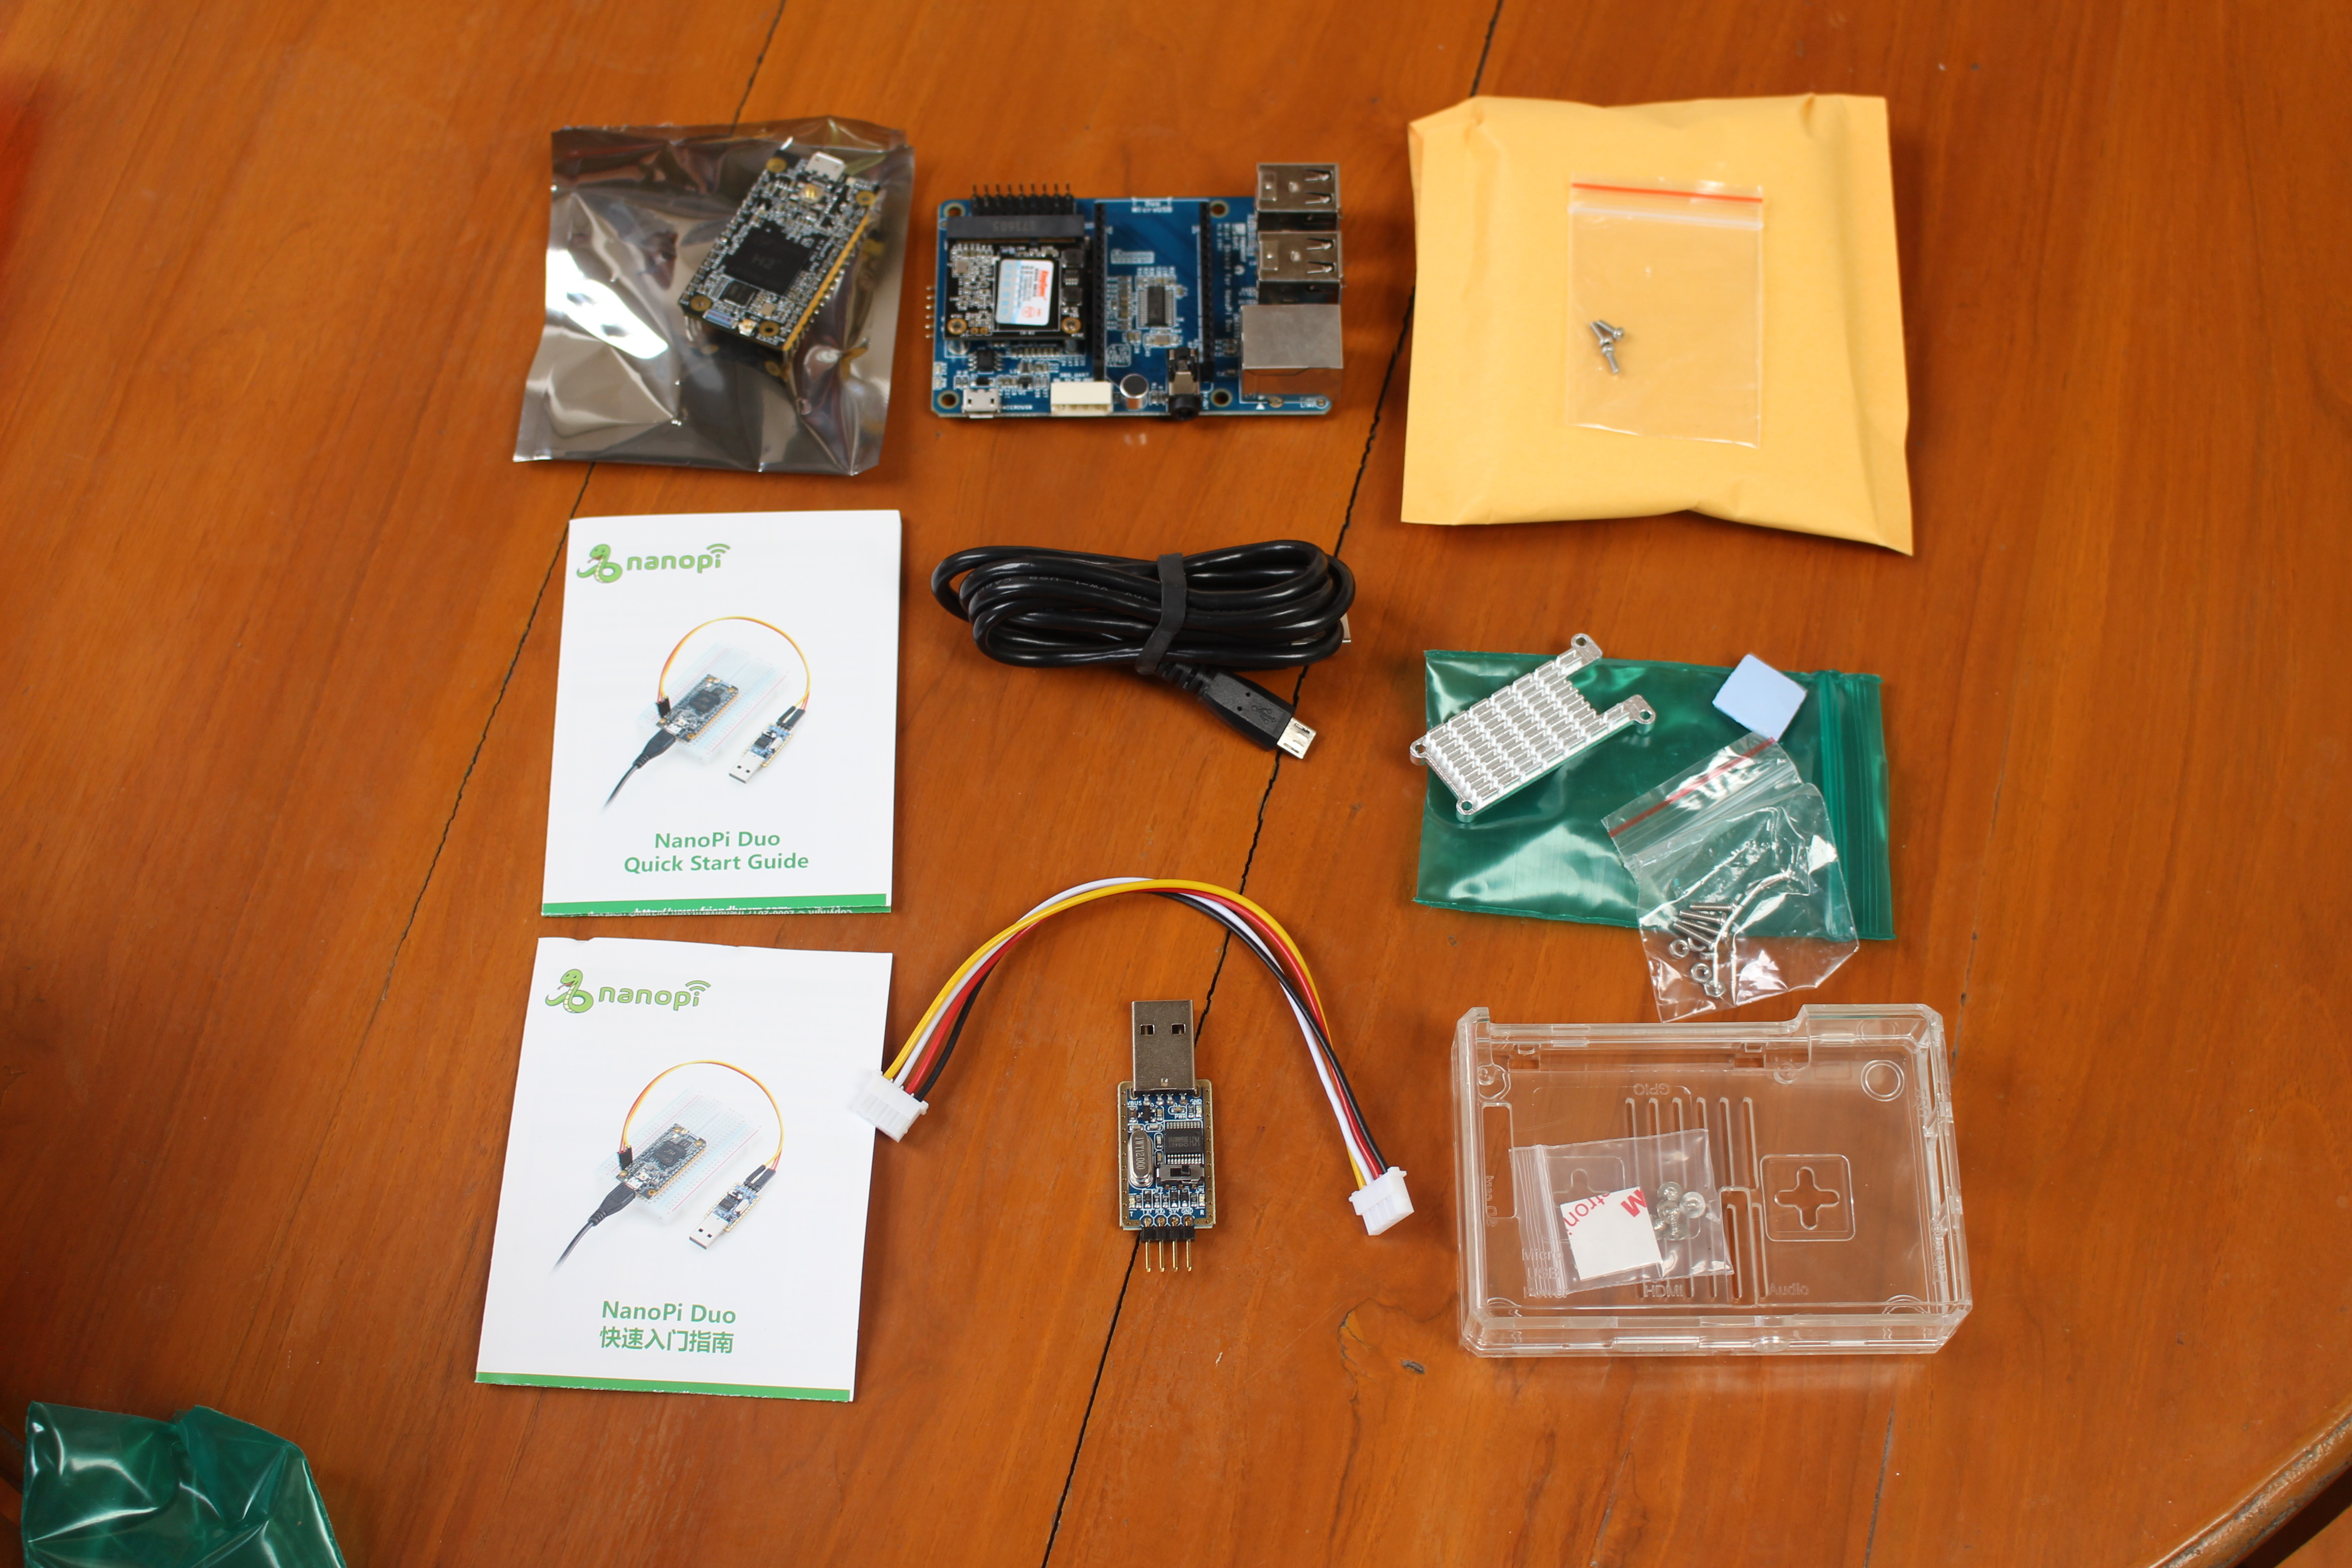
Each kit comes with a NanoPi Duo board with soldered headers, a mini Shield for NanoPi Duo, a heatsink and thermal pad set, a micro USB to USB cable, a USB to TTL debug board and cable, and acrylic case, and user manuals in English and Chinese languages.
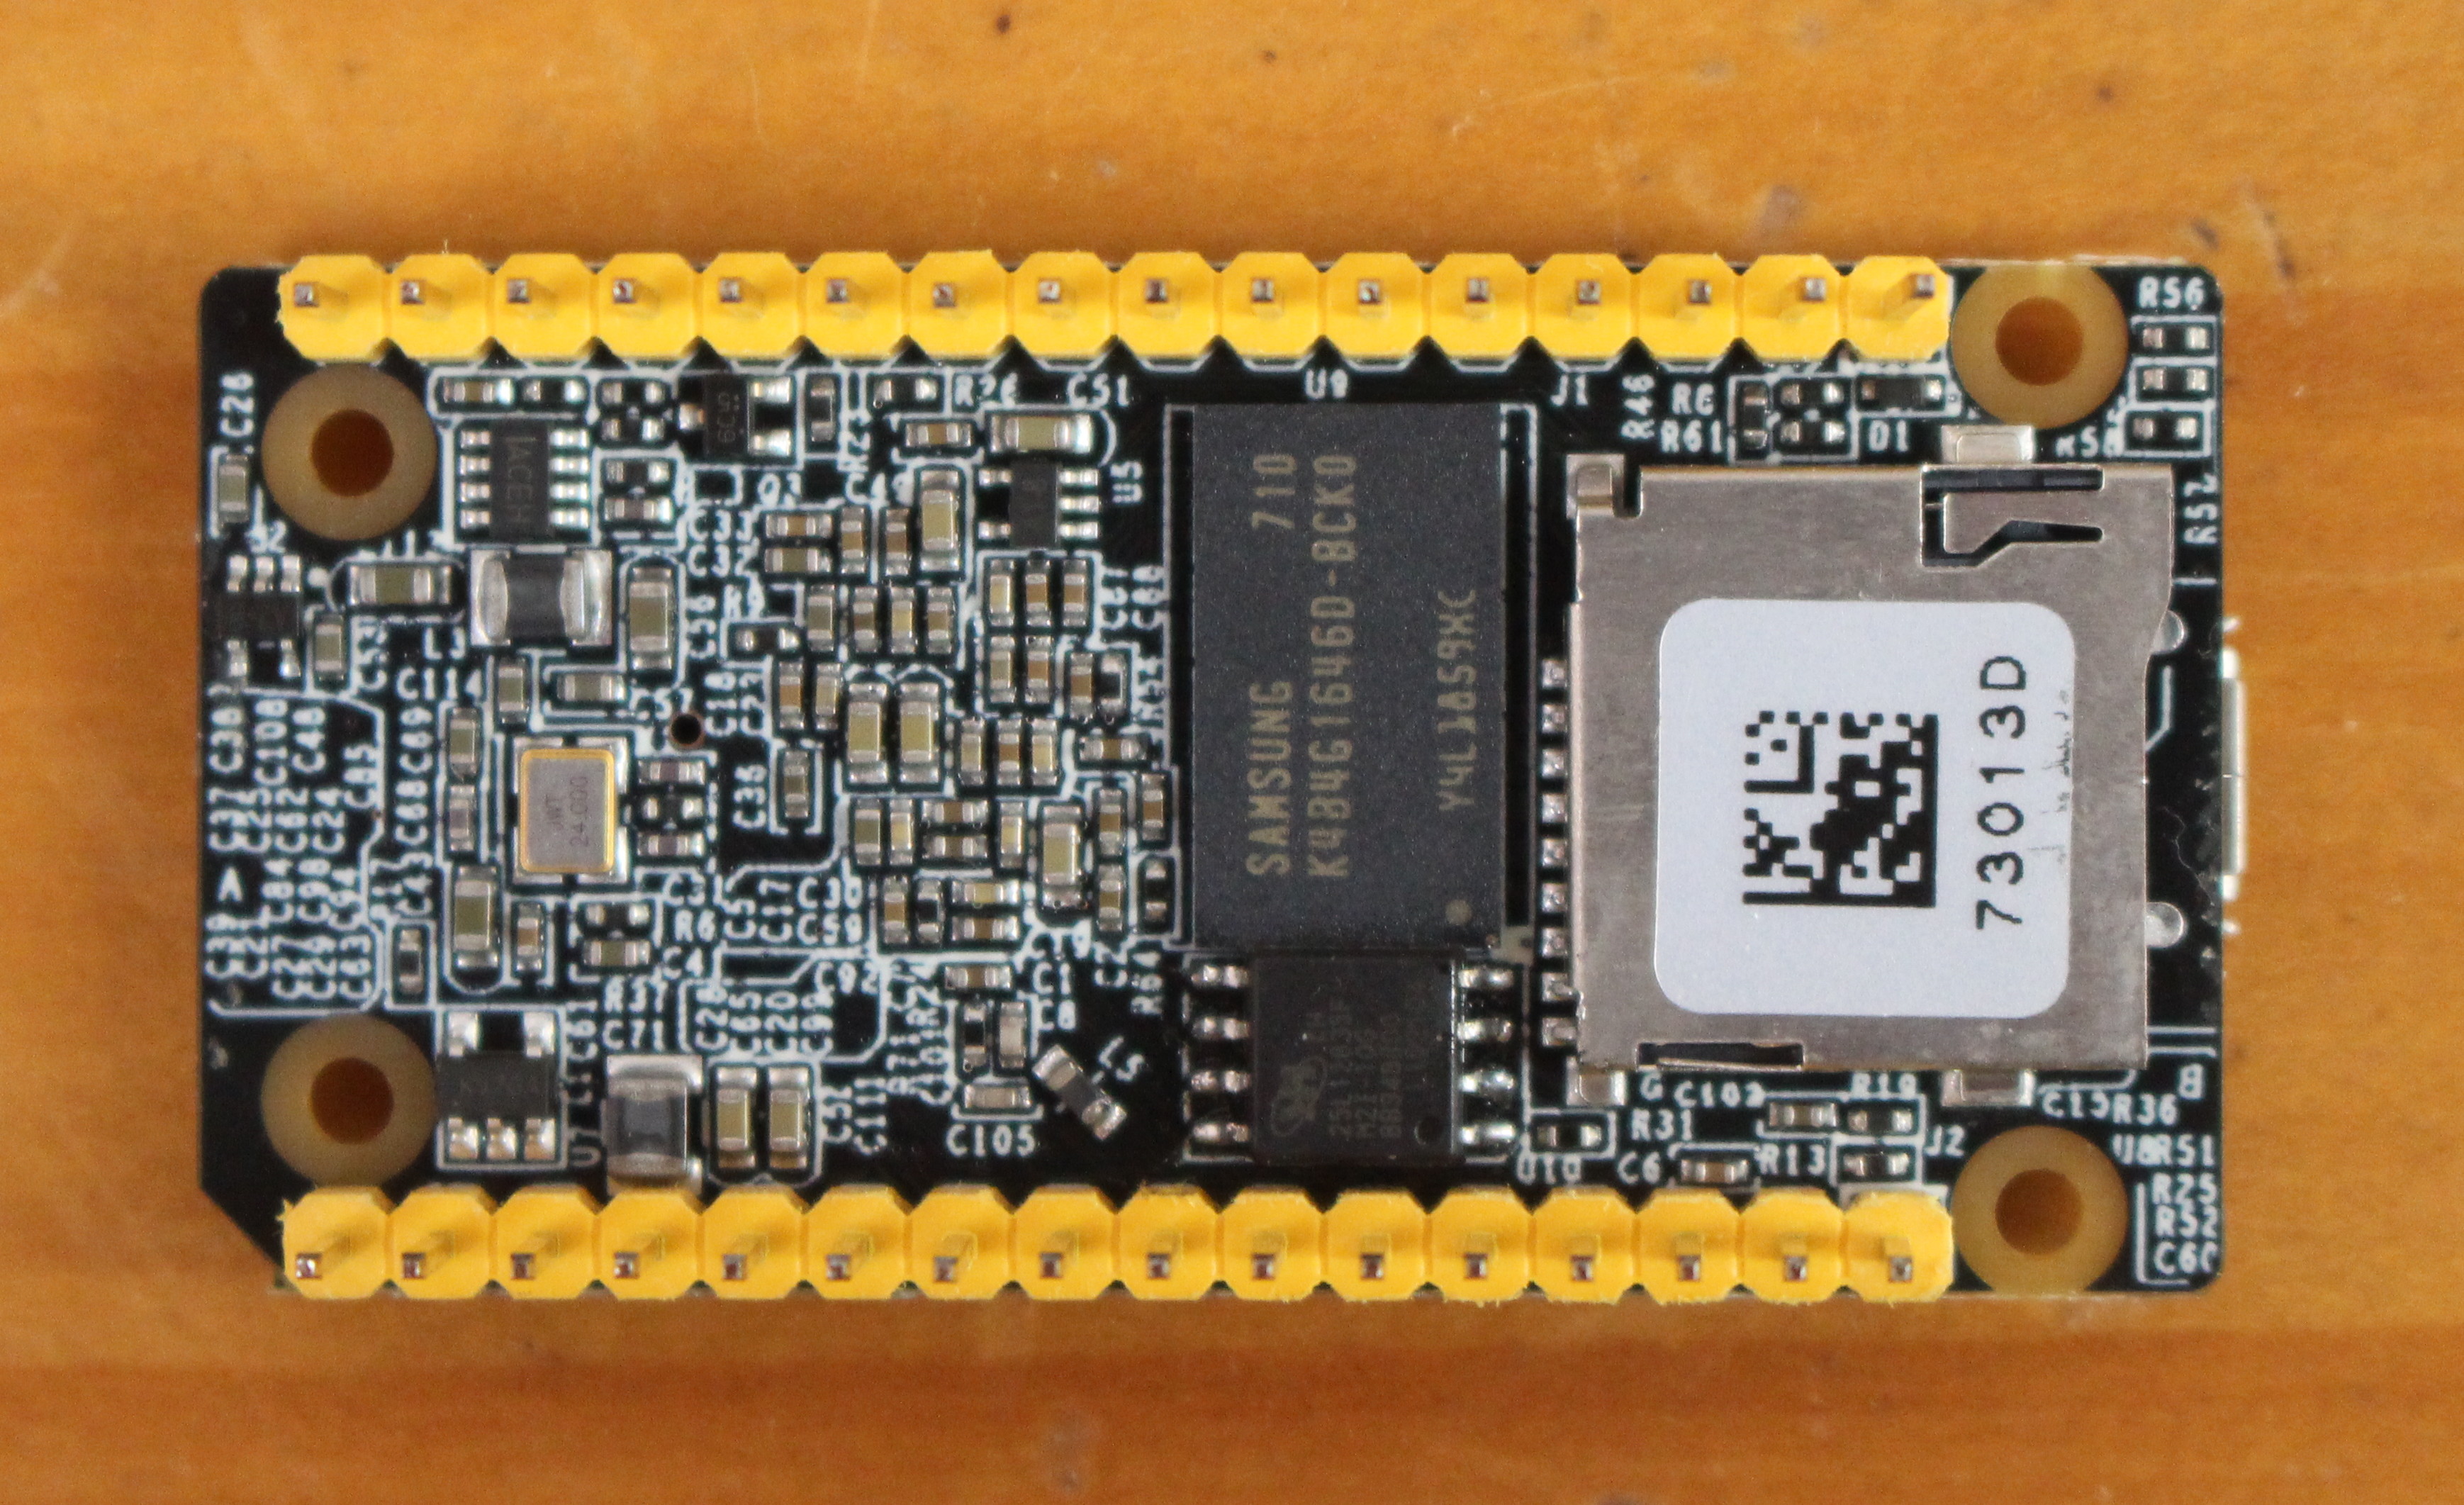
If we look closer at NanoPi Duo board itself, we’ll find the micro USB port , a button, Allwinner H2+ processor, Allwinner XR819 WiFi chip together with a board antennas and u.FL WiFi antenna connector on the top.
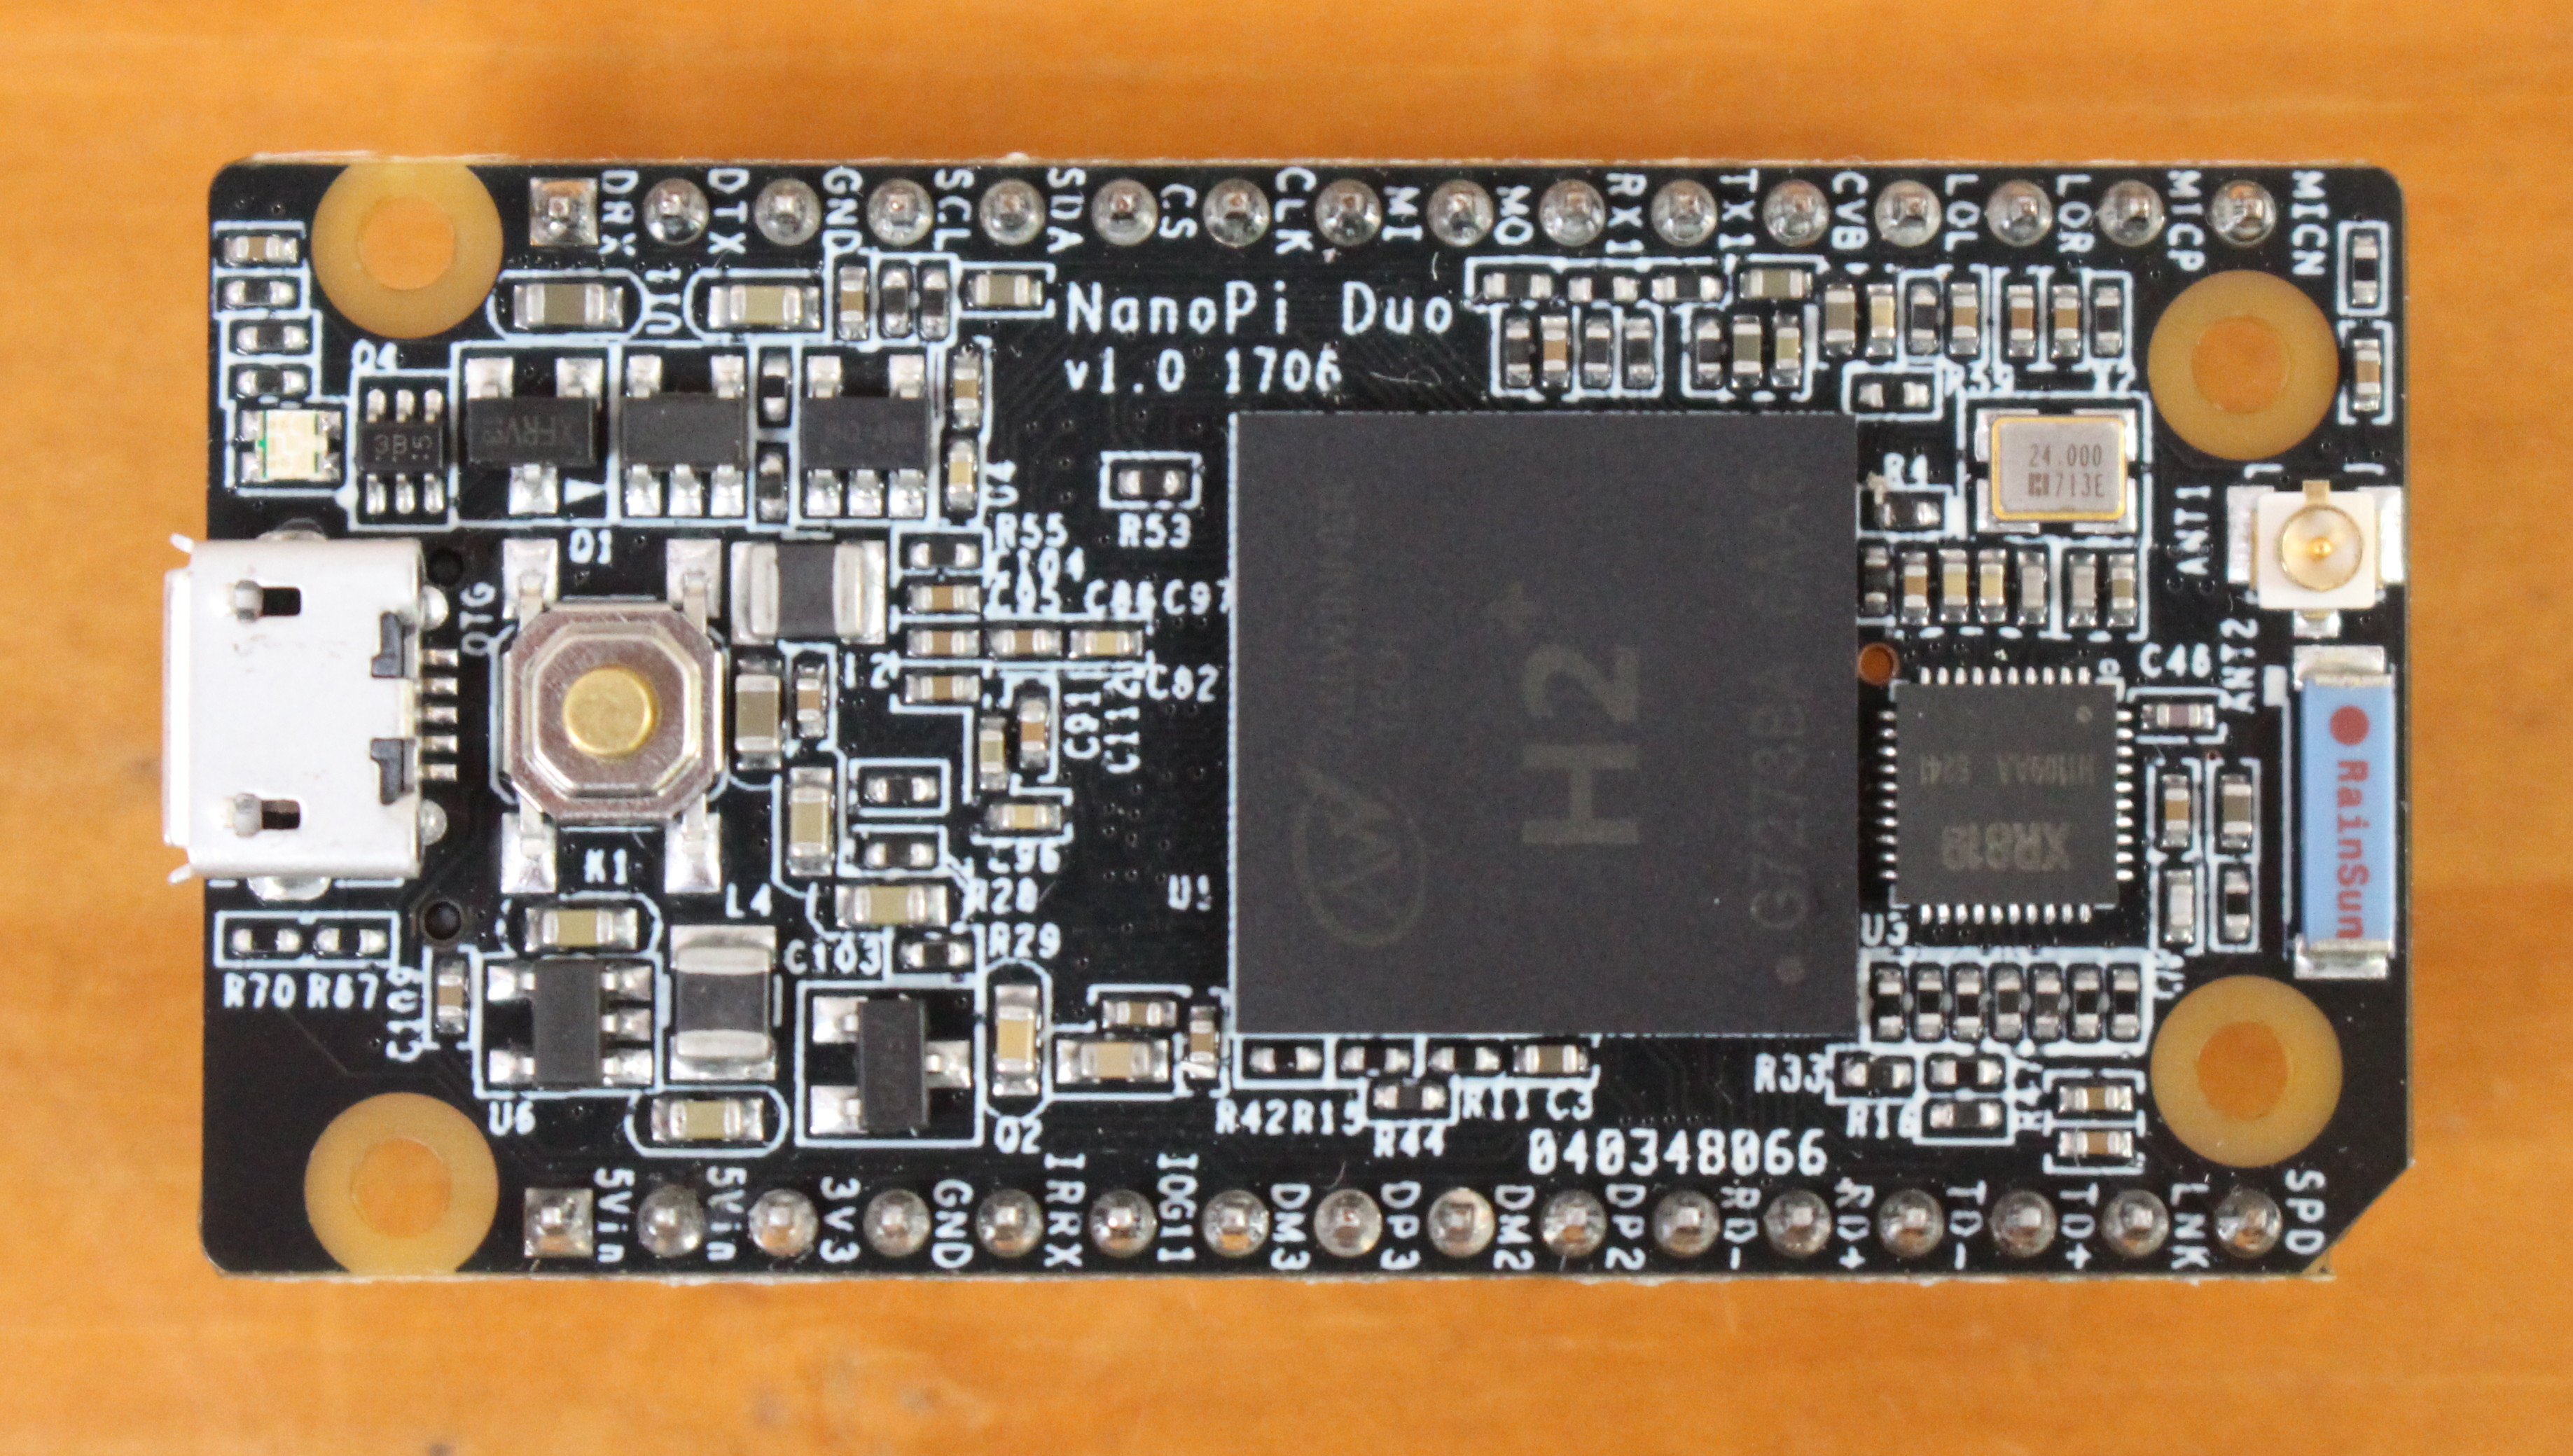
The bottom of the headers has two 16-pin headers, Samsung K4B4G1646D-BCK0 DDR3-1600 chip (meaning I got the 512MB RAM version), MXIC MX25L12835F 128 Mbit (16MB) SPI flash, and the micro SD slot.
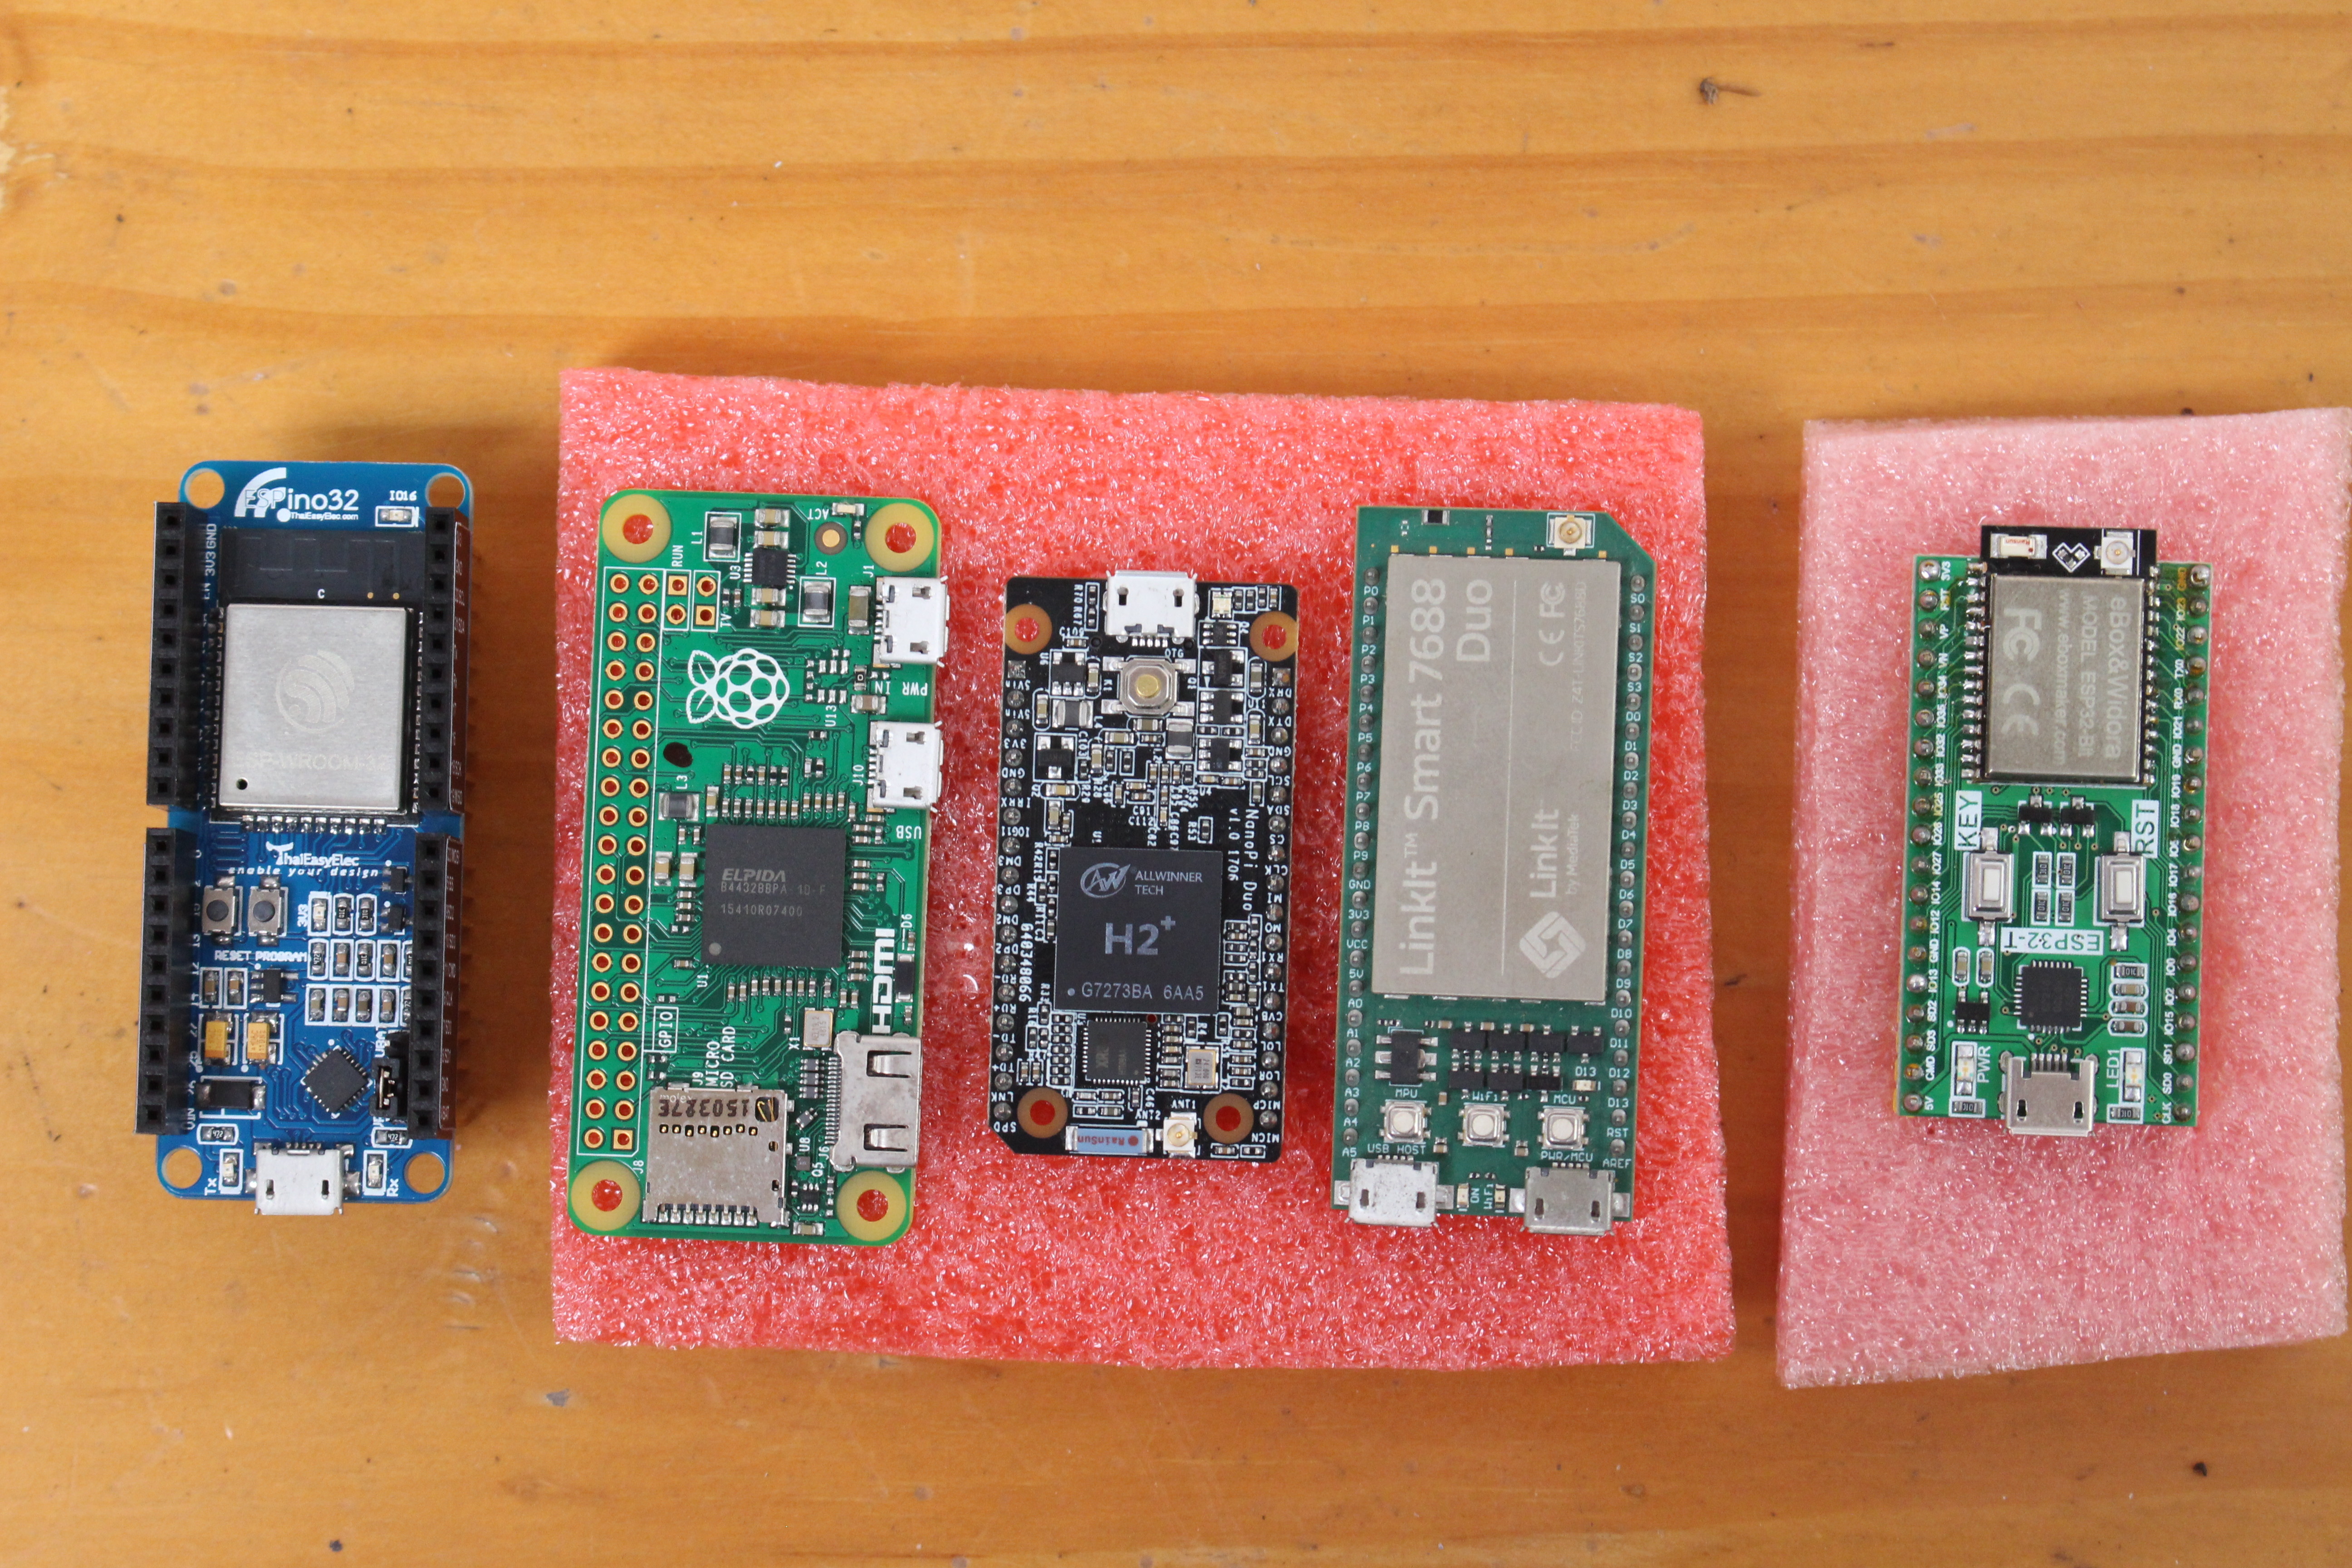
NanoPi Duo is really small. For reference, I compared it to ESPino32, Raspberry Pi Zero, LinkIt Smart 7688 Duo, and ESP32-T boards (from left to right), and despite NanoPi Duo being the most powerful of the lot, it’s also the smallest. Raspberry Pi Zero almost looks gigantic compared to it 🙂
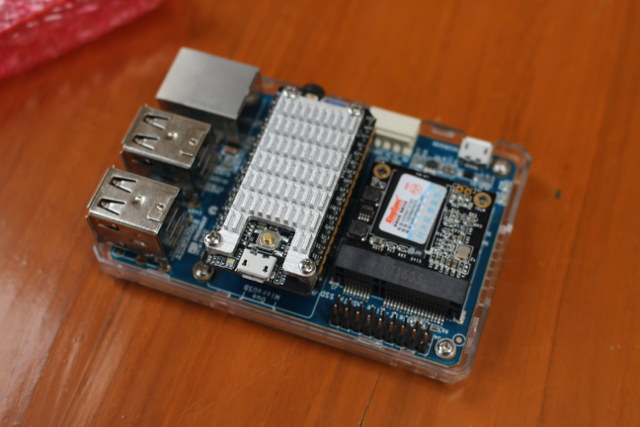
My mini shield for NanoPi Duo came with a KingSpec 64GB SSD, but note that’s a $45 option while purchasing the starter kit, and it’s not included by default.

The mini shield exposes four USB ports, a Fast Ethernet port, a micro USB port for power, a 4-pin debug port that connects to the USB to TTL board, a built-in microphone, an AV port, and J4 expansion header with 18-pin exposing I2C, UART, GPIO, SPI, 5V, 3.3V, and GND. Two main chips can also be found in the shield: FE1.1s USB 2.0 hub, and JMicron JMS567 USB to SATA (hidden under the SSD).
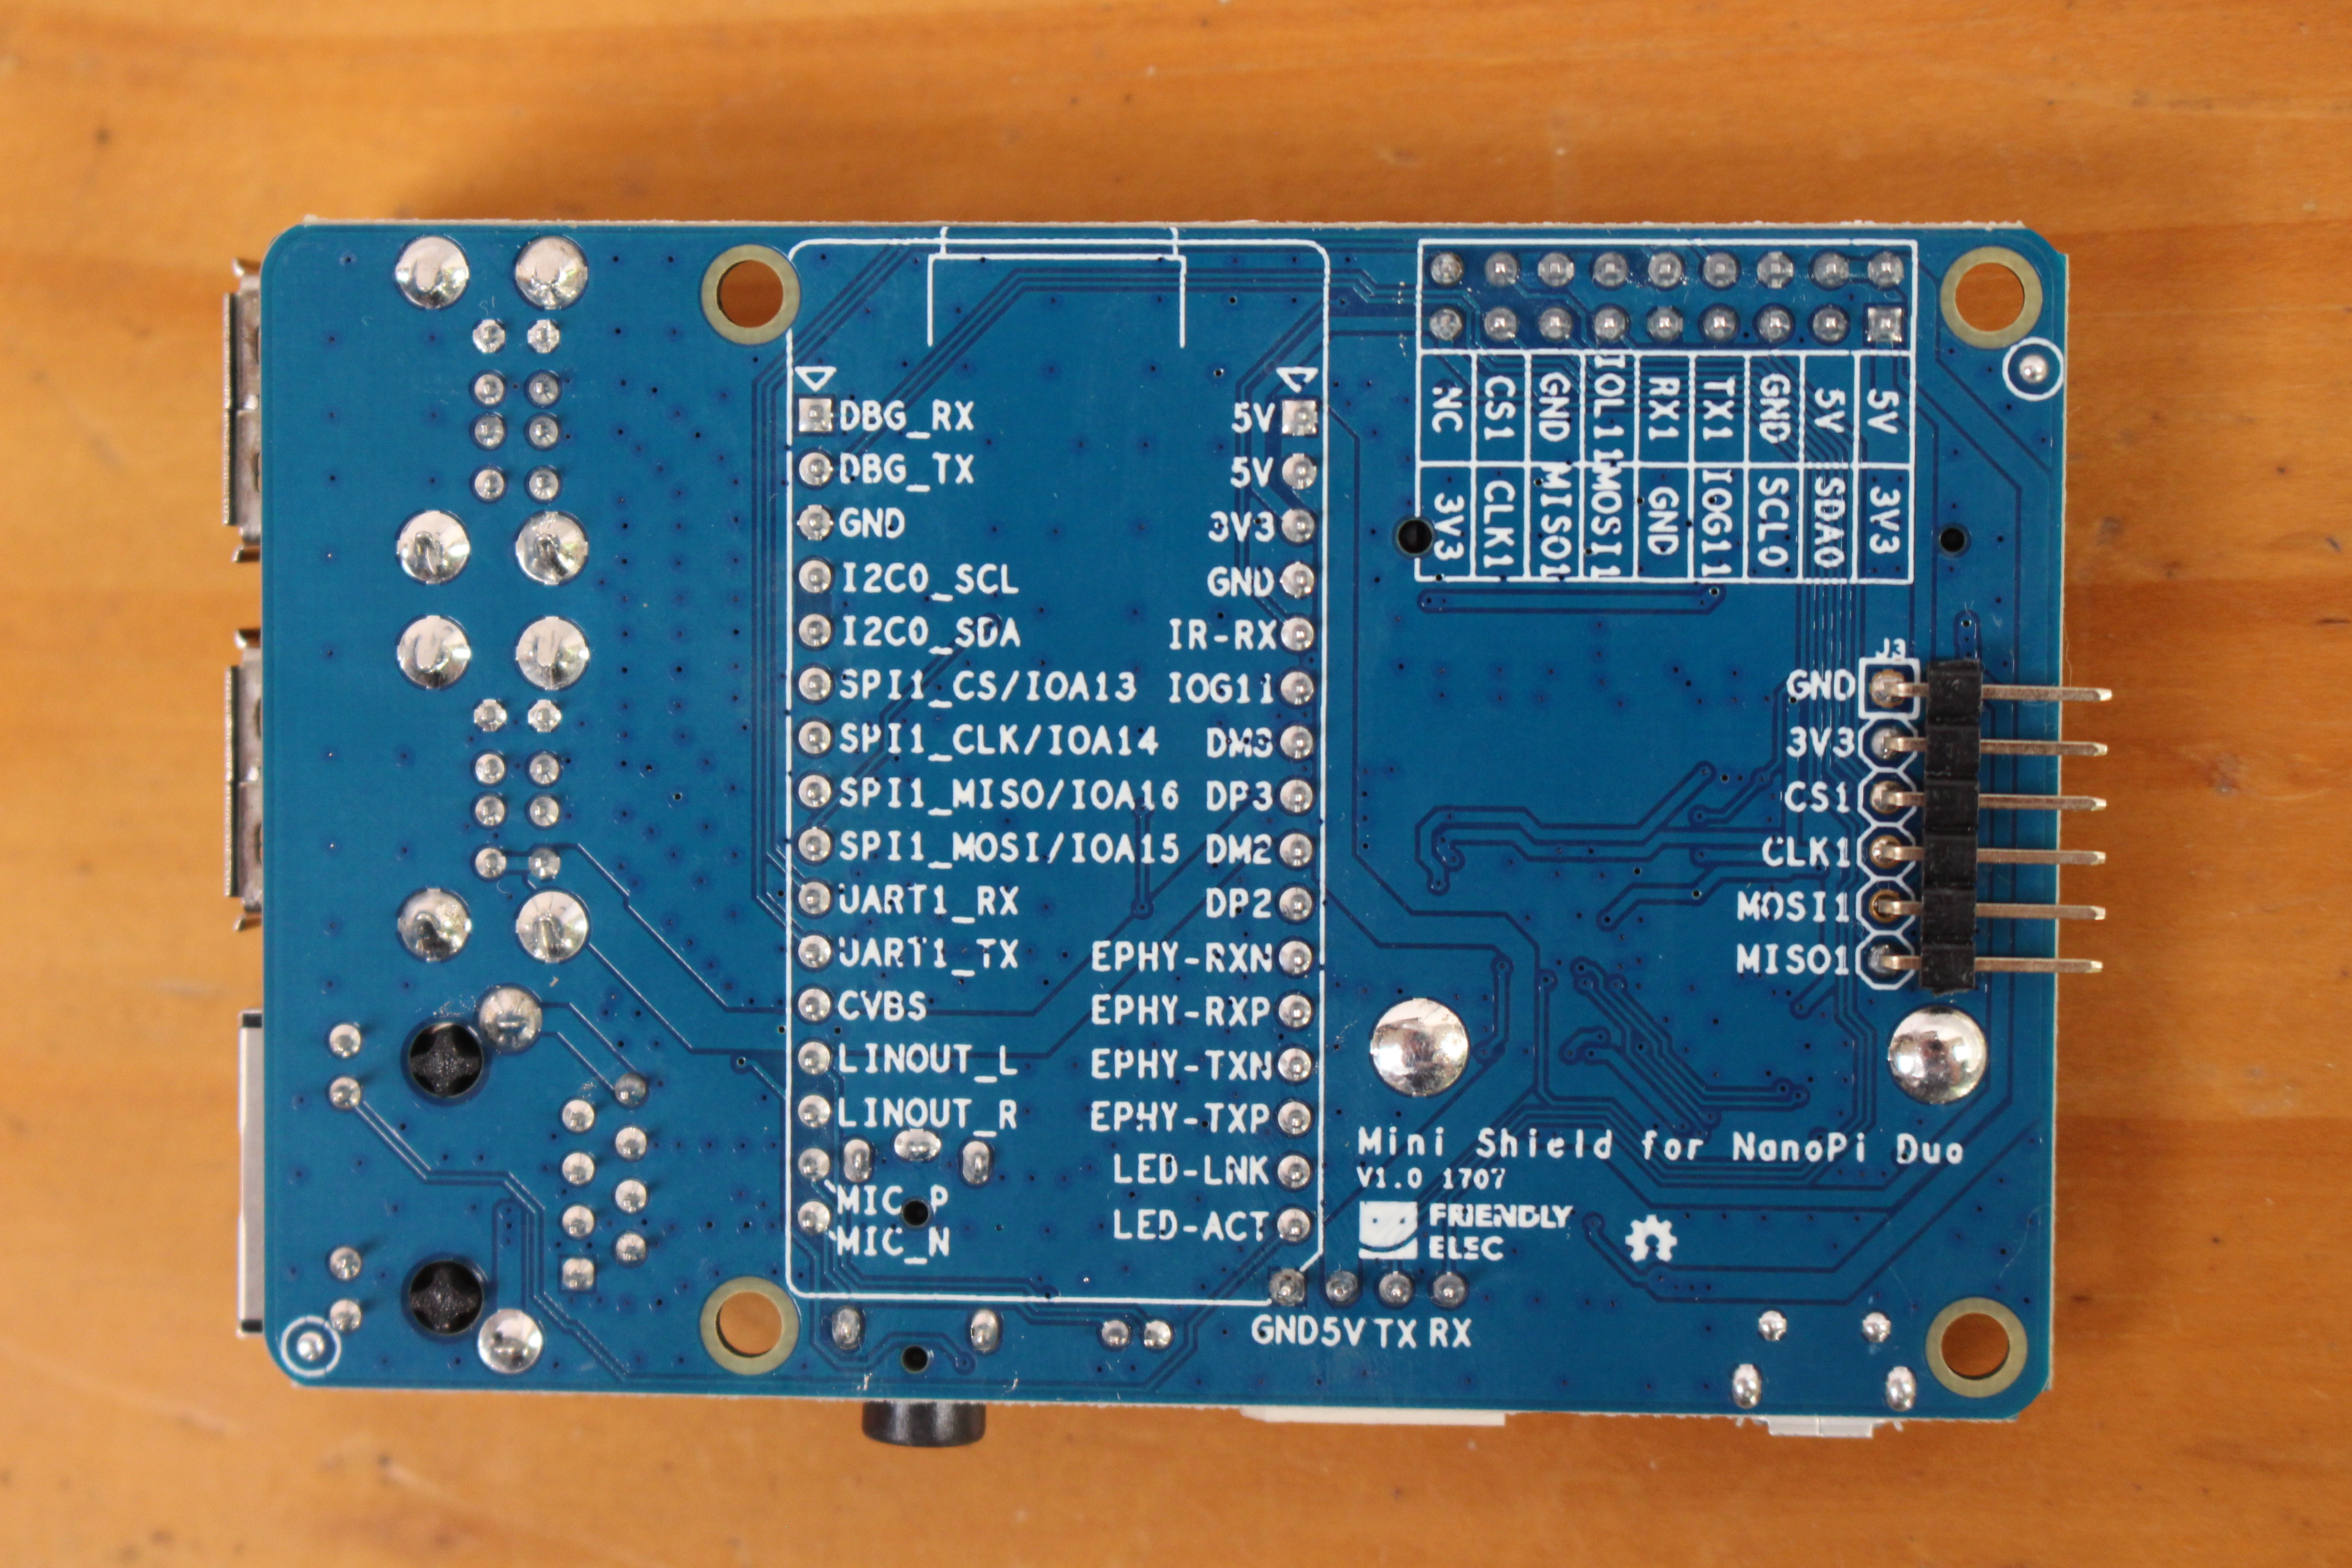
The bottom side of the board features marking with I/O names, as well as an extra 6-pin SPI header. The shield has the same dimensions as Raspberry Pi 3 board, so RPi enclosures should work with the board, and the one included in the starter kit actually look like an RPi case, as the SPI header opening is named “SD card”, the debug header is aligned with what would be the HDMI port, and the AV port is in the exact same place as the one in Raspberry Pi boards.
NanoPi Duo Heatsink Assembly and Breadboard Compatibility
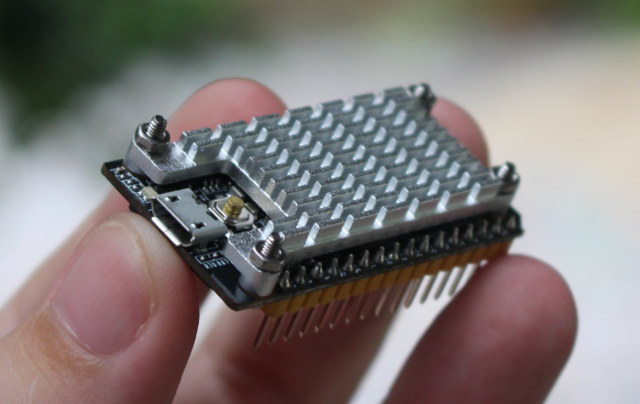
Let’s now install the heatsink kit. First peel off the plastic cover from one side of the purple thermal pad, place it on Allwinner H2+ processor, peel off the second plastic cover, install the heatsink on top of the board, and tighten it with the four bolts and nuts. Note that I place the nuts on top. More on that later.
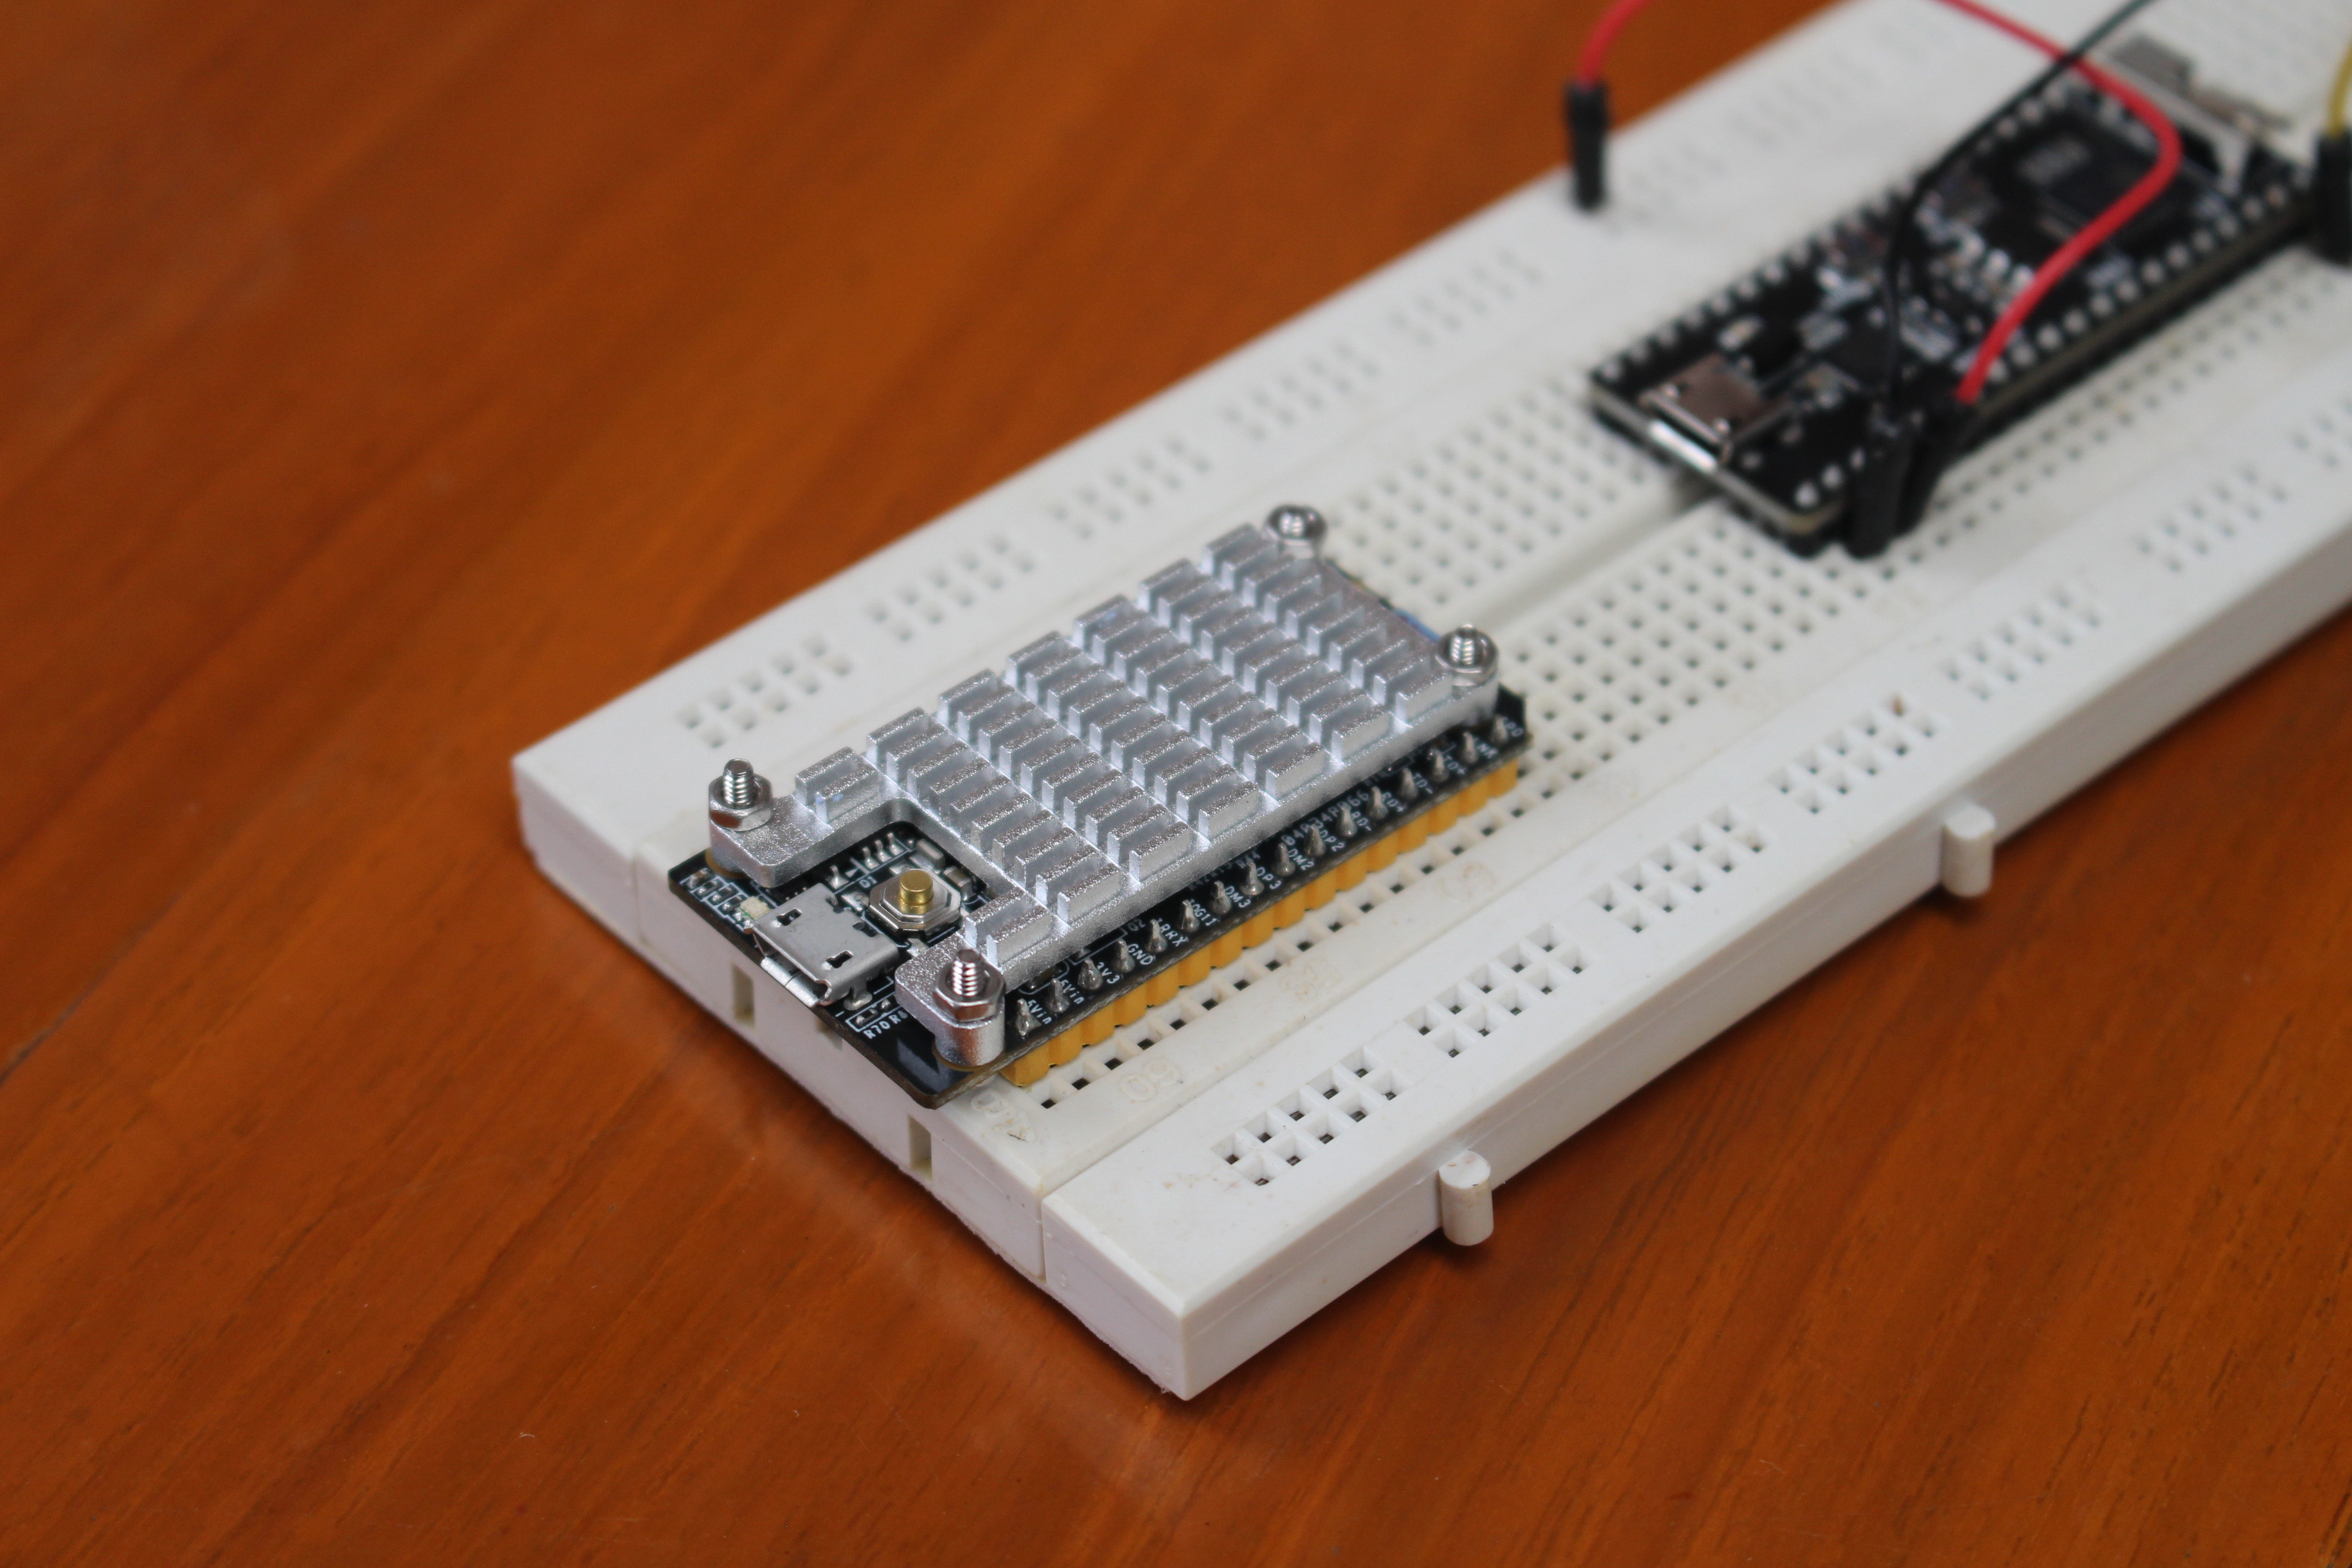
 The board is supposed to be breadboard friendly, and indeed I had no troubles inserting it in mine, with one row usable on each sides.
NanoPi Duo Starter Kit Assembly
Next I inserted NanoPi Duo into the mini shield, and tried to put the lot inside the case, but I came across a small issue…
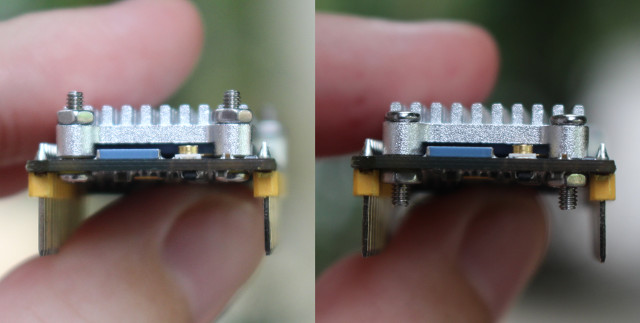
If you install the heatsink with the nuts on top, the bolts will then be higher than the heatsink, and will prevent us from closing the enclosure, as there’s not enough headroom on top. So instead I had to reassemble the heatsink with the nuts under, and I could mount it in the case. The first way (left) of mounting is a little better if you use a breadboard as you can fully insert the board, while with the second way (right) will leave a gap of 2 or 3 mm when NanoPi Duo is inserted in the breadboard. This still worked for me though, so better always puts the nuts on the bottom of the board. Another way would be to use shorter bolts, or cut them to size.
You can now place the board on the bottom part of the case, and tighten it with the four short screws provided, although I found out the board is quite fit without screws, so you may fine by skipping them too.
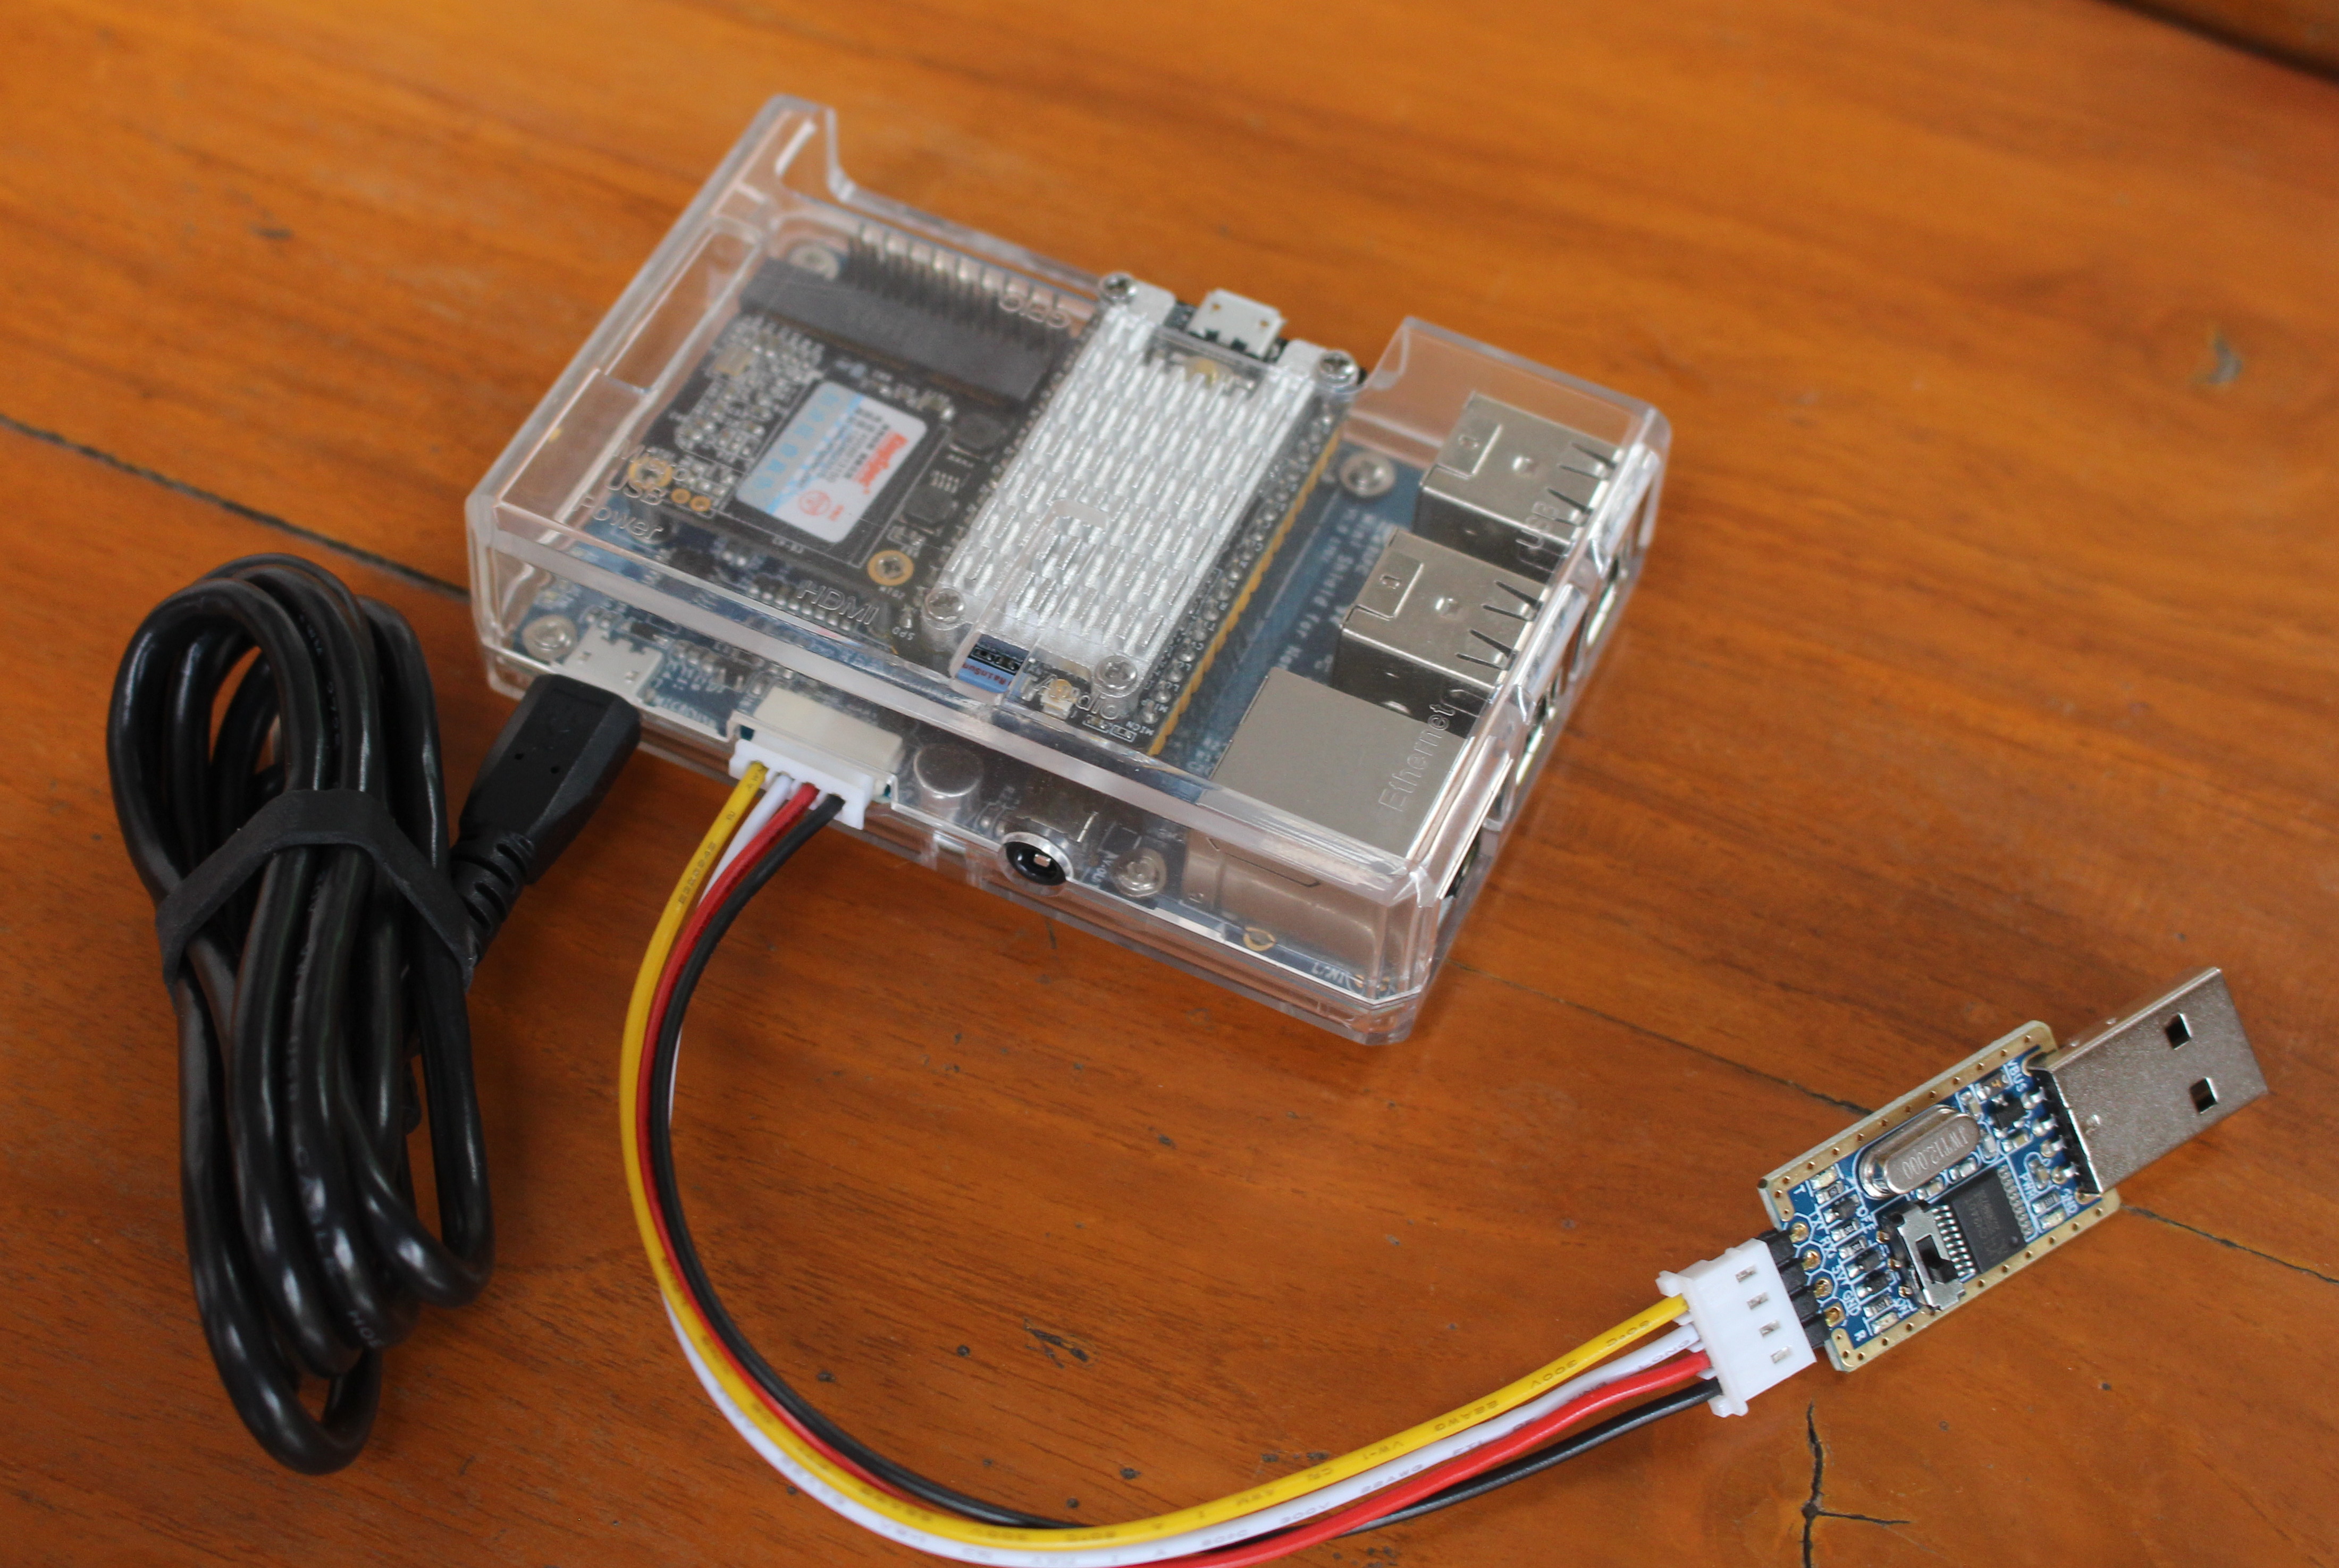
Finally, we can clip the top cover, stick the four rubber pads underneath, connect the micro USB to USB cable for power, optionally the USB to TTL board, and we should be good to go.
NanoPi Duo Starter Kit is sold for $17.98 (256MB RAM) / $19.98 (512MB) plus shipping, and you may also consider options such as the $45 64GB KingSpec SSD, USB or I2C LCD modules, a 2.8″ resistive touch LCD display, etc… If you don’t feel the mini shield is useful for your project, you can also get NanoPi Duo board only for $7.99 with 256MB RAM, or $11.99 with 512MB RAM.
Continue reading part 2: NanoPi Duo Quick Start Guide – Ubuntu, Breadboard, Mini Shield & mSATA SSD.

Jean-Luc started CNX Software in 2010 as a part-time endeavor, before quitting his job as a software engineering manager, and starting to write daily news, and reviews full time later in 2011.
Support CNX Software! Donate via cryptocurrencies, become a Patron on Patreon, or purchase goods on Amazon or Aliexpress. We also use affiliate links in articles to earn commissions if you make a purchase after clicking on those links.


Very tempting.
Thanks for the unboxing.
Please provide ‘smartctl -x’ output for the KingSpec SSDs when you do the review (and maybe check the ‘Current Temperature’ value twice after some time to see whether thermal readouts are fake like with KingDian or appear to be real).
Thanks for the unboxing…it just looks more appealing now and it was on a short-list situation as it was.
Ah, this would have been perfect for my mini sonos boom boxes if they had broken out the I2S 🙁
Would it be possible to do a small test checking the transfer rates of the ssd ?
(I found some figures for this kingspec ssd on amazon.de as well as on amazon.co.uk, but they are not the same; also would like to know how it actually does in the actual system)
@FransM
What do you expect on a system bottlenecked by USB2? That this KingSpec thing is not even able to reach the ~40MB/s NanoPi Duo is limited to with this setup? If anything could be measured then it’s random IO but this is of course pretty useless since noname vendors with ‘King*’ in their name will replace flash chips every few months anyway.
I would be more concerned about wrong/faked SMART attributes especially missing ‘wear out indicator’. But I also would never buy flash storage products that are not from those few vendors producing NAND flash, own controllers and manfucature this to retail products.
@cnxsoft: when the KingSpec is part of your review can you please remove the ‘BurnIN passed’ sticker from controller chip on the lower ‘SSD’ side and tell us the markings?
What would be even nicer, would be instructions as to how to transfer everything from the microSD to the Kingspec SSD and boot from it – I’ve scoured the web to no avail up to now.
@Peter Scargill
You can’t transfer ‘everything’ on Allwinner platforms so far since these SoCs don’t support booting from USB (technically the SSD is an USB device). Transferring the rootfs to USB is as easy as calling ‘sudo nand-sata-install’ (once Armbian supports fully this board 😉 ) and since FriendlyELEC now fortunately also joined the ‘bootable SPI NOR flash’ party a future nand-sata-install improvement will be a new mode to
– write bootloader to SPI NOR flash on the board
– transfer installation to attached USB storage
Then you can power down the board, remove SD card and it boots from SPI flash and runs off USB storage.
SoTKAISER to clarify – are you saying that FOR NOW – I assume i have to boot off the SD – and do the usual stuff for transferring the main rootfs to what seems to be SDA ??
@Peter Scargill
Exactly. And since NanoPi Duo is more or less an OPi Zero my first steps with this board would be an OPi Zero image with mainline kernel (then nand-sata-install should already work). But there is one potential problem since if the JMS567 USB-to-SATA bridge on the Shield has to be powered on by a GPIO then this has already by done by u-boot since otherwise /dev/sda won’t be available (haven’t checked that yet).
@Peter Scargill
https://forum.armbian.com/index.php?/topic/5035-nanopi-duo-plus-mini-shield/&do=findComment&comment=40261
On the standard FA image – SDA is indeed available – I’m going to try the stuff I wrote a while ago for adding a drive to the NEOs…
All looked exciting until I saw it uses XR819 WiFi chip, which according to a number of sites has poor performance (on Orange Pi Zero) with an awful barely working driver.
I hope the situation has improved with the FriendlyElec board. Grateful if you can put it through your usual WiFi test suite to show real world performance, and also, with the WiFi datastream passing via the Ethernet port ?
@Paul
XR819 works fine on my Orange Pi Zero. I use it everyday with Google Assistant.
The first versions of the board did not work well based on reports, but the new version looks good to me. I have not tested the performance though. It’s just stable enough for whatever Google Assistant does.
Anyway, I’ll test WiFi when I start the board (in one month).
Most of these reports were just the result of users as usual neither reading warnings nor the fineprint but then drawing wrong conclusions. When Armbian started to support the OPi Zero with Wi-Fi included and provided first experimental test builds the default ‘Wi-Fi powermanagement’ setting was on back then.
While we searched for a way to deal with these Wi-Fi powermanagement settings in a consistent way for all the +50 boards we support first users tested and reported ‘unusable crap’. Problem gone once powermanagement is set to off (which happened in Armbian maybe 2 weeks later, we switched the default from on to off to provide users who don’t read manuals or warnings the best user experience possible). And BTW: OPi Zero was the first Orange Pi where this setting had any real effect, on all the Oranges with RealTek based Wi-Fi there’s no difference between on or off and that’s the reason why our first experimental images we provided defaulted to on which lead directly to all these reports of abysmal Wi-Fi.
Besides that the silicon isn’t that great (as cheap as possible — users who complain should please think twice why they buy these boards) and the same applies to the driver we got in some Allwinner code drop. There are still tons of frames dropped (for the naive reader: ‘dropped’ means retransmitted directly after, at least at the TCP layer nothing is missing but only performance is hurt) and since real documentation is also still missing most probably nothing will improve here.
But according to Xunlong they improved some Wi-Fi powering issues on later OPi Zero PCB revisions and one NanoPi Duo user reported in Armbian forum peak iperf numbers of 25 Mbits/sec which I don’t believe in based on how iperf works especially in situations with dropped frames (you get an initial high peak value and only later realistic and much lower numbers)
It’s 1T1R 2.4 GHz band Wi-Fi so running any ‘performance’ benchmarks is pointless anyway.
Nice board and it runs Ubuntu. 2tkaiser: ‘unusable crap’ is armbian itself – it is intentionally made by its creators as useless, undebuggable and unsupported bloatware. Just use Ubuntu or per-board pure clear and easy setup scripts 😉
@Paul
Oh, I missed this totally: https://forum.armbian.com/index.php?/topic/5035-nanopi-duo-plus-mini-shield/&page=2&tab=comments#comment-40261 (so reported iperf performance better than the numbers we have from OPi Zero)
I look forward to your review. The Friendlyarm wiki recommends ‘better to connect an external antenna to Duo’, so to give it best shot I hope you can connect a typical omni 5 or 6 dBi ant and space the AP as far away as practical. See from tkaisers reply, important to turn off ‘Wi-Fi powermanagement’ before testing. As the early reports mention XR819 WiFi dropping link after a while, would help if you can run a heavy download for say upto an hour to test resiliance.
See from tkaiser’s link small H2 boards prone to overheat. Grateful if you can confirm the Duo’s big heatsink prevents this – with supplied case on of course. I don’t plan heavy use, but my room temp can reach 34C which has caused problems with laptops.
Thanks for informative link to raschid’s result for NanoPi Duo. See he used a ‘OPiZ-Antenna’. I couldnt find OPi Antenna Gain spec on orange.org but as only 5m from AP probably makes little/no difference. Interesting he states Friendlyarm use same driver as OPiZ. From a brief search I gather there is more than 1 Linux driver for the XR819. After reading the early bad reports, I was hoping FriendlyElec would improve it but from what you said, lack of documentation from AW makes that impractical, and only impact for the user is speed dips on Uploads due to many retransmissions – and no impact at all for the more usual Downloads.
BTW: Pete was so kind to provide some performance numbers for the KingSpec SSD attached to NanoPi Duo via the Shield: https://tech.scargill.net/nanopi-duo/#comment-38543
It’s obvious that FriendlyELEC ships with poor cpufreq settings and not just storage performance could be better (though that applies to almost all vendor OS images since for whatever reasons hardware vendors never seem to care about their products performing well — Hardkernel being one of the few exceptions here)
Thankfully Pete tested again the KingSpec SSD this time moving away from ‘stock Ubuntu’ settings (used by the OS image FriendlyELEC provides, not caring about all the stuff that is important like cpufreq behaviour, IRQ affinity, optimal dvfs settings) more towards ‘Armbian’ settings. As expected SSD performance almost doubles with small blocksizes and the maximum sequential transfer rates also get closer to the theoretical 40 MB/s USB2 limit.
Performance numbers as well as what’s still missing for optimal performance can be found in the link to Pete’s blog one comment above. ‘It’s both nice and scary how much optimized settings matter on these small gems and how less most hardware vendors and kernel/distro people care.’
IMO it’s a bit scary that once Armbian fuily supports this board (then also providing higher clockspeeds, optimized DVFS settings and optimal IRQ affinity) the overall performance difference between ‘stock vendor OS image’ (this time an Ubuntu 16.04) and Armbian might be 100% or even more. All of this not ‘distro related’ since all the magic happens one layer below.
IMO workable and stable software is more important for China boards vendors, Not everyone can do that, Thanks for your work and suggestions, it’s pretty helpful for us.
@Mindee
Sorry, wasn’t meant as an insult, it’s just kinda frustrating seeing new OS images performing lower than necessary after so much time/work has been spent on the issue already in the past by us (community).
I’m wondering how to prevent this happening again and again since it really happens all the time once someone tries to glue together a Linux rootfs (be it Ubuntu, Debian, CentOS, OpenSuse, whatever) with some bootloader + some kernel + some device settings no one seems to care of.
Especially using a stock Ubuntu armhf rootfs in the past was a guarantee for problems since containing a strange service called ondemand responsible for choosing totally inappropriate cpufreq governors on some platforms and enabling irqbalanced which did nothing useful on ARM but was responsible for the board freezing after some time due to a memory leak on systems lacking /sys/bus/pci/devices.