
I’ve recently received a Particle Mesh IoT Development Kit with one Argon WiFi + Mesh (802.15.4) board acting as gateway, three Xenon Mesh boards, and various sensors and accessories. I’ve already showcased the hardware in the first part in the review, so in this post I’ll post my experience getting started with Particle Mesh networking using the kit.
Beside the kit, you’ll need a few micro USB cables, a mobile phone running Android or iOS, a reliable Internet connection (more on that later), and a host PC for programming and debugging potential issues.
Setting Up Particle Argon & Xenon boards
First we’ll need to configure / setup the boards. Go to https://setup.particle.io to login or create an account if you don’t already have one, and you should be brought the following page.
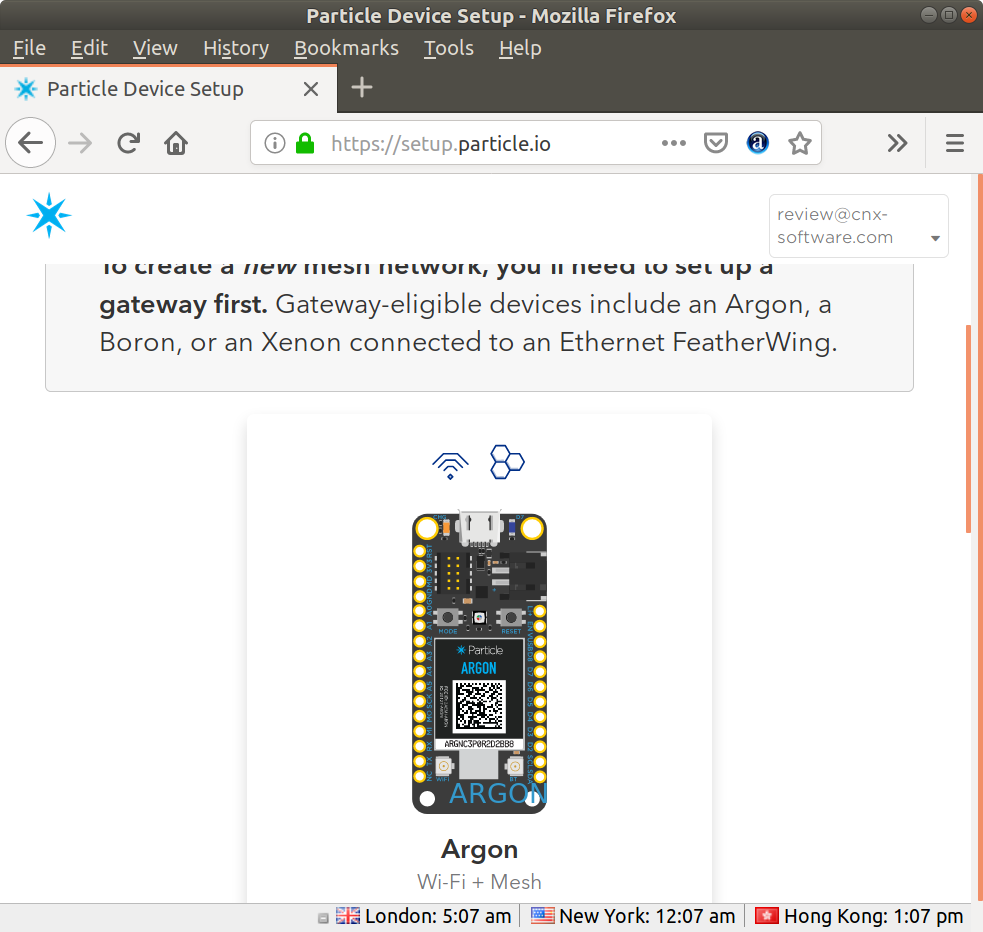
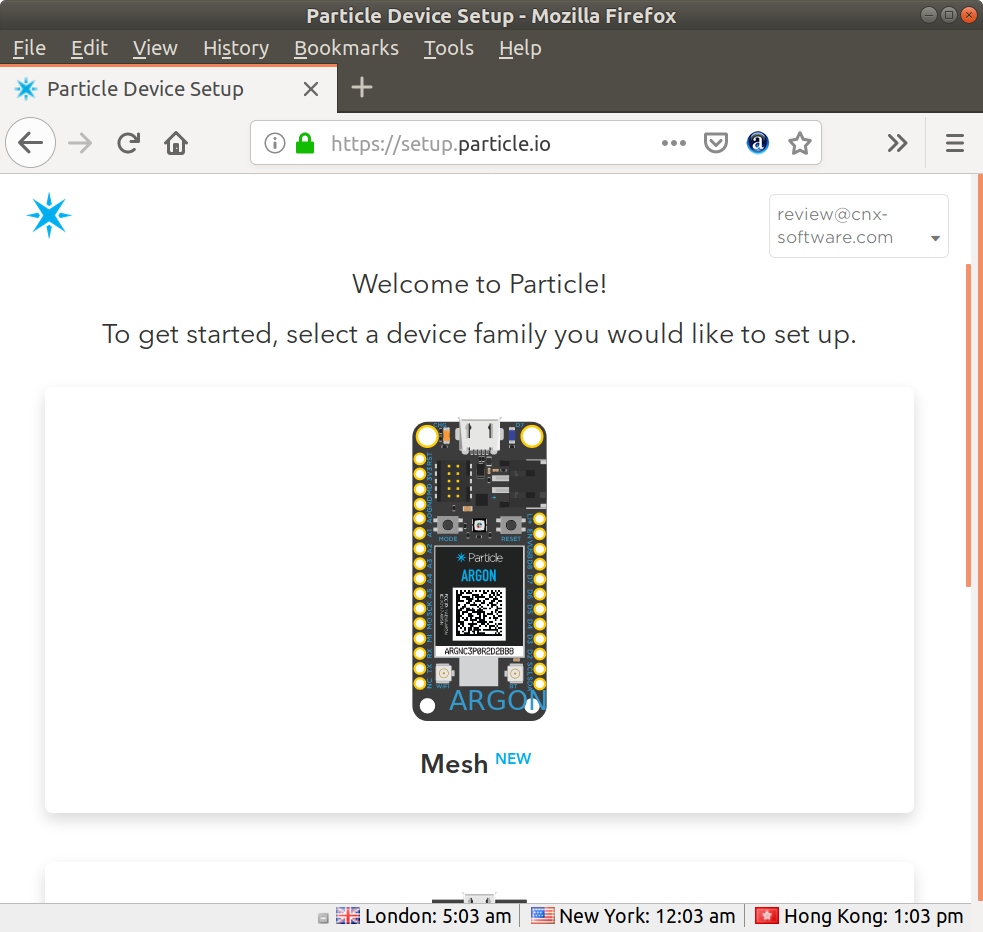 Select Mesh, and you’ll be asked to setup a gateway first. Any of the boards from Particle Mesh family can be setup as a gateway, but for our purpose Argon board with WiFi + Mesh is the ideal candidate.
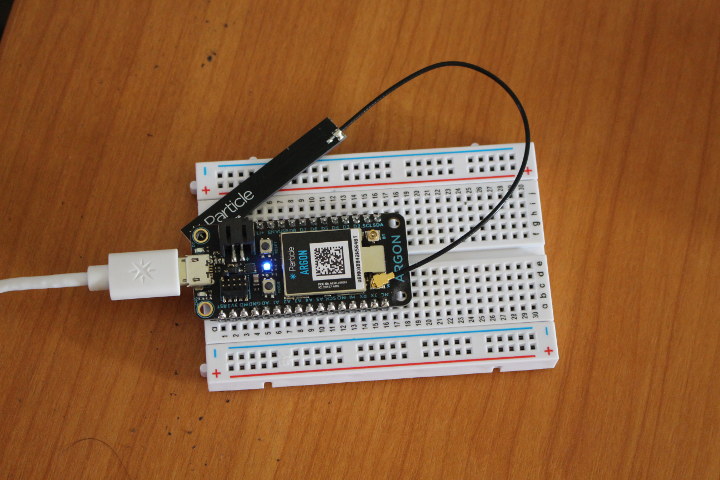
 You’ll first need to connect the WiFi antenna to the board, and powered it with the provided micro USB to USB cable.
Click Next to install the mobile for Android or iOS. I initially did this on my Android tablet, and after logging into the app with my Particle credentials, I clicked on the + button to add the Argon board.
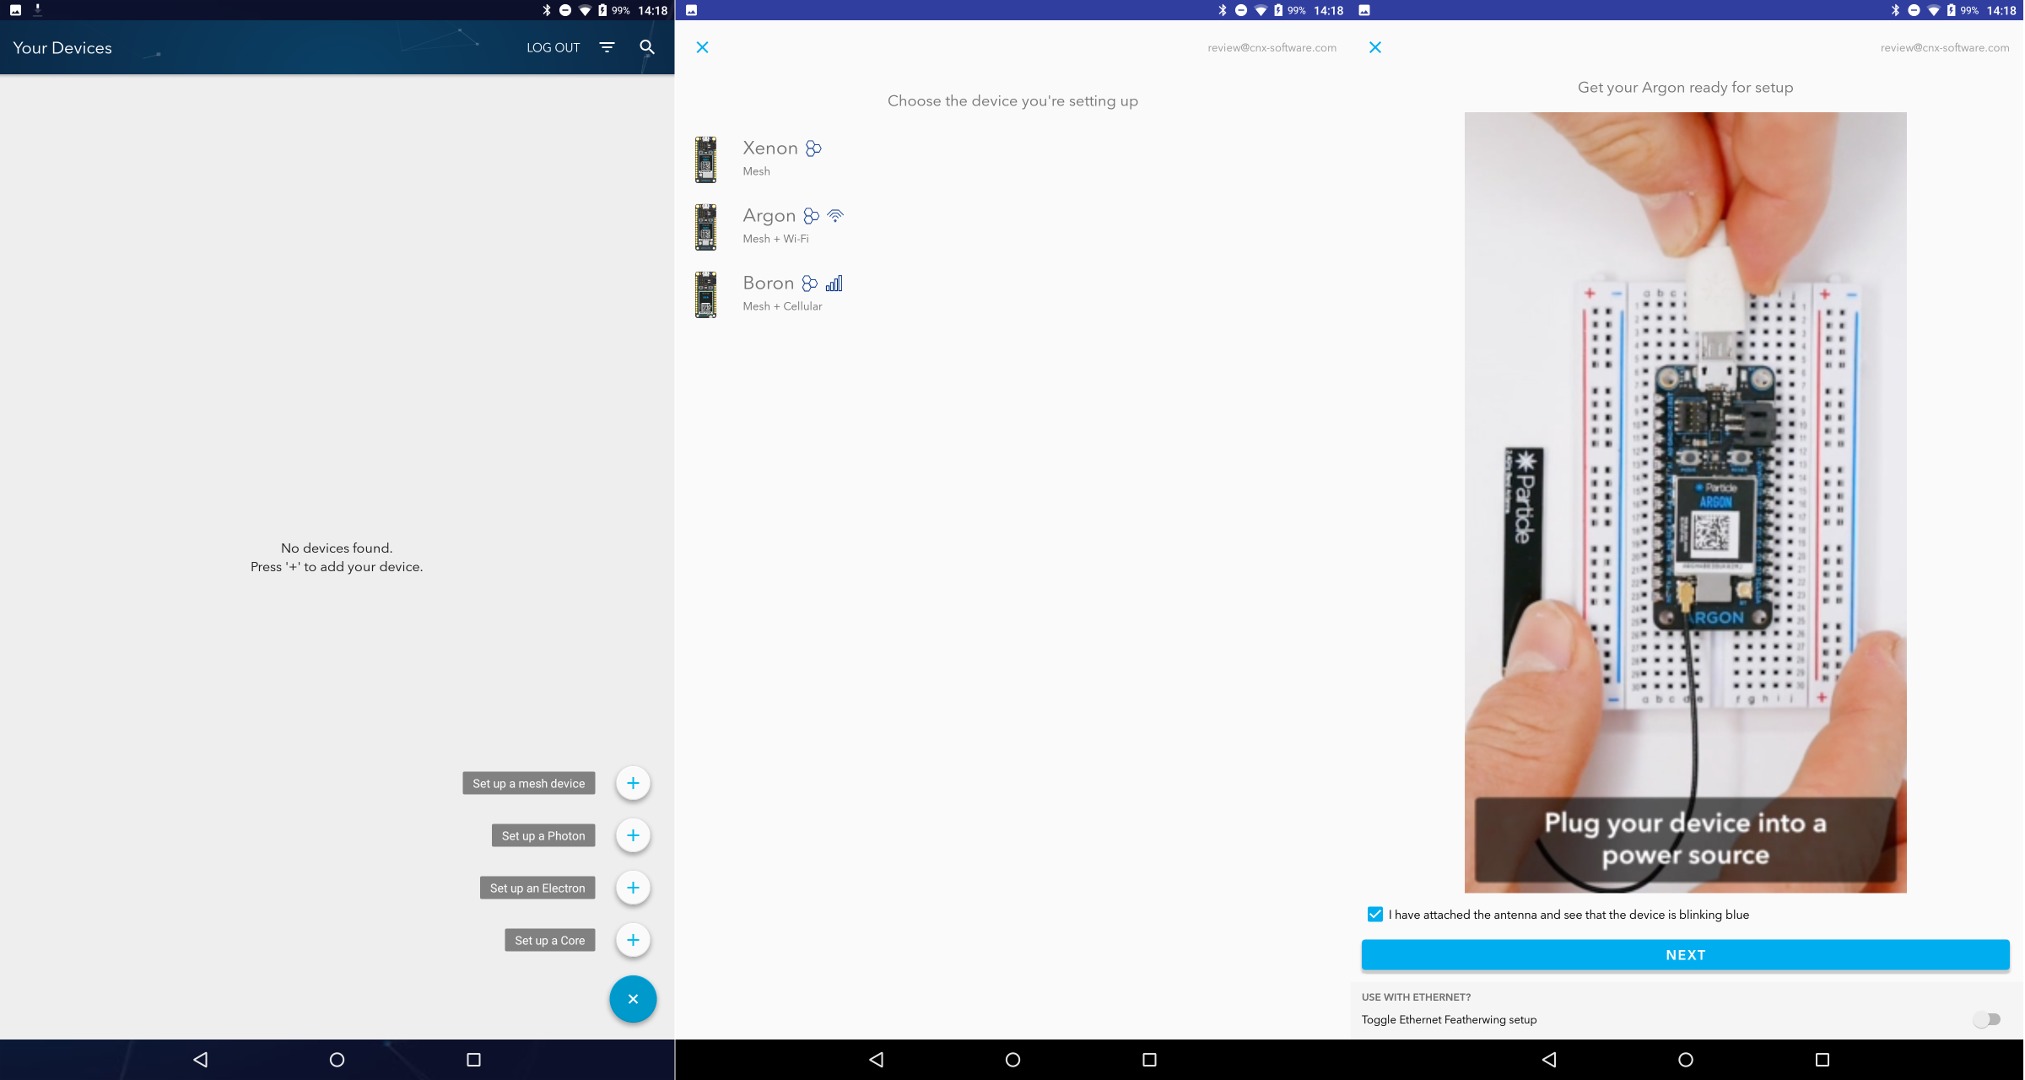
We’re being asked one more time to make sure the antenna is connected, and the Argon board powered over USB. We can now scan the QR card on the board with our phone/tablet.
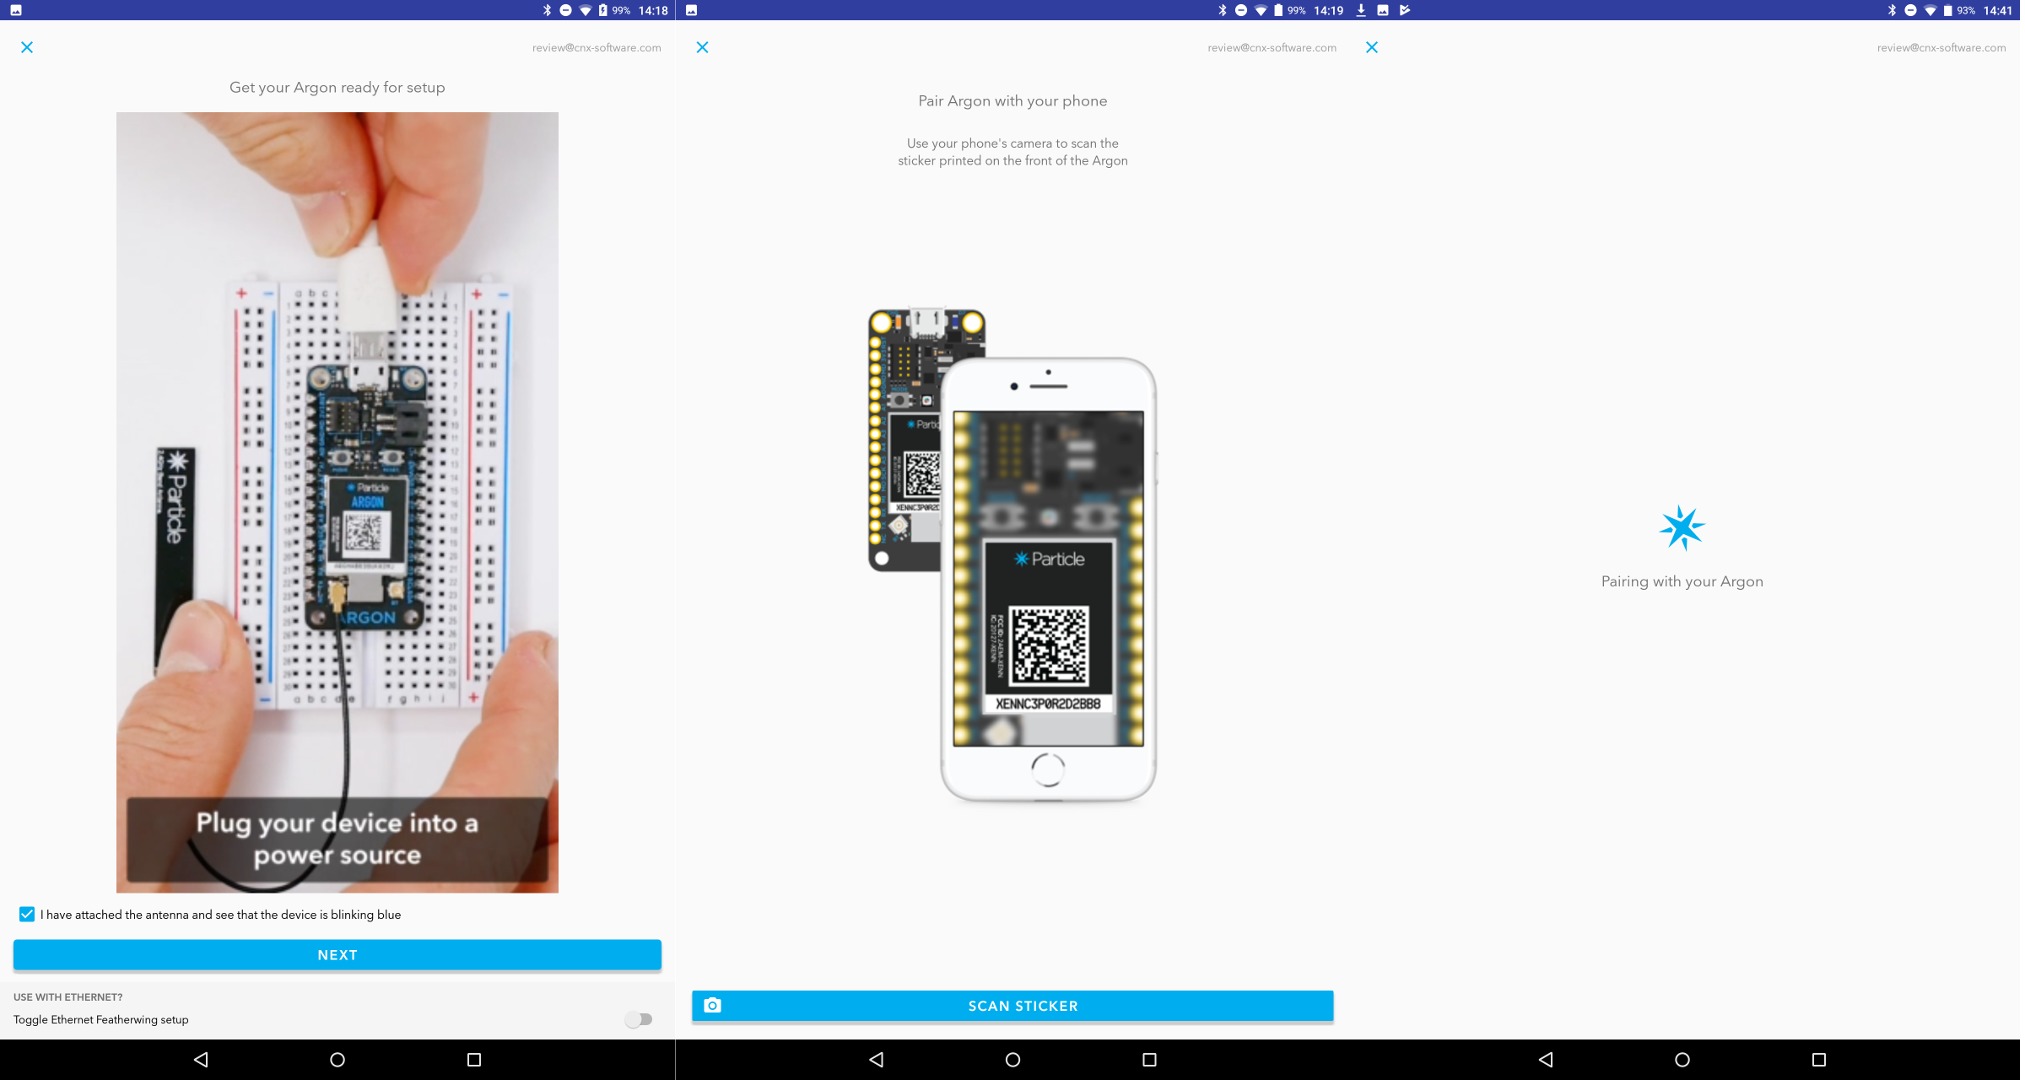
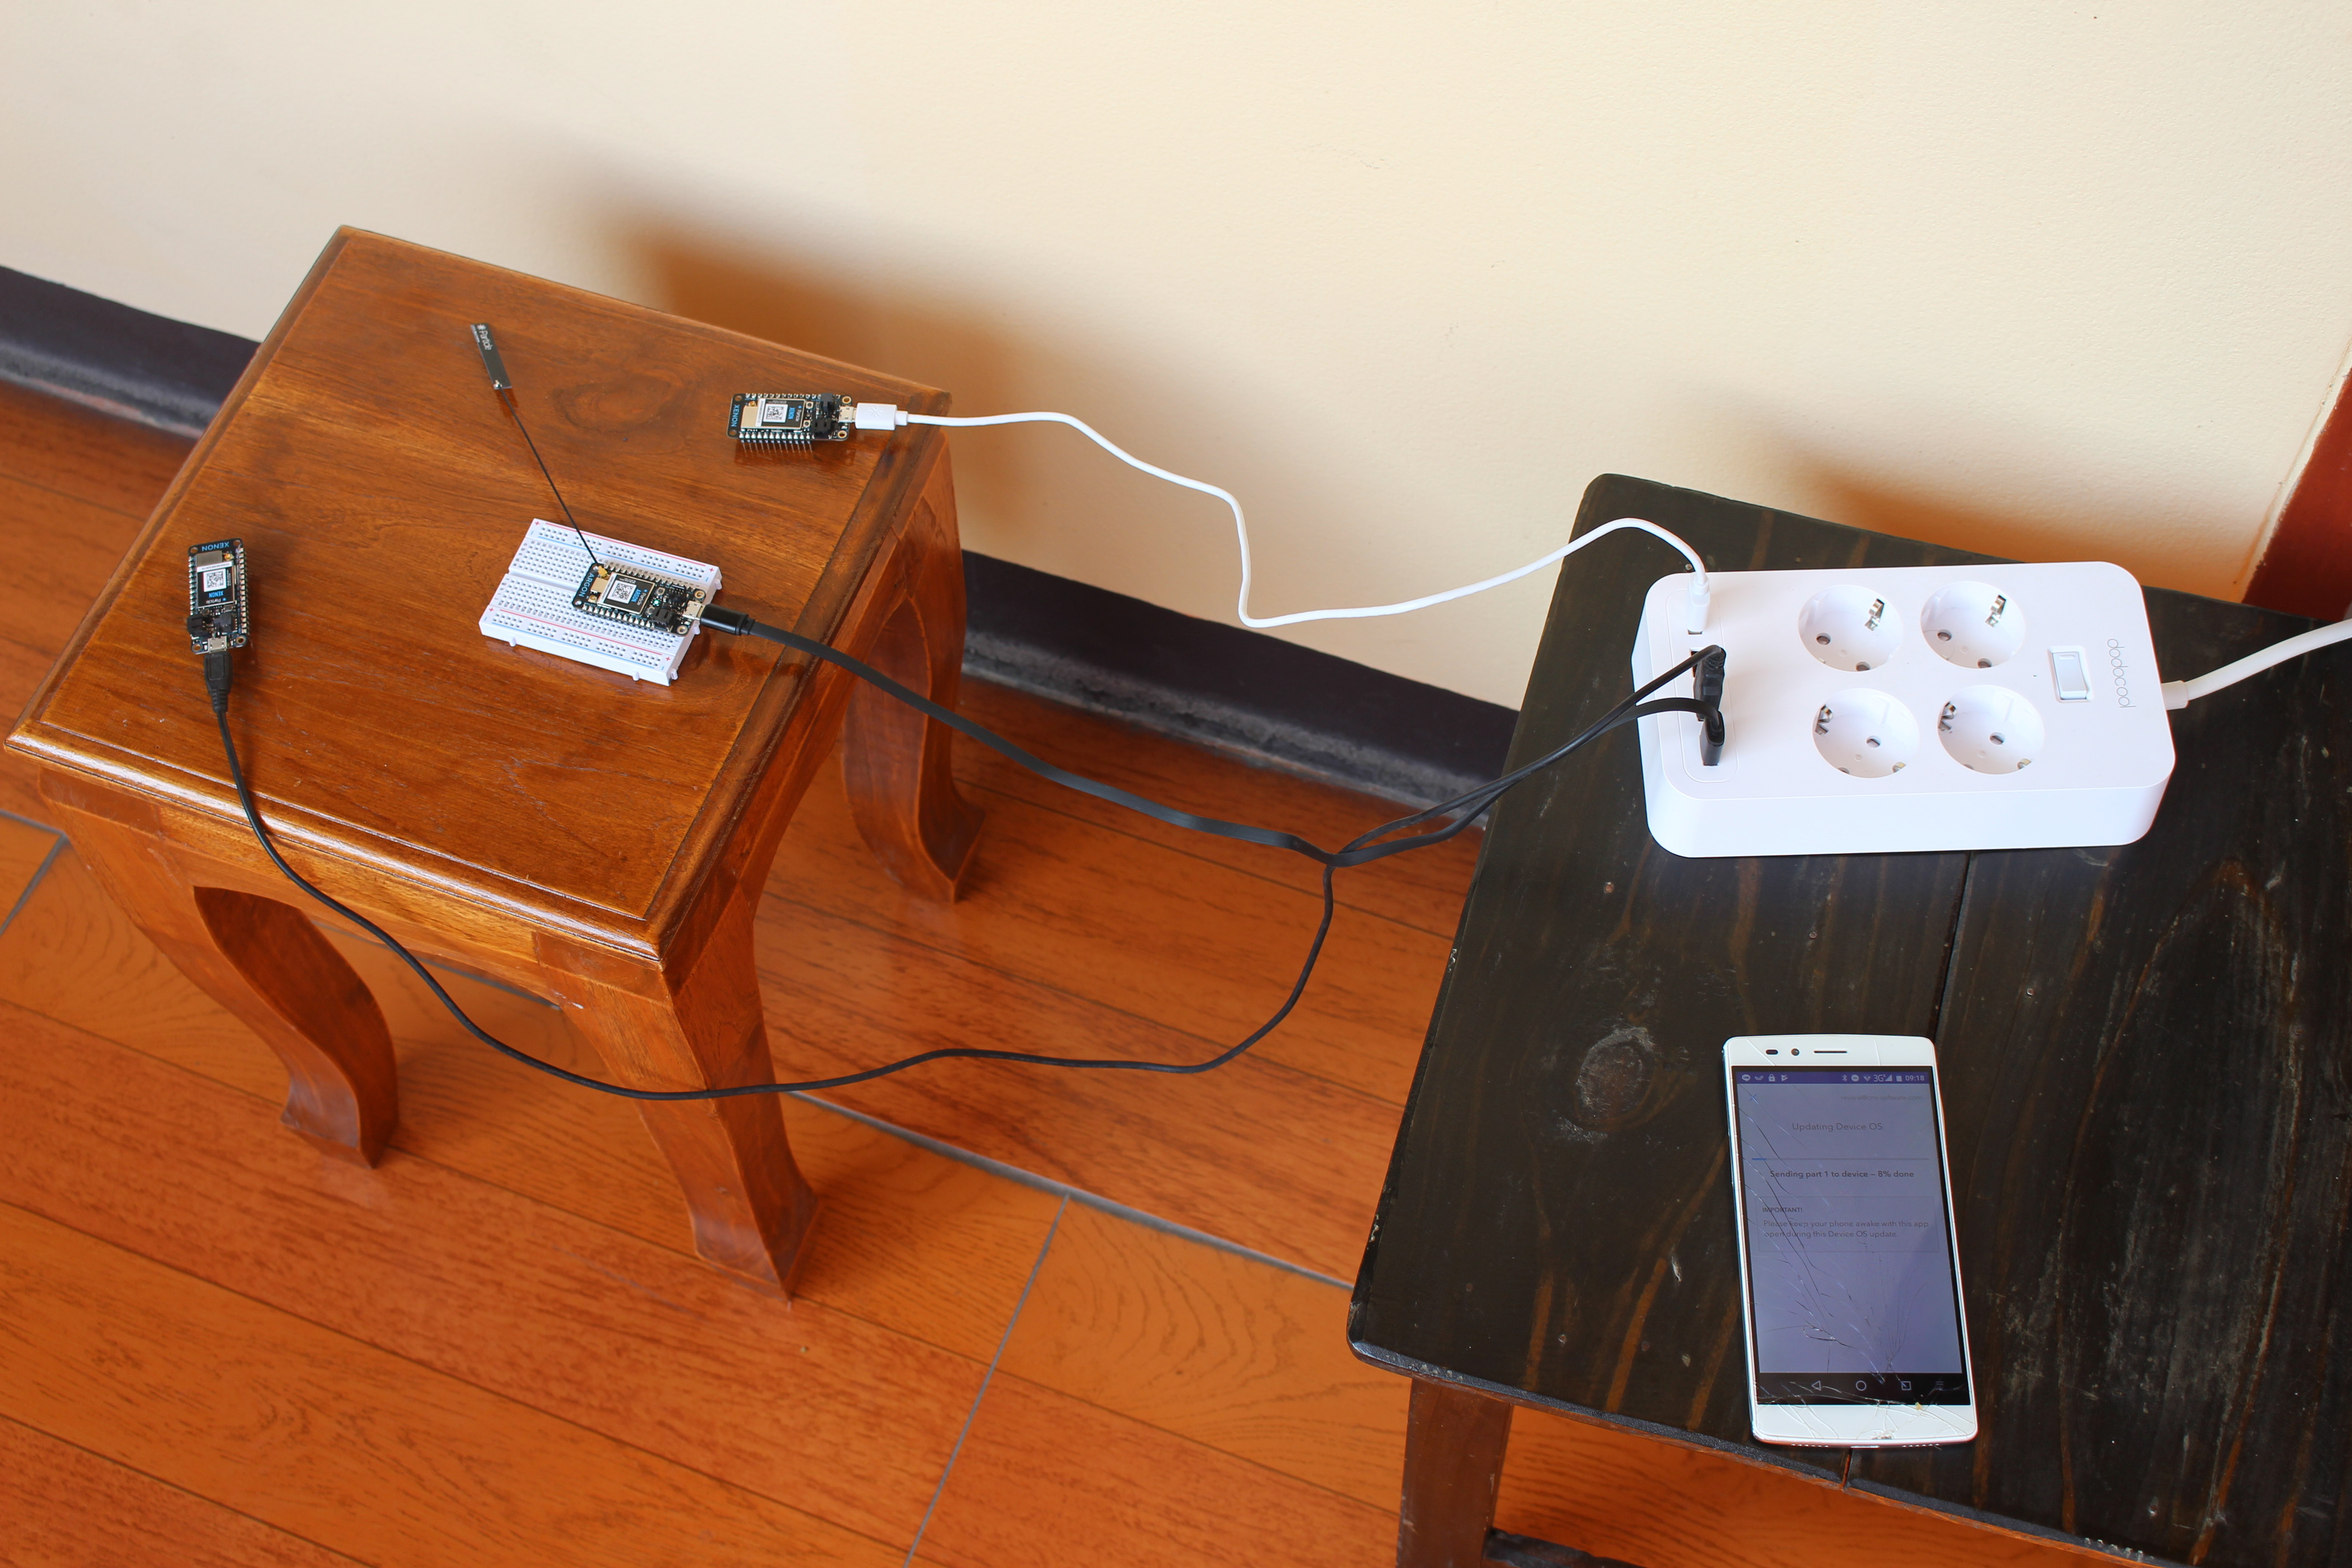
You should see a spinning blue star with the text “Pairing with your Argon” However, on my tablet, it was stuck forever, and even after one hour the star would still spin…. I eventually switched to Vernee Apollo Lite Android smartphone, and although registration was slow (maybe 5 minutes), it was successful with the next step being “Updating Device OS”. Note that my room is a bit dark, and my phone’s camera is not the best, so I struggled to scan the QR code. I had to use a flash light, and move the phone a bit around before being successful. So working in a well lit room, and not using a crappy phone does help.
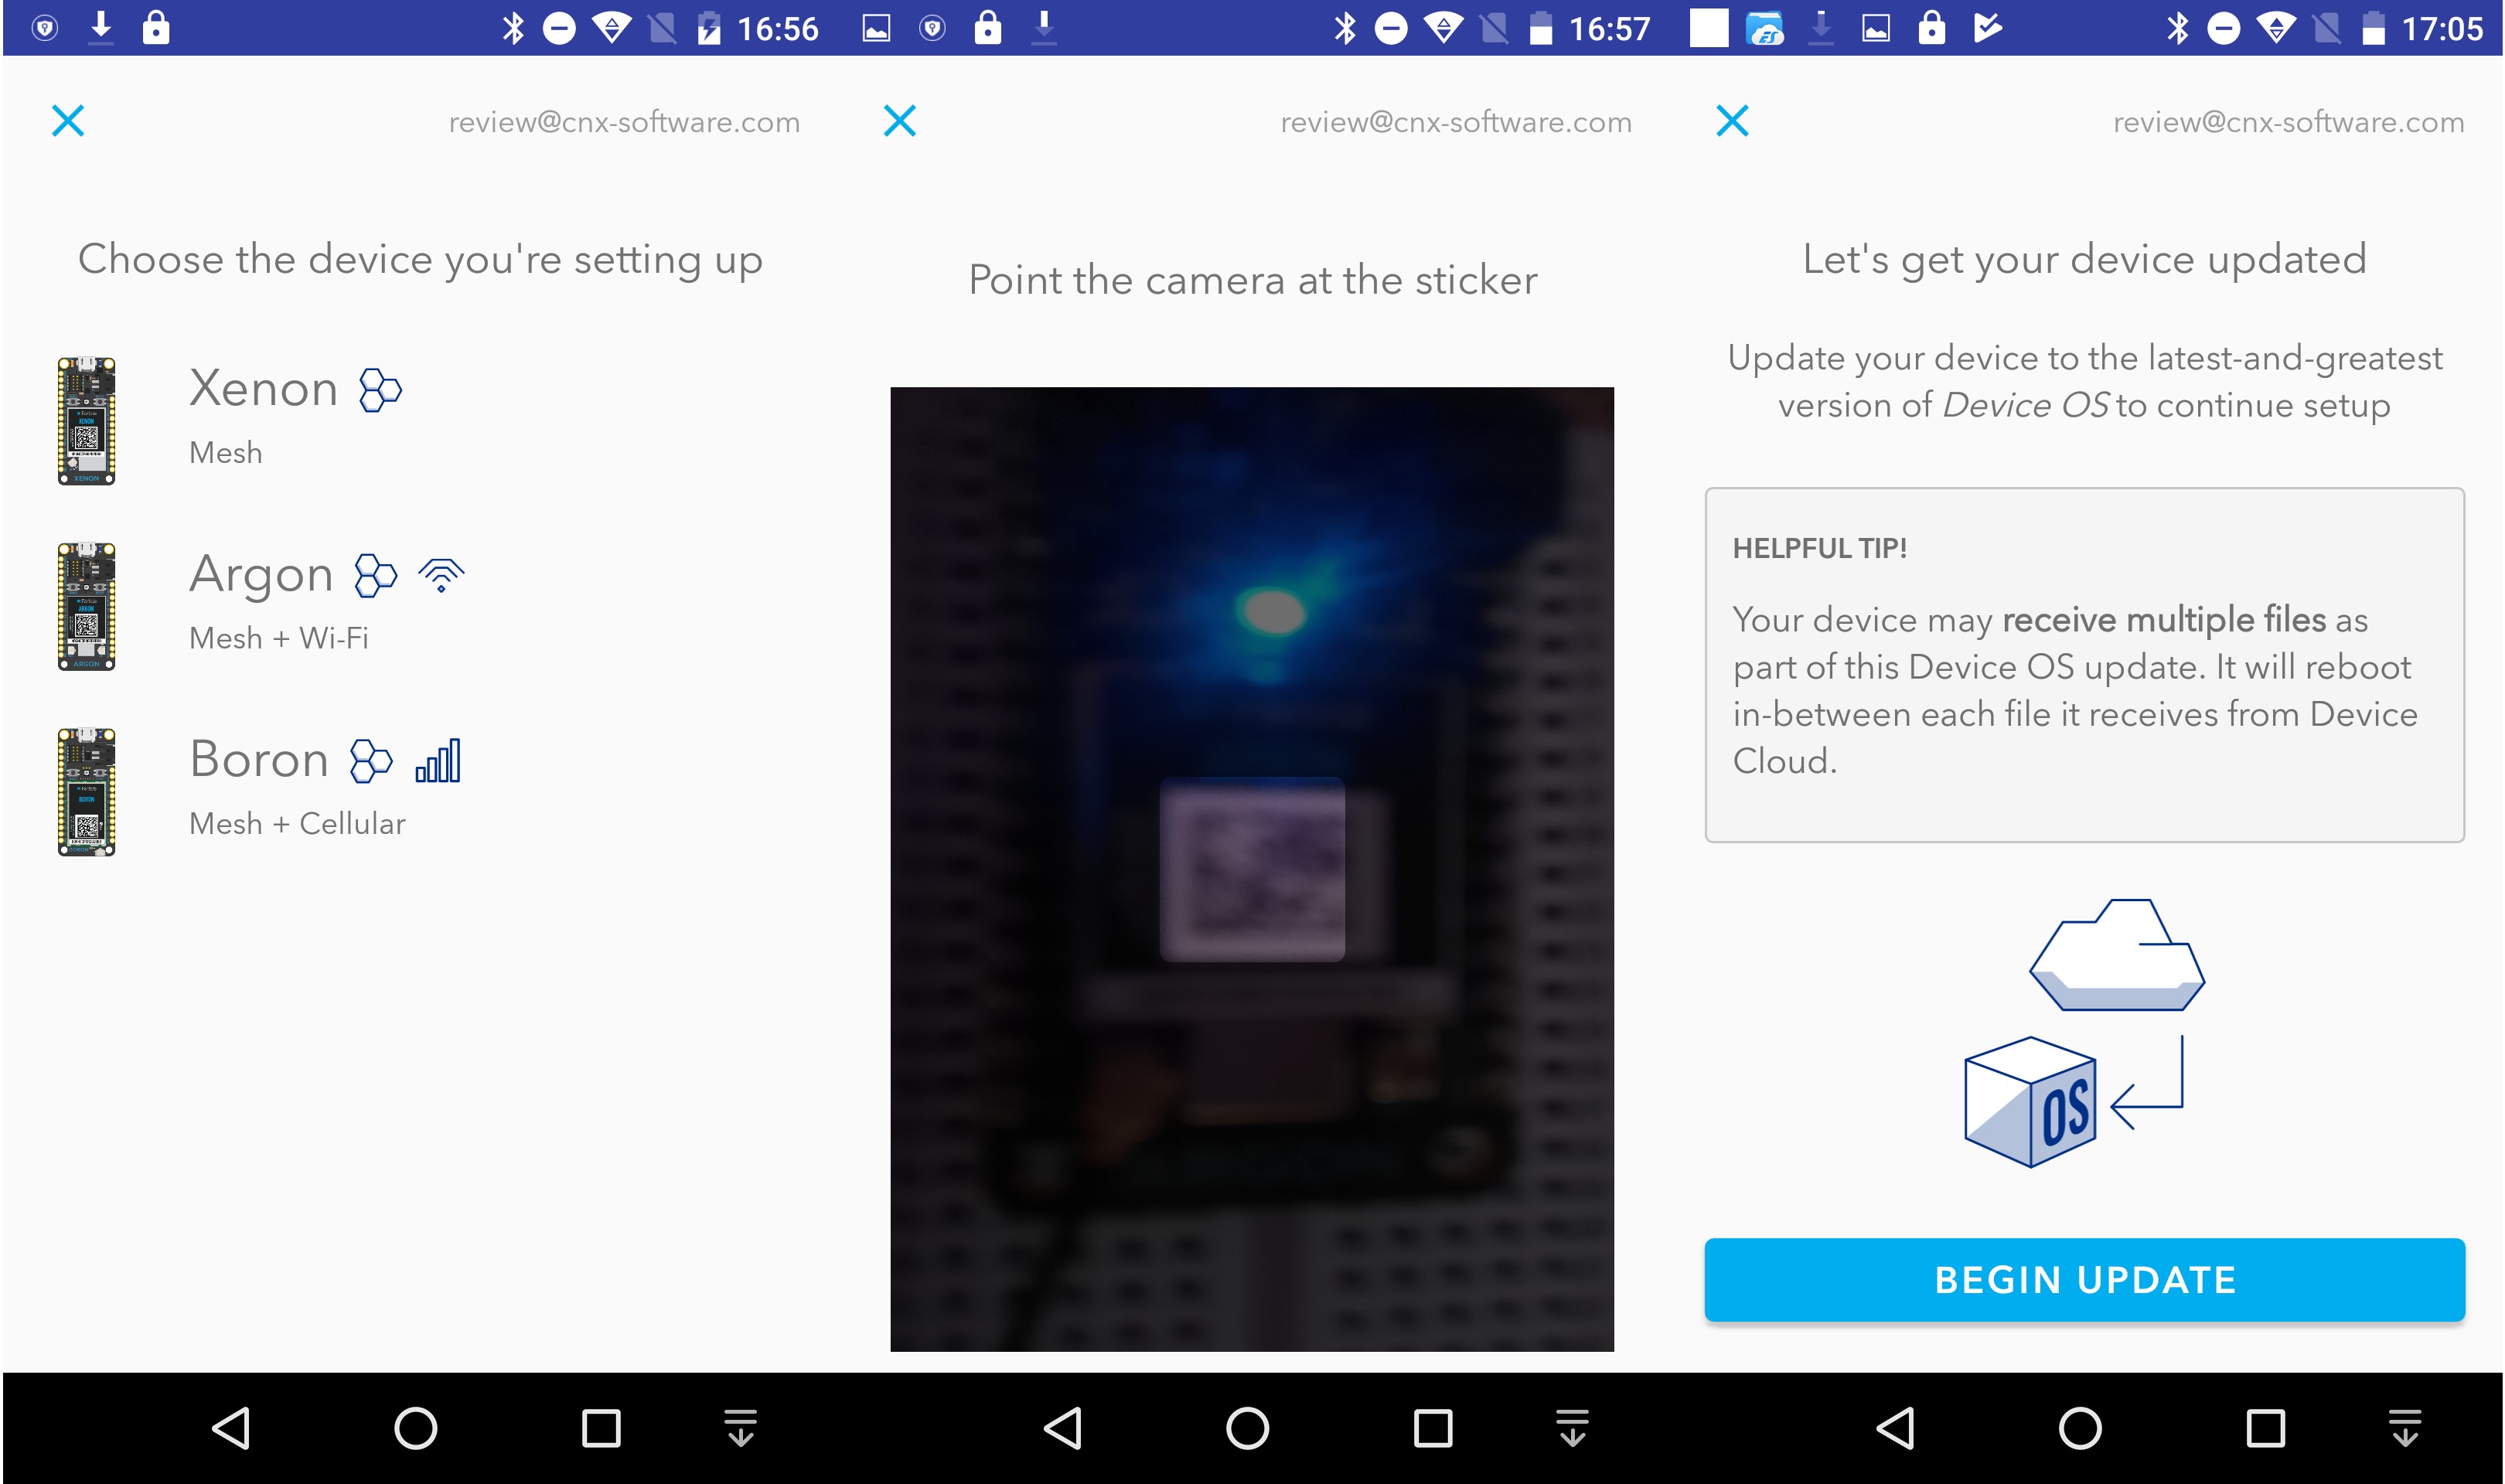
As the firmware update is on-going, the board’s blinking LED becomes purple. That’s a 2-part process that took about 30 minutes here. Once it’s all done, we’ll be asked whether we want to use this Argon in a mesh network.
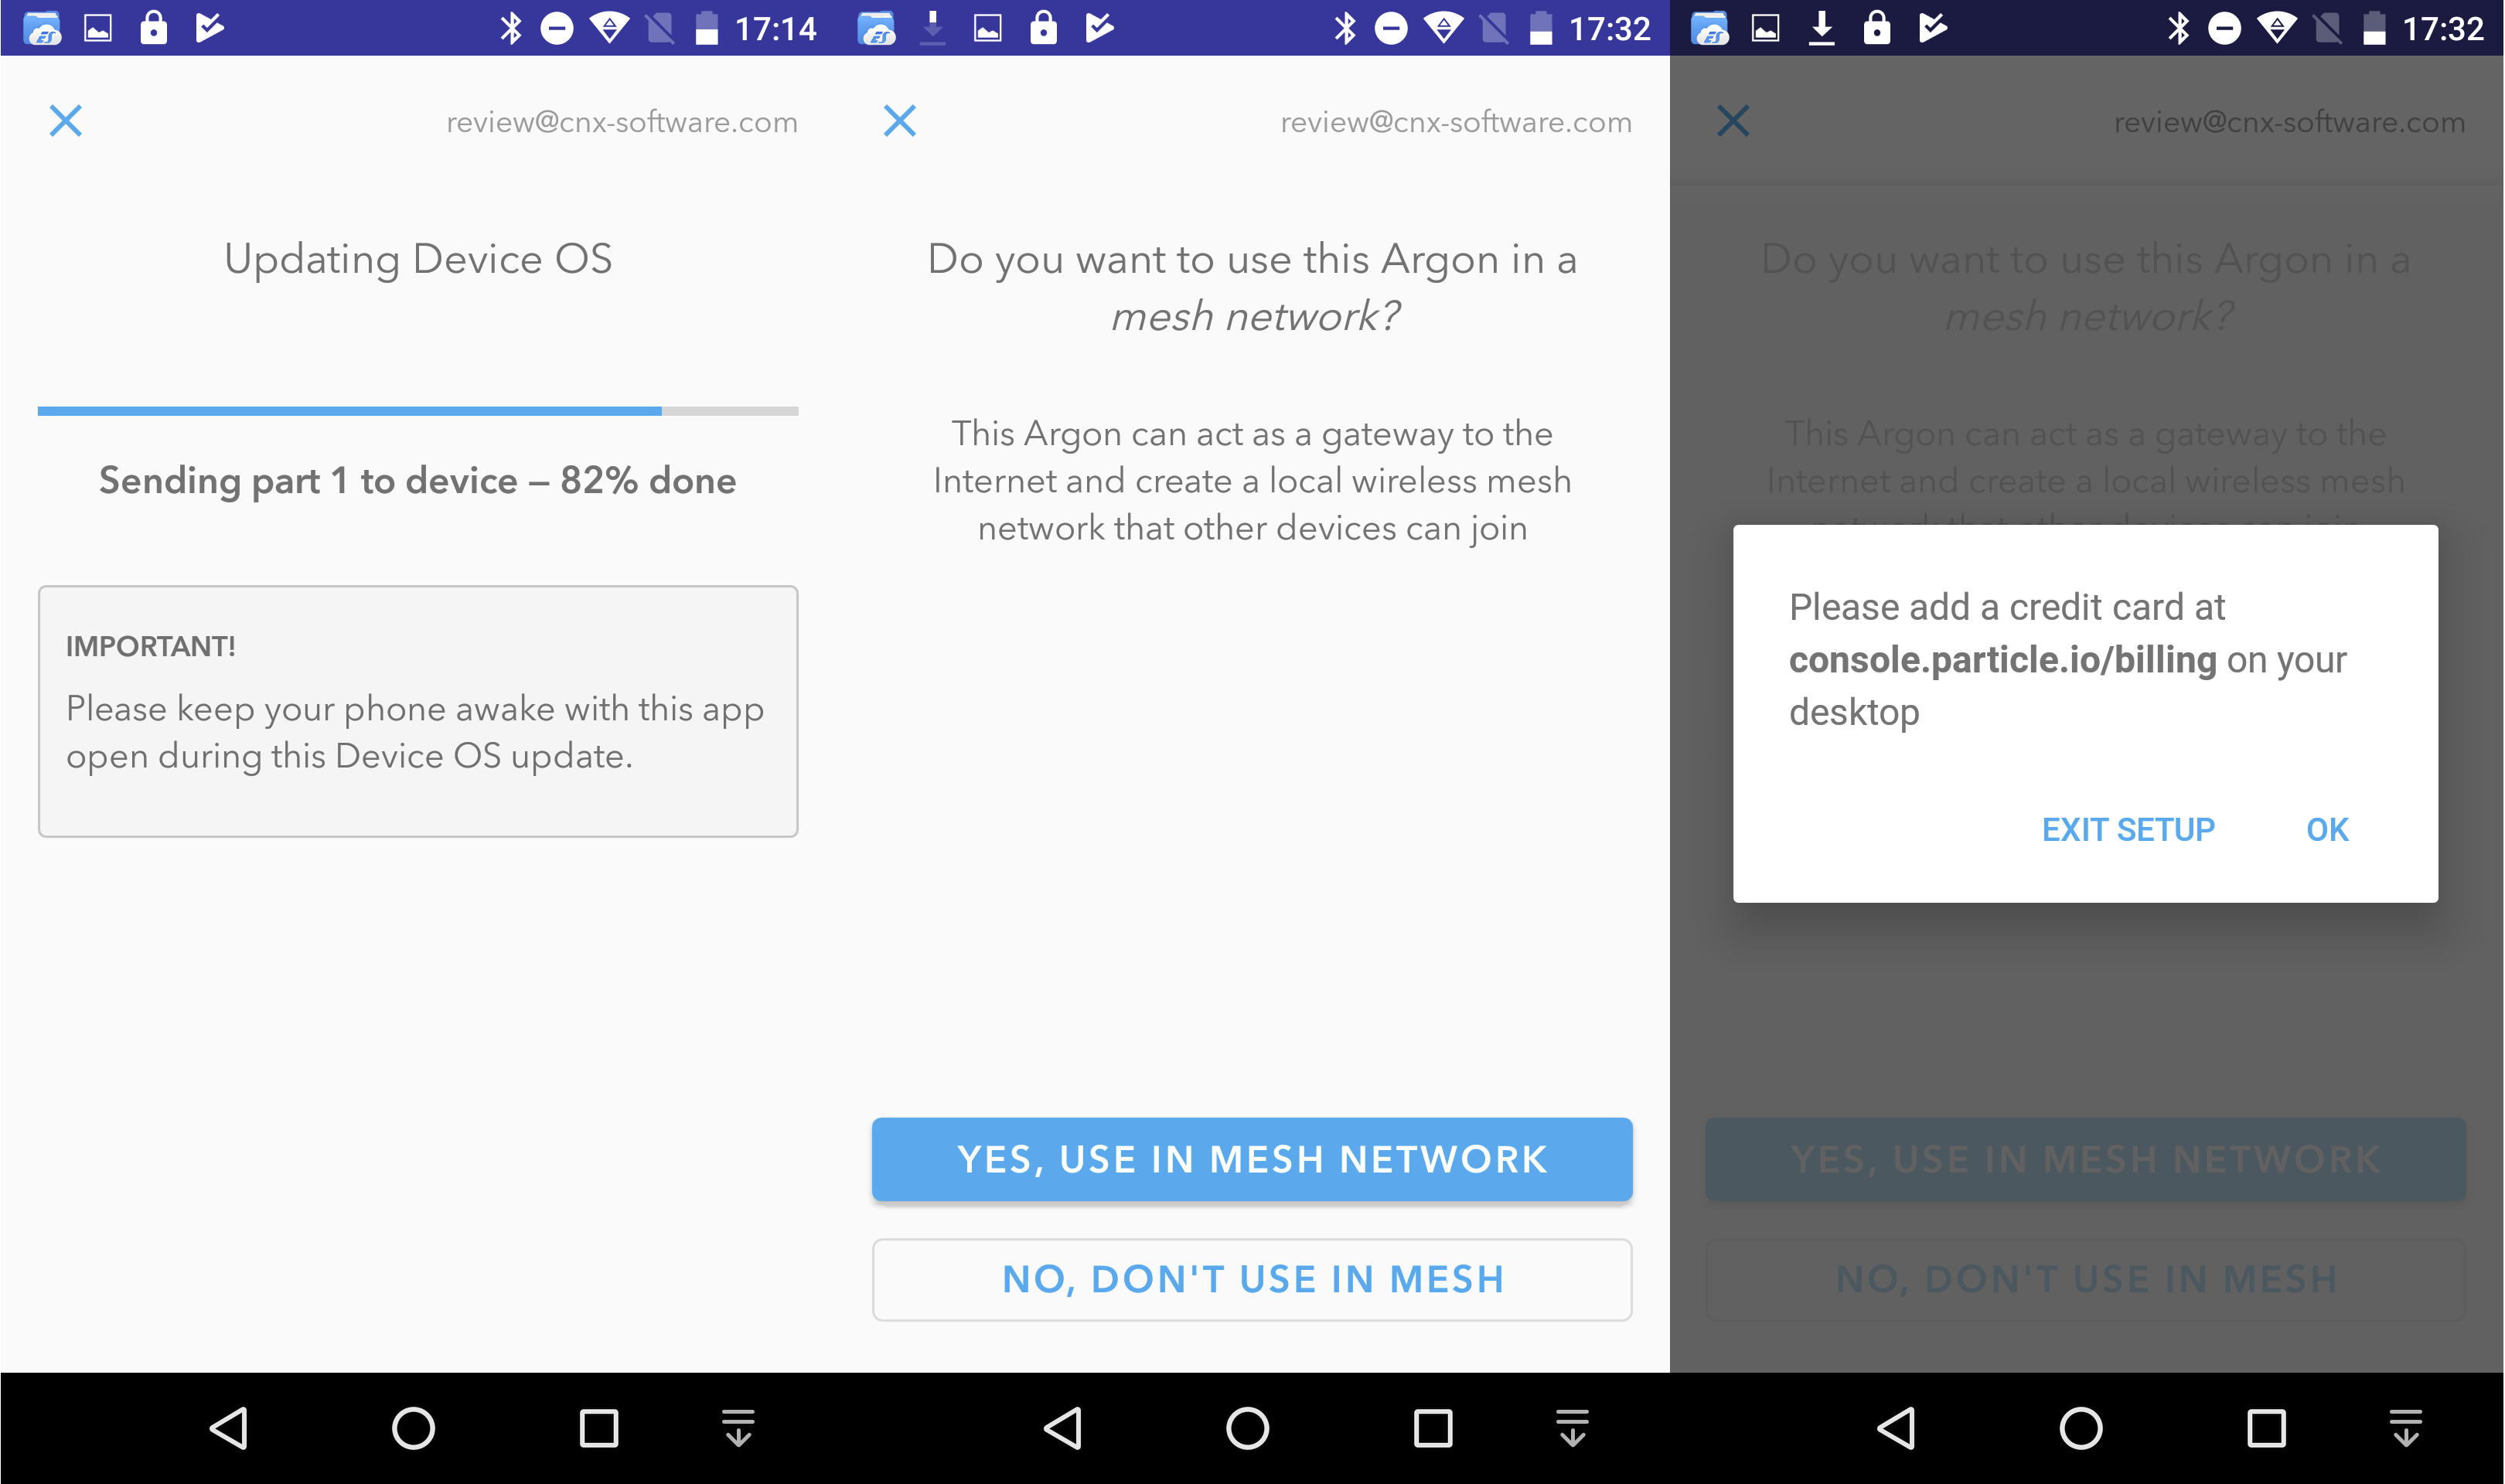
I answered “Yes, Use in Mesh Network”, and a pop-up window asked me to add a credit card at https://console.particle.io/billing. That’s all good, except I don’t have a credit card. I tapped OK, and tried to select “No, Don’t use in Mesh”, but it did not work. So I had to restart the process, but the result was the same. A credit card was needed to go further.
So I asked by email, and also in Particle’s community on November 17, and others also complained about the need for a credit card for initial testing. The company reacted quickly, implemented a fix in their beta soon after, and on November 20 the updated app was available on the Google Play Store. You won’t need a credit card if you only have a single gateway, and less than 100 devices according to the pricing page.
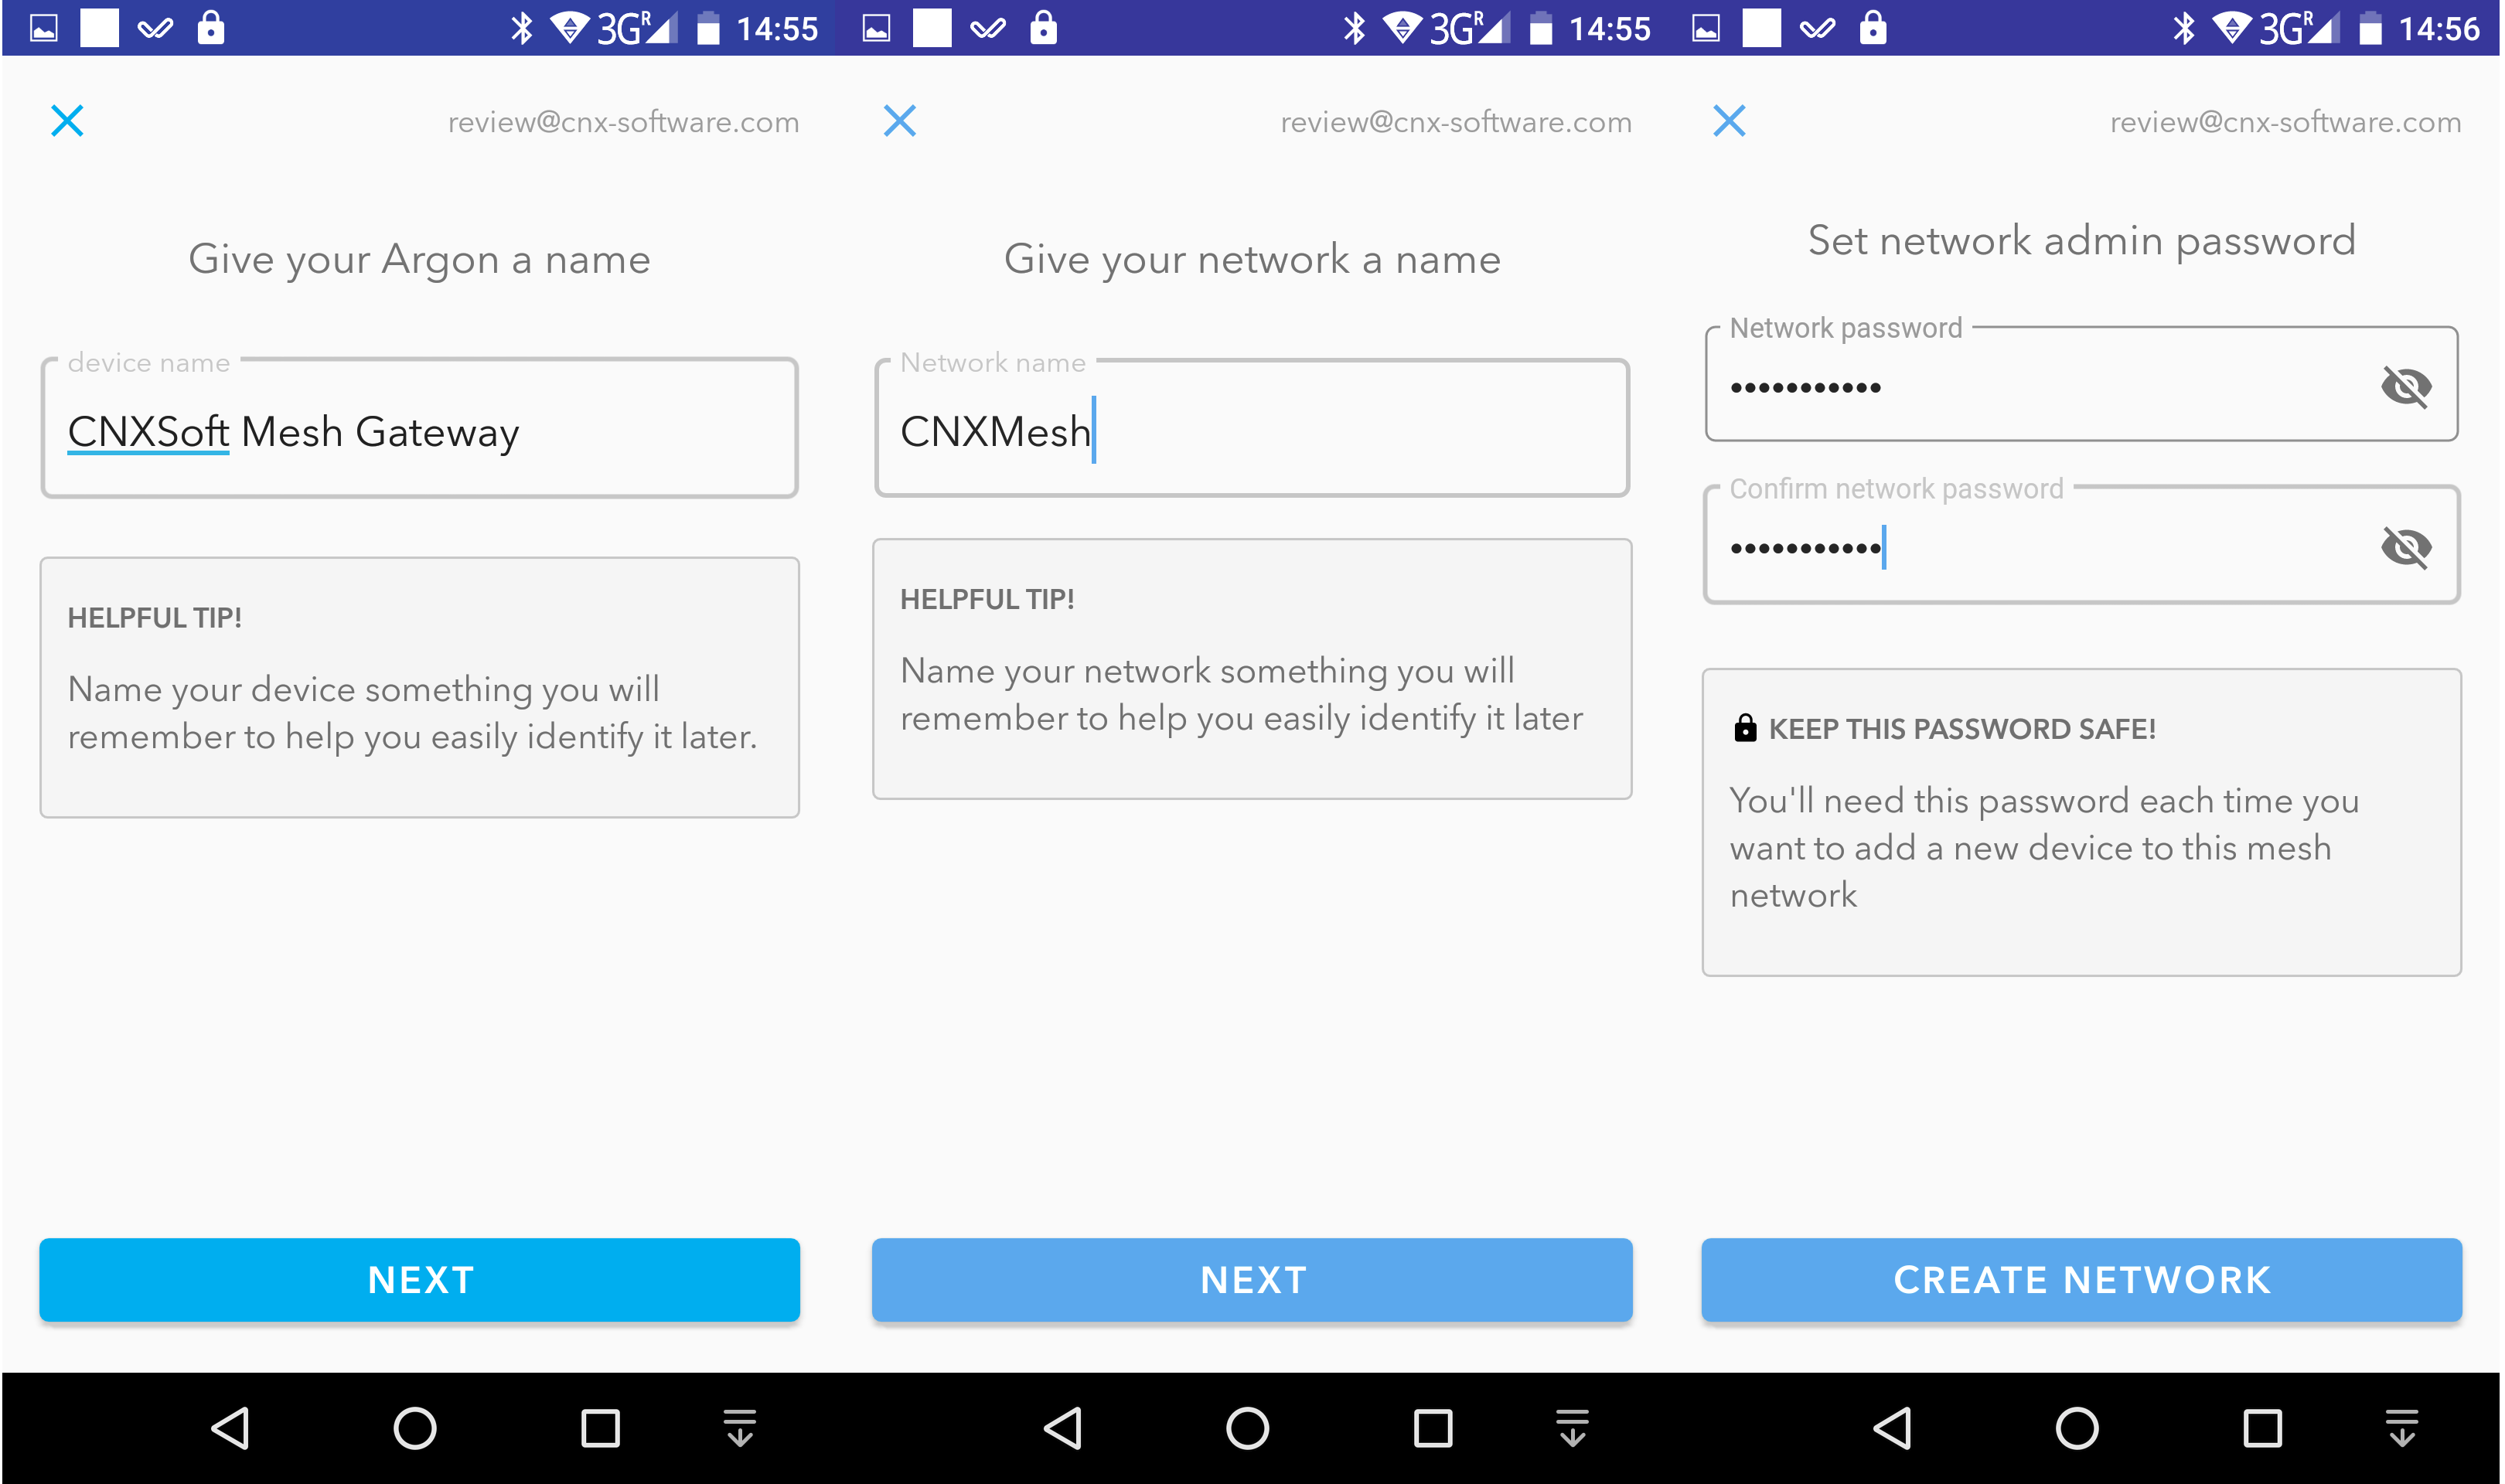
I could complete the Argon board registration with credit card afterwards. I just had to give a name to the gateway “CNXSoft Mesh Gateway”, to the mesh network itself “CNXSoft Mesh”, and set a password that we’ll use later to add Xenon nodes to the network.
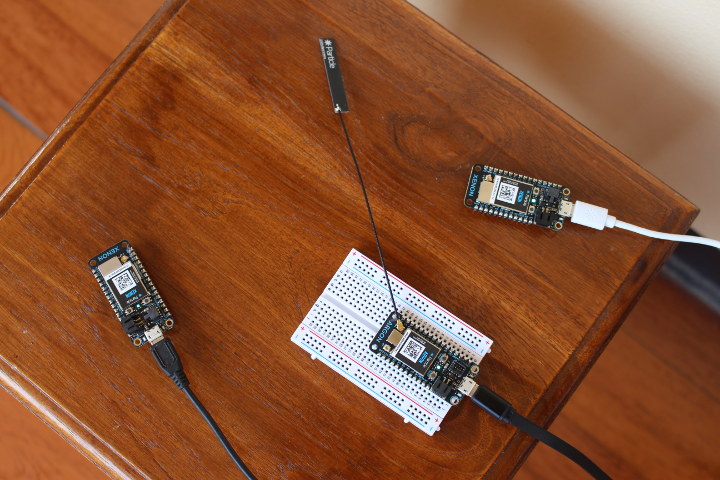
I stay in an hotel room now, and my WiFi can be spotty with ping times to the access point sometimes jumping to several seconds, and even over ten seconds. So it should explain why Argon’s registration took 5 minutes, and firmware update close to 30 minutes. When I started to setup Xenon board, the firmware update part of the process always got stuck after a while, and never resuming likely due to connection errors. I tried a few more times, but no luck. So instead I decided to move everything outside to have line-of-sight with the router placed around 5 to 6 meters away.
The first part of Xenon setup is very much like for the Argon board, we scan the QR code with the app, and firmware update is automatically applied if available. But once it is done, the Xenon board will scan for mesh networks.
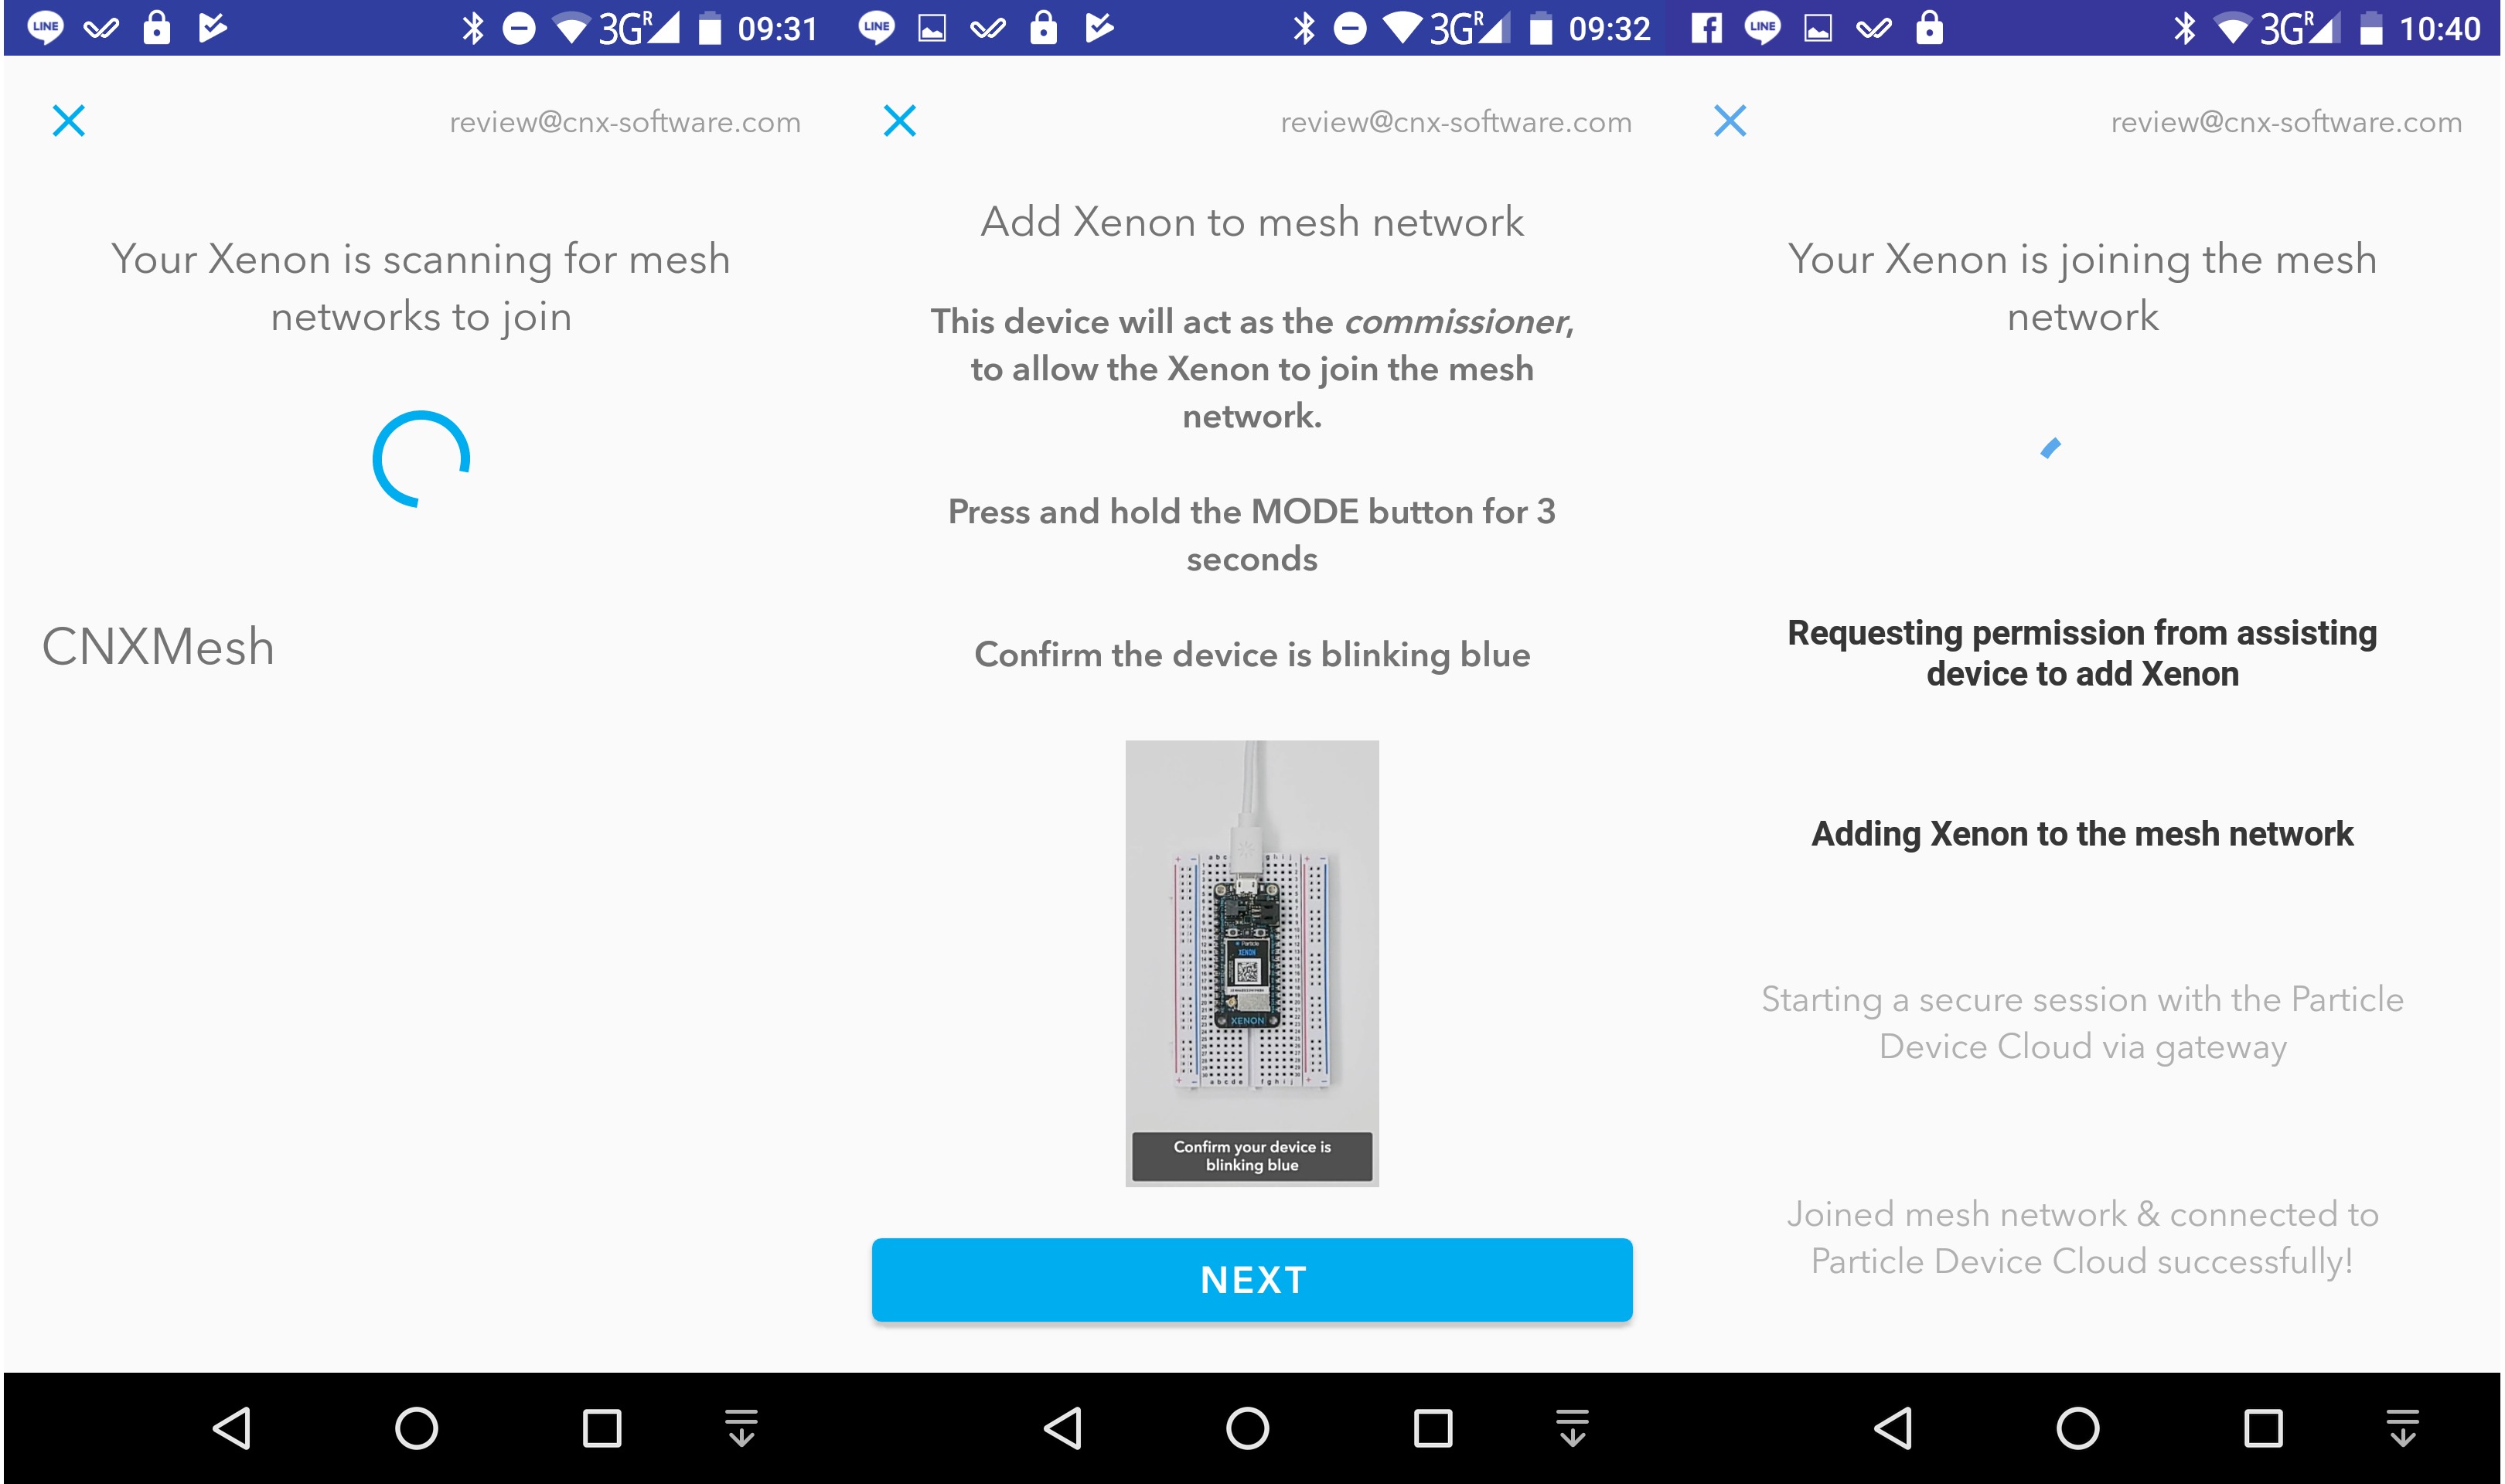
It detected CNXMesh network we just defined, and the next step is to press the MODE button for 3 seconds on your gateway (Argon here, despite being shown a Xenon board) until the LED blinks blue, and scan the QR code on the Argon gateway again. The app will then complete the registration.
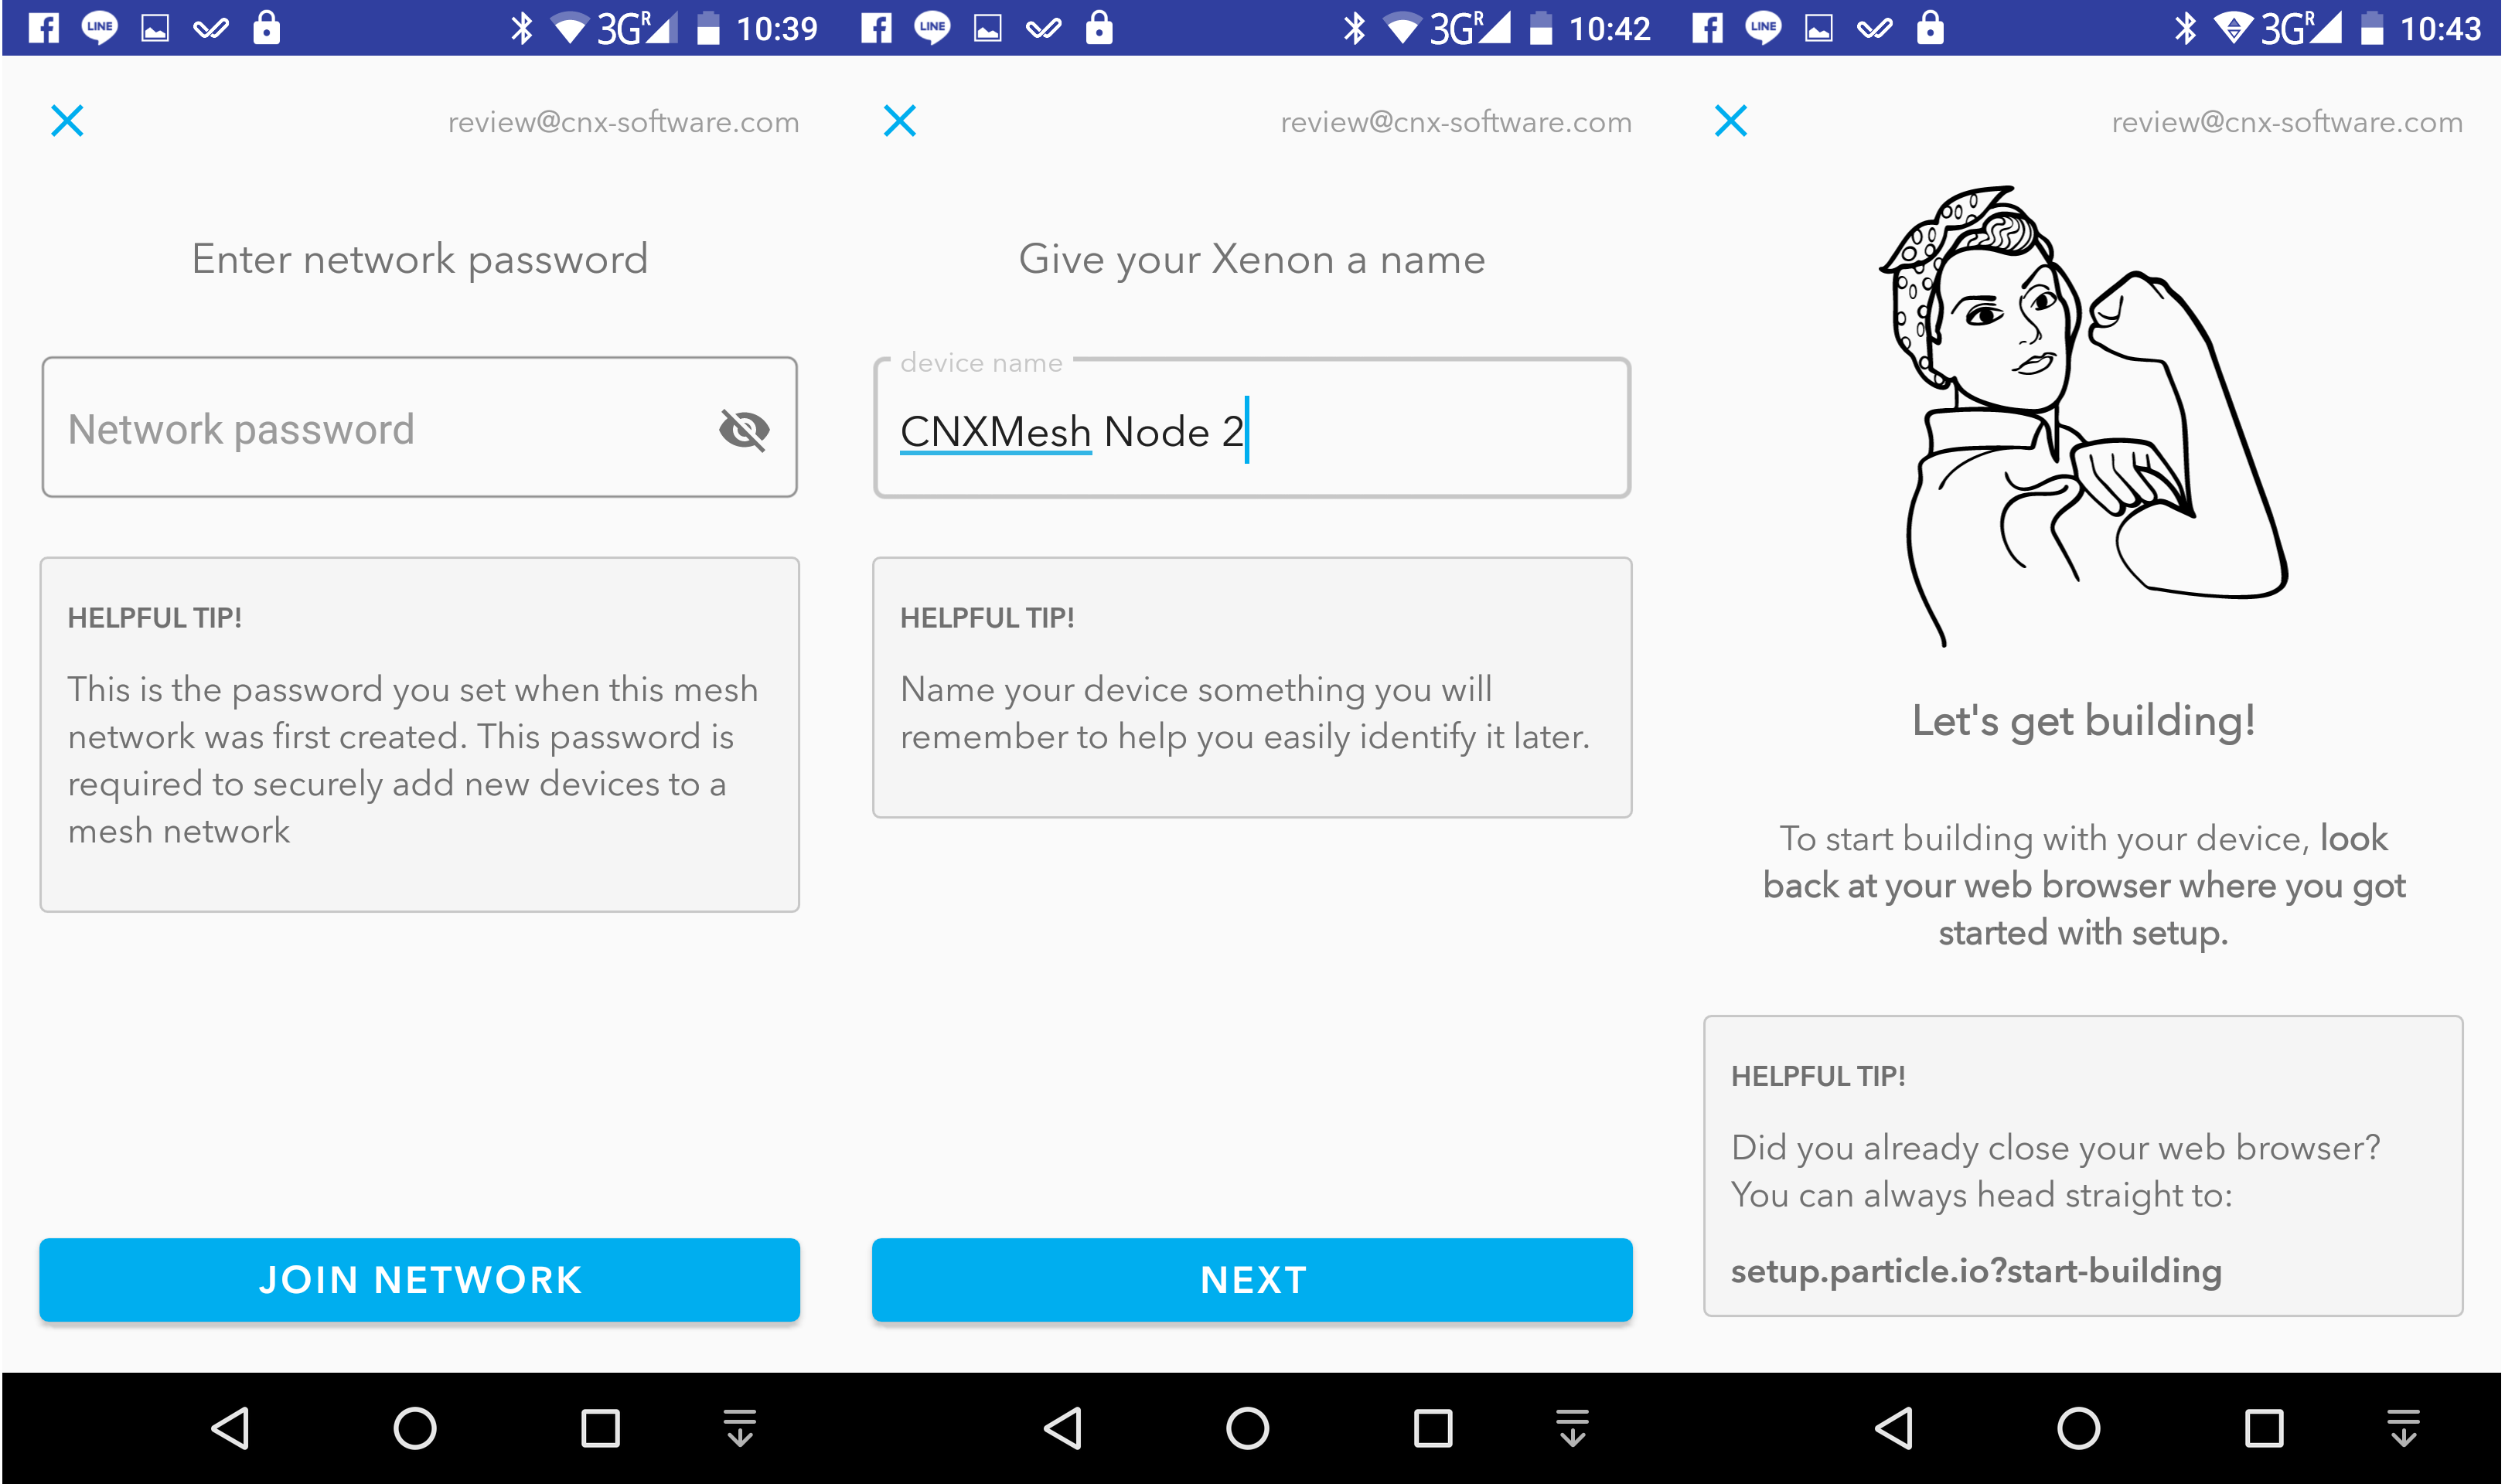
We’ll be asked the network password to add the board, and then to name the Xenon node. I repeated this again by adding another Xenon board called “CNXMesh Node 2”, and setup was complete.
Three boards LEDS turn solid cyan with some dimming from time to time. The company refers to this LED behavior as “breathing”.
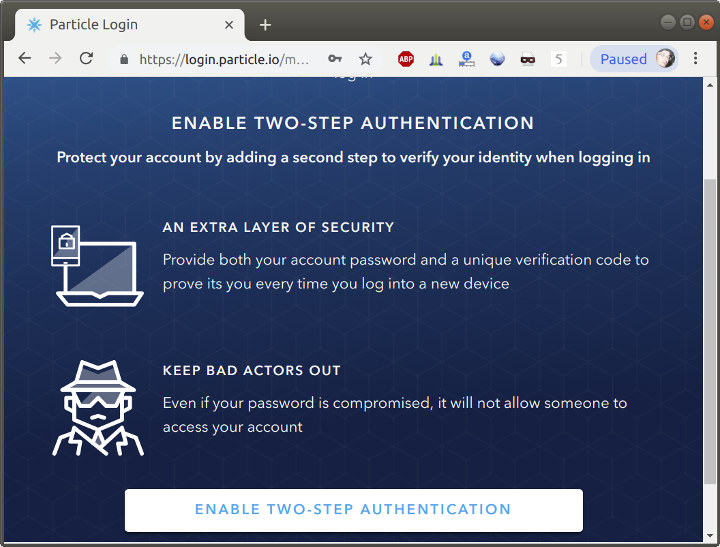
 Finally, we’re being asked to go to https://setup.particle.io?start-building, and since I went away for a while, I was asked to login again, and for extra security we are optionally being asked to enable two-step authentication.
So I downloaded Google Authenticator app on my phone, and scan the QR code showed in the web login.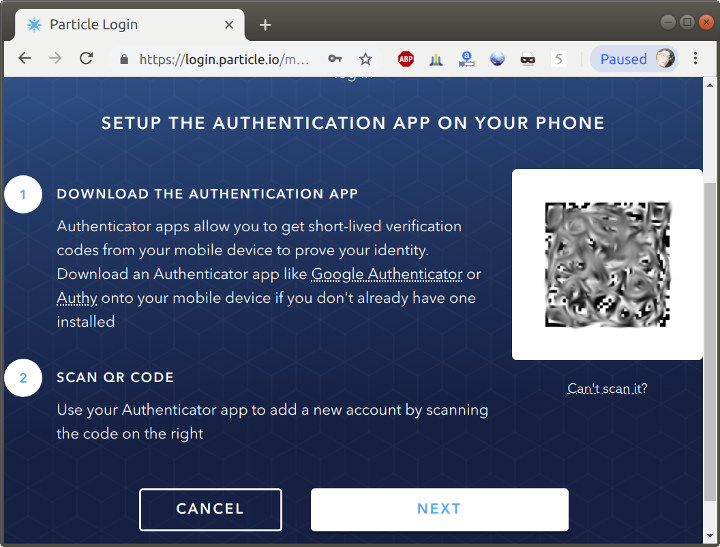 The 2FA setup is self-explanatory, so I won’t go into details. You’ll just need your phone, and input the code shows in Google Authenticator each time you want to login to particle. This also works with command line tools as we’ll see below.
Anyway, I could reach the “Start Building” page with Hello, IoT World sample that’s supposed to send a message to shout rainbows using the built-in LED.
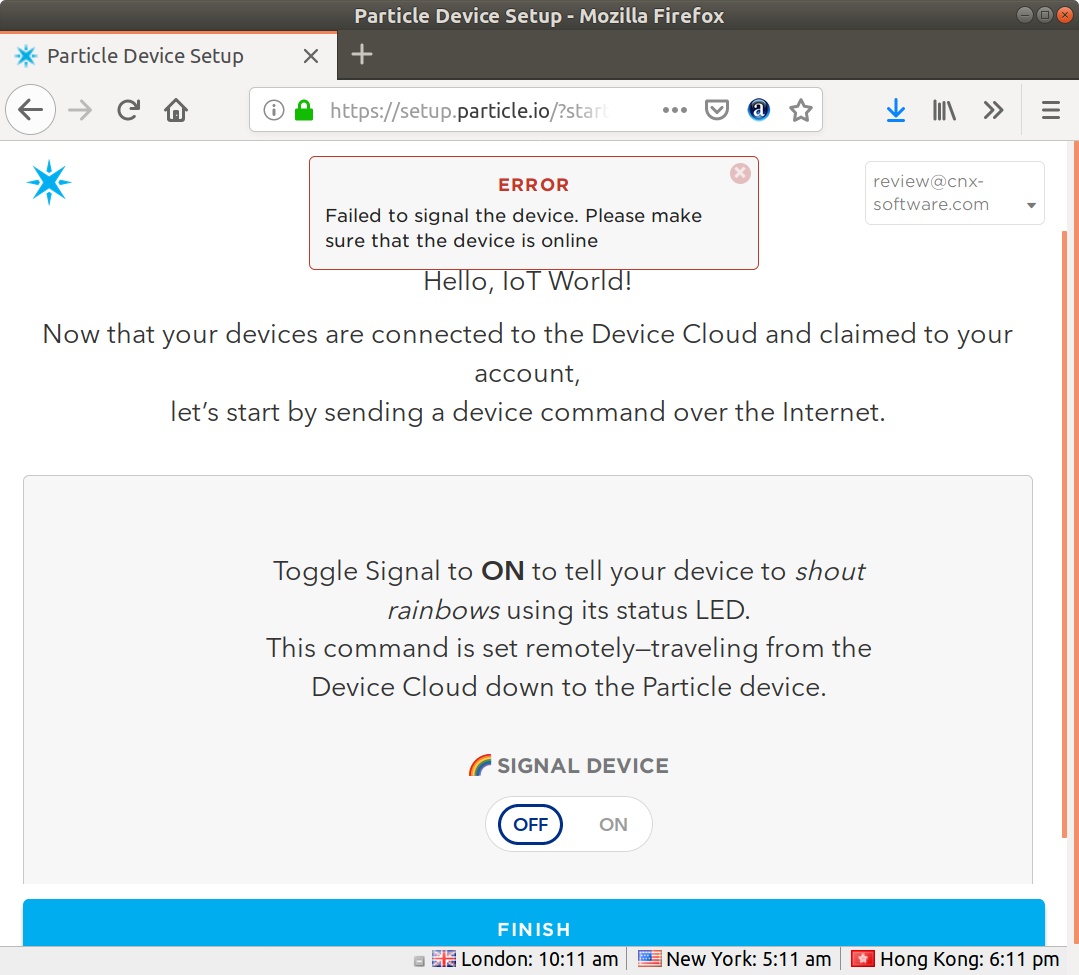
The only problem is that it did not work for me with the error message: “Failed to signal the device. Please make sure that the device is online”. So I went to the console to test I could ping the Argon board (Yes)…
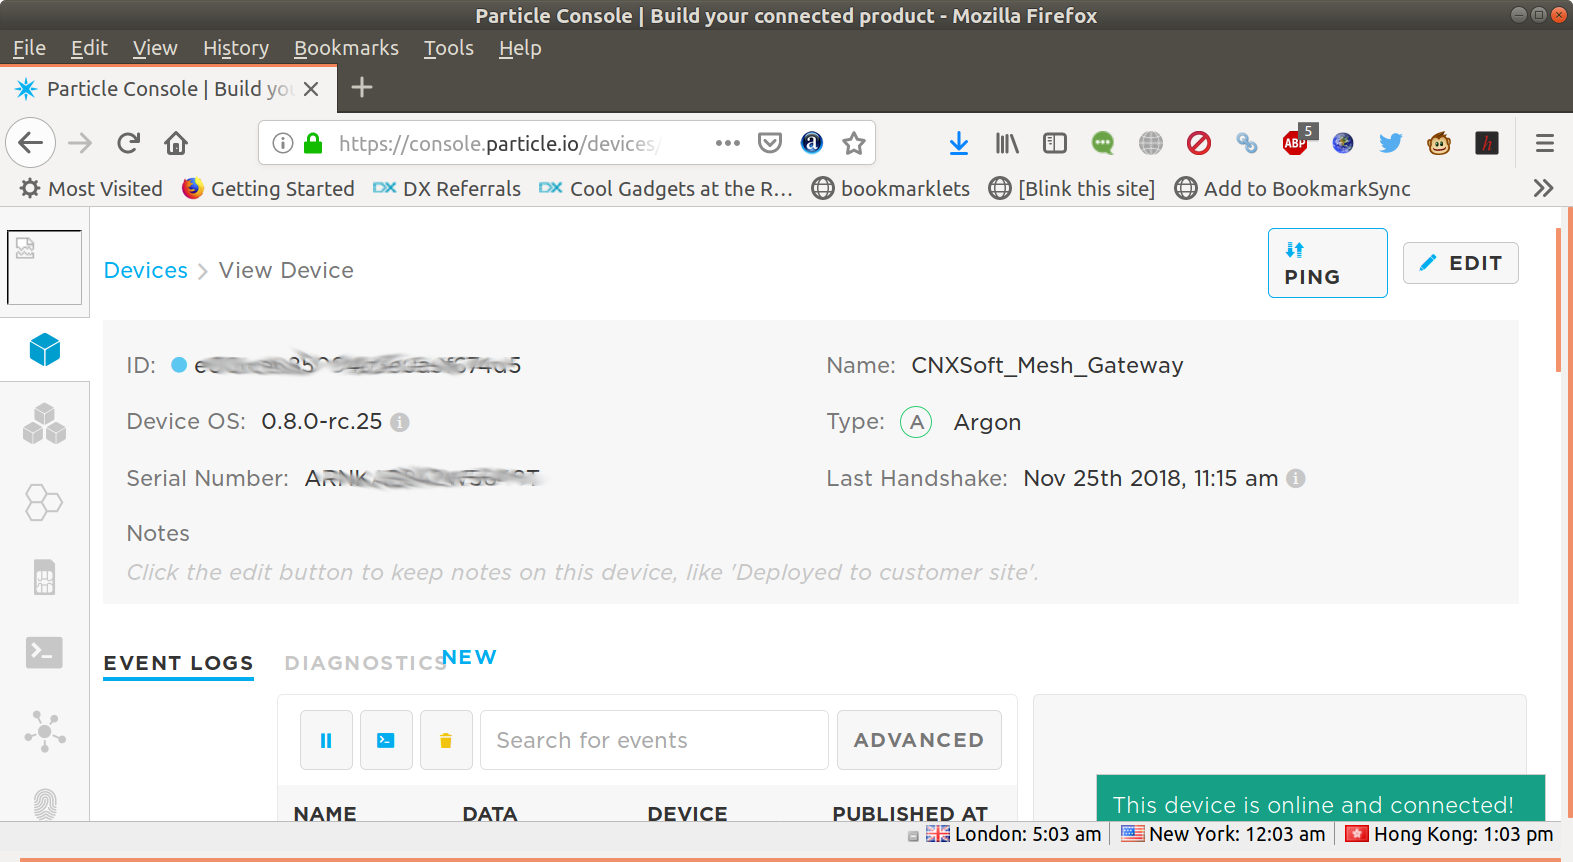
… and ran the diagnostics tool, which did not report any issues either.

So no problem reported, except the Hello World sample still does not work for me.
Programming Argon Board with Particle Build Web IDE
We could not find a solution to this problem, so instead I was asked to work through the quickstart, and see how it goes. The guide basically explains to setup the board as we’ve described above, then launch Particle Build web IDE, and load a sample.
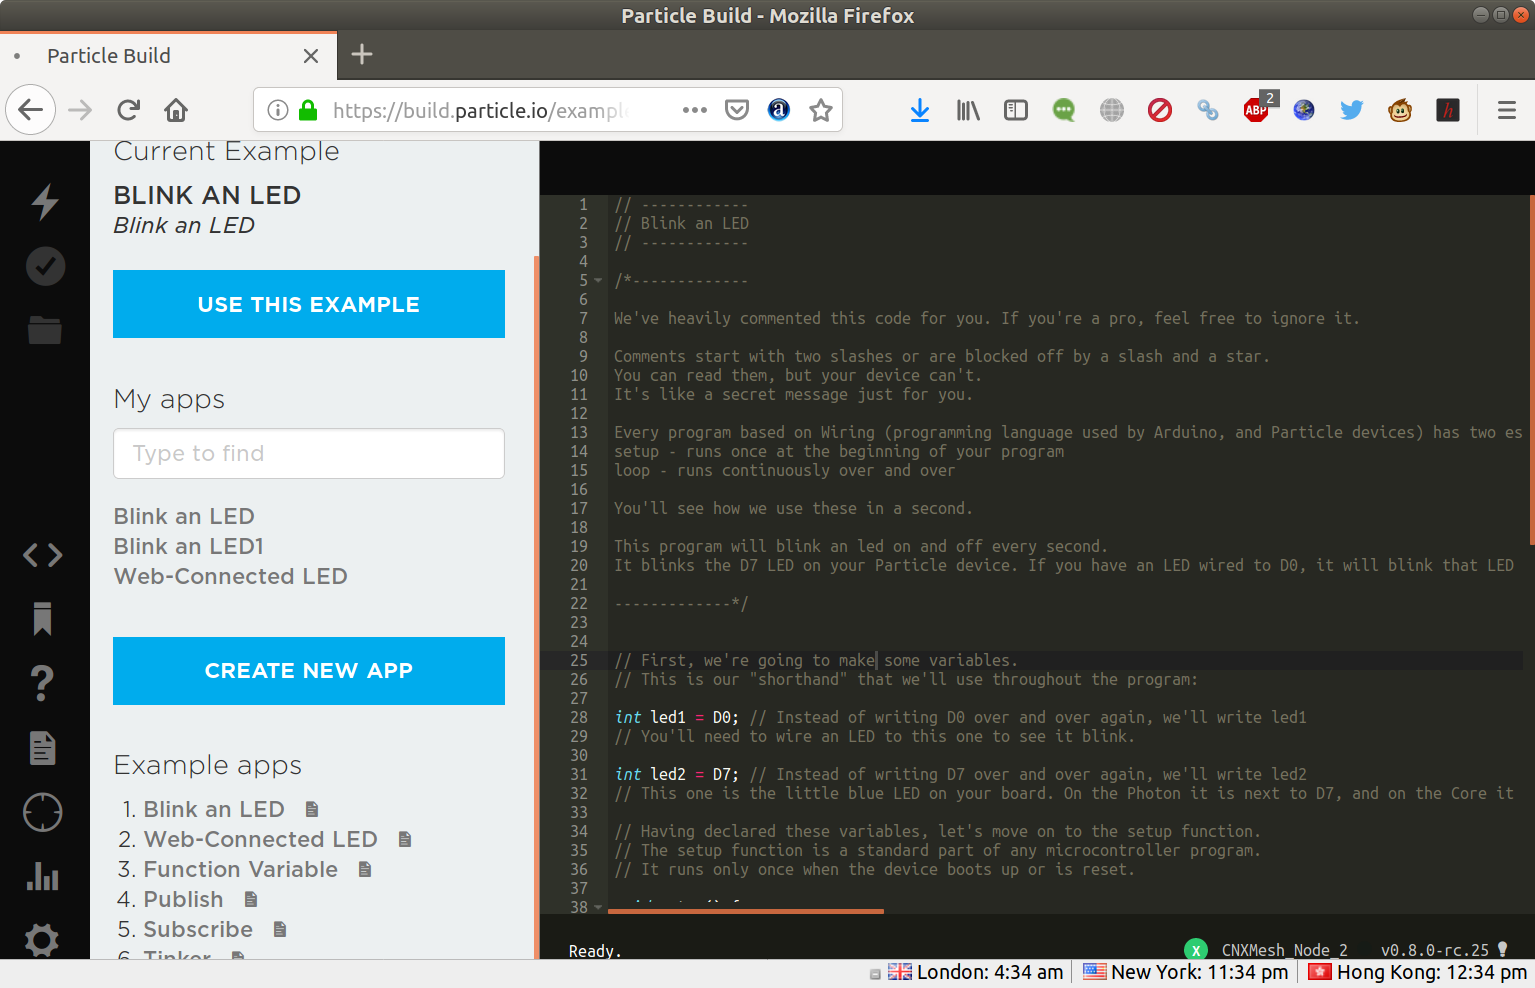
The user interface is fairly intuitive, and the sample codes have plenty of comment to help first time users understand the source code. I’ve just cut out most comments from the blink LED to show the code only:
|
1 2 3 4 5 6 7 8 9 10 11 12 13 14 15 16 17 18 19 |
int led1 = D0; // Instead of writing D0 over and over again, we'll write led1 int led2 = D7; // Instead of writing D7 over and over again, we'll write led2 void setup() { pinMode(led1, OUTPUT); pinMode(led2, OUTPUT); } void loop() { digitalWrite(led1, HIGH); digitalWrite(led2, HIGH); delay(1000); digitalWrite(led1, LOW); digitalWrite(led2, LOW); delay(1000); } |
It will look familiar to makers used to Arduino programming… But the most important question remains to be answered: could I actually control and program my Argon board from the web IDE?
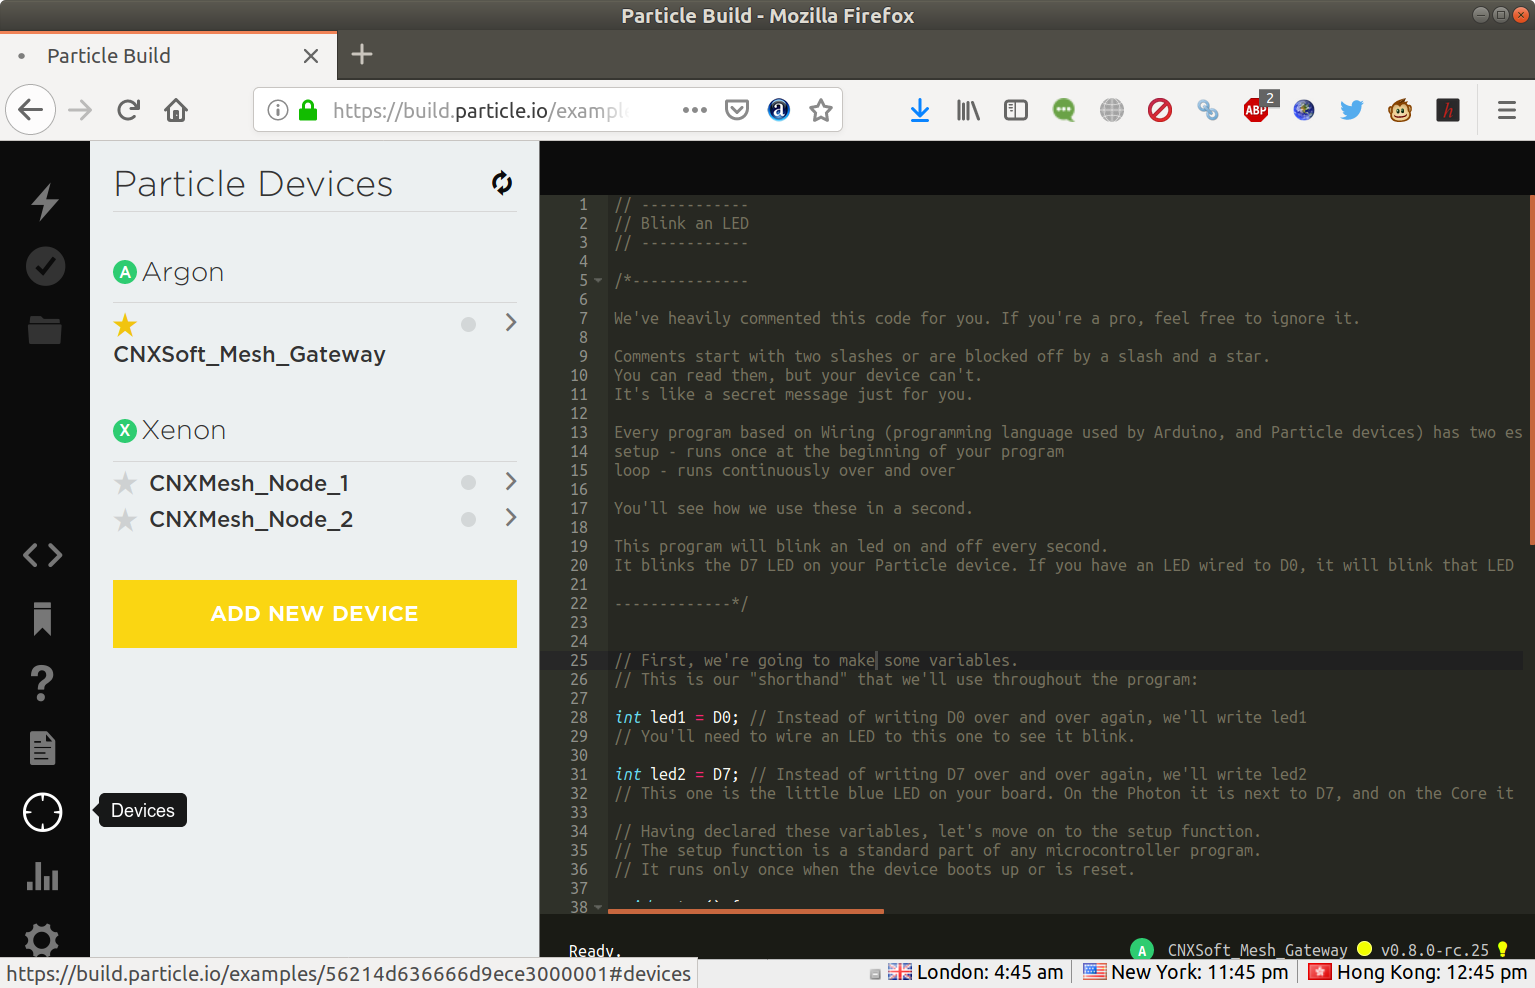
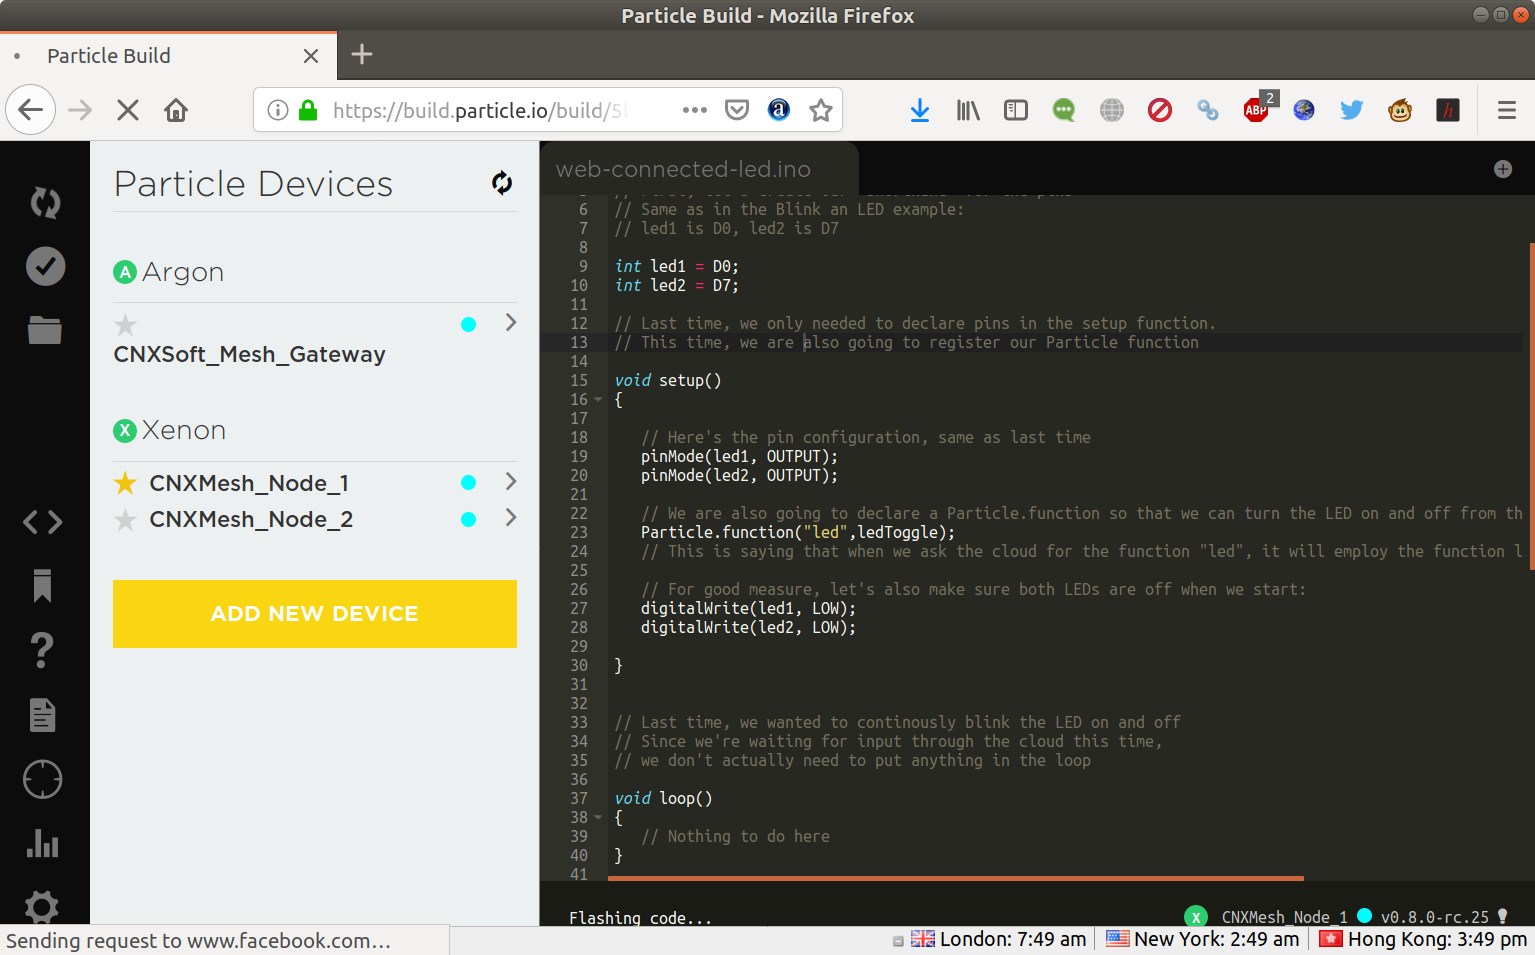
The answer is yes, and it was pretty straightforward. Click on the target/devices button on the left, select Argon board, and click on the light bulb in the bottom right corner of the screen.

It will make the status LED “shout rainbows”. Nice! If you want to load the blink LED program, click on the lightning icon on the top left menu to flash the code to the selected board.

If everything goes well, within a few second the message “Flash/status – success” should be display on the bottom of your web browser, and the Argon will reboot, and after a few more second, you should notice D7 LED (close to the micro USB port) blink blue every second.
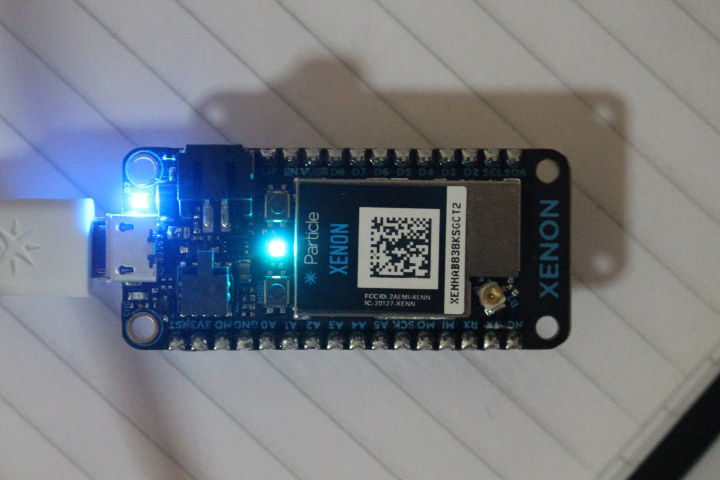
If you’ve connected an external LED on the breadboard to D0 pin, it should blink as well.
Troubleshooting – Understanding LED patterns and Particle CLI
Then I tried to do the same with the Xenon boards, but it would just not work. Then I saw the LED pattern on both boards was not right. If properly connected to the Mesh network, they should breathe cyan color. But instead:
The LED quickly blink cyan and switch to orange color for a short time, before restarting the loop with the cyan blinking. What does it all mean? Particle has extensive documentation, so if was not difficult to find an answer: if Xenon boards’ LED blink with cyan colors it means they attempt to connecting to the cloud), and the orange color indicates bad server keys.
The repaid instructions start by installing the Particle CLI in a Linux terminal:
|
1 |
bash <( curl -sL https://particle.io/install-cli ) |
You should then login to particle cloud from the command line, and as you can see 2FA also work in the terminal:
|
1 2 3 4 5 6 7 |
~/bin/particle cloud login ? Please enter your email address email@email.com ? Please enter your password [hidden] Use your authenticator app on your mobile device to get a login code. Lost access to your phone? Visit https://login.particle.io/account-info ? Please enter a login code 111111 > Successfully completed login! |
Now connect the Xenon board to your computer via USB, and put it into Listening mode by holding down MODE until it blinks blue. Then issue the following CLI command:
|
1 2 3 4 |
sudo ~/bin/particle identify Your device id is aaaabbbbccccddddeeeeffff Your system firmware version is 0.8.0-rc.25 |
Take not of the Device ID for the next step. Put the Xenon in DFU mode by holding down both the RESET and MODE buttons, releasing RESET and continuing to hold down MODE until it blinks yellow and issue the commands below:
|
1 2 3 4 5 6 7 8 9 |
sudo ~/bin/particle keys server Okay! New keys in place, your device will not restart. sudo ~/bin/particle keys doctor aaaabbbbccccddddeeeeffff New Key Created! Saved! Saved! attempting to add a new public key for device aaaabbbbccccddddeeeeffff submitting public key succeeded! Okay! New keys in place, your device should restart. |
Sadly, I still had the same LED pattern after restarting. After various attempts, I decided to turn off and turn on all three boards at the same time, and the two Xenon magically got back to their normal behavior connecting to the Particle cloud.
Back to the Web IDE for Xeon Boards, and Web Connected LED Sample
So I went back to Particle Build web IDE to select the Xenon boards, and start the rainbow signal. It worked on both, but they have to be activated one at a time.
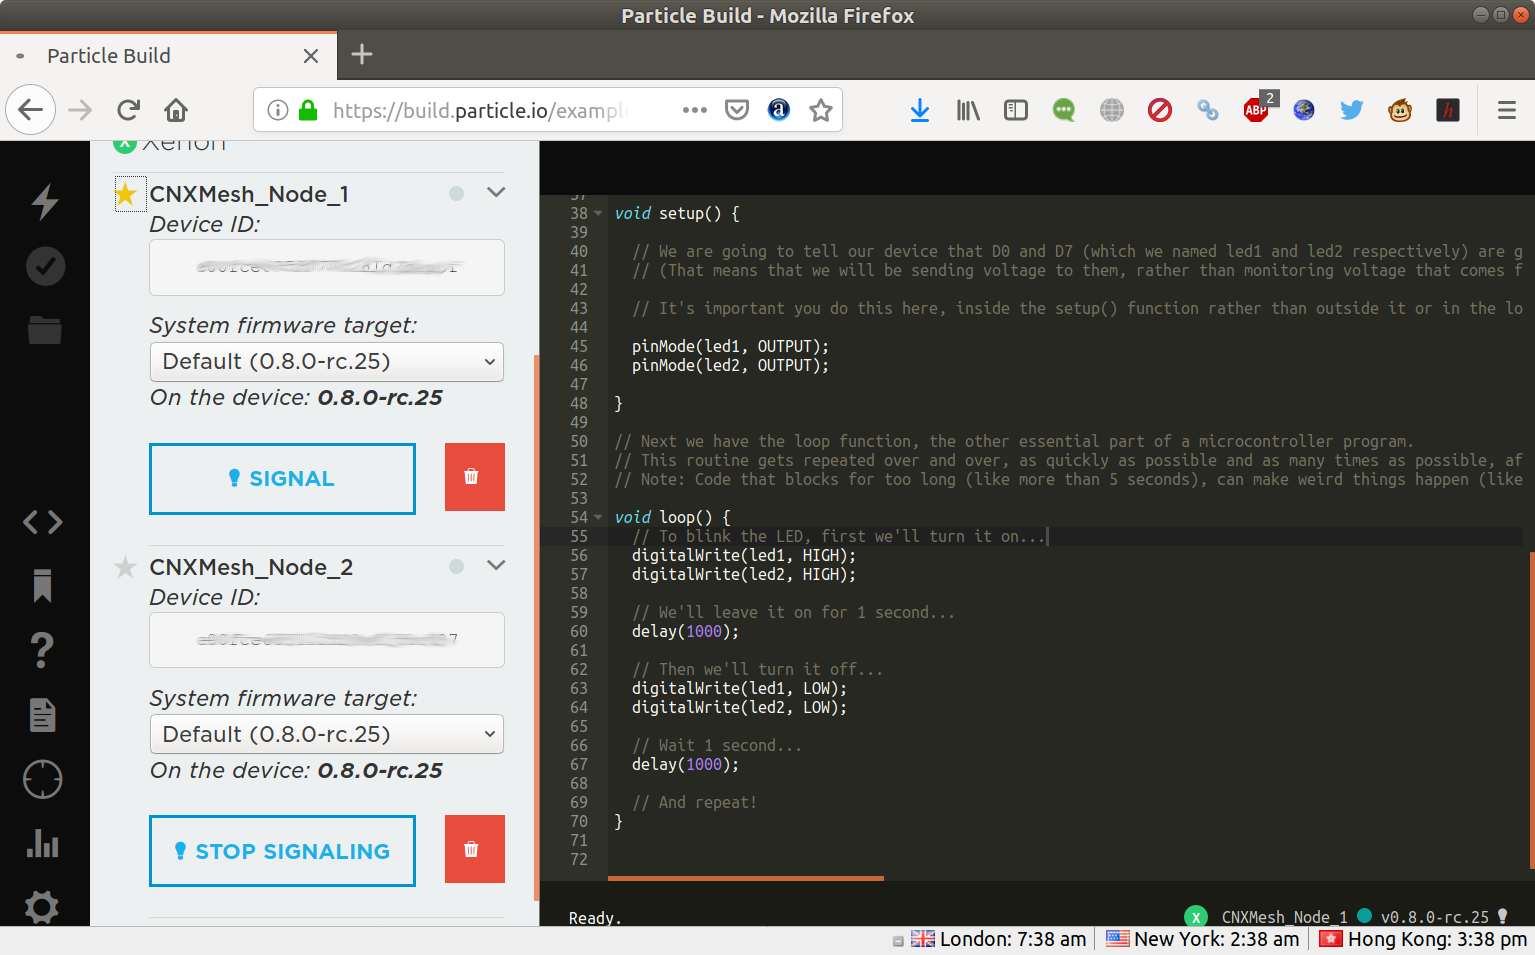
The function is useful to find out which board is which. Flashing the blink LED sample also worked, and again you can’t select two Xenon boards at the same time. You need to select one, and flash, and select the other and flash. The procedure only took maybe 20 to 30 seconds for each board including flashing the board, rebooting, and reconnecting to the Mesh network and Particle cloud.
That’s all good, and I’m happy to have finally manage to blink an LED on the Mesh boards, but let’s try a more interested sample: web connected LED that’s similar to the simple blink LED sample, except your can control it from the Internet with on and off commands for the “led” function as explained in the documentation.
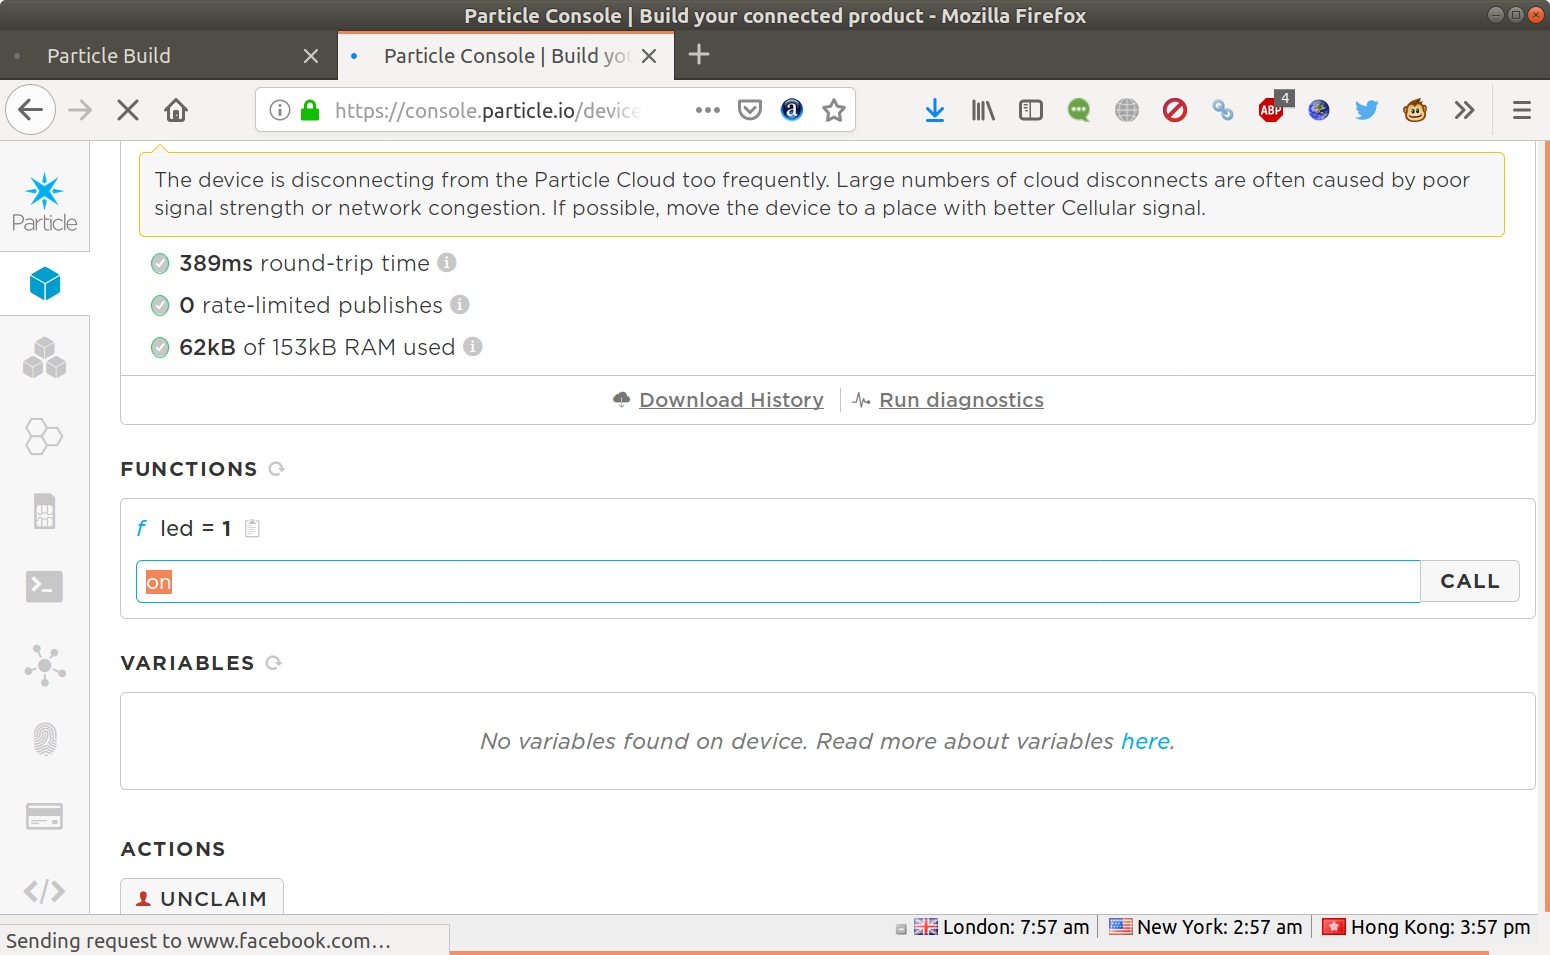
You can send the send commands via the Particle console as pictured above to turn on and off D7 LED. Simply select one of your Xenon board (e.g. CNXMesh_ _Node_1) in the console, scroll down a little until you get to the FUNCTIONS section, and enter “on” or “off” string in the “led” field, and click on CALL to respectively turn on or off the blue D7 LED.
Alternatively, you can create your own webpage to send the command to toggle the LED:
|
1 2 3 4 5 6 7 8 9 10 11 12 13 14 15 16 17 18 19 20 |
<!DOCTYPE> <html> <body> <center> <br> <br> <br> <form action="https://api.particle.io/v1/devices/your-device-ID-goes-here/led?access_token=your-access-token-goes-here" method="POST"> Tell your device what to do!<br> <br> <input type="radio" name="arg" value="on">Turn the LED on. <br> <input type="radio" name="arg" value="off">Turn the LED off. <br> <br> <input type="submit" value="Do it!"> </form> </center> </body> </html> |
Replace your-device-ID-goes-here with your actual device ID and replace your-access-token-goes-here with your actual access token, save the file as led.html (for example). Both can be found in Particle Build, with the device ID in the Device/Target field, and the access token in the settings section.
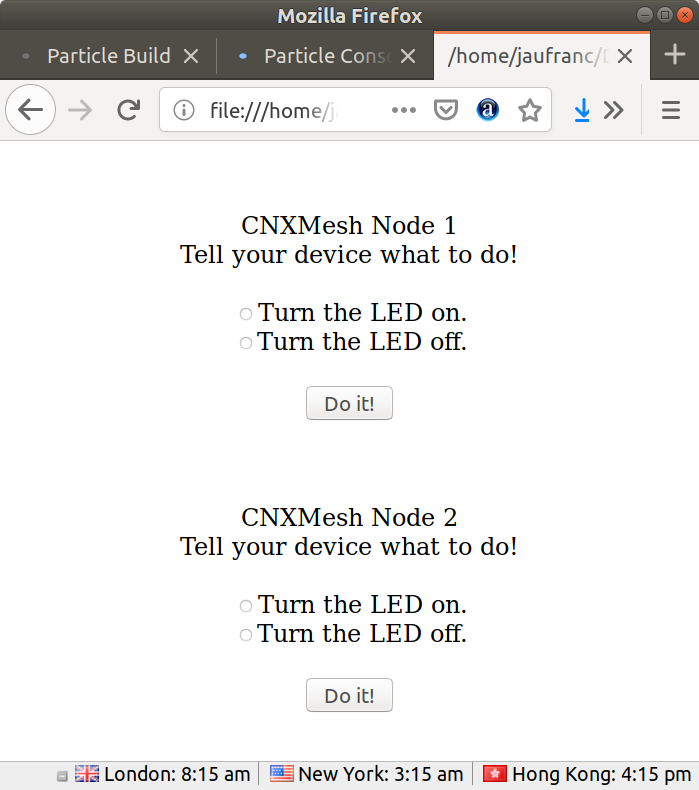
Once it’s done open the file into your favorite web browser. I slightly modified the code, duplicating the form section to support my two boards, and that’s what the page looks like.
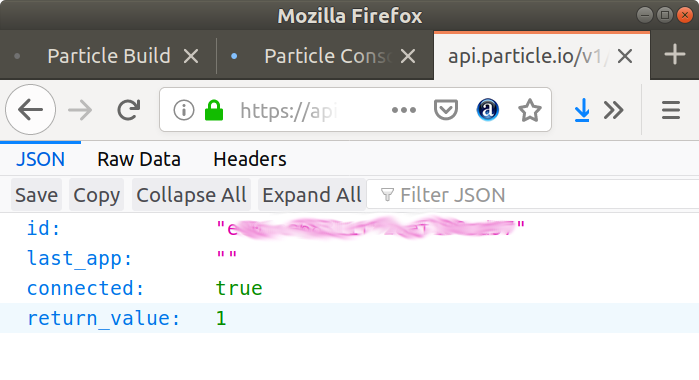
After click on Do it!, it will send the command, and show the JSON data in the web browser. Click back if you want to send another command.
 Finally, you can also achieve the same with Particle CLI from the command line by using the device name. For example:
|
1 2 3 4 5 6 |
$ ~/bin/particle call CNXMesh_Node_1 led off 0 $ ~/bin/particle call CNXMesh_Node_1 led on Function call failed: Timed out. $ ~/bin/particle call CNXMesh_Node_1 led on 1 |
I had to run “led on” twice above because of packet loss with my WiFi connection. It’s even easier with the command line, since you don’t need to find out about the device ID nor access token. Particle CLI will know about the latter since you’ve logged in, and look up the device ID from the easier to remember device name.
Final Words
That’s will be all for this getting started guide. I have to admit the setup part was quite frustrating, first because of the credit card issue (now fixed by Particle), and because of my poor WiFi connection, but that’s unrelated to Particle. Once I worked around the setup, I find the Particle Mesh solution pretty neat, as it’s very easy to program and control the Mesh board remotely, and documentation looks very good. The only things I could not figure out are why the “start building” page with Hello IoT world demo would not work, and the temporary issue with Xenon boards (LED blinking orange). The latter may have been a WiFi connectivity issue too.
The company also uses familiar Arduino-like programming in Particle Build web IDE, and OTA firmware works well provided your Internet and WiFi connection are too. I only covered part of what’s possible with Particle Mesh in this tutorial, as for example, the company has more advanced tools such as Particle Dev desktop application available for Windows, Linux, and Mac OS.
If you are interested in the solution you can get started by purchasing hardware on Particle’s online store as well as Seeed Studio.

Jean-Luc started CNX Software in 2010 as a part-time endeavor, before quitting his job as a software engineering manager, and starting to write daily news, and reviews full time later in 2011.
Support CNX Software! Donate via cryptocurrencies, become a Patron on Patreon, or purchase goods on Amazon or Aliexpress


Sounds like you need a wirleless Bridge/Repeater. I got a cheap one for $14 off AliExpress 3-4 years ago that I take with me on vacation. Plug it in, connect to it, hit the config page via browser, configure it to talk to the Hotel wifi, then visit the Hotel Captive portal page if you need to authorize the repeater’s MAC… after that all your devices can just talk to the repeater. Saves a lot of time setting up all your devices on the Hotel wifi, and saves paying per-device at some hotels.
I’m already using WDS with TP-Link TL-WDR7500 router @ https://www.cnx-software.com/2014/09/28/tp-link-tl-wdr7500-archer-c7-802-11ac-router-review/, but it does not really help. I got the slow ping times and/or packet loss that way too.
Hi @Jean-Luc Aufranc (CNXSoft)
In case you didn’t notice, articles are not loading on Android phone (A1, chrome)
Some weeks ago I had to refresh the page to be able to read article but now refreshing is not enough… and to be able to read your articles I need to switch to desktop version.
Please check this
Thanks
Thanks for the report. You’re the third person who mentions this. I could finally reproduce it on my new phone, and hopefully it’s fixed now.
I know most people buying particle boards are probably actually interested in the whole cloud thing, but if you’re like me and are actually more interested in the nrf52840, it looks like Adafruit have quietly added support for all of the particle mesh boards to their circuitpython repository (a micropython fork with a more cohesive user-facing API and atmel samd and nrf52 ports). Exciting news if you want to avoid the whole cloud thing and just use the hardware as a cheap USB+BLE MCU!
Why did this article not cover any of the components in the Grove Starter kit as pictured in the part 1 of this series. I was most interested to see those components in action.
Basically time constraints. I try to spend over 20 hours per review, as I usually have other hardware platforms in the “review queue”. Right now I have a backlog of 5 devices / boards.
FYR, I played with the similar Bakebit Starter Kit on another platform (Arm Linux + Python) a little while ago as well: https://www.cnx-software.com/2017/03/26/nanopi-neo-2-board-nanohats-and-bakebit-starter-kit-review-part-1-hardware-overview-assembly/